DIY Hydrophobic Sand: Make Sand That Stays Dry Underwater
Make DIY hydrophobic sand at home! It’s a science-meets-craft project that stays dry under water—budget-friendly, vibrant, and totally mesmerizing. Great for sensory bins and STEM fun!
If you’ve already made moon sand or kinetic sand and thought, “Okay, that’s pretty cool,” wait until you try magic sand.
This colorful science activity looks like ordinary sand at first glance, but the moment you pour it into water, something amazing happens. Instead of getting soaked like regular sand, it stays dry beneath the surface. Seriously. You can scoop it out afterward and it still feels dry to the touch.
The secret is that you’re creating hydrophobic sand. The word “hydrophobic” literally means “afraid of water.” When you make hydrophobic sand, each of the tiny grains of sand gets coated with a water-repelling layer.
That coating prevents water from sticking to the sand, creating a fascinating science experiment that’s just as fun to play with as it is to learn from.
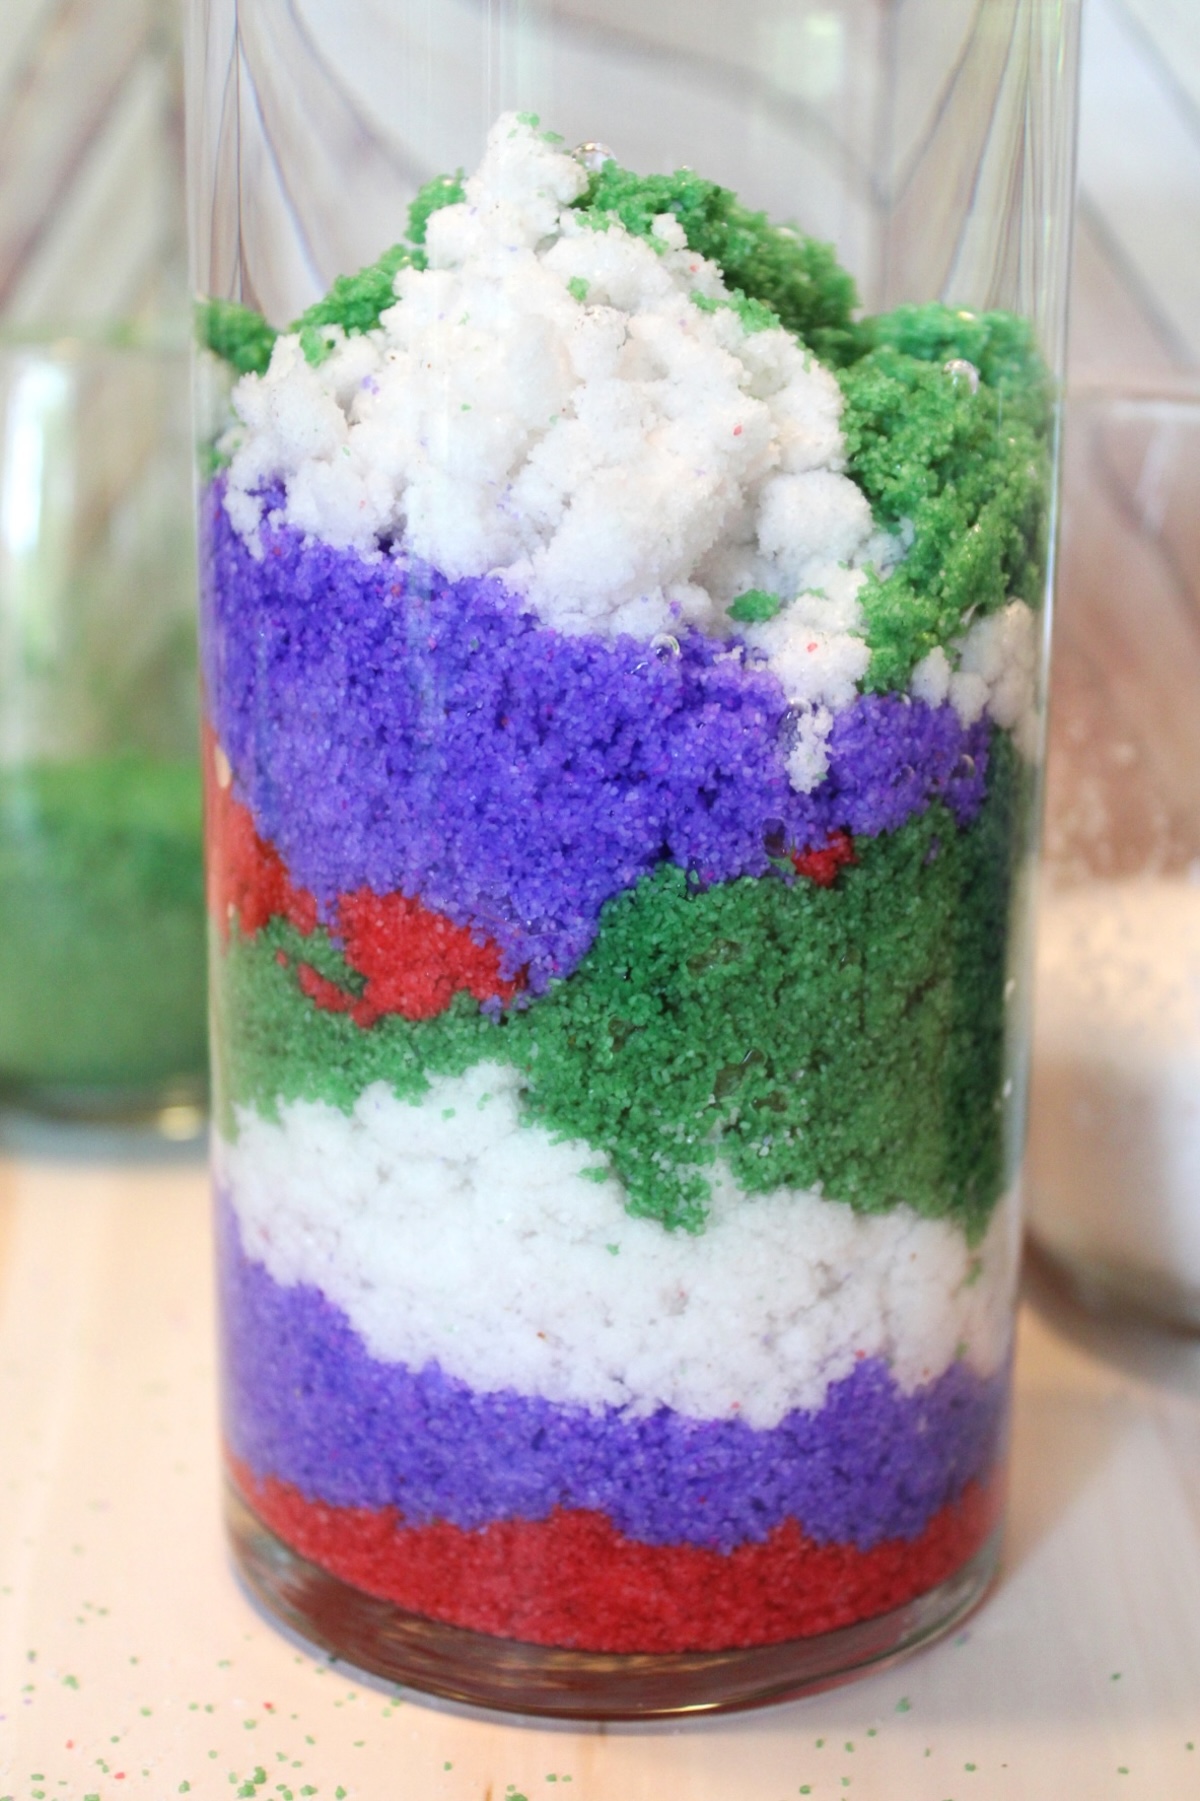
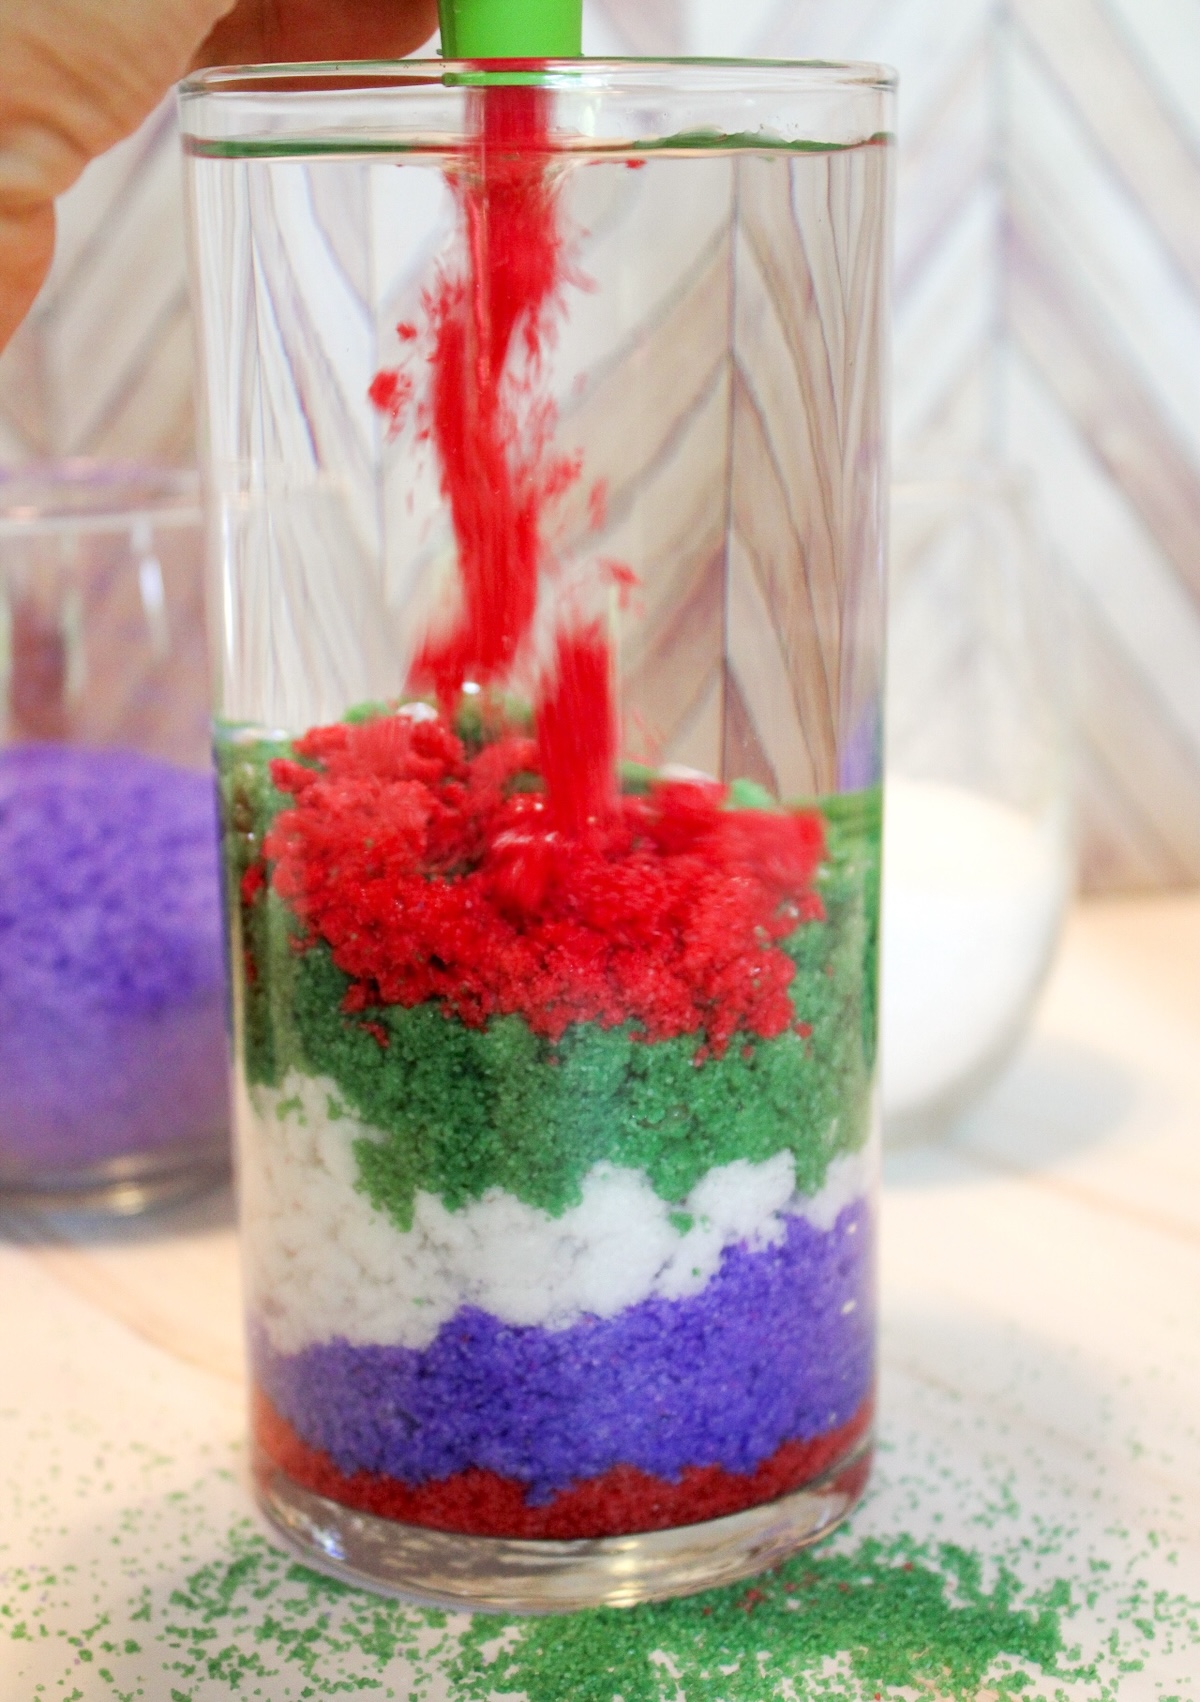
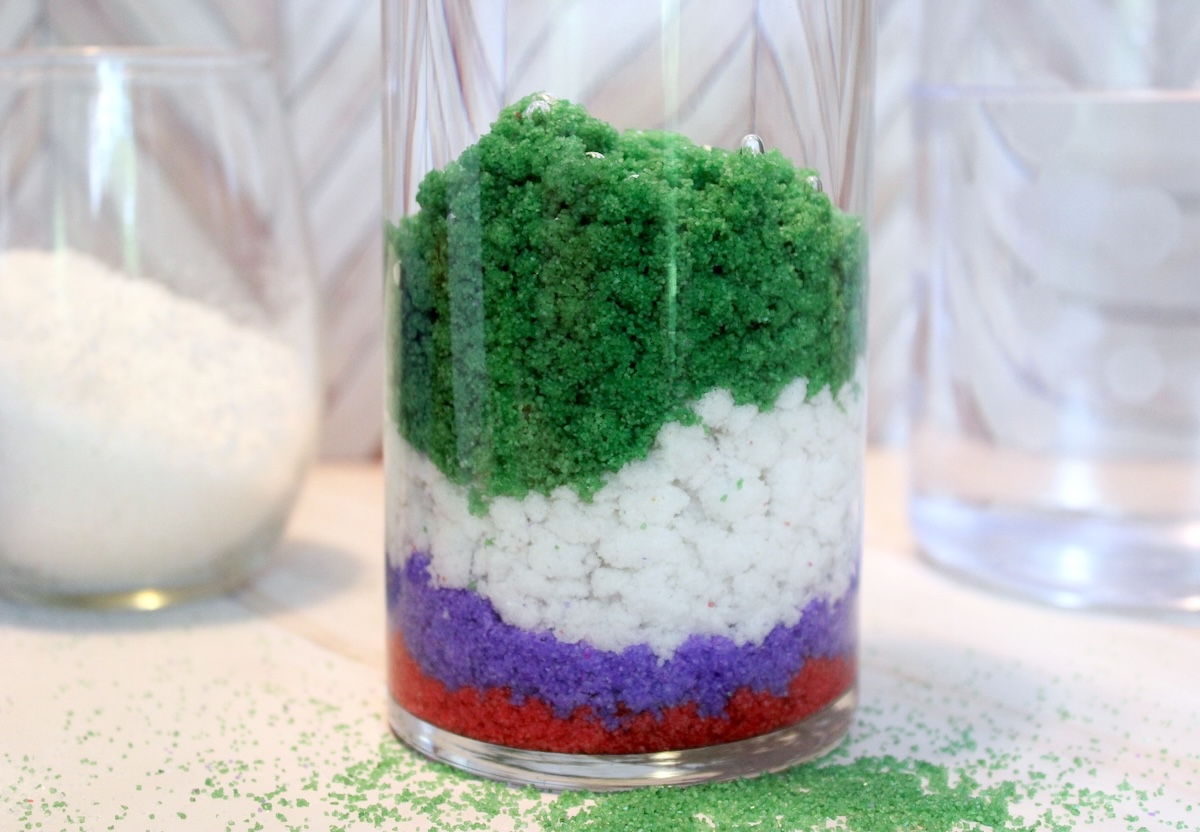
One of my favorite things about magic sand is how mesmerizing it looks in action. Fill a container or glass of water, then slowly pour the sand beneath the surface. You’ll notice tiny pockets of air and water droplets forming around the sand instead of soaking into it. The result is almost magical.
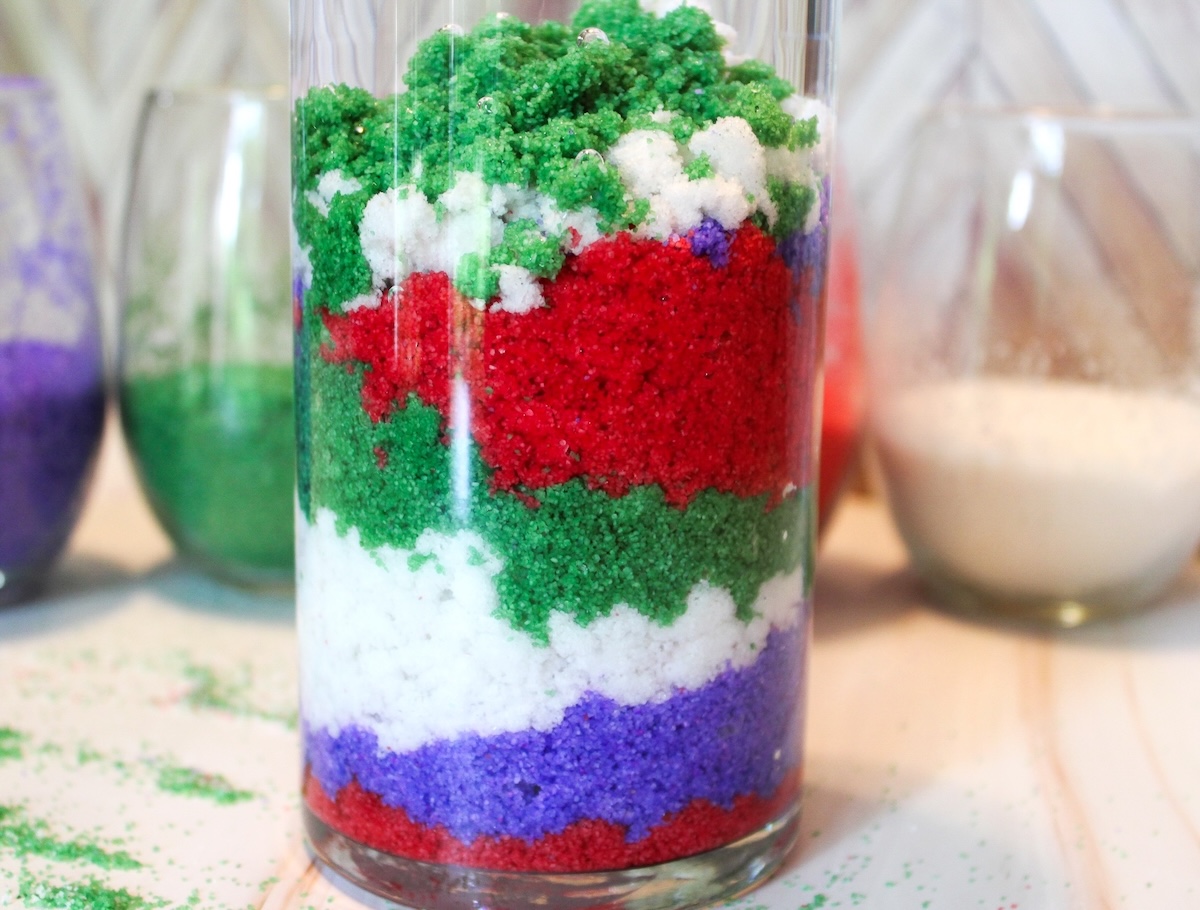
Unlike regular sand, which clumps and gets wet, hydrophobic sand keeps its unique texture underwater. Kids love watching it sink, swirl, and pile up into colorful shapes beneath the water.
This project is also surprisingly budget friendly. Store-bought magic sand can be expensive, but making your own version at home takes just a few supplies and creates far less mess than many other sensory activities. Plus, once you’ve made your own magic sand, you can use it again and again.
Whether you’re looking for a STEM activity, a sensory bin filler, or simply a cool science experiment that will impress everyone in the room, DIY hydrophobic sand is guaranteed to get some “Whoa, how did that happen?” reactions.
How Does Magic Sand Work?
Even though magic sand looks like ordinary sand, it’s actually a type of hydrophobic sand that has been treated with a water-repelling coating. When placed in water, the coating traps tiny pockets of air around the sand and prevents water droplets from soaking in.
That’s why you can pour the sand into water, watch it form interesting shapes, and then remove it while it still feels dry. The water never fully reaches the surface of the individual particles.
This is very different from what happens with regular sand. Normally, water fills the spaces between the particles and creates a wet, sticky mess.
With hydrophobic sand, the coating blocks that process and keeps the sand separated from the water. It’s science you can actually see happening right in front of you.
If you’re ready to try it – get the printable how to card below:
Magic Hydrophobic Sand
Equipment
- Spoon
- Container for water
- Funnel
Materials
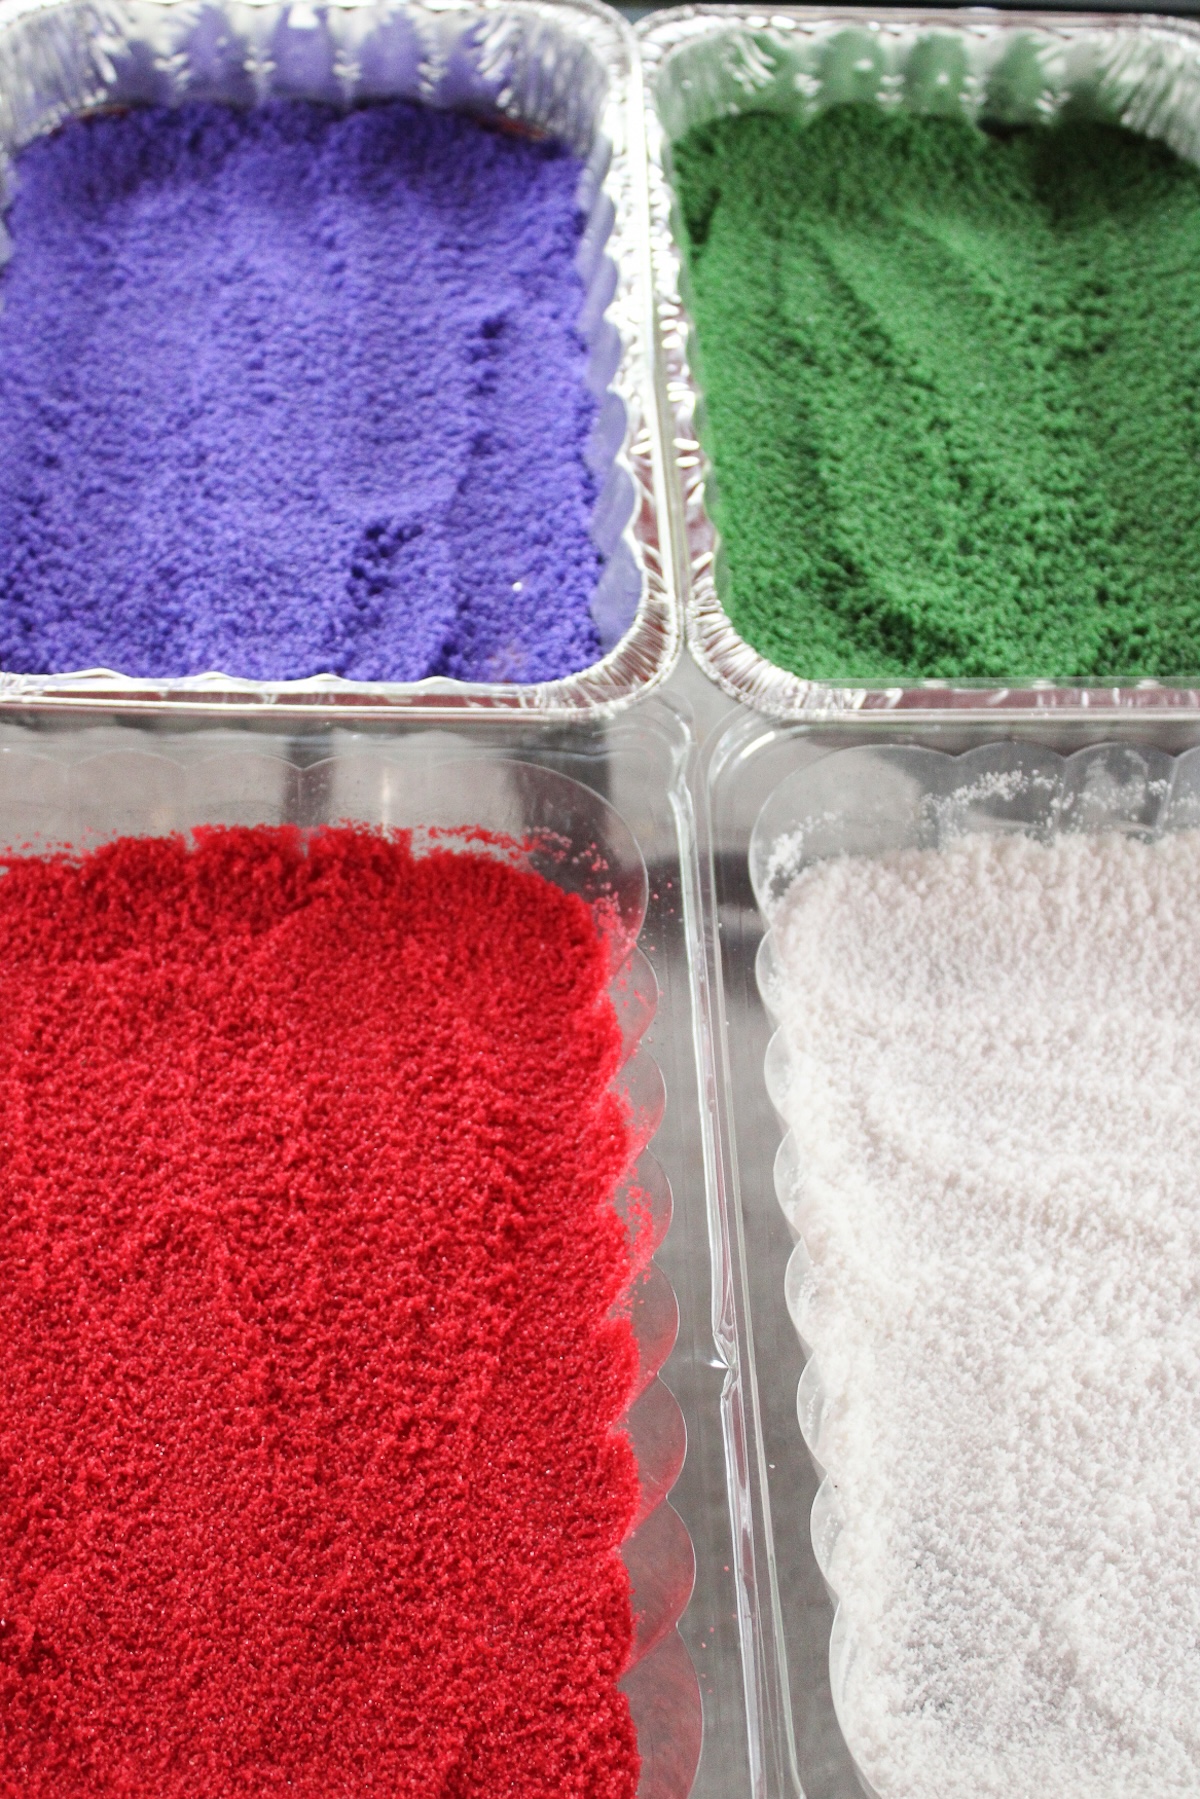
- 4 bags play sand or decorative sand 1 lb each, assorted colors
- 4 Disposable aluminum trays
- Scotchgard fabric water shield
Instructions
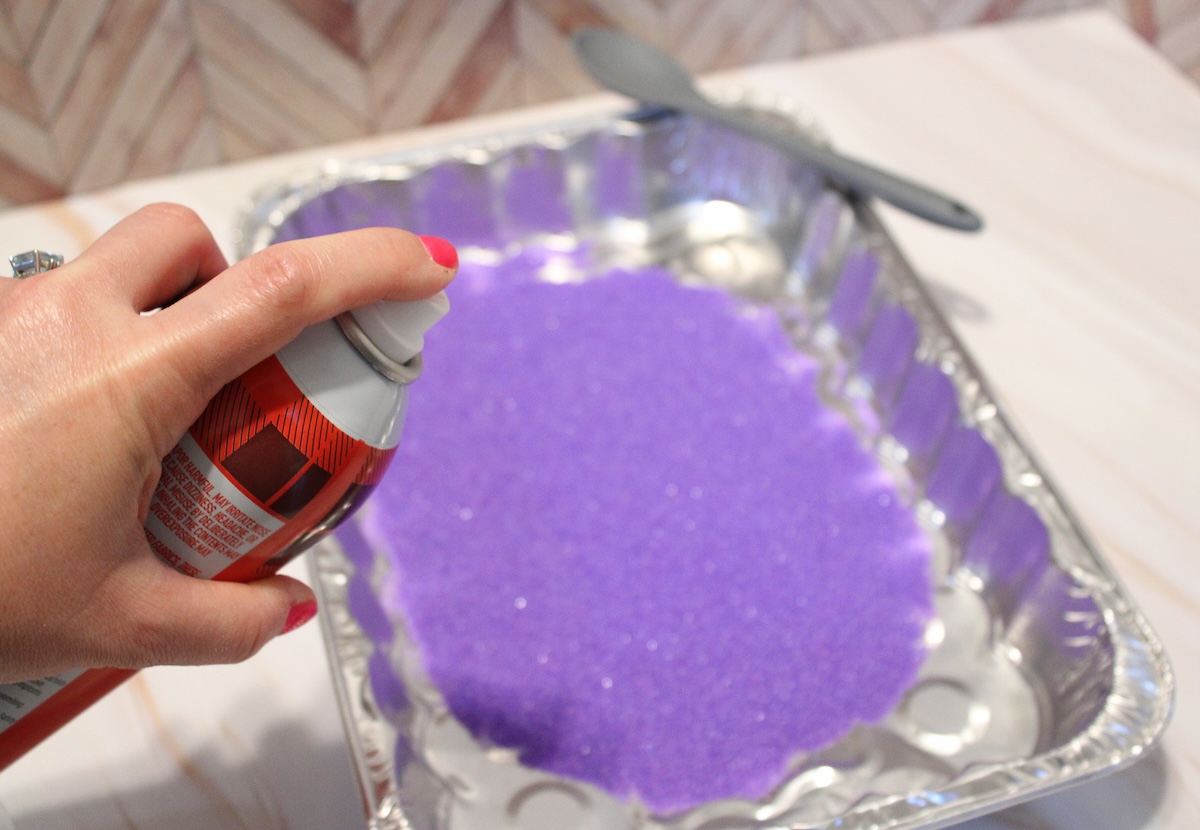
- Pour each sand color into its own aluminum tray.
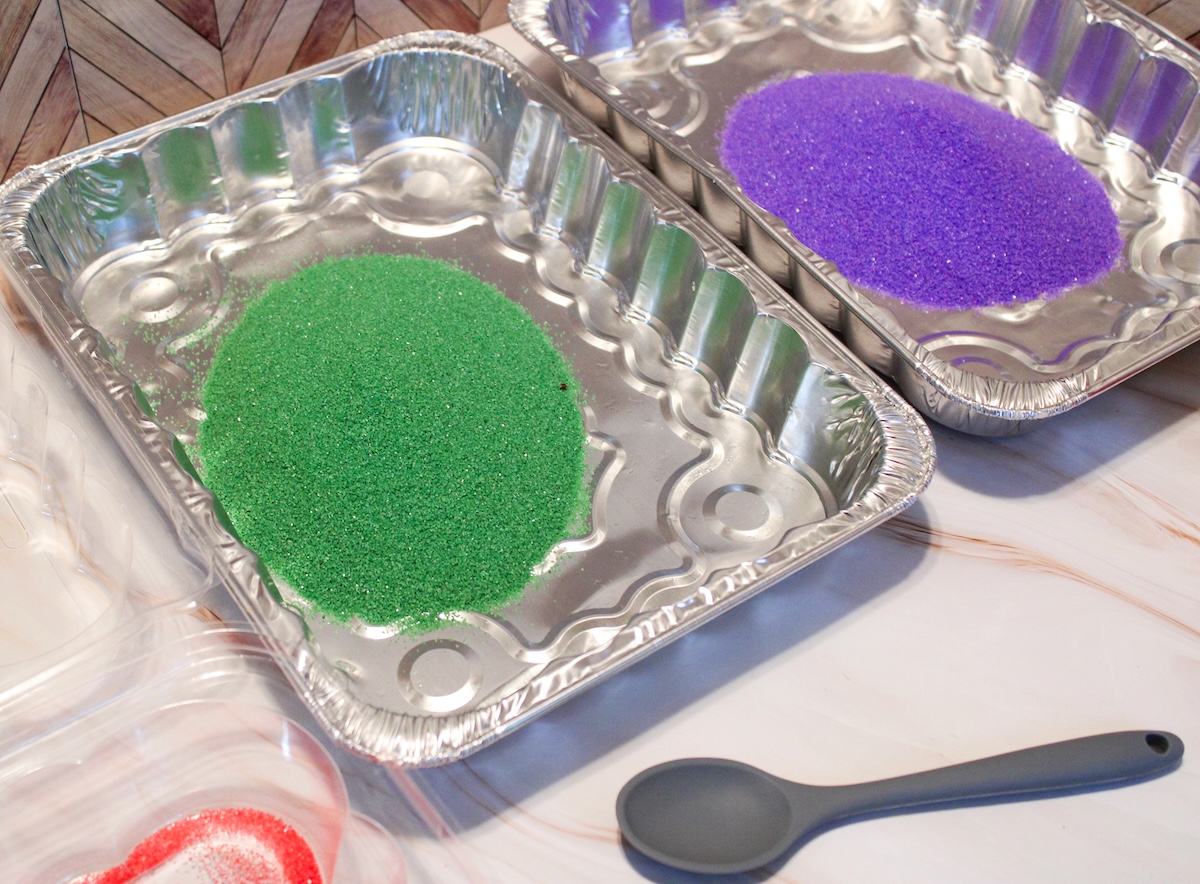
- In a well-ventilated area (highly recommend being outside) spray each color of sand with the Scotchgard fabric spray. Use the spoon to incorporate the spray into the sand.Repeat until all the colored sand has been sprayed with Scotchgard.
- Leave the sand in a well-ventilated area for 24 hours, stirring each container of sand a few times while it dries.
- Fill a container with water. Pour or spoon the sand into a funnel, and watch as it floats to the bottom of the water.
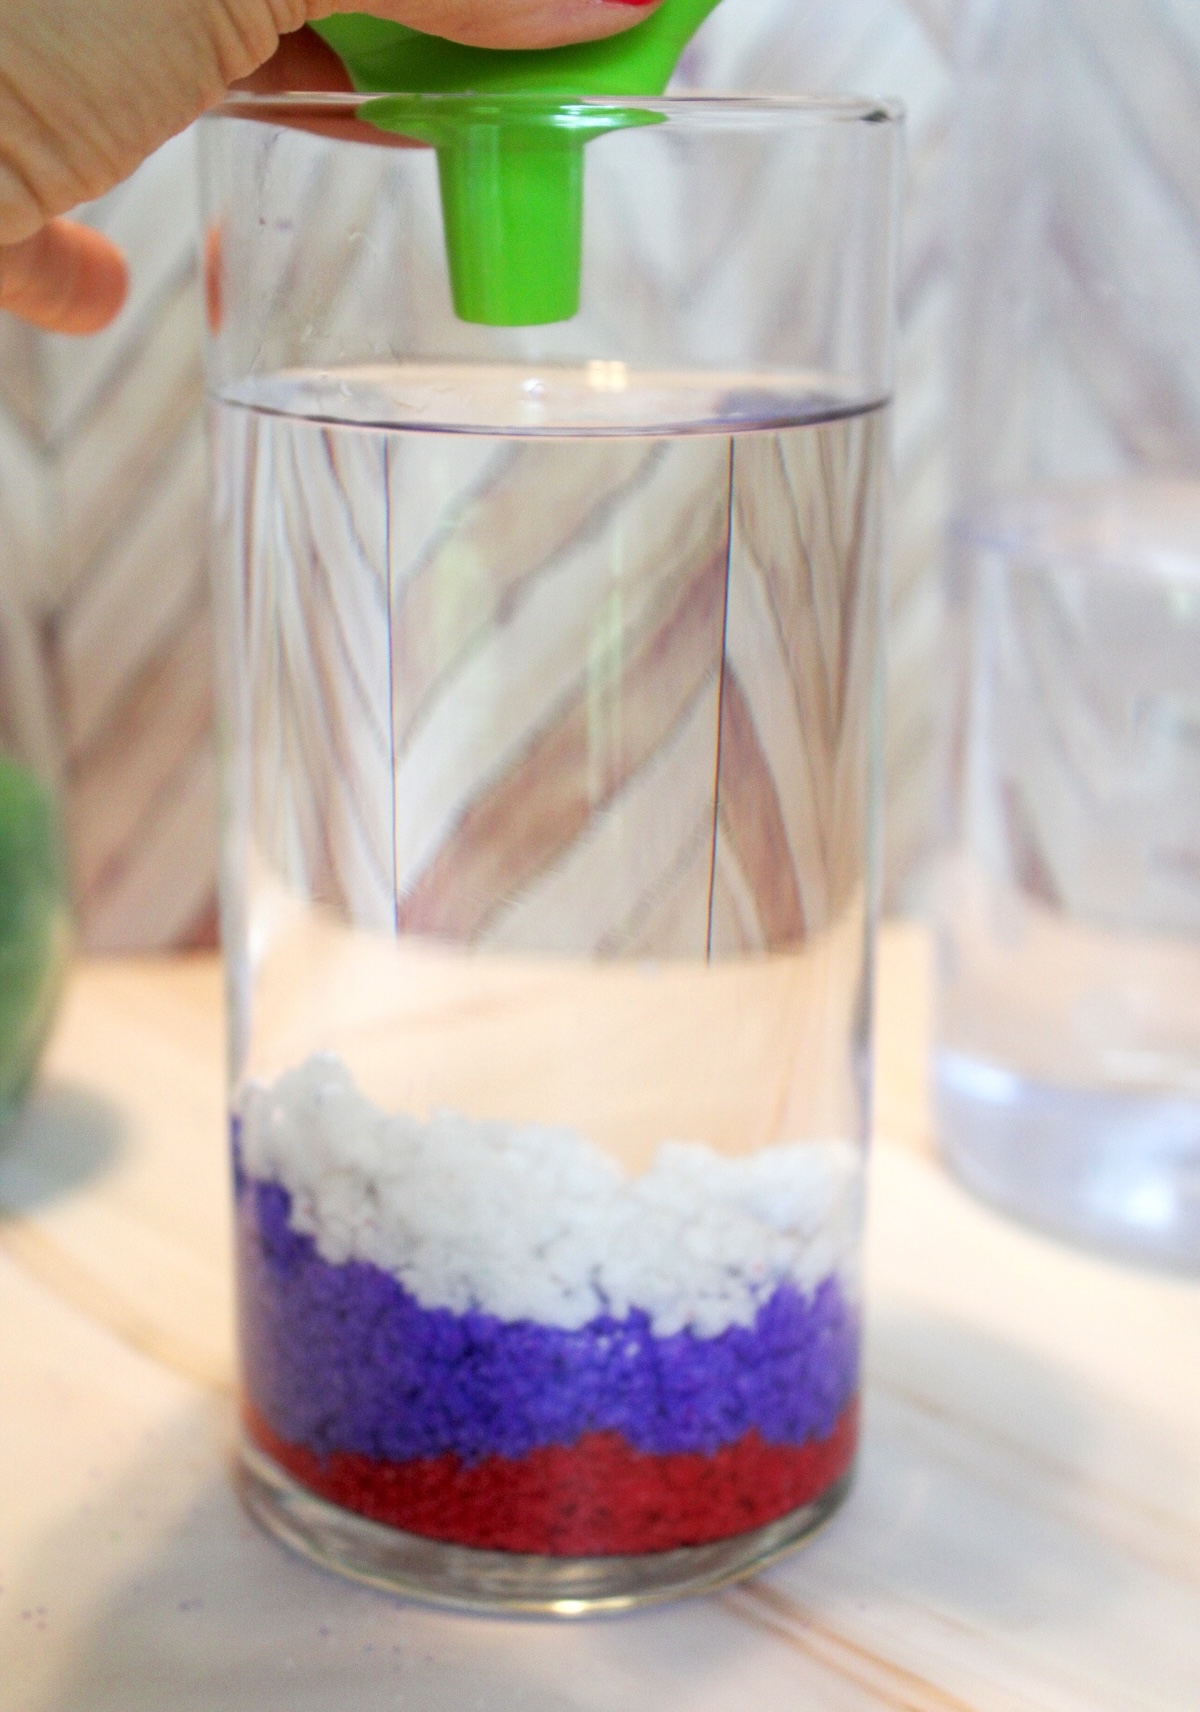
- Layer the sand colors to create a unique design and experience the hydrophobic nature.
Did you enjoy this craft? Let me know in the comments! I’d also love for you to check out these other projects and tactile crafts:
Blow Painting • Borax Crystals • Bubble Wrap Painting • Cloud Dough • Food Coloring Art • Homemade Playdough • Jello Play Dough • Silly Putty • Spin Art • Weaving for Kids