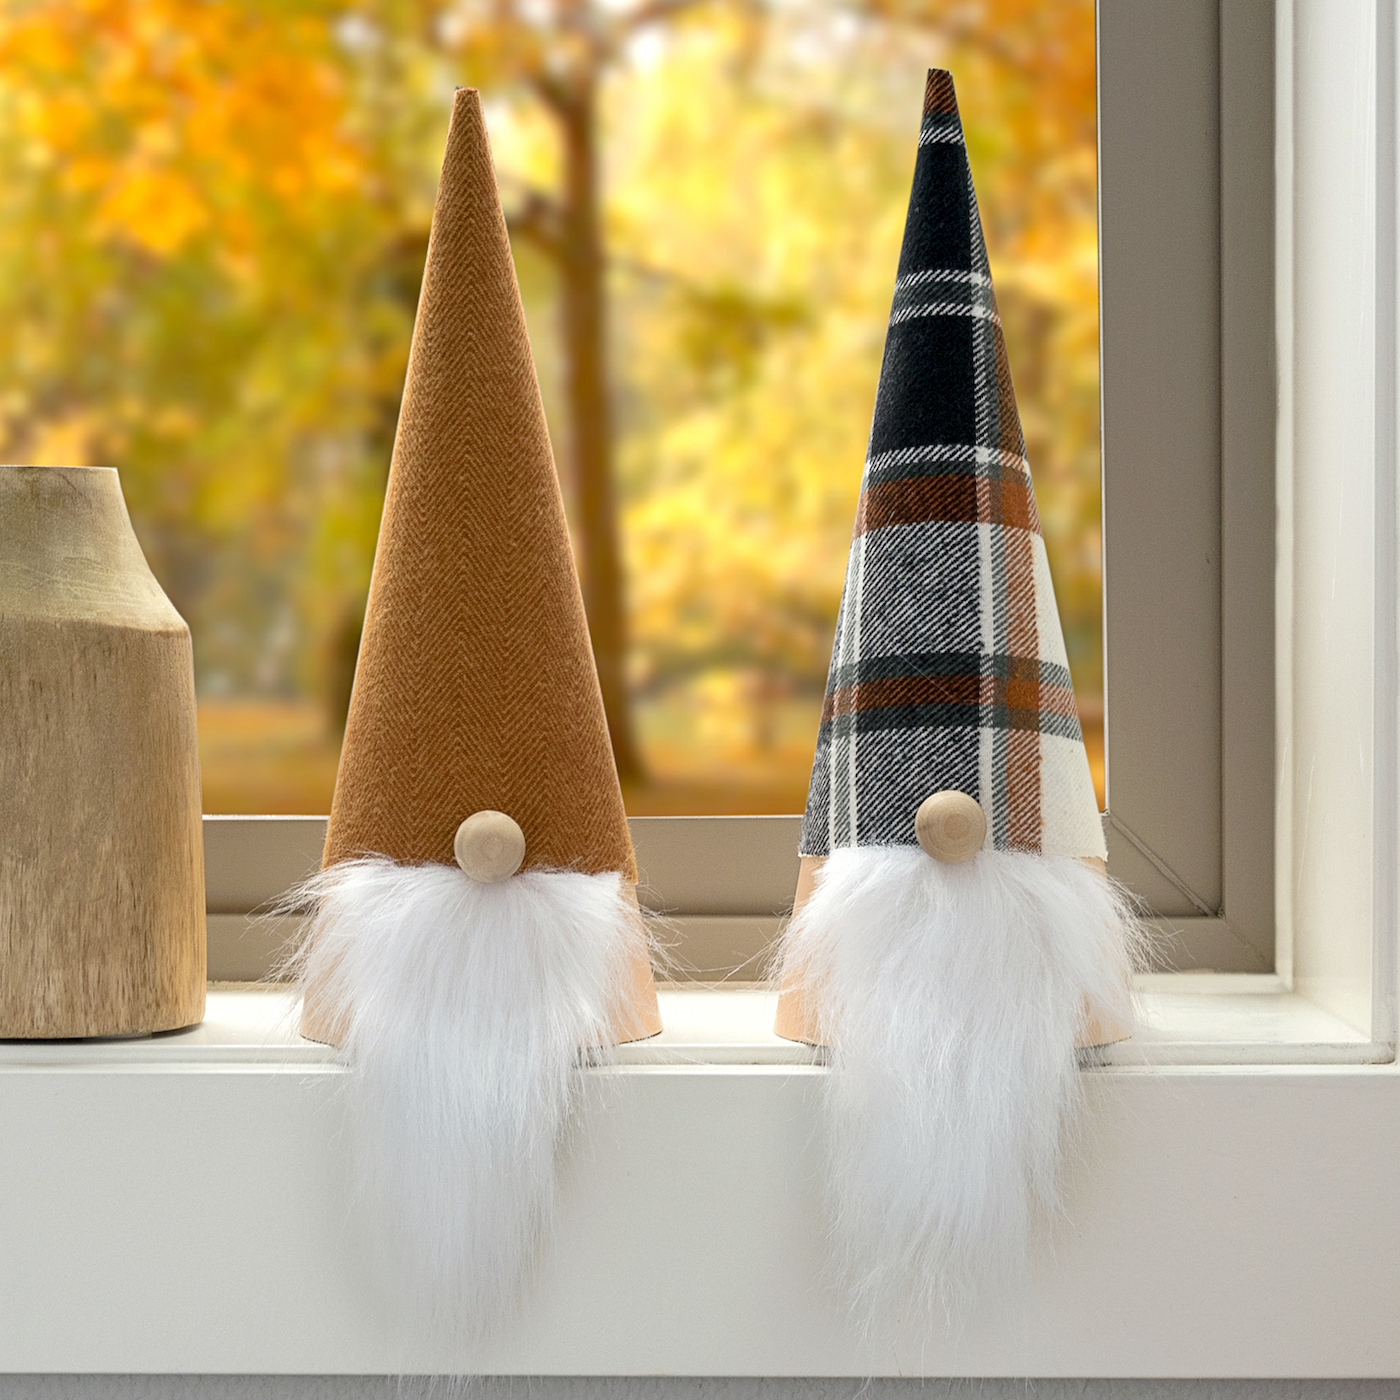
Whimsical Fall Gnomes: DIY Magic for Your Autumn Decor
Learn how to make the cutest DIY fall gnomes to accent your seasonal decor! These are such an easy autumn project – great for kids or adults.
Skills Required: Beginner. Even if you’ve never crafted before, you can easily make a gnome using a paper cone. You’ll be doing some cutting (using templates), painting, and attaching things using adhesive.
If there’s anything you should know about me it’s these three things: 1) I love pumpkin; 2) I love autumn; 3) I love gnomes. Actually there are a lot more things you should know about me, but it’s September . . . so this is what on my mind!
Once fall hits, I get the crafting bug bad. I craft all year, but my desire and enthusiasm definitely increases toward the end of the year. I’m all about fall colors (orange, yellow, brown), plaid, scarves, and all the great stuff that goes with it. I also love the decorating!
And lately I’ve realized that my autumn decor isn’t quite up to snuff. I wanted to make something easy, which is how these DIY fall gnomes came about.
I only had a few criteria for my project. I wanted it to:
- Use simple supplies and easy to make
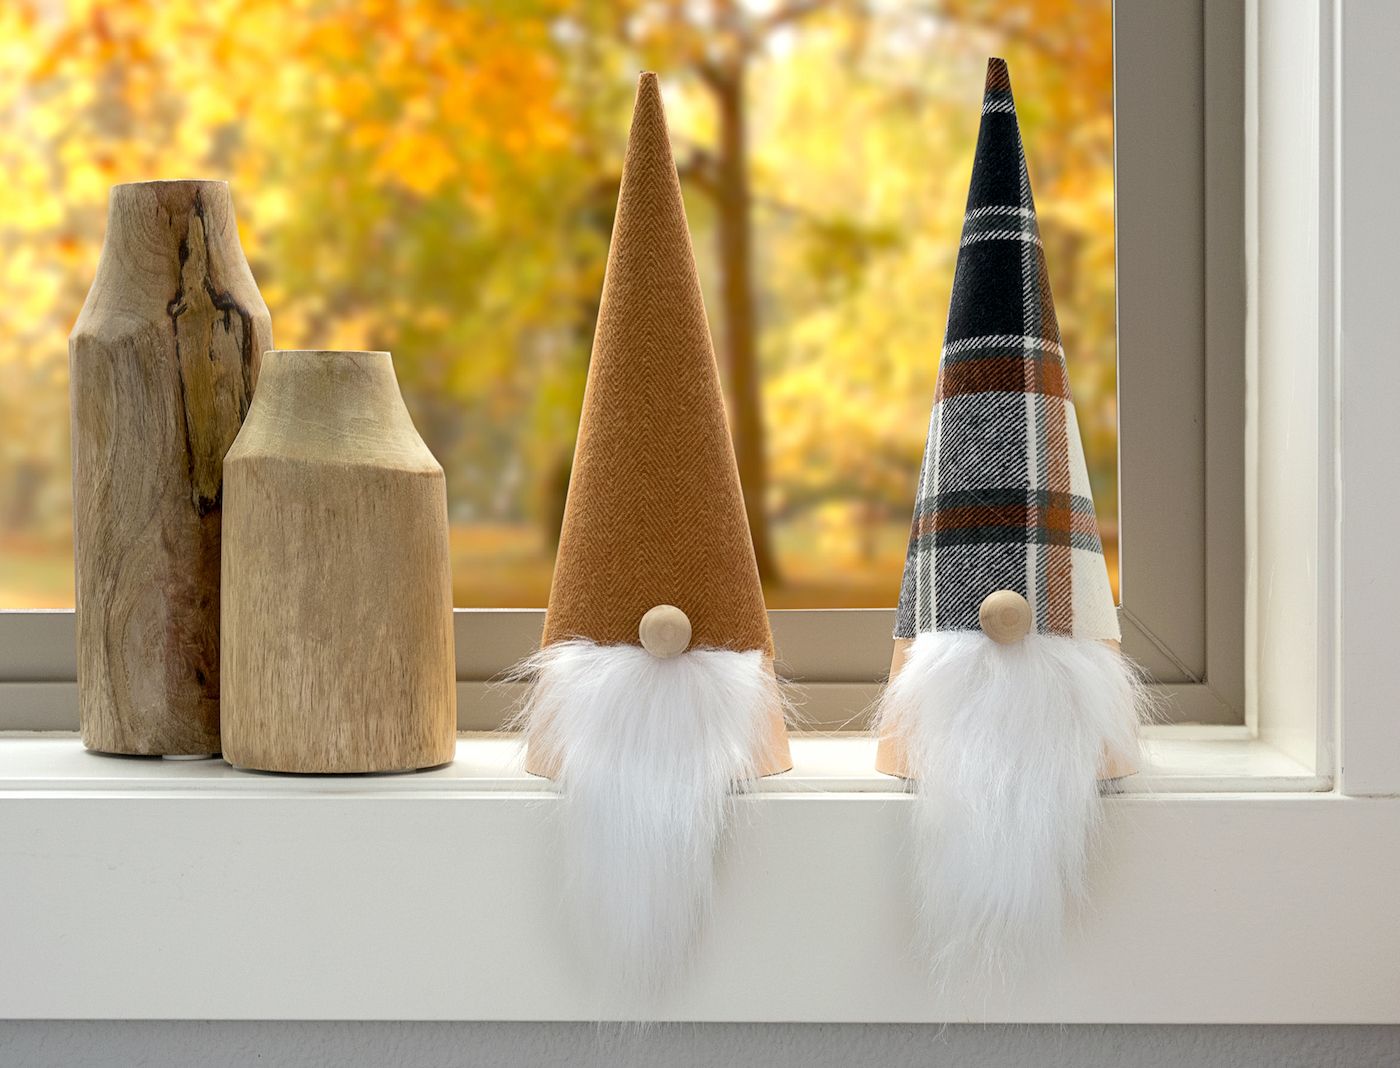
- Use herringbone, plaid, or other cool autumn fabrics (but be no-sew)
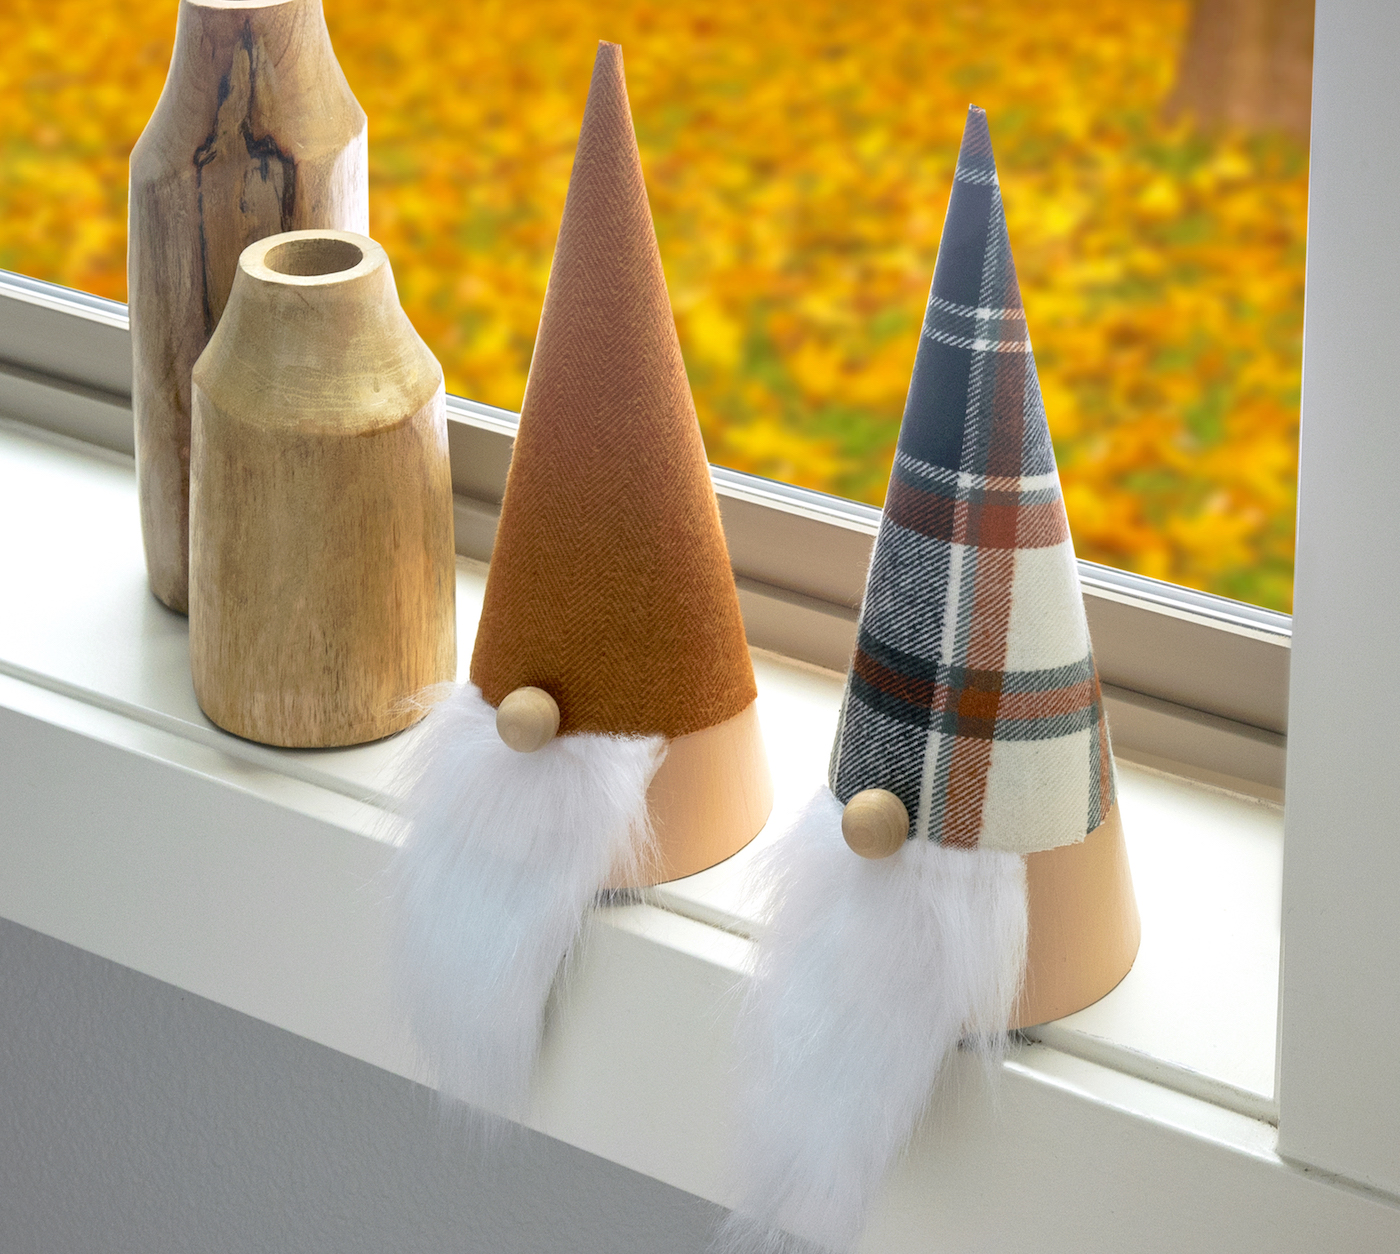
- Be able to sit on a mantel or table
- Some vertical height
- Can recreate for other holidays
I think I did okay! I love my little autumn gnomes and how they turned out. I’m hoping that you want to make them too, and I’m going to show you how below.
You can make a gnome in a few simple steps! You’re going to make the template, then set aside and paint the cone. You’ll cut out the hat fabric. Then you’ll attach the fabric, then the beard, and then the nose.
The paper mache cones for my base can be found here. They are 10.63 x 4″. The template I made works for this size cone, but I’m sure you can alter it easily for other sizes.
I prefer the look of the paper mache, but you can also use foam cones. To be honest, they are a little bit cheaper and more readily available.
I used faux fur for the beards, though some people use felt, yarn, or even a cut up dollar store mop head. There are a few options – I do like the faux fur best, plus it comes in a bunch of different colors.
Are you ready to learn how to make fall gnomes? Here we go!
Gather These Supplies
- Paper mache cones – 2
- Cone template
- Beard template
- Wood beads – 2 (5/8″)
- Acrylic paint – skin tone of your choice
- Flannel fabric – enough to cover the cone (the same thing I used in my toilet paper pumpkins)
- Faux fur pieces
- Paper to print template
- Paintbrushes
- Spray adhesive
- Sharpie or pen
- Painter’s tape
- Sandpaper
- Scissors
- Hot glue gun
Make as many gnome as you like! Pick fun fabrics, and even add fun embellishments if you like. I’m thinking I should’ve added some leaves or twigs to the hats. . . . I still can!
Display these bad boys anywhere you like. Along with a pumpkin garland. I love my new decor!

DIY Fall Gnomes
Equipment
- Sharpie or pen
- Sandpaper
Materials
- 2 Paper mache cones
- Cone template
- Beard template
- 2 Wood beads
- Acrylic paint skin tone of your choice
- Flannel fabric enough to cover the cone
- Faux fur pieces
- Paper to print template
- Spray adhesive
- Painter’s tape
Video
Instructions
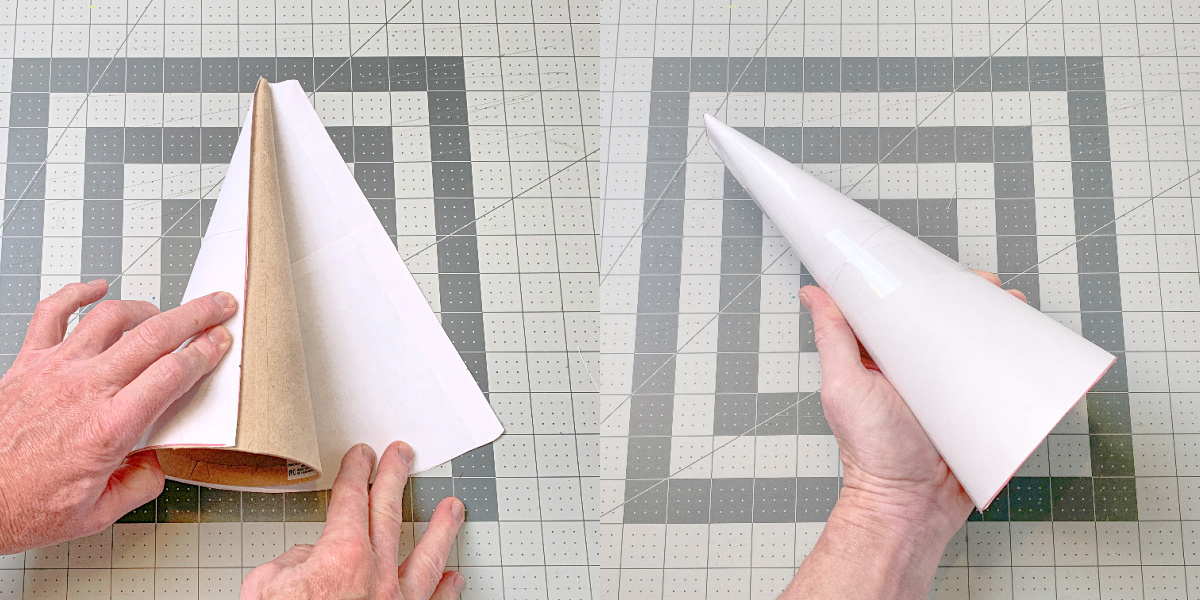
- Print out the template (poster setting, full size, it should take four pieces of paper) and assemble using tape. Cut out, and then cut 1 3/4" off of the bottom of the template. Set aside, and also save the scraps.
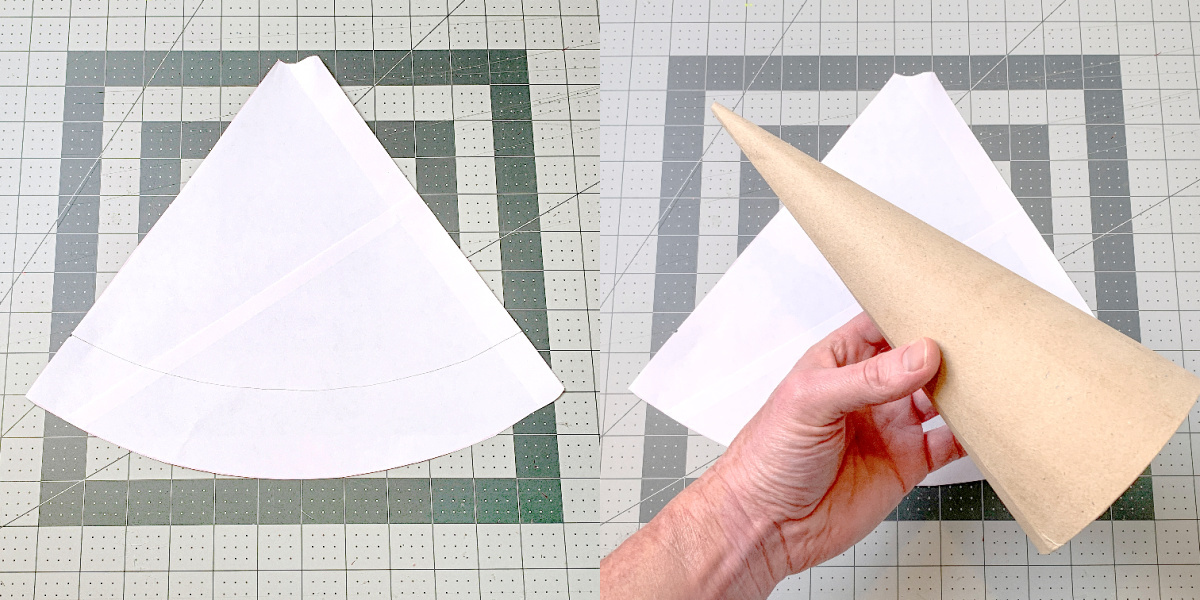
- Test the template for fit. You don't want to move onto the next step if it doesn't cover the cone.
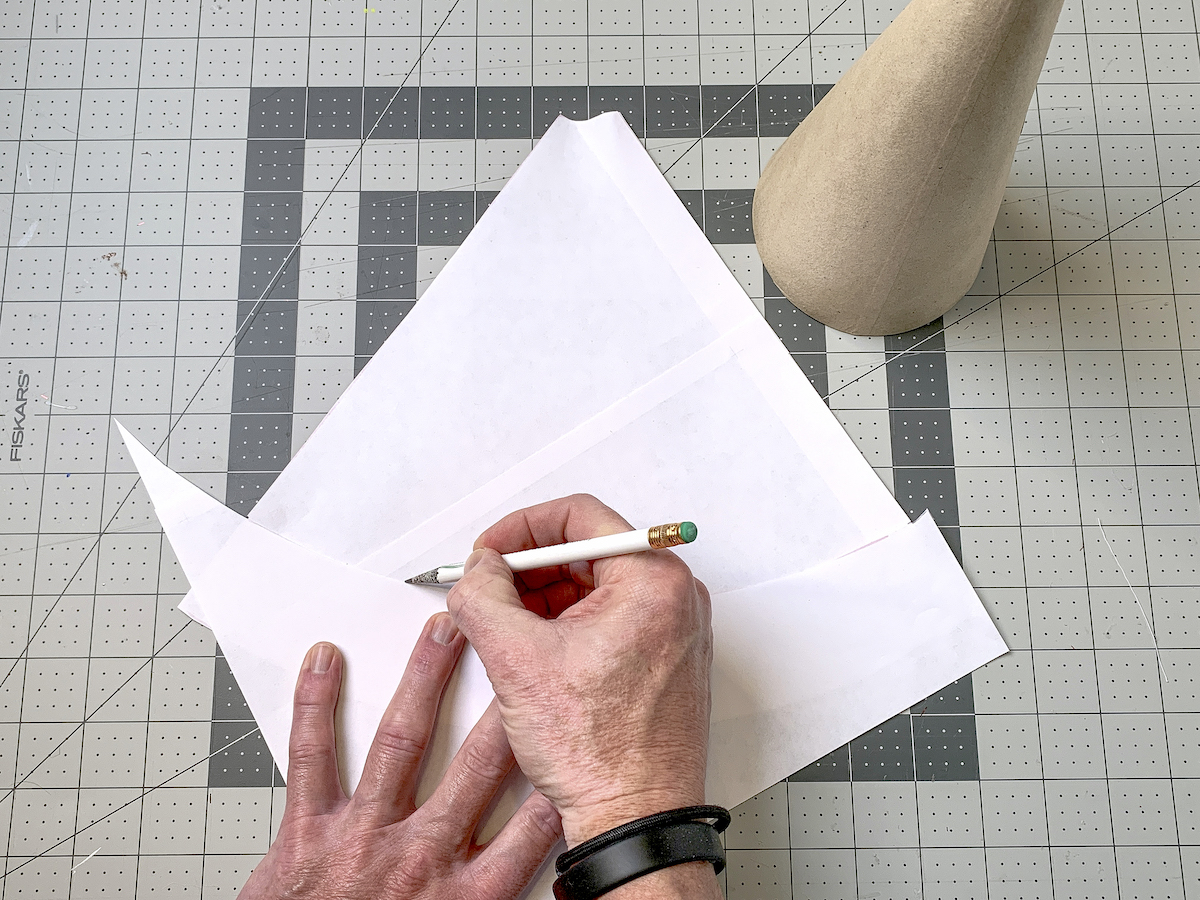
- The large scrap piece that you cut off the bottom will be used draw a line about 1 3/4" from the bottom of your template! Turns out the cut scrap makes a perfect curved line for you to trace. Cut the bottom portion off your template on the line you just traced using the scissors.
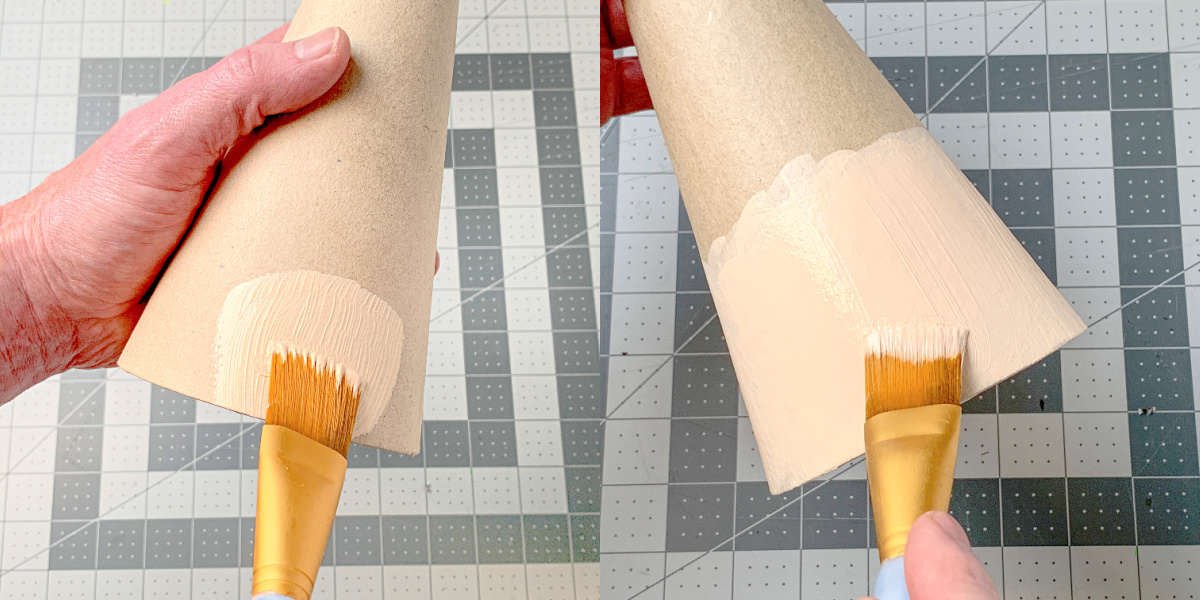
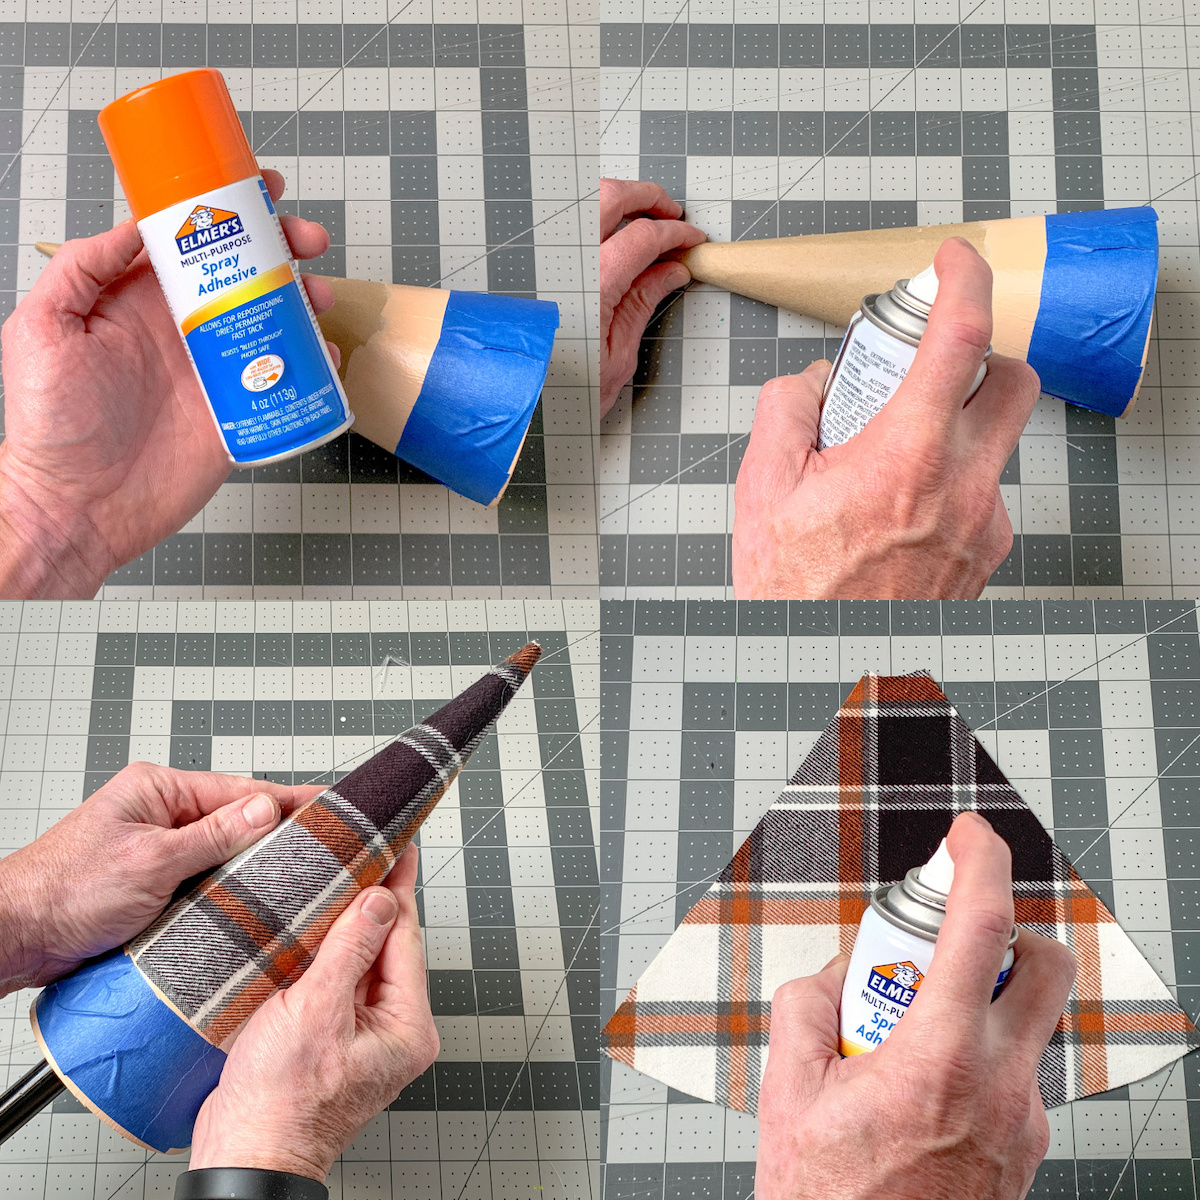
- Paint the bottom of the cone with a few coats of acrylic paint, using the skin tone paint of your choice. Let dry.
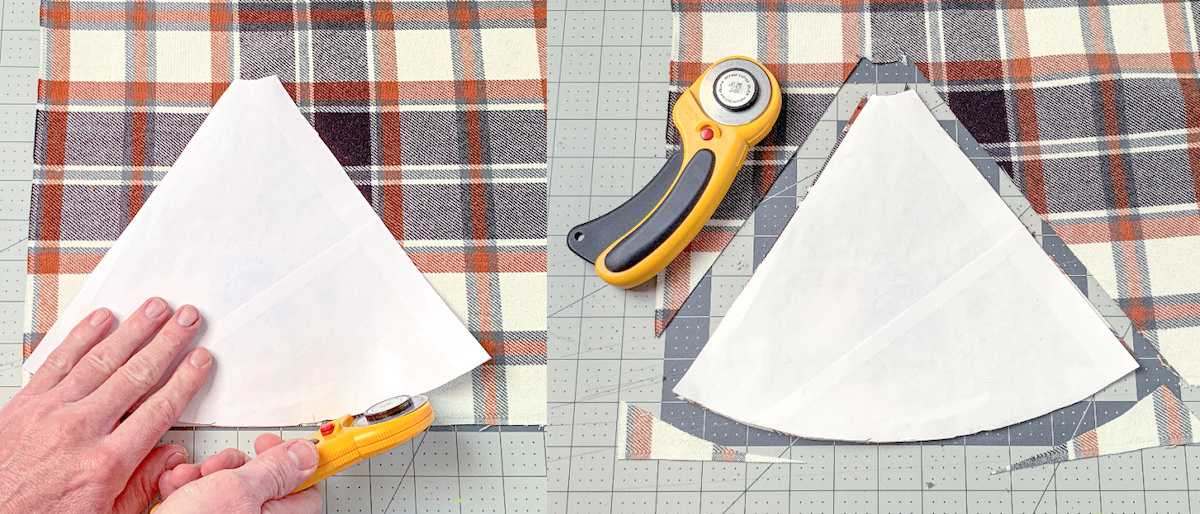
- Place your fabric down on a cutting surface and place the template on top. Use a cutting wheel or scissors to cut the fabric of the hat.
- Tape off the bottom of the cone so you don't get any adhesive on the skin of the gnome. Apply spray adhesive to the top portion. Wrap the fabric around, smooth, and let dry.
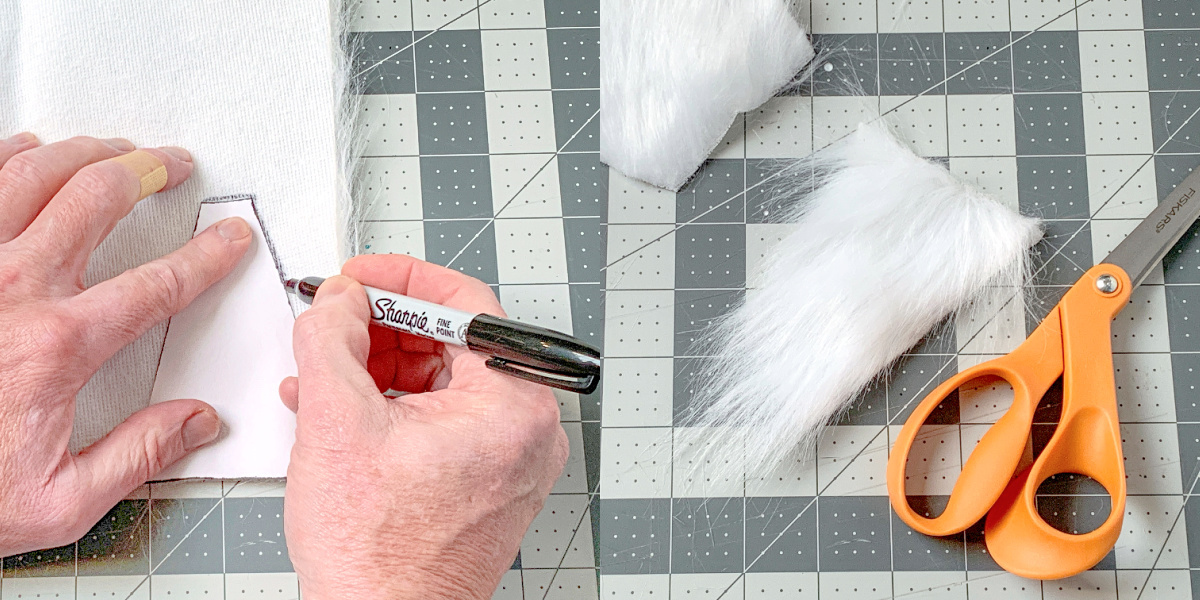
- Cut the faux fur for beards using the template. Trace on the back and then cut. Don't just cut through the faux fur because you'll end up cutting off a lot of the beard fur. Pull the fur forward and away from the back of the fabric when cutting.
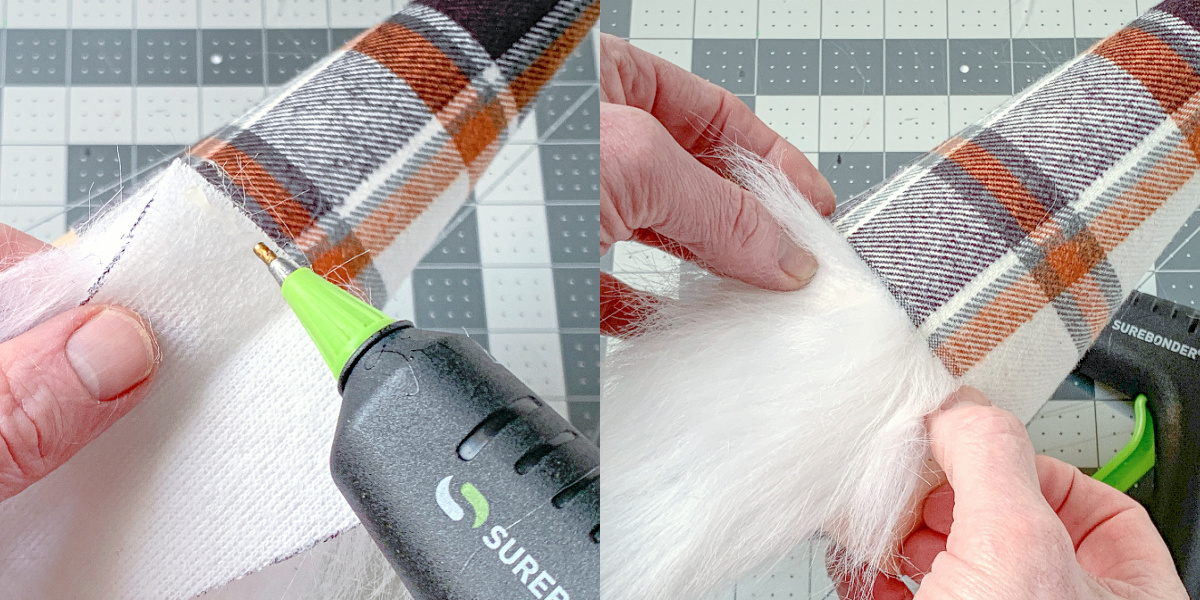
- Attach a beard piece to the base of the cone using a hot glue gun.
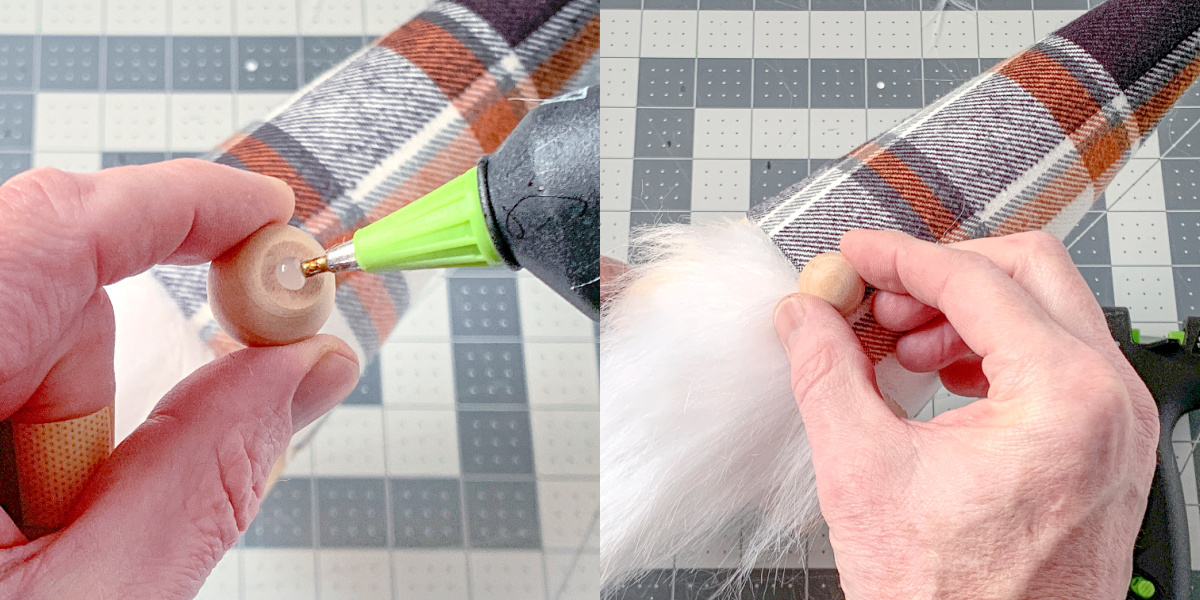
- Sand a flat spot on a wood bead using sandpaper. Hot glue the nose in the center where the beard meets the fabric to finish.
Notes
I hope you enjoyed this fall gnome craft! If you love them, let me know in the comments. Happy fall y’all! Don’t forget to check out some of our other awesome autumn projects:
Book Page Pumpkin • DIY Fall Wreath • Leaf Cork Trivets • Mini Fall Banners • Mini Pumpkin Vases • Mini Pumpkin Wreath • Scrapbook Paper Leaf Decor • Twig Votives • Wine Cork Pumpkins


Hi there,
We loved this craft idea, so we linked you to our latest blog post!
https://hawksbillcardandcraft.com/21-amazing-autumn-craft-ideas-for-every-age/
Thank you so much for the feature, that was lovely!