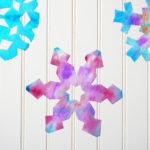
Snowflakes with Coffee Filters
You'll love learning how to make this cute coffee filter snowflake craft, perfect for kids this Christmas or winter!
Servings 5 snowflakes
Cost $1
Equipment
- Small spray bottle of water
- Hair dryer (optional)
Ingredients
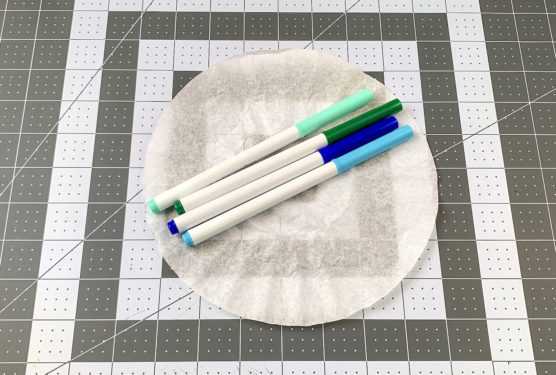
- Coffee filters 1 per snowflake
- Washable markers colors of your choice: pinks, blues, purples, and maybe a dark green or orange for fun
Instructions
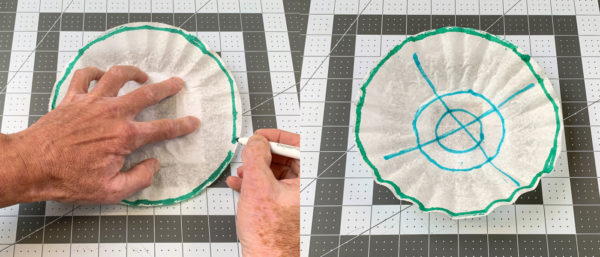
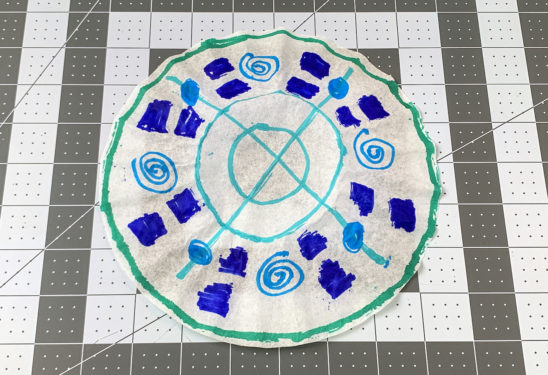
- Choose four colors that you would like to use for your snowflake. Picking a variety of colors that are different shades (light and dark) makes for the best results.
- Start with a green or similar dark shade of marker. Draw a circle around the edge of the coffee filter and then draw some circles and blue lines in an "X" across the middle.
- Take a contrasting color marker and draw some dots and lines within each quadrant on the coffee filter.
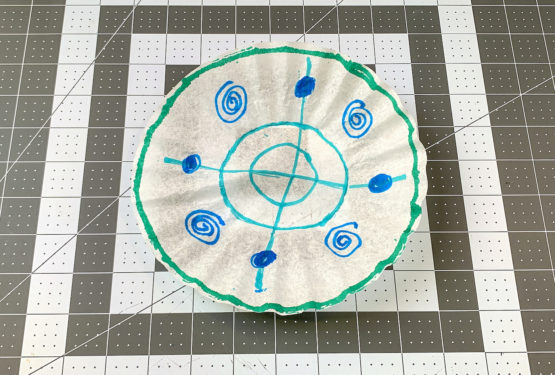
- With the remaining marker(s), add additional lines, squares, and squiggles on the coffee filter. No need to add too many lines or shapes. They will bleed into each other.
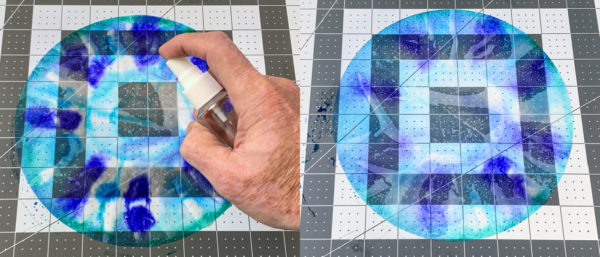
- Place the coffee filter down on a washable work surface. You can use a craft mat, silicone mat, or wax paper. Mist the paper with 4 – 5 sprays of water and you will start to see the markers bleed. This is what you want.
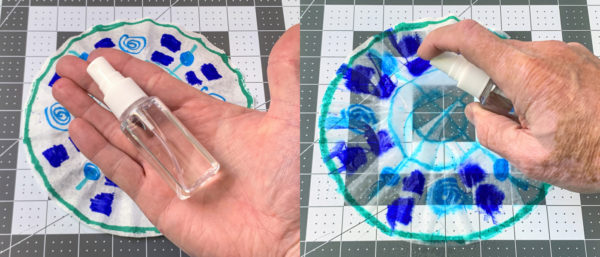
- If the markers didn’t bleed enough, add additional sprays of water. Don’t add too much water. You want to just saturate the filter, otherwise all the water will drip off the filter and take the color with it.
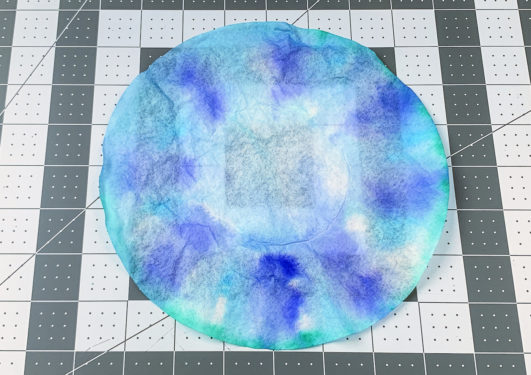
- Leave the coffee filter on your work surface to dry. Additionally, you can take a hairdryer and dry the filter, or place in the oven for a few minutes at the lowest heat (watching the entire time).
- To turn the filters into a snowflake, you'll cut it for folding. Fold the coffee filters in half, and then into thirds. Then fold in half once again.
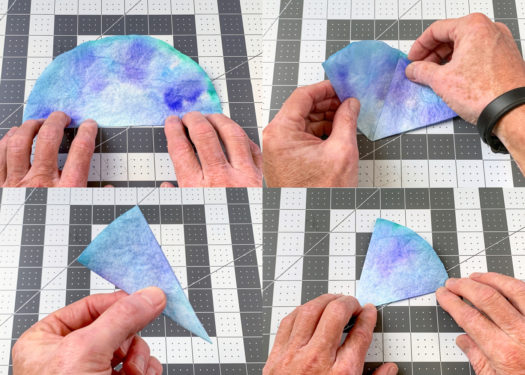
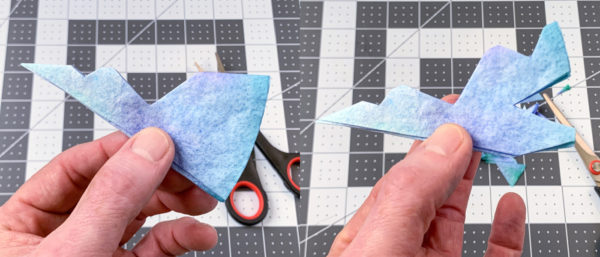
- On the folded filter, you're going to cut notches out on both sides and then the top. Make small cuts, both triangular and round. The more detailed the cuts, the more detailed the results.
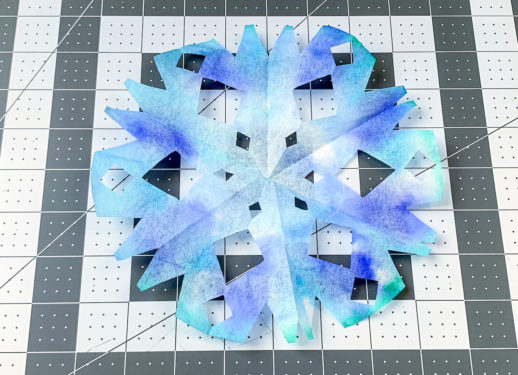
- Carefully unfold the filter to reveal your finished snowflake.
Video
Notes
If you don’t have a spray bottle, you can drop water (single drops) on various areas of the filter, or use a toothbrush to fling water onto the filter. It might be a bit messier but it gets the job done.
Don’t add too much water when you spray the filter. You want to just saturate the filter, otherwise all the water will drip off the filter and take the color with it.
You can let the coffee filter dry naturally. It might take a few hours. Other options are to use a hairdryer, or place in the oven for a few minutes at the lowest heat. If you use the oven, use a baking sheet and watch the whole time so nothing catches fire.