
Terracotta Pot Christmas Tree
Make the cutest trees for Xmas using clay pots! These are easy for all ages.
Servings 1 tree
Cost $2
Ingredients
- 3 Clay pots 2 1/2", 3 1/2", and 4 1/2"
- Acrylic paint green (two shades), white, and then multiple colors for the dot lights
- 1 bottle Craft glue
Instructions
- Start by painting the main parts of the three pots with your darker green color. Give several paint coats and let dry.
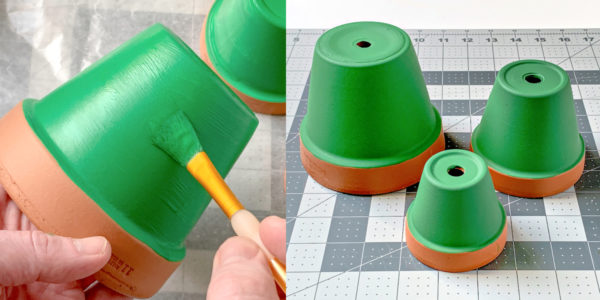
- Paint the lips of the clay pots with a different, lighter green color. Wrap the paint around the top of the lip a bit so that all of the terra cotta is covered. Let dry.

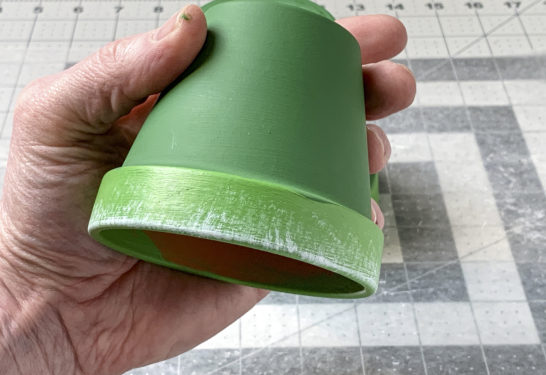
- The "faux" snow is made by dry brushing white onto the rims of the pots. This means you're going to remove most of the paint from the brush and scrub or dust the remaining paint on.You'll put a little bit of white paint on the brush and then remove most of it. Then scrub the paint around the rim. Practice a little bit on your palette or some scrap paper . . . then try it on the pot.
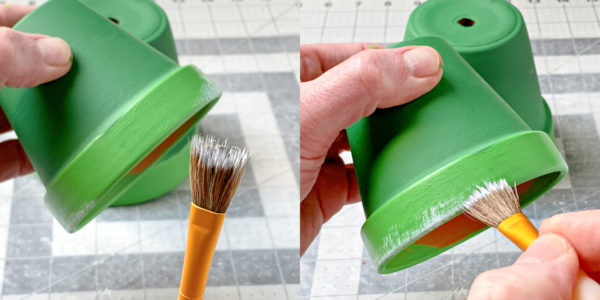
- Repeat with all three pots. If you don't like the snow you make, you can just paint over it and start over! This dry brushing technique is a fun one for kids to learn and can be used in a variety of applications.
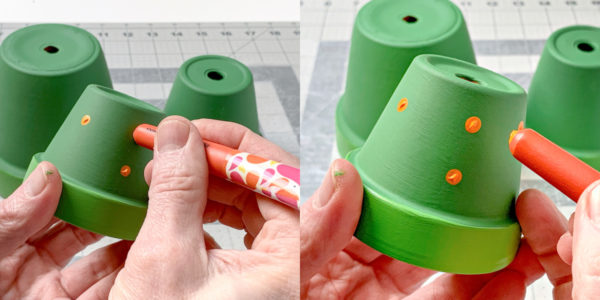
- It's really easy to add "lights" to your clay pot Christmas trees with the end of a paintbrush. Dot the end of your paintbrush into the paint, and then place it down on the painted tree to create a colorful light. reload when you run out of paint. And obviously - use multiple colors and sprinkle the "lights" around the tree! Let dry.
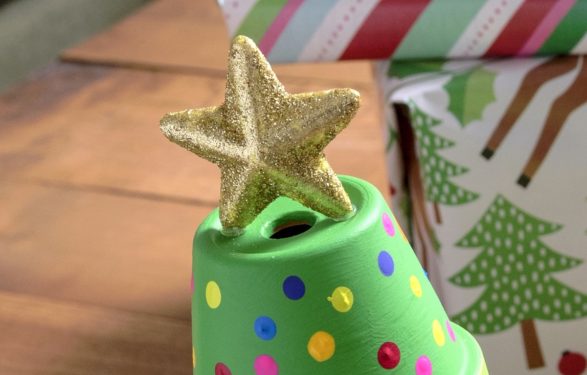
- Stack the pots, then attach the topper. I attached with hot glue. Let your tree dry completely before displaying.
Video
Notes
- Make sure the pots are clean and dry before painting. You don't need to do anything if you purchase them new, but if you use old plant pots, clean the dirt off and wash (and let dry) so the paint sticks.
- You don't need these exact pot sizes - you can go bigger or even smaller (to make an ornament!). You want about a 1" difference in diameter between your three pots to make it work.
- You can use inexpensive craft paint like Apple Barrel for this project. It's a great price, while at the same time providing good coverage (and it's safe for kids).