Make Festive Clay Pot Christmas Trees for a Kid-Friendly Holiday
Learn how to make clay pot Christmas trees using simple craft store supplies! Kids will love to make these to add to your holiday decor.
Skills Required: None. If this is your first craft ever, that’s okay! You’re going to be painting pots in some various ways, adding dots, and then stacking. You can do this, and so can the children (of all ages).

If you’re a child of the 70s and before, perhaps you’ll take a trip down Christmas memory lane with me. I’d like for you to let me know if you remember a little something called the ceramic Christmas tree:

Did your family have one? Because ours did. And it was a big deal to bring it out every year. Because not only was it amazing to watch my mom plug it in each year, but we also got out to set around the ceramic pieces that went with it. There was a kid on a sled and even a little dog!
We were expressly prohibited from touching the tree for obvious reasons. I had four brothers. You start playing with the tree, and it’s about five minutes before it’s toast. So we could never touch or play with the tree, but we could watch its brilliant glow from afar.
Maybe you had a tree like this one growing up, or you even have one now (you can get them on Amazon). Either way, your littles might want to participate in the holiday fun. I’ve got a great craft for you: “lighted” clay pot Christmas trees!

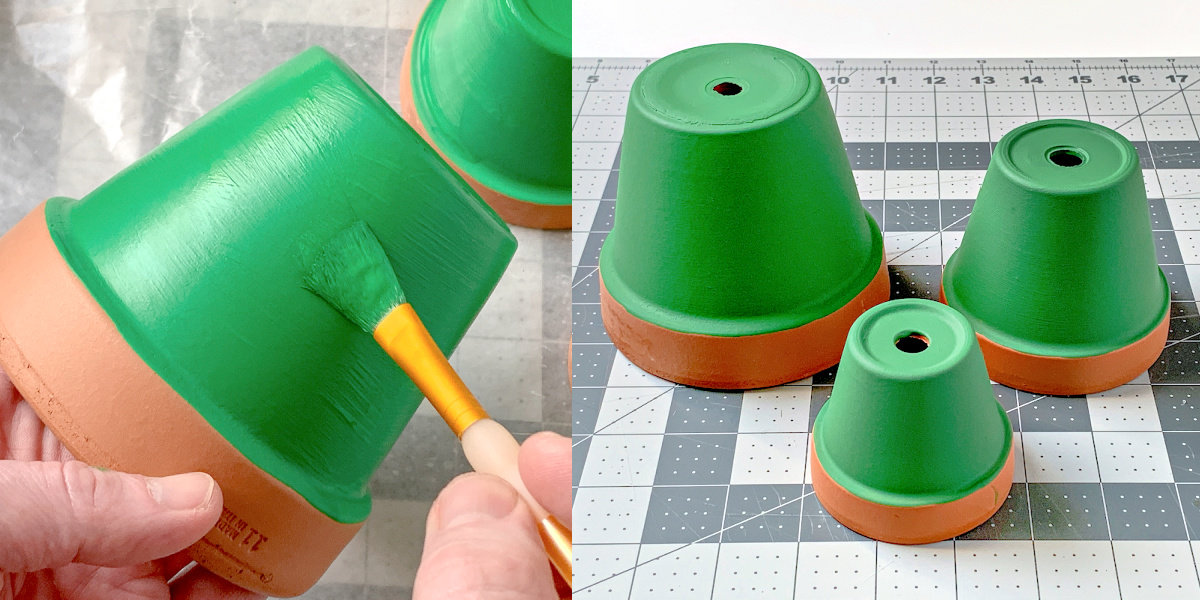
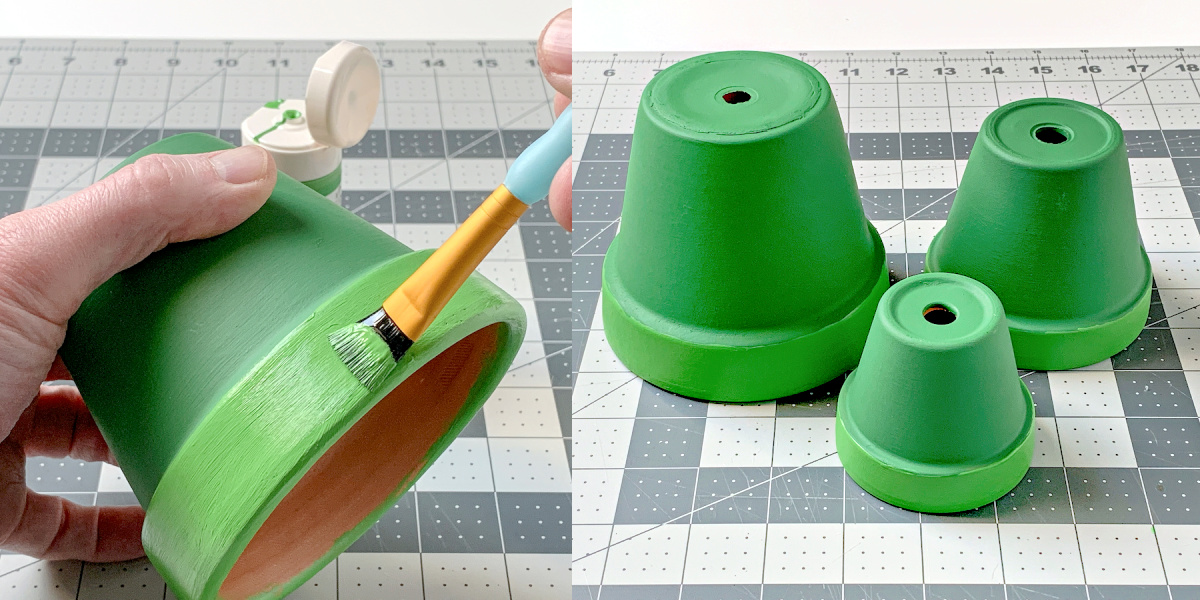
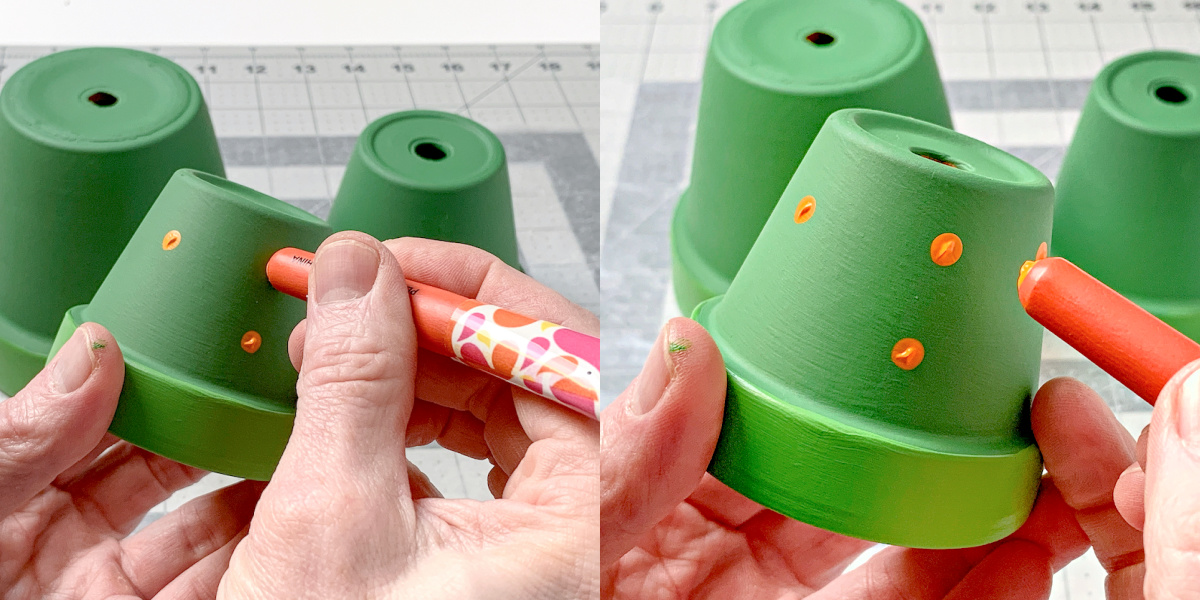
These trees can be made in four easy steps. You’ll paint the pots using two shades of green (I went darker on the body and lighter on the rim). Then you’ll add the “snow” to the bands, and add the polka dot lights. Finally, you add the toppers on top!
Gather These Supplies
- Clay pots – 2 1/2″, 3 1/2″, and 4 1/2″
- Acrylic paint – green (two shades), white, and then multiple colors for the dot lights
- Paintbrushes
- Craft glue
- Hot glue gun and glue sticks
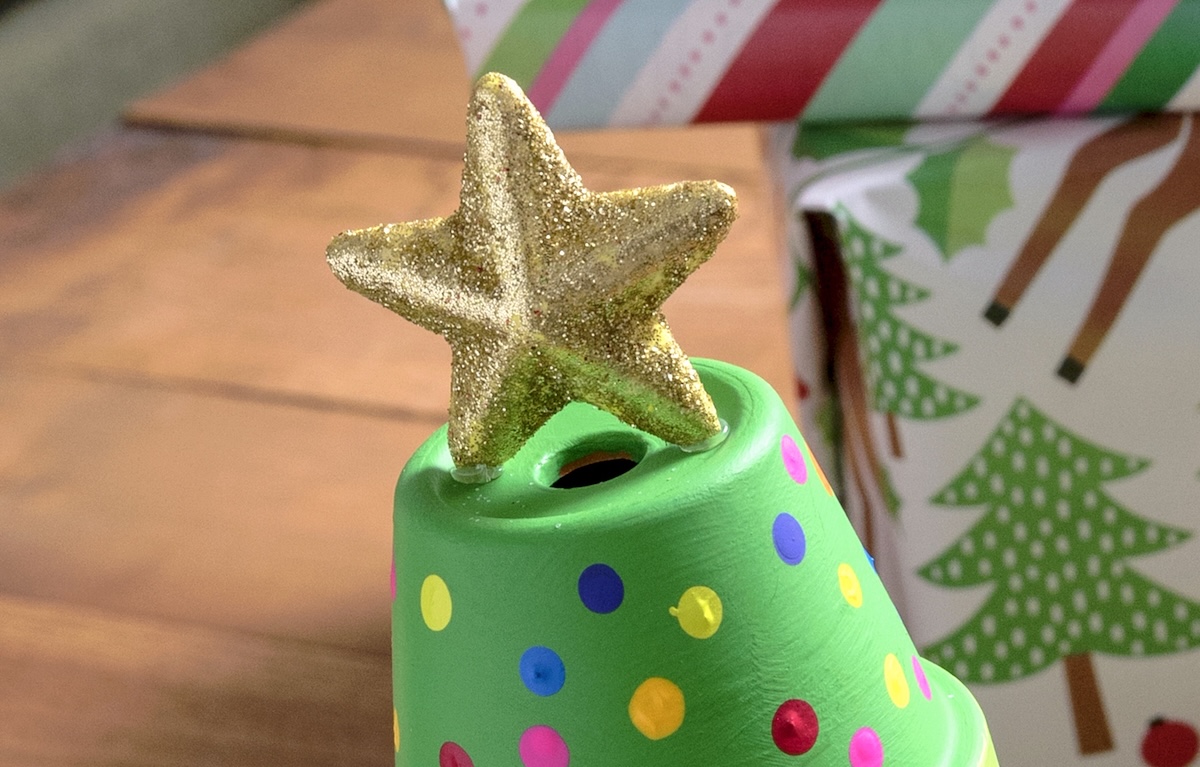
You can use just about anything for the topper. Painted cardboard, stiff paper, a wood shape . . . root through your stash to find something that will work as your topper! You’re not required to use a topper, but it really adds something.

If you are feeling really Christmas-y, I dare you to paint the entire pot with Sparkle Mod Podge. Kids love the glitter effect and it’s so festive! I’d love to know if you make these . . . let me know in the comments!
Get the printable how to below:

Terracotta Pot Christmas Tree
Materials
- 3 Clay pots 2 1/2", 3 1/2", and 4 1/2"
- Acrylic paint green (two shades), white, and then multiple colors for the dot lights
- 1 bottle Craft glue
Video
Instructions
- Start by painting the main parts of the three pots with your darker green color. Give several paint coats and let dry.
- Paint the lips of the clay pots with a different, lighter green color. Wrap the paint around the top of the lip a bit so that all of the terra cotta is covered. Let dry.
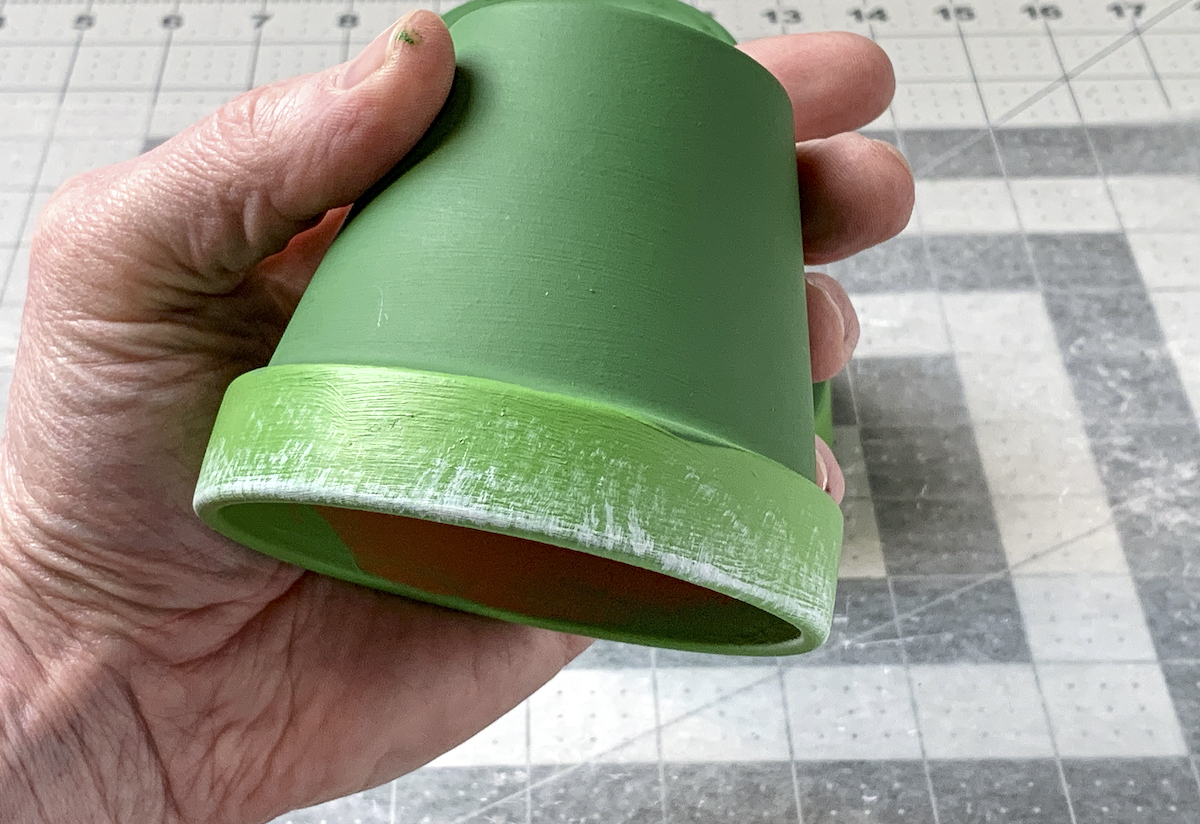
- The "faux" snow is made by dry brushing white onto the rims of the pots. This means you're going to remove most of the paint from the brush and scrub or dust the remaining paint on.You'll put a little bit of white paint on the brush and then remove most of it. Then scrub the paint around the rim. Practice a little bit on your palette or some scrap paper . . . then try it on the pot.
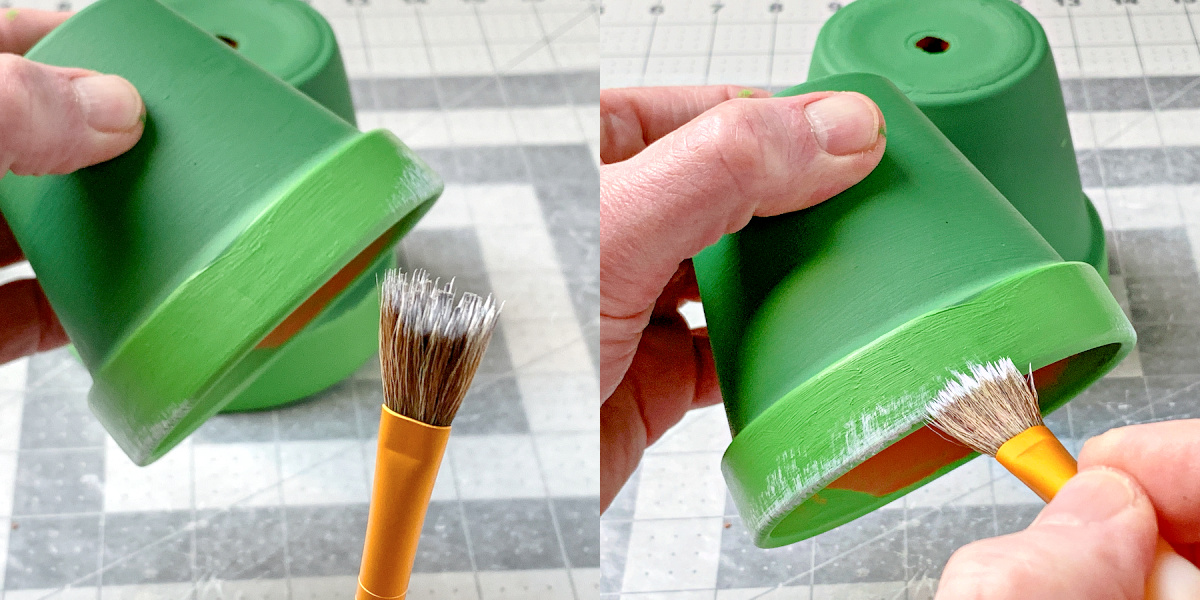
- Repeat with all three pots. If you don't like the snow you make, you can just paint over it and start over! This dry brushing technique is a fun one for kids to learn and can be used in a variety of applications.
- It's really easy to add "lights" to your clay pot Christmas trees with the end of a paintbrush. Dot the end of your paintbrush into the paint, and then place it down on the painted tree to create a colorful light. reload when you run out of paint. And obviously – use multiple colors and sprinkle the "lights" around the tree! Let dry.
- Stack the pots, then attach the topper. I attached with hot glue. Let your tree dry completely before displaying.
Notes
- Make sure the pots are clean and dry before painting. You don’t need to do anything if you purchase them new, but if you use old plant pots, clean the dirt off and wash (and let dry) so the paint sticks.
- You don’t need these exact pot sizes – you can go bigger or even smaller (to make an ornament!). You want about a 1″ difference in diameter between your three pots to make it work.
- You can use inexpensive craft paint like Apple Barrel for this project. It’s a great price, while at the same time providing good coverage (and it’s safe for kids).
If you enjoyed this project, let me know in the comments. Plus, you’re going to love these other Christmas kids crafts:
Christmas Perler Beads • Christmas Tree Perler Beads • Origami Ornaments • Paper Bag Snowflakes • Paper Chain • Perler Bead Gingerbread House • Pine Cone Christmas Trees • Santa Perler Beads • Wine Cork Reindeer


We made these over Thanksgiving with children from 4-10. Instead of paint dots for ornaments, we used fuzzy pom poms and a glue gun for a much “cleaner” and fun craft. Used star shaped tea lights on top for a light-up look.
That you for the great step by step christmas tree with clay pots! What an ingenious idea and would make such a great kids holiday craft. Thanks for sharing and keep up the great work Amy!