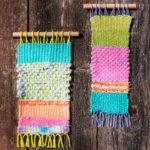
Weaving for Kids
Try weaving with kids in this simple wall hanging project. Fun and easy step-by-step guide for all ages!
Servings 1 wall hanging
Cost $3
Equipment
- Hot glue gun and glue sticks or craft glue (optional)
Ingredients
- Cardboard piece for loom
- Dowel rod(s) or twig/other stick
- Yarn variety of colors and thicknesses
Instructions
- Begin by cutting a piece of cardboard to act as your loom. Cut one large piece approximately 6 1/2" by 11" long.
- Cut two additional strips of cardboard approximately 1" long and the width of the larger piece, or 6 1/2".
- Hot glue the strips to the top and bottom of the cardboard, leaving 1/2" at either end.
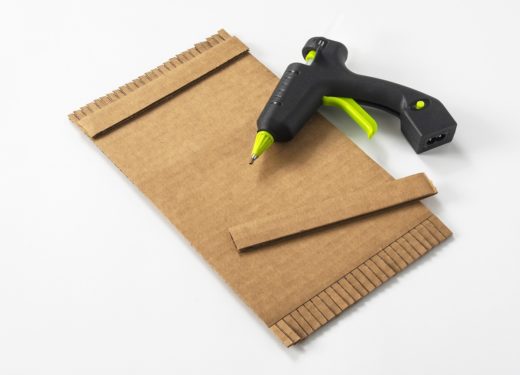
- Cut slits in both ends of the cardboard, about 1/4" apart. This is your finished loom.
- Choose your first yarn color. Hold on to the back of the loom in the top left and place the yarn between two slits of the loom. String down across the front.
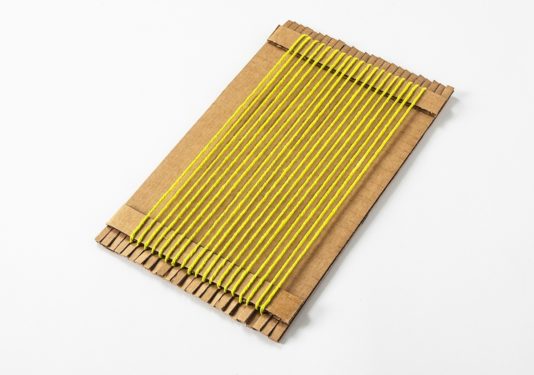
- Slide the yarn down in between two slits of the bottom of the loom, bring to the back and over to the right one slit. Bring the string through to the front and string up across the front. Repeat until the loom is strung.
- To start weaving, choose a different color yarn. Starting from the right, begin weaving the yarn. Go over and under the strung yarn and repeat until you are to the end of the row.
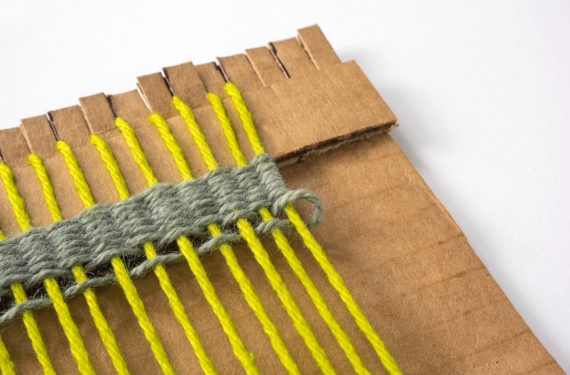
- At the end of each row, wrap the yarn over the last strand to the left, come under, and back up around that last strand. And then begin weaving the next row.
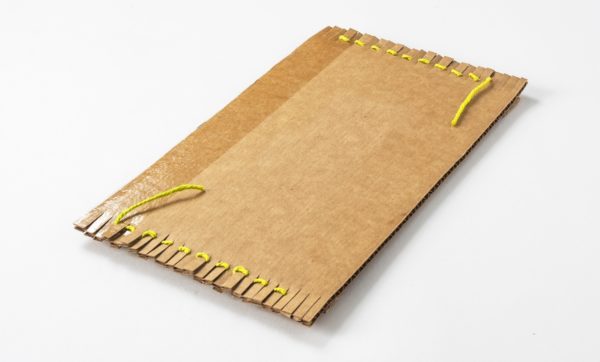
- When you’re ready to start a new color, simply end the previous color and weave in a new one. You can weave in the ends of the yarn on the back (or glue them if desired).
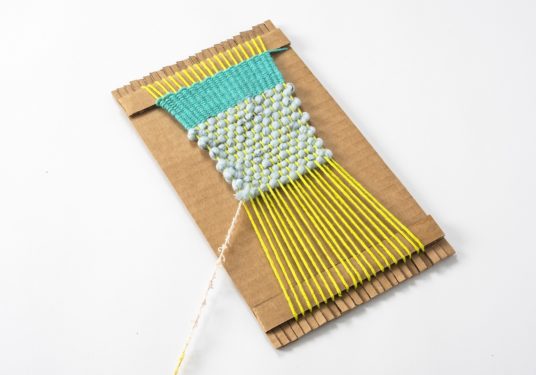
- Continue weaving until all the desired rows are completed. Secure the end of the weaving yarn with glue or by weaving it back in.
- Remove the loops from the bottom of the loom. Cut and knot them close to the weaving.
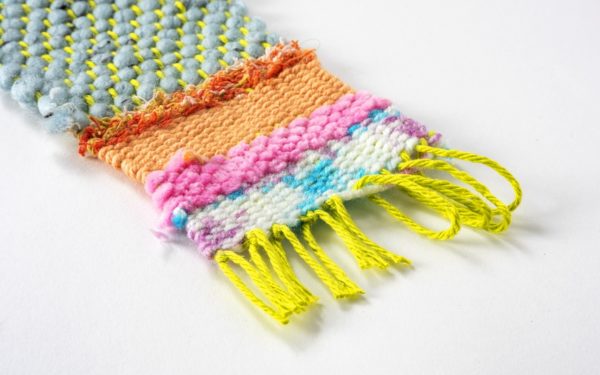
- Remove the loops from the top of the loom and slide onto a dowel or twig for hanging. Use additional yarn to create a hanger. Cut a length about 12” long and tie to the end of the dowel or twig (at each end) and hang.