
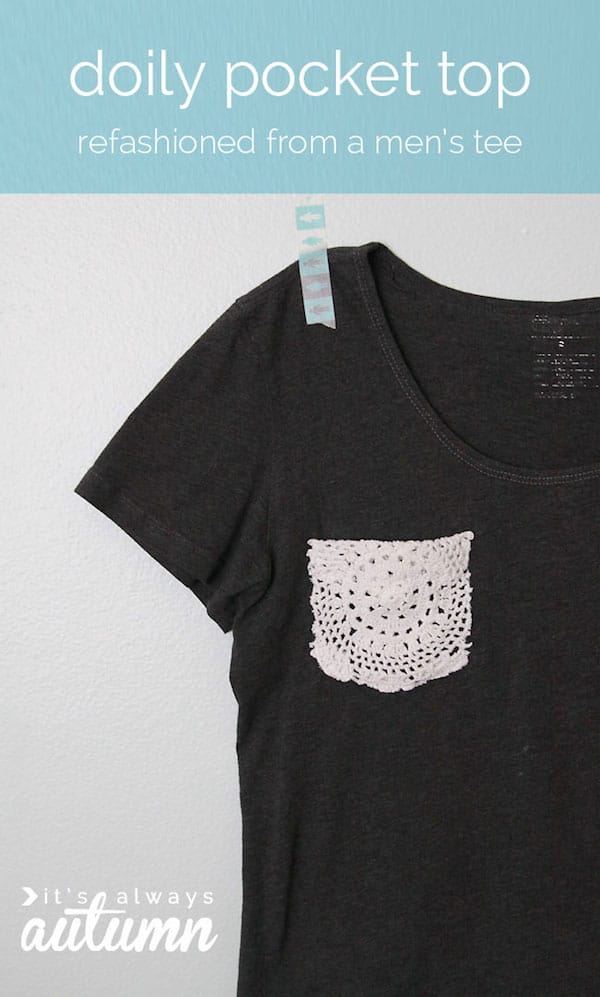
Does your boyfriend or husband have a leftover t-shirt? Refashion it into a DIY pocket tee with a doily, and and it’s so easy to do!
Skills Required: Beginner. You need to know how to use a sewing machine, but this tee refashion just uses basic stitches. Perfect for people with little experience sewing.

Hi all! I’m Autumn, and I blog at It’s Always Autumn, where I share sewing and photography tutorials along with recipes and crafts.
Today I’m going to show you how easy it is to refashion a men’s tee into a cute, feminine, doily-pocket shirt. I think you’re going to love this upcycled clothing idea!
This simple fashion craft is perfect for t-shirts you find at the thrift store or steal from your little brother (or teenage son!).
I started with a grey GAP tee I bought at the thrift store for $1 – it was soft and comfy and fit pretty well, so I started wearing it around on days I was feeling lazy.
Until I caught a glimpse of myself in a store window one day and realized how terribly masculine and unflattering it looked.

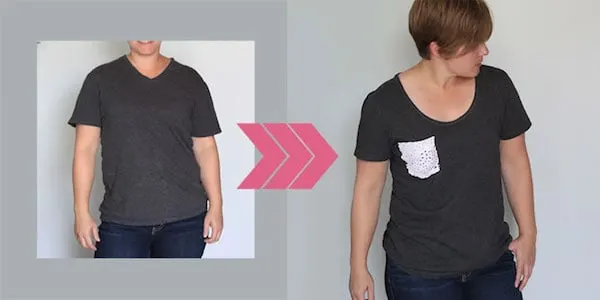
But it was so comfy! So I decided to transform it in just a few easy steps.
Add a Pocket to a Tee
Supplies
- T-shirt that fits fairly well
- 6-inch doily
- Fray check
- Sewing machine
- White thread
- Scissors
- Straight pins
- Fabric marker (optional)
Step 1: Lower the Neckline
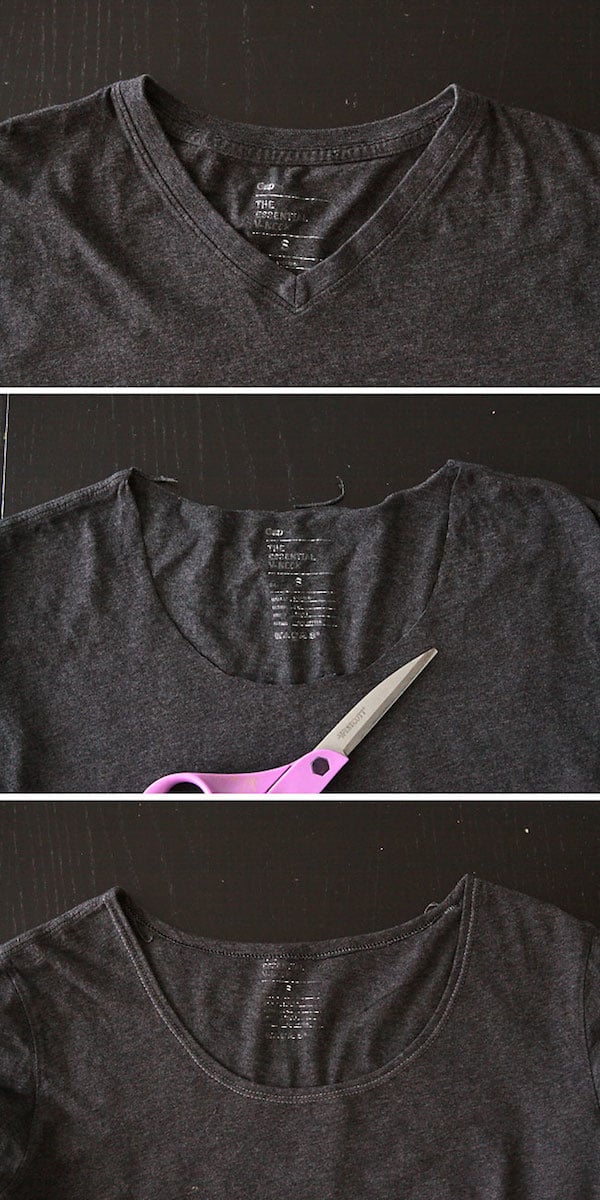
The high v-neck looked really masculine on this shirt, so I started by changing it to a scoop neck. I cut just below the “ribbing” in the back, and then cut a new, lower curve on the front of the shirt (I like to use a small plate to trace the curve).
Then I folded the neckline under about 1/2 an inch and stitched it in place using a double needle. If you don’t know how to use a double needle, you can use a zig zag instead. Give the new neckline a good pressing with lots of steam to help eliminate any stretching caused by the stitching.
Step 2: Create a Doily Pocket
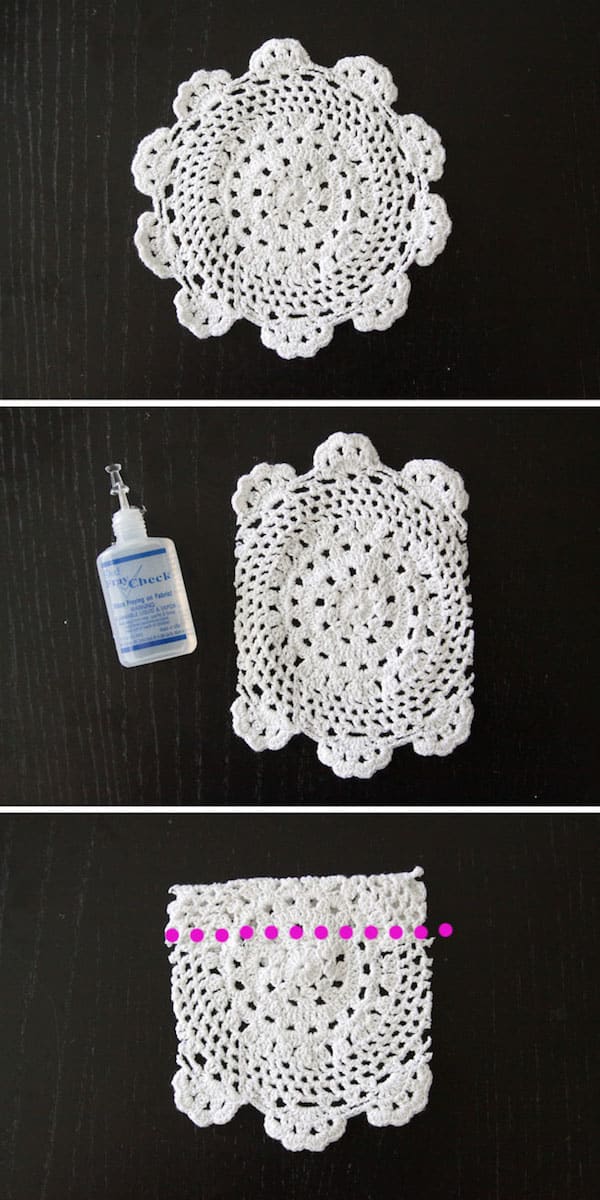
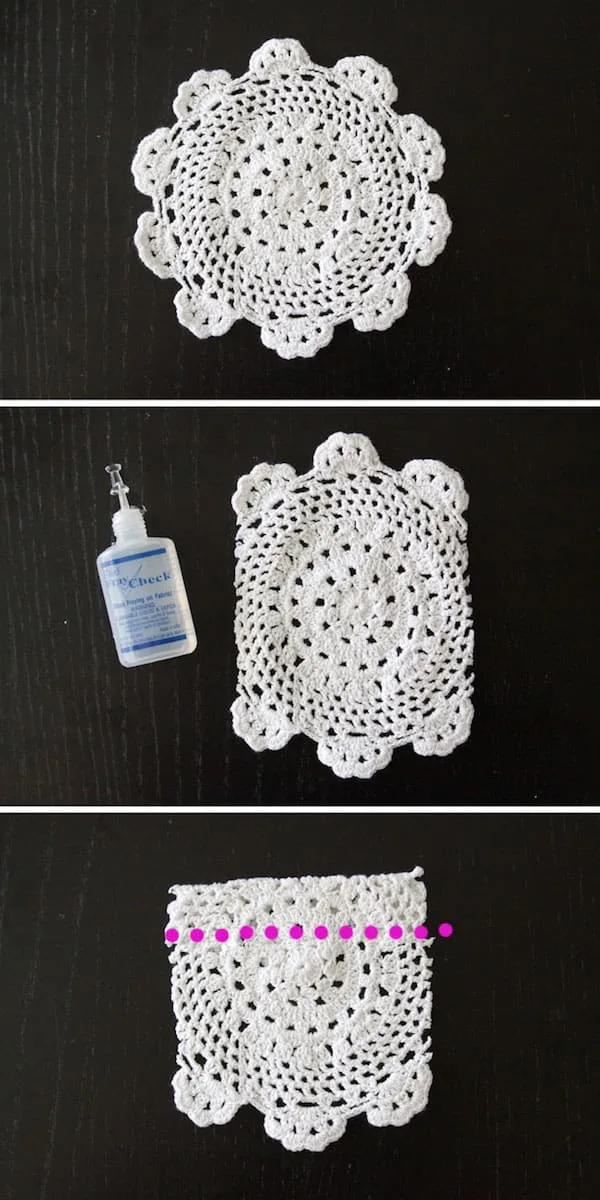
I found this 6-inch doily at Joann Fabrics for $2. After pre-washing the doily, I cut straight down the sides as shown, then used fray check along the cut edges.
Then I folded the top under and stitched straight across to get a pocket shape. I also folded up the scalloped edges along the bottom and pressed (as shown in next photo).
Step 3: Attach the Pocket
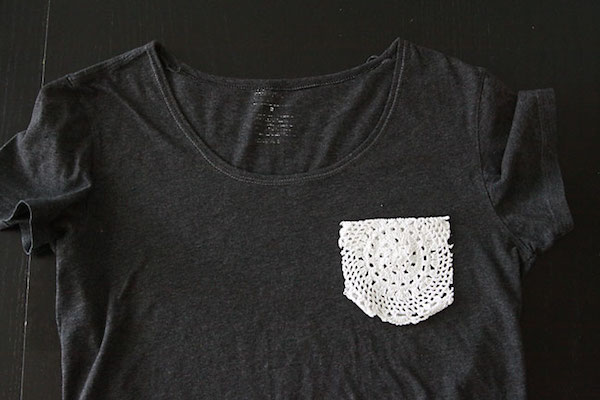
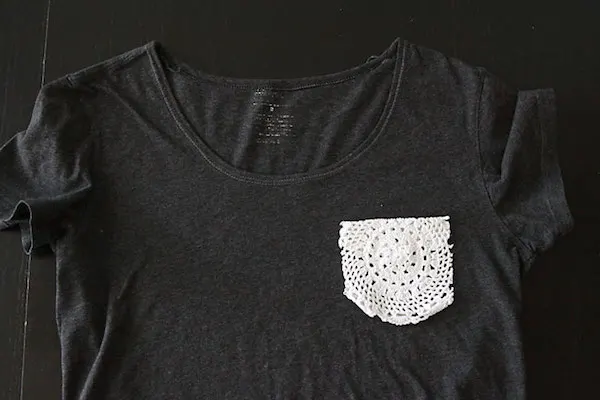
I tried on the shirt and figured out where I wanted the pocket placed, then pinned it in place very thoroughly. Starting at one top corner, I sewed down the side using a zig zag stitch to secure all the cut edges to the shirt.
When I got to the bottom, I sewed across it using a straight stitch (since there were no raw edges). Then I continued back up the other side, again using a zig zag.
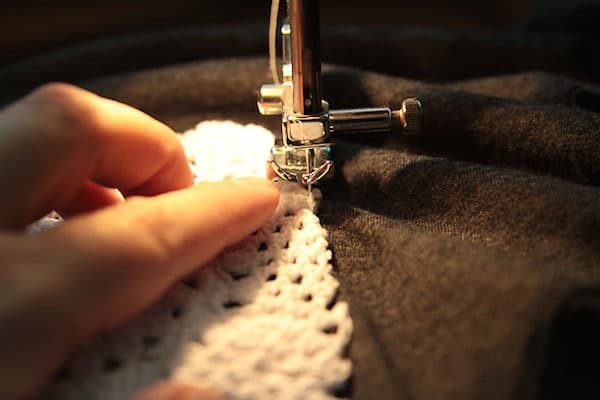

It’s best to go slow when zigzagging the sides – you may have to push the doily under your presser foot a little as you go. I find it easiest to go slowly.
If you find that the doily doesn’t want to feed under your presser foot, you can stop sewing with the needle down, lift the presser foot, and smooth the doily back under it. I had to do that a few times on each side, but sewing the doily pocket on still took less than 5 minutes.
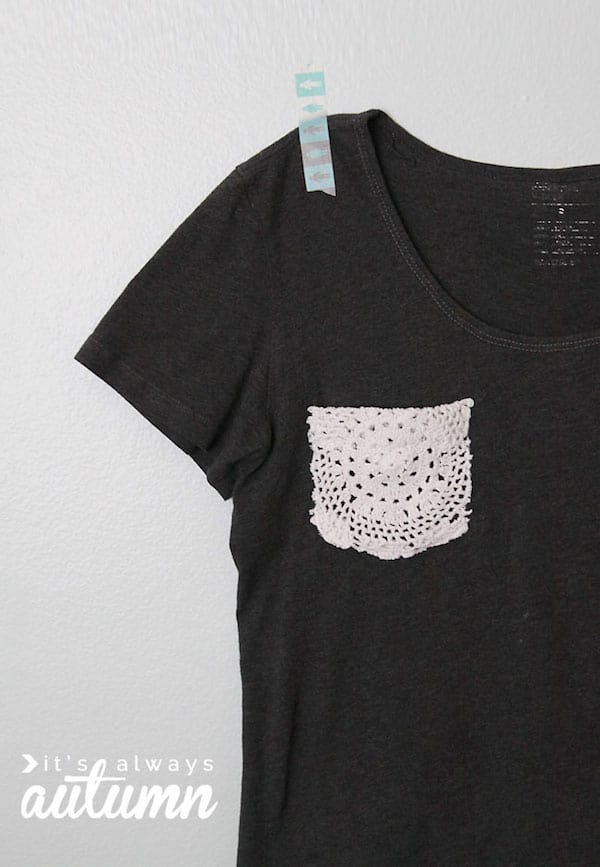
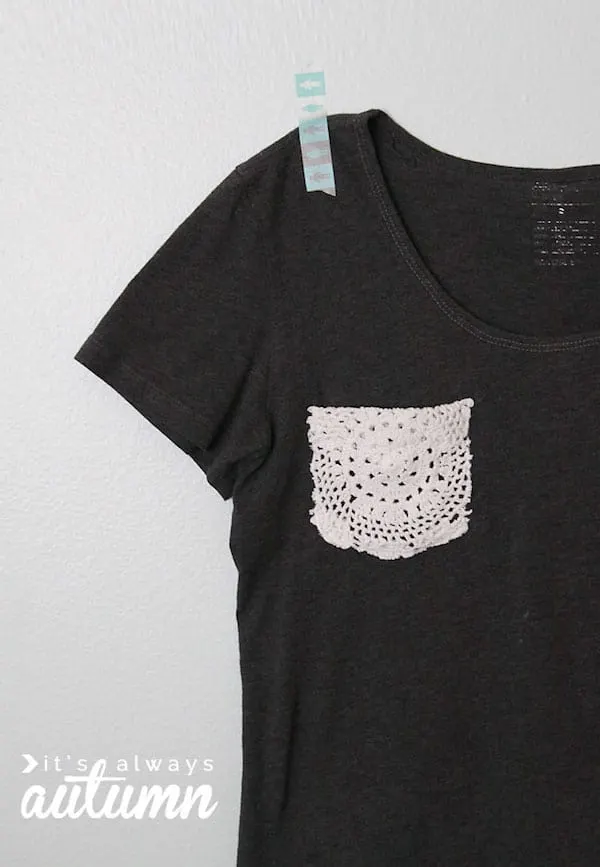
In less than half an hour total, I transformed a very masculine tee into a cute, feminine DIY pocket tee that’s still super comfortable and easy to wear.
If you’d like to see more of my projects, visit me at It’s Always Autumn, where you can learn to sew your own super easy t-shirt. I’d also love for you to visit these other upcycled clothing projects: