DIY Bandana Headband That’s Stylish and Simple to Make
Make a stylish DIY bandana headband with this easy tutorial. Perfect for a retro, boho, or casual look. Minimal sewing required and ready in minutes! Forgo the sewing machine and use a hot glue gun for a no-sew option.
Skills Required: Beginner. You just need to know how to braid. If you’re not that experienced with crafts, you’ll be fine with this project.
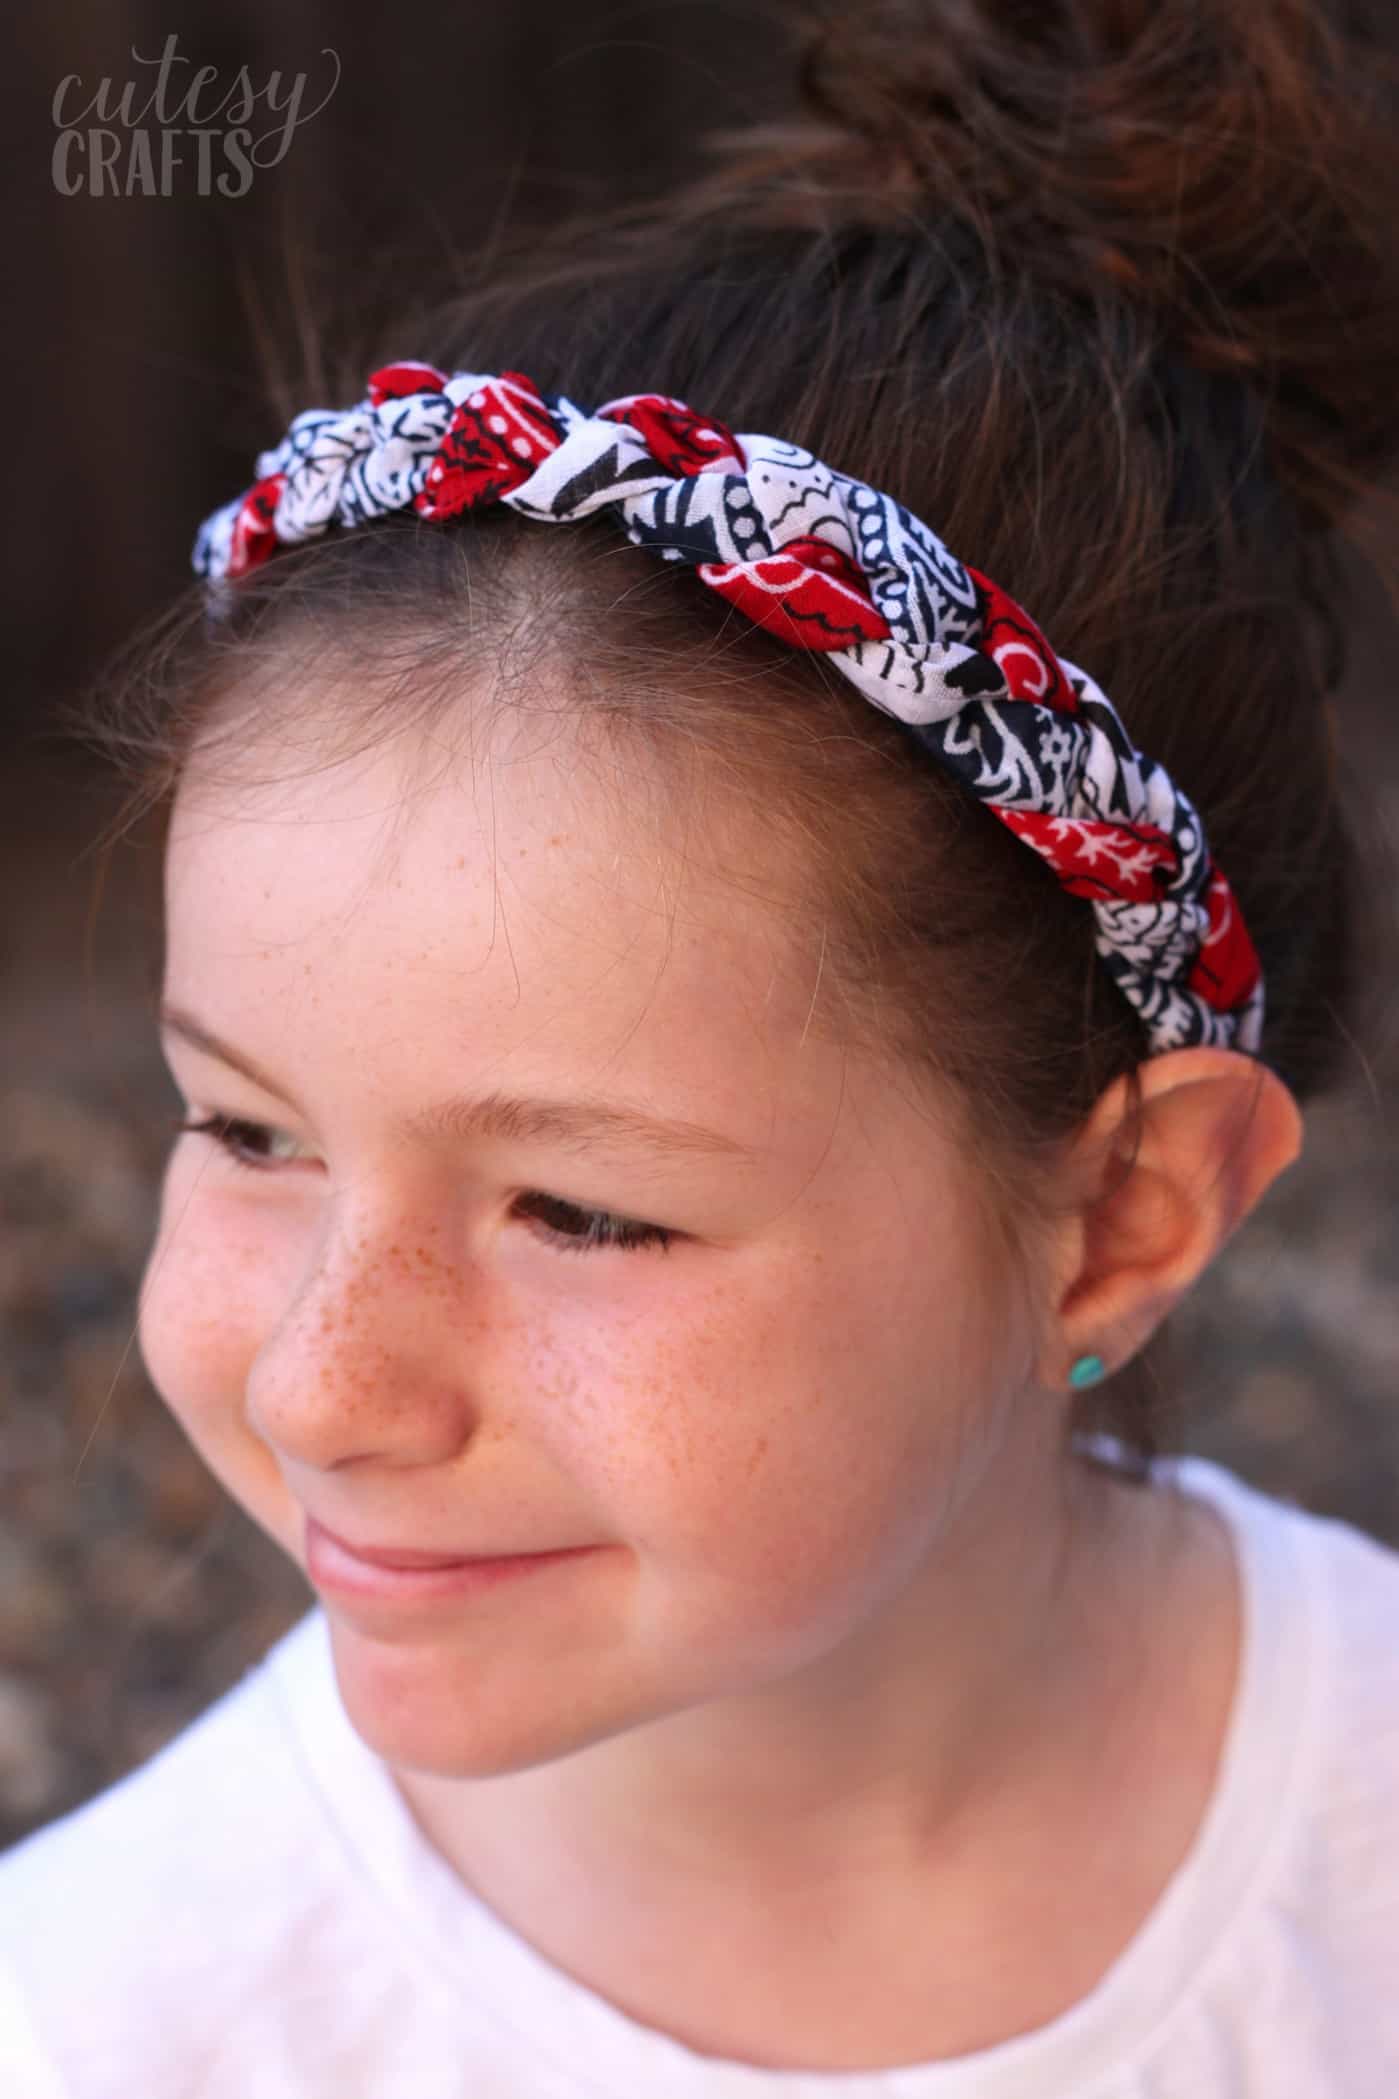
Bandanas are always a hot summer trend, especially for 4th of July. Red, white, and blue ones seem to be out of stock in all of my local craft stores!
I eventually tracked some down and made these fun red, white, and blue bandana headbands that are a great 4th of July craft.
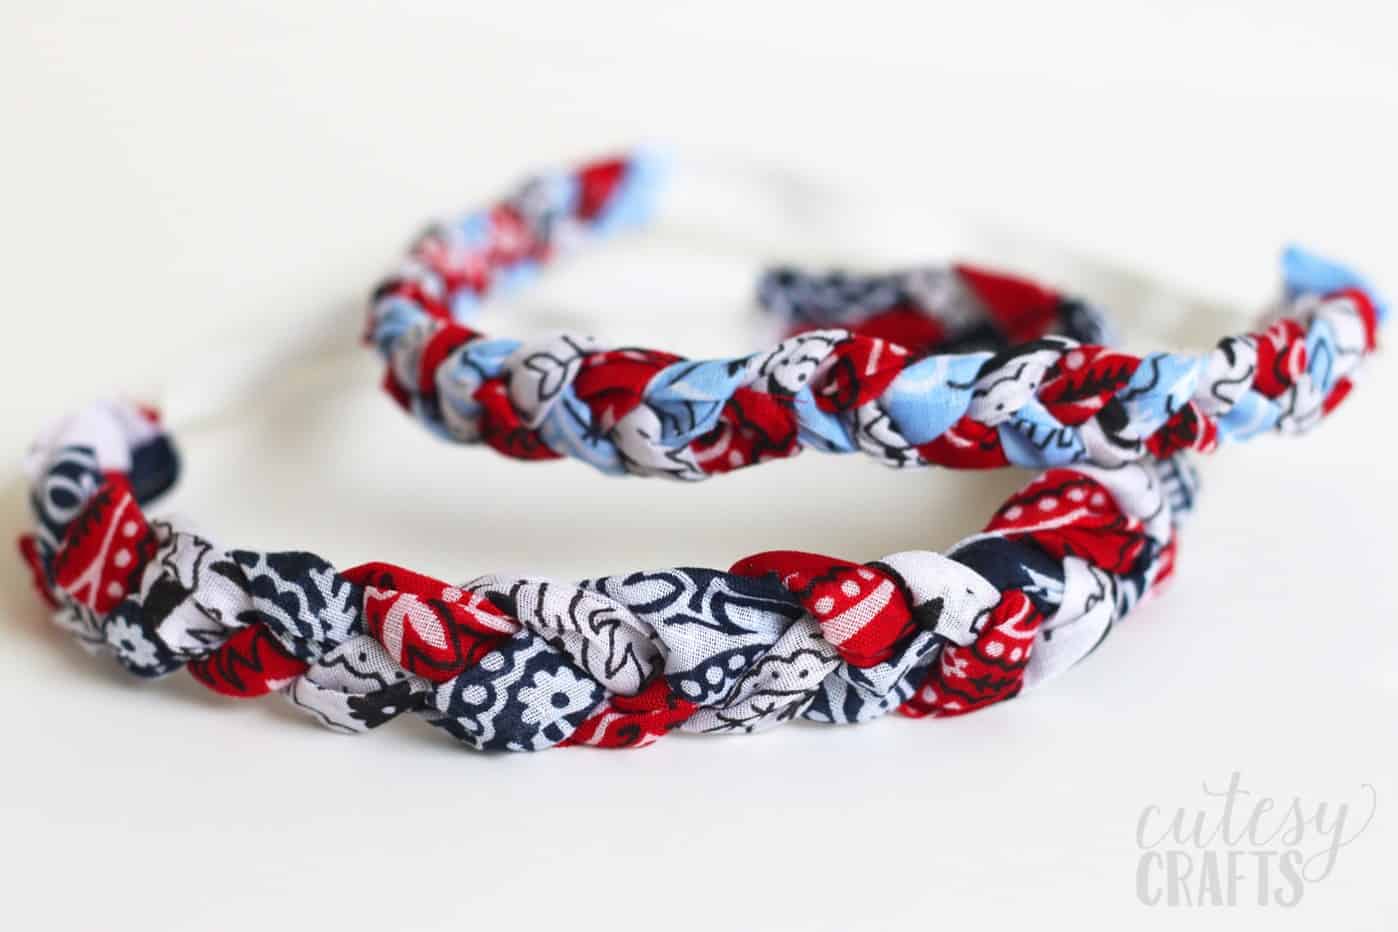
These DIY hair accessories are so easy to make, and you only need fabric bandanas and elastic (plus some basic supplies you already have on hand).
You can sew them or use hot glue to make them no-sew. Fun for older kids and grown-ups too. Easy, cute, and just in time for 4th of July. Get the how to below:

Make a Bandana Headband
Equipment
- Large sewing ruler
Materials
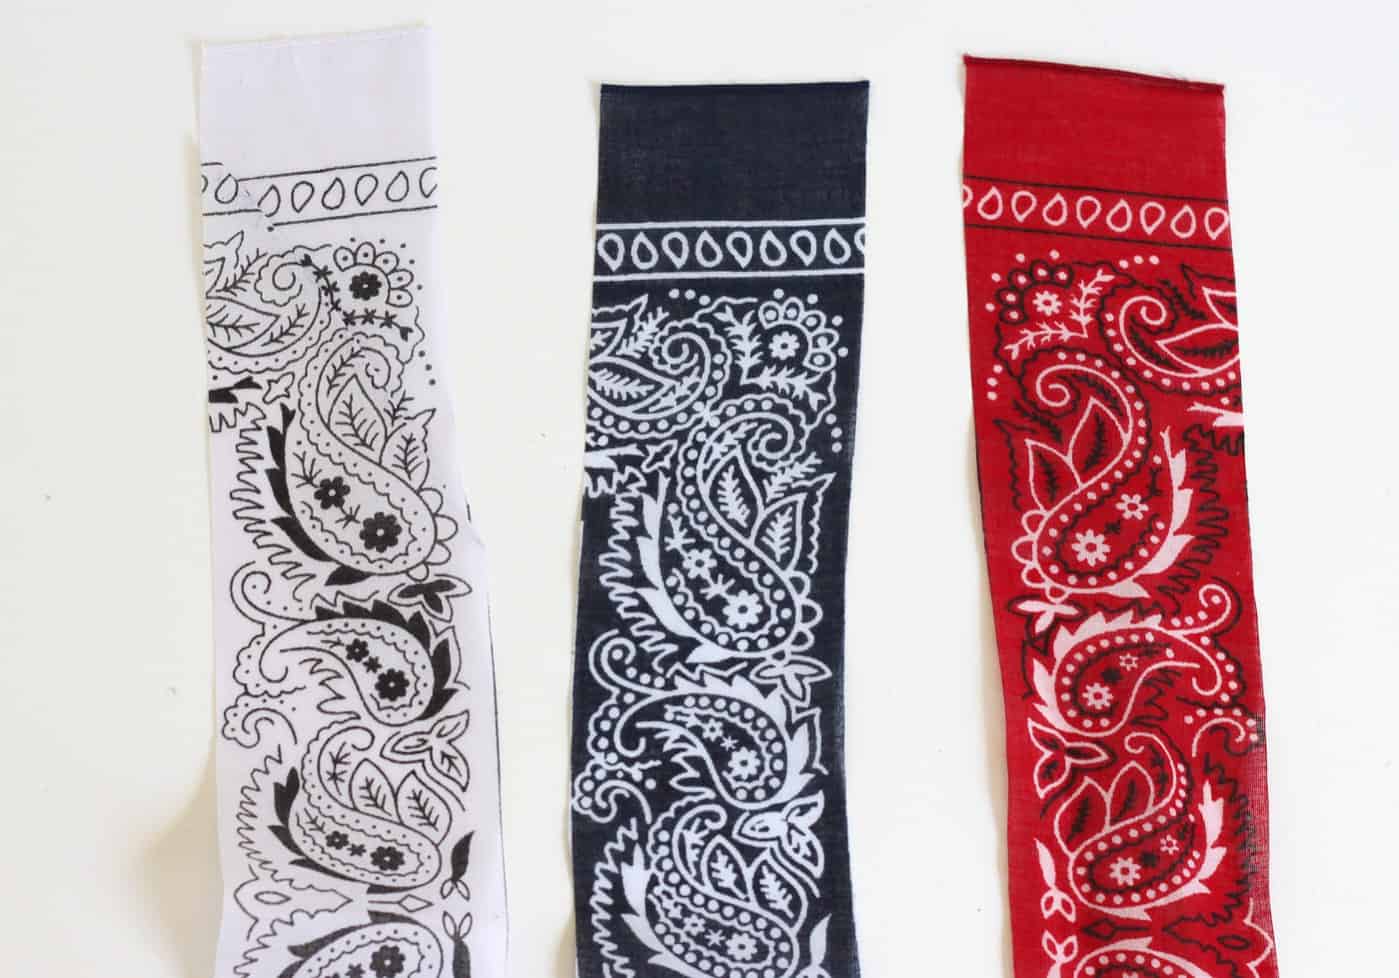
- 3 Bandana(s) red, white, and blue, 1 of each
- Elastic trim 1/2 inch wide
- Thread
Instructions
- Cut a 3-inch wide strip from each bandana using scissors and a ruler. This part is really easy to do with a rotary cutter, if you happen to have one.
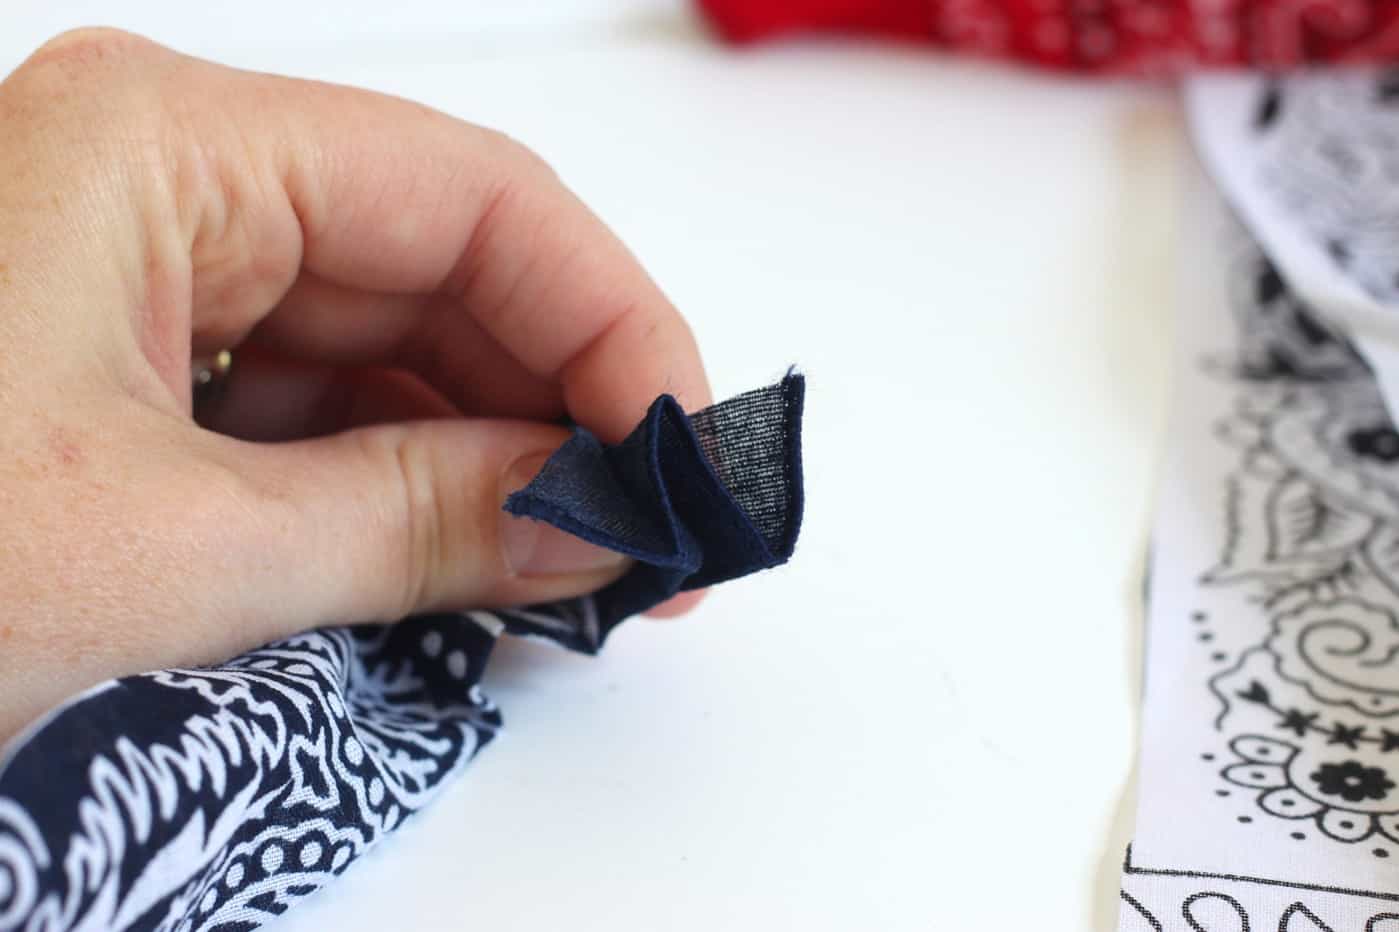
- You'll end up with three strips for each headband. Fold one end of each strip to make a "W" shape.
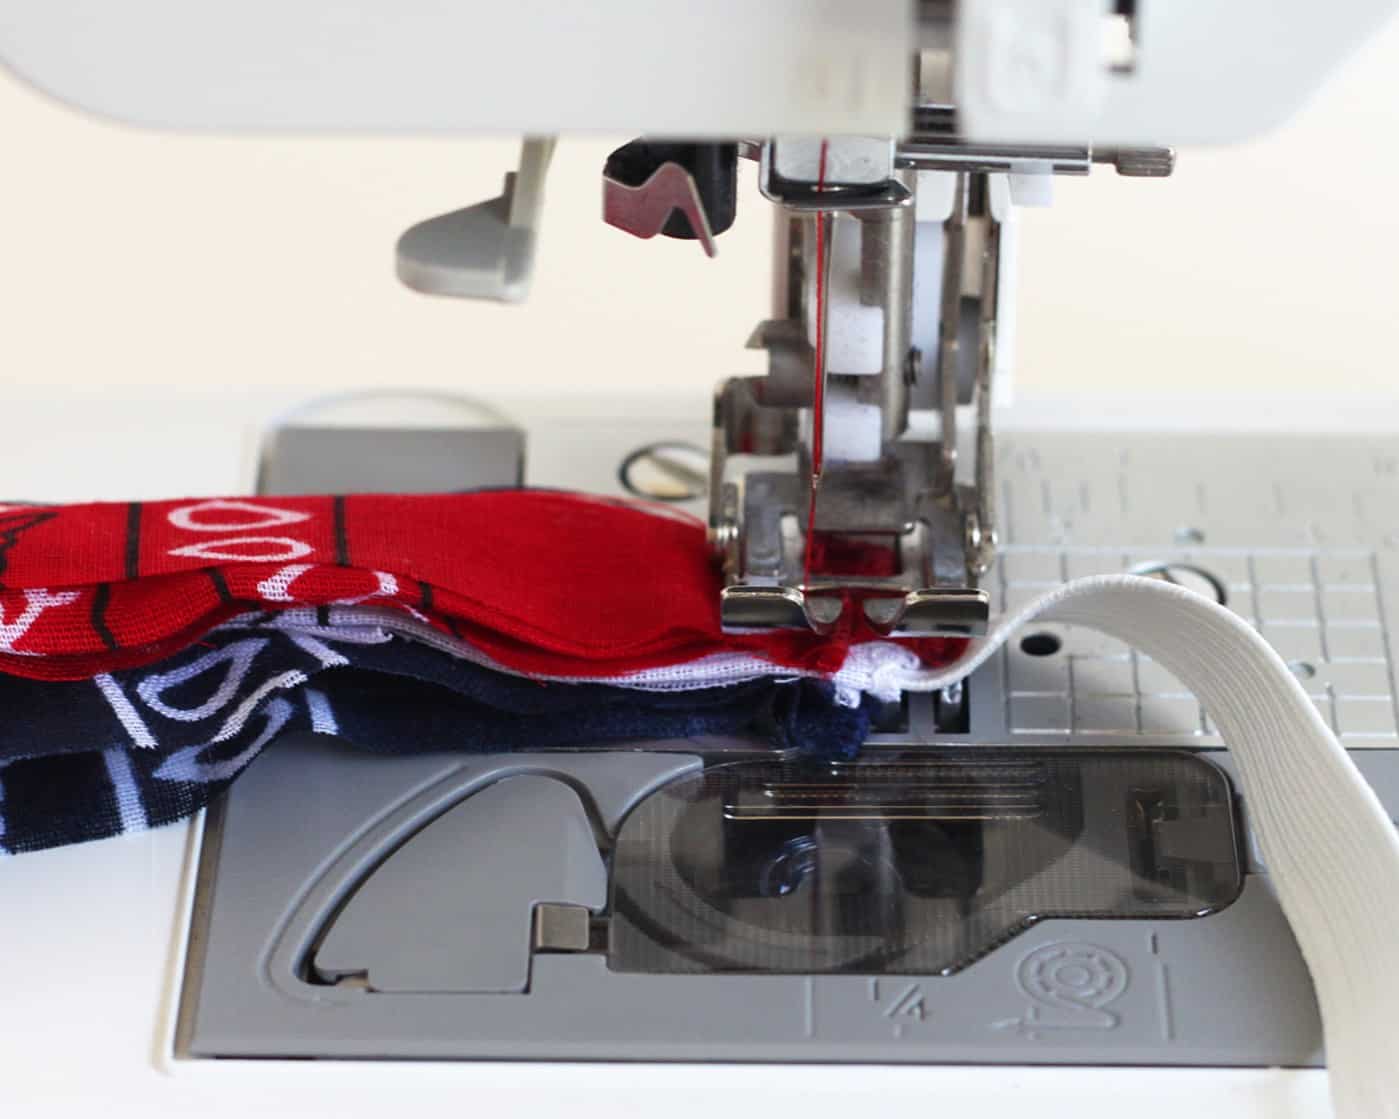
- Stack all of the strips together and place one end of the elastic in the middle; sew through the end.
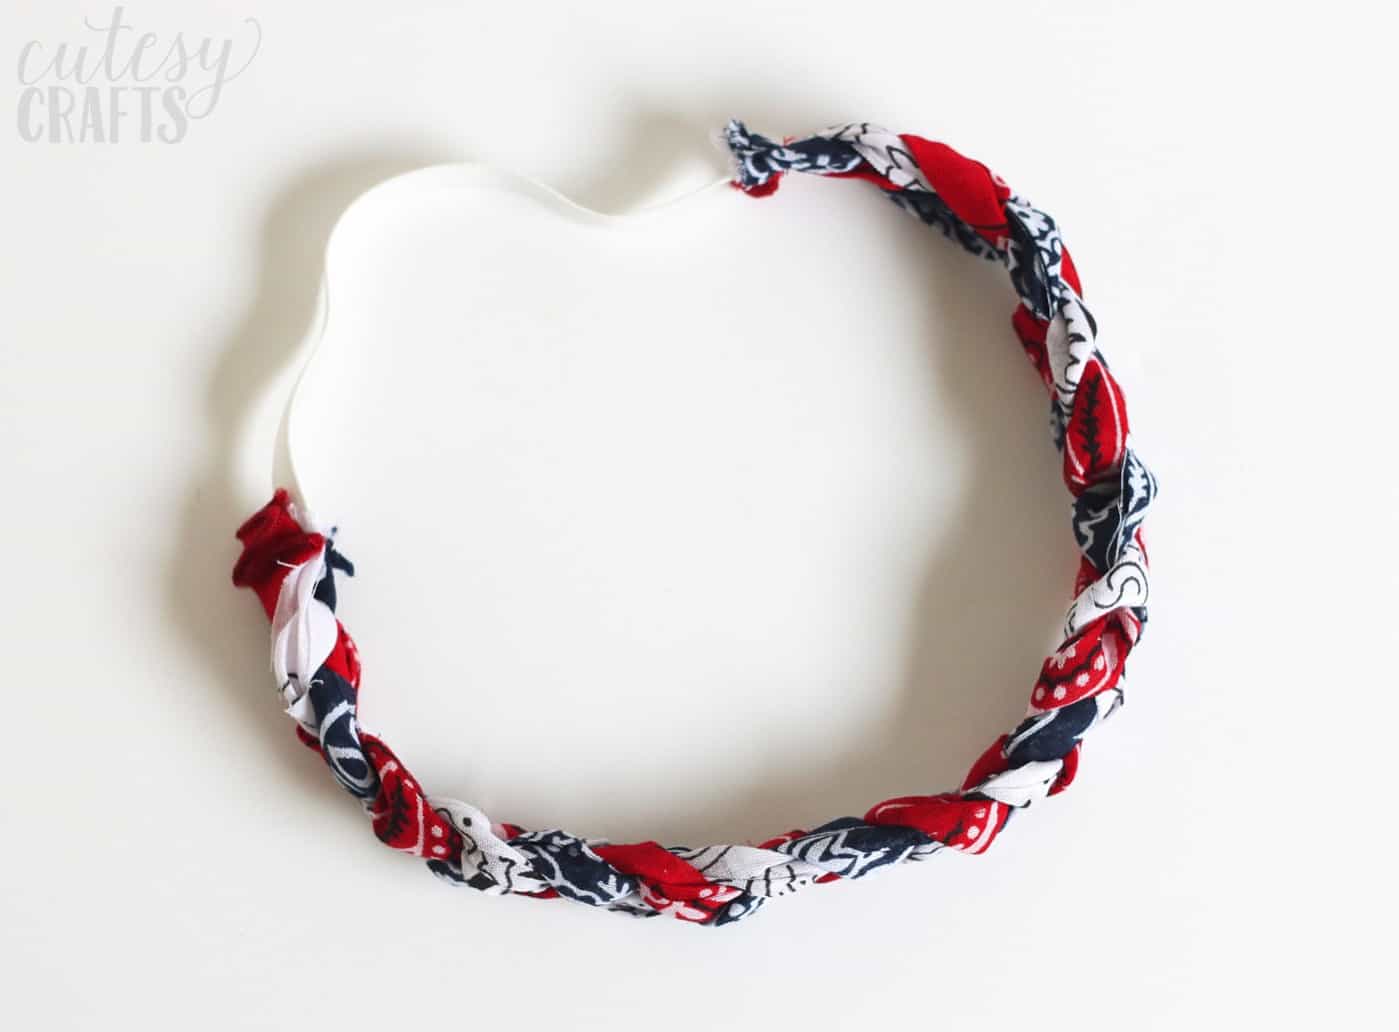
- Braid the fabric together until the headband is long enough to fit around the head. Trim the elastic with scissors.
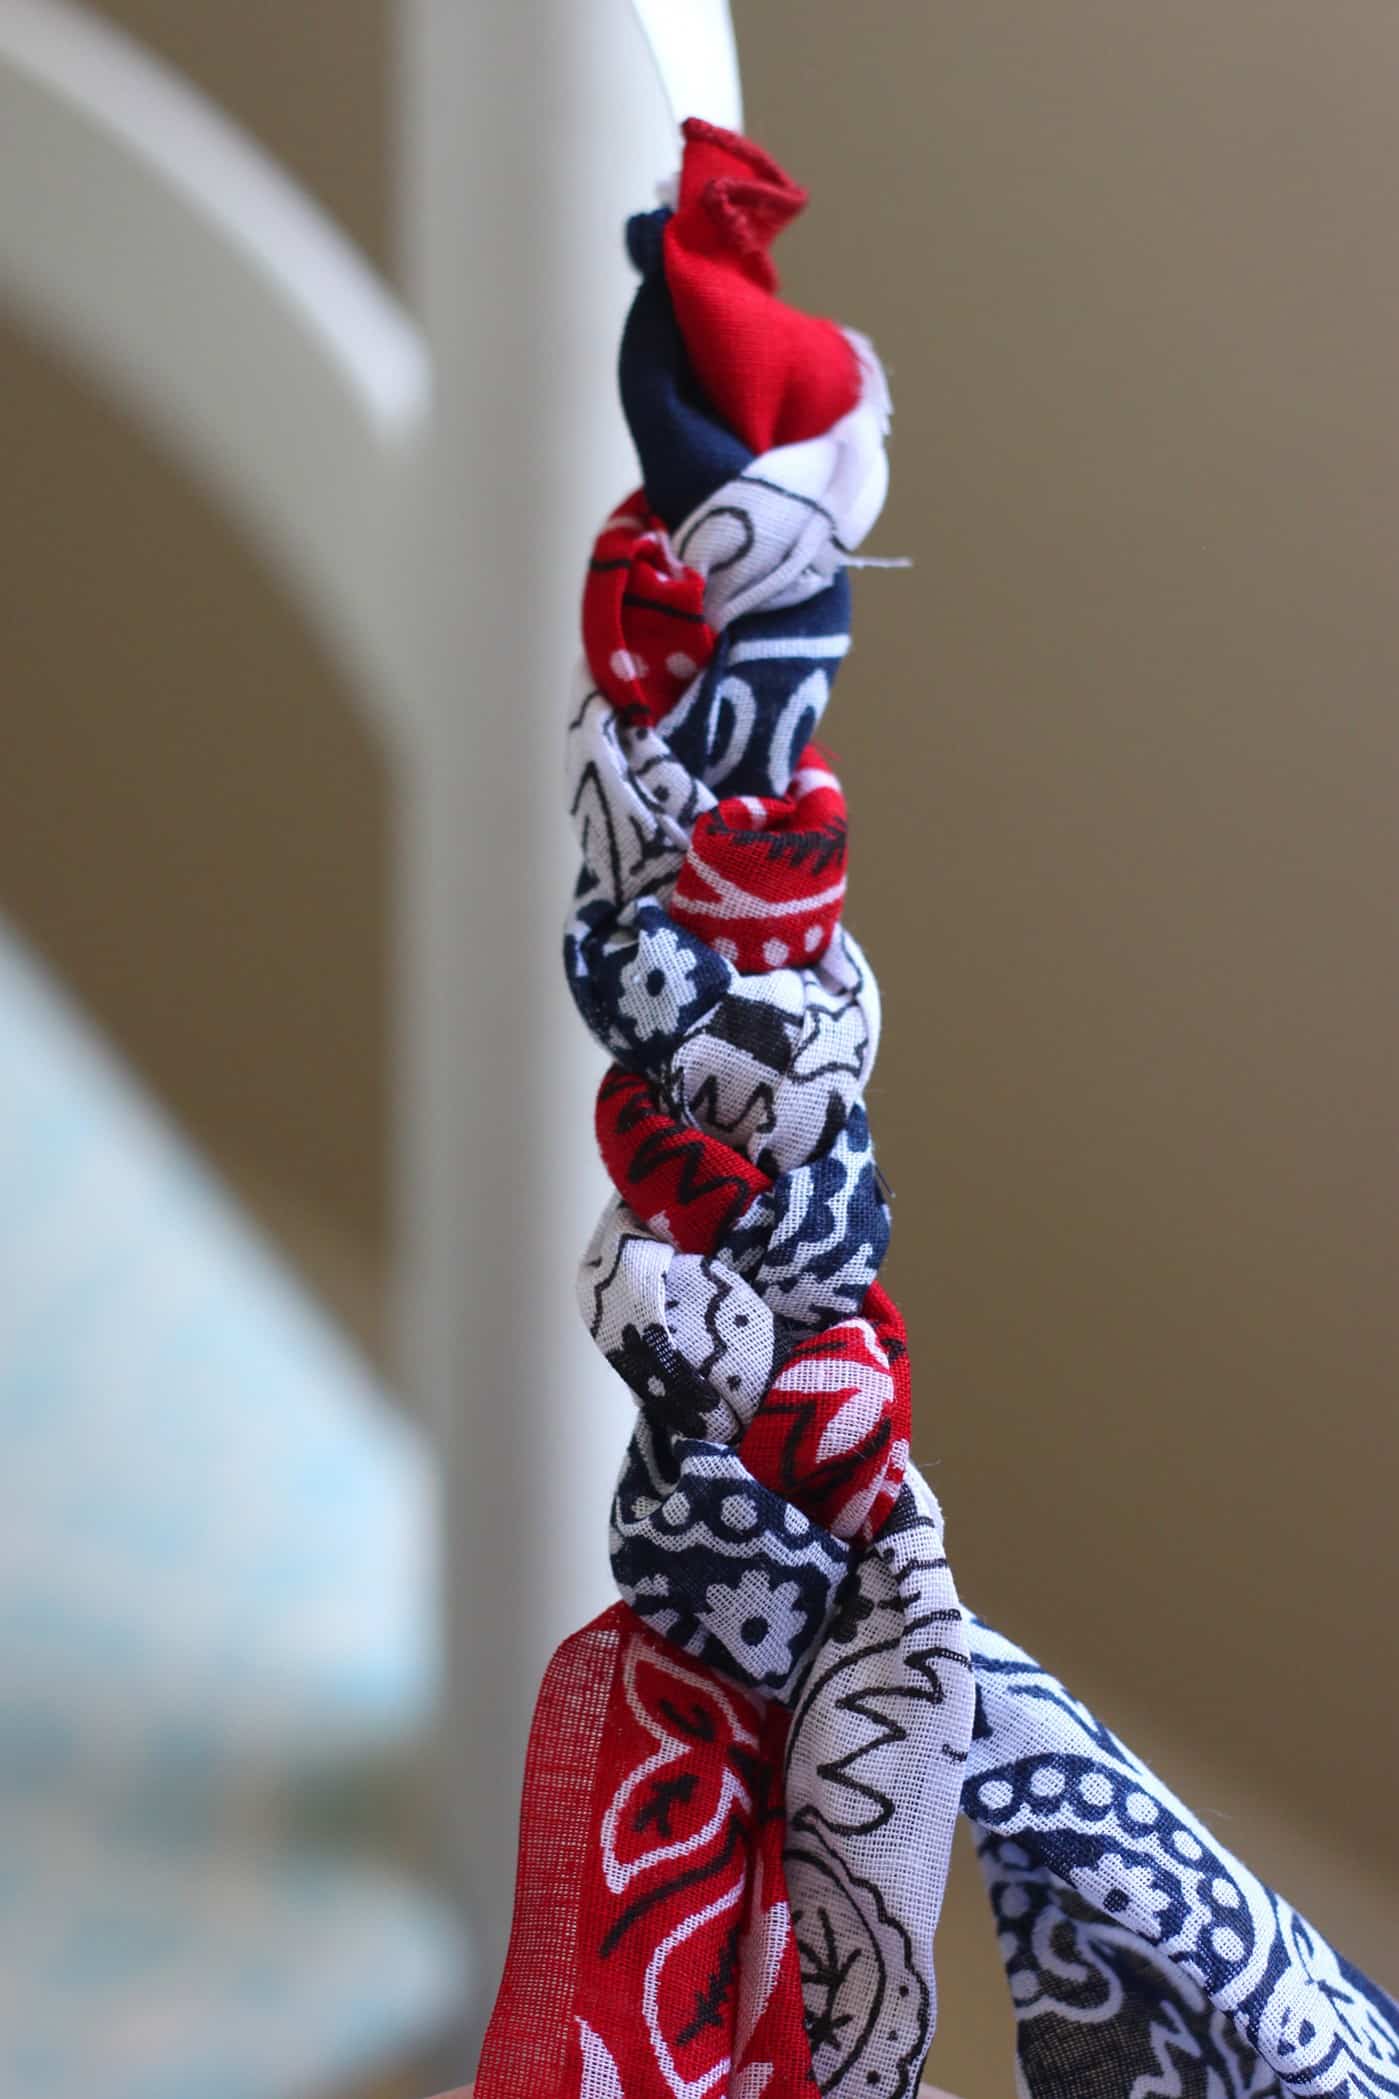
- Sew (or glue) the trimmed end of elastic to the other end of the headband as you did before.
Notes
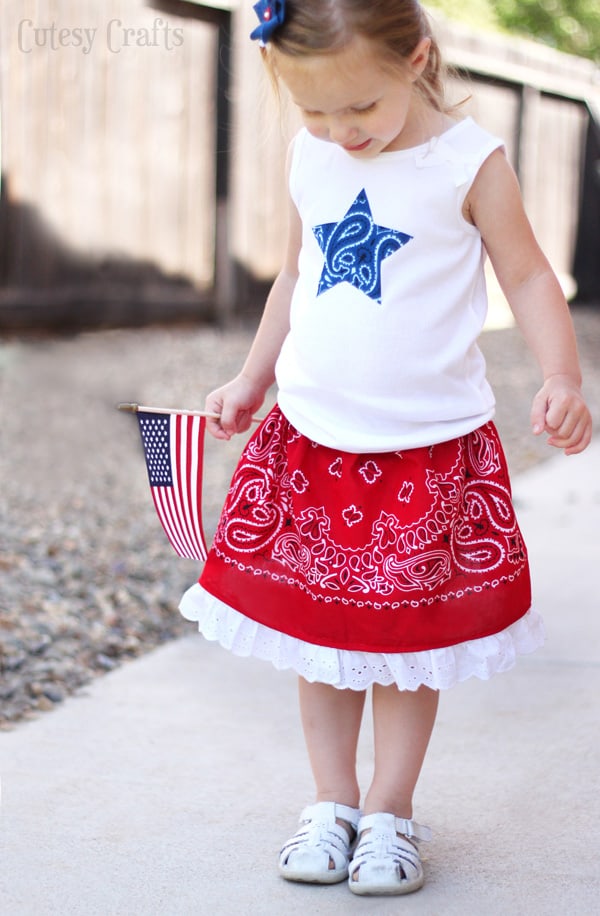
If you are looking for another fun bandana craft for the fourth, check out this girls’ skirt.