Best DIY Headlight Restoration Kit for Crystal Clear Lights
This IS the best DIY headlight restoration kit that you can buy! This method works every single time, even if your lights are rough. You can save money, and be done in an hour – restore your headlights with this simple DIY.
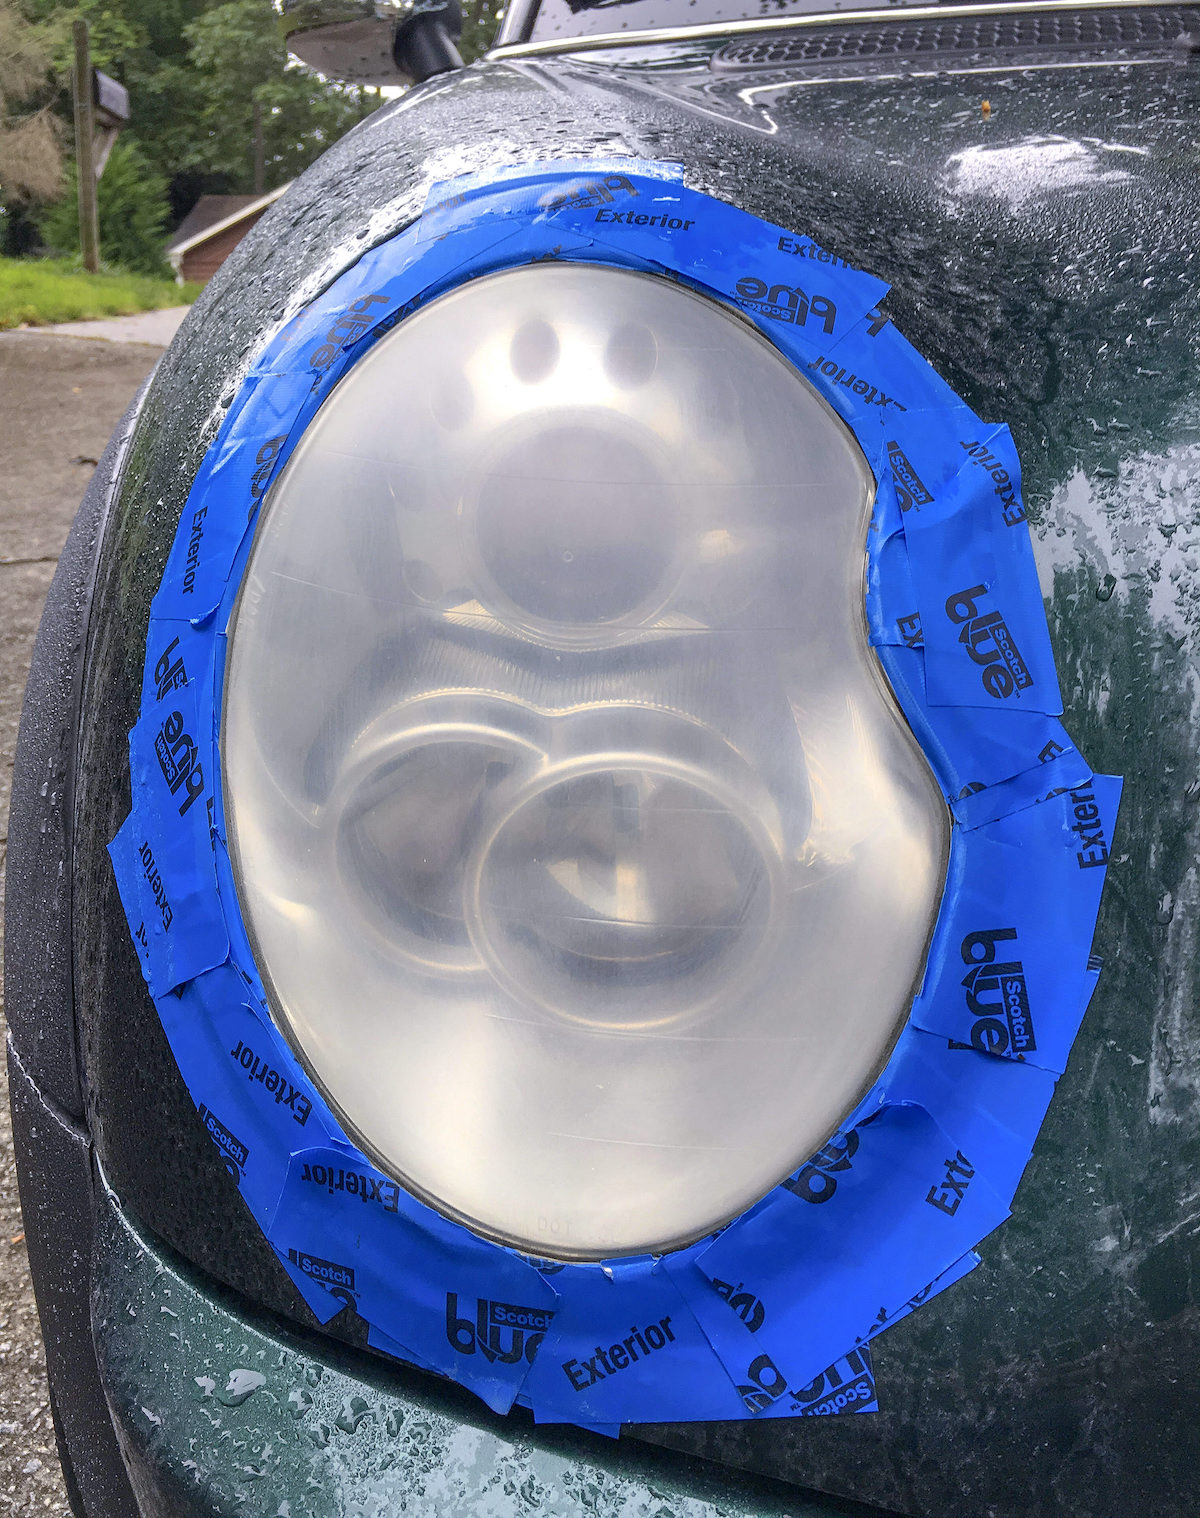
I get it – headlight restoration is boring. But it’s a necessary evil, if you’re wanting to sell your car or just want your ride to look nice. Many people think if their headlights become cloudy – they need new headlights (which can be a fortune!).
That is absolutely NOT true and you can clean your headlights yourself using this method.
Headlight cleaner can work (have you seen the toothpaste hack?), and you can try that first if you like.
It depends on what you are looking to spend. When we get to this stage of grime (in the pics), we typically forgo the cleaner and go right to the kit. We know it’s going to work!
Professional Cost vs DIY
After a little investigating we discovered that headlight restoration is about $100 – $150, but a headlight restoration DIY kit is about $15 – $20, and it typically does 2 – 3 (even 4!) cars.
We have six cars – soon to be seven. So we DIY. Using the 3M Headlight Restoration Kit.
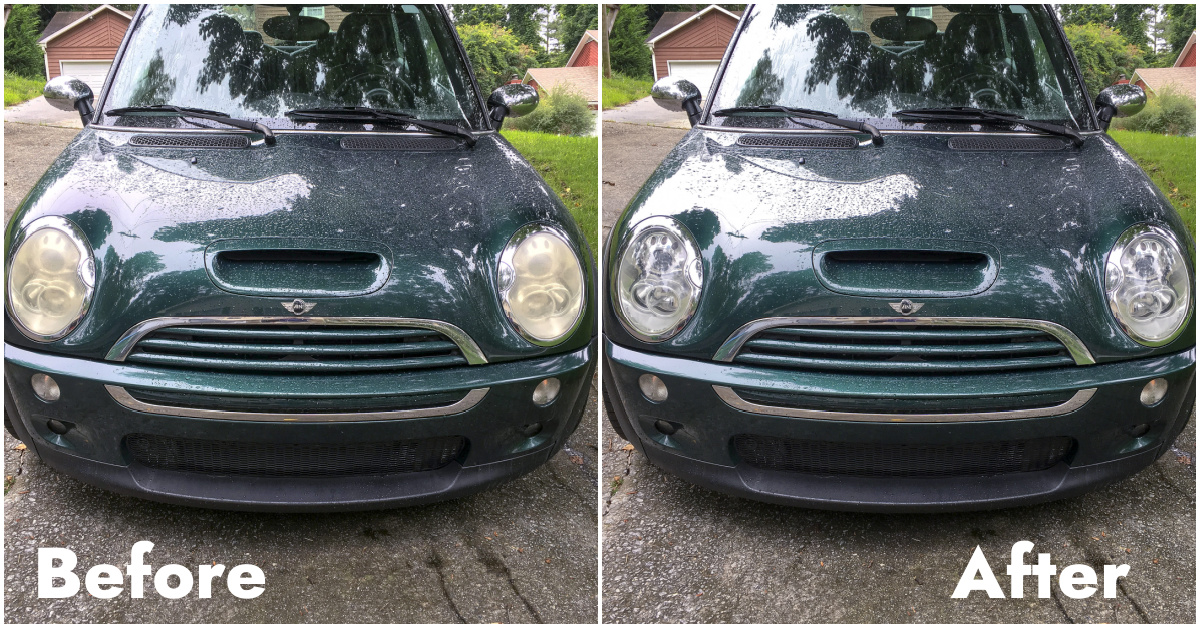
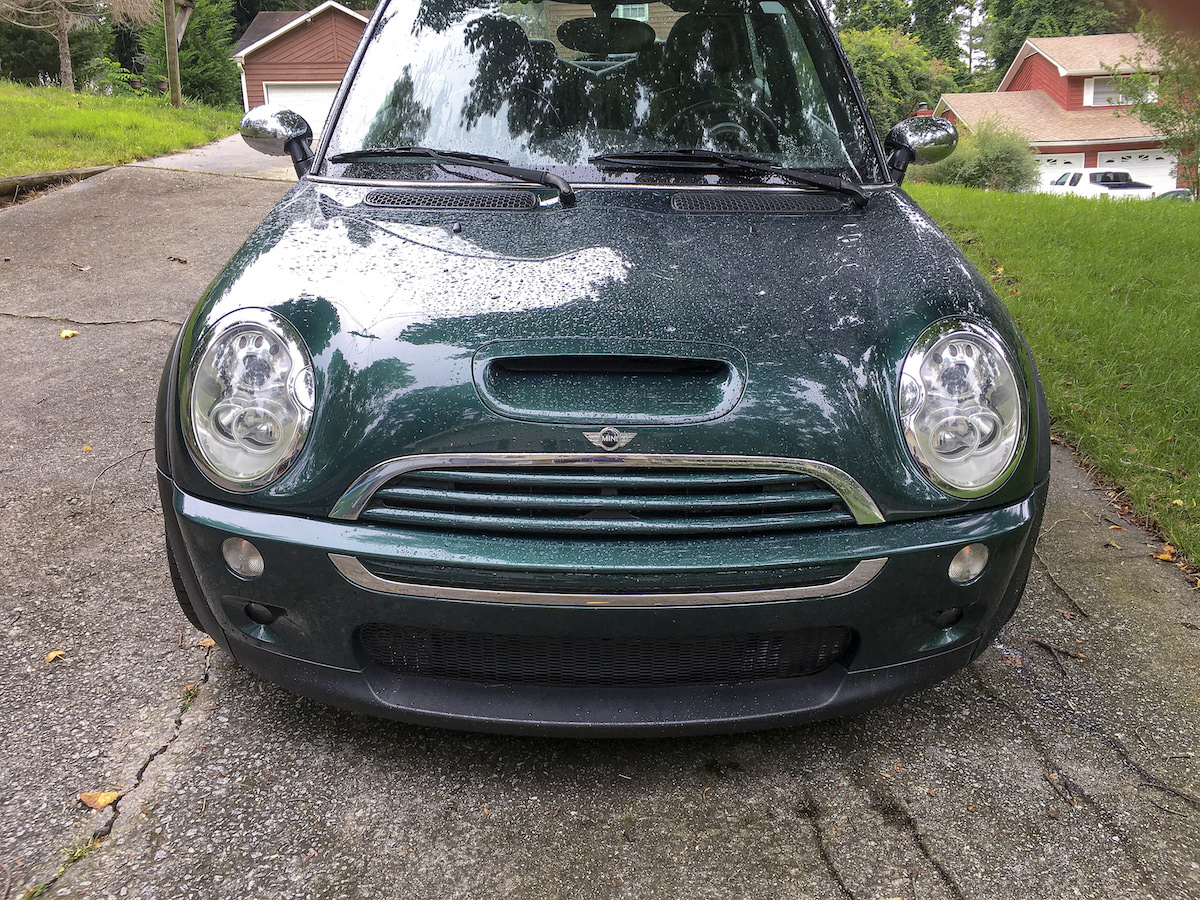
I think if you check out the results above (the before and after), you’ll see that this kit achieves perfect results! Forget all the other products out there . . . this is it.
We added a couple of things to get the headlights looking as crystal clear as possible. Are you ready to learn how to use the kit (and our modifications)? Keep reading!
DIY Headlight Restoration
Equipment
- Spray bottle filled with water
Materials
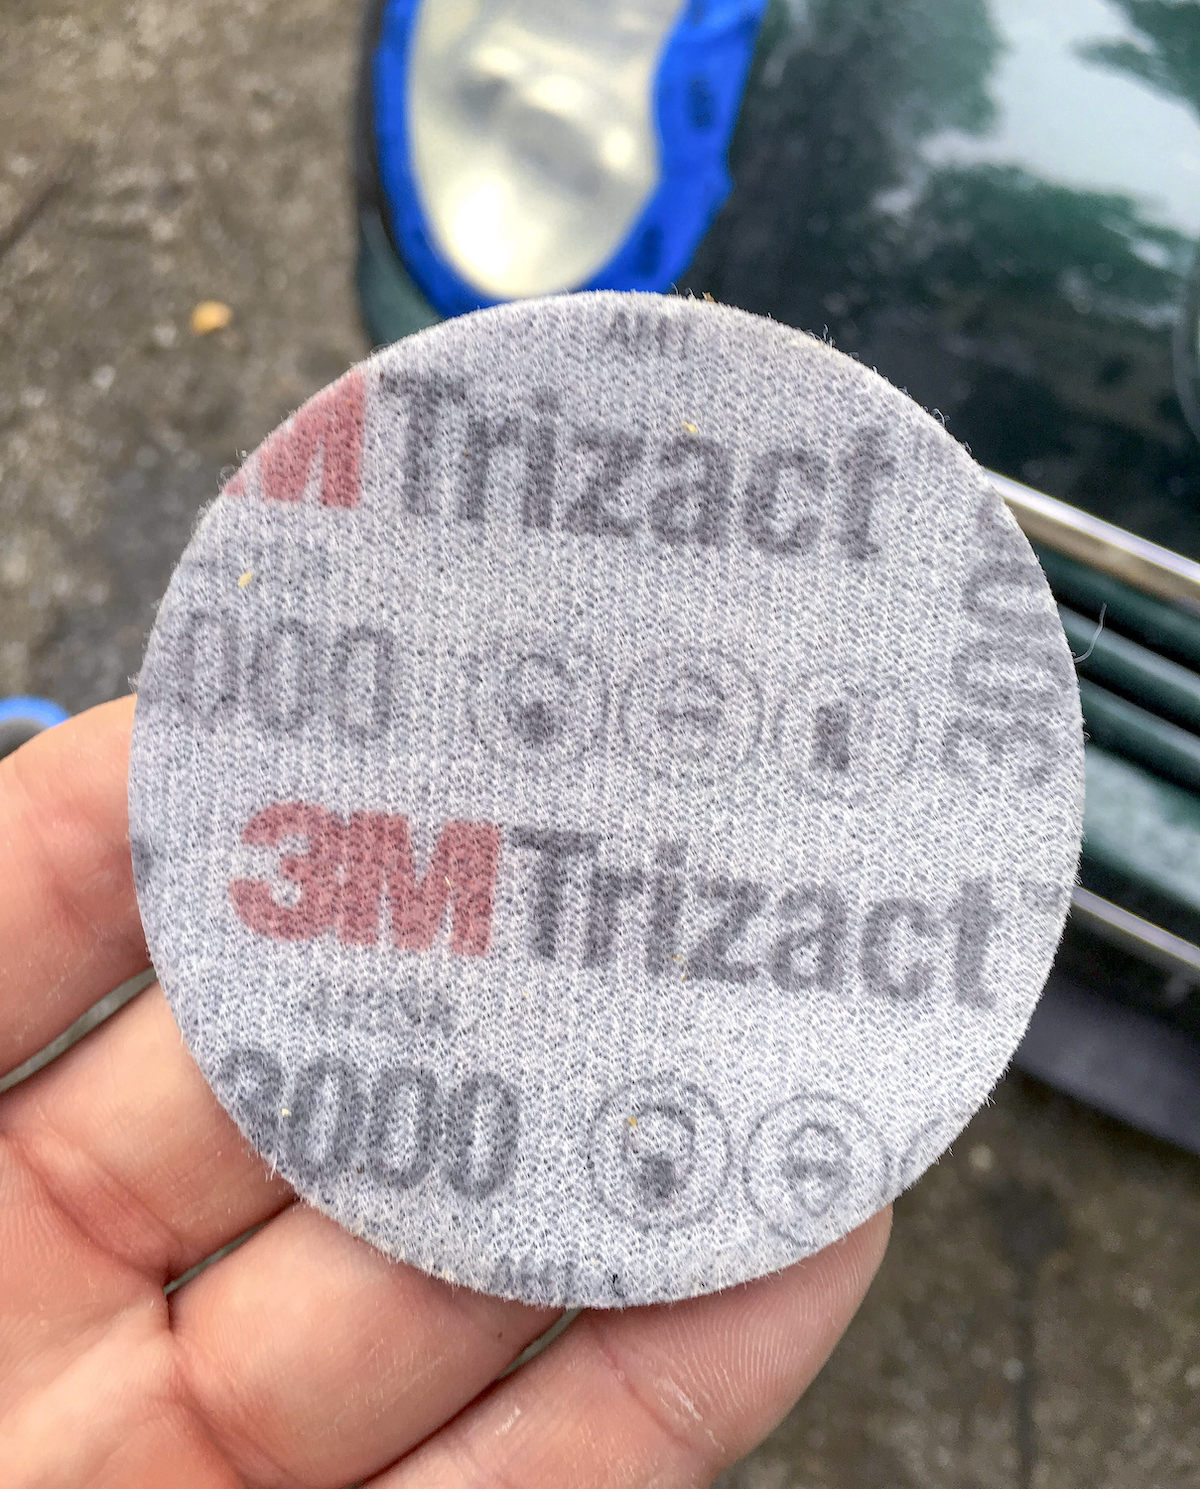
- 1 3M Headlight Restoration Kit includes all the sanding discs referred to below
- Painter’s tape it comes in the kit but we used our own
- sandpaper 2500 – 3000 grit wet, extra step which we'll explain
- Cleaning solution/rubbing alcohol
Video
Instructions
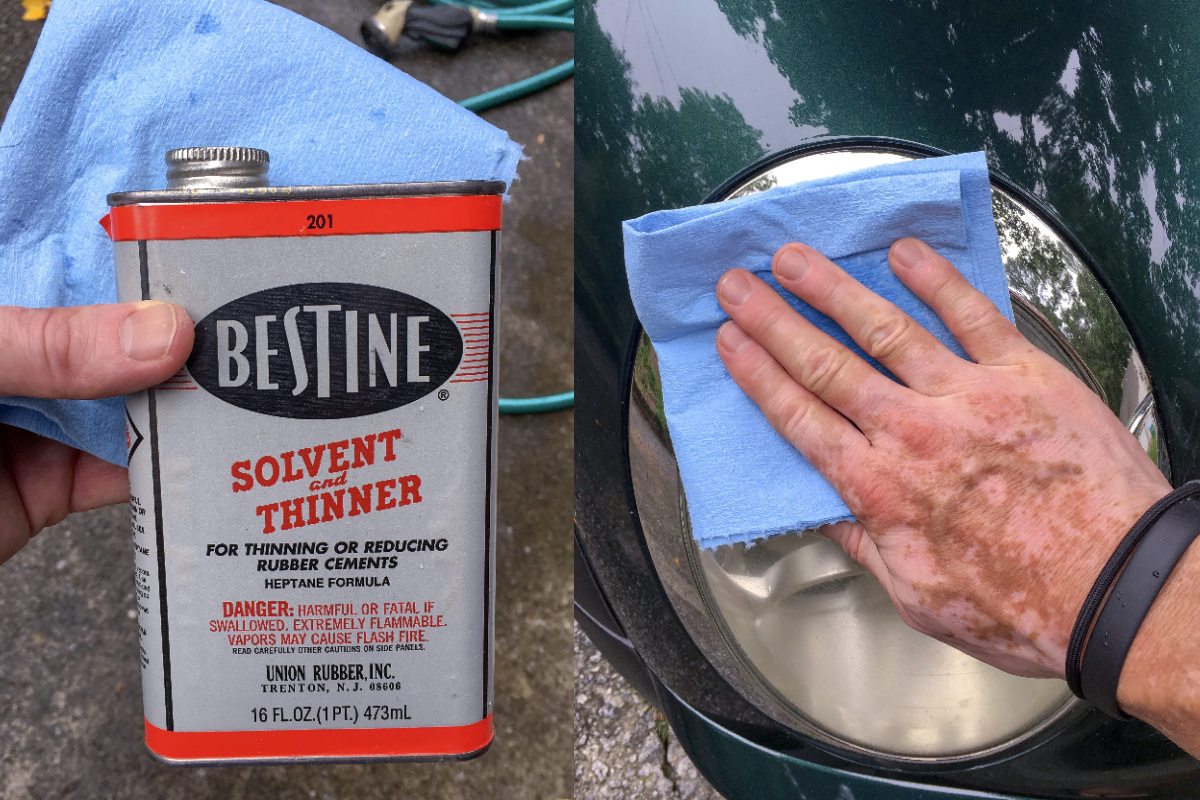
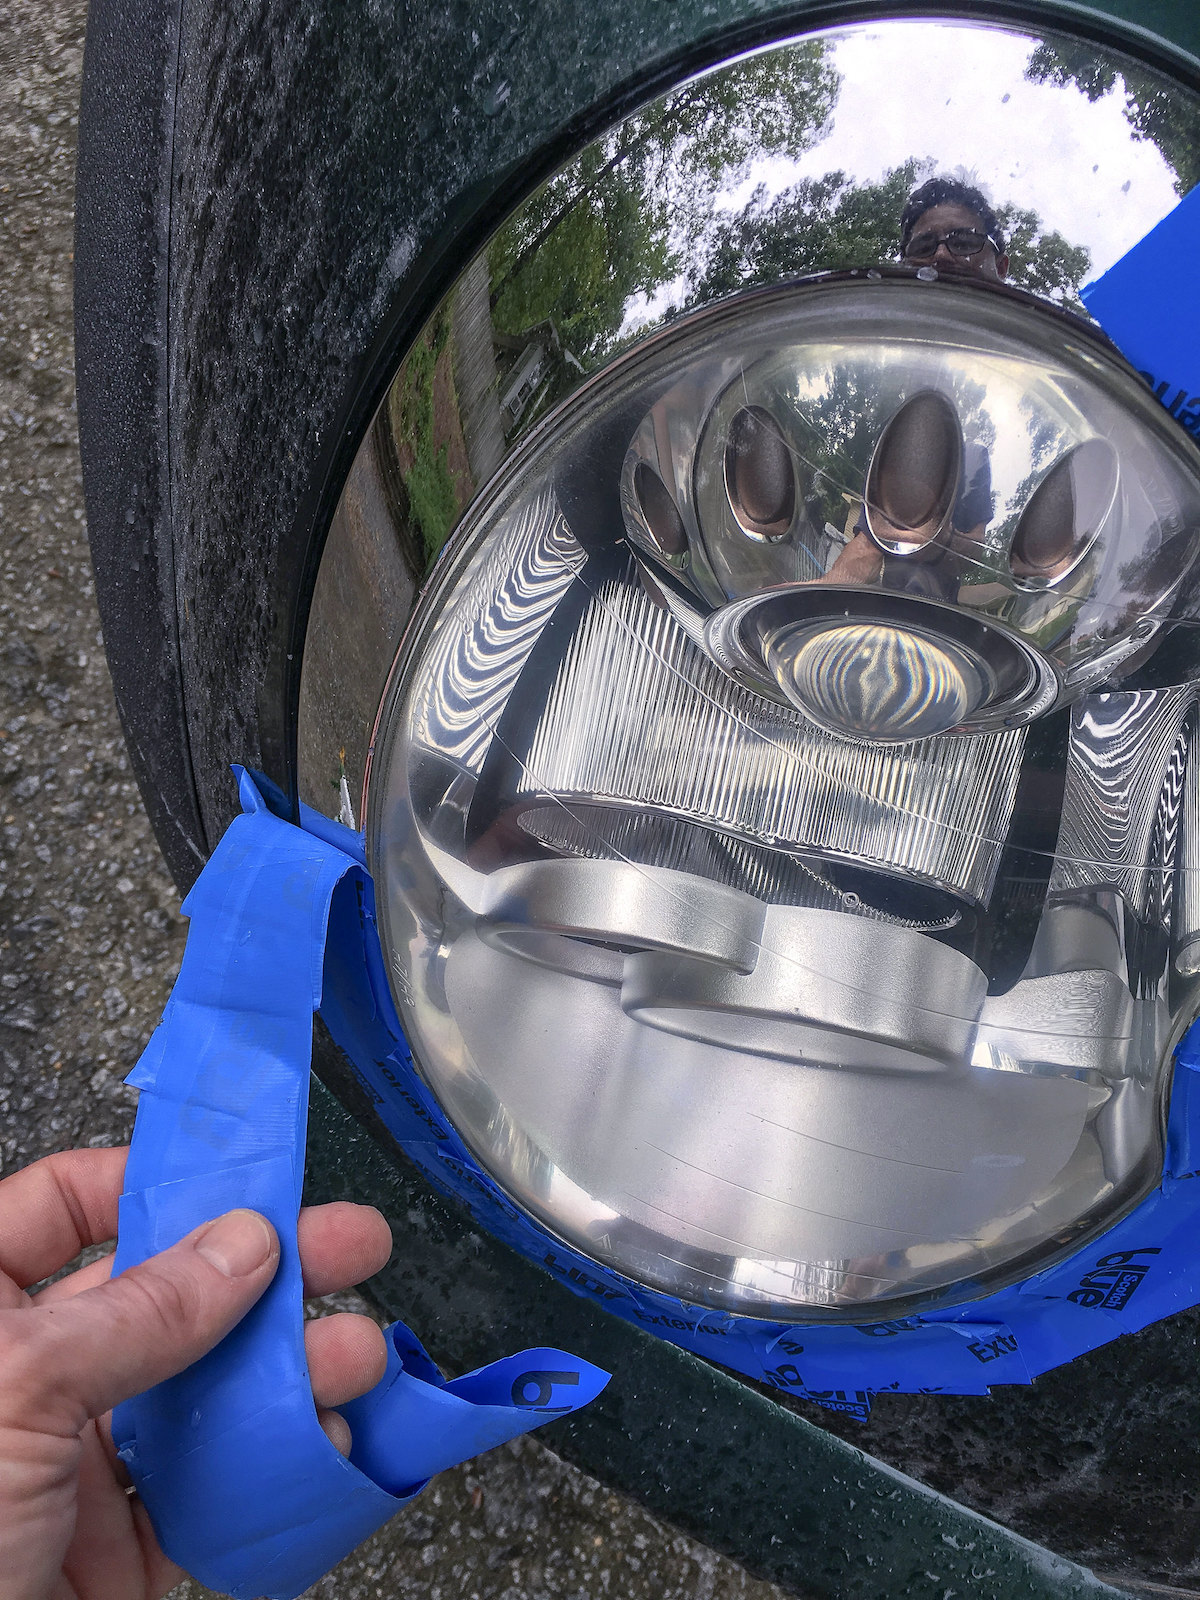
- Clean the headlight. I used a solvent and thinner solution, but rubbing alcohol would work as well.
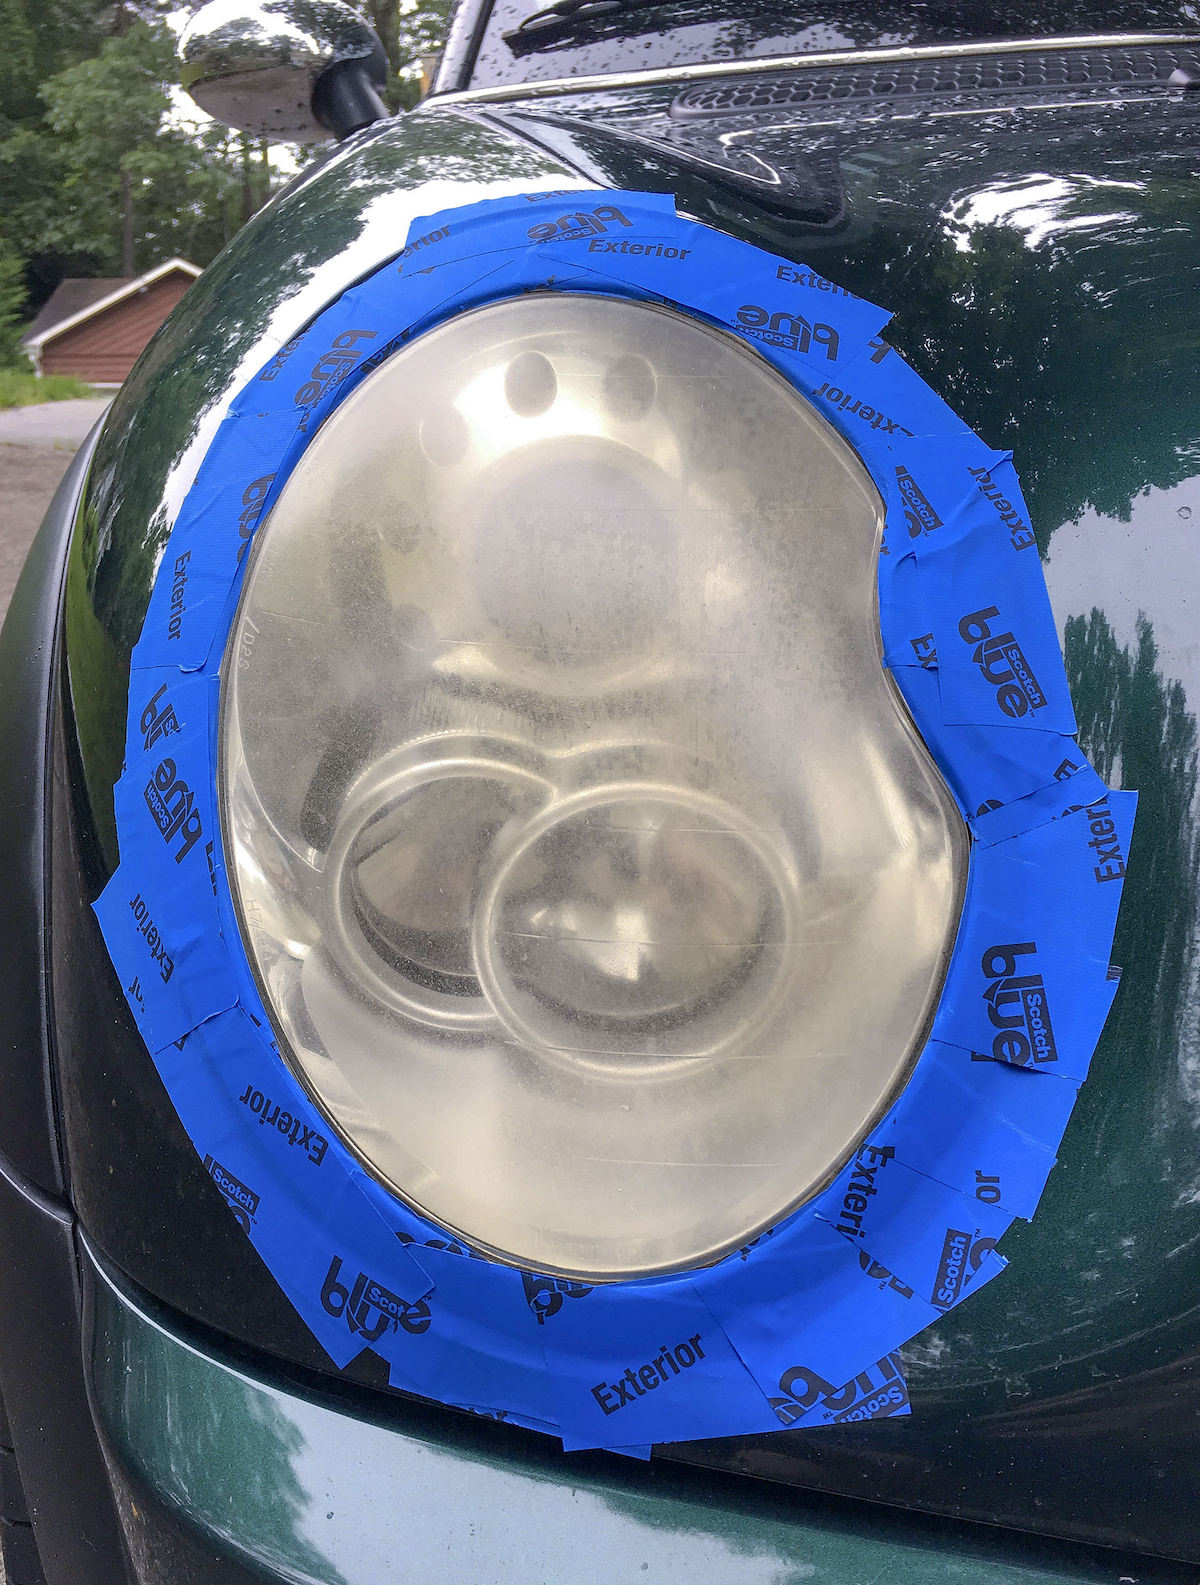
- Tape off the both lights using painter's tape.
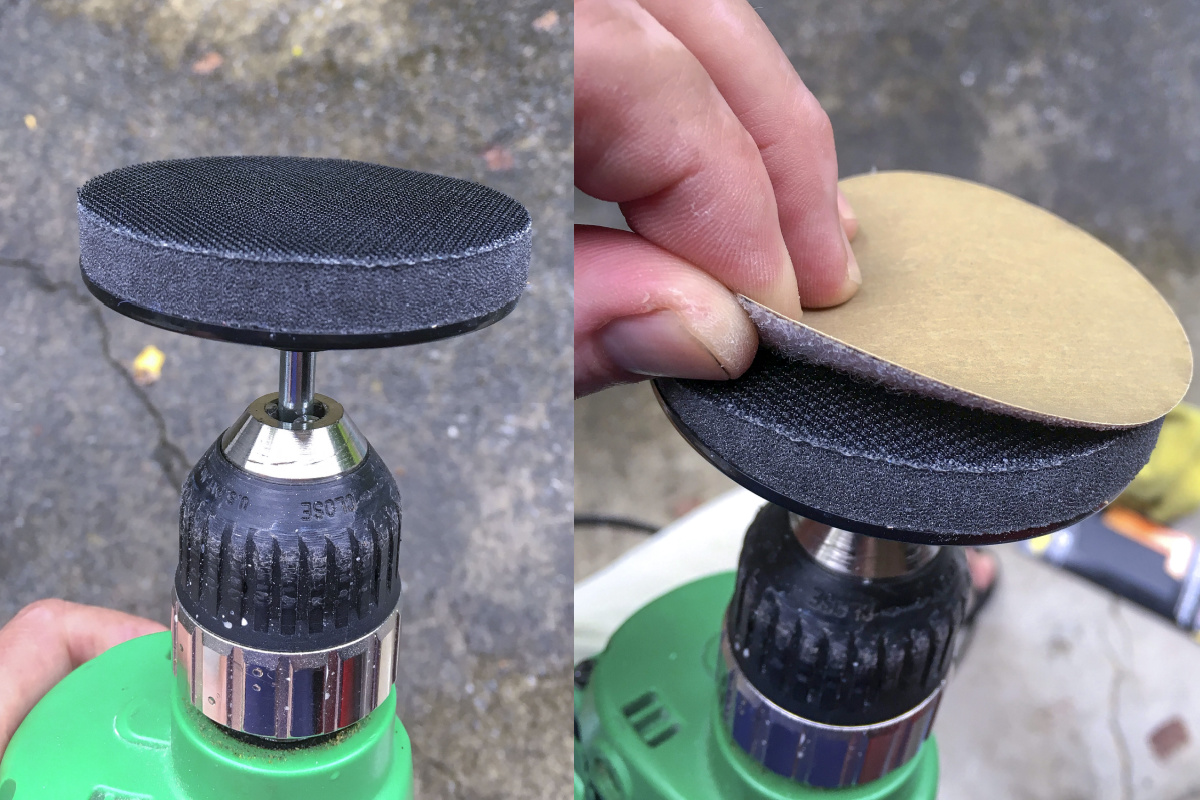
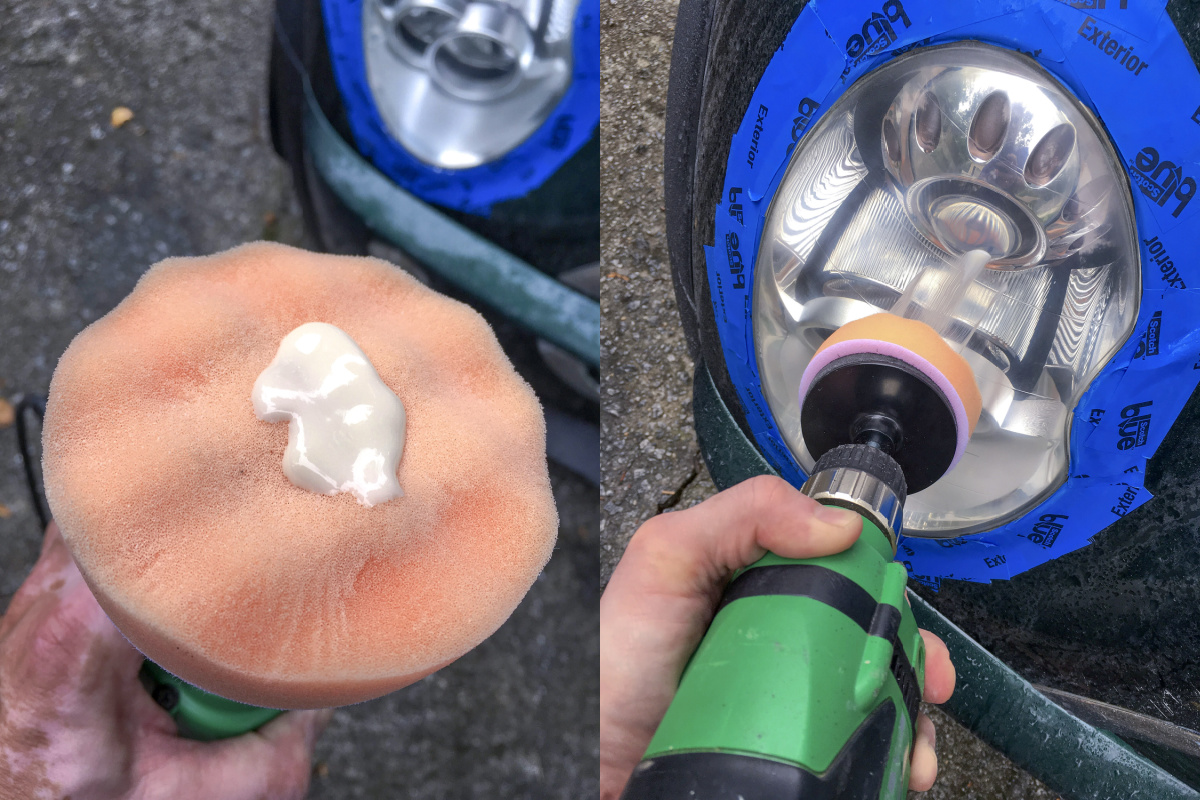
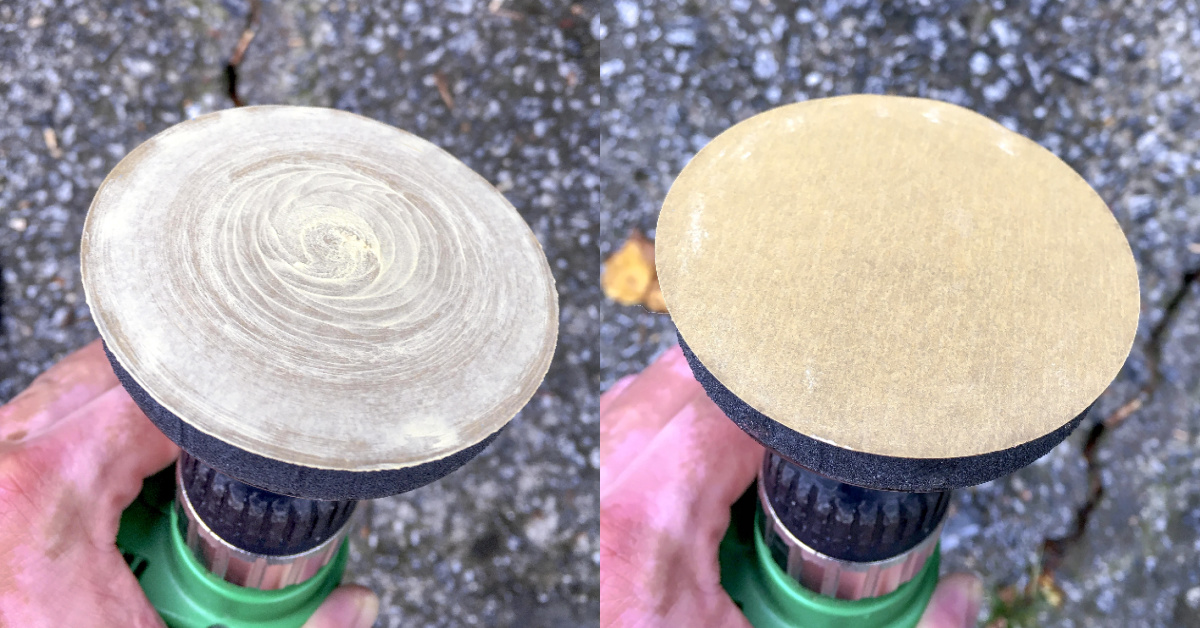
- Put the foam velcro buffing pad from the kit in the drill, then place the 500-grit sanding disc on the pad.
- Then spray water on the headlight and on your sanding disc. This will keep everything lubricated so it can flow and prevent scratching.
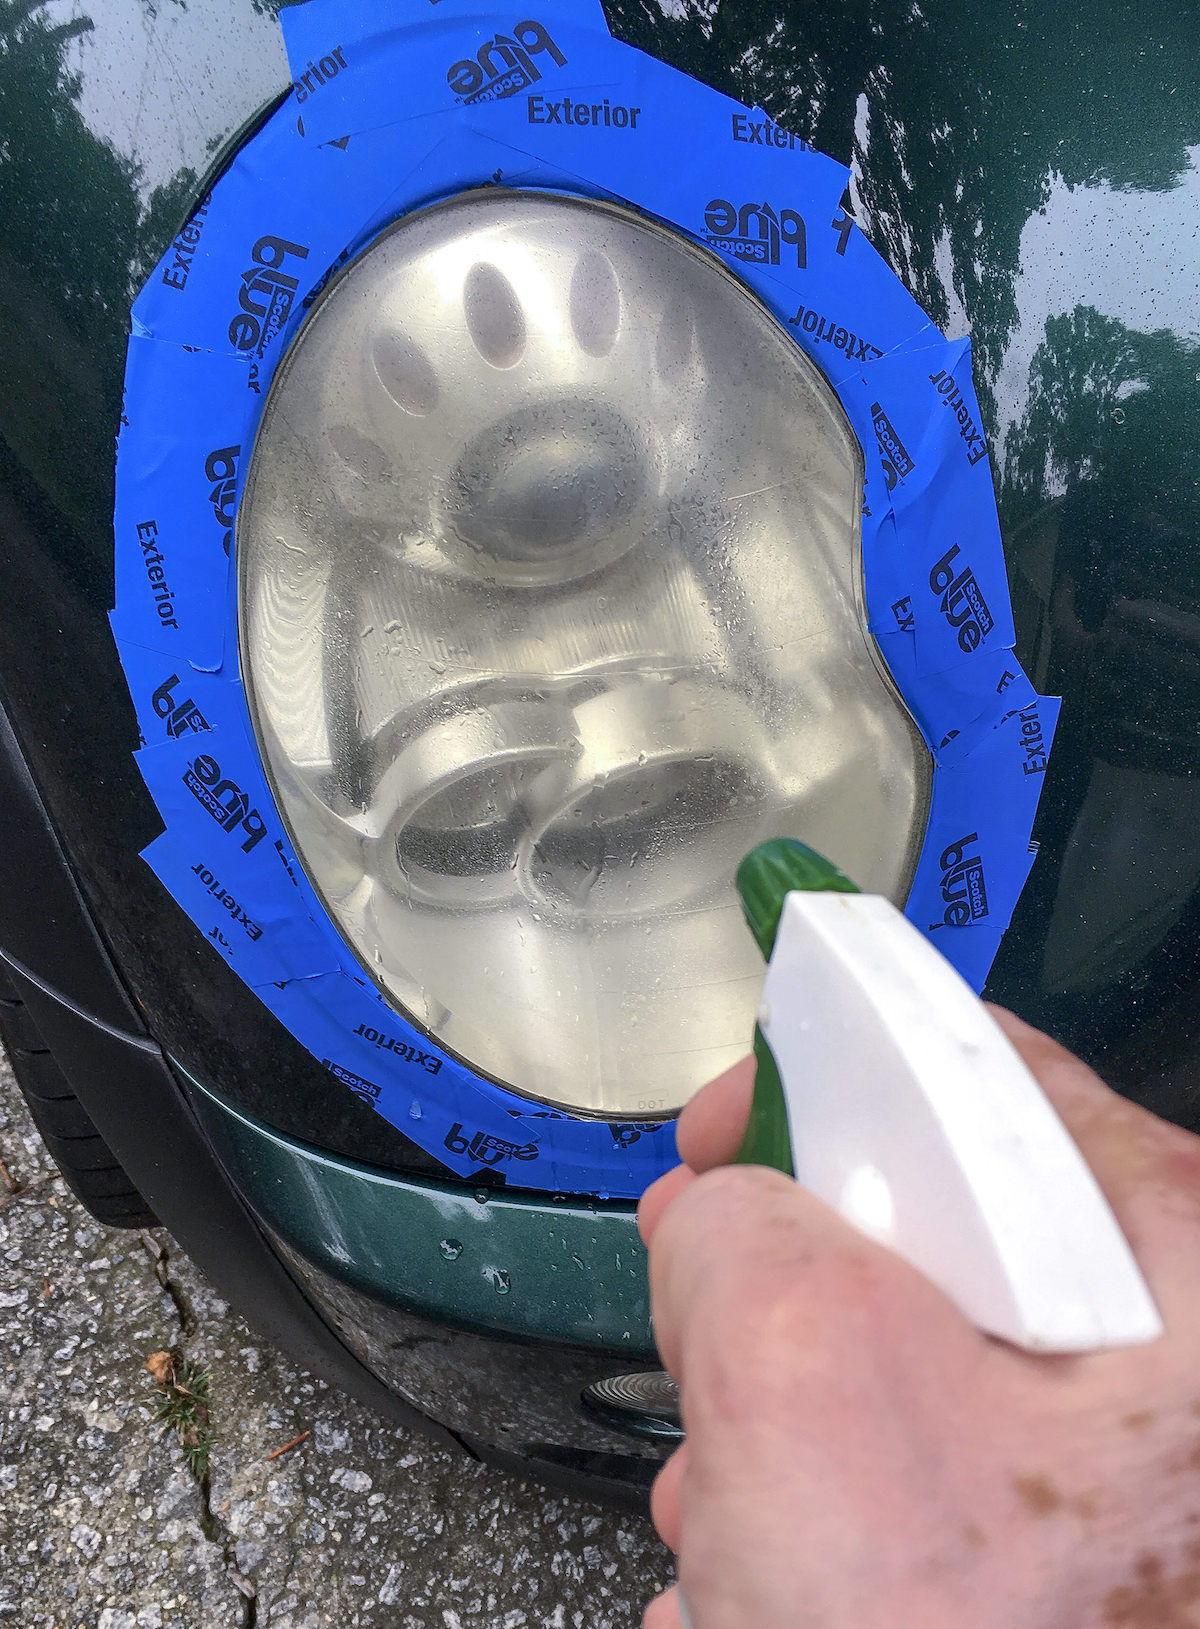
- Using a slow to medium speed on your drill, apply medium pressure and keep the pad flat on the headlight. Begin sanding, moving back and forth over the surface until you see the yellow UV damage and oxidation start to come off the surface. Reapply water as needed so that you are always sanding on a wet surface.
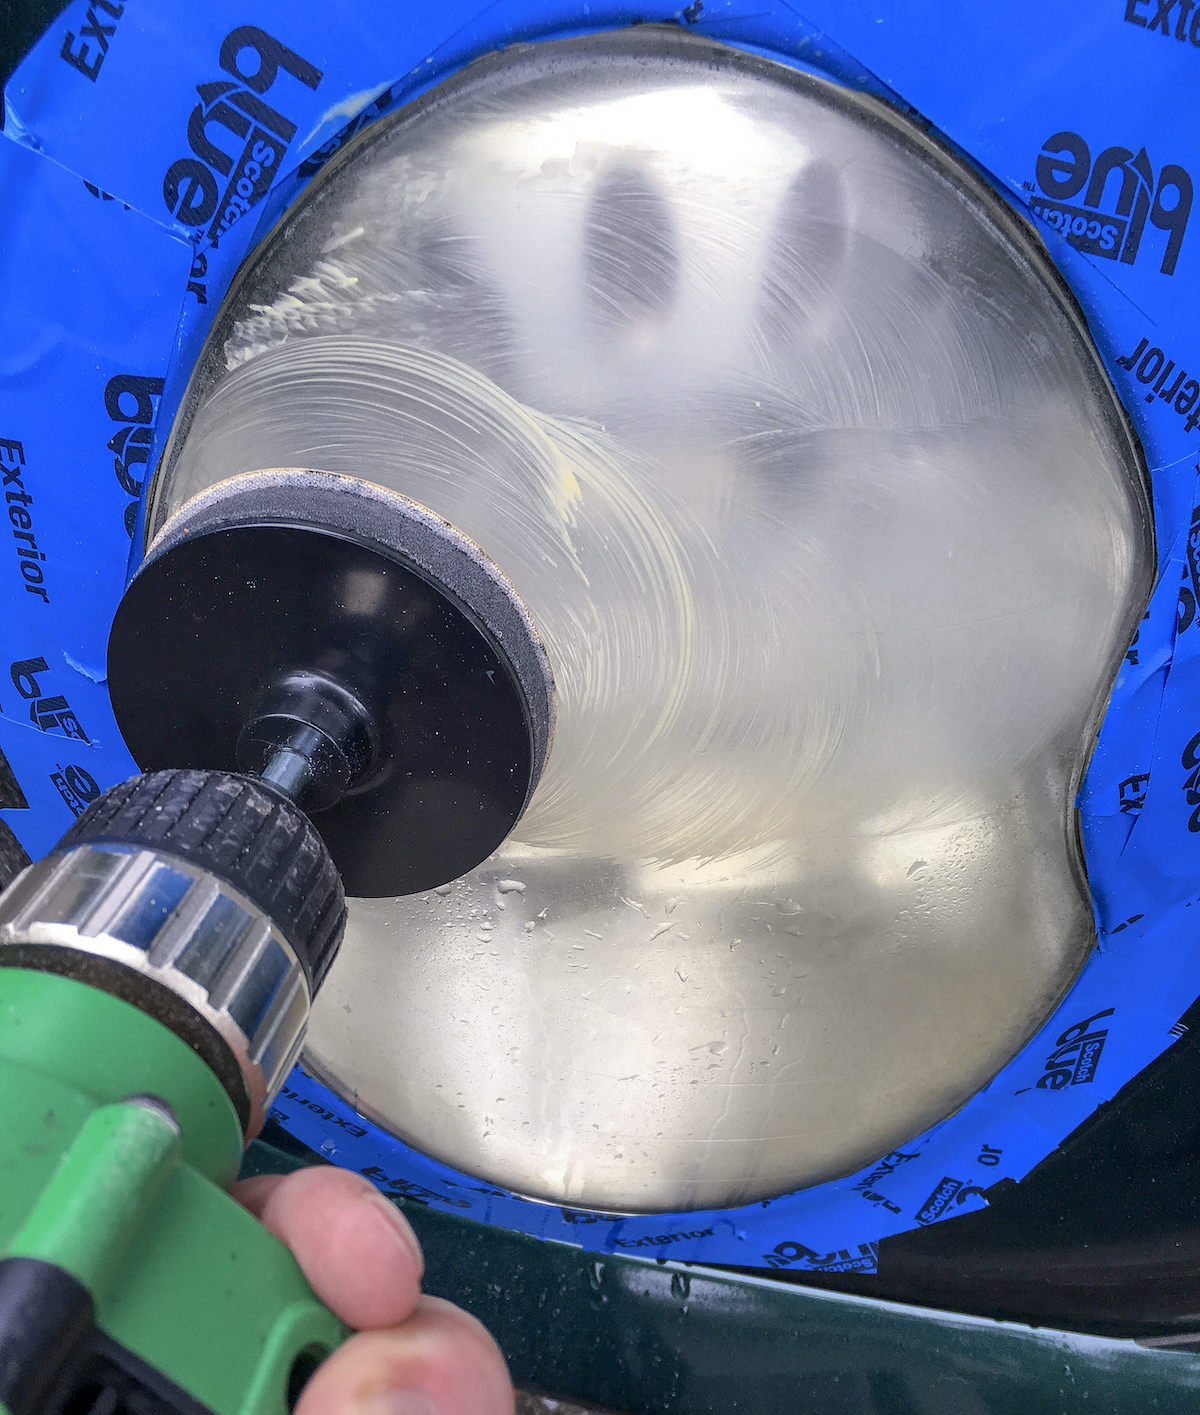
- Make three or four complete passes with your drill and sanding pad, adding water as needed.
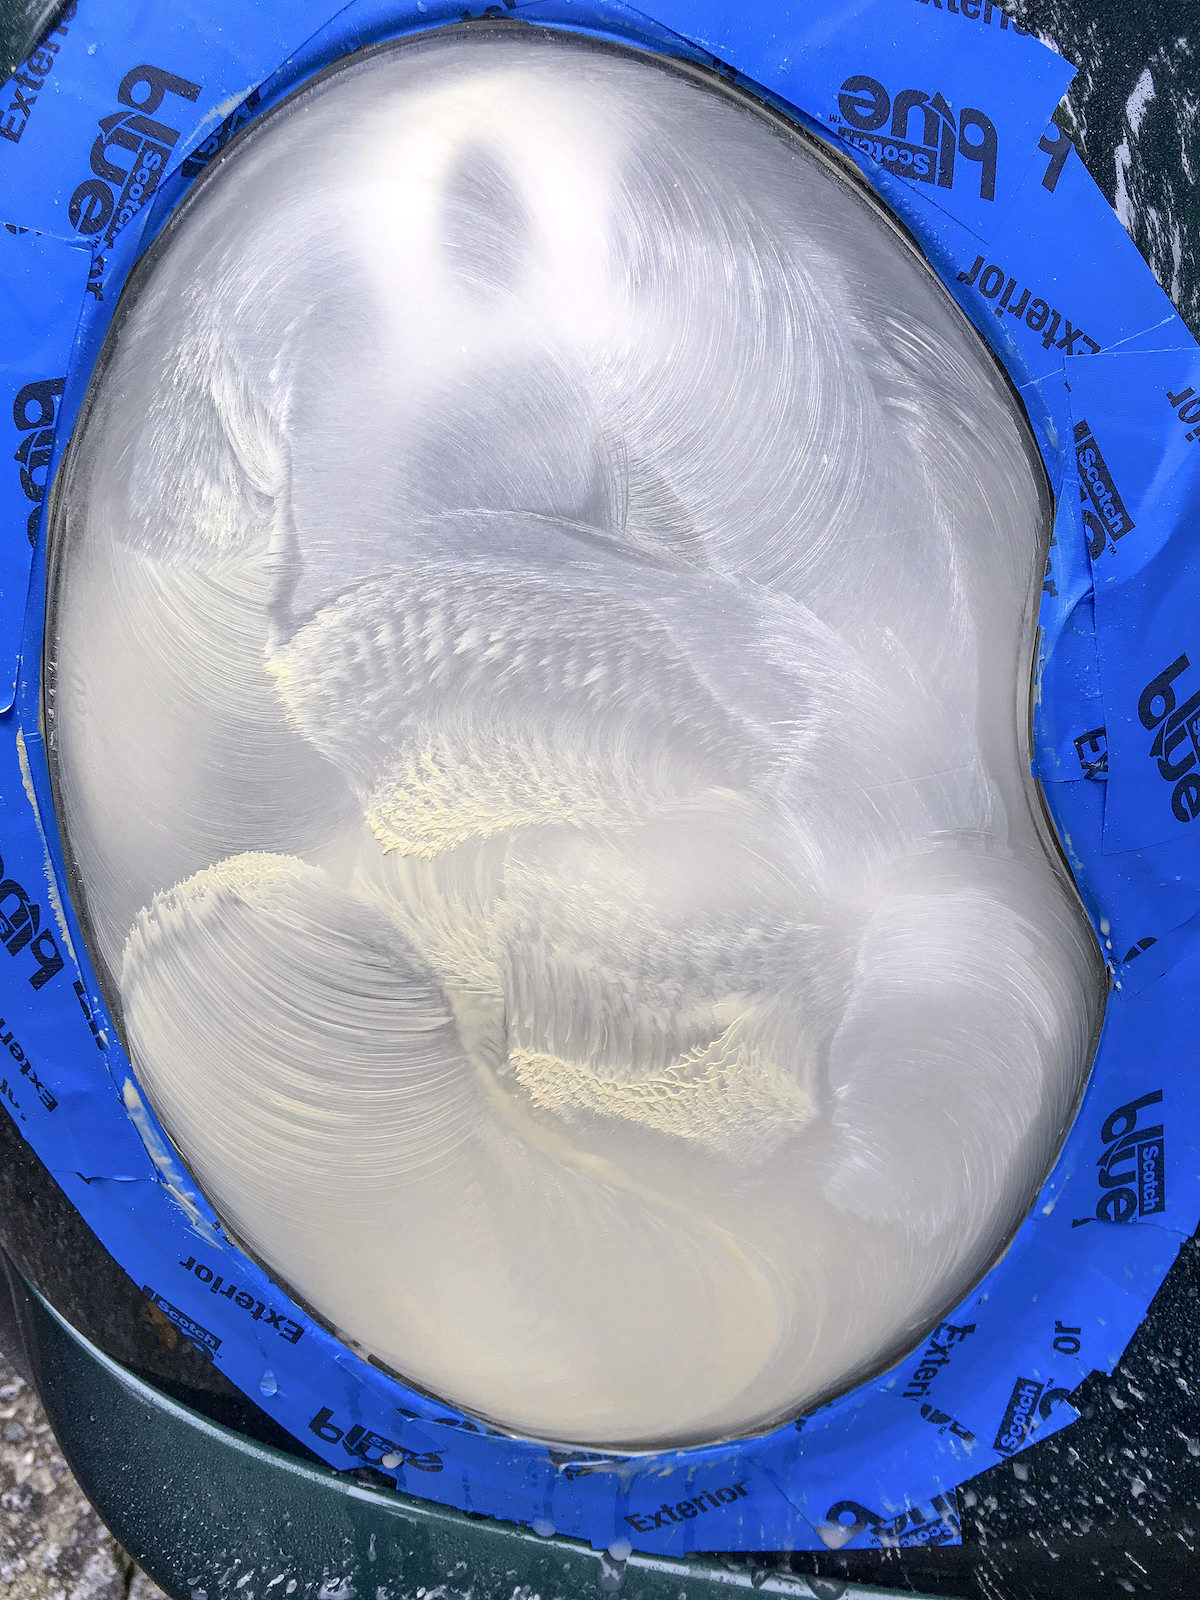
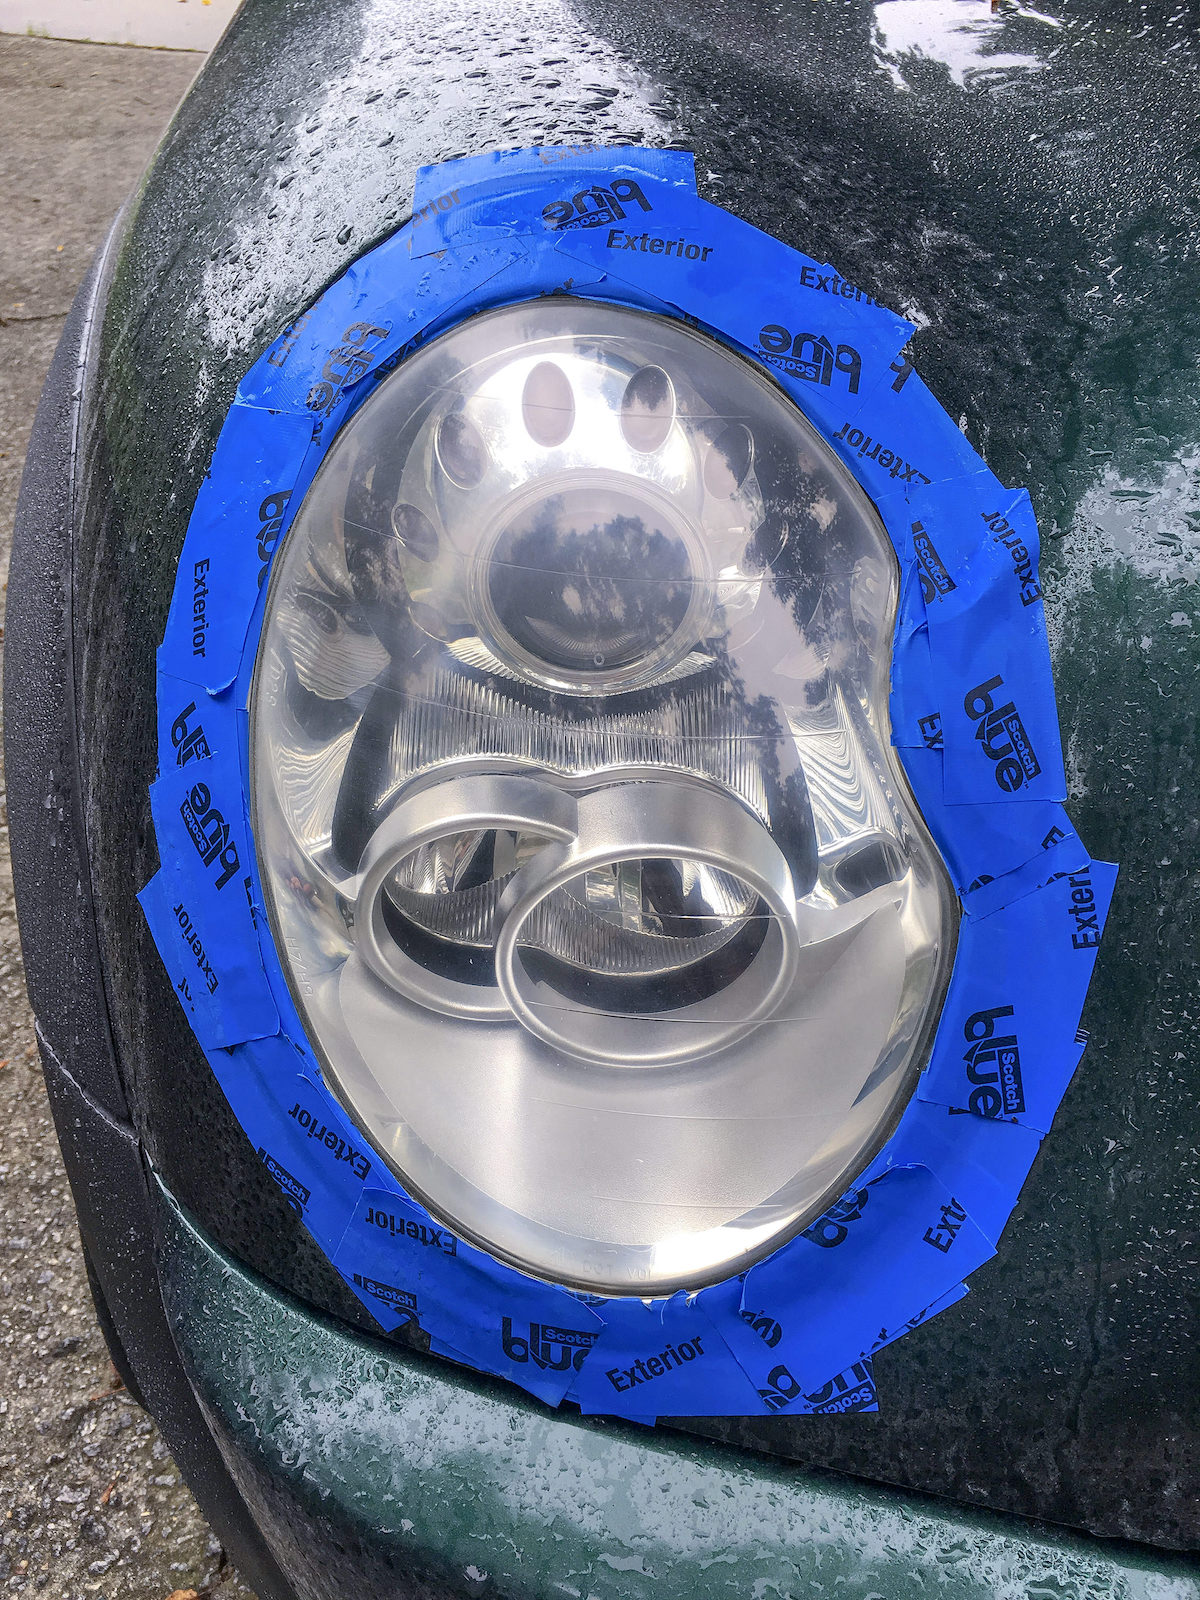
- Spray water on the light and wipe off with a clean rag and this is how the headlight will appear. It will look worse before it gets better!
- Apply the 800-grit sanding disc from the kit and repeat the steps used with the 500-grit disc. Spray and wipe off the light again.
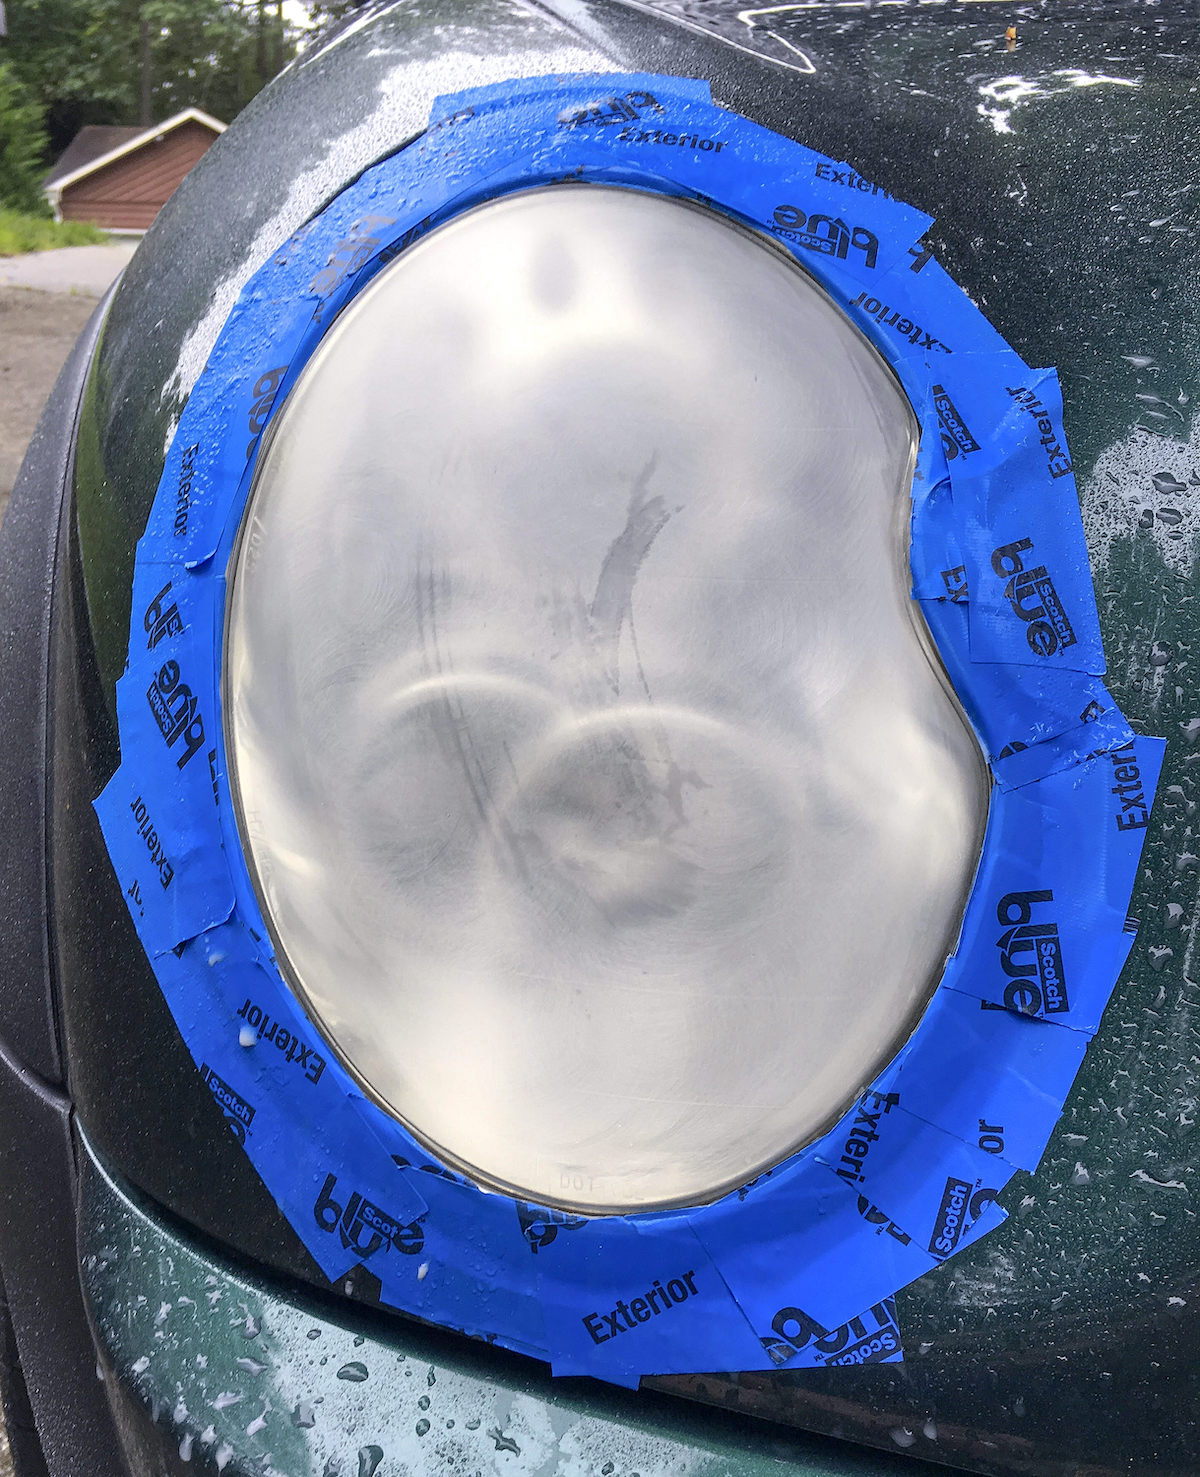
- Use the 2500 grit wet sanding paper – spray water on the headlight and directly on the sandpaper, then start sanding the light by hand. Use circular motion.

- When finished hand sanding, wipe the light dry and you will see that you are getting closer to the desired effect.
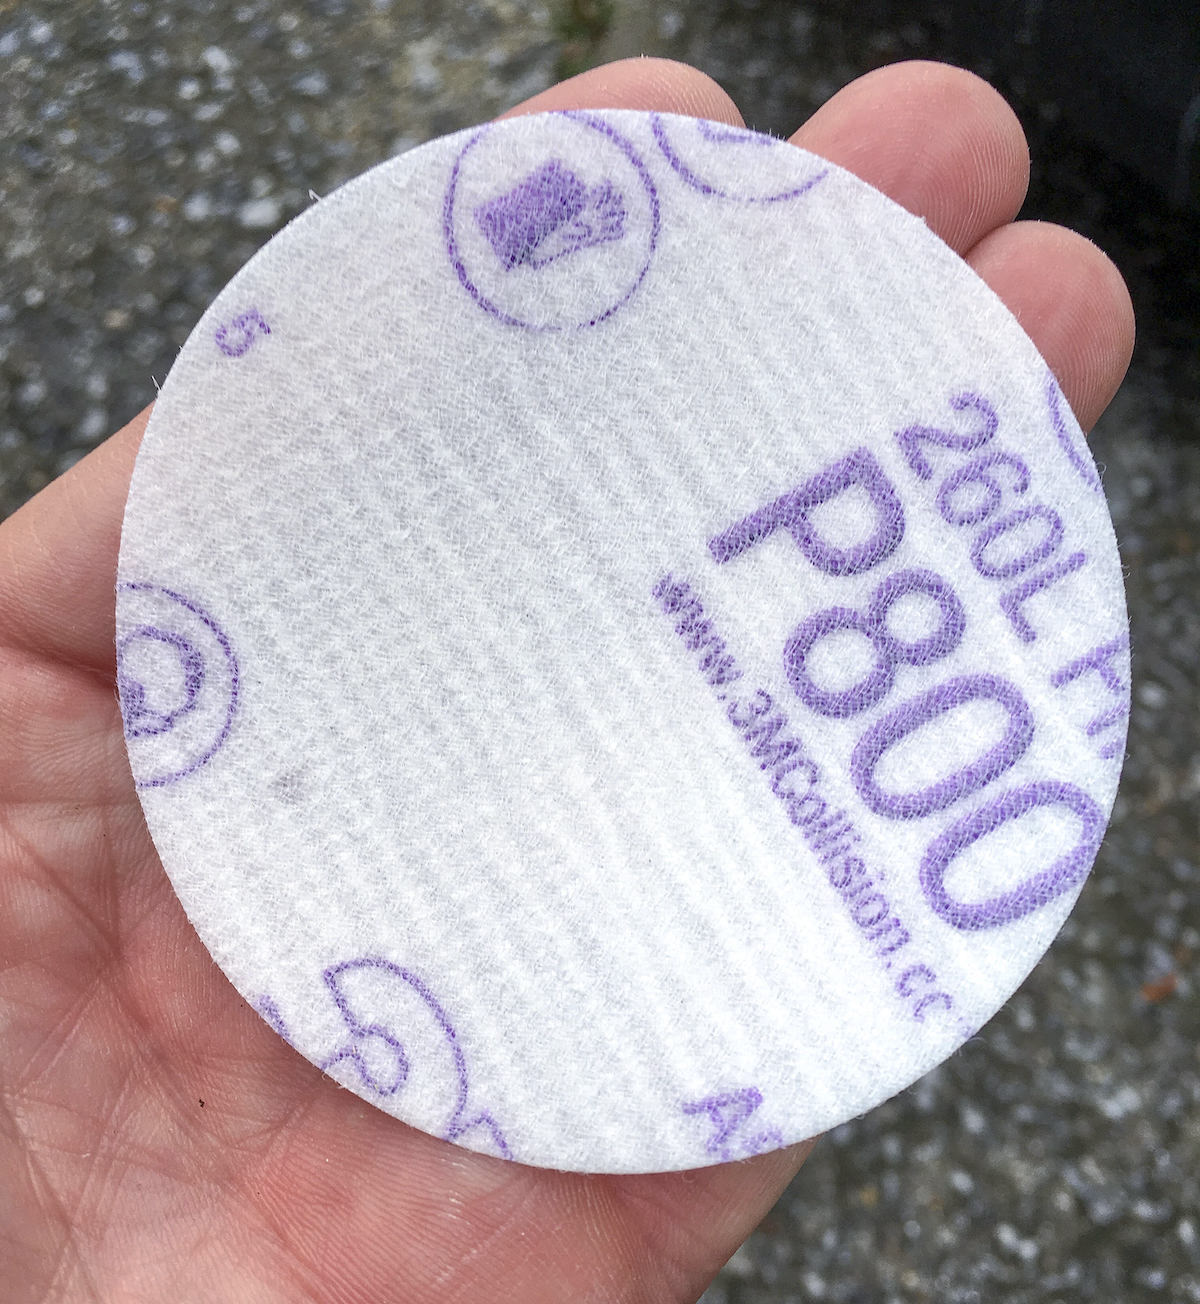
- Add on the 3M 3000 grit Trizact foam sanding disc. Use this disc as you did the other discs: keep the surface wet as you make 3 to 5 passes over the headlight.
- Keep applying water and passing over the headlight until you get the desired amount of clearing. Wipe off the light with a clean rag until dry.
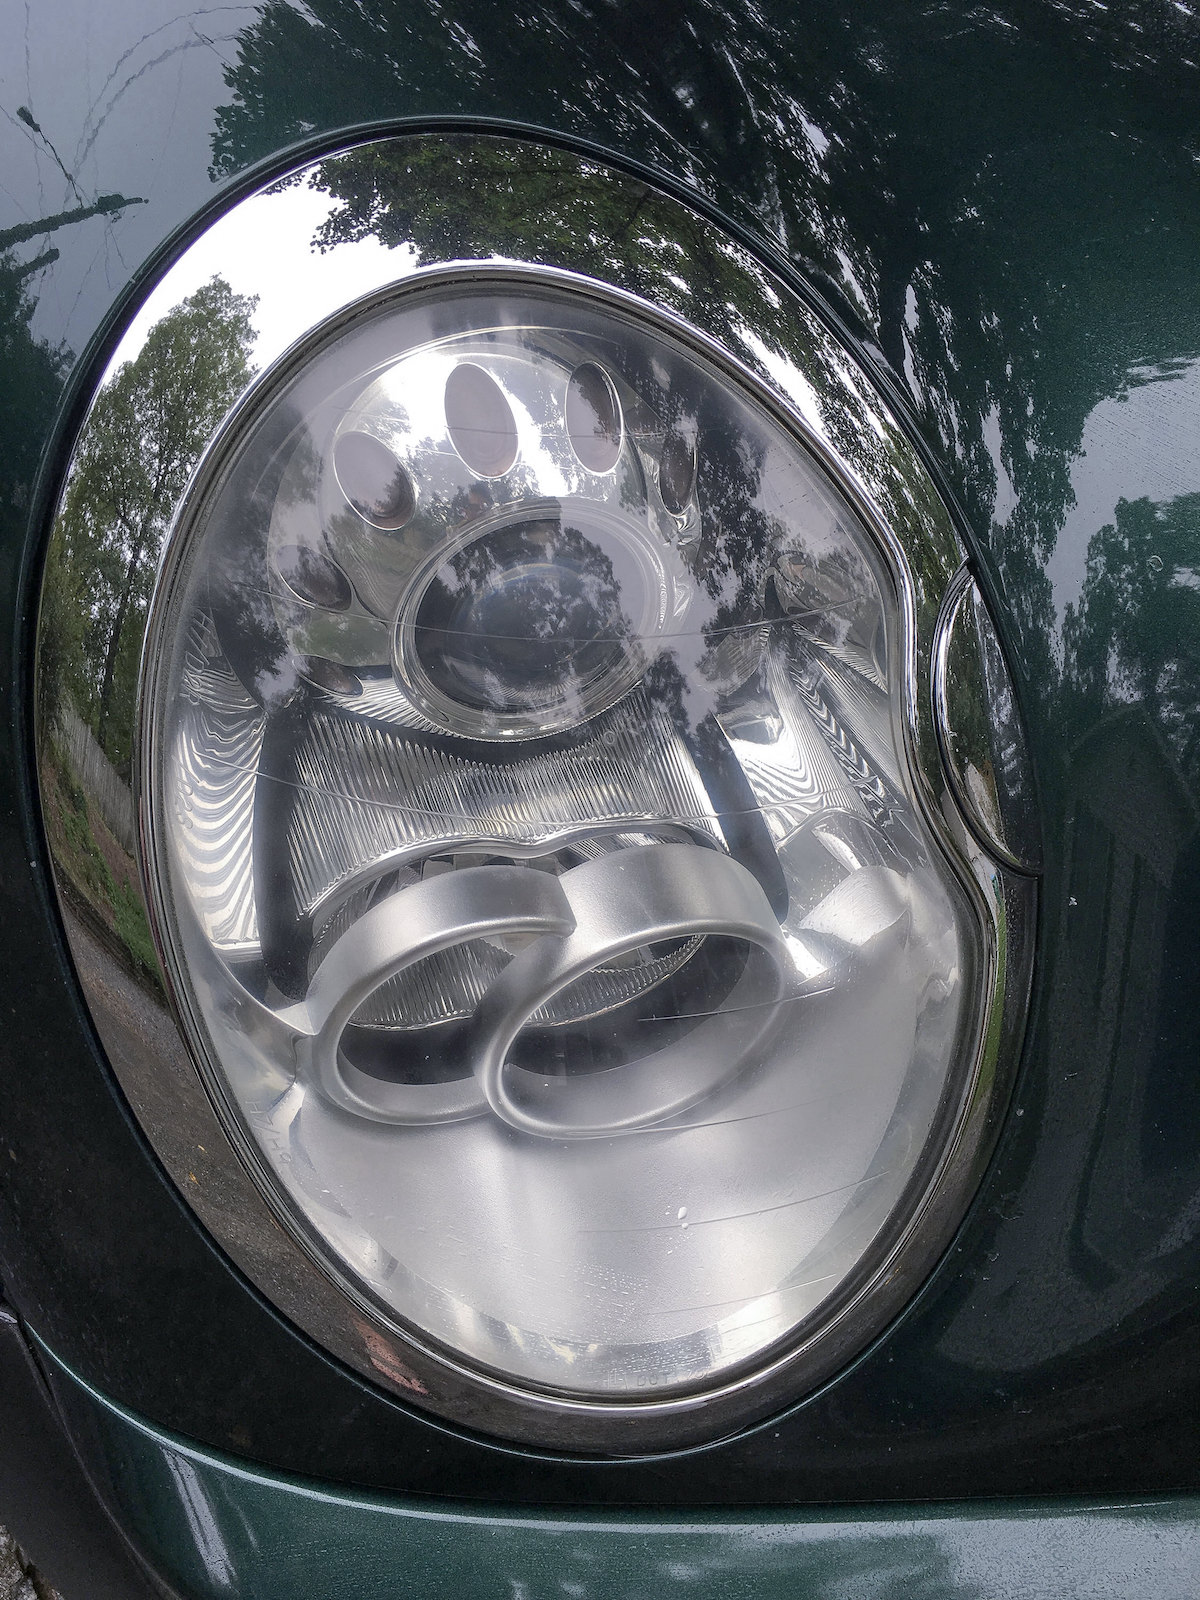
- Using the foam polishing disc provided in the kit, apply a quarter sized dab of the Synthetic Wax Protectant (also provided in the kit) to the pad and smear on the light without the drill on. Begin polishing by turning the drill on. As you make more passes the light will become completely clear.
- When you are happy with the result, wipe clean with a clean rag. Remove the tape to finish.
Notes

Ready to clean other stuff around your home? We’ve got lots of cleaning posts here on the blog, and here are some of my favorites:


Needs a clear coat.
I have this down for reference. I live in a condo and don’t have a drill for sanding. I will keep in my nd – thanks!
My headlamps are plastic. Will this work on that? Thanks.
Ours were plastic. And yes it did. Having said that if you want to be sure, you can contact 3M who could probably tell you. This is an at your risk type project, but I think it’s going to work for most headlamps 🙂
I honestly don’t write reviews but after my son used this 3M kit on my car headlights I’ve got to say its a fantastic product! My headlights look brand new again. So don’t waste you $ buying new headlights or going someplace to get it done. You can do it yourself.
Thank you so much! My son and I decided to restore a ’93 JDM Sport and boy has it been an adventure. This headlight kit was PERFECT for us, and I’m so pleased with how the headlights have turned out! We are getting so close to finishing this up and I can’t wait to finally take a drive.
This headlight restoration kit is FANTASTIC. I visited my Mom in Arizona a few years ago and she said she didn’t like driving at night any longer as she couldn’t see as things were to dark out there in the desert! One evening while I was driving her car I was immediately aware of her issue. I pulled into an auto parts store and assisted her out of her car. I showed her the cloudy headlights on her 2002 Buick LeSabre and explained that ANYONE would have difficulty seeing with THESE cloudy headlights. I purchased the kit and did her headlights the next morning. They turned out GREAT. I looked at the headlights of her neighbors vehicles in the condo association that she lived in and since I had everything already there, moved over and did several other vehicles headlights. Everyone of them deeply appreciated what I’d done and after driving at night made sure to thank me once more. My Mom was happy to know that it wasn’t her eyes that were failing her and that it was only her foggy and hazy plastic headlight housings. GREAT PRODUCT that works as described.
Yay! Glad this method worked for you!
I believe there’s a better way to restore headlight lenses. Just one mod after all the steps of sanding off any factory uv protectant. Skip the final polish and go straight to
vapor deposition of acetone, synthetic gauze soaked in acetone to wipe on or airbrush acetone. Applying a soaked gauze pad and wiping once can be tricky as acetone reacts immediately to polycarbonate lenses, melting if lingering or wiping twice over the same area. One gauze pad per lens. Vapor deposition is best while airbrushing may be just as effective.
I’ve used off the shelf products twice and clear coated but lenses yellow after a year or so. Over sanding left score lines but after careful sanding on my third try in several years, acetone appears to be best at immediate restoration of clear lenses. I did not clear coat them this time as I want to see how well they hold up. Since acetone dissolves polycarbonates readily, it seems to be the ideal way to paint on a clear lens that mends all the scratches involved in sanding. Vapor deposition or airbrushing may be the best two ways of applying acetone in a controlled manner but does depend on proper lens preparation before its applied.
Hi there! I’m not sure what any of this means to be honest but I’m happy to add this comment in case it makes sense to others!