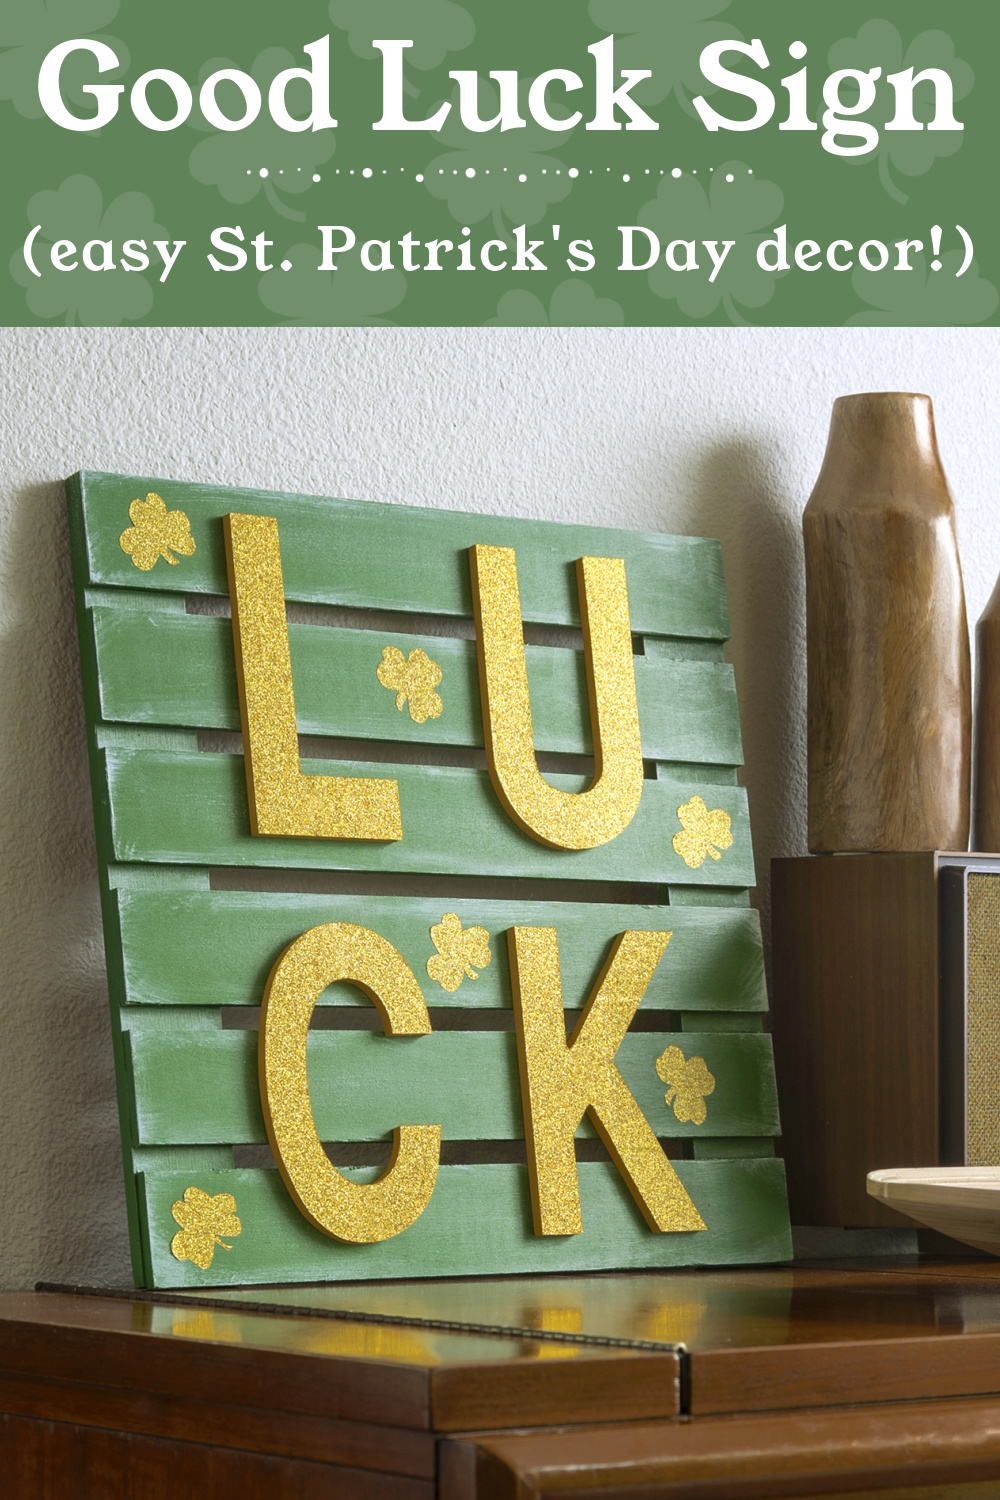
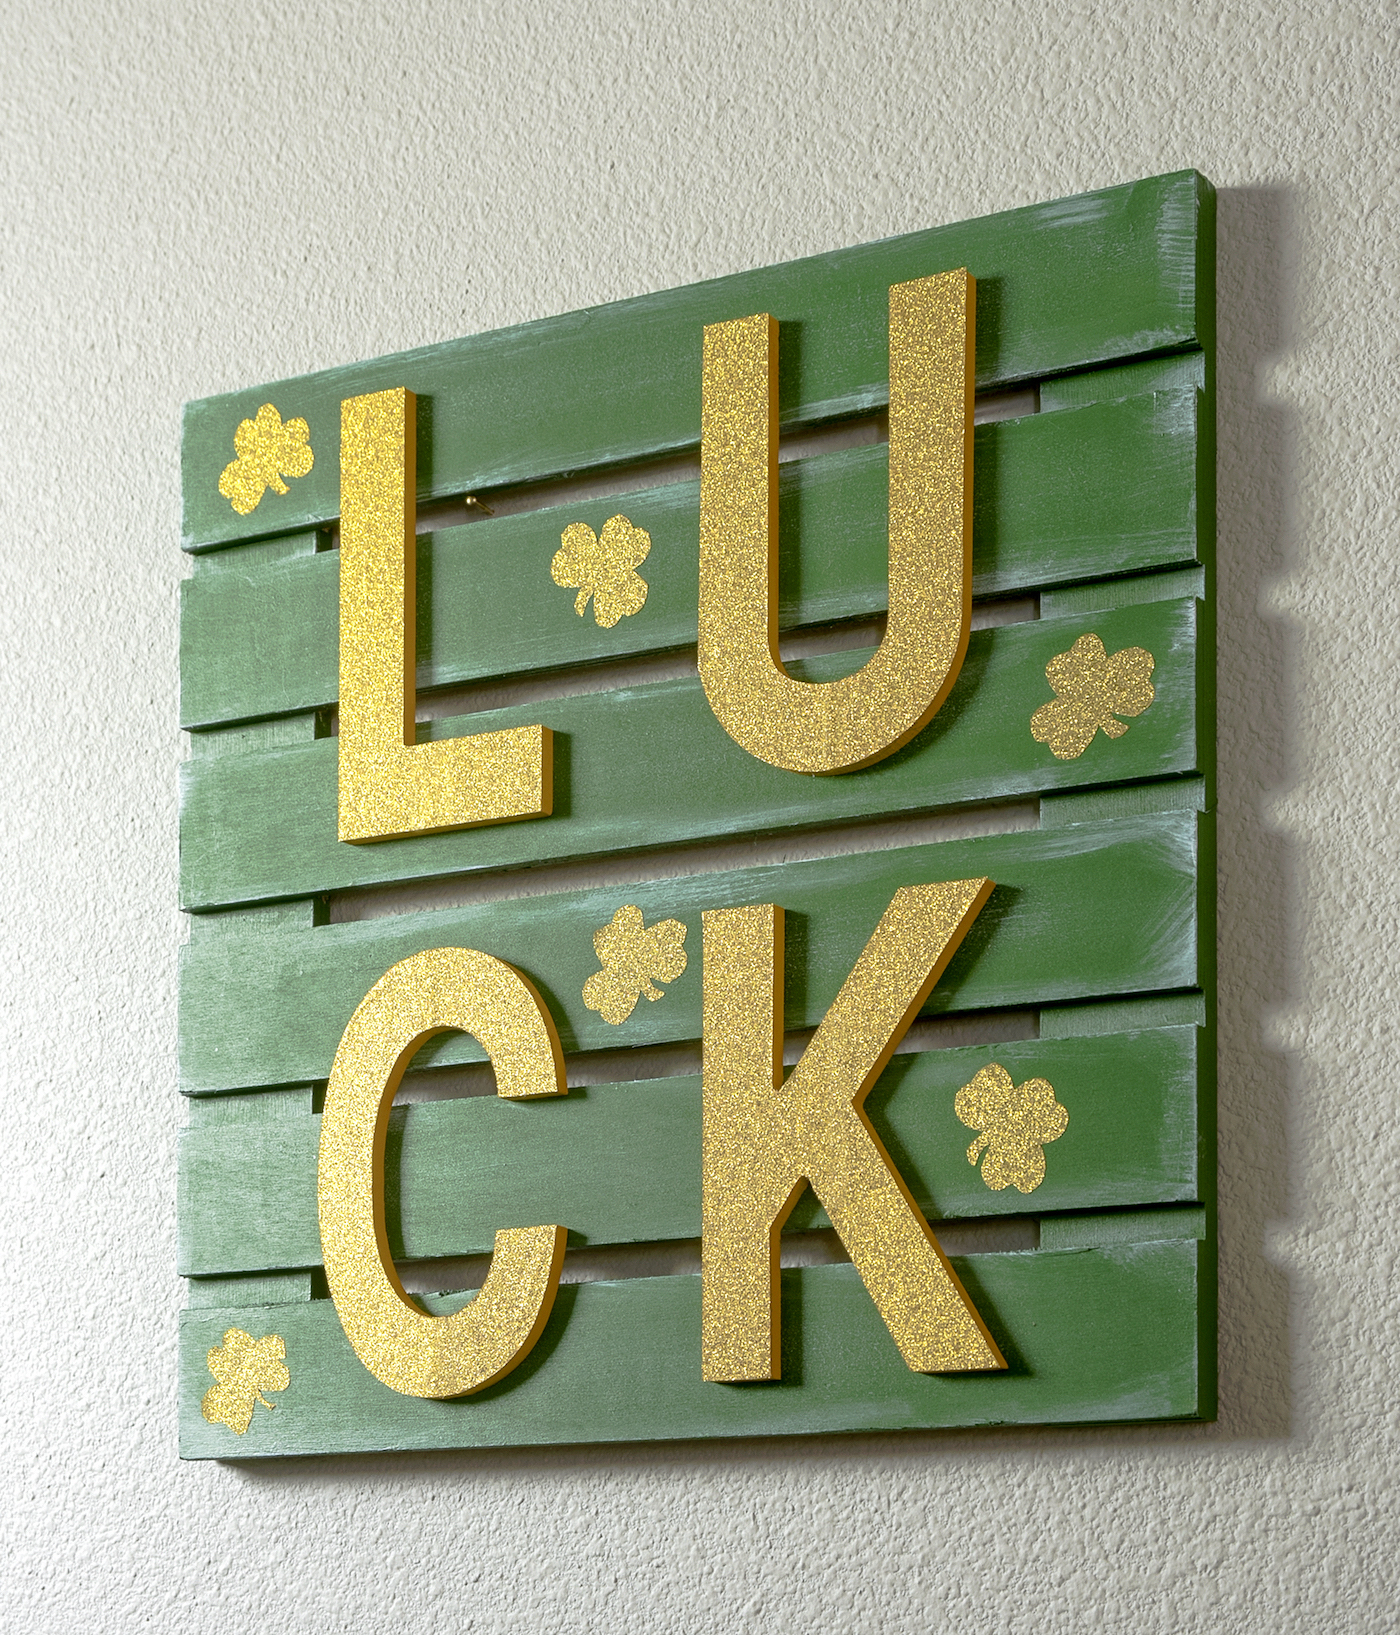
Make a Good Luck Sign for St. Patrick’s Day
Learn how to make an easy Good Luck sign for St. Patrick’s Day decor! This is great for beginners and perfect for a holiday mantel display.
Skills Required: Beginner. It helps to have some experience with a craft knife since you’ll be cutting Duck Tape into shapes. Otherwise, it’s basic painting, and a great project for beginning crafters.
If there is one thing I am always willing to take more of, it is good luck! I just feel like I never have enough, you know?
I do have a few good luck trinkets that I keep around – including some lucky bamboo. Yep, my brother gave it to me for a gift and it’s on my kitchen windowsill. Again . . . it can’t hurt?
Some people don’t believe in luck and some people believe all of life is a series of finding luck. Whether you believe in one or the other or are somewhere on spectrum, my hope is that if you’re here we can unite around one common theme today: St. Patrick’s Day!
Good Luck St. Patrick’s Day Sign
It’s hard to find good decor ideas for St. Patrick’s Day, but guess what – you’re in luck (yes, I went there).
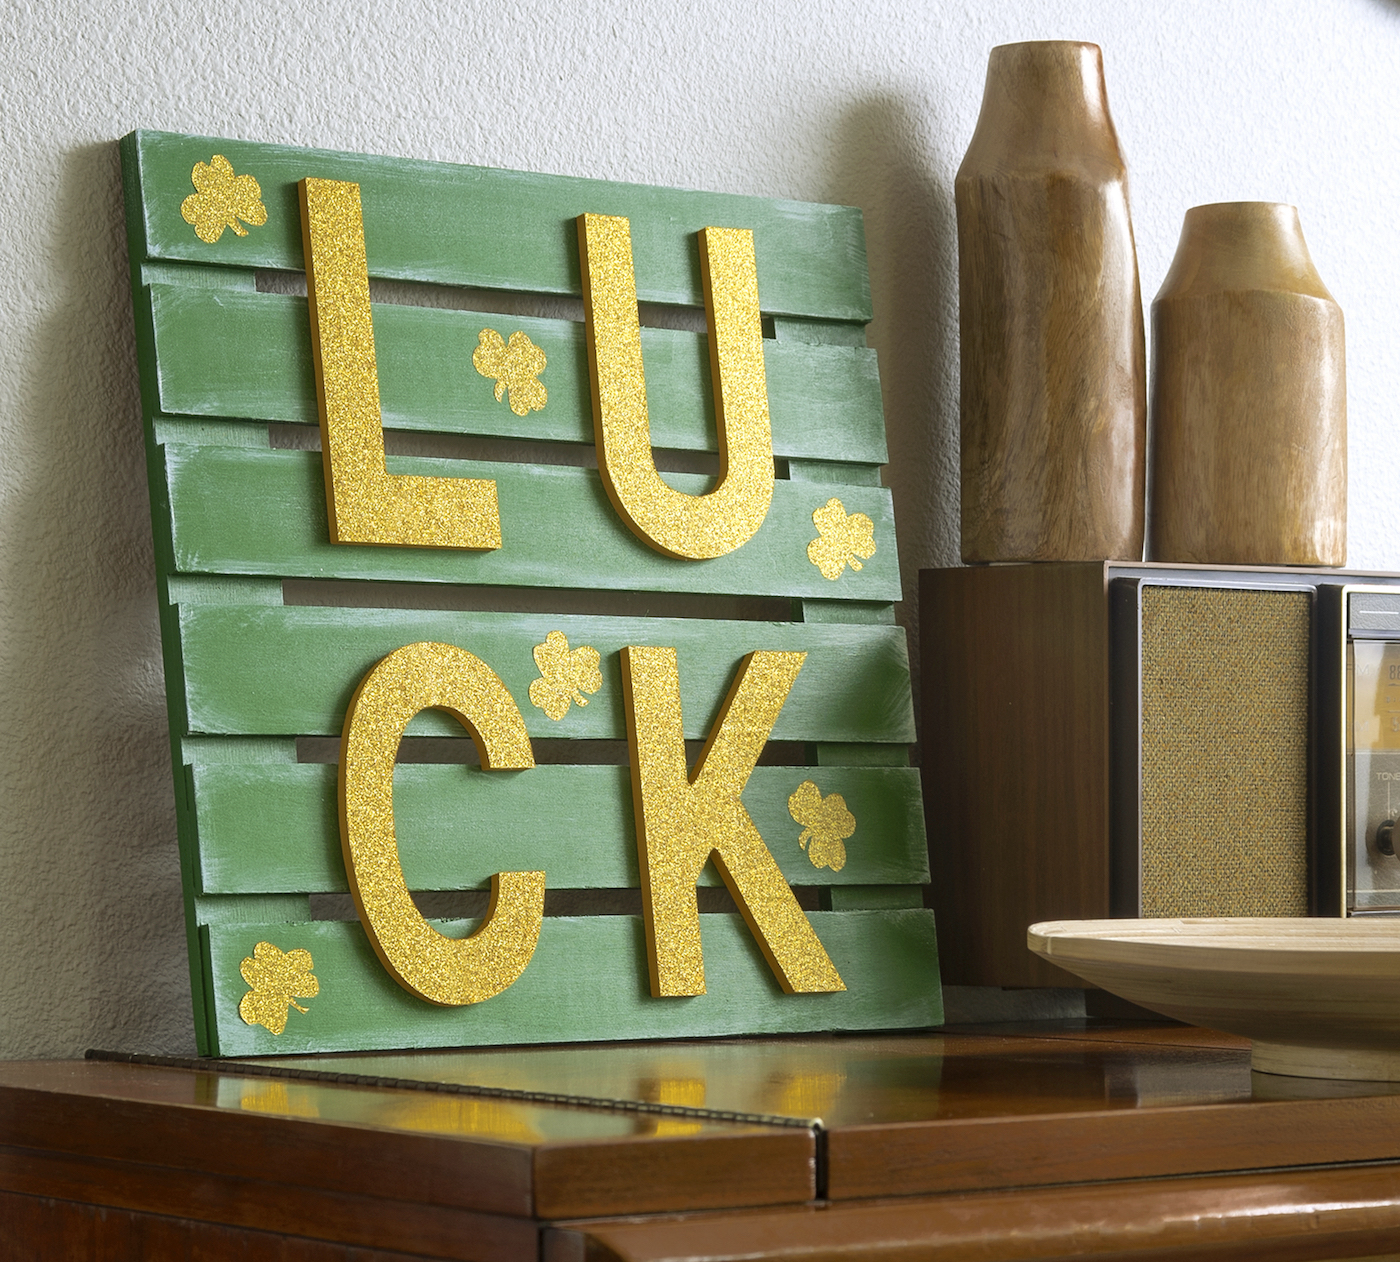
Years ago on another blog I did a “LOVE” canvas in the style of Robert Indiana’s LOVE. Basically all that means is you have a four letter word that you square up on a background.
I used this idea for Valentine’s Day, so it was time to give it a try for St. Patrick’s Day! I made a good luck sign for St. Pats using wood letters and gold tape.
This St. Patrick’s Day sign was made in four easy steps. You’re going to paint the pallet and add white accents. Then you will paint and decorate the letters. You will glue everything together. And finally, you’ll add some gold shamrocks.
This good luck sign is so simple, even beginner can make it! Learn how to do it below.
Gather These Supplies
- Wood pallet (purchased at Michaels – look in the wood surface section of your craft store)
- Wood letters spelling “LUCK”
- Gold Duck Tape
- Acrylic paint – golden yellow, green, and white
- Paintbrush
- Craft glue
- Craft knife and mat
Paint the Pallet
I got a 12″ (approx.) unfinished wood pallet in the wood section of the craft store. Then I headed to the wood letters and found some that fit. I highly recommend this strategy to make sure everything fits!
If you can’t find a pallet in the size you like, check out other wood surfaces OR get a wood panel canvas. You have options!
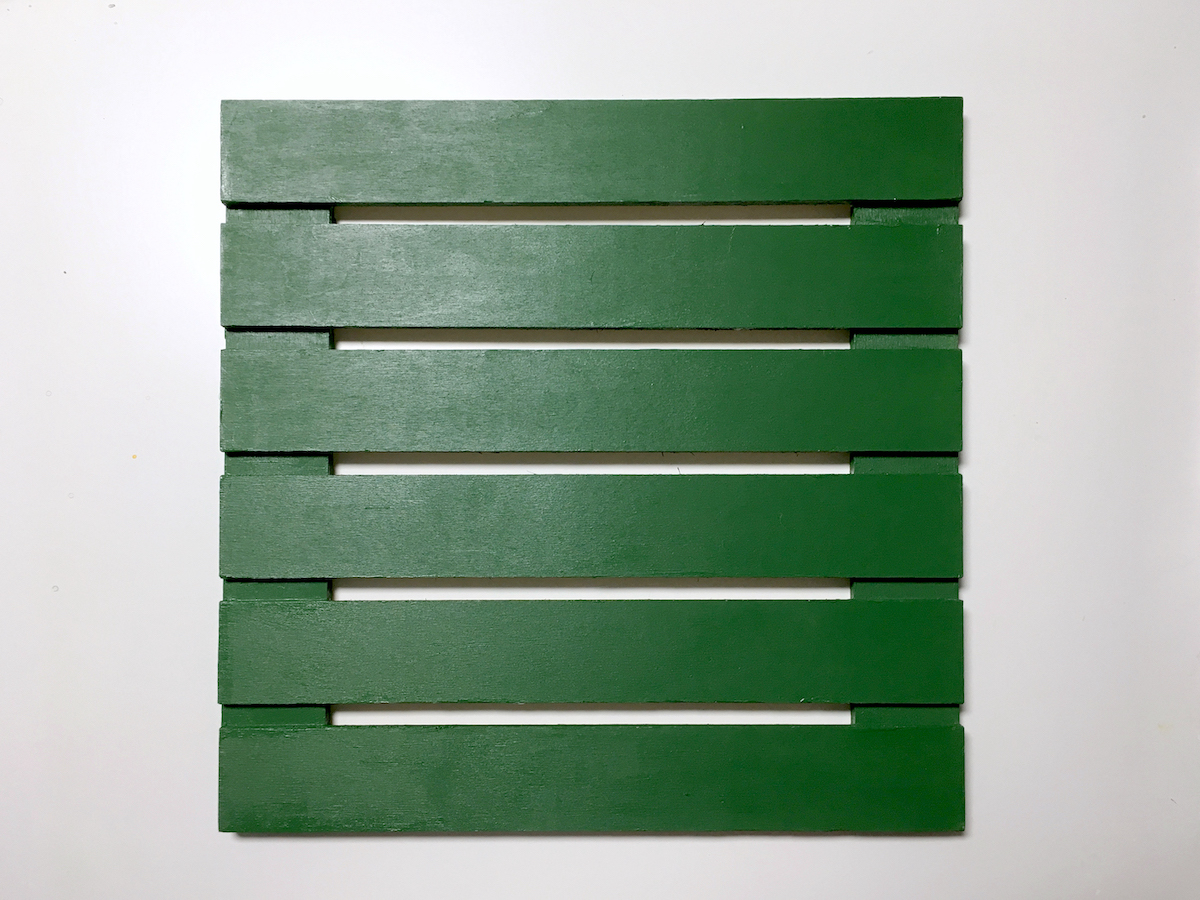
Begin by painting the pallet with green paint. You can select any shade you like but I opted to go for a darker forest green.
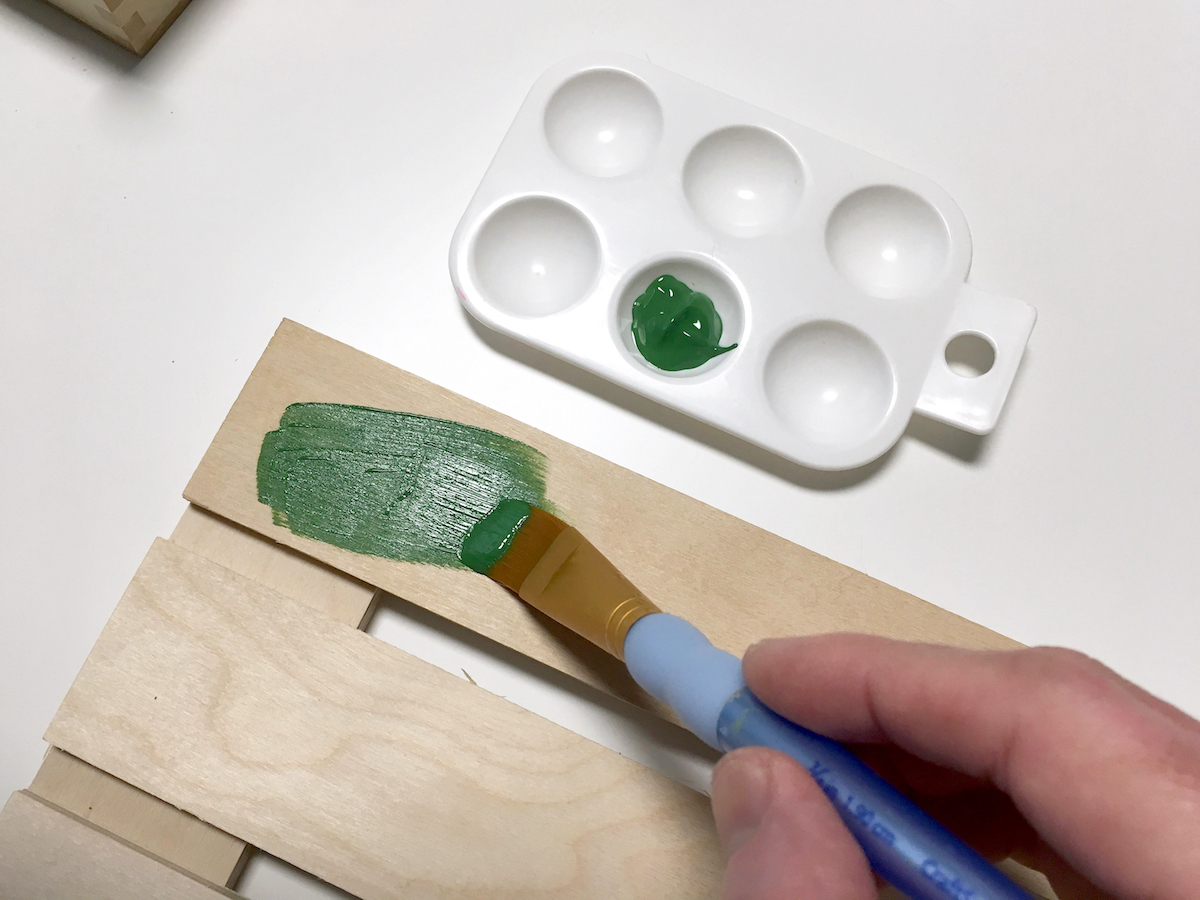
Give the pallet several coats of paint and let dry. Don’t forget to hit all the nooks and crannies (it helps to use a smaller brush). You want to cover the entire surface from every angle.
The straight up green paint is nice, but I wanted a little added “flair.” This is one of those tricks that adds a little interest to your good luck sign. Trust me. Grab a different brush with looser bristles.
Then you’re going to “dry brush” white paint on the edges of the pallet. You’ll do this by dipping the brush in a small amount of white paint, then brushing most of it off.
After you do that, brush the paint onto the edges of the pallet. You’ll see some of the paint lightly come off onto the wood – and that’s what you want! Practice first on paper if you need to. It’s really easy once you get the hang of it.
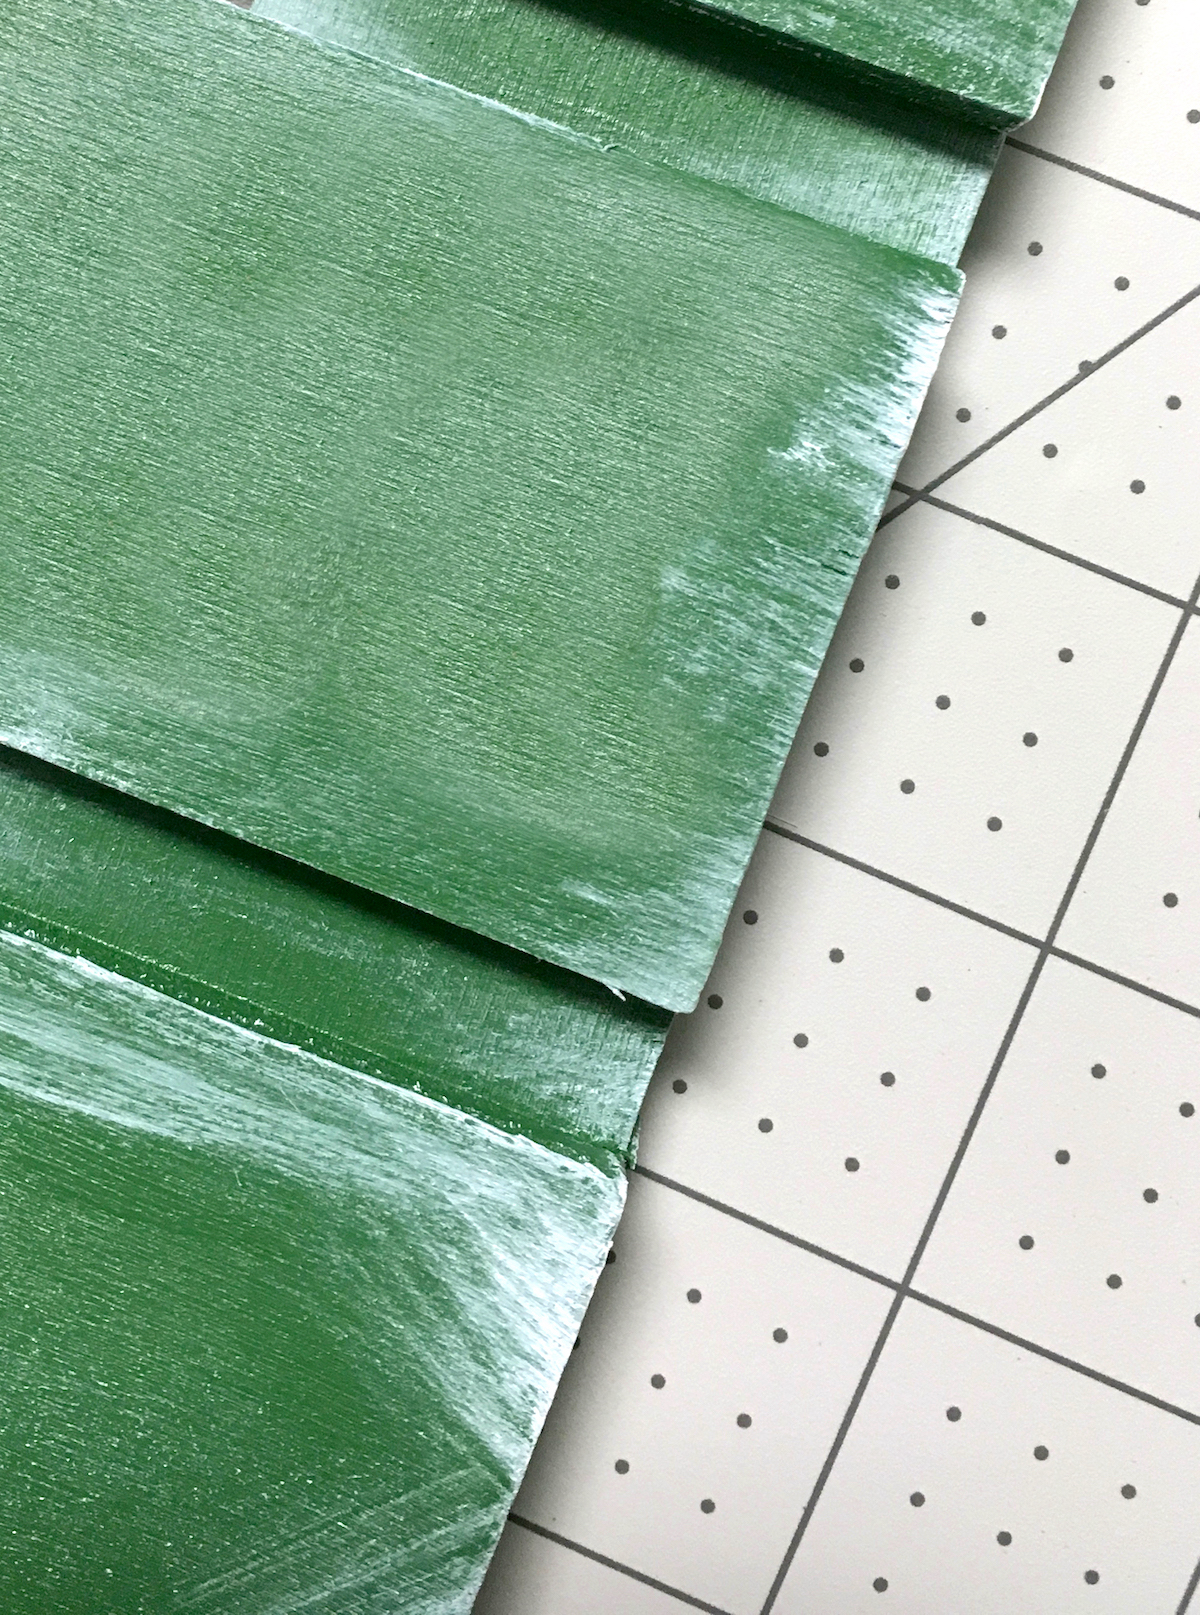
If you apply too much white, you can go back over it with green OR use a wet towel to try to rub a little off before it dries. Once you are satisfied, let your sign dry.
Paint and Decorate the Letters
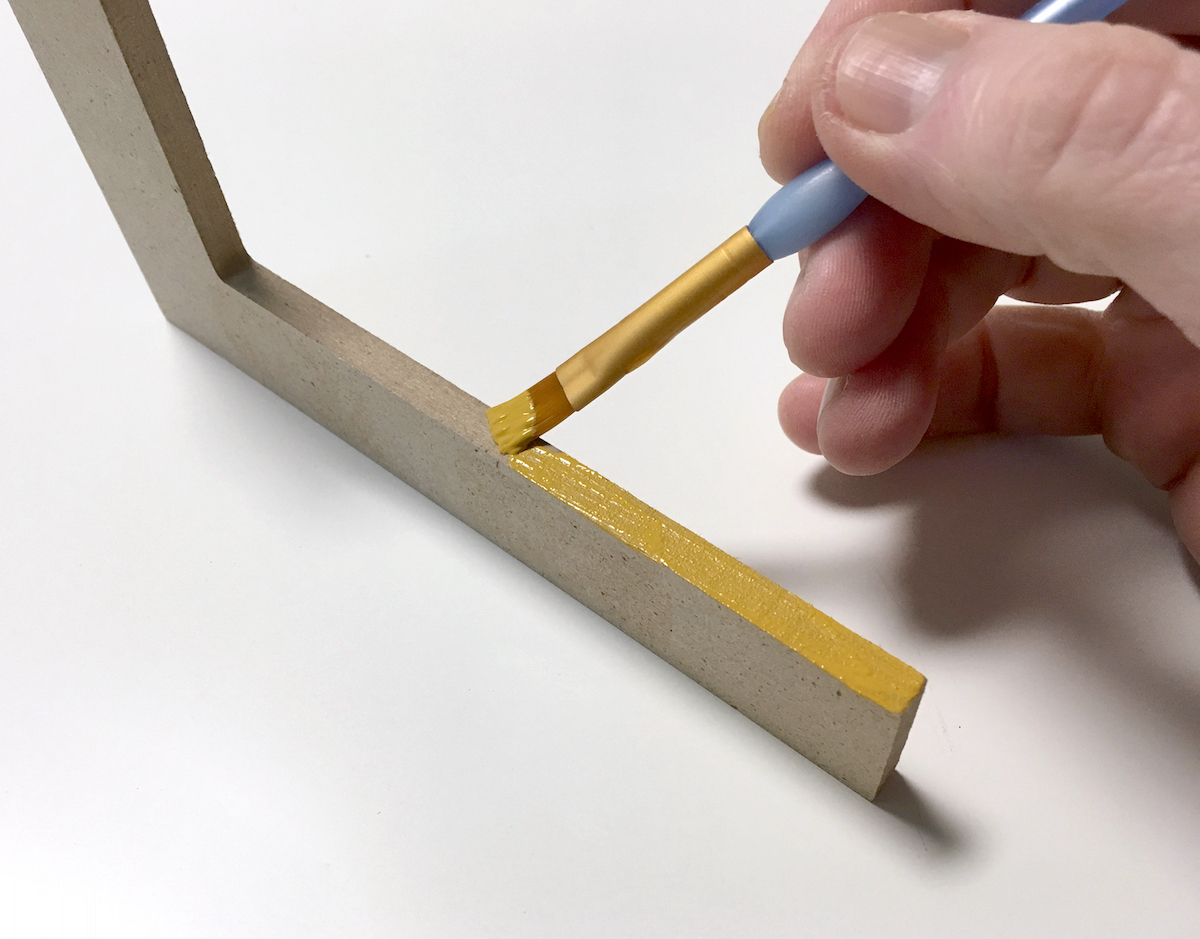
For this step, you’re going to outline the letters in paint first. This is because the glitter tape is going to be on the front of the letters, but you’ll be able to see the sides.
Use a golden yellow to paint all the sides of the letters and let dry.
At this point you COULD paint the entire letter. And then add glitter or gold glitter paint on top. But glitter is messy. And gold glitter paint requires a lot of layers. And that’s fine.
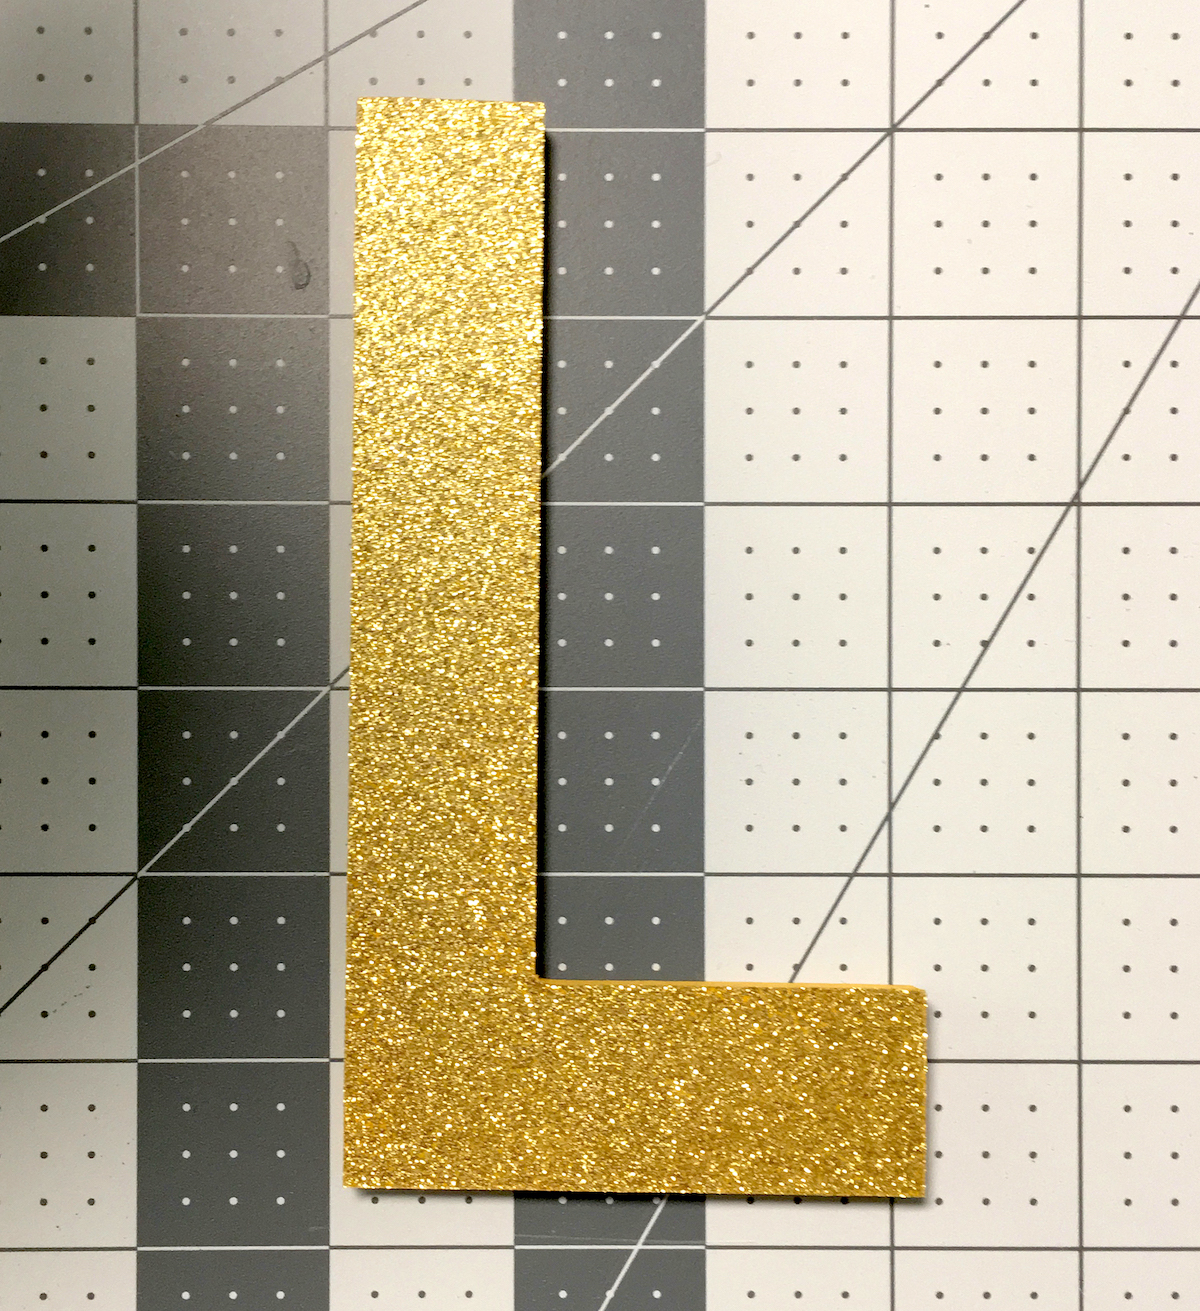
But this time I wanted it to be simple and non-messy, so I used gold glitter Duck Tape! I keep it around for situations just like this.
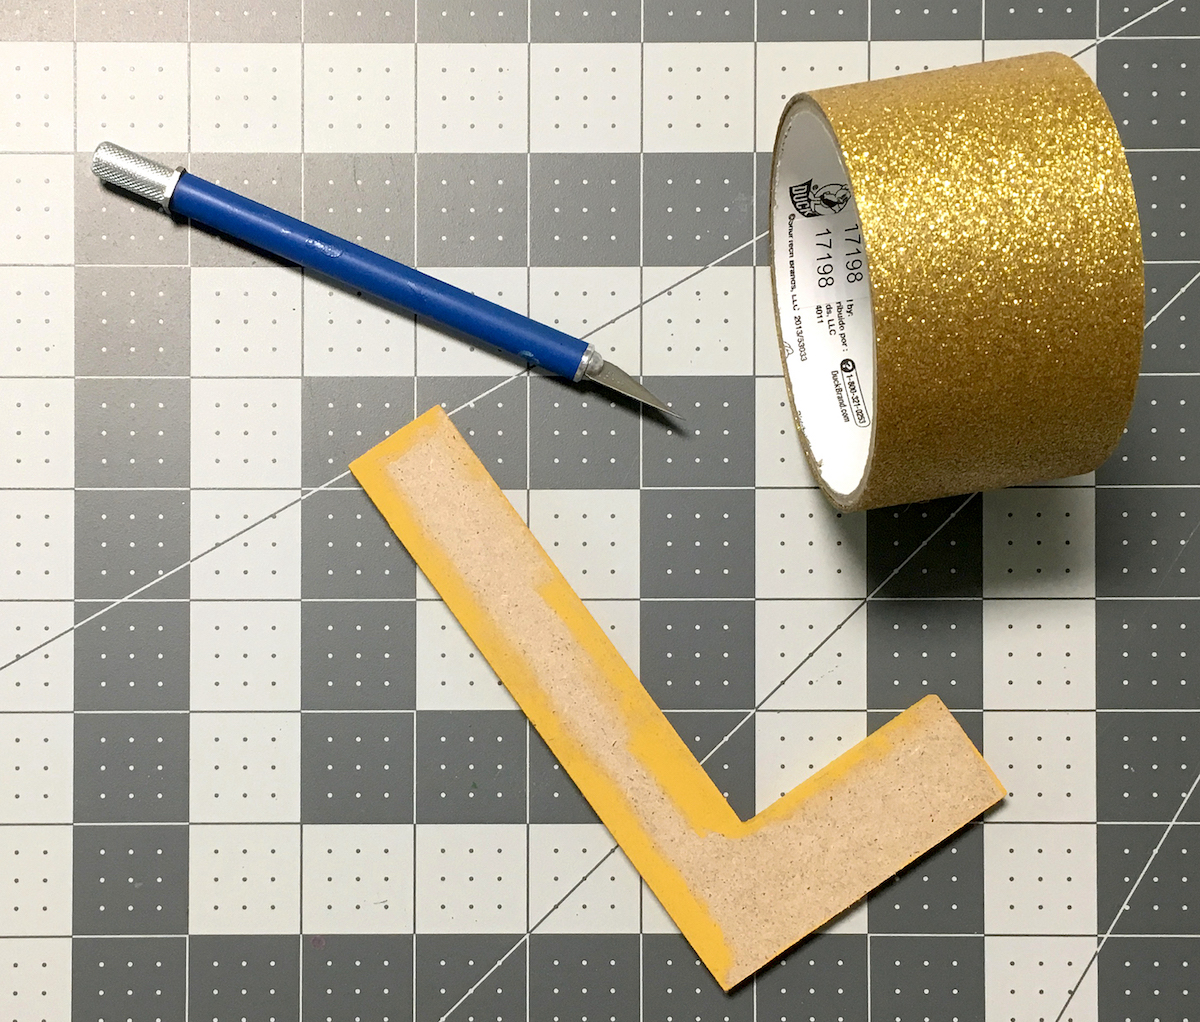
Apply the glitter tape to one side of the letter. Smooth down. Then turn the letter over and trim with the craft knife. Remove the excess tape.
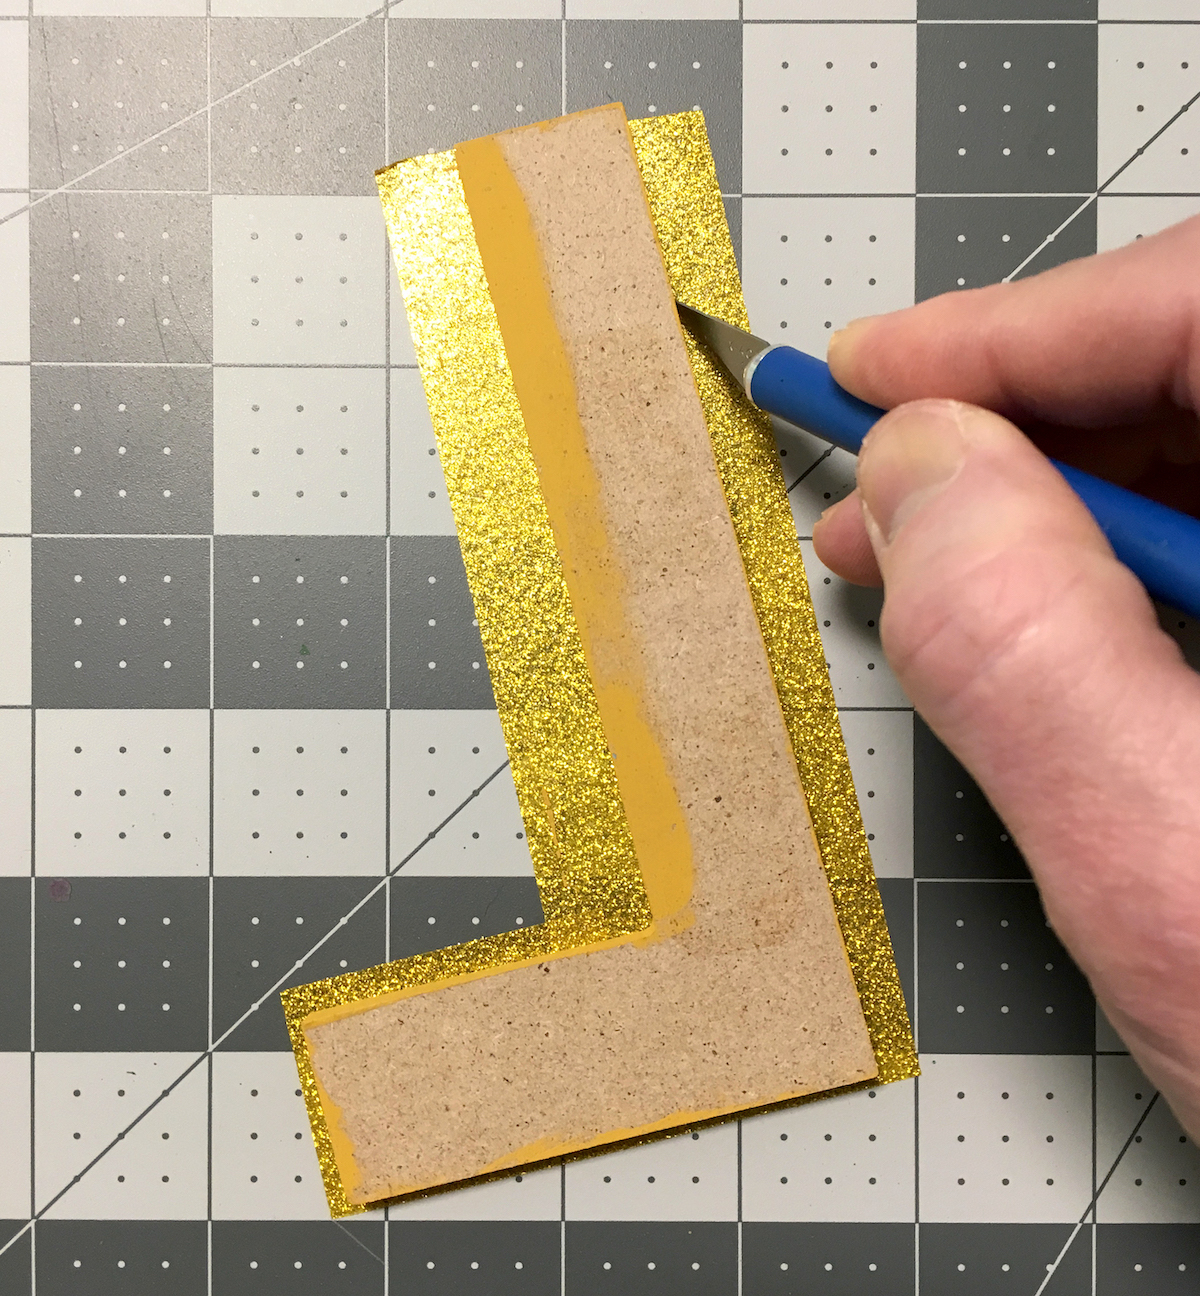
Repeat with the other letters. Make sure to tape on the right side of the letter! How do I know this? Don’t ask.
Glue the Letters
Time to glue the letters to your St. Patrick’s Day sign! Place the letters first, before gluing them into place. Make sure you like the arrangement.
Glue down and let dry.
Add the Shamrock Accents
While the letters are drying, go onto your computer and download some shamrock clip art. Print it out and use it to cut some shamrocks out of the gold glitter tape.
You can also freehand your shamrocks if you choose.
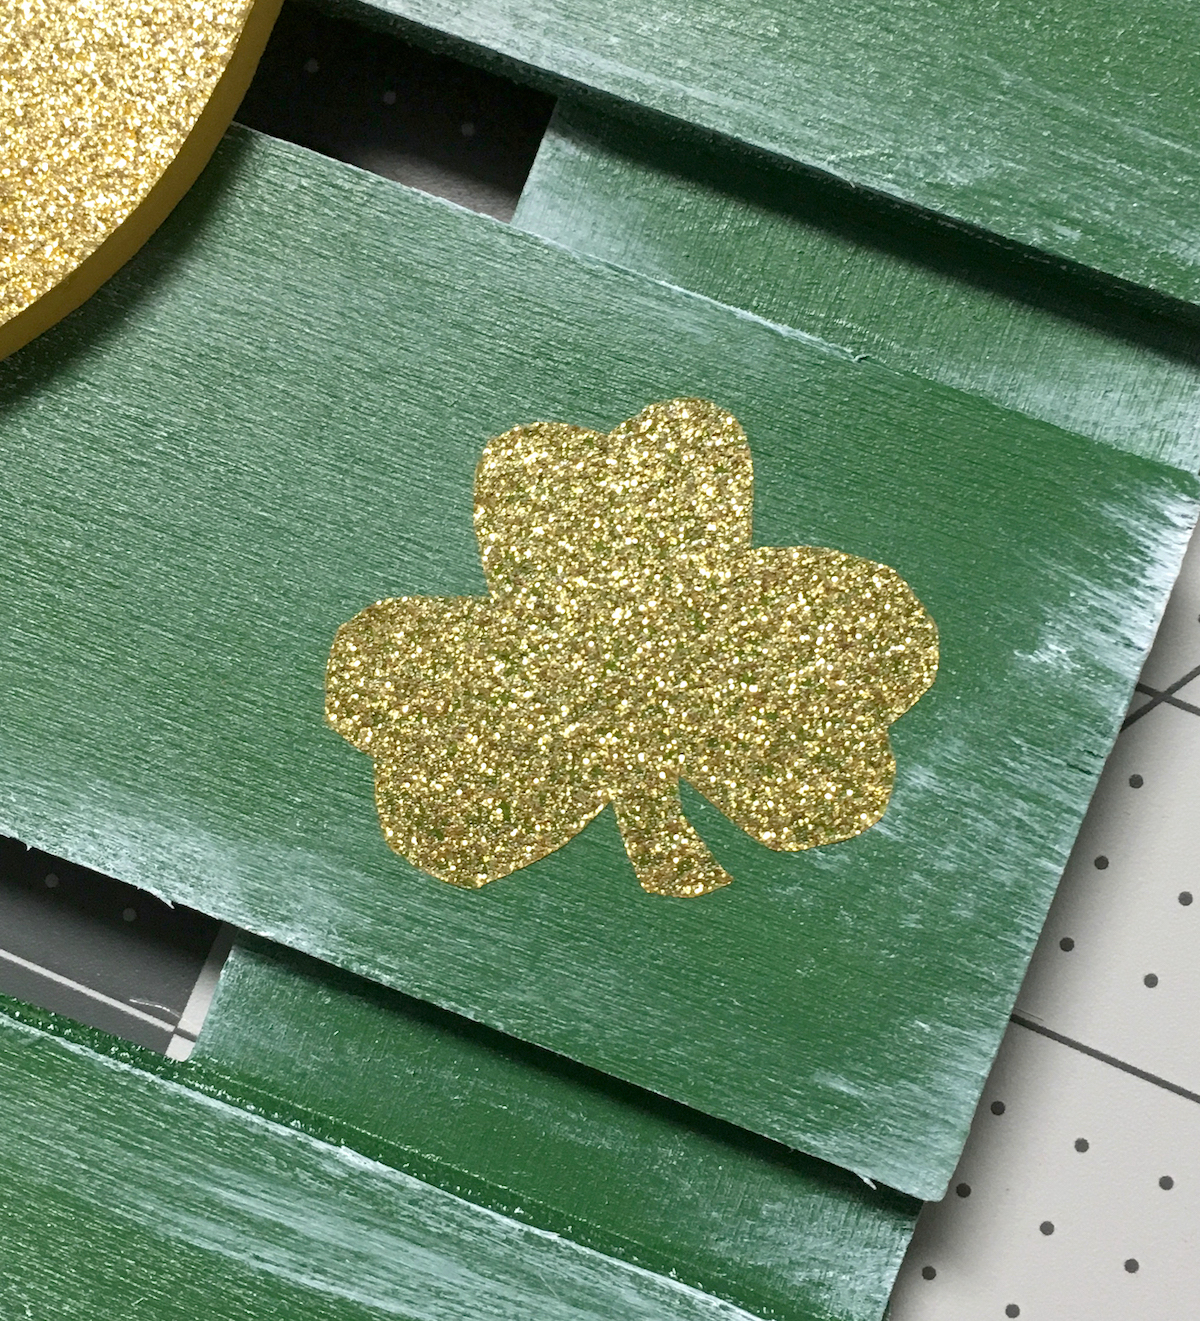
I made six to spread around the pallet. I really love the way my good luck sign turned out! What makes me happy is that it’s cute St. Patrick’s Day decor without being too crazy or overwhelming. Plus it was easy!
If you enjoyed this St. Patrick’s Day good luck sign, leave me a comment. I’d also love for you to check out these other ideas: