DIY Magnets: Fun, Easy, and Perfect for Gifts
Learn how to make these DIY magnets using dollar store supplies. These are a great handmade gift idea and perfect for beginning crafters.
Skills Required: None. Even if you’ve never crafted before you can make these, using the paper or photos of your choice. They’re easy enough for kids to try as well.

Are you ready to add a touch of personality to your fridge? Today I’m going to show you how to make one of the easiest crafts ever: DIY magnets.
Whether you’re a seasoned crafter or just dipping your toes into the crafting pool, this project is a breeze and super satisfying. Plus, homemade magnets make simple-yet-cute gifts that everyone loves – sometimes even more than the elaborate crafts you might spend hours on.
What’s great about these magnets is that they’re not only fun to make but also incredibly budget-friendly. You won’t need a long list of supplies. And you can get these all from the dollar store!
Just grab some flat glass marbles, your favorite washi tape, Mod Podge or spray adhesive, and, of course, the magnets. Voila! You’re all set for a fantastic crafting session.

Now, let’s talk about how easy this project is. If you have kids, this is a perfect way to get them involved. They’ll love picking out washi tape patterns and watching as their designs come to life under the glass marbles. It’s a hands-on activity that sparks creativity and results in something useful – win-win!
And if you’re looking for a thoughtful gift, look no further. Birthdays, holidays, or just because – they’re a sweet, personal touch that shows you care. You can tailor them to fit any theme or personality, making them a truly unique present.
As far as durability, using spray adhesive or Mod Podge ensures that your designs stick well and last long. The adhesive forms a clear, moisture-resistant bond, perfect for a kitchen environment where your magnets will get plenty of use.

So, roll up your sleeves and get ready to create some magic. Follow the tutorial below, and in no time, you’ll have a set of beautiful, homemade fridge magnets that’ll brighten up your kitchen or make someone’s day extra special. Ready to get started? Let’s go!
Gather These Supplies
- Spray adhesive or Mod Podge
- Flat glass marbles – mine are from the dollar store
- Washi tape – patterns of your choice
- Scrapbook paper – white, a few sheets
- Magnets
- E-6000
- Scissors
Tips and Thoughts for This Project
You can use photos for this project! Make copies of photos; don’t use photo paper. I recommend printing them out on laserjet if possible.
If you have an inkjet printer and want to use Mod Podge to attach them, spray both sides of the printout with hairspray or spray sealer and let dry for several hours. This is so the ink doesn’t bleed.

These don’t take long to make at all! What do you think of my DIY magnets? What pattern of washi tape or photos would you use? Let me know in the comments!
DIY Magnets
Equipment
Materials
- Spray adhesive or Mod Podge
- E-6000
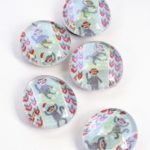
- 5 Flat glass marbles
- 2 rolls Washi tape 2 coordinating patterns
- 2 sheets Scrapbook paper white
- 5 Magnets
Instructions
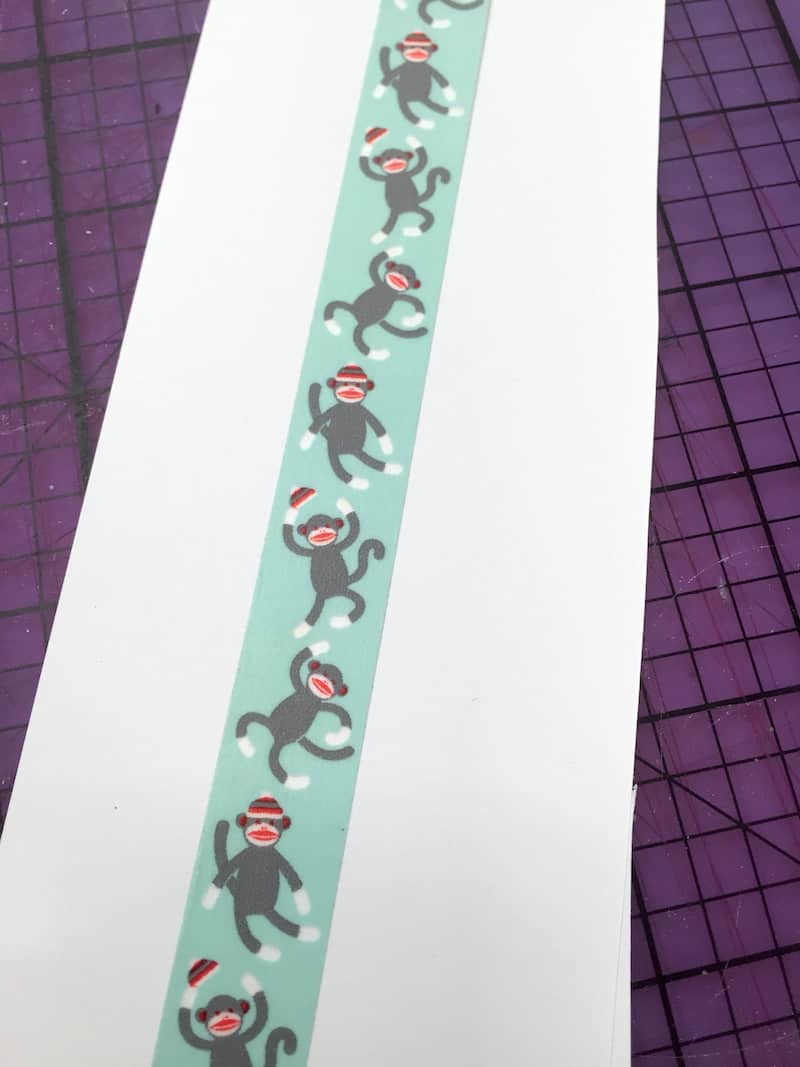
- Lay a sheet of scrapbook paper on your surface. Place a long strip of the washi tape down one side of the paper.
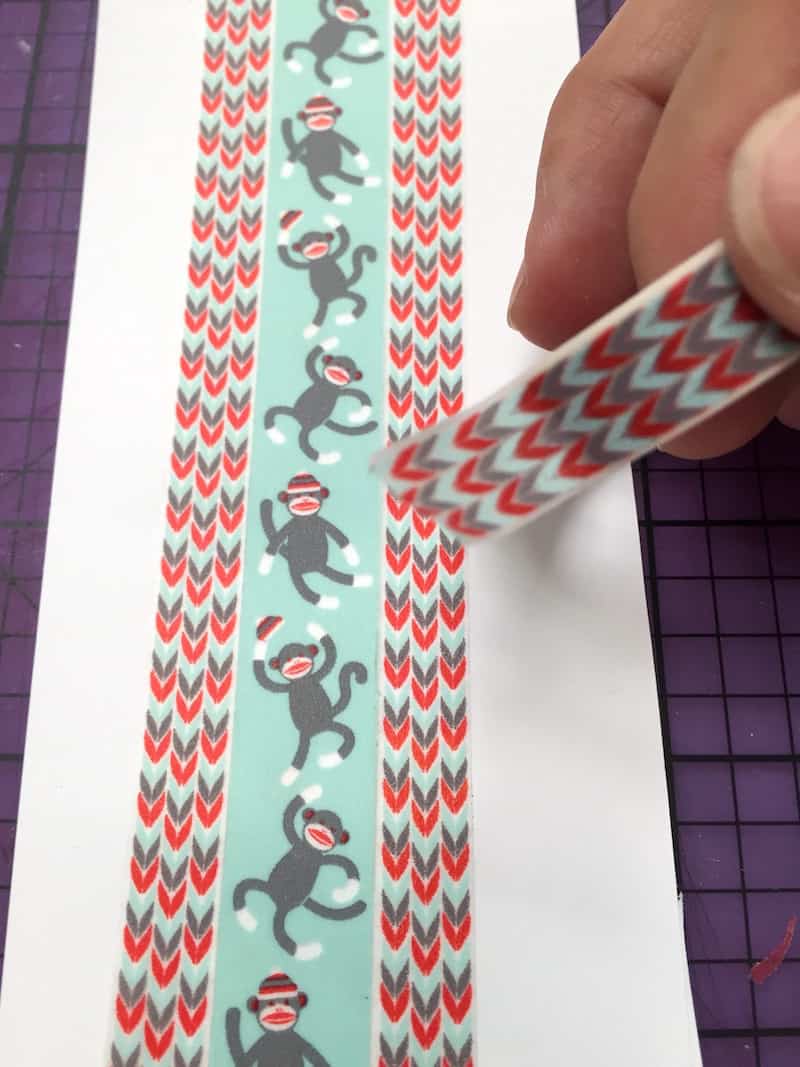
- Place a complementary pattern of washi tape down either side of the center piece of washi tape. The tape should be wide enough to completely cover the back of the glass marble.
- Spray the adhesive spray on the washi taped paper and press the marbles down. If you use the Mod Podge, brush a light layer on the paper and press down. Let dry.
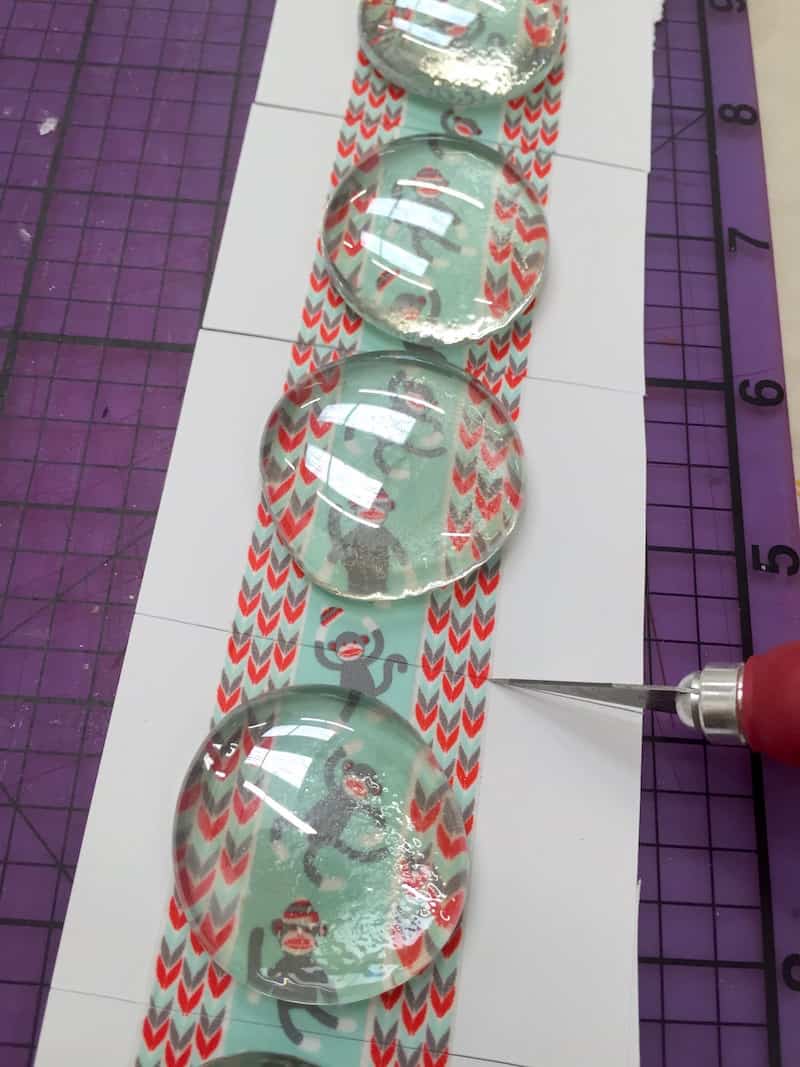
- Cut between the marbles with scissors or a craft knife to separate them from each other. Trim to remove excess paper.

- Attach the magnets to the back with E-6000 or another strong craft glue. Let dry for 24 hours before using.
Notes
If you liked this project, here are some other ideas I think you might enjoy:


As part of my arts & crafts repertoire, I diamond paint. Basically you start with an artistic picture coated with glue. This is then covered in clear plastic to keep the glue clean as you “paint” the picture with resin beads that are flat on one side and faceted on the other. These “diamonds” are then placed on the glued surface by following a placement code to complete the “painting”. As you progress placing the diamonds, you peel back the plastic cover sheet. To keep the plastic in place, you use a magnet [decorated as you have in your DIY fridge magnets] to keep the clear cover sheet from falling back on to your work. These are known as cover minders. All I would have to do is add another magnet so as to sandwich the cover between the flat marble and the 2nd marble. My apologies for being long winded. But I must thank you for the great, creative & inexpensive idea for cover minders. Ironically, washi tape is used regularly to frame your diamond painting to frame your diamond painting! Thanks again and happy crafting.
could we do pins instead of magnets?
Hi Maria! Absolutely – you can do anything you like. I’d just glue thumbtacks to the back for pins!
Oh ok thanks for your quick reply. I found several patterns on amazon but not the monkeys
I’d try Etsy – I’m sure one of the sellers would be willing to ship to you! I saw some patterns for sock monkeys on there 😀
I just discovered your blog.
And I come across this great DIY idea.
I’m going to guard him for this weekend and do it with my kids.
Great thanks a lot.
I live in Europe, I would like to know where I can find his patterns ?
Hi Angela! I just got my washi tape at the craft store. I’m not sure if they would have sock monkeys anymore; I would just pick a fun pattern that you like! Thank you!