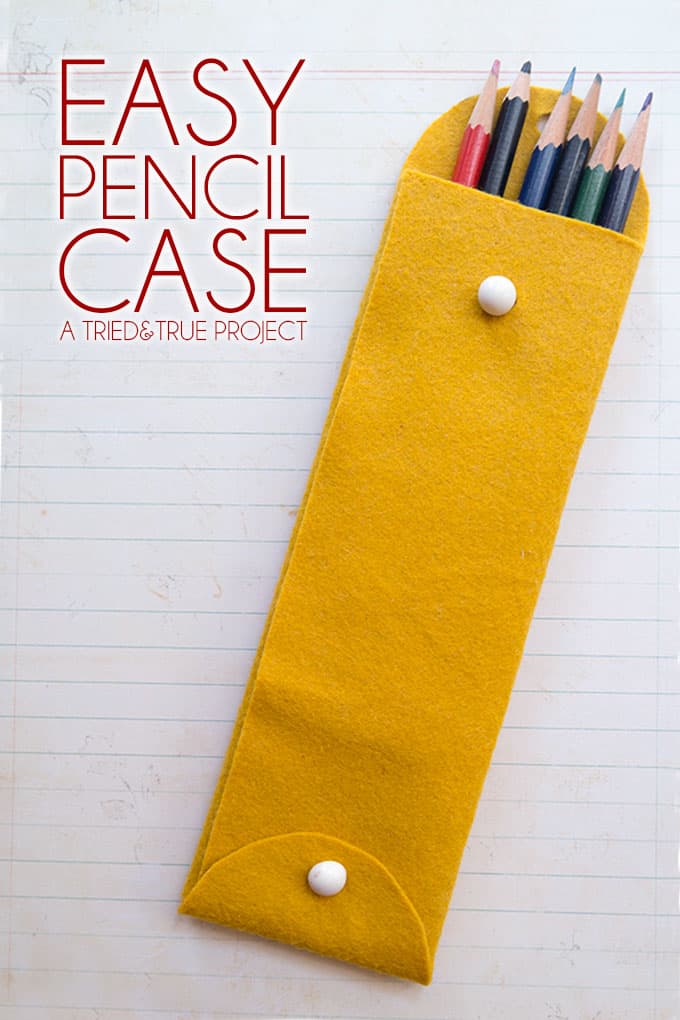
Hand Sewn Pencil Case in Minutes (Easy DIY)
Don’t know how to use a sewing machine? It’s okay! Make a hand sewn pencil case with a few supplies in under 10 minutes. It’s REALLY easy and anyone can do it!
Skills Required: None. Even if you’ve never tackled a craft before, you should be able to do this project. I’ll walk you through it. You’re going to be cutting felt and hand sewing.
Can you believe it’s already time to start talking about back to school crafts? If you’re looking for a quick and easy way to make a pencil case, I’ve got the project for you!
My name is Vanessa from Tried & True and I’m here to show you how to make a hand sewn pencil case in under 10 minutes with only a couple of supplies.
DIY Pencil Case
What is so cool about this project is that you can make it out of one piece of felt. In four simple steps! You’re going to print out the pattern and cut, then sew on the buttons. You’ll punch holes for the buttons, then fold it all together.
If you’re ready to begin, let’s dive in!
Gather These Supplies
- Easy Pencil Case Pattern
- Wool felt
- Buttons
- Needle
- Thread
- Scissors
- 1/4″ hole punch
- Pins (optional)
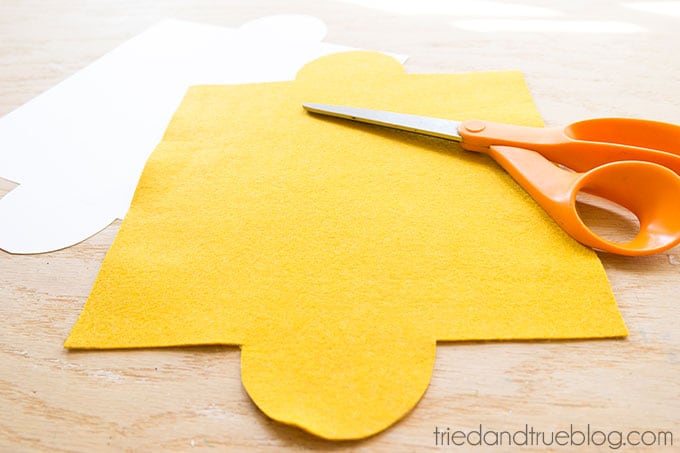
Print Out the Pattern and Cut
1. Print out the Free Easy Pencil Case Pattern and use it to cut the wool felt. You can use pins to hold the paper in place if you need to.
I chose to use wool felt in this project because it’s thicker than the felt you get at the craft store (the kids’ section). It also comes in more fun colors! You can get similar in the fabric section of the craft store, typically.
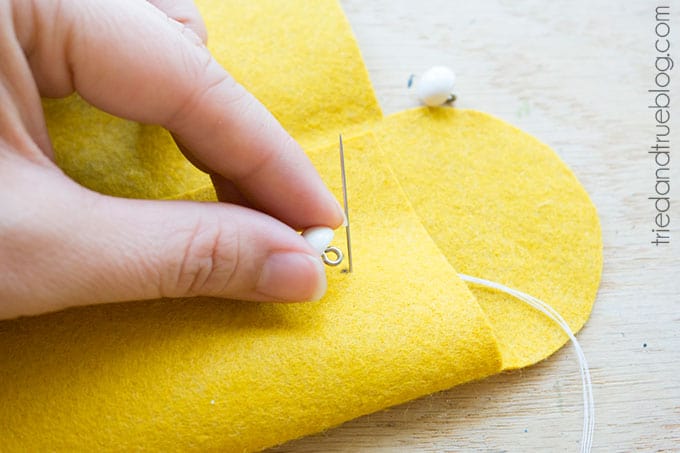
Sew on the Buttons
2. Hand sew buttons on the designated spots. When you select the buttons, consider choosing something that is a little raised – called a shank button. This is because you’re going to be overlapping felt onto the button.
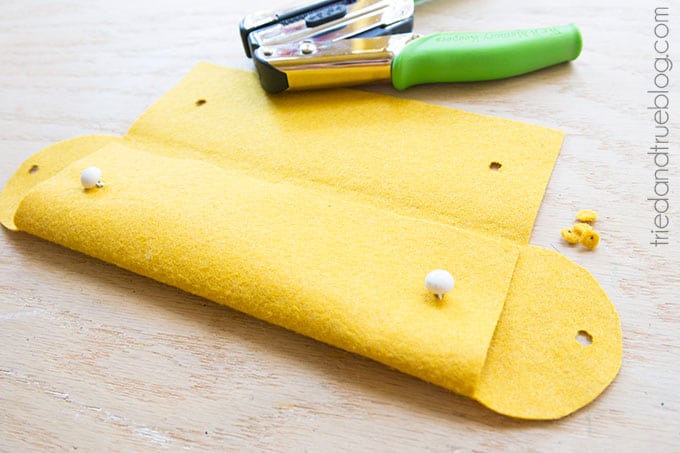
Punch the Holes
3. Cut out the holes designated on the template with either a 1/4″ strong hole punch or by hand. You’d have to be pretty good with scissors, but you could use a craft knife.
Note: make SURE not to cut the holes too big! But if it happens, you can use this tutorial.
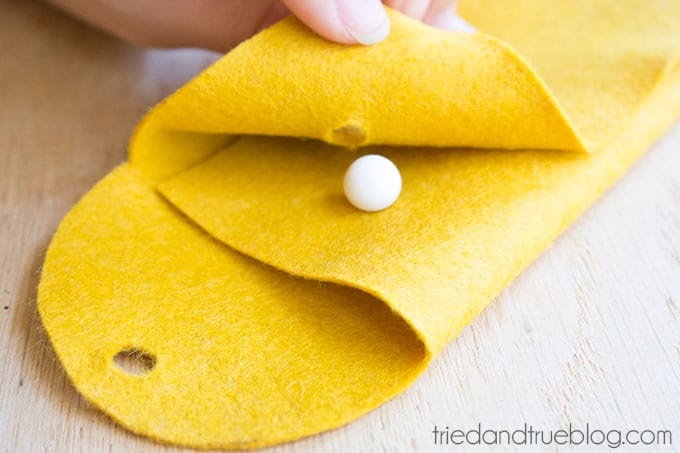
Fold the Pencil Case Together
4. Fold flaps in and button in place. Tada! So super easy, right?
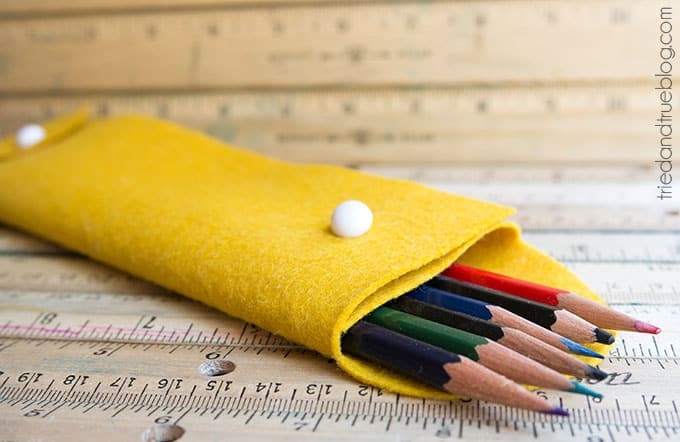
To retrieve your pencils from the pouch, you’ll simply open one end. You can make a bunch of these to keep different types of pencils and pencils organized! Plus it’s so easy to size just right.
Thanks for letting me share this Easy Pencil Case with you all! Feel free to stop by Tried & True for more time-tested Back-to-School tutorials and recipes like these: Fish Backpack, Trilingual Number Cards, and Montessori Sandpaper Letters.

DIY Pencil Case
Equipment
- Needle(s)
- Hole punch 1/4"
- Pins optional
Materials
- Easy Pencil Case Pattern
- Wool felt
- button(s)
- Thread
Instructions
- Print the pattern out and use it to cut out the felt. Use the pins to hold it down if desired.
- Hand sew the buttons using the needle and thread according to the placement on the pattern.
- Cut the holes designated on the template using the hole punch, an awl, or a craft knife.
- Fold the sides in and button, then the ends in and button. Unbutton one end to add or remove pencils.
Did you enjoy making this hand sewn pencil case? I’d love for you to check out these other ideas: