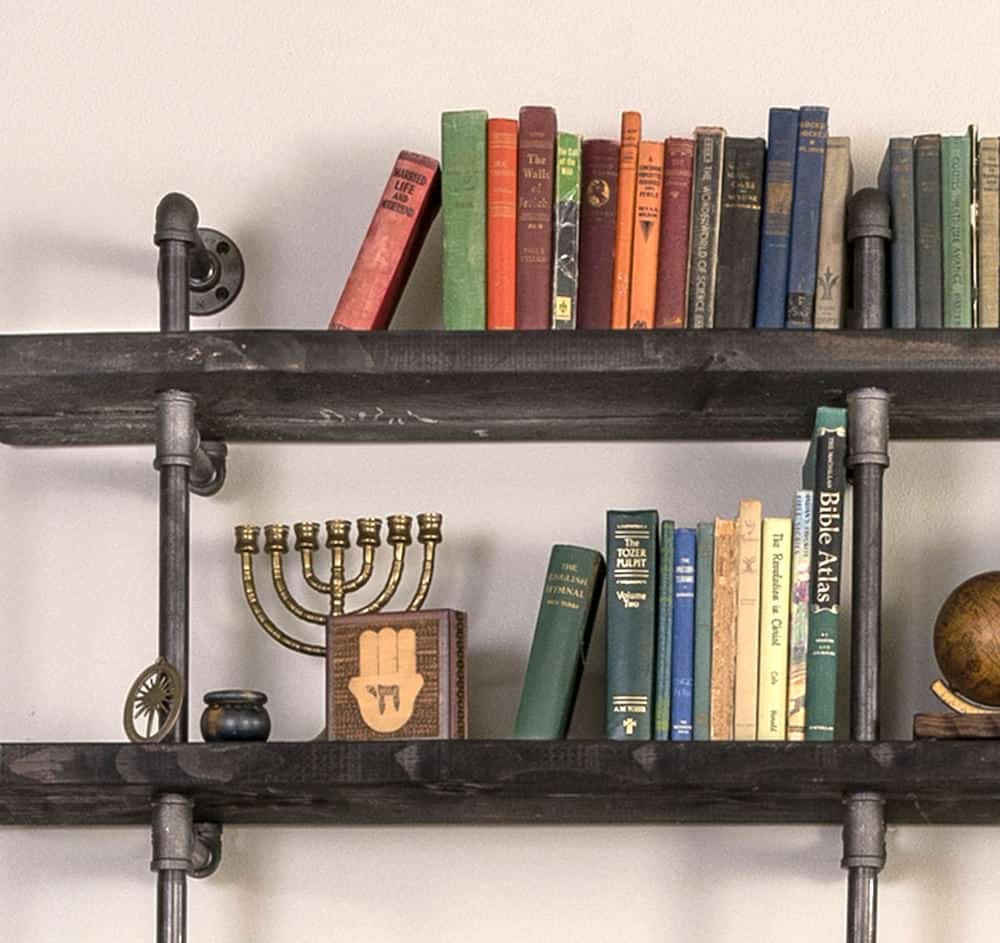
DIY Industrial Pipe Shelving On a Reasonable Budget
Learn how to build this impressive industrial pipe shelving the easy way! We’ve sourced the cheapest supplies for a pipe bookshelf if you’re on a budget. These DIY pipe shelves are perfect for farmhouse, rustic, or industrial modern decor.
Skills Required: Advanced Beginner. You’ll need to be able to stain wood and screw pipe together, as well as operate a drill. Cutting wood can be done for you at Home Depot, or you can use your own table saw.
You’ll construct this industrial pipe shelving from bottom to top, assembling the pipe and adding shelves as you go. It’s only attached at the very top of the unit using screws.
I’m not usually impressed by bookshelves, but when I went into my neighbor’s house and saw his DIY industrial pipe shelving in his living room, I couldn’t believe it.
First I figured that his pipe bookshelf must have taken weeks to put together, and secondly I was assuming this piece of home decor cost a fortune, but I was incorrect on both counts.
Pipe Bookshelf
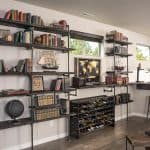
The entire pipe bookshelf structure took about 12 – 13 hours for him to make, which is impressive given that it basically covers one entire wall.
It also cost under $$$$, which is also impressive given how many parts are involved and that these DIY pipe shelves basically cover one entire wall!
After instruction on how it all came together, I’m going to teach you how to make this industrial pipe shelving yourself, and how to adapt it to your home and needs. It’s a good woodworking project for beginners.
One of the issues that people experience with DIY pipe shelves is COST. It can be expensive so I’m going to share with you the most inexpensive places to buy parts.
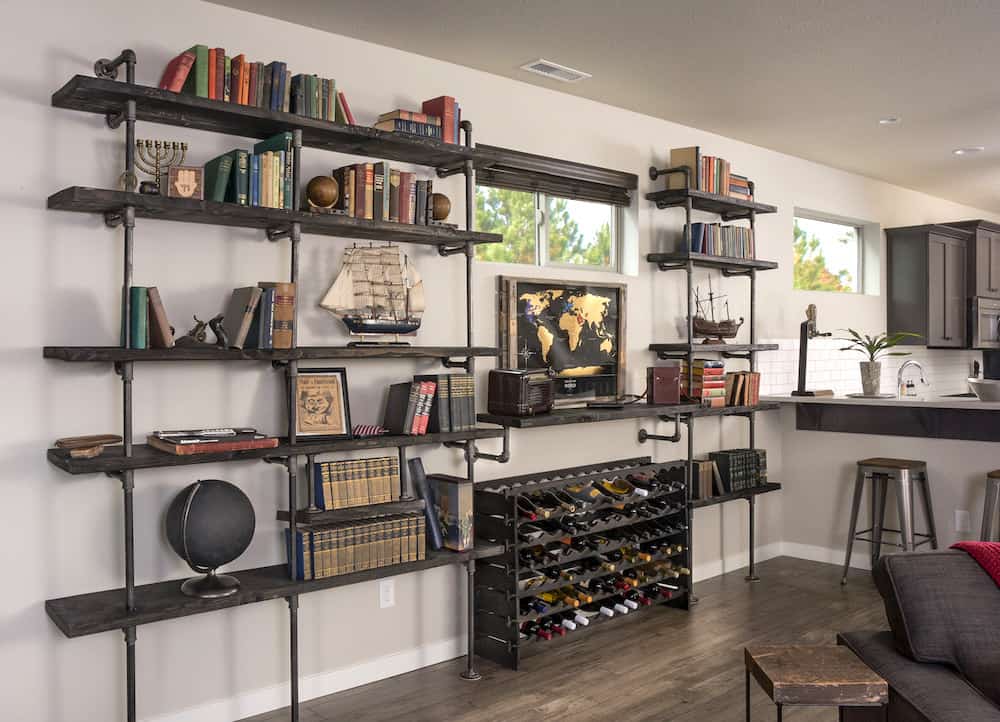
There are essentially three separate structures that make up this industrial pipe shelving:
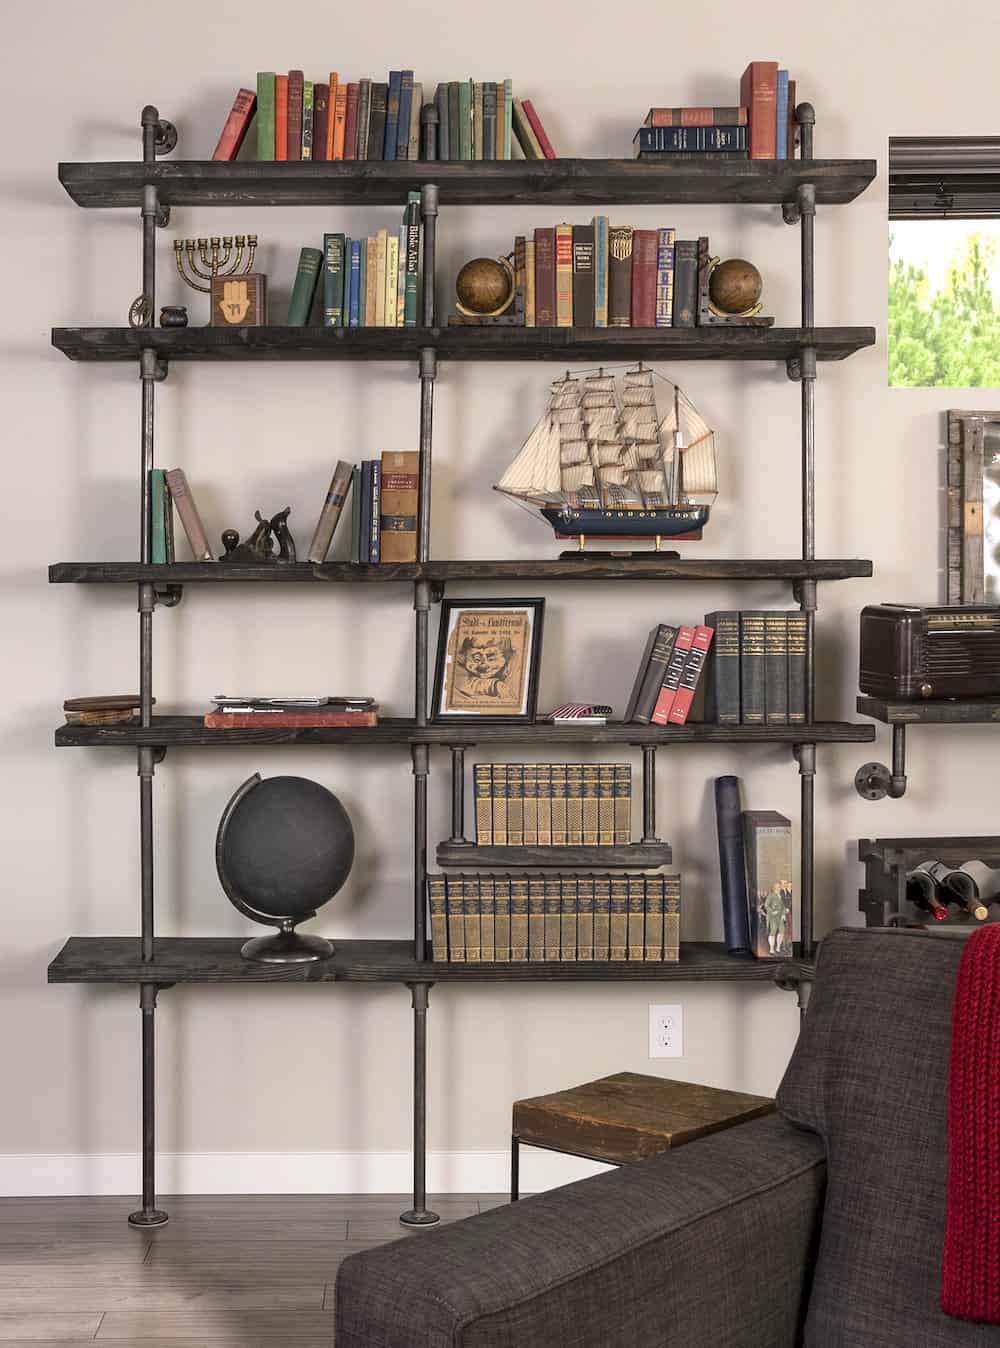
- a left shelving unit (with five shelves) that is 70″ long
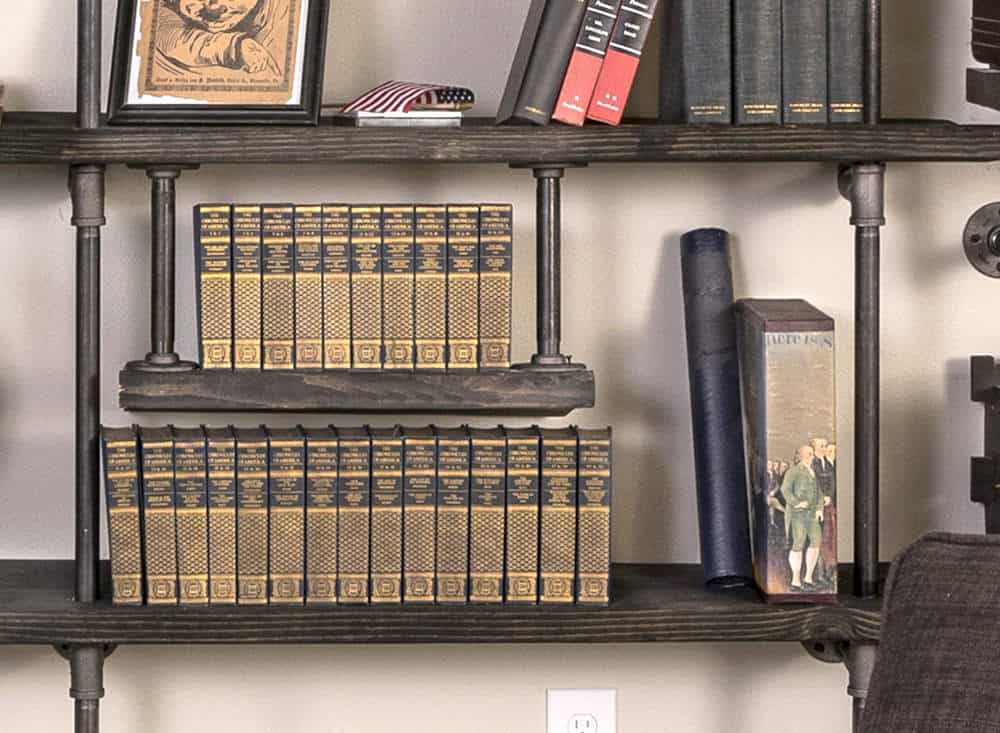
- a middle, single shelf that is 53 5/8″ long
- a right shelving unit (with five shelves) that is 36″ long
All of these DIY pipe shelves are (approximately) 11″ deep. AND the only place the left and right shelving units are attached to the wall is at the very top, using the flanges! This is so he didn’t have to drill any holes in his floor. We’ll cover that more in depth in a moment.
Where to Begin
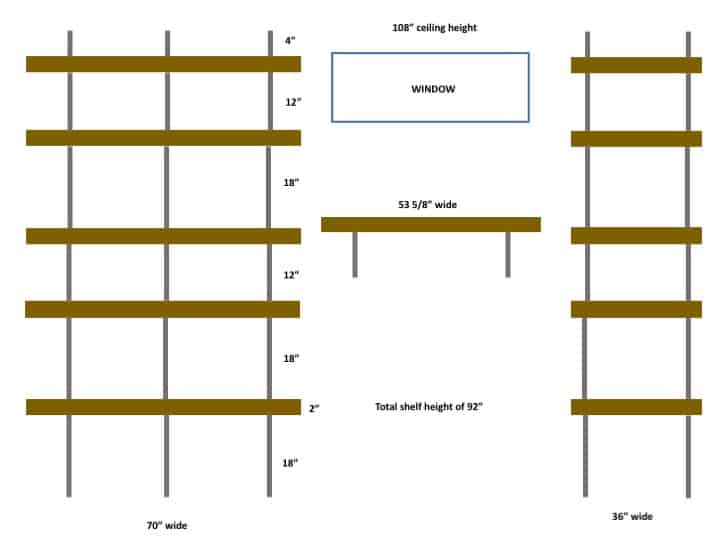
Before you start making your industrial pipe shelving, you should consider doing a drawing of your space and where you want the pipe shelves to go. If you’re just doing one shelf, this won’t necessarily be required.
But if you’re making a large industrial pipe shelving display like this one you should take a picture of your wall and print it out. That way you know where the windows are (if any) and how the industrial pipe shelving is going to fit in the space.
Another reason you’re going to do this drawing is so you know how much pipe and wood you’re going to need. You’ll want to add the shelves into your drawing. This video shows you how to make a scale drawing (he uses a regular ruler at about 7 minutes in).
You don’t need to go crazy with it; however, a basic drawing is going to tell you if your industrial pipe shelving will fit your items, and also if the shelves fit it in the space both height and width-wise. I did mine in PowerPoint since it’s easy to make boxes in the program.
Once you’re done designing, you need to buy your industrial pipe shelf supplies. This includes both the pipe and the wood. Special note about pipe sizing: the labeled pipe size and actually pipe size are not the same thing!
Refer to this chart. As long as you get flanges, elbows, and nipples with the same labeled size, you should be okay!
Basic Supply List for All DIY Pipe Shelves
- Drill with 1 1/2″ spade bit
- Table saw
- Screws – 20 plaster or drywall, unless you are going into studs (then get wood screws)
- Painter’s tape
- Minwax wood finish – this project uses Ebony 2718 and Gray 271
- Rag for applying stain
Left Shelving Unit, 70″ long
- Pine boards, 2 x 12, 6 feet long – 5
- 3/4″ black floor flange – 6
- 3/4″ black elbow – 18
- 3/4″ black tee – 15
- 3/4″ 4″ black nipple – 3
- 3/4″ 6″ black nipple – 18
- 3/4″ 12″ black nipple – 6
- 3/4″ 18″ black nipple – 9
Middle Shelf, 53 5/8″ long
- Pine board, 2″ x 12″ x 6′, cut to fit the space
- 3/4″ black floor flange – 4
- 3/4″ black elbow – 2
- 3/4″ 6″ black nipple – 4
Right Shelving Unit, 36″ long
- Pine boards, 2 x 12, 3 feet long – 5
- 3/4″ black floor flange – 4
- 3/4″ black elbow – 12
- 3/4″ black tee – 10
- 3/4″ 4″ black nipple – 2
- 3/4″ 6″ black nipple – 12
- 3/4″ 12″ black nipple – 4
- 3/4″ 18″ black nipple – 6
Where to Buy Inexpensive Pipe
You’re going to want to go online or to a local wholesale plumbing supply store. The prices we found online were considerably cheaper than what is available at the big box retailers.
My neighbor purchased his metal pipes from Supply House, with prices 50 – 75% less than at the big box home improvement stores OR other places online. I did my own research, and Supply House has the cheapest pipe parts I’ve seen as well!
I will say that purchasing your pipe online makes sense if you need a lot of it. If you’re just doing one simple shelf, purchasing from the Home Depot is fine.
The cost savings from ordering online for a smaller shelf aren’t necessarily worth paying shipping and handling, etc. And you can get everything you need in one trip. I’ll let you decide that based on the size of shelf you are making!
Where to Buy Wood and What to Use
You can get inexpensive pine from Home Depot. Pine will work well especially if you want your DIY pipe shelves to look like traditional industrial shelving – and be weathered and warped slightly when you apply the stain.
If you don’t want that look, go for pre-treated or a hard wood like poplar. However, your cost is going to go up over what pine will cost.
Cost of Project
- Left shelving – $129 piping
- Middle shelf – $21 piping
- Right shelving – $90 piping
- Wood – $100
- Stain & rags – $12
- Total cost = $352
This cost is pretty impressive based on the size of the project! Remember – this covers an entire wall!
How to Build a Bookshelf
Let’s get into the step by step. Doing a drawing of your space should give you an idea of how many shelves you want, and how long they should be.
Step One: Cut the shelves to size using a table saw. My neighbor cut:
- Left shelving – five shelves at a 70″ length
- Middle – one shelf at a 53 5/8″ length
- Right shelving – five shelves at a 36″ length
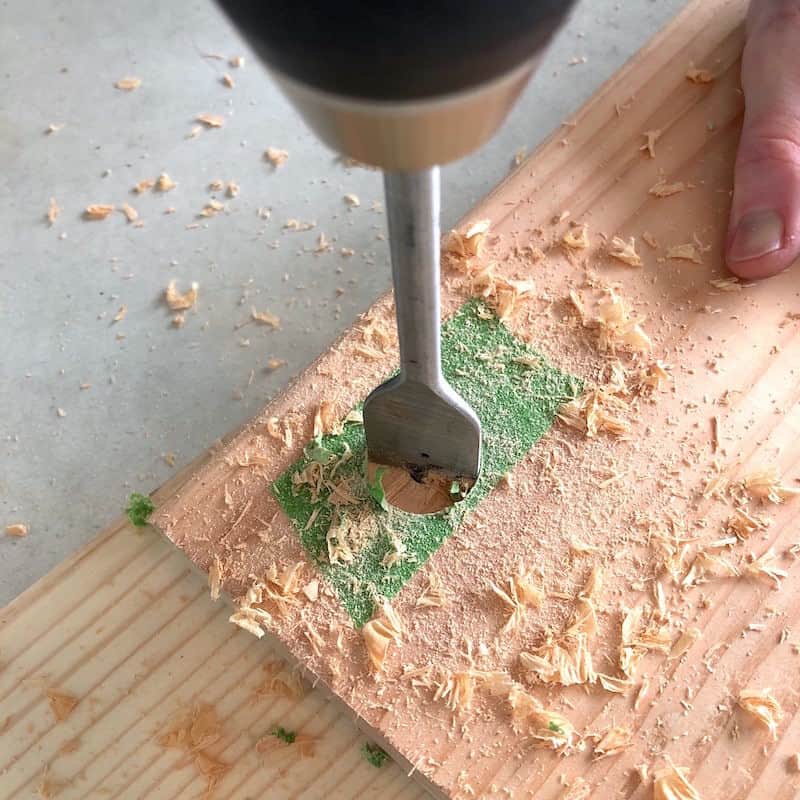
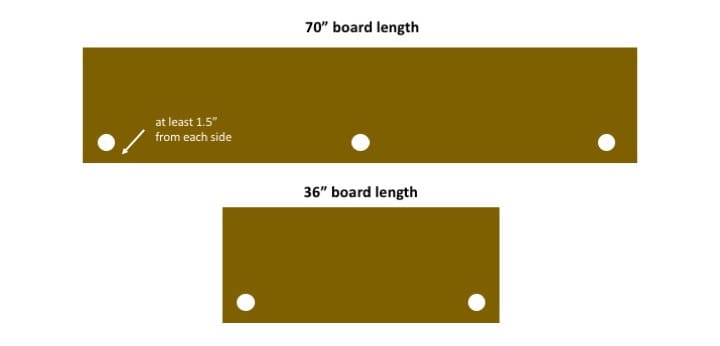
Step Two: Using your 1 1/2″ spade bit, you’re going to drill three holes through each 70″ board and two holes through each 36″ board. Refer to the diagram below for hole placement. Your holes need to be in the same place on every 70″ board and the same place on every 36″ board since you are stacking them. 😀
There are no holes in the back of the shelves – the shelves are supported by elbows in the back.
Step Three: Stain your boards. My neighbor used Ebony stain, let that dry, and them used random Gray stain in various areas for a rustic look.
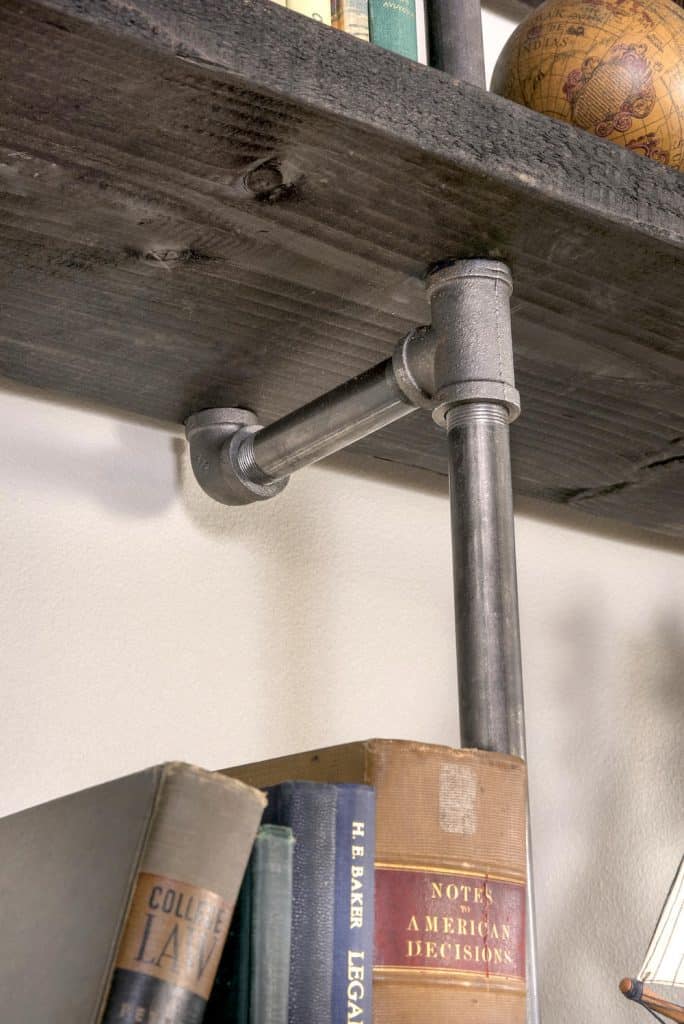
Step Four: Begin building your industrial pipe shelving. Each shelf has a long piece of pipe, tee, a second piece of pipe, and an elbow as shown above. Screwing those all together will save you time! On this shelf, an 18″ pipe went into each flange at the bottom, and then at the top a tee.
Step Five: Stack the shelves, sitting each board onto tees and then screwing pipes in above. Work your way to the top, attaching flanges and screwing those into the wall to finish.
Attaching to the Wall
You’re going to probably want someone to help hold your pipe bookshelf straight as you stack the pipes and boards. Everything can get heavy quickly and you don’t want it to dump over on you.
You’ll need a ladder to secure it to the wall. Have your friend (or two) hold it in places as you anchor it with the screws into the flanges at the top. Each flange needs four screws.
Will My Pipe Bookshelf Be Stable & Secure?
If you live in an area with earthquakes, you’re definitely going to want to secure your industrial pipe shelving to the floor as well as to the wall.
If you want extra secure-ness, you can put a set of flanges on the back (halfway up?) instead of the elbows, and screw those into the wall.
You might want to consider extra flanges if you have small children as well. My neighbor has a 9-year-old daughter and it’s never been an issue!
As long as no one is hanging on the shelves, they are fine secured at the top and not screwed into the floor.
Could I Make This a Freestanding Pipe Bookshelf?
Absolutely! You can’t make your pipe bookshelf this high – maybe two or three wood shelves maximum (with less distance between them).
You’ll want to duplicate the holes you drill with the spade bit on both sides of the shelf. Then you’ll need to purchase the same pipe and flanges from the front side, as well as a pipe piece that will go across the top and attach elbows.
What do you think of this pipe bookshelf? Would you try some industrial shelving of your own? Let me know in the comments!
DIY Industrial Pipe Shelving
Equipment
- Drill with drill bits including a 1 1/2″ Spade Bit
Materials
- Pine boards see the Notes section
- Black pipe see the Notes section
- 20 Screws – plaster or drywall unless you are going into studs (then get wood screws)
- Painter’s tape
- Minwax wood finish we used Ebony 2718 and Gray 271
- Rag(s)
Video
Instructions
- Cut the shelves to size using a table saw. See the notes for cut lengths.
- Using your 1 1/2" spade bit, you’re going to drill three holes through each 70" board and two holes through each 36" board. Your holes need to be in the same place on every 70" board and the same place on every 36" board since you are stacking them.
- Stain your boards. We used Ebony stain, let that dry, and them used random Gray stain in various areas for a rustic look.
- Begin building your industrial pipe shelving. Each shelf has a long piece of pipe, tee, a second piece of pipe, and an elbow as shown above. Screwing those all together will save you time! On this shelf, an 18" pipe went into each flange at the bottom, and then at the top a tee.
- Stack the shelves, sitting each board onto tees and then screwing pipes in above. Work your way to the top, attaching flanges and screwing those into the wall to finish.
Notes
- Pine boards, 2 x 12, 6 feet long – 5
- 3/4" black floor flange – 6
- 3/4" black elbow – 18
- 3/4" black tee – 15
- 3/4" 4" black nipple – 3
- 3/4" 6" black nipple – 18
- 3/4" 12" black nipple – 6
- 3/4" 18" black nipple – 9
- Pine board, 2" x 12" x 6', cut to fit the space
- 3/4" black floor flange – 4
- 3/4" black elbow – 2
- 3/4" 6" black nipple – 4
- Pine boards, 2 x 12, 3 feet long – 5
- 3/4" black floor flange – 4
- 3/4" black elbow – 12
- 3/4" black tee – 10
- 3/4" 4" black nipple – 2
- 3/4" 6" black nipple – 12
- 3/4" 12" black nipple – 4
- 3/4" 18" black nipple – 6
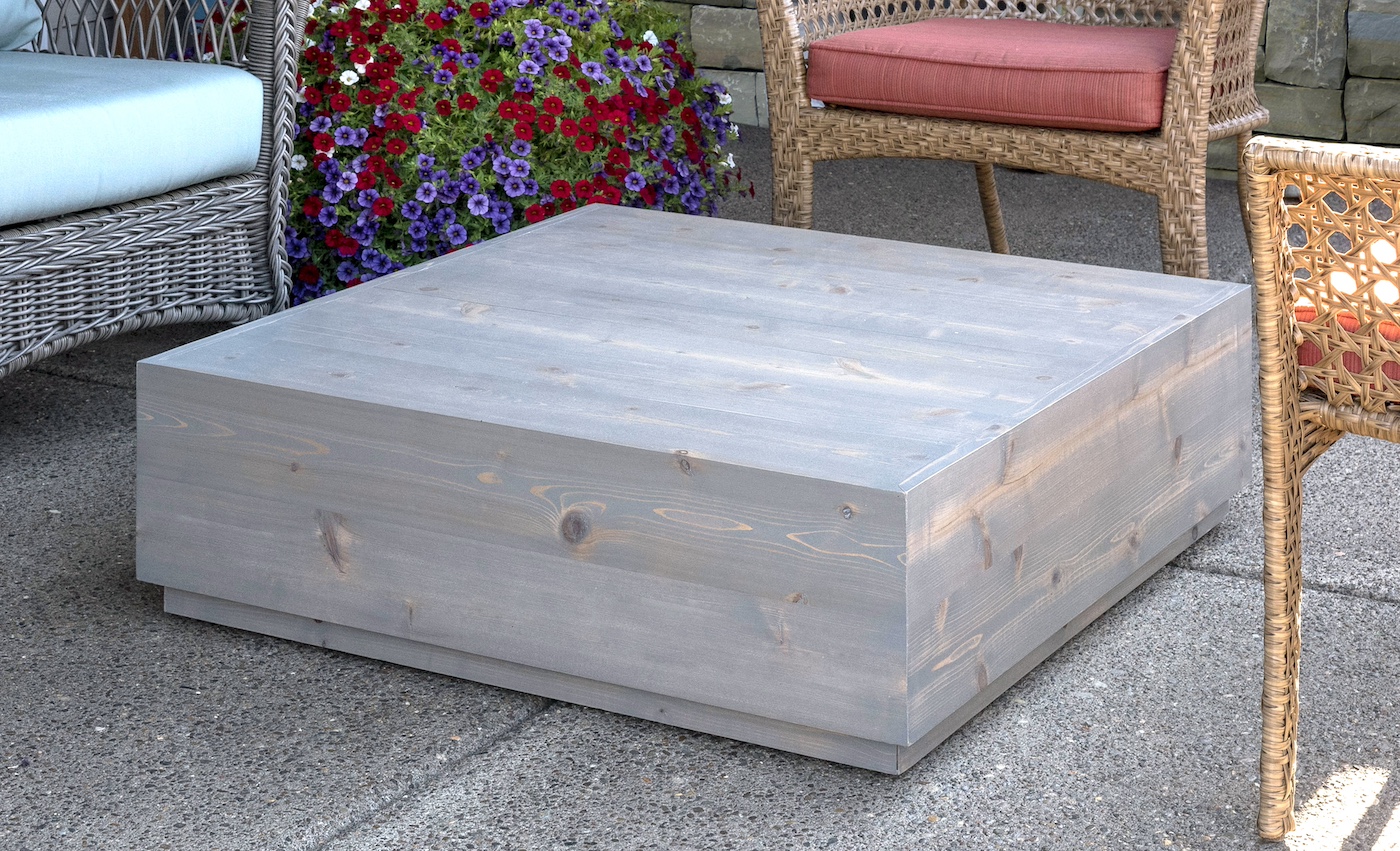
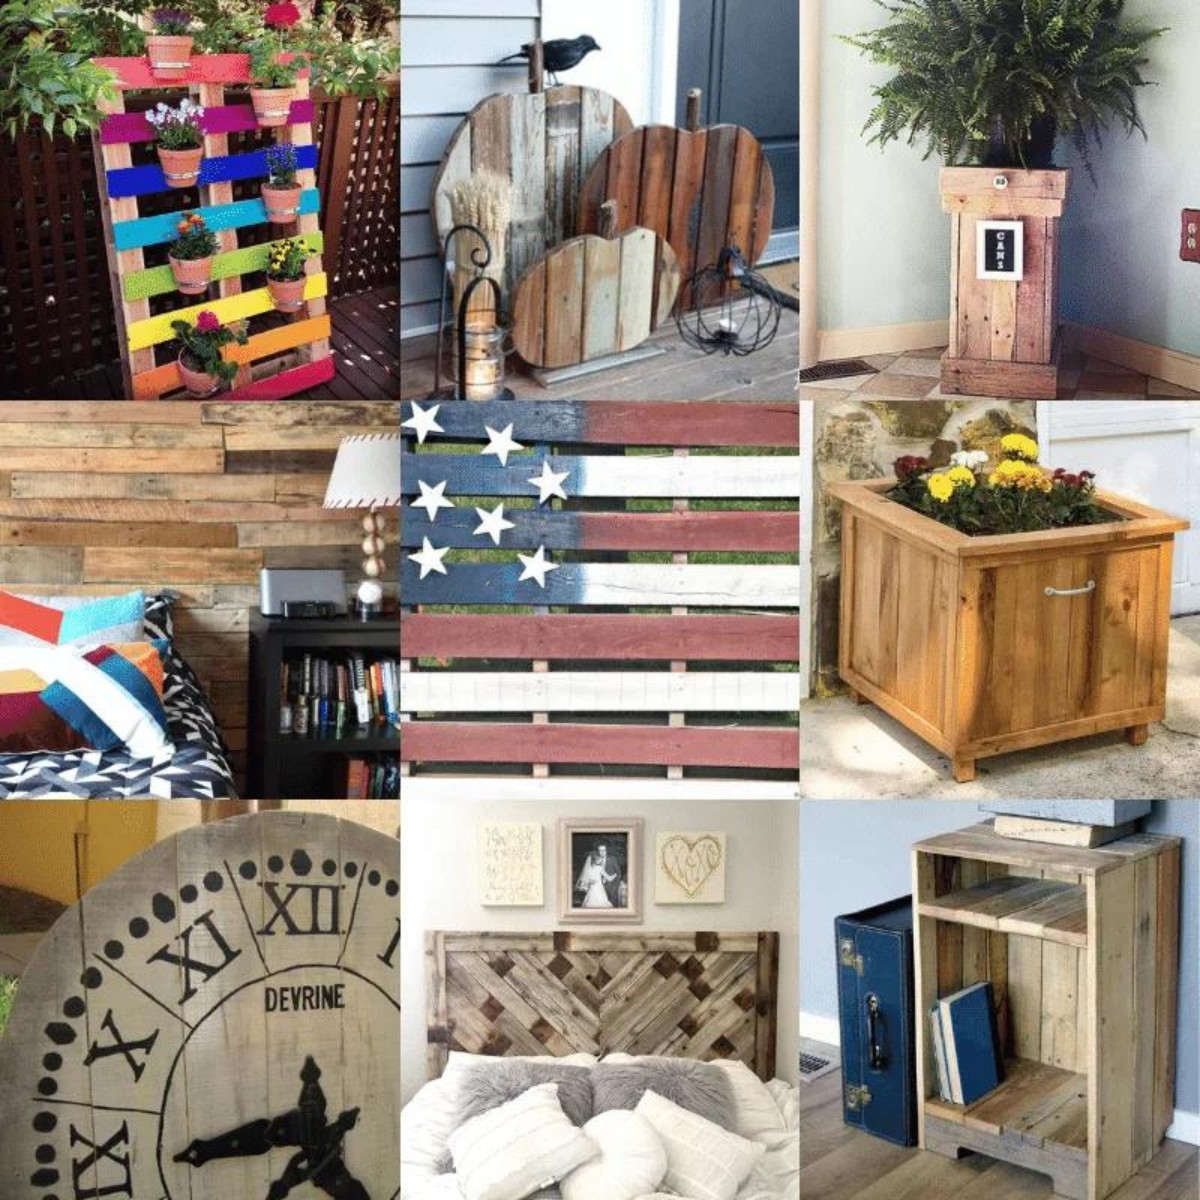
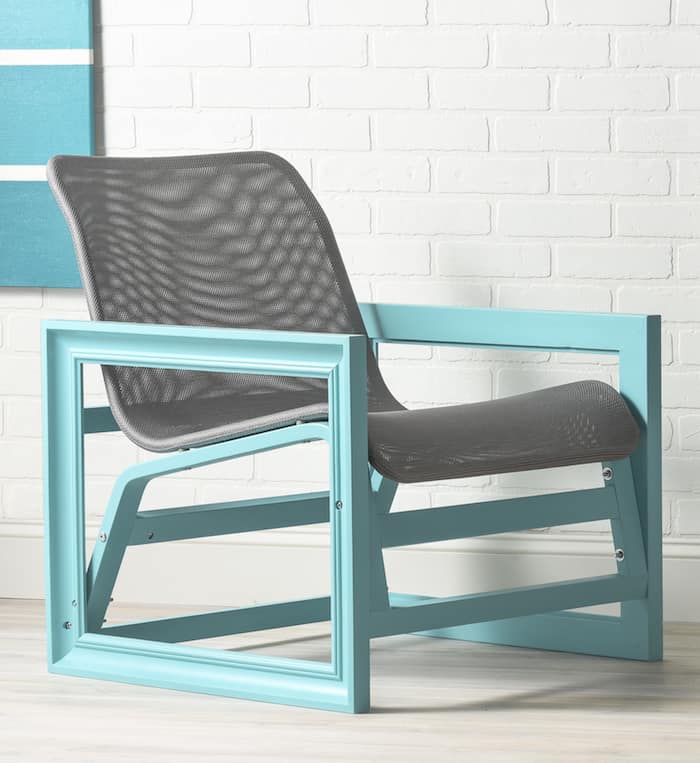
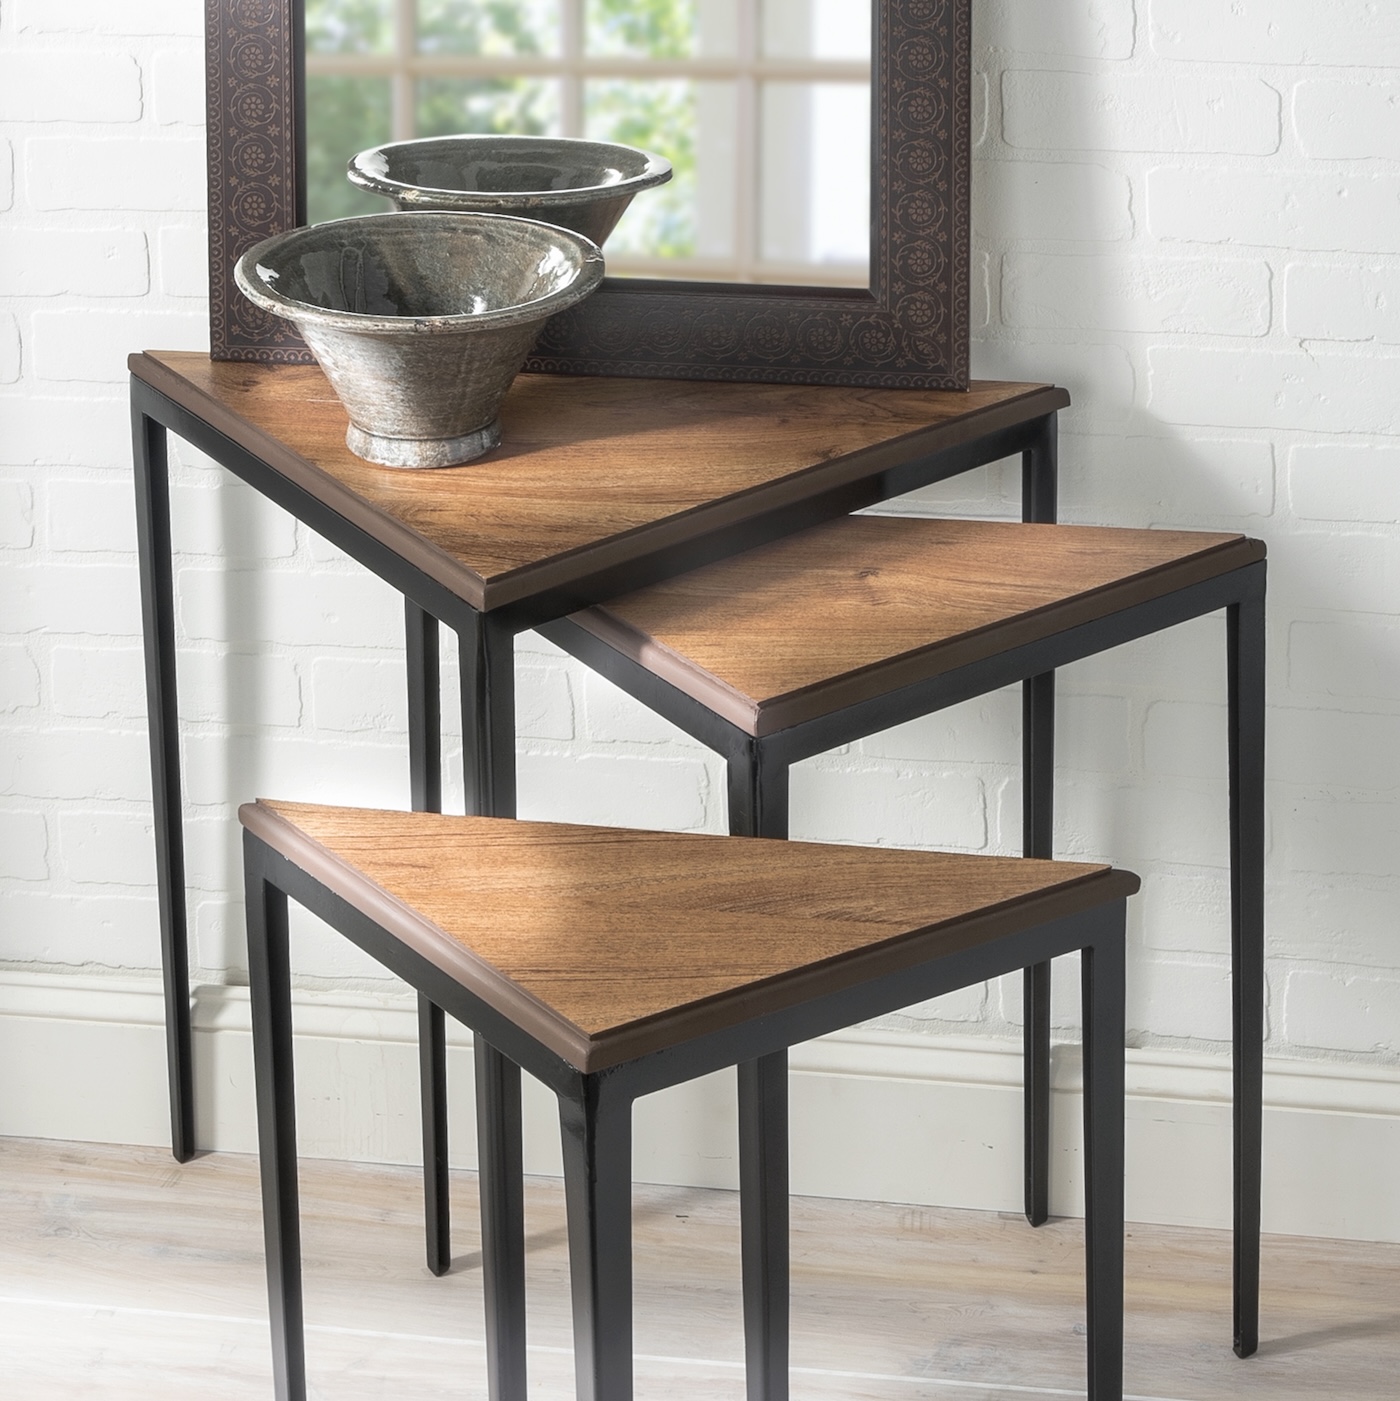
Now that you know how to build a bookshelf, you might be interested in trying the following projects:

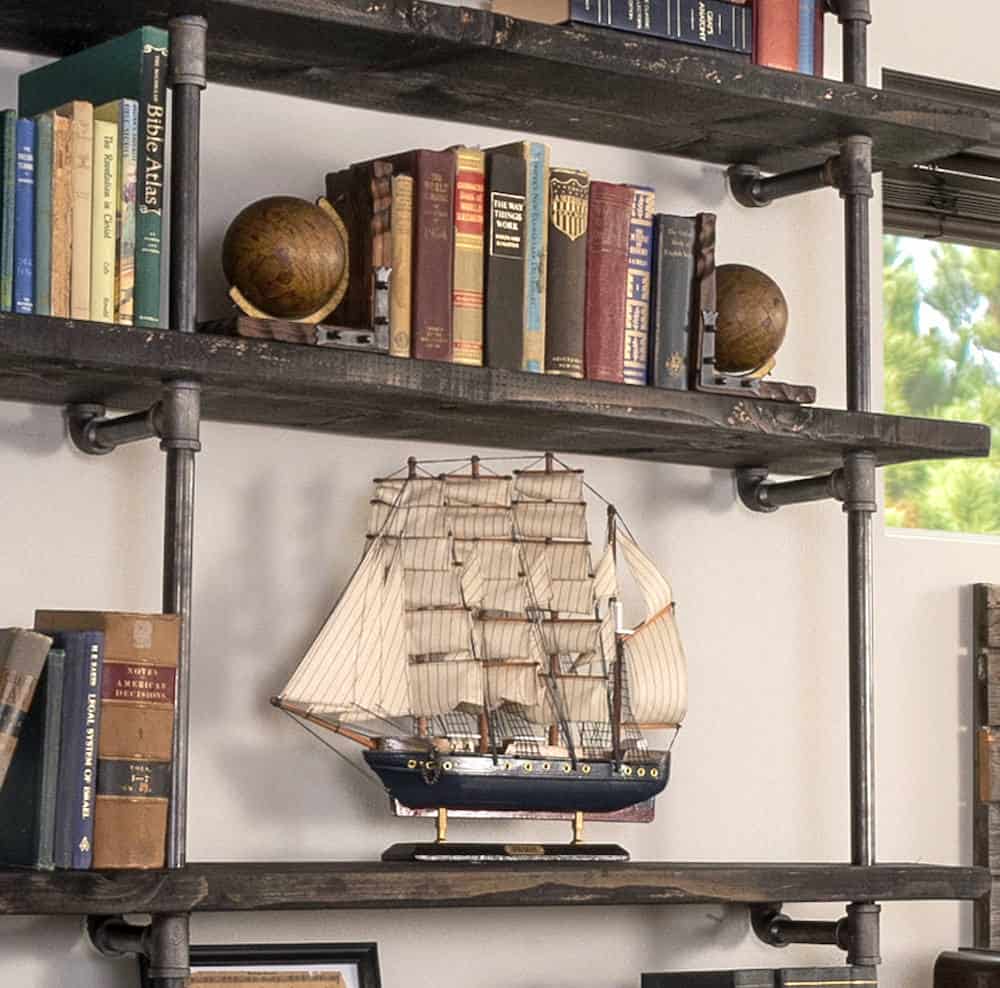
These shelves look great, and I love that they are at varying heights for interest. The “hanging” shelf section on the lower left is perfect to display that set of books. Thanks for sharing the source for cheaper pipe parts. That can really add up and saving over $1.20 per flange will make it more affordable. It looks great with your floors too!
Hey Amy, I love this bookshelf your neighbor made and the weathered look it has to it. I have introduced a new product in the last two years named SteelTek that encompasses the industrial look and style without the threaded ends. I would love to see what you can do with our products!
Love this shelf. I am in the process of trying to figure this basic shelf out for my bar area. You did an awesome job!!!!
Hi Amy, I love this book shelf and made a slightly modified version to serve as a 5-tier shoe shelf yesterday. One thing I did realize is that the beginning of your article mentions a 1 1/2″ spade bit and the article later references a 1″ bit. I actually found that a 1 1/4″ bit is perfect and a 1″ was too small for 3/4″ pipe in my case. I also think I will need an 8″ nipple for the top wall anchor, as the 6″ with my floor flanges is quite short. Great instructions and super easy, fun project! Thanks for sharing!
Good catch Rachel! We did use a 1 1/2″ spade so I revised it. Thank you so much for reading!!
@Rachel, I am building a version of these shelves and 1 1/2 is too big of a hole for the fittings. 1 1/4 seems to be right.
Where did you find the wine cabinet?
It’s from IKEA!
Hi,
Love this and planning mine now. Questions:
1. Beginning of article you say build from top to bottom, but later on, you say add shelves going upward. So do you start at top and work down or at floor and work up?
2. If you start at floor, is the unit standing upright as you build? If so how are you holding it all up since not connected to floor or wall yet. Or is it being assembled on the ground lying flat and then stood upright to attach?
I’ll be doing this mostly alone, so trying to figure out the logistics. Thanks.
Hi Renee!
1) I changed it, you’re right! I meant bottom to top.
2) You can start to lean it against the wall as you assemble it (be careful) and it will kind of stand up on its own (but don’t just leave it standing there). It’s best if you can have two people for the assembly, but if you have to do it alone, I don’t recommend laying it down. It’ll be too heavy to lift!
Hello- in some of the pictures the pipe looks black or antiqued, in another it looks more silver. Was there a treatment applied to make the shiny/new look “aged”?
I’ve made some shelving fixtures for customers from “black” iron pipe and we were surprised that the threads are always longer than the flanges, leaving exposed threads which we didn’t account for, aesthetically, plus they are sharp! so we had to sand them down to make them safer for retail usage. In our experience, the Pipe was very expensive and there’s not a lot of variety in vendors where we are. I look forward to trying your suggested supplier! thank you for sharing.
Hi Mike! There wasn’t a treatment applied – the pipe just arrived that way! It does have some silver areas in person; but also my husband is a photographer and used lighting to take the photo, so that may cause a different look. I will say I was impressed with Supply House. There weren’t many sharp edges if any and the pipe looked good. 🙂
I want to build this to hold scrapbooking supplies. The supplies can get very heavy. With support only at the top will this hold much weight?
Hi there – I looked up a shelf that was similar (pre-made) and it attaches the same way. The weight limit was 15 lb per shelf, which seems reasonable to me! Of course, it depends on several factors, so I’d do 5 lb, then 10 lb, etc. and make sure. Slowly load it up rather than doing it all at once.
This is an amazing design! Thanks for sharing, especially all the details. It really balances costs, effort and beauty. Everyone loves it and it is tempting to continue building in this style around the room.
https://www.instagram.com/p/BvZcPgpnon-/
BTW – I purchased my pipe parts here https://rustydesignusa.com/collections/pipe-kits
One question: the middle supports do not come into contact with the shelves. It doesn’t seem to matter much in terms of support. My shelves were not perfectly straight, and the shelf would only rest on two of the supports at a time. Any other suggestions?
@Jonah, If I’m understanding you correctly it sounds like your shelve may be bowed a bit from the front of your shelve to the back. Take a look at your shelve from one end and is it curved up a bit? If it is and it’s enough that it bothers you, you may have to cut a new shelf piece or if you have access to a planer you can plane it flat. Please write me back if I have failed to identify the problem correctly. Thank you for commenting!
I am in the midst of this project and found that the 6” nipple fits well across the width of the shelves when it is connected between the Tee and the Elbow in the shelf “supports”; however at the top of the structure, where it is connected between the Tee and the Flange, the same length of pipe will not work as the “depth” of the flange is not as great as the elbow. In other words, the flange is a relatively flat fitting while the elbow is not, so the distance from that fitting to the tee at the front edge is different. I’m going to need to order some additional nipples for the top that are slightly longer, probably 7-8”.
Also, the pipe from Supply House arrives heavily greased to protect it from rust. Unfortunately, that won’t do when you’re using it for a home furnishing. So one should plan on a day or so of degreasing (acetone worked best for me) and then rust-proofing (I used paste wax but a spray on Rust-Oleum product would work well too).
Curious what length nipple you ended up using for the top connection to the flange. I will also be using this length to connect a flange somewhere in the middle of the wall to add some additional support (little kids).
Appreciate your help on this.
Thanks,
I used 7” nipples at the top and that worked. I measured the ideal size would be something custom cut like 7 1/4” but I just used the 7 and didn’t thread it all the way at either end and it worked fine.
@Ryan Kowalski, this is a great source to show the cleaning process.
https://www.youtube.com/watch?v=7bReWtdBtkA
I am also concerned with the grease on the pipe and the fact that buying black pipe is not actually black. Wash with Dawn to degrease then paint with Rustoleum to seal and make black? Thoughts?
sure. I used rustoleum “soft iron” paint.
if you are using galvanized instead of black pipe, you need to paint with “universal primer” first.
Hi!
Firstly, My wife and I love this bookshelf. You spelled it out so simply and even showed us where to buy the pipes and all! We have everything ready and will be starting today. We will be modifying this to make an 84″ wide bookshelf. Question, You say to use a 1.5″ wingtip bit. We made the hole and the lip of the T pipe goes right through making the shelf uneven. Did you mean to say a 1″ tip? That’s the size of the pipe itself. Excited to begin. We will post send pics when done. Thanks!!
another way the make the shelving is to drill the pipe holes more-or-less through the center of the boards, then use riser clamps on the pipe to support the shelves at whatever height you want. You get a different look, but you have adjustable shelves.
other advantages of the riser clamps is you can cock the arms a little if the wood is warped, and they are lots cheaper than using the fittings and nipples approach.
If you use structural pipe connectors instead of threaded ones, you get more flexibility also. Lowes sells the connectors reasonable cheaply in both galvanized and black.
I noticed on the supply house website there’s quite a bit of difference in cost I between domestic vs imported pipe. Which did you use?
I would choose the less expensive personally!
So like other reviewer’s mentioned, when trying to attach the pipes and flanges at the very top of the shelving system the 6 inch pipe fall short. I did go out and buy 7 inch pipes and they fit wonderfully. Unfortunately 7 inch pipes are not a cut carried by most big box stores because it’s probably unusual so you have to order them online.
Also just to clarify I know some people had questions about the drilled holes in the boards. I believe that the pipes don’t actually connect through these holes but it allows for the end of a pipe to screw into it nicely on one side and allows the other side of the board to nicely rest on the tee below it. Maybe the creator could share their input. I drilled on a test board with my 1 inch and that seemed to be too tight for me. Also my shelves are also only 1in (actual measurement 3/4in). 1 and 1/8 inch is just perfect.
Thanks for the plans.
I came back to edit: after actually attaching the flanges to the wall it pulled the whole shelving unit tighter to the wall by a lot. I ended up needing 8 inch pipes. This also changed the hole line up position slightly. So I used glue/filler then recut. Hope this helps someone. I’ll post pics when I’m done in another day or so.
Things I’ve noticed while building these shelves:
As of now (1/2021) the total price given doesn’t accurately reflect actual cost for the pipe.
Also, 1 1/2” bit size is way to big. 1 1/4” will work but 1 1/8” is better.
My big problem with this article is there are no plans given to duplicate these shelves. I.e. if you drill your holes 2” off front edge you’ll need an 8” pipe to mount the top. If you want to exactly follow the given inventory list you’ll need to drill your holes 4” from front. Would have been really helpful to have some blueprints to reference.
My question is… are the distances between the bottom of one shelf to the top of the shelf below ACTUALLY the numbers listed, or are they ‘close’? And then – if I’m looking to get close to ceiling, planning needs to be pretty much down to teh inch (which includes the 1.5″ of the two-by).
Thanks.
Am I missing something? The instructions call for 2×12” boards but the nipples are only 6” long. Where does the other 6” on the 2×12” go?
Should you use 2×8”s? Or 2×12” that need to be cut narrower?
@Brandon Miller, hello! If you look at the image under step 3, you can see that the nipple added to the tee and elbow makes it longer than 6″, plus you are insetting the drill hole from the edge. You don’t need the pipe to extend the entire length of the board for support.
Neat project, but you really need to revise the plans for the wall anchor pipe lengths based on the linked supplier. 90deg elbow vs floor flange depth will differ between 1-1/4″ to 1-1/2″ depending on supplyhouse vs home depot vs lowes. I needed to replace the 6″ nipple with a 5″ nipple + 1 connector + 1’1/2″ nipple to get the proper length.
I’m currently working on this project now and in the end, I’d say the plans here are more for inspiration and not necessarily plans you can follow verbatim. Between the wrong size spade bit (3/4 Tee will just slip through) and the shelves in those pictures can’t be 2x12s given the pipe lengths used to attach it to the wall above the top shelf – I don’t recommend just following what is here. However, the construction (using the 6 inch pipe with the elbow and a tee is a great way to give the shelves support.
The most worrisome instruction here is “drill the holes in the same spot on all boards since you are going to stack them” and “at least 1.5 inch away from the edge of the board.” While those are true statement, the location of those holes is based on where the flange+nipple+elbow+4inch pipe meet the board. That’s where you drill your hole. If you drill it in some other place, the chances of getting a store bought pipe length to line up with the holes you drilled a very low.
Generally speaking, if someone doing this project reads the comment section, they probably will be alright in the end. As for me, I wound up buying the exact pipe listed for the “left shelf” and only had to swap out the three 6 inch nipple for three 8 inch nipple. As some others attested here, the 6 inch nipple+flange at the top is too short to reach the wall with the 6 inch nipple+elbow on the shelves below. And the change of the 8 inch nipple at the top dictates where the hole needs to be drilled.
And the best tip on this entire project – Supply House for pipe. I read this project and bought pipe for two projects through them as opposed to the local stores. It is far far cheaper there than at the brick and mortar stores.
I have purchased the materials and am drawing out to figure out hole placement, but here is what I don’t understand. Based on the quantities, it seems like a 6″ pipe is used both for the elbow supports throughout *and* the flange mount to the wall. But – an elbow mount has more depth than a flange mount, so wouldn’t the elbow supports for the shelf impact the ability to mount to the wall?
@Noah, yes, from what I can see that is correct. I ordered the parts based on this post verbatim and the nipples that connect to the flange need to be longer. I ordered 7″ and 8″ nipple replacement just to be safe – though I’m fairly sure only 8″ will be needed.
@Noah, I used 8 and 6 inch on my shelf supports and 10 inch on the mounting to the walls and it came out perfect.
Looks great but my concern is that each shelve only supports 15 pounds of weight. Any recommendations on this? I have some large and heavy books. Thanks
@William Weis, if built with 3/4 pipe and 1 inch boards, provided you’ve mounted the flange to studs or drywall bolts, this thing holds way more than 15 lbs. I have a LOT of old books on mine
Thanks for the amazing article! I was wondering, in the parts list you wrote down black for the color of the fittings but in the pictures they look more silver. I’m new to all of this, so is that just what black pipe fittings look like, or did you use stainless for yours?
That is just what the black fittings we ordered were like!
One thing I would challenge on this is that it takes a lot longer than the 6 hours. The staining alone will mean extra time, not to mention buying your materials. And you really should be sealing that wood (more time) unless you don’t mind books or even just people touching it getting dirty.
And speaking of dirty, you’ll need a day to de-grease all your nipples, er uhm… pipes. You also may end up having to strip paint from pipes if you end up getting stuck with painted “black” nipples. But Supply House is great for finding the right sizes and getting them quick.
There’s also always the assumption you have all the tools needed. So consider brushes, pads, sand paper or a sander, bits (use 1 1/8 spade) mounting bolts, de-greaser, gloves…
That being said, this design produces a very nice finished product. Pity I can’t include a photo to show how perfectly this came out. Though I tweaked a few pieces and splurged on better wood than pine, it was totally worth the time and effort and greatly enhances my office space. So much better than the boxy wood shelves I had before.
Hi! Very informative…thanks! Only where i live one has to buy uncut lengths of pipe without thread! This means i have to somehow cut the thread myself after cutting the pipes!
Already to assemble and discovered the 1 1/2 inch hole problem. Bummer. Can the directions be corrected to reflect the proper hole diameter, 1 1/8?
How long are the pipes that go underneath the shelves? The ones that support each shelf?
Do you know how much weight these can hold? approximately?
I am no shill but SupplyHouse made it soooooooo easy to order – even harder to find lengths – shipped fast and the prices were very good overall.
With a 1 1/2 spade bit the tee slides through the hole making the shelf slide forward. Thanks for the DIY but you probably didn’t use a 1 1/2 in bit for it. After wasting one board with the 1 1/2 I’m going to have to do a smaller bit. I guess I should have not trusted your measurements after all and I would have saved one board…
I gave this a try and I’m almost done. Yes there were “errors” in the instructions but overall this was easy to figure out if you just got creative with it.
You need a 1 1/4″ spade bit. I picked up a Diablo bit from Home Depot and it’s great. Ryobi cordless drills aren’t the best for this kind of thing but I was able to find my Skil cordless and it worked perfectly. Don’t forget to turn the torque setting all the way up on the drill. Ryobi’s will work but their 18v cordless just doesn’t have enough torque to be efficient at boring through pine, let alone anything else.
The ebony and carbon stain approach is great and looks awesome. You’ll need some polyurethane to seal the boards after you stain them. I went with a water based one by the same stain manufacturer recommended in the DIY instructions.
My room is only 8 feet high so I cut boards proportionately smaller. 55″ for the left, 46″ center and 41″ on the right. I only drilled two holes per board and that worked fine.
Supply House is def the place to order from as they are super quick, much more affordable than the big box stores and their customer service was awesome.
Use the right tools. A 12″ miter saw is much better than a 7 1/4 which I was using initially. You can do it, but you have to flip boards over and it’s inefficient. Get an electric sander and steer clear of the ones that require you to buy their sandpaper.
Cool tip: I used pine and sanded it in a way that made the boards (after they were stained) look like expensive reclaimed wood. I can’t say enough that you don’t need to spend a lot here to make this look great. I completed the project with 5 eight foot 2×12 boards.
Safety: Stain the wood outside and use a respirator, especially if you’re working indoors. Stain is extremely toxic and flammable so be careful with it!
So you’re using 3/4″ pipe, and you say to use a 1.5″ drill bit on the wood. I’m working through this project right now and I can say 1.5″ is way too big of a hole.
1 1/8″ seems about right.
If you drill a hole in the middle instead of towards the front, do you need the support elbows underneath? I’m wondering if I can get a more streamlined look that way or if the shelves will wobble. Anyone tried that?