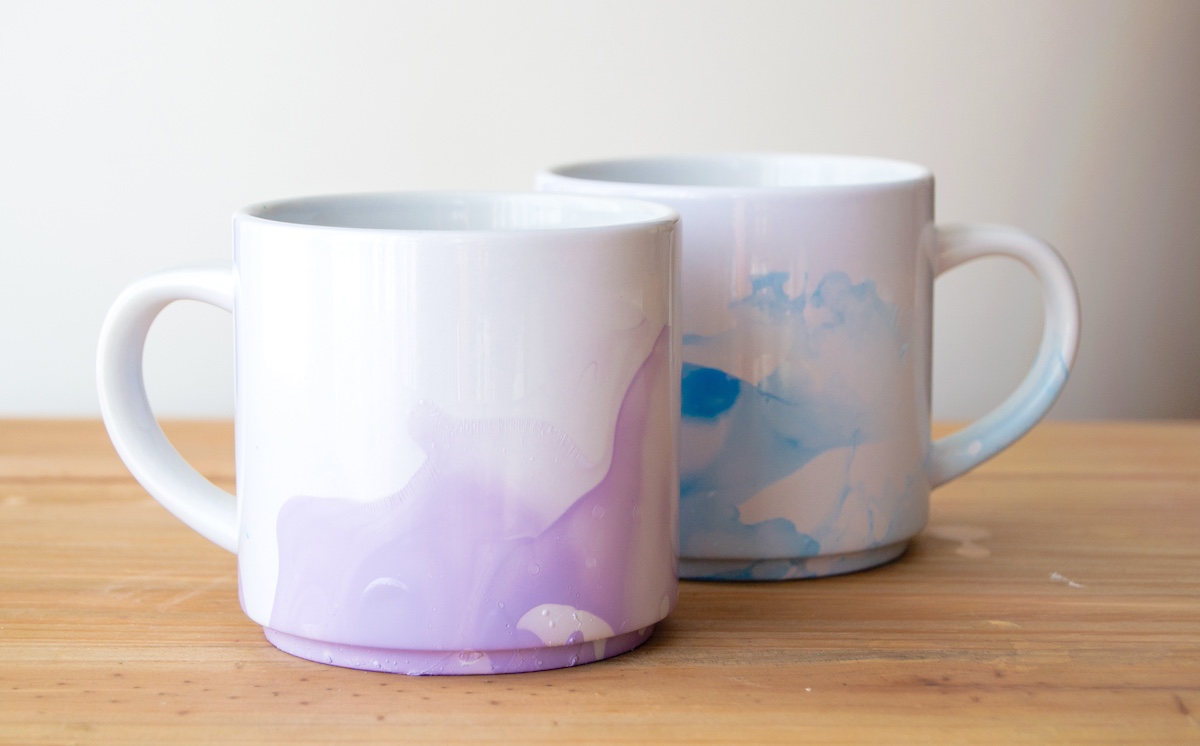
DIY Marbled Mugs with Nail Polish (with Video!)
Did you know you can make cool marbled mugs with nail polish? It’s easy and you can have gorgeous gifts in minutes. These DIY nail polish mugs cost LESS than a dollar each!
Skills Required: Beginner. You will be using nail polish to create a marbled effect on a mug. Scroll down to the bottom of the post to see a video of the process in action. You’re going to have a great time.
I am SO excited to share this DIY mug decorating project with you, friends! I have been seeing the marbling trend all over Pinterest lately and finally succumbed to e-peer pressure; I tried some nail polish mugs for myself over the weekend.
I was so inspired by this gorgeous post where Jan marbled mugs, and decided I had to start there! My goal was to make them for some cute homemade gifts.
Making Marbled Mugs
The best thing about these nail polish mugs is that they only costs a couple of dollars to make – and even less time to finish. I found my mugs for $.79 each at Goodwill.
I used nail polish I already had at home, which means I was able to make six nail polish mugs for less than $5! A DIY mug is a steal with a BIG payoff. Plus, I’m obsessed with the outcome.
Are Nail Polish Mugs Dishwasher Safe?
No, not right out of the gate. You can’t wash them in the dishwasher nor should you microwave them. Baking them only darkens the nail polish (sometimes to a color that is very unappealing) so don’t bother with that either. These are meant to be hand wash only – but you can seal them with Mod Podge.
Dishwasher Safe Mod Podge
If you’ve never tried Dishwasher Safe Mod Podge, this is the best way to seal your mugs. You’ll just paint the mug with the formula, and then let it cure for 28 days.
This doesn’t mean you can’t use it, but you shouldn’t wash it for that time frame (rinsing out is fine). The Mod Podge will extend the life of your mug.

I still recommend hand washing even after using the Dishwasher Safe Mod Podge. You can try the top rack of your dishwasher, but the nail polish will still wear down just because it’s always going to be slightly fragile. That doesn’t mean a mug like this isn’t worth it, but it’s something you need to consider!
Tip: using Mod Podge doesn’t mean you can microwave your mug. That is still a no-no.
If you’re ready to try this adult craft project – here’s how you make these marbled mugs!
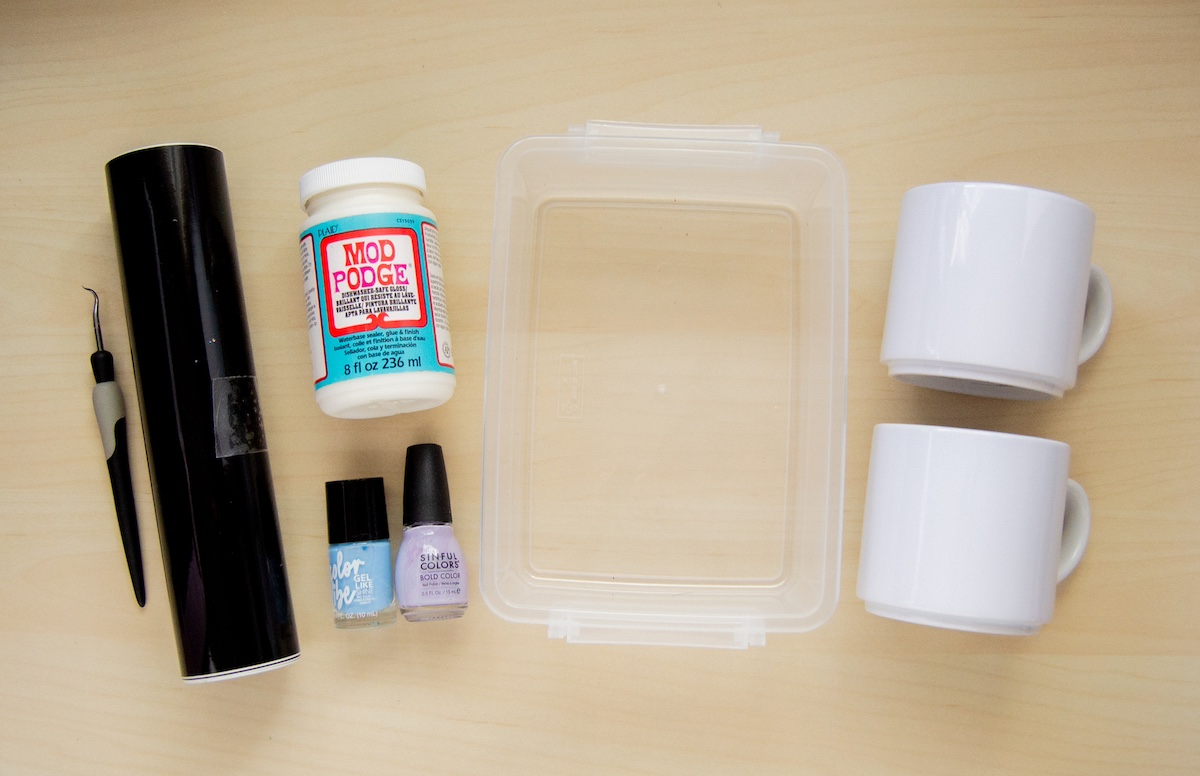
Gather These Supplies
- Mugs
- Nail Polish (stay away from quick dry!)
- Dishwasher Safe Mod Podge
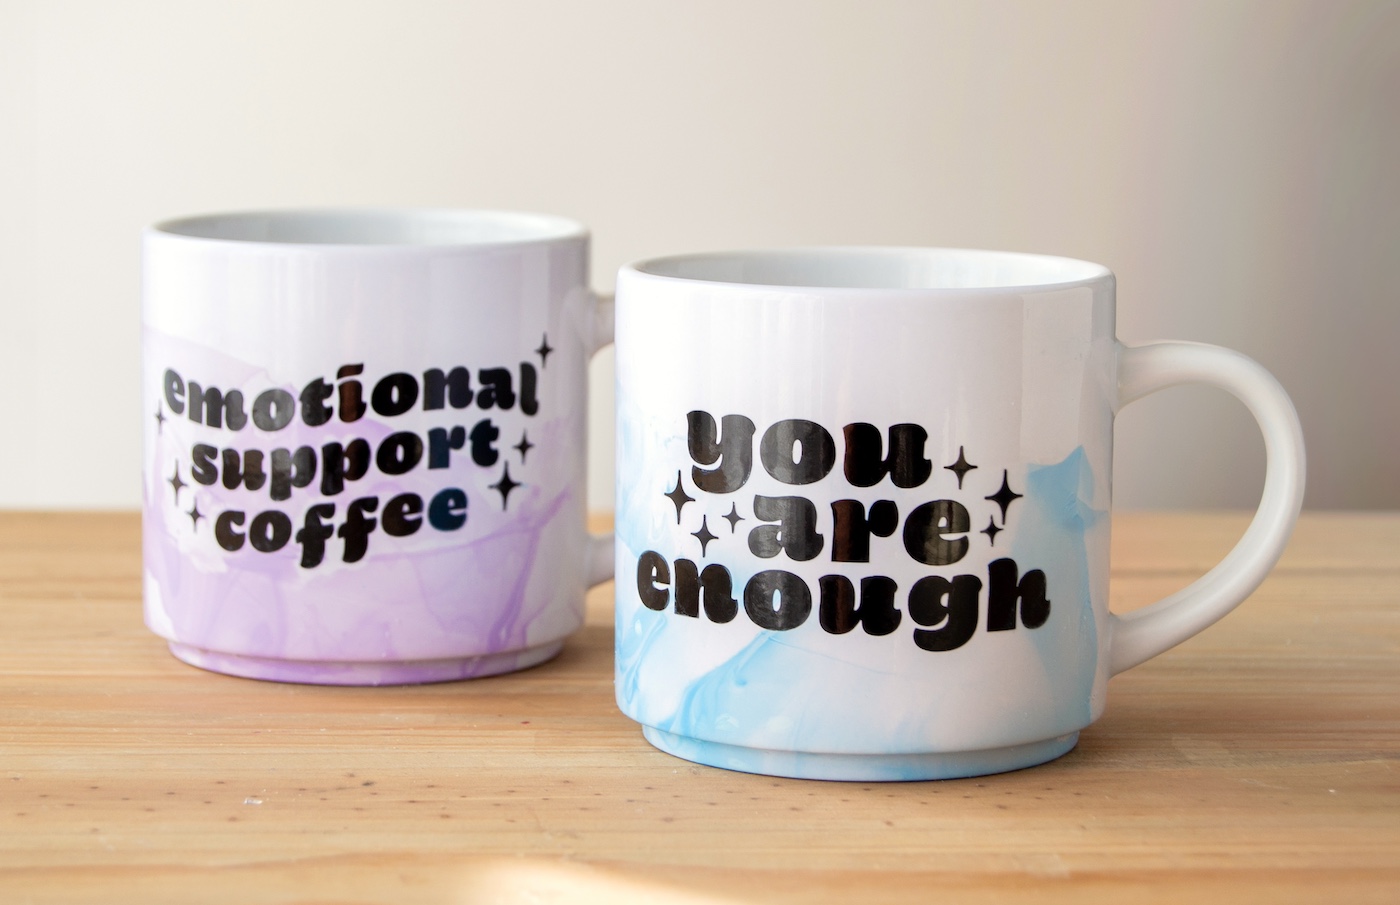
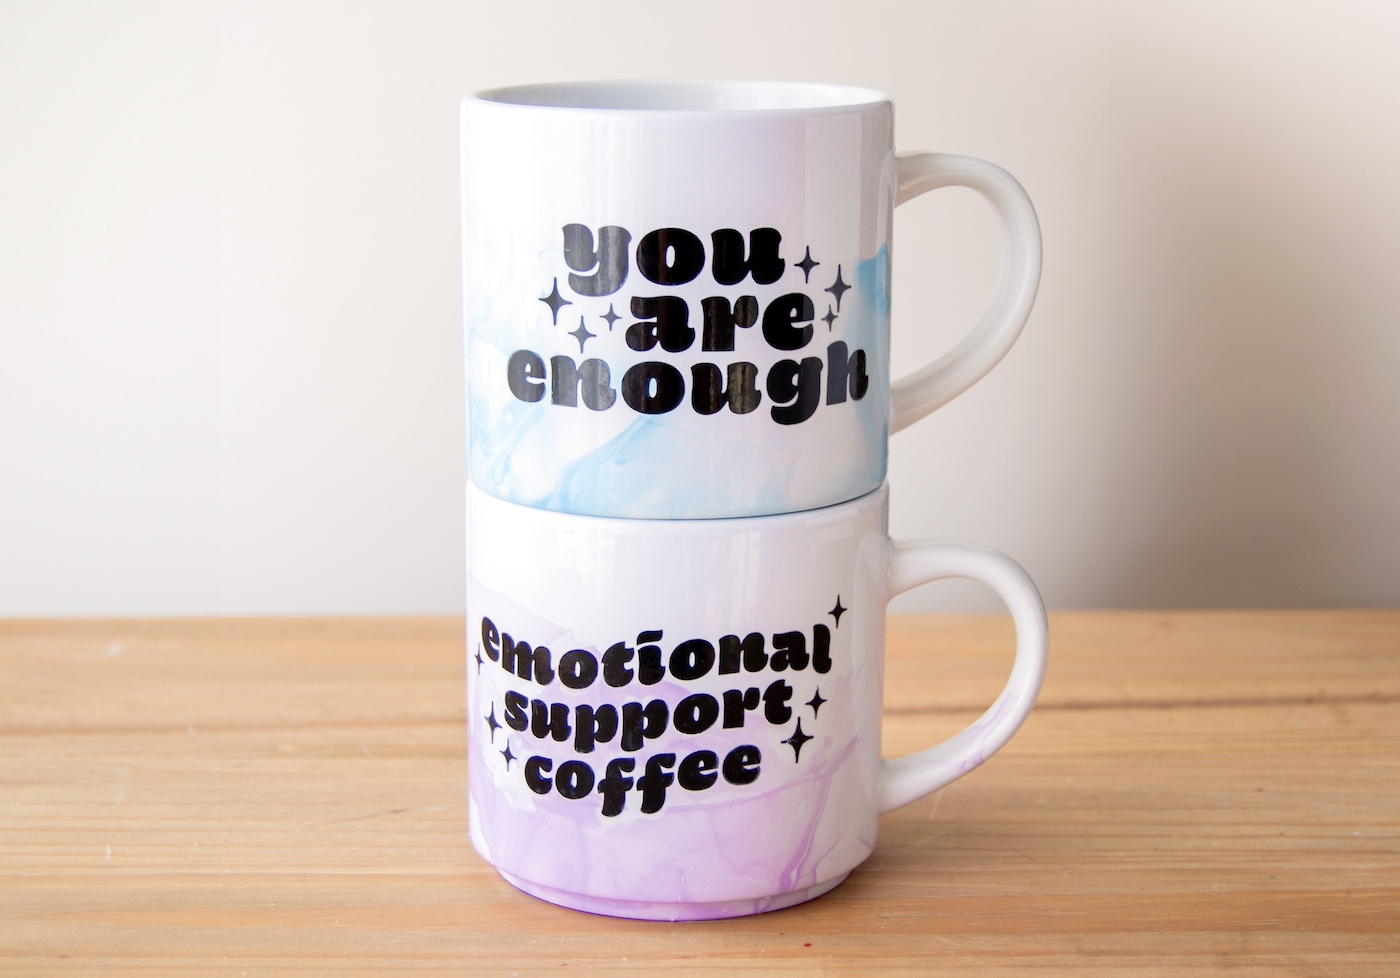
- Printable sayings in SVG format – You Are Enough and Emotional Support Coffee (optional)
- Die cutter and permanent vinyl (optional)
- Toothpicks
- Acetone and cotton swabs
- Container (this will get ruined, so make sure it’s old or disposable)
Note: If you want to use the printable sayings, apply those with permanent vinyl before you dip the mugs.
My Best Tips After Making This Project
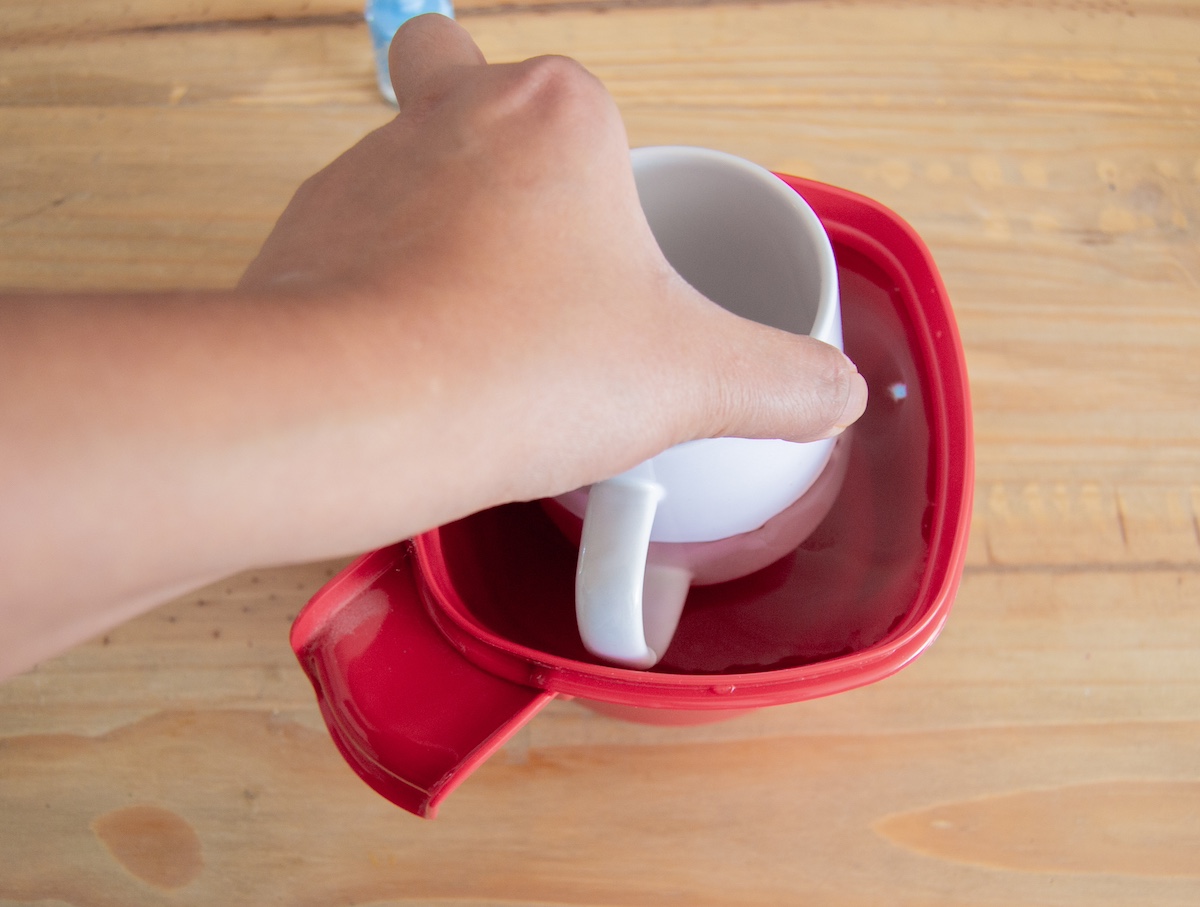
When dipping your marbled mugs, it’s best to only dip them on the mug below your lip line, at least on one side, for your health.
Get all your supplies ready so that you can work quickly. The hot water will keep the nail polish from drying too quickly, but you’ll still need to move fast.
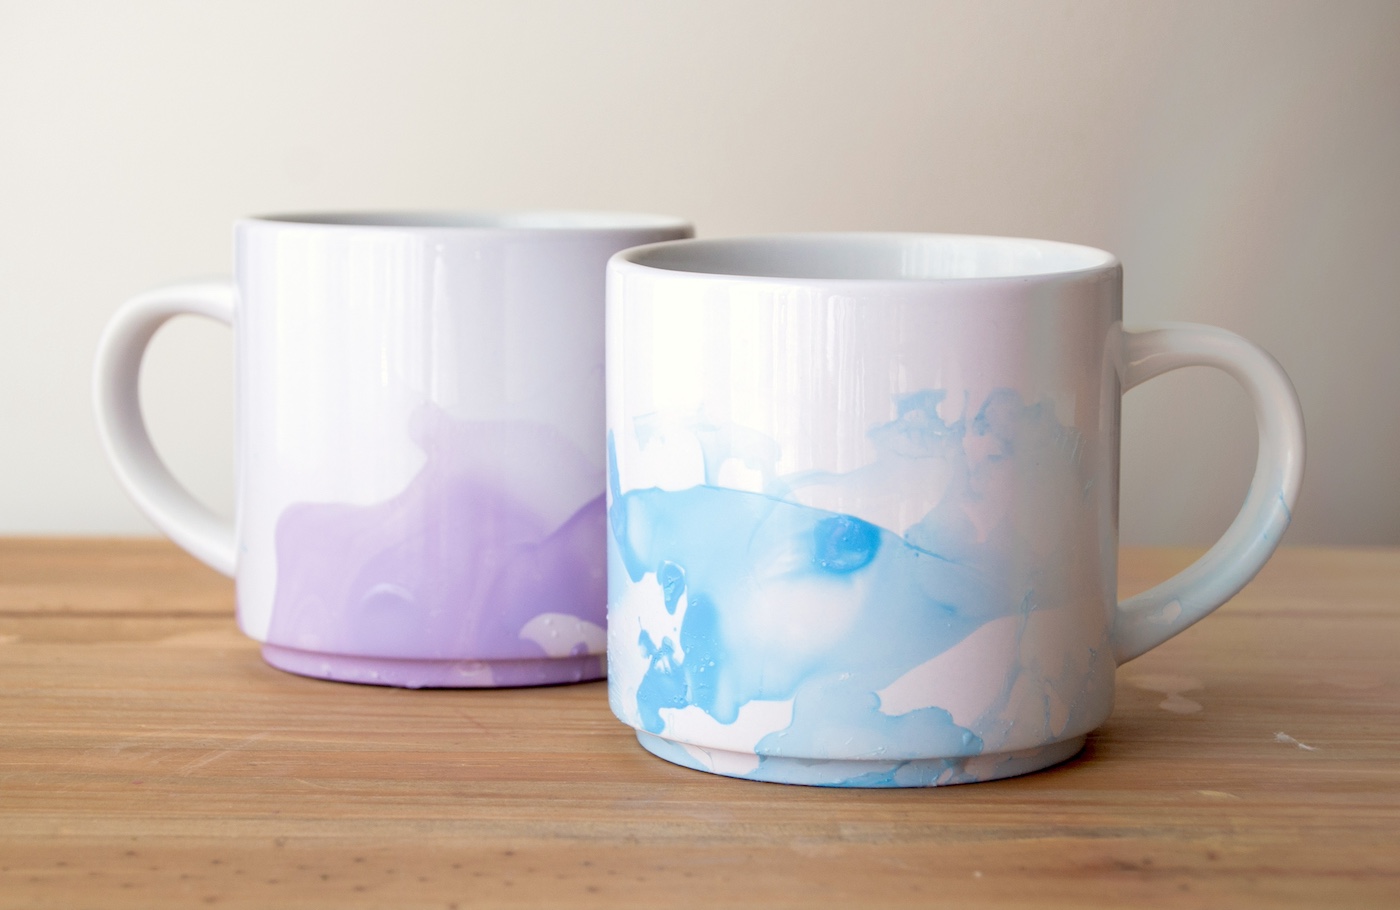
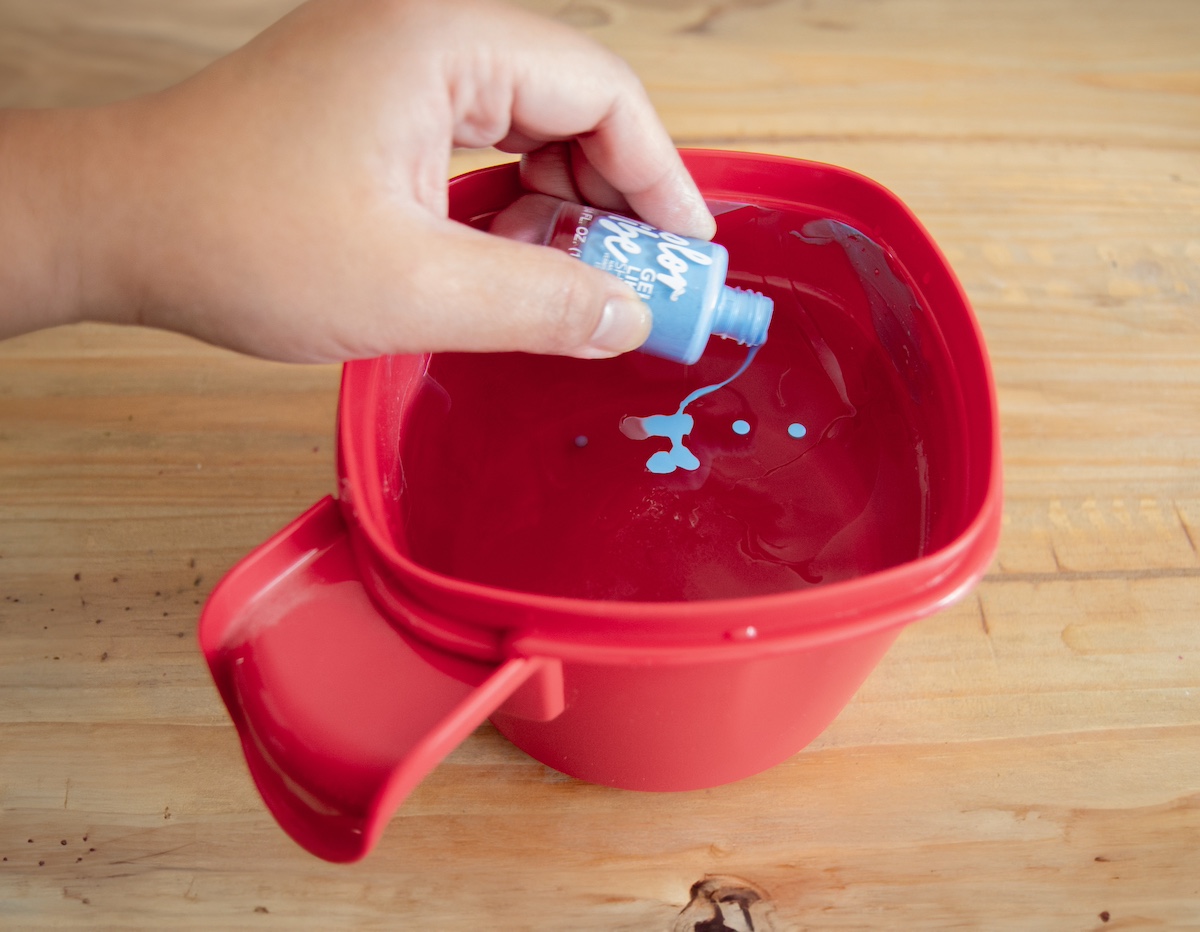
Spread your nail polish over the surface of the water CLOSE to the water. If you pour it from above, it’s going to clump. This will cause clumps on your mugs.
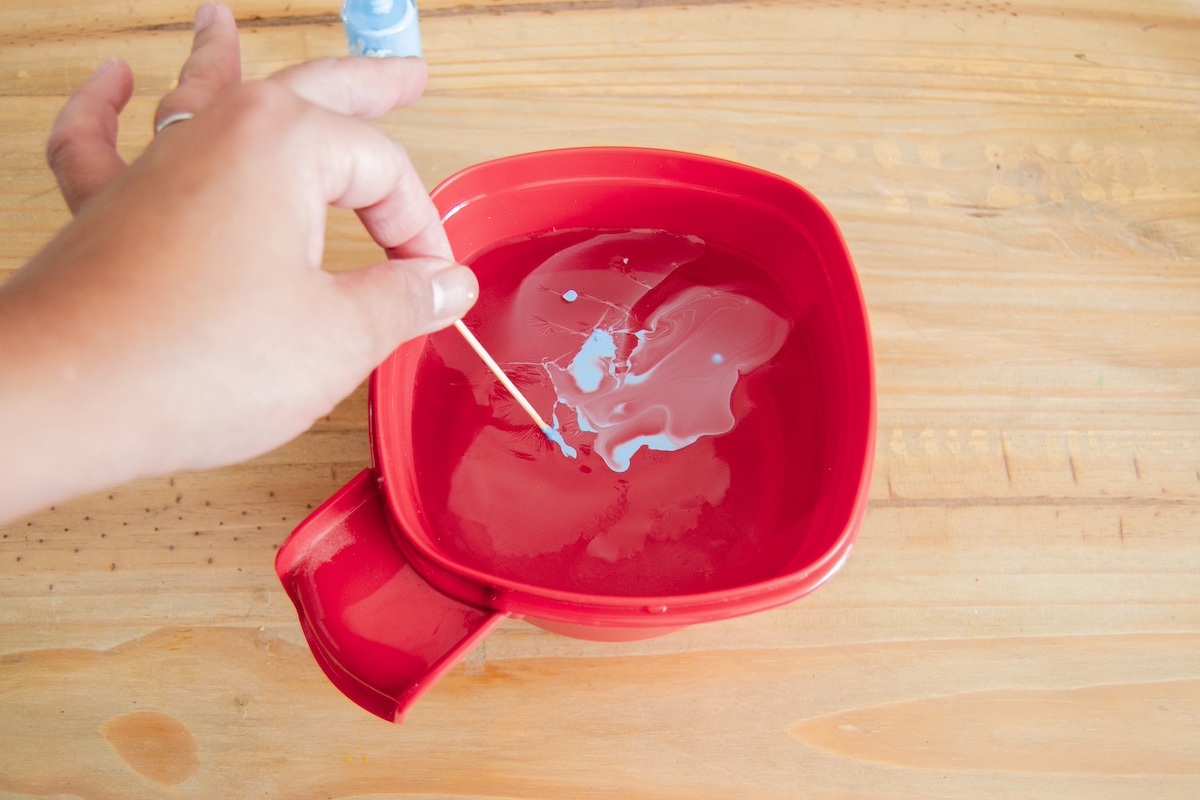
Use a toothpick to mix the colors together if you want to get creative and mix multiple polishes. Pour the polishes in various areas (not all together), and spread out thoroughly over the surface of the water.
Want to see how these marbled mugs were made? Check out the video inside the how-to card below:

Marble Nail Polish Mugs
Equipment
- Disposable water basin
- Acetone and cotton swabs
Materials
- 2 Mugs
- Nail polish – not quick dry
- Toothpick(s)
- Dishwasher Safe Mod Podge
Video
Instructions
- Pour hot (but not boiling) water into the container. Once the nail polish touches the water it is going to want to set and the heat will slow the process.
- Carefully add drops of nail polish into the water, keeping the bottle close to the water to prevent the nail polish from sinking into the bottom. I added a few drops of nail polish and also moved the bottle around as I poured to help create a swirl effect.
- Quickly use your toothpick to swirl the polish around.
- Once you are happy with the swirl effect, quickly dip the mug in, making sure to submerge at least half of the mug’s body. The setting process is quick once the polish touches the water, so you'll want to move quickly. Depending on the lightness of your mug and how big your container is, you may have to repeat this process another time to fully cover the mug’s sides.
- Place the mug on a paper towel to dry, top down.
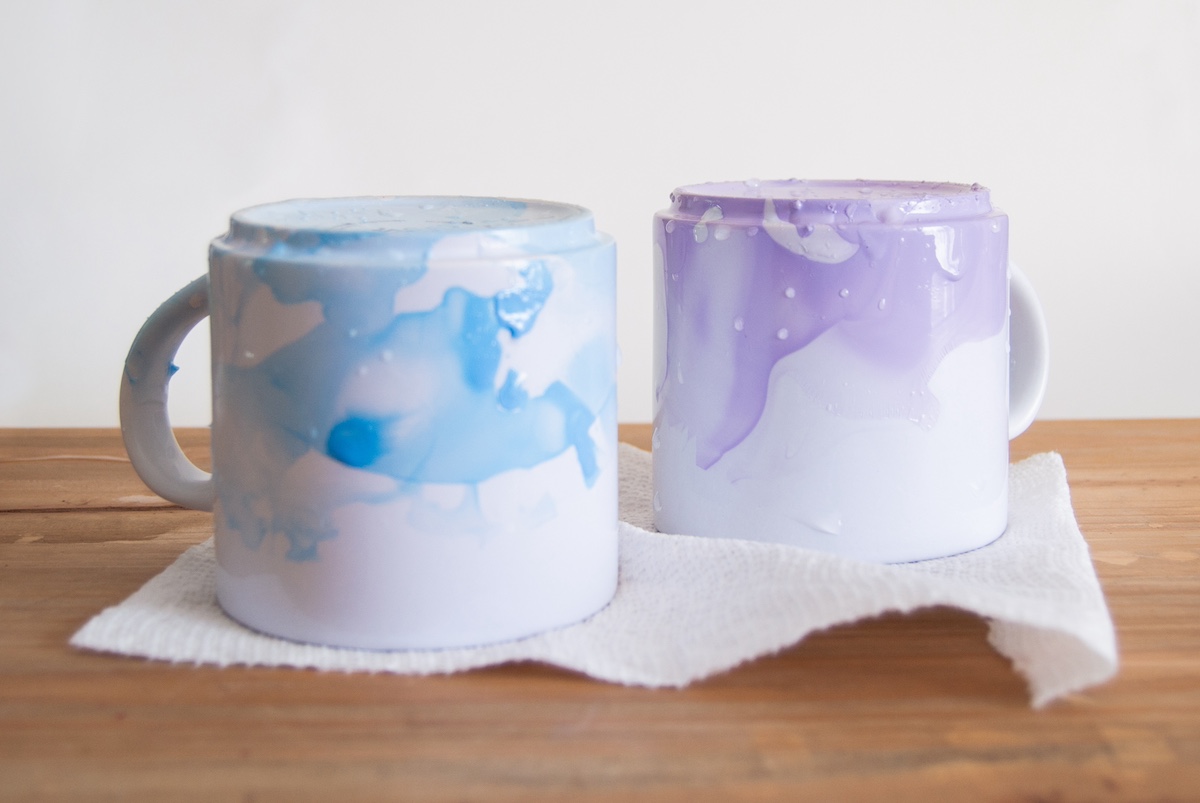
- Use nail polish remover to take the excess polish off the bottom of the mug. Let set overnight. Use Dishwasher Safe Mod Podge to seal if desired.
Notes
If you’re ready for more, learn to decorate mugs ten ways. This is also part of a collection of easy crafts for adults, homemade Mother’s gift ideas, and Mother’s Day crafts for kids so you should check those posts out too!

Do you have to put anything on top of them after dipping them in nail polish or is it optional
I followed this exactly as well. Thank you for emphasizing the word fast and quick. It really felt like I was rushing! I know it says an adult craft but my 5 year old did it too and was very patient. He wanted to swirl the paint and do the drops. I dipped the cups. Some of the mugs turned out great and some didn’t. Some are just like your picture and others seem like the nail polish just didn’t stick or only on one side. We really enjoyed the project and the fact that we had to be fast is great. This was a really unique activity. Thank you!
Glad you enjoyed it!
How did you dispose the rest of the water when you were finished?
You can usually skim the surface of the water with a paper towel or large spoon and get the nail polish out, at least most of it. Then you can pour out the water. You could probably pour it through a sieve too and filter out all the chunky monkeys 🙂
Thank you, I realized I have to wait a little till polish gets dry and becomes sticky, then I pulled it with toothpick that I used for marbeling the colors
Oh that’s good to know! Picking it out with a toothpick is a good idea.