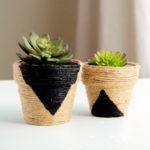
DIY Mini Planters for Your Tiny Succulent Garden
Make these easy mini planters – the small size makes them perfect for filling with cacti or succulents to decorate your house or give to friends!
Skills Required: Beginner. You can accomplish this project even if you don’t have much crafting experience. You’ll be using a hot glue gun and acrylic craft paint.
Have you ever looked around your home and thought, “You know what this place needs? More greenery!” But not just any greenery—something small, manageable, and oh-so-cute.
If that sounds like you, then buckle up, because I’ve got the perfect project that’s not only going to tickle your craft fancy but also adds that much-needed pop of life to your living space.
I’m excited to share these DIY mini planters, where the small size doesn’t limit their charm but instead amplifies it, making them the perfect abode for your cacti or succulent buddies.
This project is designed for beginners, requiring more enthusiasm than experience. You’ll be wielding a hot glue gun and dabbling in some acrylic paint, but the real joy comes from seeing these mini creations come to life—a bit like plant parenthood, but with less watering involved.
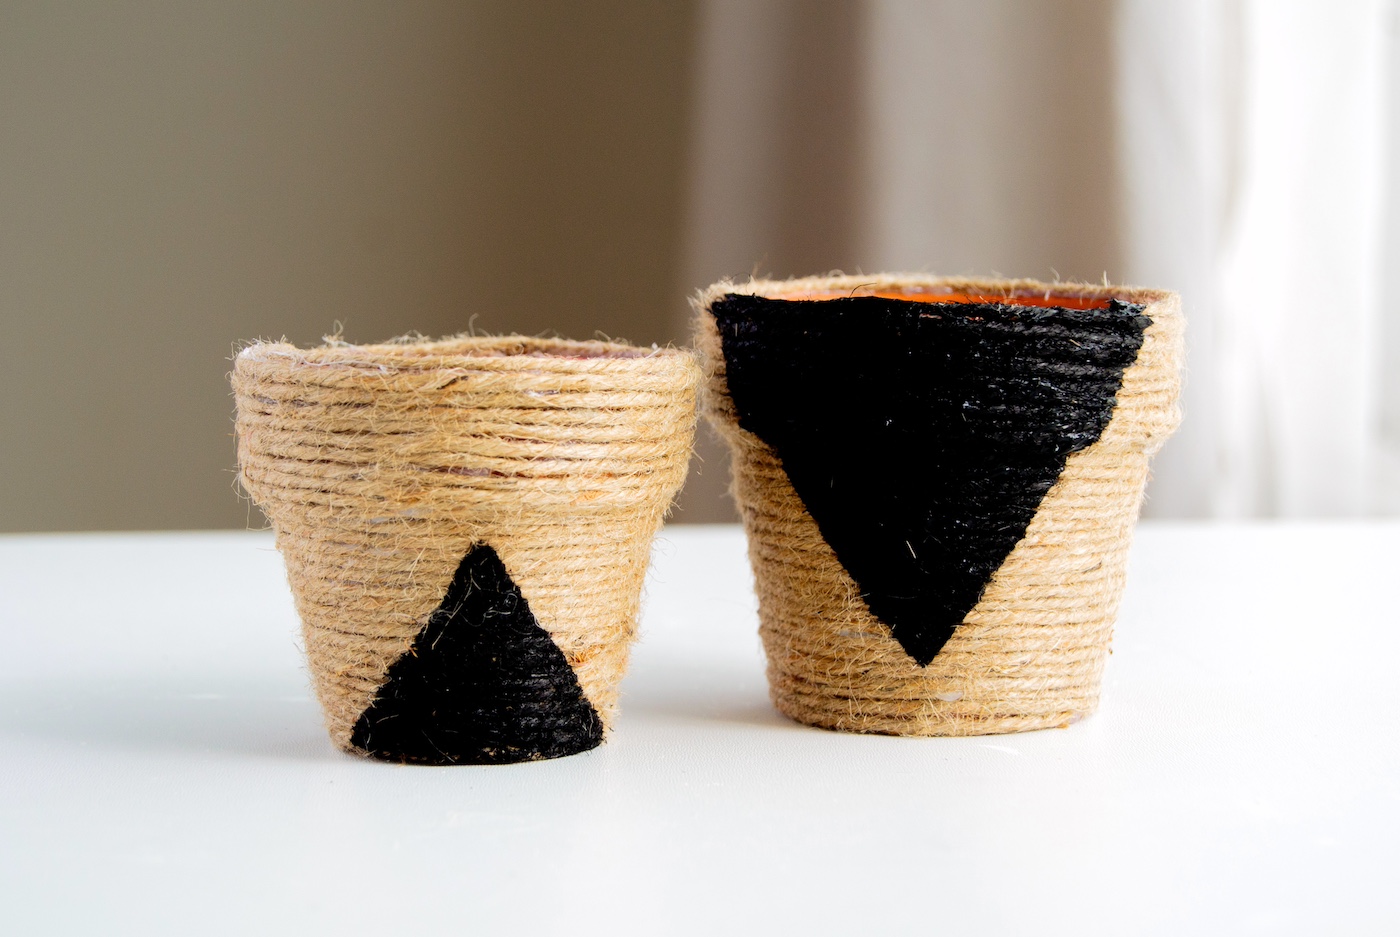
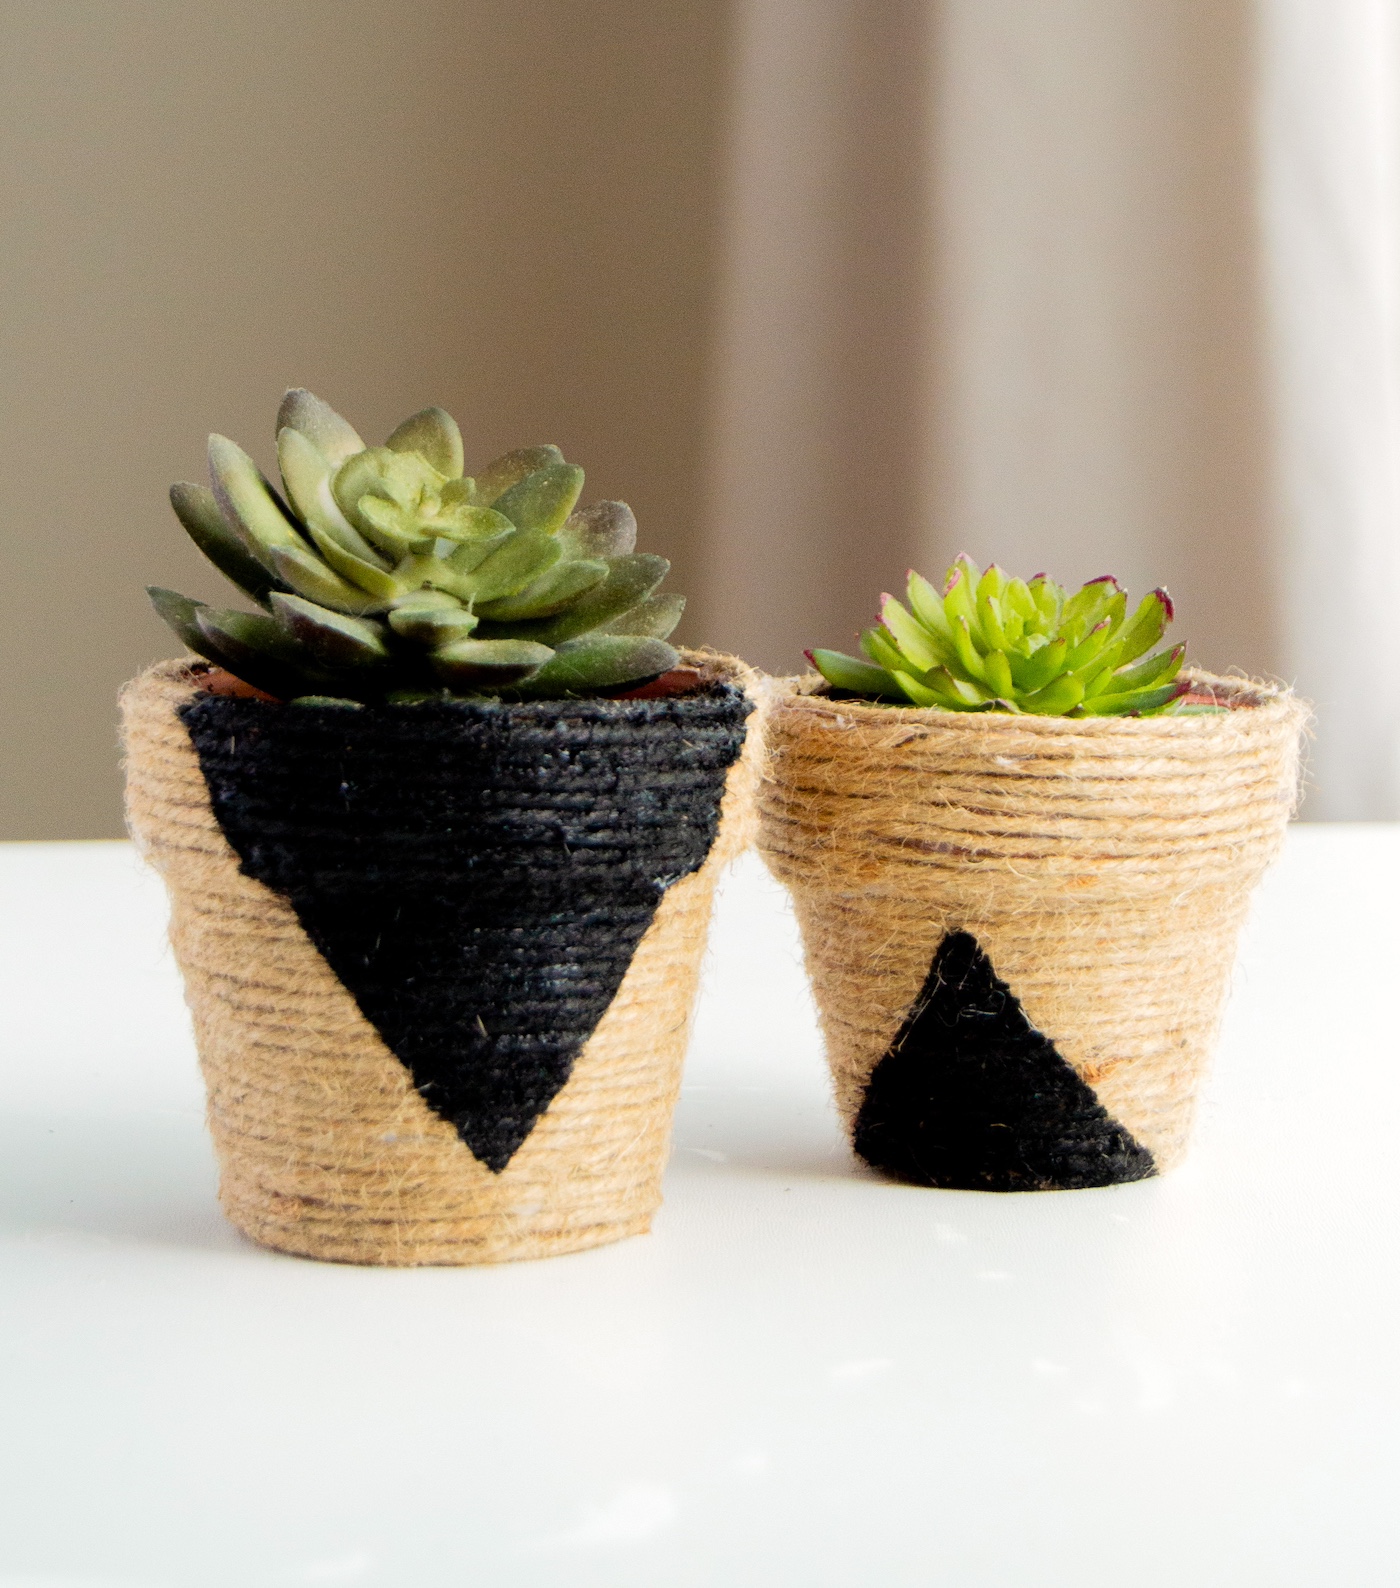
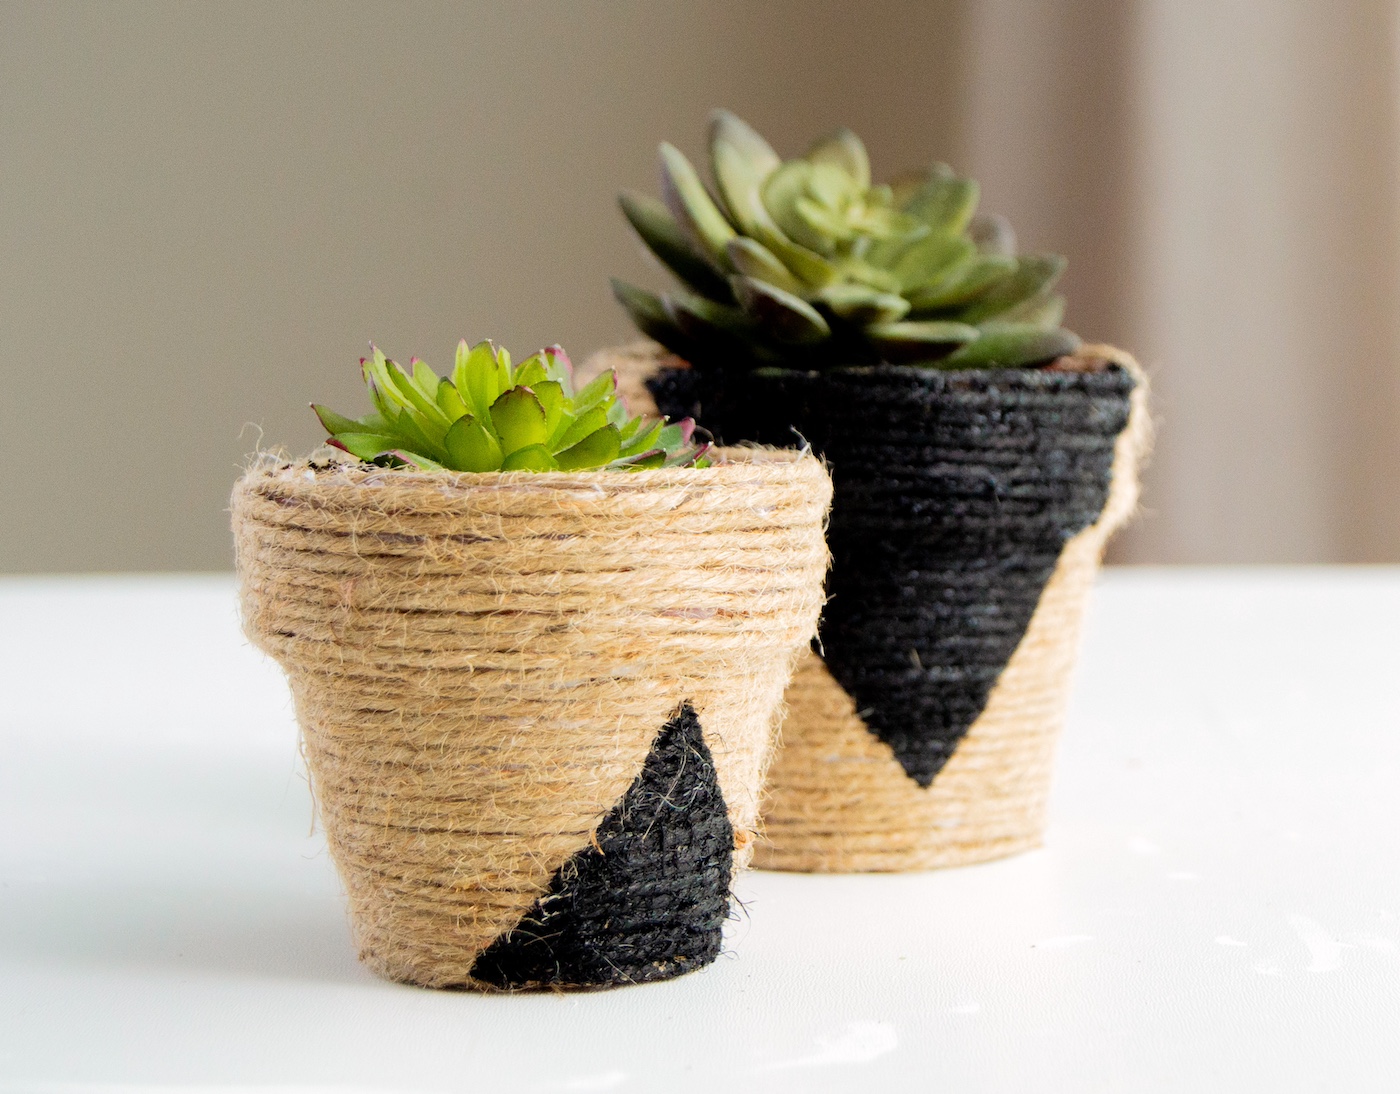
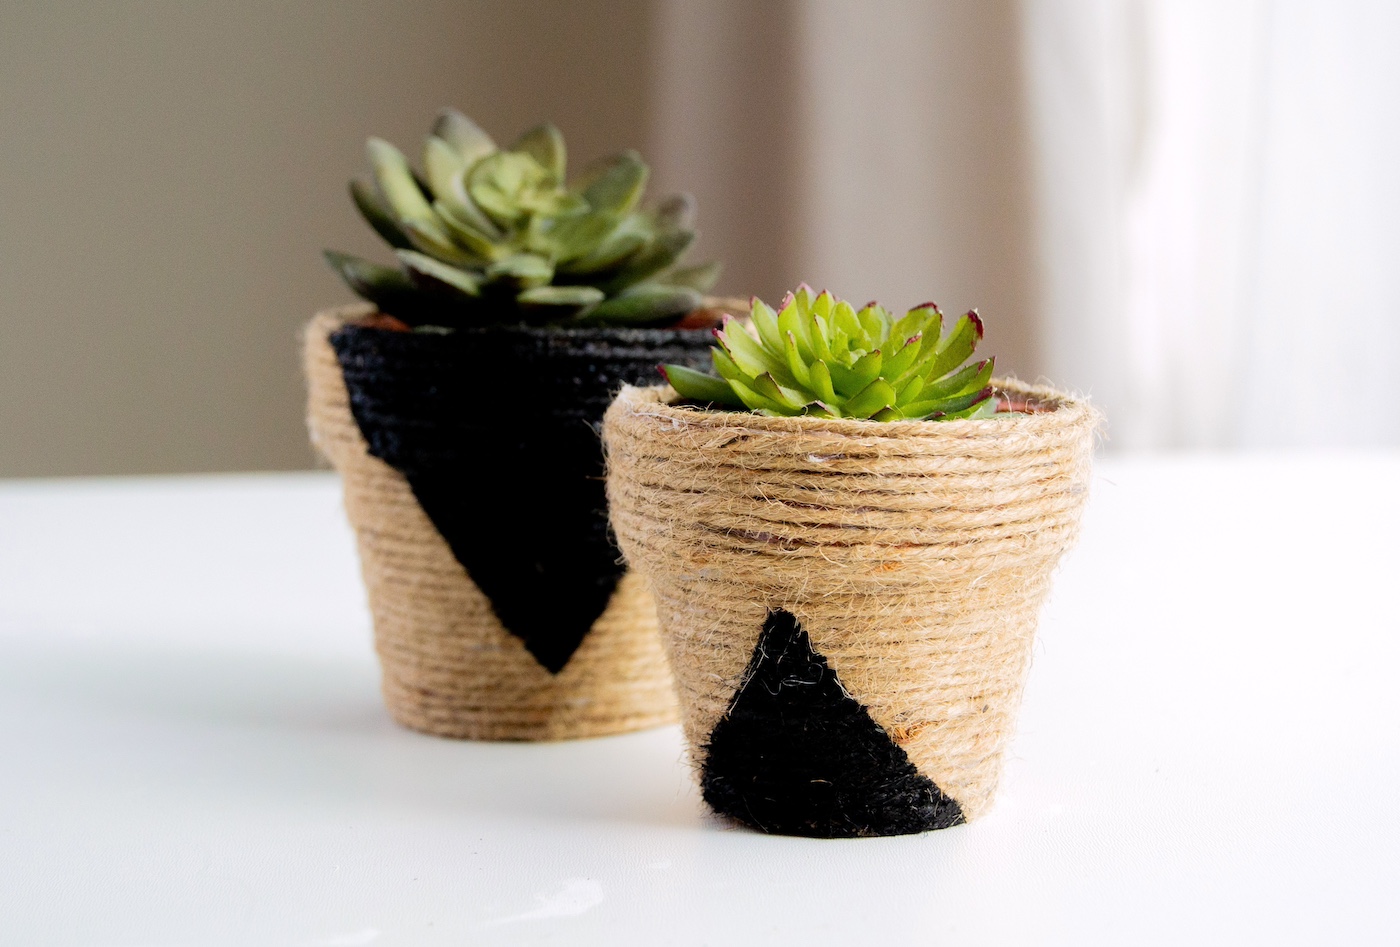
We’re going to take dollar-store finds (yes, I’m talking about the mini terracotta pots or even those adorable mini buckets you’ve seen but never knew what to do with) and give them a makeover that would make any succulent swoon.
With a bit of jute or twine, some strategic glue gun action, and a dash of paint, you’ll transform a tiny vessel into something that looks like it walked straight out of a chic boho boutique.
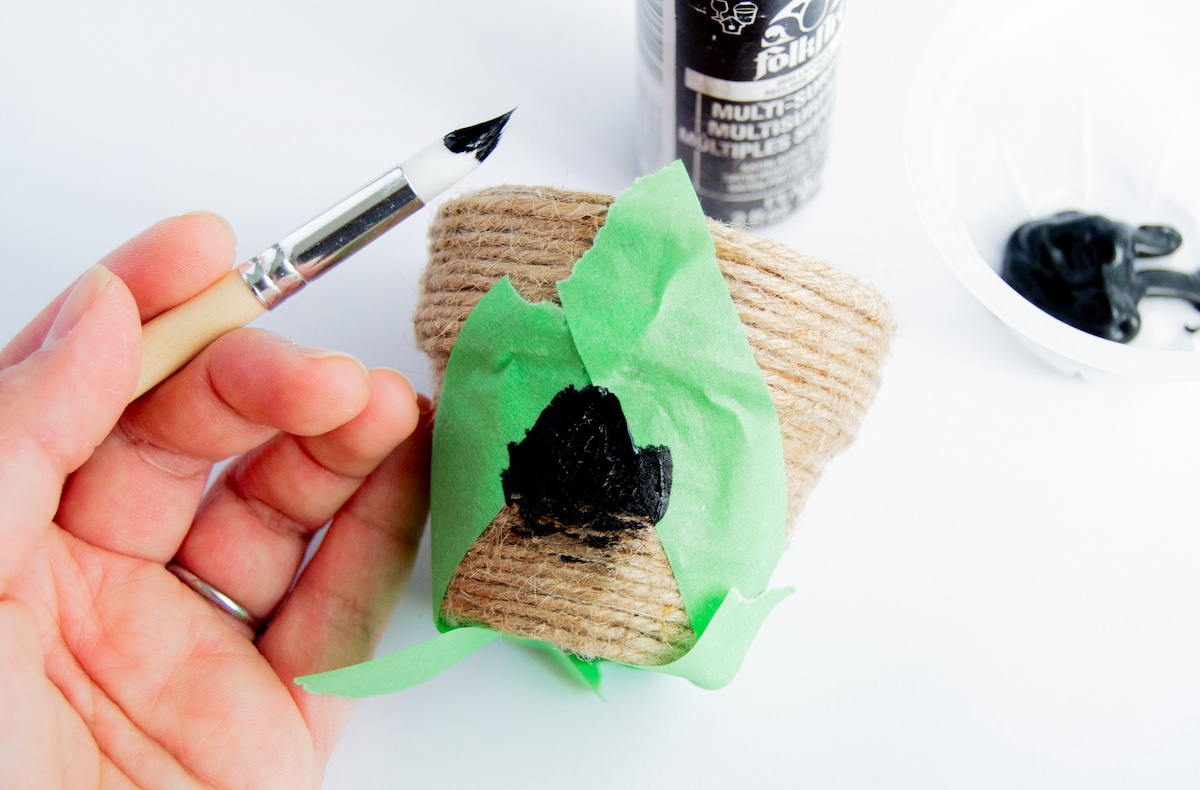
The twine creates a textured, earthy vibe that screams “I’m crafty and environmentally conscious.” You’ll also have fun painting your design – be it minimalist black triangles for that edgy look or something more colorful and whimsical.
And when you’re done? These DIY small planters make for the most thoughtful, homemade gifts. Whether it’s for a housewarming, a birthday, or just because, gifting one of these beauties says, “I made this, thinking of you and your love for tiny green things.”
Whether you’re looking to expand your indoor garden or searching for that perfect, personalized gift, this tutorial is your first step towards creating something truly special. Let’s bring some life into our homes, one mini planter at a time. Let the crafting begin!
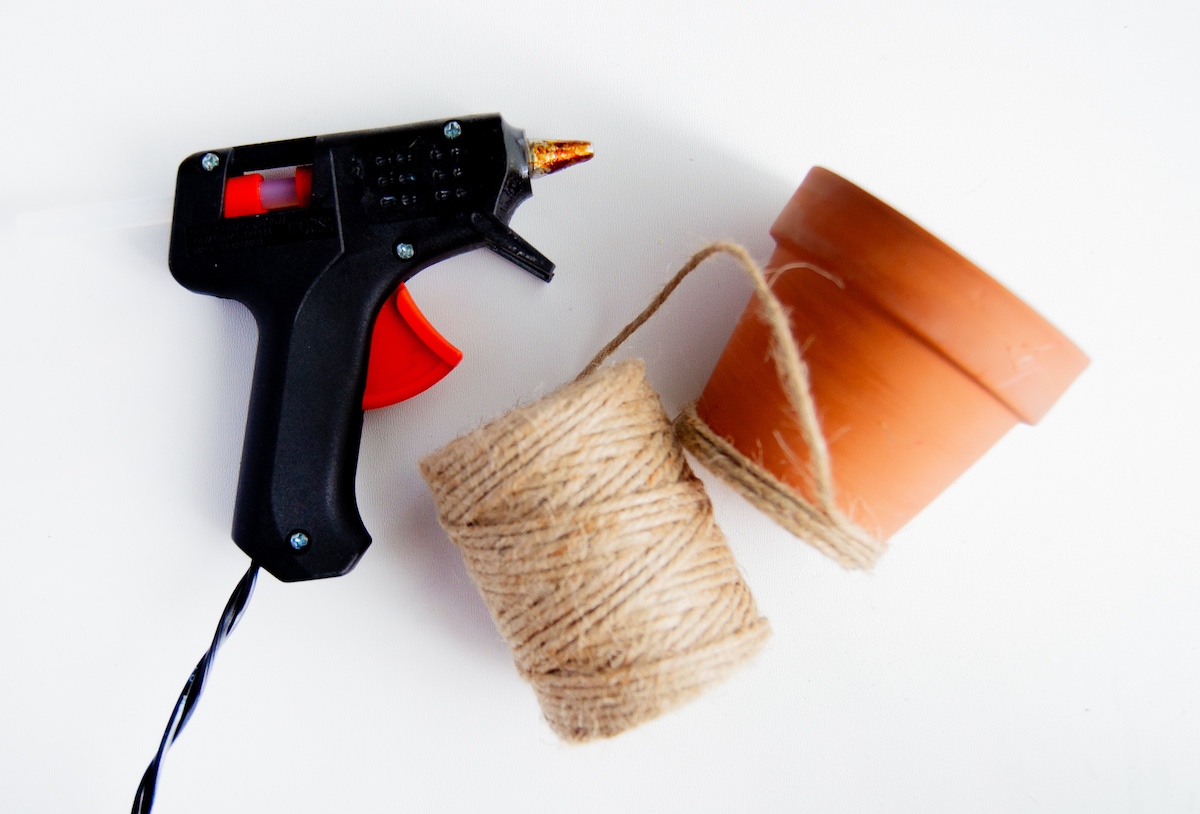
Gather These Supplies
- Clay pots or mini buckets from Dollar Tree
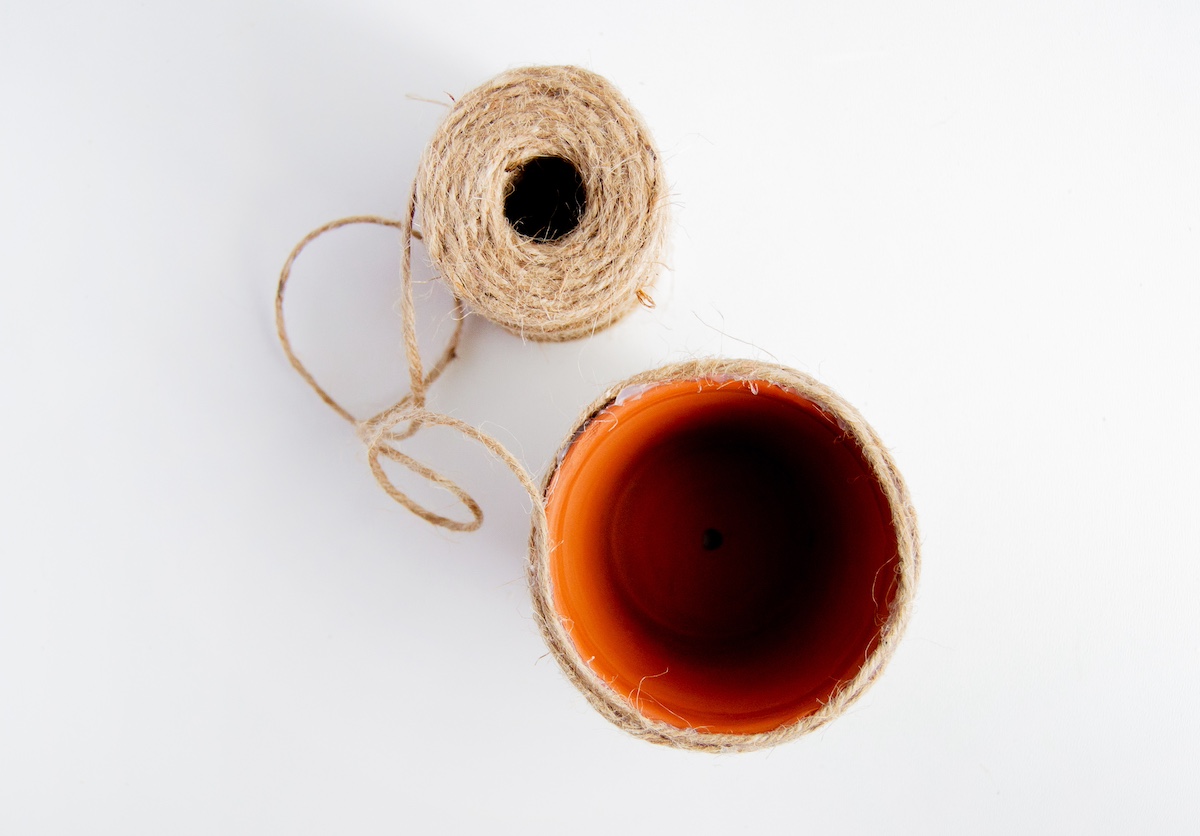
- Rope/twine
- Craft paint – regular or multisurface
- Paintbrush
- Hot glue gun and glue sticks
- Painter’s tape
- Scissors
Tips and Thoughts On This Project
NOTE: Unglazed or unsealed terracotta will draw moisture from the plant and soil, keeping the pot itself moist. Extra moisture may affect the external decoration by causing paint to blister, and glue to fall apart and mold.
In a nutshell? If you’re not using succulents in your pots, which need very little water, YOU NEED TO SEAL THE INSIDE OF THE POT.
You’re going to carefully seal the INSIDE with a water based acrylic sealer. Spray or brush seal the inside of the pot with a couple coats. Allow each application to dry before applying the next.
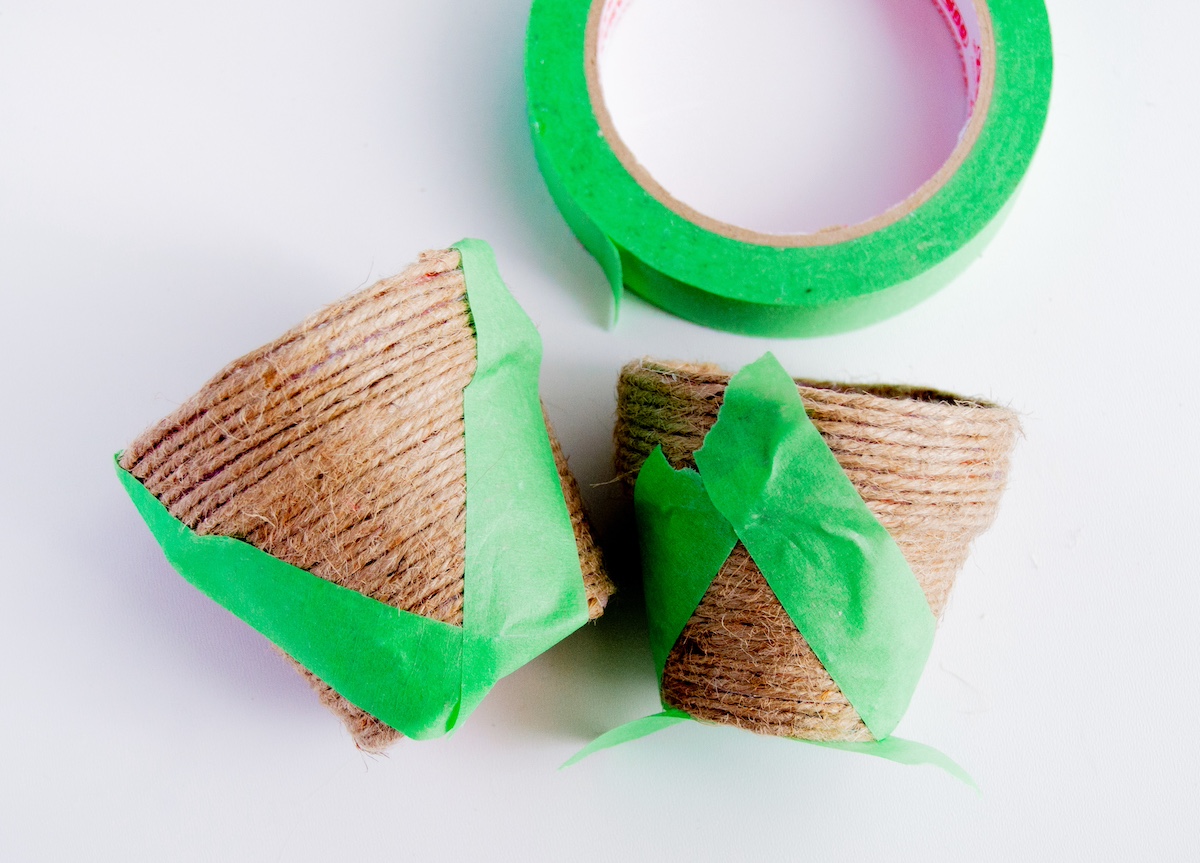
For paint – I opted to paint black triangles for a minimalist, boho look. You can definitely freehand them, but I wanted crisp, straight lines so I used painter’s tape to outline my design.
Get the printable how to for this project below:
DIY Small Planters
Materials
- Clay pots or mini buckets from Dollar Tree
- Rope/twine
- Acrylic paint regular or multisurface
- Painter’s tape
Instructions
- Glue the end of your rope to the bottom of your pot, making sure to apply hot glue all around to hold it in place.
- Wrap the rope around the pot, gluing periodically to keep it tight and affixed to the pot. Repeat until the entire pot is covered from top to bottom.
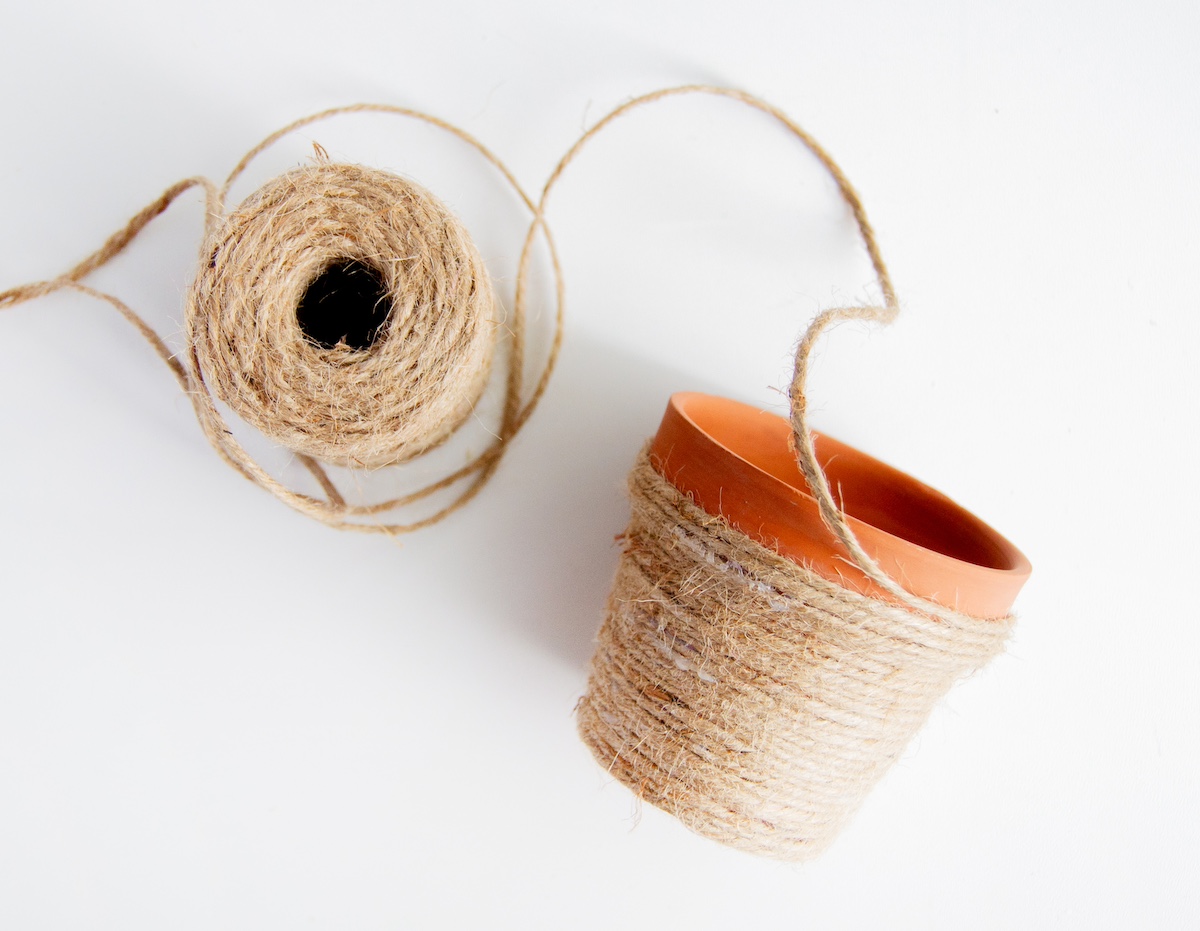
- For the top part, make sure to apply hot glue all around to secure the rope and keep it in place. Snip off the end of the rope with scissors.
- Paint your preferred design on your planter. You might need to do a few coats of your design. Let dry.
- Peel off the paint's tape and snip off any stray fibers from the rope to clean it up. Your planters are ready for plants.
If you enjoyed these DIY small planters, let me know in the comments! Plus you might also enjoy these other posts:
Concrete Candle Holders • DIY Door Stop • DIY Plant Hanger • Faux Terrarium • Floral Hanging Frame • Hot Glue Mushroom Lights • Paint Fake Flowers • Painted Doormat • Pool Noodle Wreath • Poster Hanger • Ribbon Wreath • Sand Terrariums • Song Lyric Art • Twig Candle Holders • Wood Bead Garland • Yarn Wall Art • Yarn Wall Hanging
I love these planters! They’re adorable!
Paige
https://www.thehappyflammily.com/