Star Wars Christmas Tree That’s Out of This Galaxy
Calling all Star Wars fans! Bring the galaxy far, far away to your holiday celebrations with this droid-themed Christmas tree. Discover how to create your own C-3PO and R2-D2 ornaments with ease, perfect for adding a touch of sci-fi magic to your festivities.
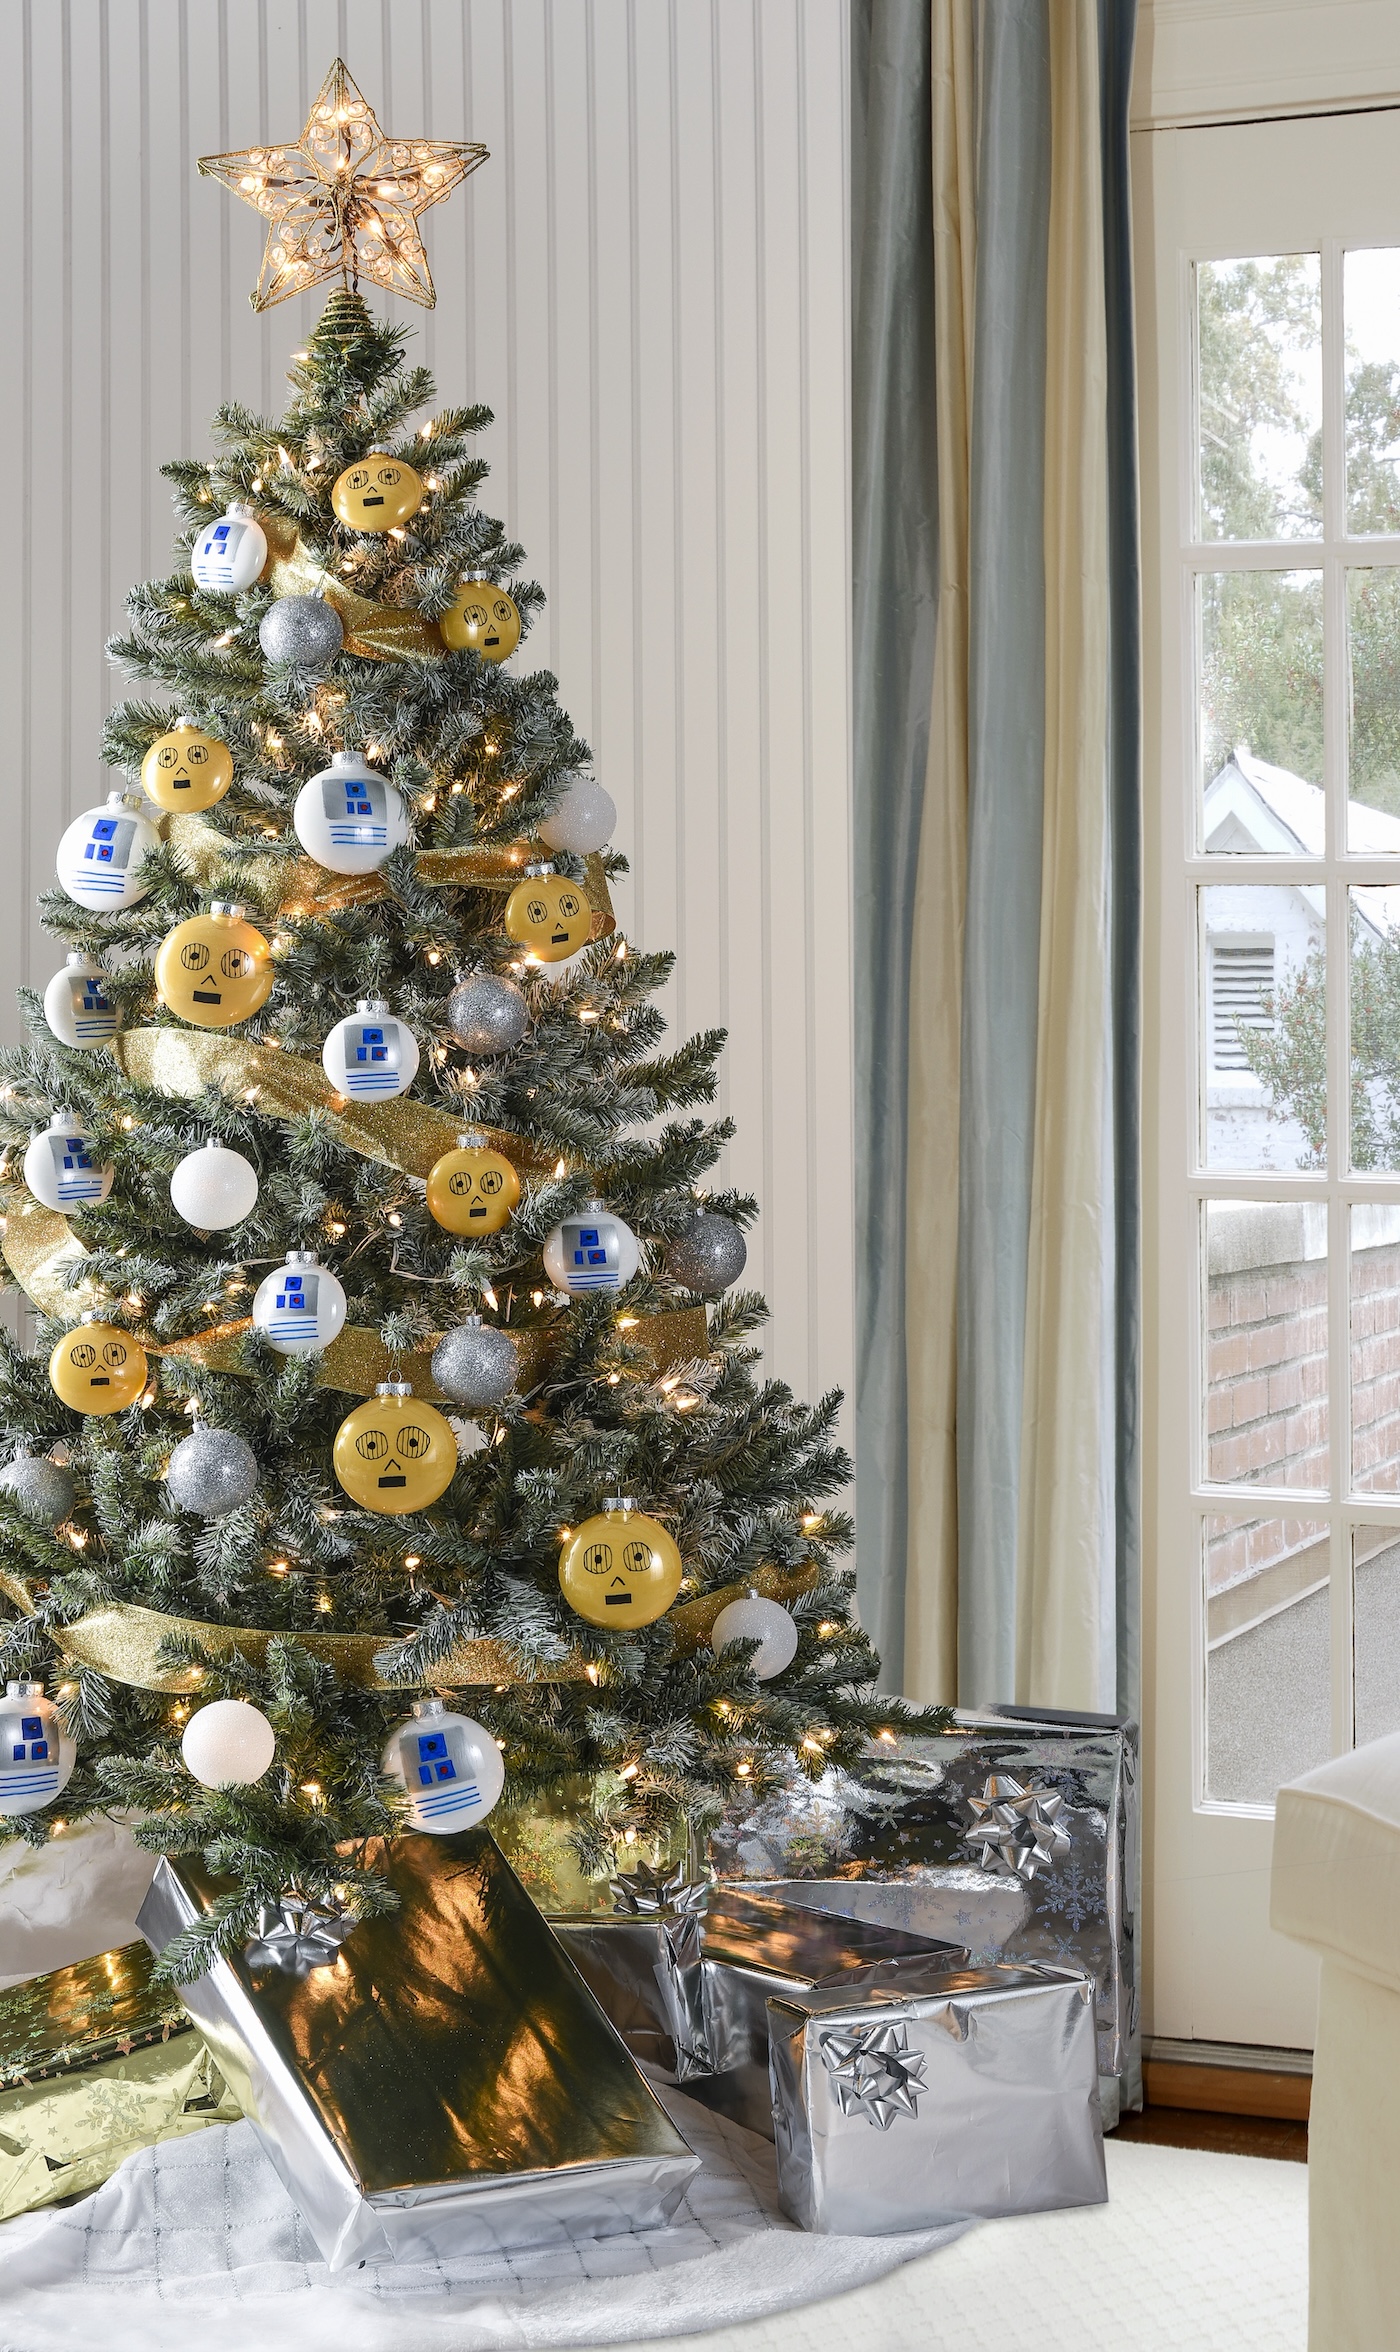
I’ve had a dream for a while – a dream of having a Star Wars themed Christmas. Because when you’re obsessed with the original trilogy, it naturally makes sense, right?
I finally executed my dream this year with a Star Wars Christmas tree as part of the Michaels Makers challenge! Let me be honest though, the whole process wasn’t easy. It took me awhile to figure out which particular Star Wars theme I would go with.
I finally decided to make my tree a little more subtle (if there is such a thing when your theme is Star Wars?) and go with the droids. Why? Because they are silver and gold, and I like those colors for Christmas.
They’re actually pretty traditional. I figured that someone might approach my tree and think, “hmmm . . . . what are those?”
(get Star Wars crafts that are out of this world!)
Then they’d come a little closer and see this:

Cute C-3PO and R2-D2 ornaments staring them in the face! Nestled in the branches of my Star Wars Christmas tree amongst silver and white glittery baubles. I love them so much!
I bet you are wondering how I made them. It’s REALLY easy.
Gather These Supplies
- Non-breakable fillable ornaments – I used 8 large and 12 small
- FolkArt multi-surface paint in Titanium White and Pure Gold (about 4 – 5 bottles each)
- Sharpie paint markers – Black, blue, red, silver
- Paper towels
- Cups for draining excess paint
What did I do to put the tree together? I flocked it first with a snow spray purchased at Michaels. I let that dry, then put a gold ribbon around it.

Finally, I placed a star topper on the very top, then hung up the Star Wars ornaments. I filled in with silver and white glitter balls!
A pretty white and silver tree skirt along with some packages went beneath.
I adore my Star Wars themed Christmas tree! It’s not too overwhelming, but the perfect amount of “the force” to compliment my holiday decor. I’d love to know what you think!
Star Wars Christmas Tree
Equipment
- Paper towels
- Cups for draining excess paint
Materials
- 20 Non-breakable fillable ornaments 8 large and 12 small
- 10 bottles Multisurface craft paint in Titanium White and Pure Gold, about 4 – 5 bottles each
- 4 Sharpie paint markers black, blue, red, silver
- Rubbing alcohol
Instructions
- Take the lid off each ornament. Swirl a bit of rubbing alcohol around inside and pour back into the bottle. Let dry.
- Squeeze several drops of paint into the ornament. Roll around and shake (use paper towel to cover the top) until the inside is coated. Add more paint if necessary.
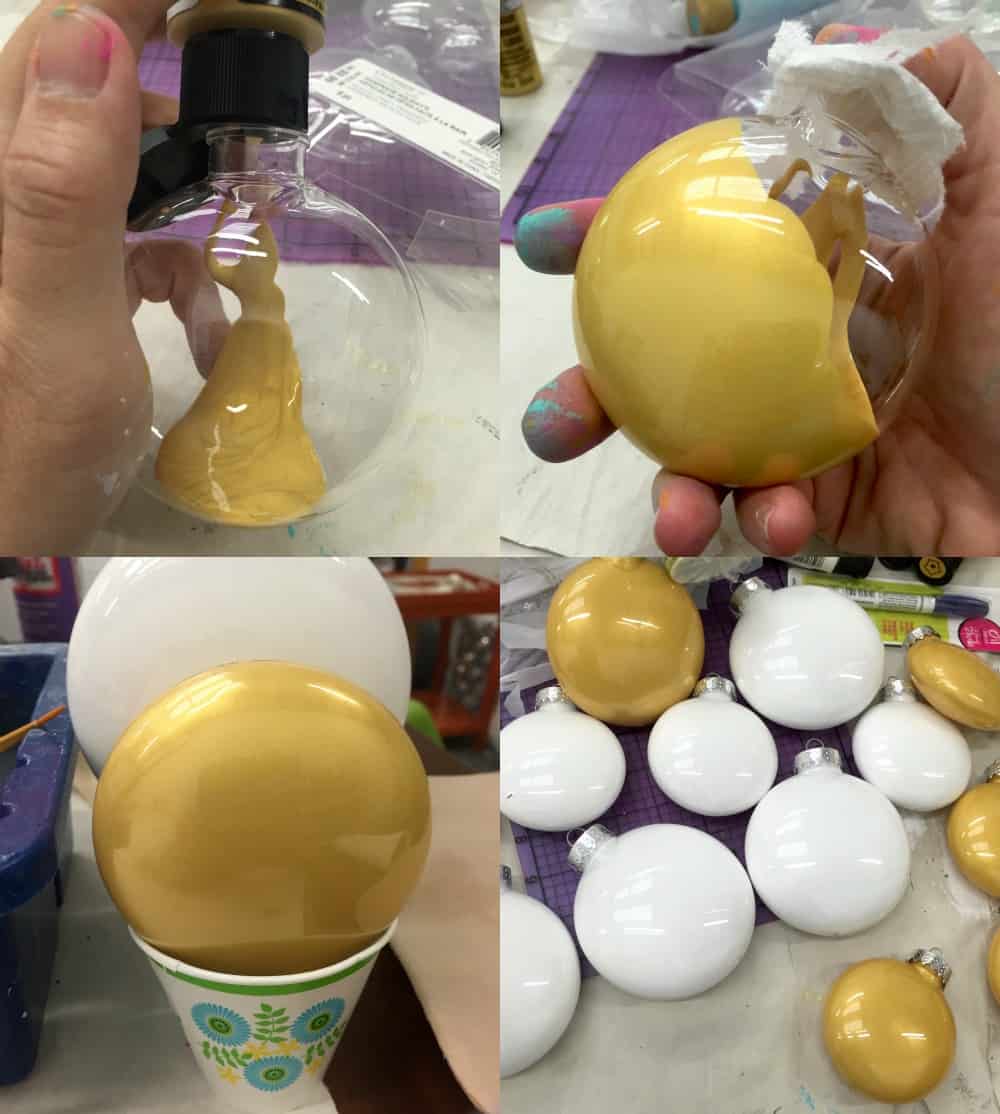
- Stand up a small cup and place the ornament upside down to drain. When most of the paint is drained, you can pour it back into bottle. Replace the ornament upside down to dry. Drying can take from 1 day to several days depending on the climate. Replace the lids of your ornaments when dry.
- Use fine tip oil based Sharpie paint paints to create the C-3PO and R2-D2 faces.

- Hang on a flocked tree and add additional ornaments as you like.
Did you enjoy this cute themed tree? Let me know in the comments! Plus check out these other posts:






What a unique and delightful way to decorate a christmas tree
Thank you for this. it is super cute. 🙂
Wow! I absolutely love how you incorporated the droids into your Star Wars Christmas tree theme. R2-D2 and C-3PO ornaments are such a clever touch, and the silver and gold color scheme makes it feel festive without being overwhelming.