A miter saw is a power tool that lets you cut at a variety of angles! It’s a very versatile tool; learn the basics and how to use it here.
Of all the power tools you can use on a regular basis, the miter saw is one of my favorites. Let’s face it – it’s fun to operate tools.
But just because it’s fun to operate a tool – that doesn’t make it useful. However the miter saw is both! It’s fun to operate and it’s very useful.
To give you an idea of how much you can do with this saw, we’ve made some projects you should check out. Take a peek at this beer caddy, mirror frame, coffee table, outdoor table, hose holder, and platform bed frame.
That’s just a small sampling of what you can make, but as you can see it’s good for projects large and small. I can’t express how versatile this tool is!
How to Use a Miter Saw 101
So why should you have this tool? The primary purpose of a miter saw is to make crosscuts and miter cuts with high precision:
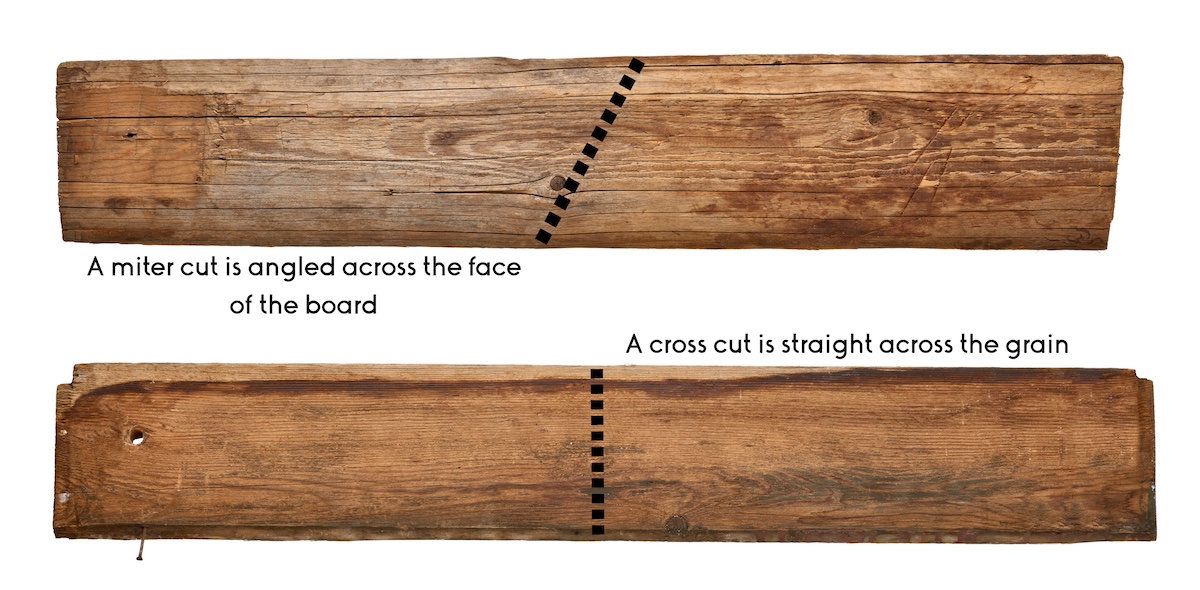
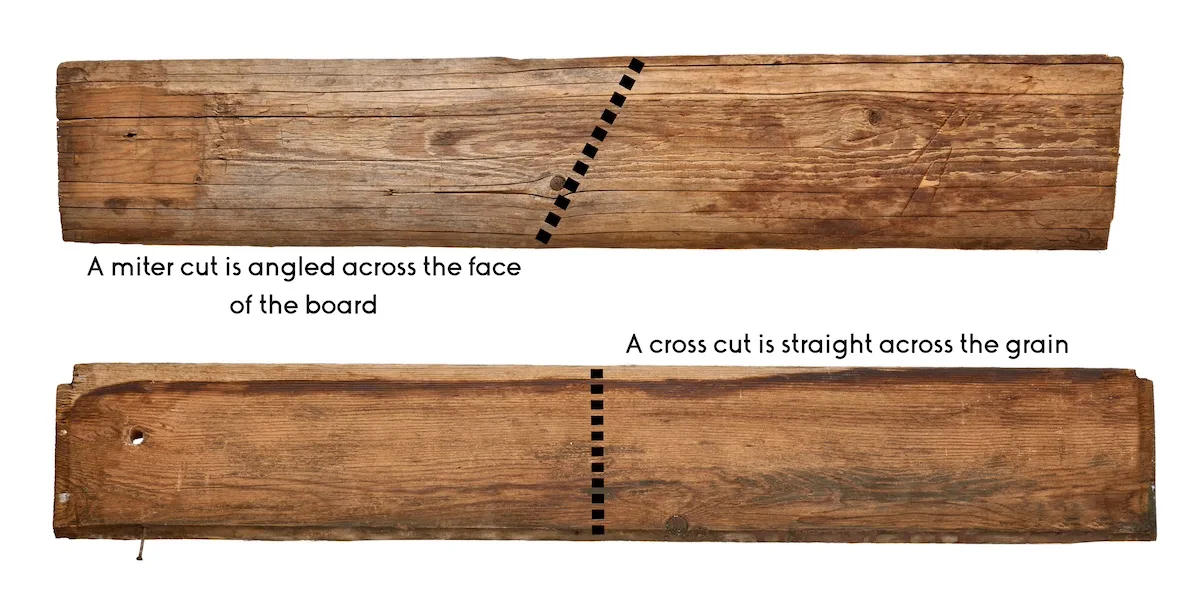
Crosscuts are cuts that go straight across the grain of the wood, while miter cuts are angled cuts useful in forming corners. You’ll make these cuts a lot if you do woodworking, making this saw must-have in your tool arsenal.
Depending on the type of saw you have, it might also be able to make bevel and compound cuts as well!
What is a miter saw good for?
Miter saws are designed for quick and efficient cutting. They are ideal for projects that require multiple cuts with the same angle, such as picture frames, window casings, or crown molding.
Even for beginners, these saws are relatively easy to operate. With basic instructions and safety guidelines, most people can make precise cuts without extensive training.
A miter saw often gets confused with other saws – so before we move onto to how to use this tool, I wanted to alleviate some confusion.
Chop Saw vs Miter Saw
You may hear these terms used interchangeably, but chop saws are primarily used for cutting hard materials like metal and heavy-duty lumber. They are more robust and powerful.
Chop saws generally only make straight, 90-degree cuts. The blade is typically larger, and moves up and down in a chopping motion.
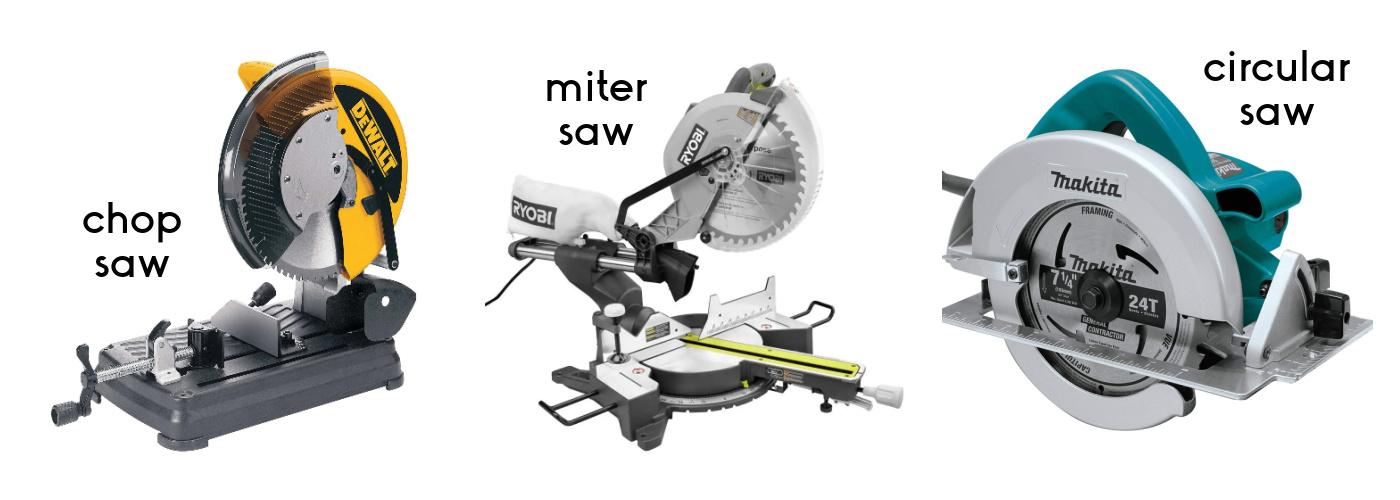

Circular Saw vs Miter Saw
A circular saw is a handheld tool with a round blade, making it highly portable and versatile. This saw for rough construction work, cutting large sheets of material (like plywood), and where mobility is crucial.
It’s generally less precise than a miter saw, and requires a steady hand. The miter isn’t handheld at all; it’s stationary with a mounted blade.
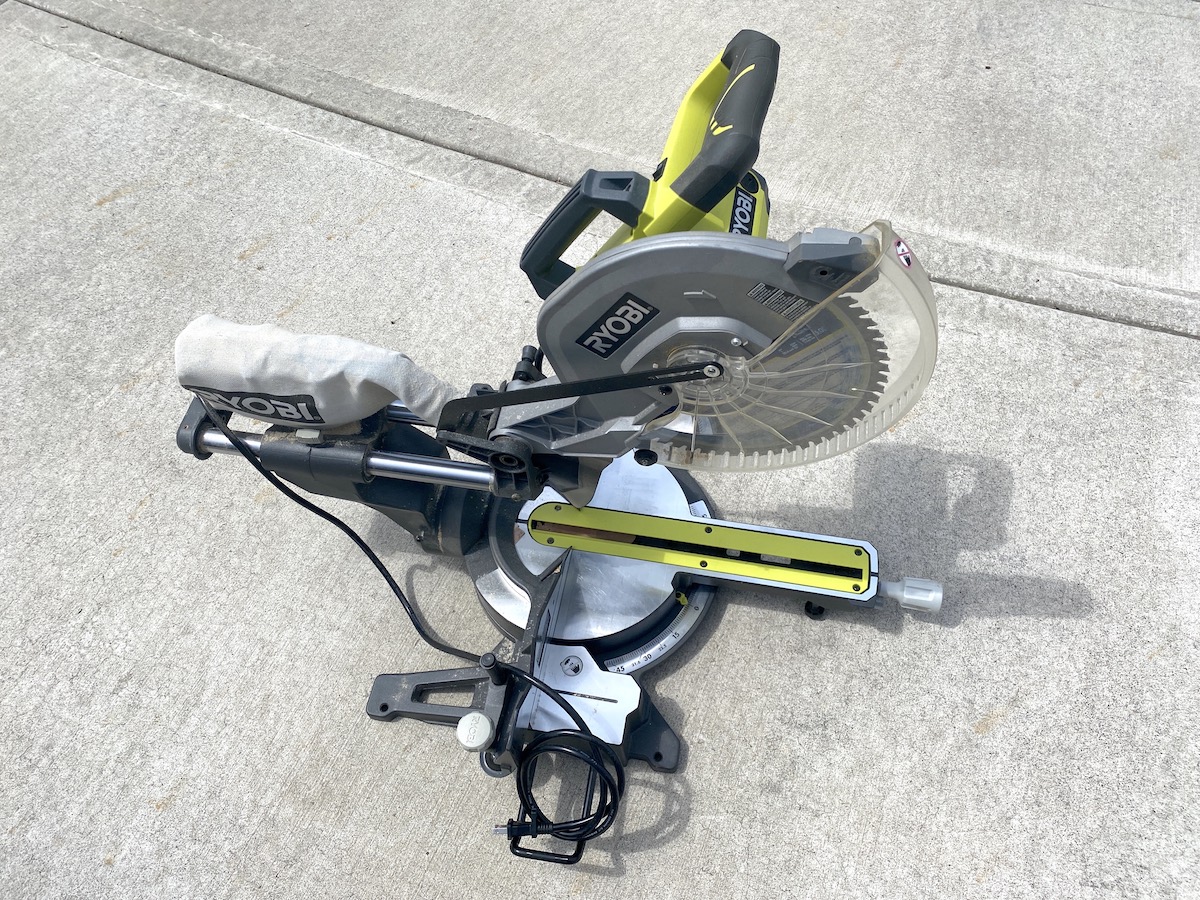
Components of a Miter Saw
Now that you are more familiar with this saw and why you would use one – let’s talk about the components! You need to understand the anatomy before you use your tool.

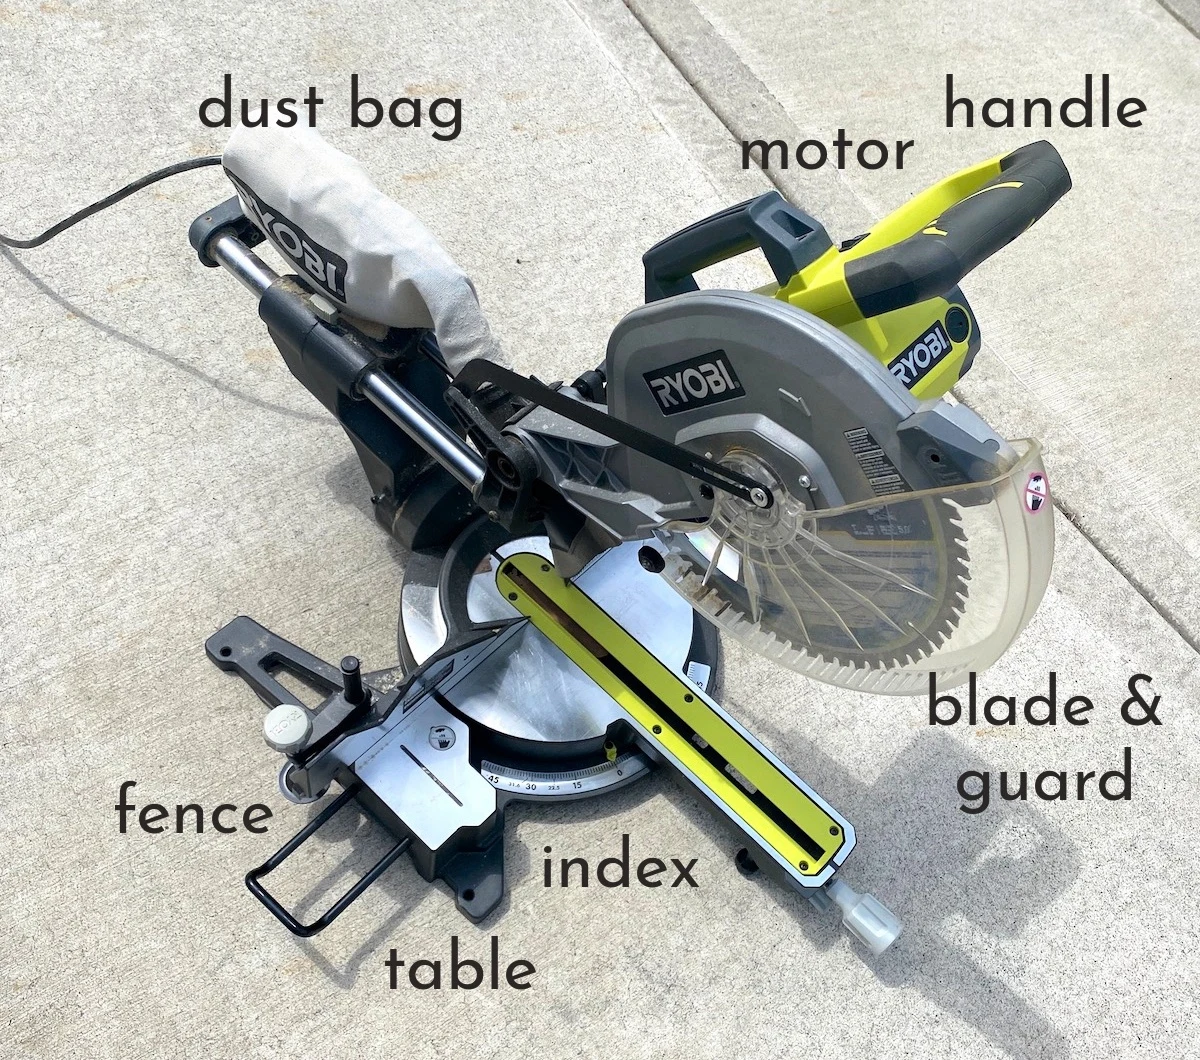
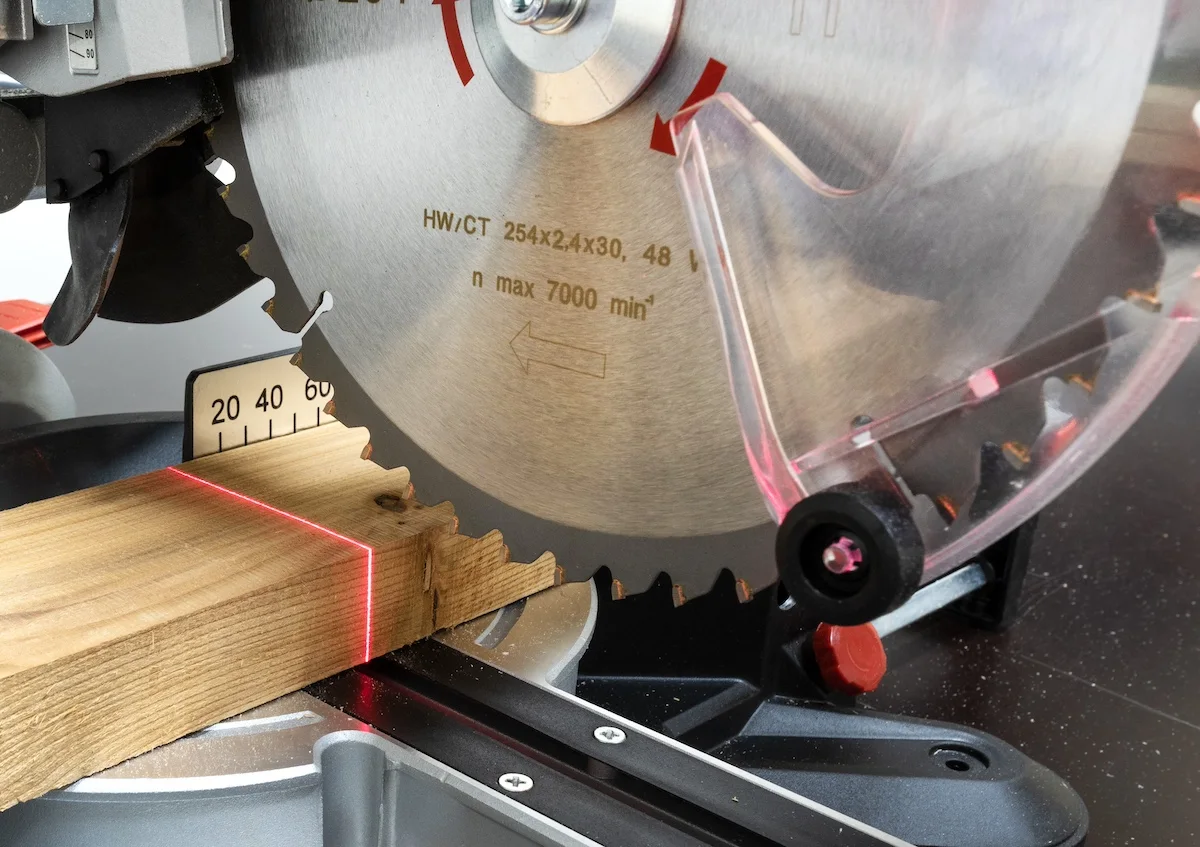
Blade: The most critical part of the miter saw, the blade does the actual cutting. Blades come in various sizes and types, depending on the material to be cut and the type of cut desired.
Motor: Powers the blade. The motor’s strength (usually measured in amps) determines the saw’s ability to cut through different materials.
Miter Index: Allows you to adjust the angle of the blade for making miter cuts. The miter index typically has preset stops for common angles like 15°, 30°, 45°, etc.
Fence: Serves as a guide to keep the material stable and ensure a precise cut. The fence is particularly important for getting straight, accurate cuts.
Table: The flat surface where the material to be cut is placed. The table needs to be sturdy and stable.
Blade Guard: A safety feature that covers the blade when it’s not in use and retracts when the saw is operating.
Handle and Trigger: The handle, with an integrated trigger, is used to operate the saw. Pulling the trigger engages the motor and lowers the blade to make the cut.
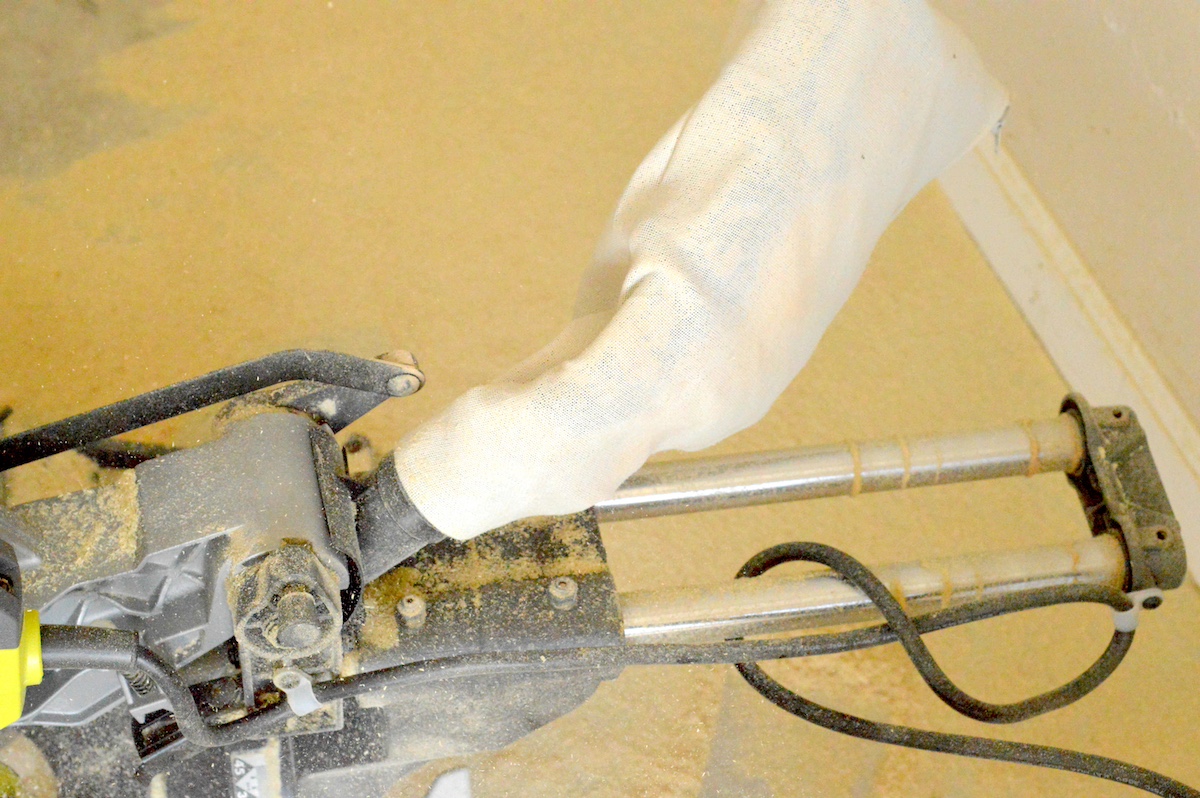
Dust Bag/Collection System: Helps manage sawdust and keep the work area clean. Some models come with a bag; others can be hooked up to a shop vac.


Basic Operation
Before you get started, make sure to observe ALL the safety warnings on your saw and get on your safety equipment. Keep a first aid kit handy in your workspace.
Always read the manual specific to your miter saw model for detailed instructions and safety information. Practice with some scrap pieces to get a feel for the saw before starting your actual project.
Set Up Your Workspace
- Choose a stable, flat surface for your miter saw.
- Ensure adequate lighting.
- Keep the area free of clutter.
Prepare Your Saw
- Make sure it’s off and unplugged before making any adjustments.
- Check the blade to ensure it’s sharp and appropriate for the material you’re cutting.
- Plug in the saw and turn on.
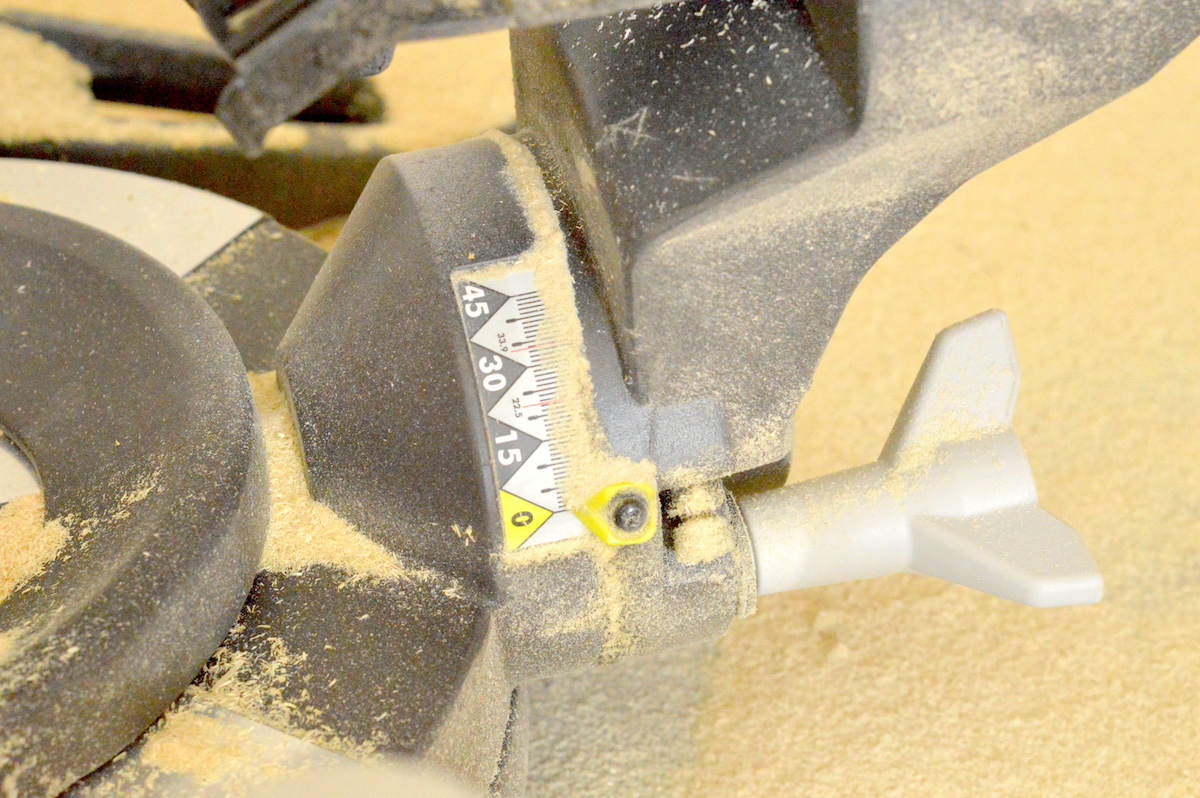

Adjust the Saw for Your Cut
- Use the miter index to set the angle of your cut. Lock it in place.
- If making a bevel cut, tilt the blade to the desired angle and lock it.
- For a sliding miter saw, adjust the slide mechanism as needed.

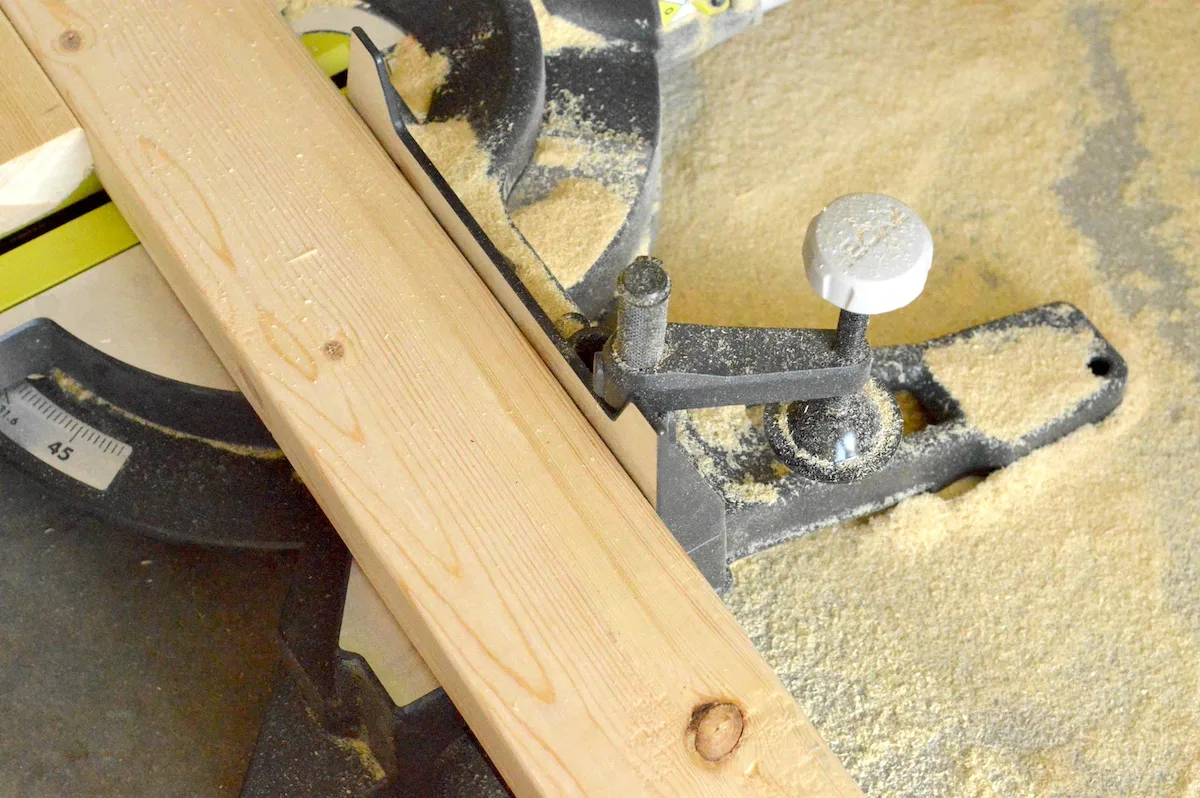
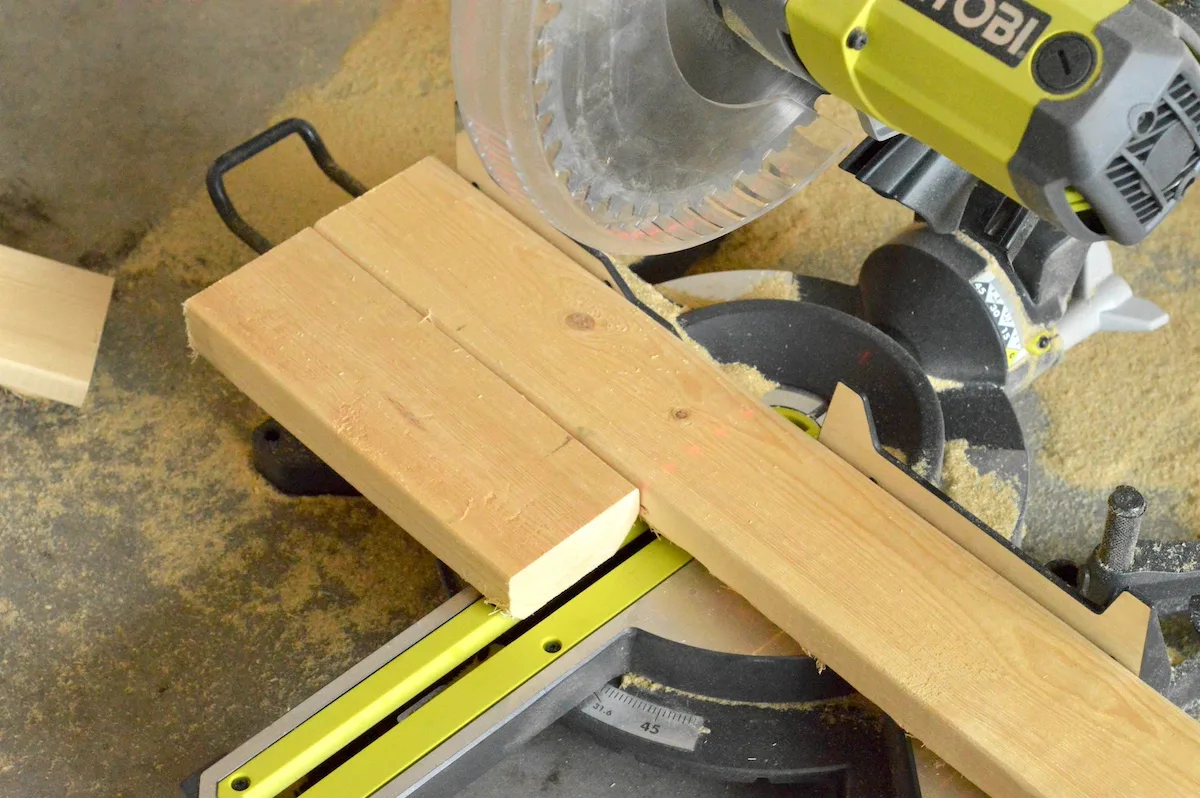
Secure the Material
- Place the material (wood, etc.) on the saw table against the fence for stability.
- Use clamps if available to securely hold the material in place.
Position the Blade
- Raise the blade guard.
- Without turning on the saw, lower the blade to the material to ensure proper alignment.

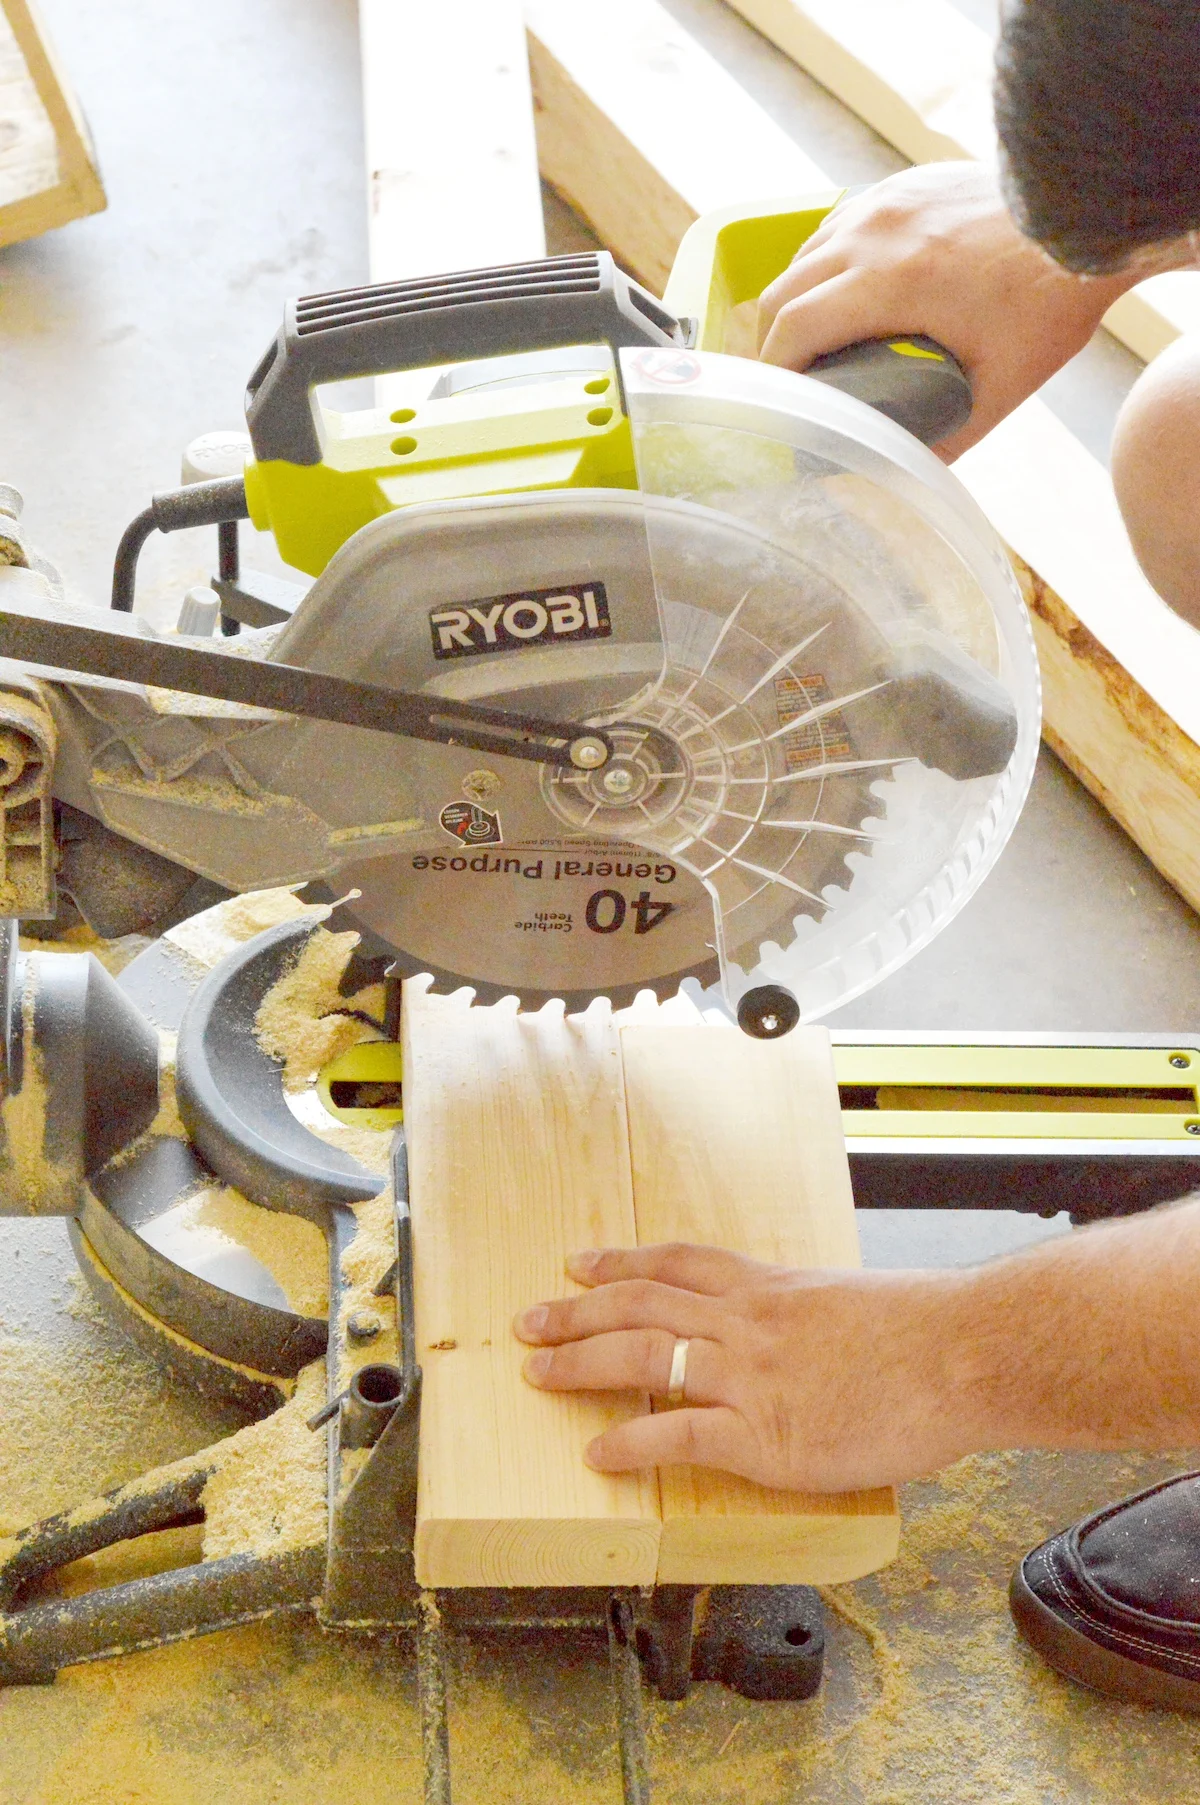
Make the Cut
- Hold the material firmly against the fence.
- Start the saw and let it reach full speed.
- Lower the blade smoothly through the material. For sliding saws, slide the blade forward as you cut.
- Keep your hands away from the blade.
Complete the Cut
- Continue until the cut is complete.
- Release the trigger and let the blade come to a complete stop.
- Raise the blade and return it to its resting position.

Handling Offcuts
- Wait until the blade stops before removing any offcuts.
- Keep the area clean to avoid any accidents.
Repeat as Necessary
- If you need to make multiple cuts, turn off the saw to adjust the material or settings each time.
Power Down
- Turn off the saw and unplug it when you’re done.
- Clean up any sawdust or debris.
Maintenance and Care
Proper maintenance and care are crucial for the longevity and performance of your miter saw. Tools are expensive! So I encourage you to keep them maintained.
After Each Use: Brush off sawdust and debris from the saw table, fence, and other parts. A soft brush or air compressor can be used for this.
Deep Cleaning: Periodically, use a damp cloth to wipe down the saw. Avoid getting moisture in the motor or other electrical parts.
Lubricate the pivot points and sliding parts with machine oil as needed. This keeps the movement smooth and prevents rust.

Check the Blade
Always ensure the saw is unplugged before handling the blade.
Regularly check the blade for dullness, warping, or damage. Clean the blade with a blade cleaning solution to remove sap and resin buildup as needed.
Check for Wear and Tear
Inspect belts, cords, and moving parts for wear and tear. Replace any cracked, worn, or damaged parts immediately.
Calibration and Alignment
Regularly check and adjust the alignment and accuracy of the blade and fence. Refer to your saw’s manual for specific calibration procedures.
When to Change the Blade
Dullness: If the saw is struggling to cut or burns the material, it’s a sign the blade is dull.
Damage: Replace the blade if you notice any chips, missing teeth, or warping.
Specific Projects: Use a blade suitable for the material and type of cut. Change the blade when switching to a different material or cut type.

Storing Your Saw
Store the saw in a dry, clean place to prevent rust and damage. Always unplug the saw before storing it.
Ensure the saw is stored where it won’t be knocked over. Lower the blade guard when storing to protect the blade and prevent accidents. Use a saw cover or a cloth to keep dust and debris off the saw.
Do you have any questions? I’d love to know in the comments! I’d also love for you to check out these other tool guides: