Surprise Message Card That Kids will Love to Make!
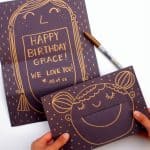
Learn how to make a surprise message card that the recipient will love! This cute secret message card is perfect for birthdays and holidays. Such a great kids’ craft project.
Skills Required: None. Even if you’ve never crafted before, you’ll be able to make this project. It’s simple drawing with a paint pen and folding of paper.
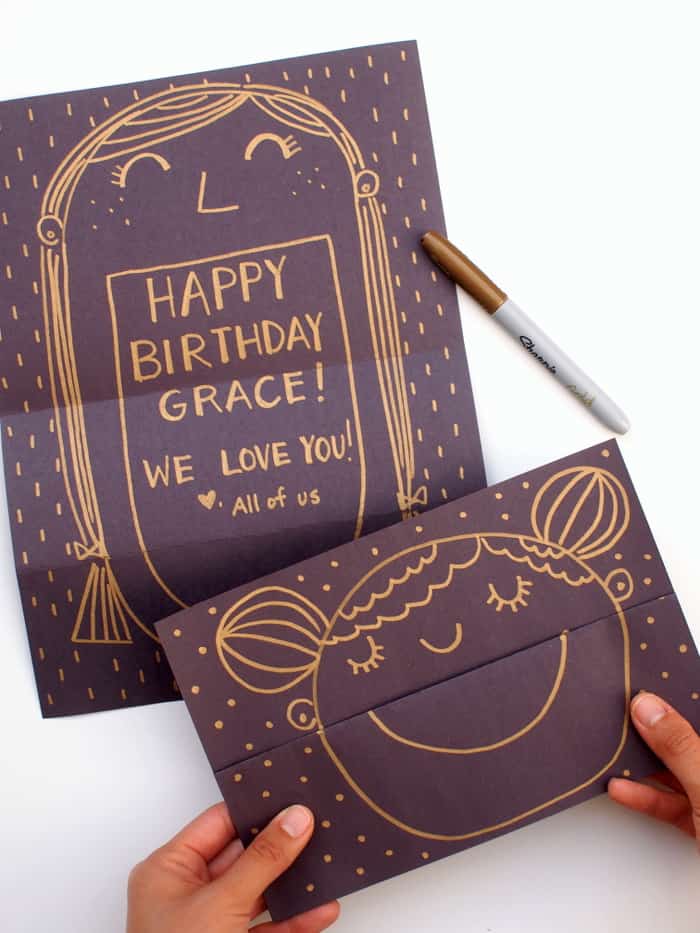
It’s always fun finding greeting cards that surprise you. A secret pop-up message, unexpected music, or a funny image always make me smile.
Hi! It’s Leslie from Pink Stripey Socks. Today I’m sharing really fun surprise DIY cards that kids can make for friends and family! (These cards were inspired by the ferocious being cards found here.)
When folded, the card looks like just a simple smiling face. But once it’s unfolded, a fun hidden message is revealed inside!
Children are going to love making their own faces and designs on their cards. Here’s how they’re done.
Secret Message Card
Gather These Supplies
- Black construction paper
- Gold Sharpie markers
- Scissors or paper cutter (optional)
- Pencil (optional)
Tips for this project:
- This definitely needs a thicker paper to be a fun project. I would use construction paper, cardstock, or even scrapbook paper.
- Before beginning, cut the paper down to be the size you like. I just used a regular sheet of construction paper, untrimmed. But if you’d like, you can cut it down with scissors or a paper cutter.
- If you or your children aren’t confident in your drawing skills, go ahead and draw the elements in pencil first. Then you can trace over those parts with the marker, and you won’t see the pencil below (or you can lightly erase).
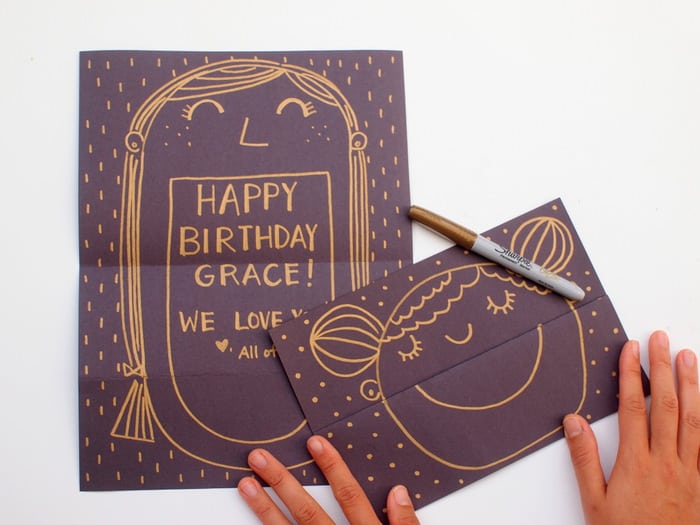
Once you’re ready to give this project a try, check out the printable how to card below.
Surprise Message Card
Equipment
- Scissors or paper cutter
- Pencil(s) optional
Materials
- 1 piece Construction paper black
- Sharpie(s) gold
Instructions
- Fold your paper in half vertically. Keep the open portion to the top and the fold at the bottom.

- Fold the top sheet down so that it meets the bottom fold made in the previous step.

- Use the marker to make a large circle on the front of the card.

- Draw eyes and nose above the fold. Draw a pair of ears so that they end right above the fold.

- Draw a smile on the front flap so that it touches the fold. Add hair.

- Open the card. Draw the top of the mouth below the ears (to make sure the mouth is hidden when the card is folded).
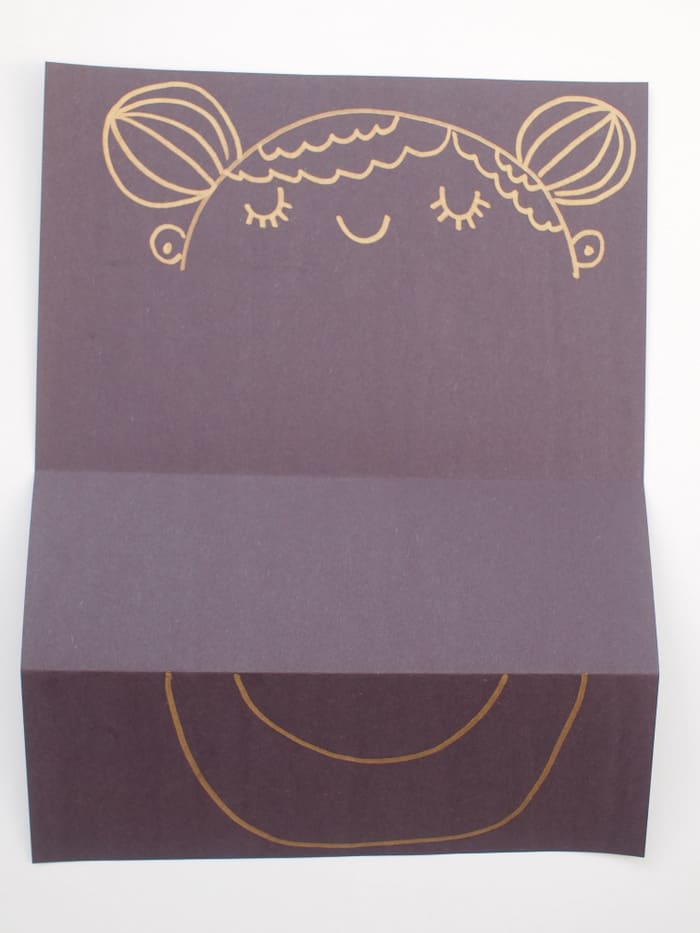
- Connect the top and bottom of the mouth with lines. If your child needs help making a straight line, use a ruler.
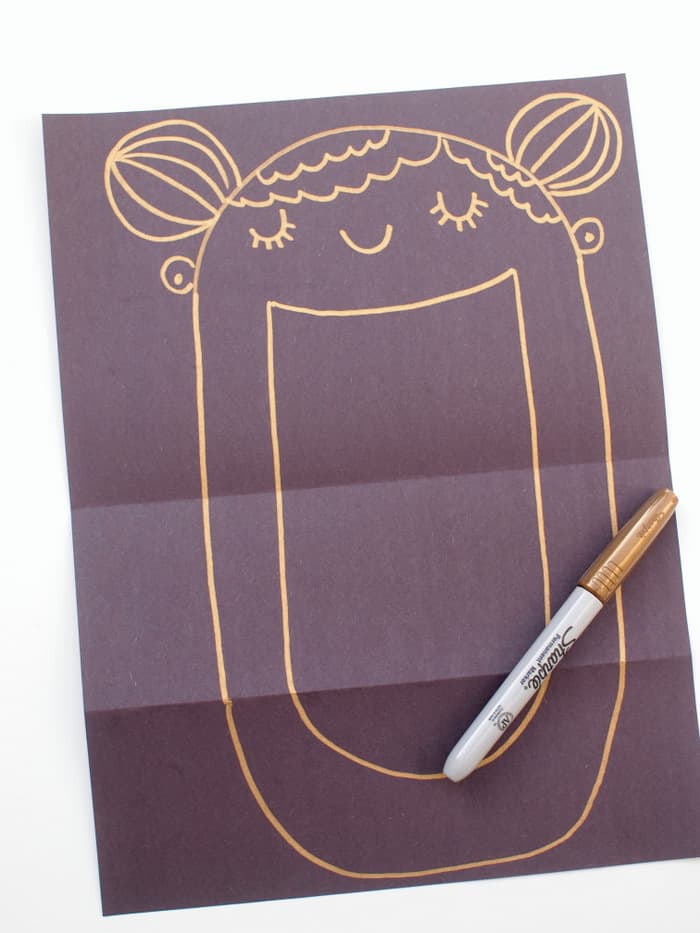
- Write a message inside the mouth. Make sure that it finishes above the bottom fold so that the words are hidden when the card is closed. Add in any extra details like dots or stars in the background.

Notes
Voila! Aren’t these DIY cards so easy-to-make and adorable? My 5-year-old and I made a whole bunch for several friends’ birthdays. The secret messages are sure to bring smiles.
If you try this craft, I’d love to know in the comments! Looking for more fun kid-made card ideas? Check out these other posts below:
Happy making, friends!

