Craft a Gorgeous Yarn Wall Hanging Without Breaking the Bank
If you love budget friendly decor, this is your project. Learn how to make this unique yarn wall hanging with a stick and some cute colors of yarn.
Skills Required: None. Even if you’ve never crafted before, you can make this wall hanging. You’ll be tying yarn and spray painting, and all that’s required is patience.

Our new place has a lot of bare walls begging for some attention. I like to mix things up and avoid putting something framed on each and every wall, so I came up with this DIY wall hanging idea for a change of pace.
I’m excited to share this yarn wall hanging with you because it’s SO easy. You’ll only need to cut a dowel rod down to size, cut yarn, and then drill holes in the ends to attach your hanger. Although I have an option for that if you don’t have a drill!
I love that this wall hanging goes with a variety of styles including boho, farmhouse, modern . . . it’s really about the choice of colors and how you put them together.
You can use items already in your home to help you pick yarn colors, but I also love using Design Seeds for color palettes.

Once you pick your colors, the rest of this wall hanging is simple. Ready to get started on this yarn craft? Here’s how it’s done.
Gather These Supplies
- Dowel rod – 1 inch in diameter, cut down to 21″
- Piece of wood or cardboard for wrapping yarn – mine was about 21″
- Skeins of yarn – 3 in complementary colors
- Scissors
- Drill (optional)
- Saw – to cut down your dowel rod
For wrapping the yarn: I used a board that was about 21″ inches in length that I had leftover from another project for wrapping. Stiff cardboard would also work.
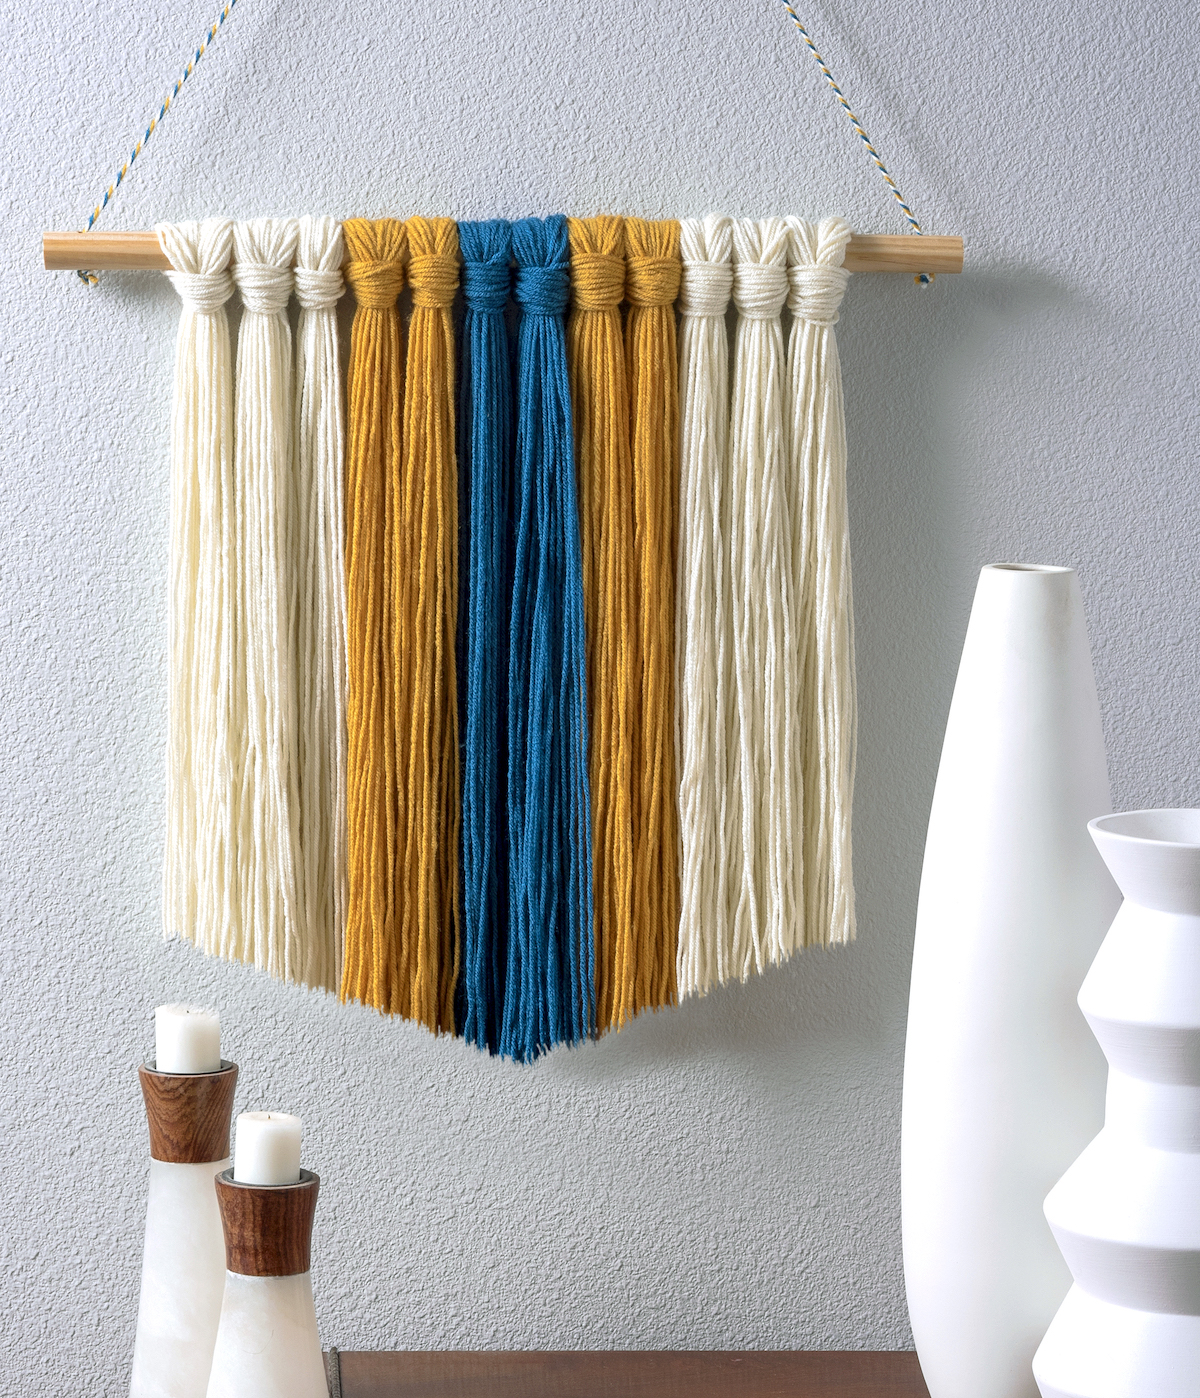
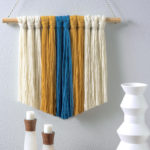
The finished hanging really looks awesome on the wall. I can’t believe this didn’t take that long to make, and how good it looks! It would be fun to experiment with different colors and styles of yarn.
Yarn Wall Hanging
Equipment
- Drill with drill bits optional
- Saw
Materials
- 1 Dowel rod(s) or stick
- 1 piece wood or cardboard, to use for wrapping
- 3 skeins Yarn complementary colors
- Sandpaper
Video
Instructions
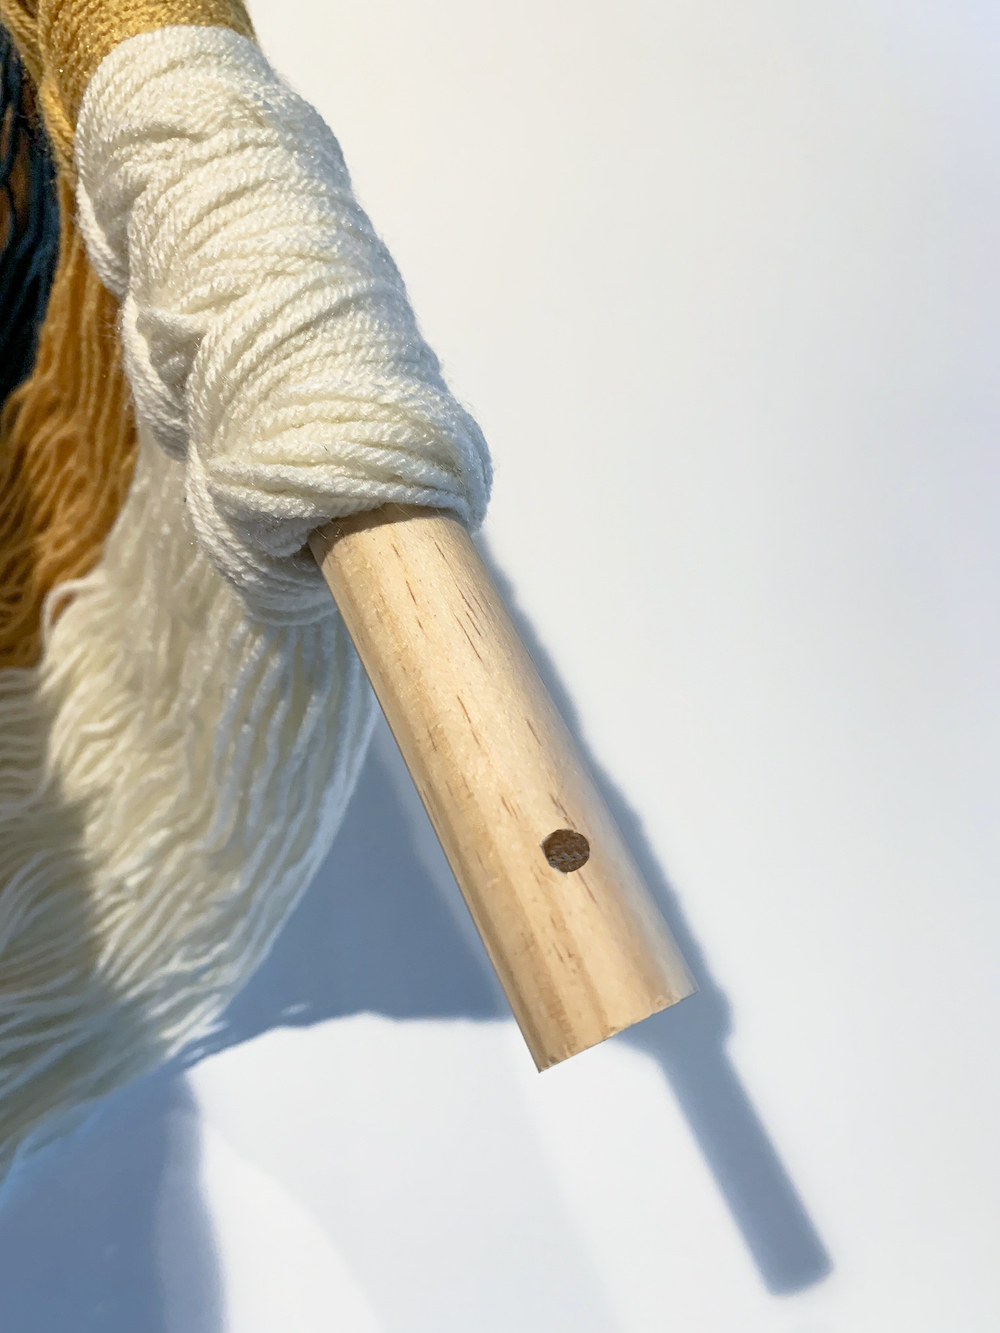
- Select a dowel rod and cut down to size using a saw. Sand the ends to clean up.
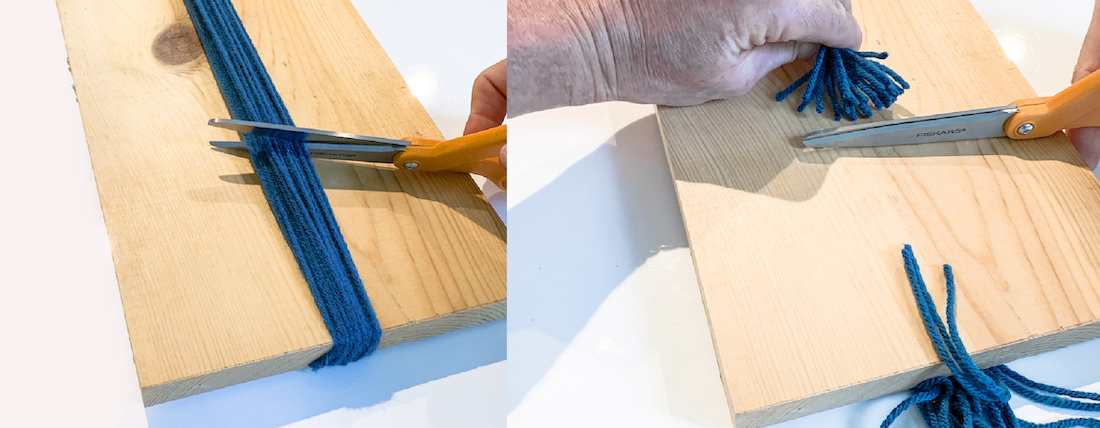
- Begin with the center color. Wrap the yarn around your wood or cardboard about 15 – 16 times. Trim the end.
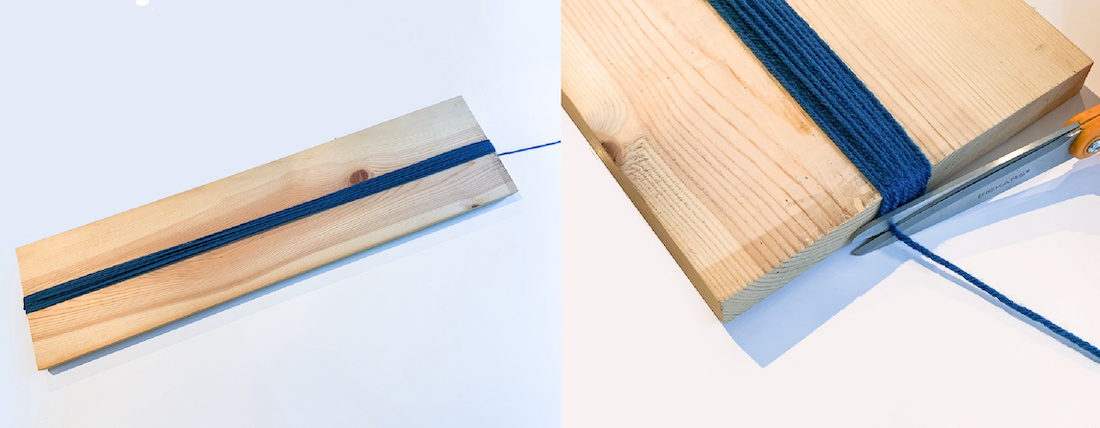
- Once you are done wrapping and have trimmed the end from the skein, cut across the yarn. You'll basically have 15 – 16 pieces of yarn together that will be tied to your dowel.
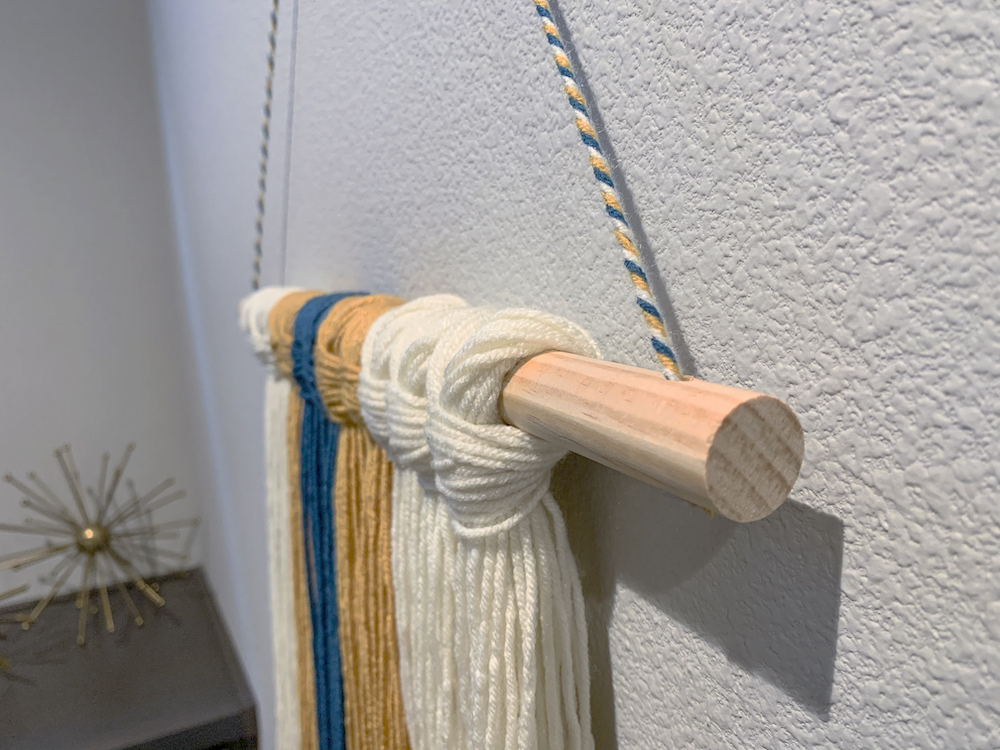
- Double the yarn (fold it in half) so that there is a loop at the top and the ends are all at the same length. Take the top of the yarn stands and flip it over as shown in the picture, creating a loop with the yarn.
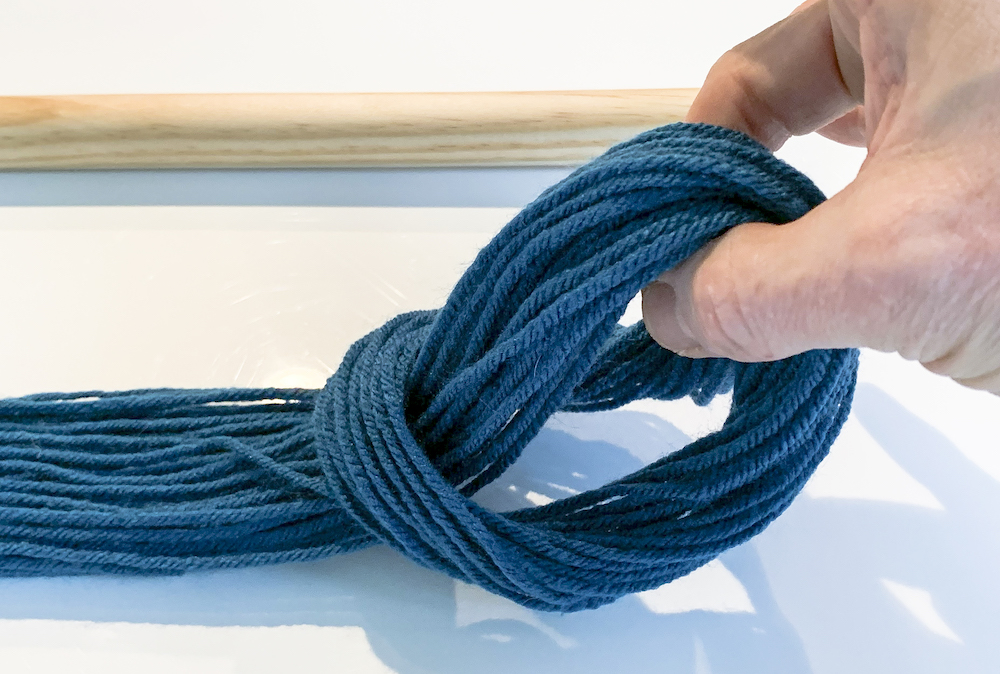
- Tighten the loop around the dowel rod toward the center. You can adjust later, and don't worry about the yarn being completely even at the bottom at this moment. Repeat, so that you have two strands of color A in the middle of your rod.
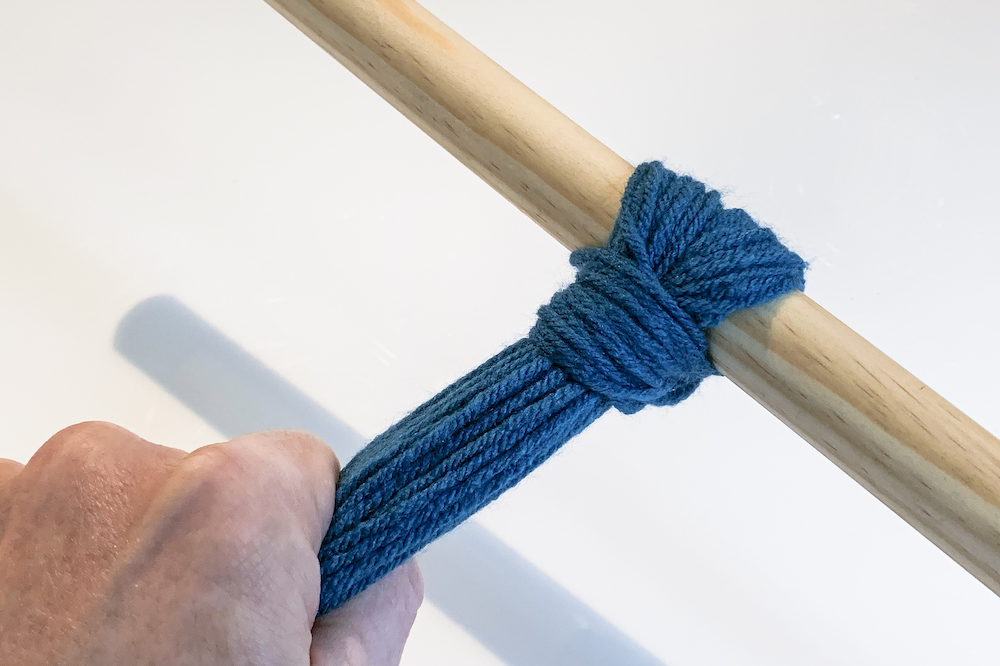
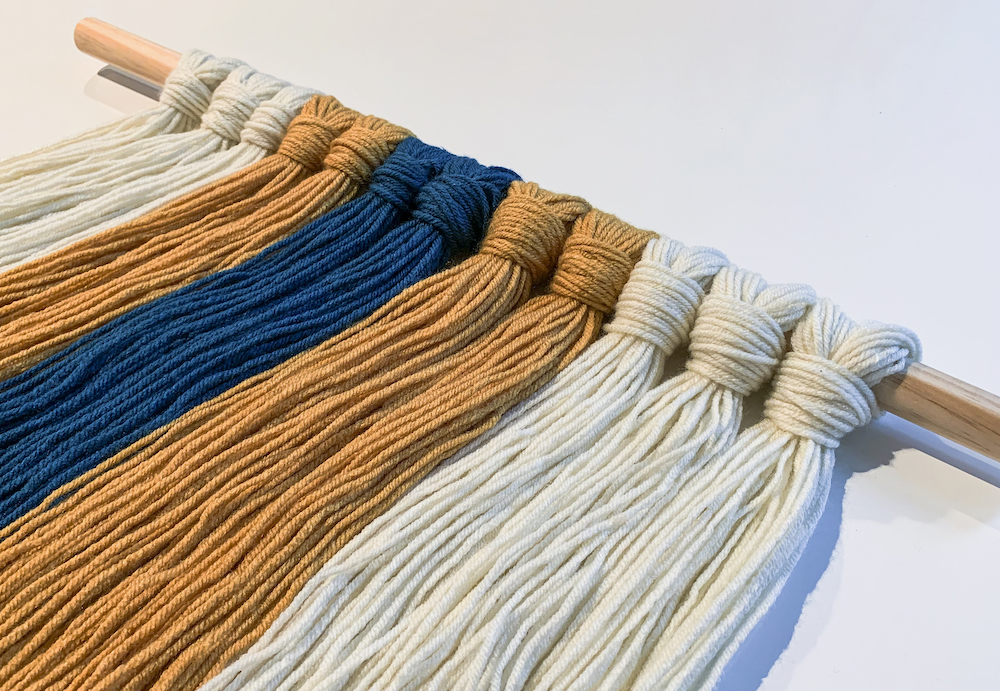
- Select color B, and then make four yarn strands to put on your dowel rod, two on either side of color A. Finish with color C – using three strands each on either side of color B. You will end up with 12 total lengths of yarn.
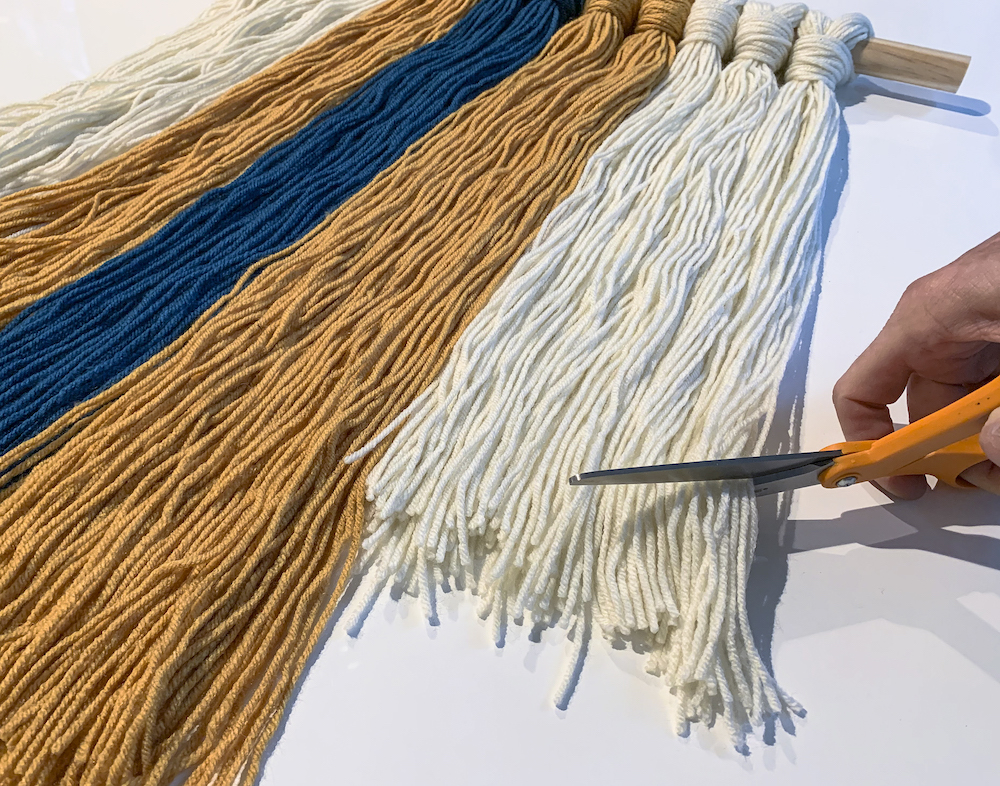
- Clean up the yarn by trimming the ends. You could cut straight across, create a "v" shape; whatever you like. I chose to create a v-shape.
- Drill into each end of the dowel rod for hanging (this is optional; you can also tie the yarn onto the ends).
- Create a braid of the three colors of yarn about 24" long, then feed through the holes and knot for hanging. Display on a thumb tack or nail.
Notes
Are you ready to try a yarn wall hanging DIY? I’d love to know how this home decor project works out for you in the comments!
If you like this simple decorating idea, I’d love for you to check out these other easy craft ideas and helpful posts:


I thank you for such good ideas to use my yarn!!
I have a “lot” of yarn and now I see there are a lot way to use it, thank you!!!
easy to do but very beautiful handcraft
Do you know what kind of yarn you used? I love how it lays!
I used a lot of Lion Brand and Red Heart yarn! I wish I still had the labels.
Worked out awesome, only I took a risk of using a 6 foot long interesting limb found while in the woods.