Have you ever seen a stranded pallet by the side of the road? Don’t pass it by – turn it into a unique pallet shelf with this easy tutorial!
Skills Required: Beginner. You’ll need to know how to use basic tools and a saw to cut the shelf. Make sure to have your protective equipment (gloves, eyewear) as well.
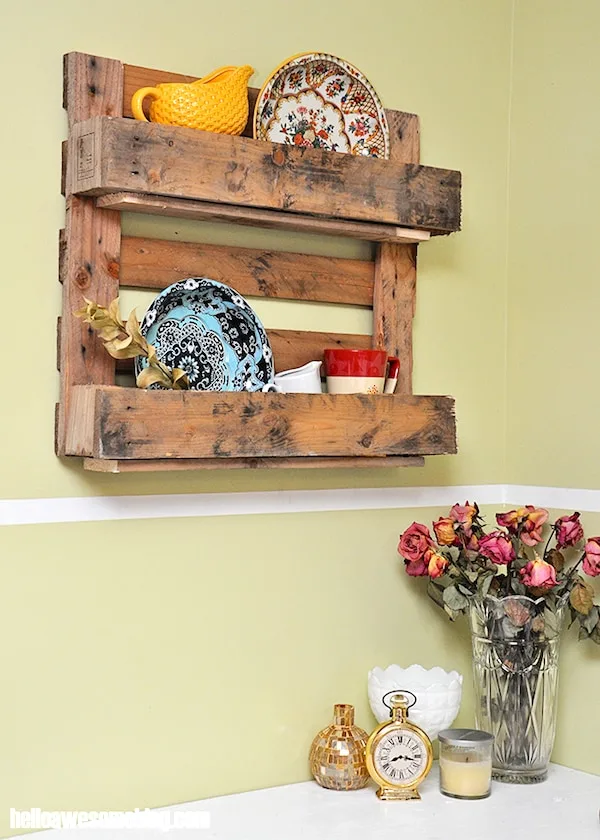
One Sunday morning as we were driving away from church, I noticed a couple of nice looking pallets on the side of the road. And if you’re a newbie to the blog, I love me some reclaimed wood.
There’s this area right across the street from our church building where people pile stuff they don’t want. The last time was this amazing table we picked up for our son’s train set. This time, it was pallet heaven.
It took me a good two weeks to decide that I needed a pallet shelf. The possibilities were endless but when I looked at each room, the kitchen was pretty neglected design wise.
As each room evolves, other ones need a bit of help. So with the help of my handy husband, here’s how to create one for yourself! This is a perfect beginner woodworking project. So if you’re just beginning with power tools, try this home decor idea.
DIY Pallet Shelf
Gather These Supplies
- Pallet (duh)
- Pencil
- Jig saw
- Nail gun or hammer and nails
- Sandpaper (optional)
- Drill and screws
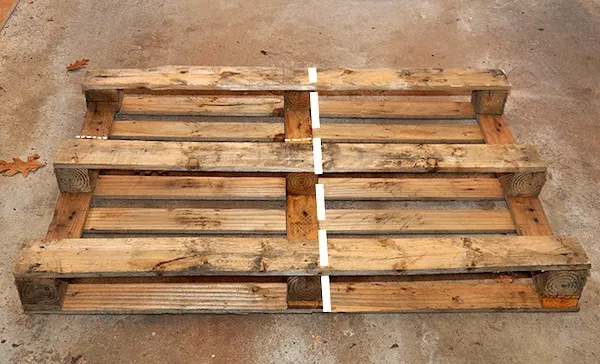
The first thing I did was plan how I wanted my DIY pallet shelf to look and where the cuts should be. The photo above shows where you’ll be cutting with the saw.
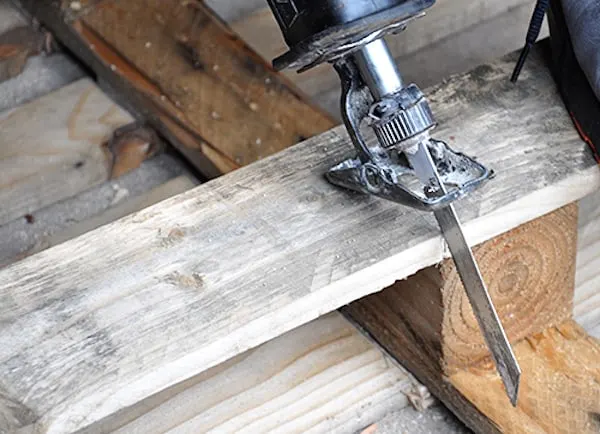
Use the pencil to mark the wood and where you’ll be cutting.
Next take the saw and cut along those lines. Here’s an overview: Count two rows of pallet boards down and cut across the left and center vertical boards.
On the right side of the center board, cut all the way down, both top boards and bottom boards.
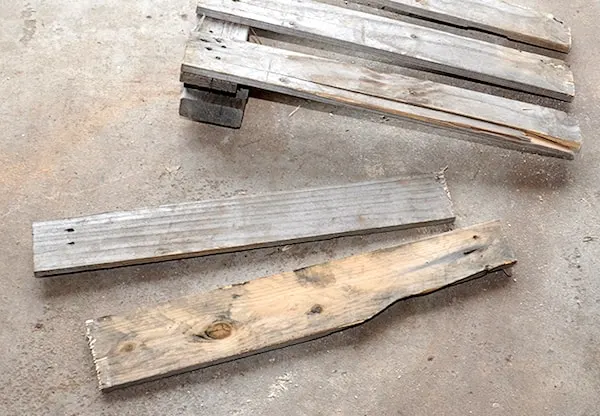
You will have extra boards left over. That’s a very good thing! Choose two of the extra boards and secure them as the shelf bottoms with the nail gun.
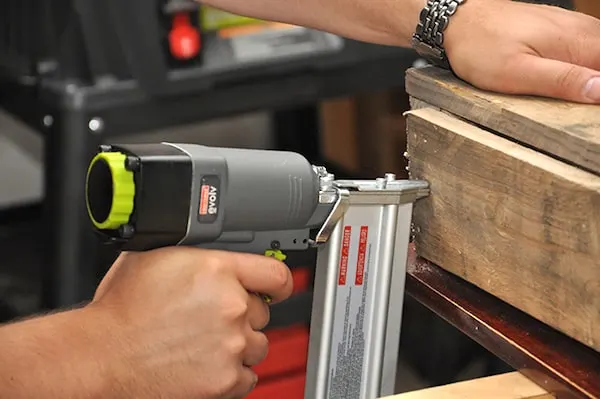
Also, most pallets have old nails so make sure to add some new ones for support all over.
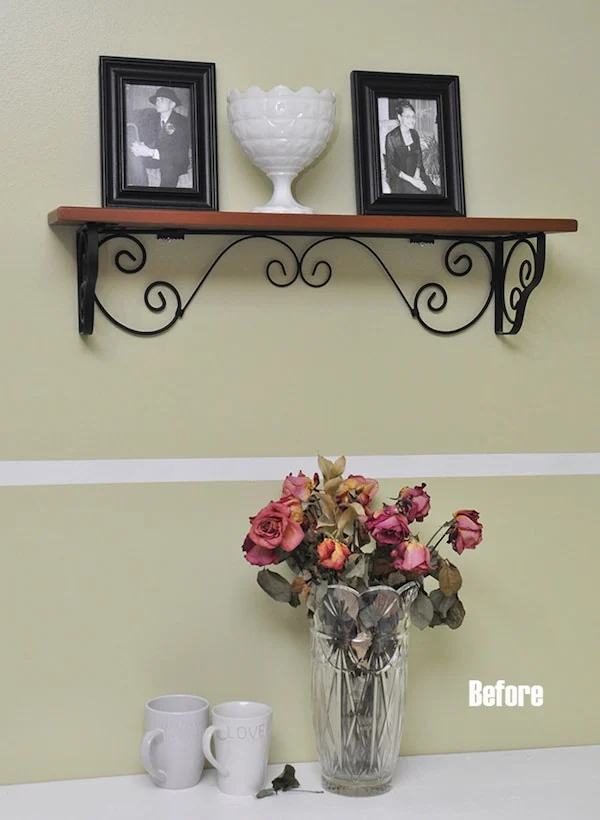
This is the area of the wall where we chose to hang the shelf, just so you can get an idea of the “before.”
Hanging up your DIY pallet shelf can be done a number of ways. I encourage you to find a way that works for you. My husband just used the stud finder and drilled it right to the wall.
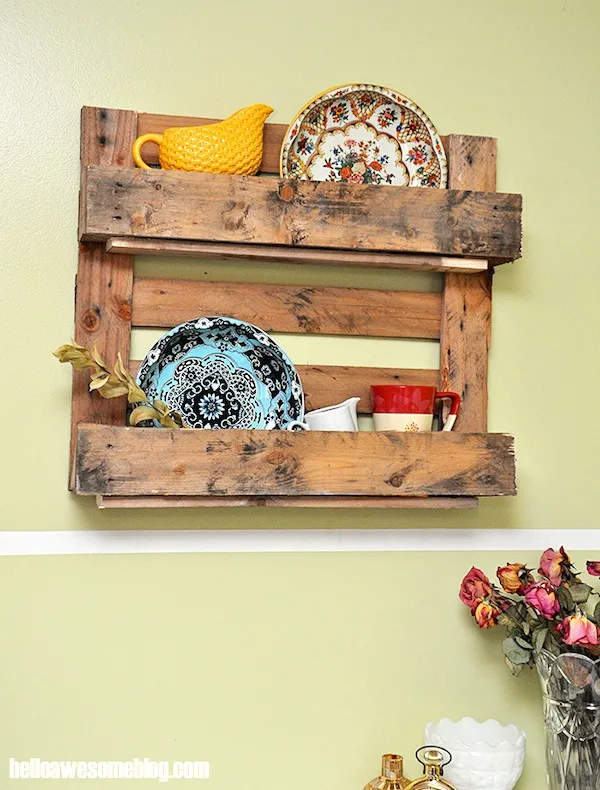
I was totally fine with that. Before, that wall was okay – but now it’s a piece of art! I decided to leave the wood as is but you can use the sandpaper to clean up the edges or paint it.
We have plans on making this corner a coffee and tea area. I’m even more excited to see it decorated in cute white mugs and maybe a witty sign about caffeine!
Pallet Shelf
Equipment
- Saw
- Nail gun or hammer and nails
- Stud finder
- Pencil(s)
Materials
- 1 Pallet
- Wood screws
- Sandpaper optional
Instructions
- Lay the pallet directly on your work surface, face down.
- Use the pencil to mark the cut marks. You’ll cut directly to the left or right of the center support piece.
- Take the saw and cut along the lines. Count two rows of pallet boards down and cut across the left and center vertical boards.
- On the right side of the center board, cut all the way down, both top boards and bottom boards.
- You will have extra boards left over. Choose two of the extra boards and secure them as the shelf bottoms with the nail gun.
- Add nails around your shelf for additional support.
- Use a stud finder to drill the shelf directly in the wall.
If you liked this DIY pallet shelf, I’d love for you to check out these other project ideas:

Jameela
Friday 20th of January 2023
Got my pallets ready to go.
Amy
Friday 20th of January 2023
Yay! Thank you for trying the project.
Janice
Thursday 18th of February 2021
I have seen the work of the Amish... this looks nothing like what they would make.
Amy
Friday 19th of February 2021
I don't believe it was ever suggested that Amish made this.
C Wang
Tuesday 15th of May 2018
Wow! Very vintage.
Amy
Thursday 17th of May 2018
Thank you! Glad you like it!
Jessica
Thursday 13th of August 2015
Love it on so many levels! Like the idea of turning a wooden pallet destined to die and rot ( although, technically companies have to pay to recycle this pallet wood, so we are saving them money too) into a functional,beautiful, no less than a piece of art that's functional, very pleasing decor... Our home was built in the late 1880's and has the original cellar wood doors and fun finds all over here and there so I love this look, rustic old house charm... Your instructions are very easy to follow as well. I'd go so far as wanting to create " upcycled" wood pallet furniture for indoors as well! That's how much I love this rustic look! Well done and thanks for the share!