This Birch Candle Holder Makes a Great Gift (Easy DIY!)
Learn how to make a birch candle holder using a real log! This would make a pretty home decoration or even a wedding or anniversary gift. It goes great with all sorts of decorating styles including outdoor, rustic, and farmhouse.
Skills Required: Beginner. You’ll need to know how to use a drill on wood. Besides that, you’ll be carving with a knife. This birch log candle holder is difficult to mess up because it doesn’t need to be exact (the more natural, the better!).

I’ve always had a secret desire to carve something into the side of a tree, but being a good girl, I have never given into that urge. So when I saw these birch pillars being sold at the craft store, I knew exactly what I wanted to use one for.
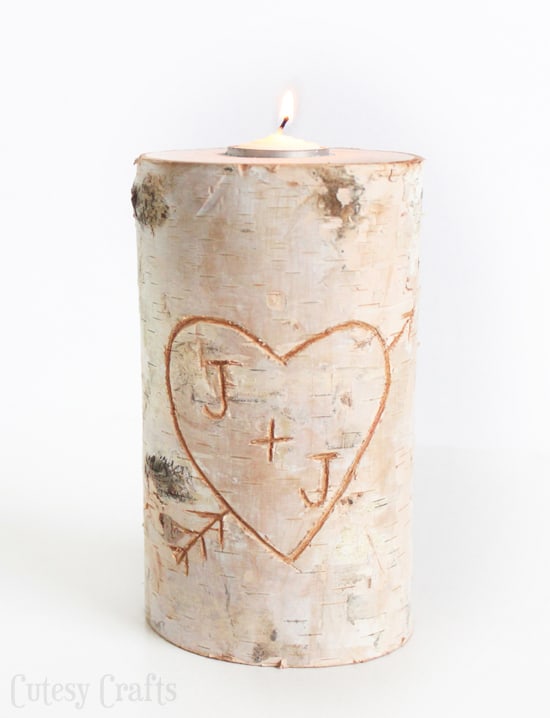
My wedding anniversary is coming up, and I thought it would be cute to carve mine and my husband’s initials into the pillar. You know, with the whole heart and arrow thing too. Then I turned it into a birch candle holder. It looks so pretty next to our wedding photo!
Birch Log Candle Holder
To make this candle holder, you will need:
- Birch pillar from the craft store OR a piece of birch log you cut yourself
- Tealight candle
- Colored pencil – light brown
- Pencil
- Knife
- Drill
- Drill bit – 1 3/8″ spade bit or slightly larger
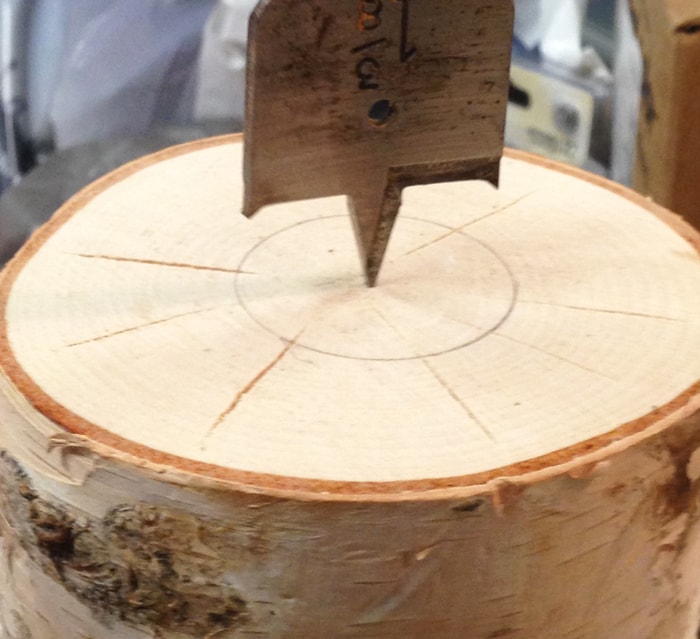
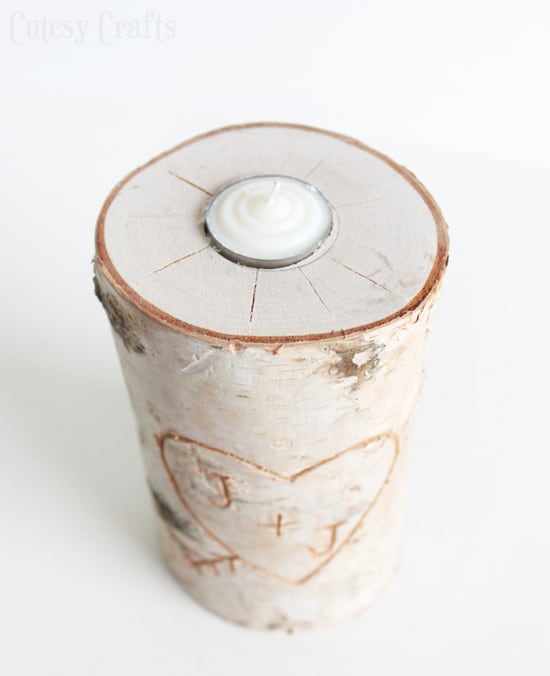
Start by marking out the size of your candle and drilling a hole in the top of your birch pillar. Trace the bottom of the tealight in the center of the birch log, then place the bit down in the middle of it.
With this kind of bit, you might need to rock the drill back and forth a little while drilling to get a good hole.
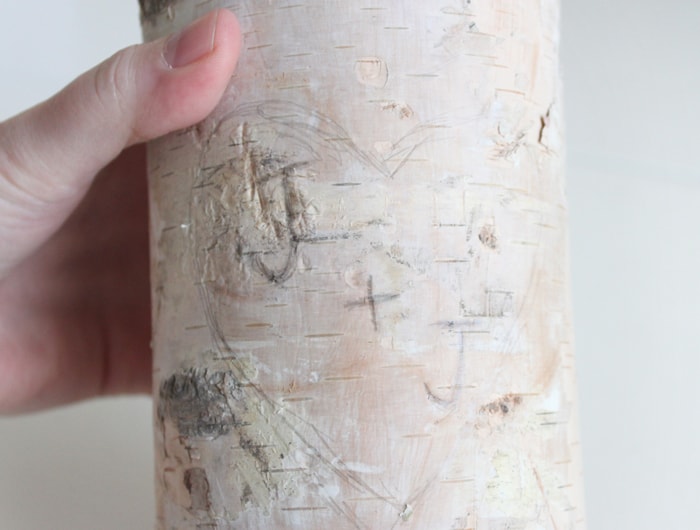
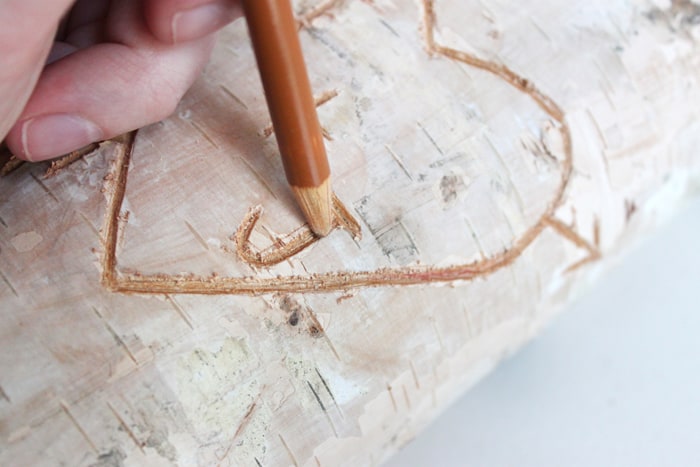
Sketch the design you want on the front of your birch pillar. It doesn’t need to be perfect. You want it to look like it was carved spontaneously into the side of a tree.
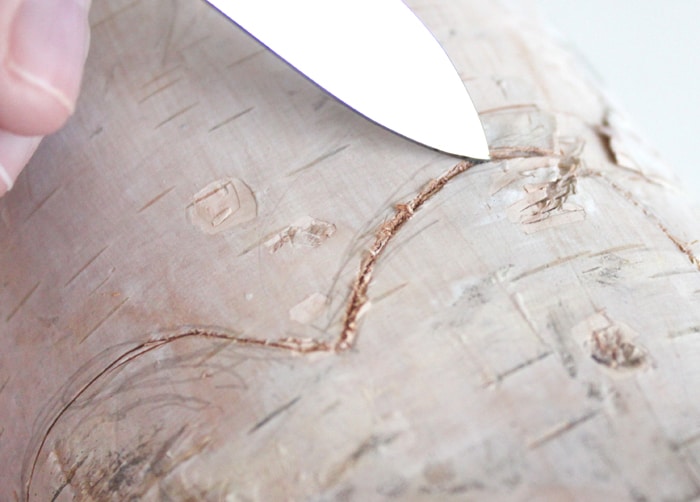
Carve your design with an old, dirty pocket knife. You know, to make it as authentic as possible. But really, if you have some kind of special carving knife, that would probably be even better.
I wanted the design to “pop” a little bit more from far away, so I shaded it in with a light brown (hazel) colored pencil. Not 100% necessary, but I think it made it look better.
Put a tealight candle in the top of your birch candle holder and you’re done!
I’m thinking you could make a bunch of these birch candle holders and they would make really pretty wedding decorations. You could even give one as a wedding or anniversary gift with the date carved into the bottom. So cute!
Birch Candle Holder
Equipment
- Knife
- Drill with drill bits including 1 3/8" spade bit or slightly larger
Materials
- 1 section birch wood
- Tealight candle
- Colored pencil(s) light brown
- Pencil
Instructions
- Trace the tealight in the center of the birch wood piece using a pencil.
- Begin drilling with the spade bit, placing the center of the bit in the center of the tealight circle. Rock the drill back and forth a little while drilling to get a good hole.
- Sketch the design you want on the front of the birch pillar using a pencil.
- Carve the design on the pencil lines using a knife.
- Shade in the design using a light brown colored pencil.
- Put a tealight candle in the top of the birch candle holder to finish.
Come on over to my blog, Cutesy Crafts, to find some other fun things to make! I’d also love for you to check out the following projects: