DIY Hot Glue Mushroom Lights
Learn how to make the cutest home decor with hot glue mushrooms! This project shows you how to make a light up terrarium display using your glue gun.
Skills required: Intermediate. You will be using hot glue to create mushrooms and make a small light display with it.
In the grand hierarchy of DIY tools, where power drills and sewing machines often steal the spotlight, there sits the hot glue gun, quietly waiting for its moment to shine. Well, folks, that moment has finally arrived.
Let’s face it, the hot glue gun has been pigeonholed for far too long. Used for attaching, mending, or in my case, accidentally gluing my fingers together more times than I’d care to admit.
I’m always trying to think of ways to use hot glue aside from, well, gluing things. I’ve made earrings, push pins, and other knick-knacks. But today I’m going to show you how to do something even cooler: hot glue mushroom lights!
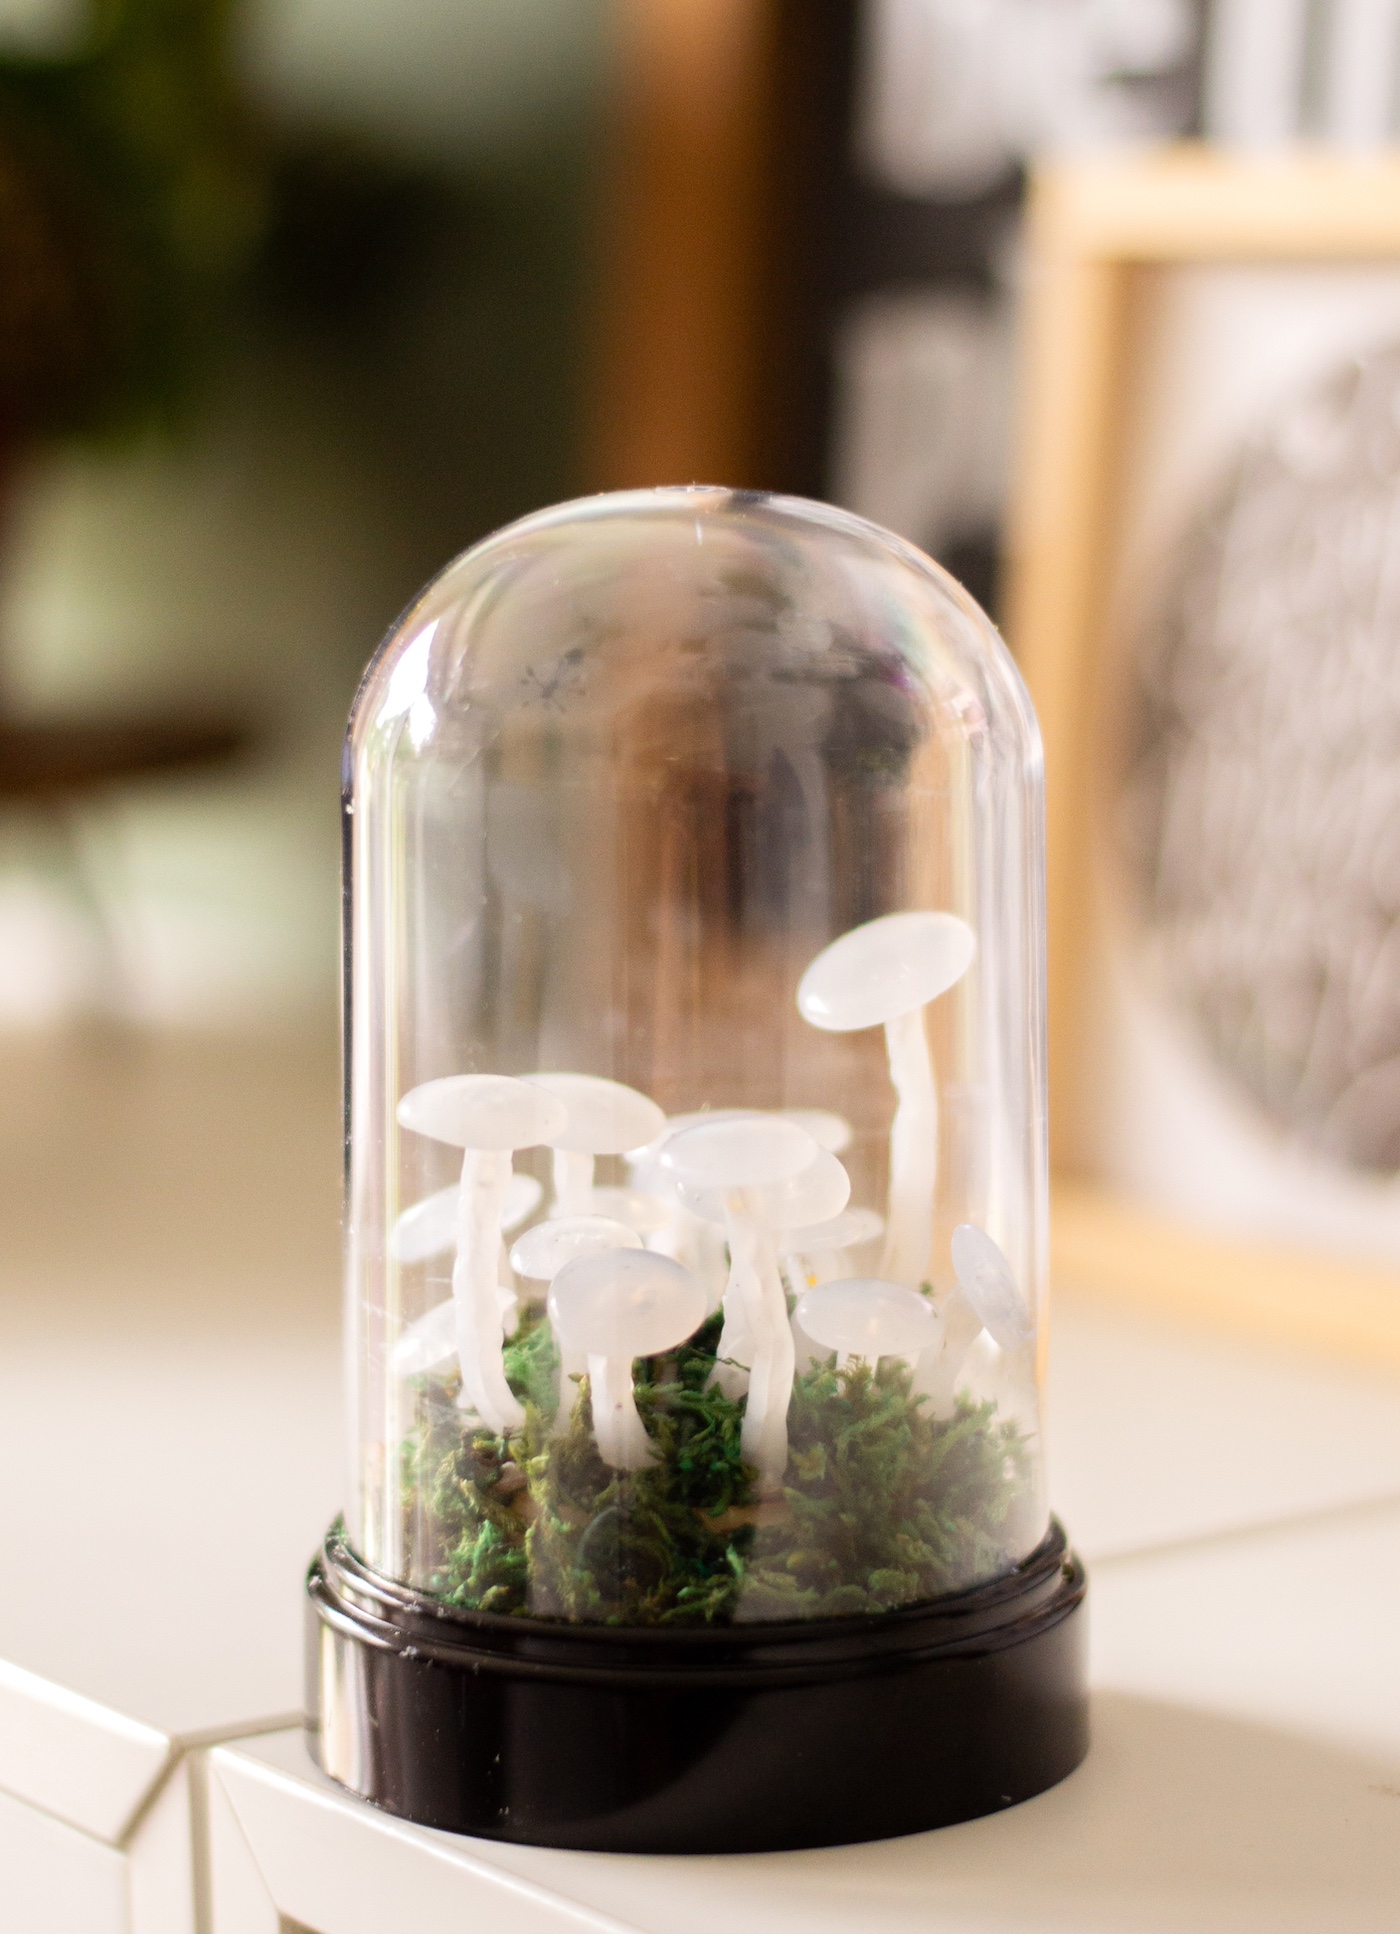
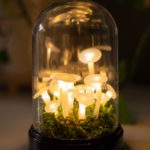
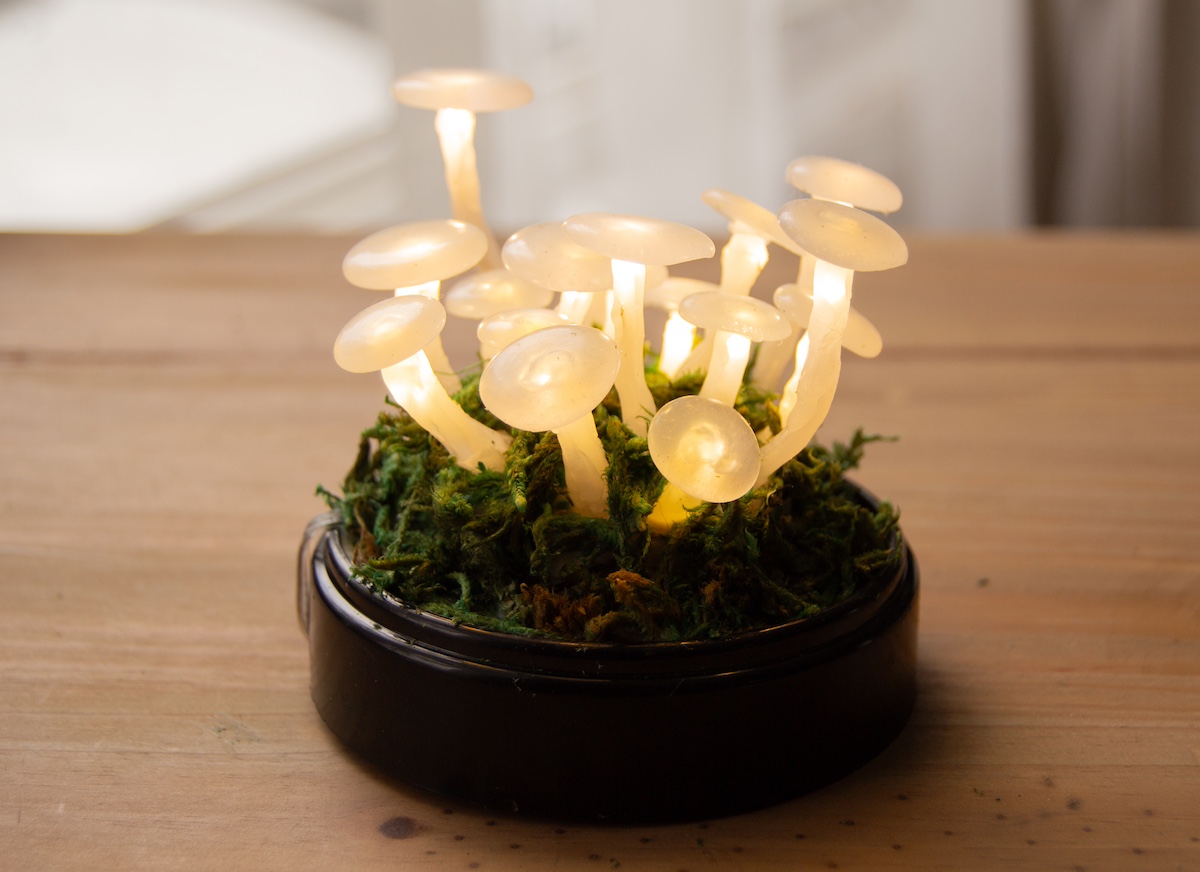
This magical, light-up terrarium is filled with glowing mushrooms made from – you guessed it – hot glue. It’s a cute DIY project that looks straight out of a storybook. And it’s very cottagecore!
Ever wanted your living space to look like a page out of a fairy tale? Well, wish granted. With a bit of patience and some LED string lights, we’re about to turn that fantasy into reality.
Now, before you start worrying about your skill level or whether you need to be some sort of glue-wielding wizard, let me stop you. This home decor craft, while dabbling in the intermediate realm of DIY skills, is more about fun and customization than perfection.
You’ll be using a list of materials that sound like they’ve been plucked from a wizard’s inventory: LED string lights, a wood slice, a cloche (or a round hanging planter for those who like to keep their options open), and of course, the star of our show, the hot glue gun.
We’ll twist, arrange, and attach our way through this project, layering on the hot glue to craft our mushrooms, then setting the scene with moss if you’re feeling extra.
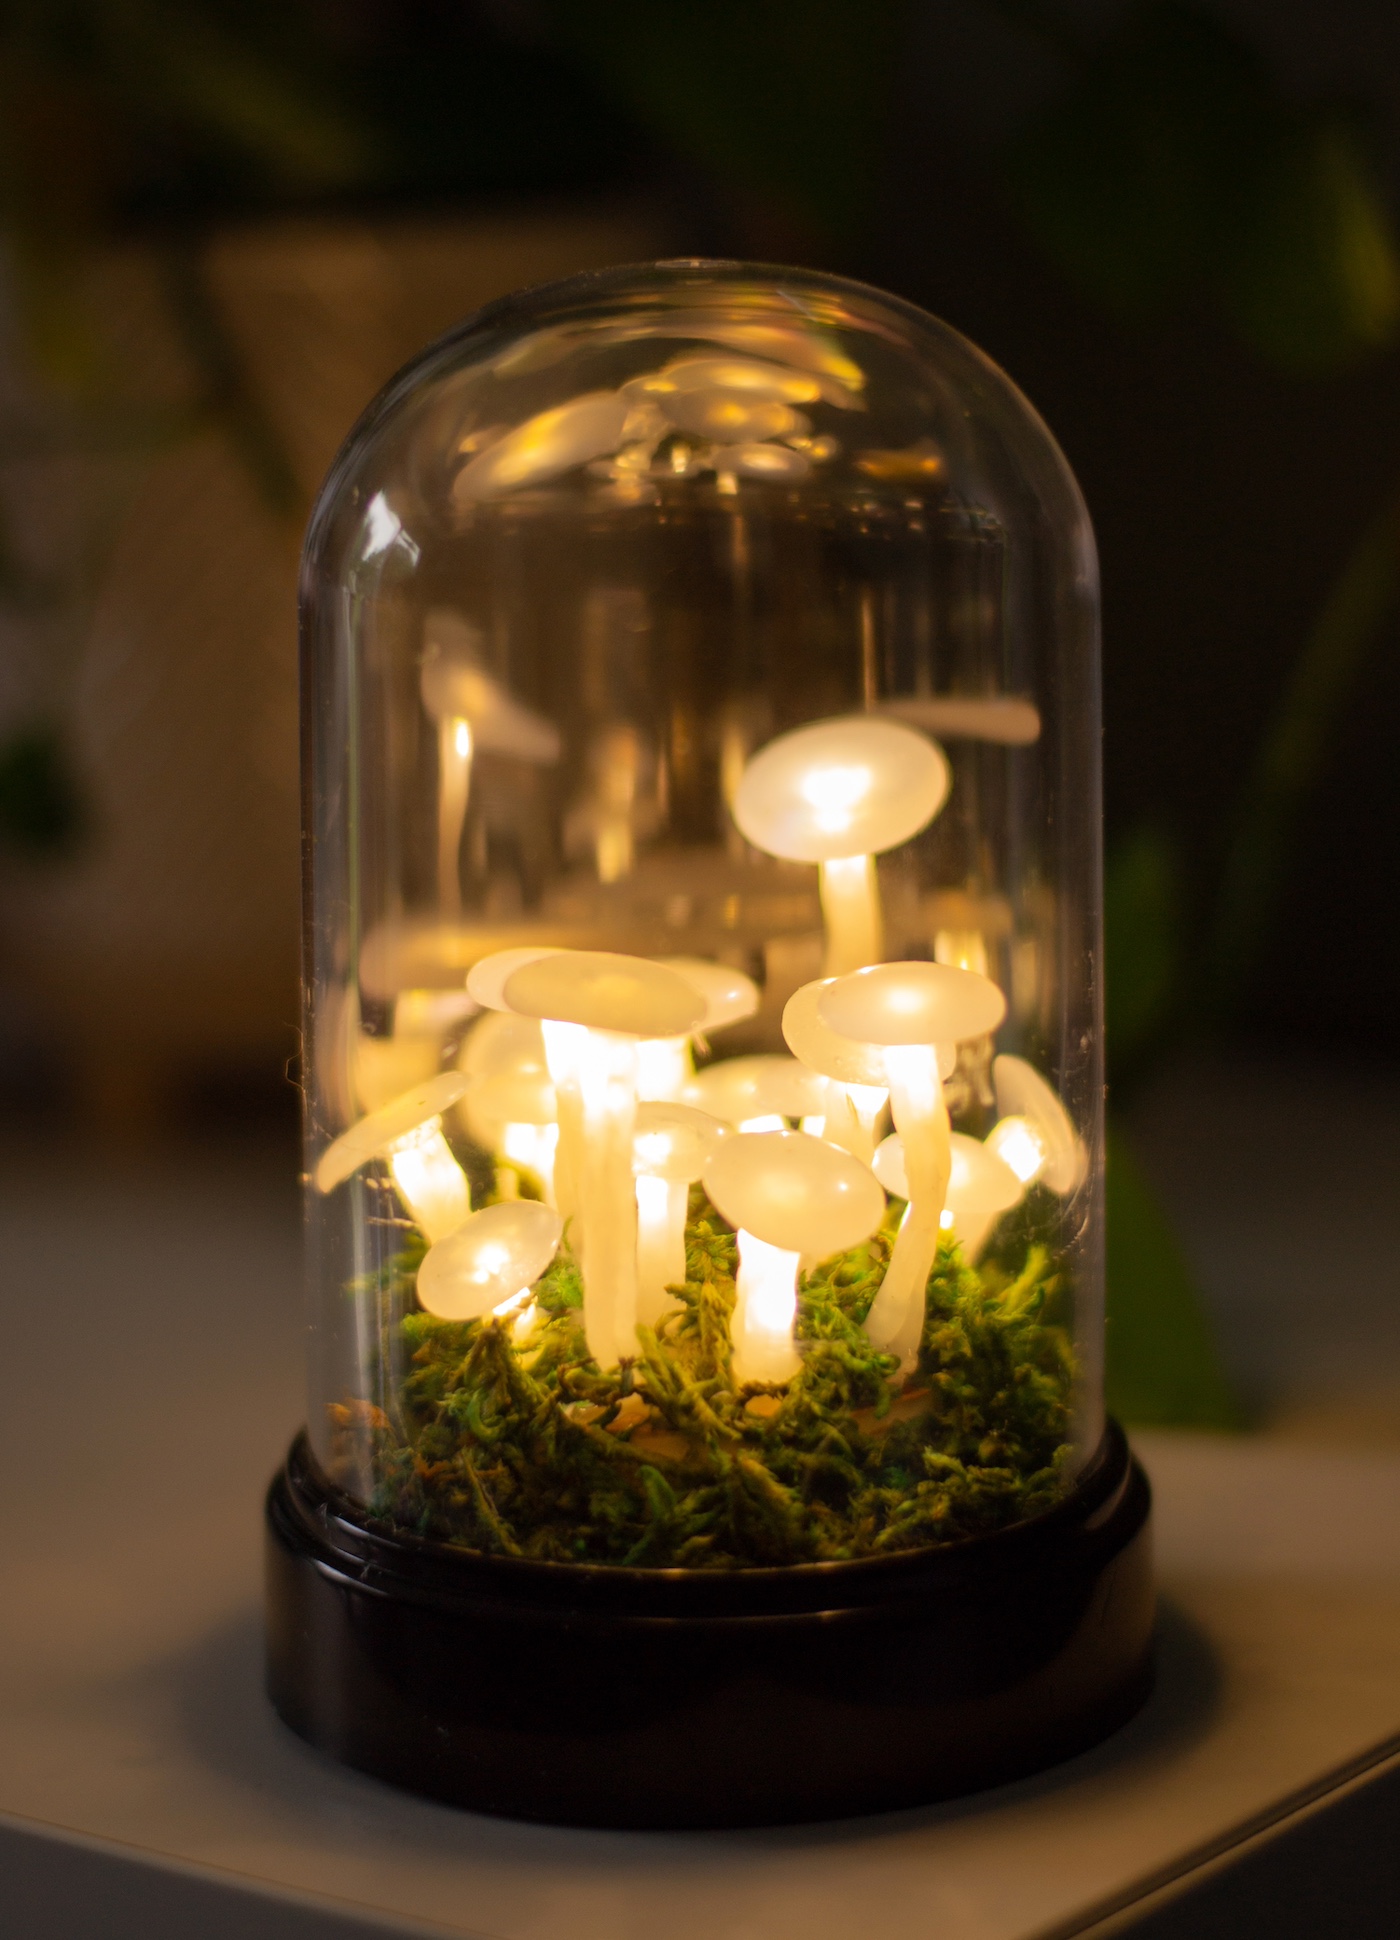
Who doesn’t love glowing mushrooms? Not the kind you find in nature (we’ll leave those to the forest), but the kind that lights up your home with a soft, enchanting glow. And it’s a real conversation piece, too.
And guess what? You can tell people you made it!
So, whether you’re a DIY enthusiast looking for your next challenge, or someone who just wants to add a bit of magic to their decor, I hope you’ll give these hot glue mushrooms a try.
Let’s push the boundaries of what a hot glue gun can do, and in the process, create something that’ll have all your guests asking, “How did you make that?”
Ready to glow up your crafting game? Scroll down, and let’s get started on creating your very own enchanted mushroom terrarium. Here’s what you’re going to need.
Gather These Supplies
- Hot glue gun
- Glue sticks
- LED string lights
- Wood slice
- Cloche or round hanging planter
- Heat gun
- White glue
- Moss or other covering for the base
- Tweezers
- Parchment paper
Tips and Thoughts for This Project
If you don’t want to make this lights (and just want to make it a display), you can use regular wire instead of the LED lights. You can also paint the hot glue when it’s cooled (with craft paint).
If you’re worried about finger burns, I recommend silicone finger protectors when you form the stems. And be careful – too much heat will make the glue sticky and hot – be careful! Heat up only until it’s pliable and warm.
Choosing your display case: if you have an LED string light with a slimmer switch, you can use a round hanging planter. If you have one that needs AA batteries, the cloche is a better option.
Get the how to for this project below:
Hot Glue Mushrooms
Equipment
- Heat gun
- Tweezers
Materials
- Glue sticks
- LED string lights
- Wood slice(s)
- Cloche or round hanging planter
- Elmer’s school glue
- Moss or other covering for the base
- Parchment paper
Instructions
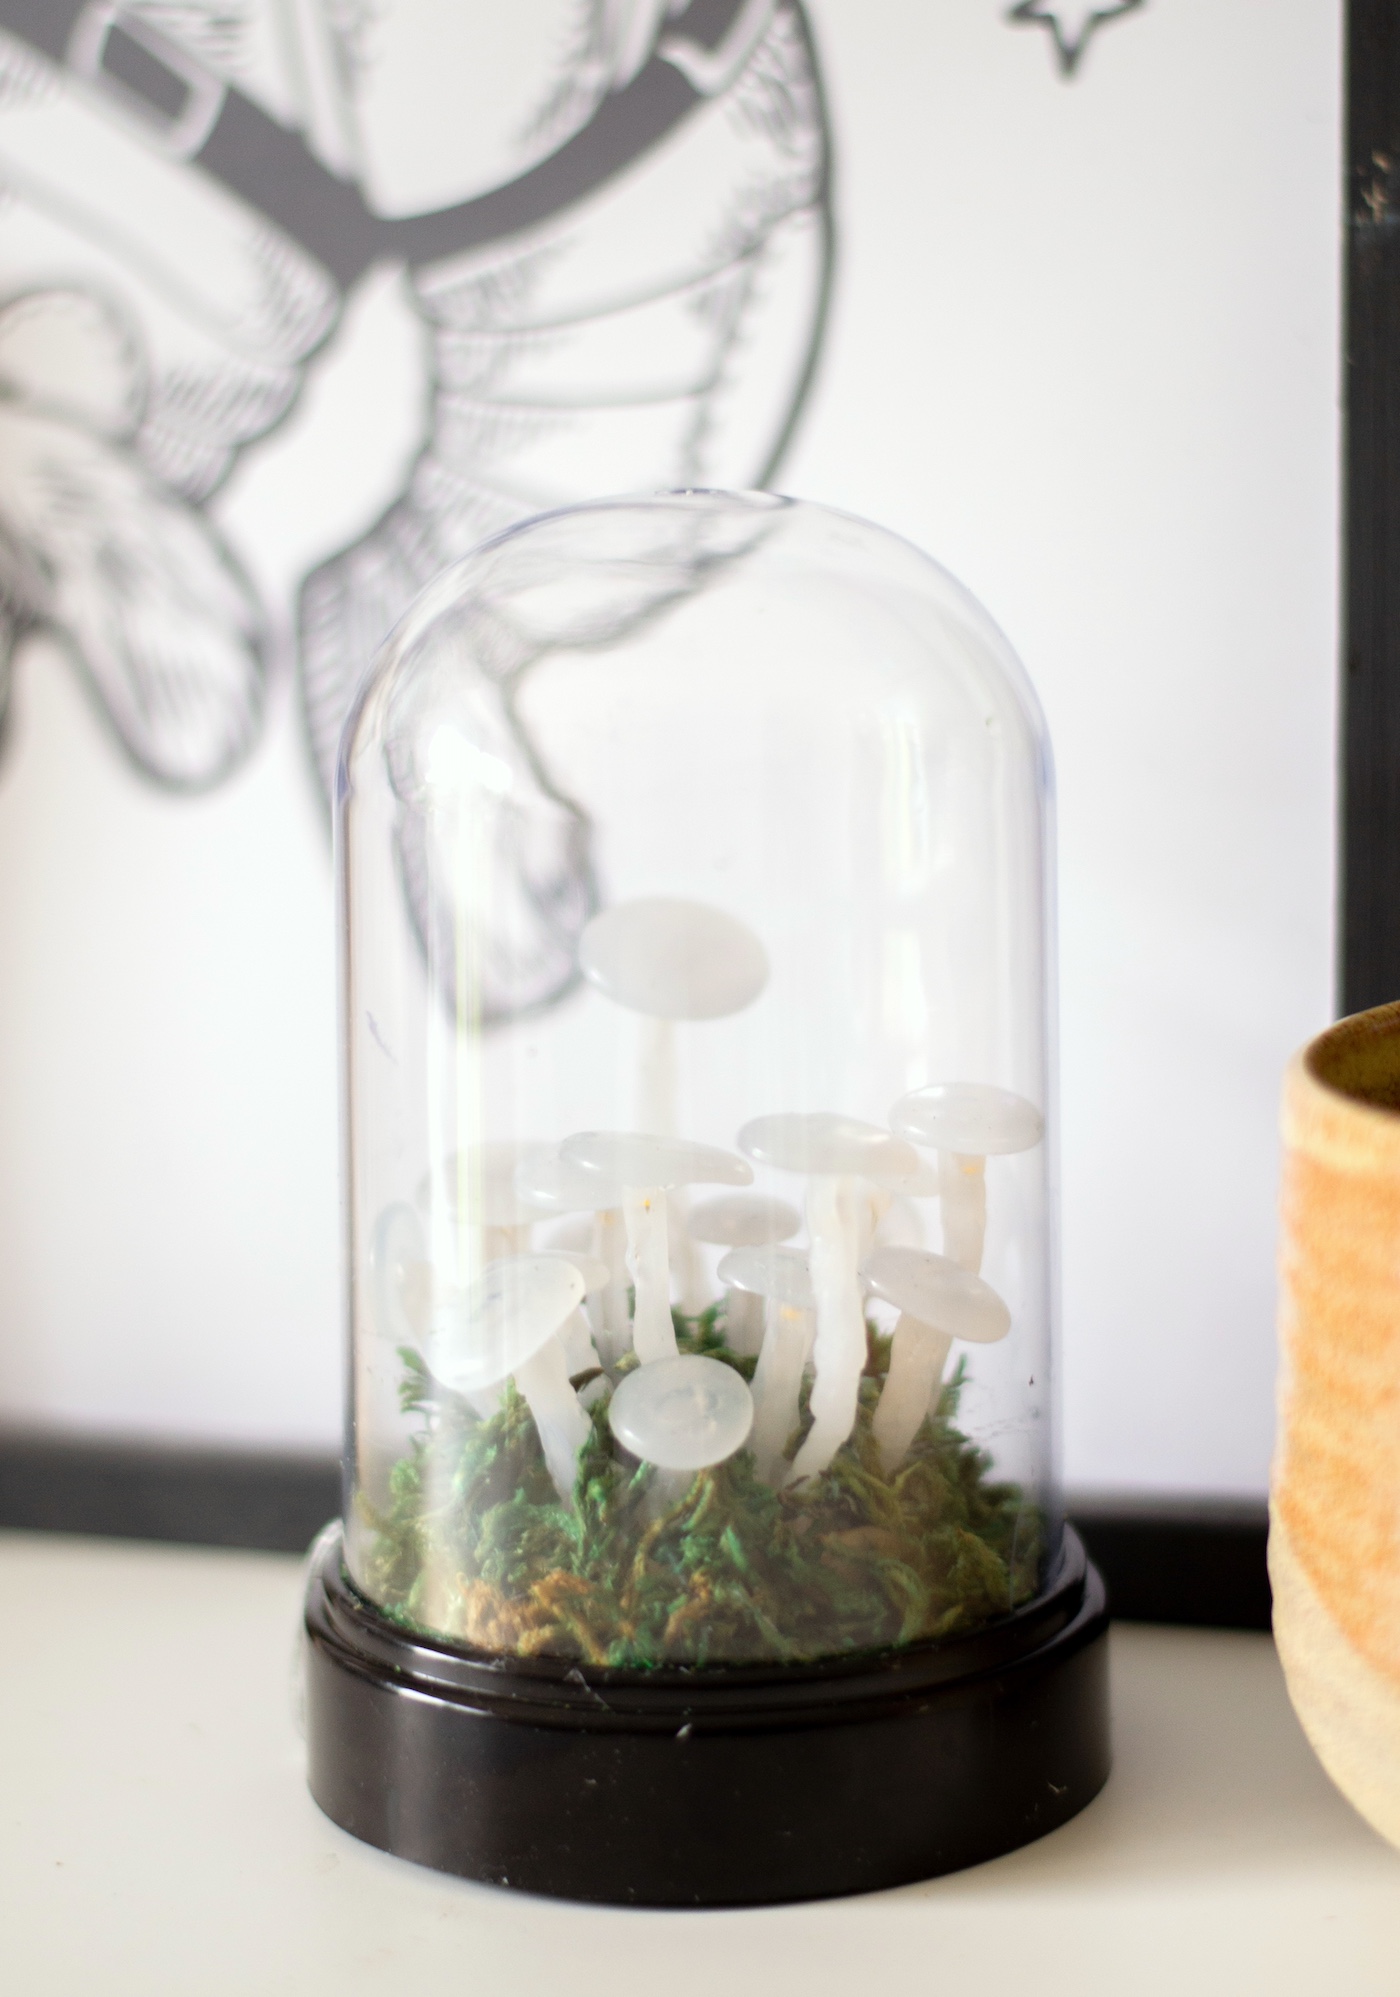
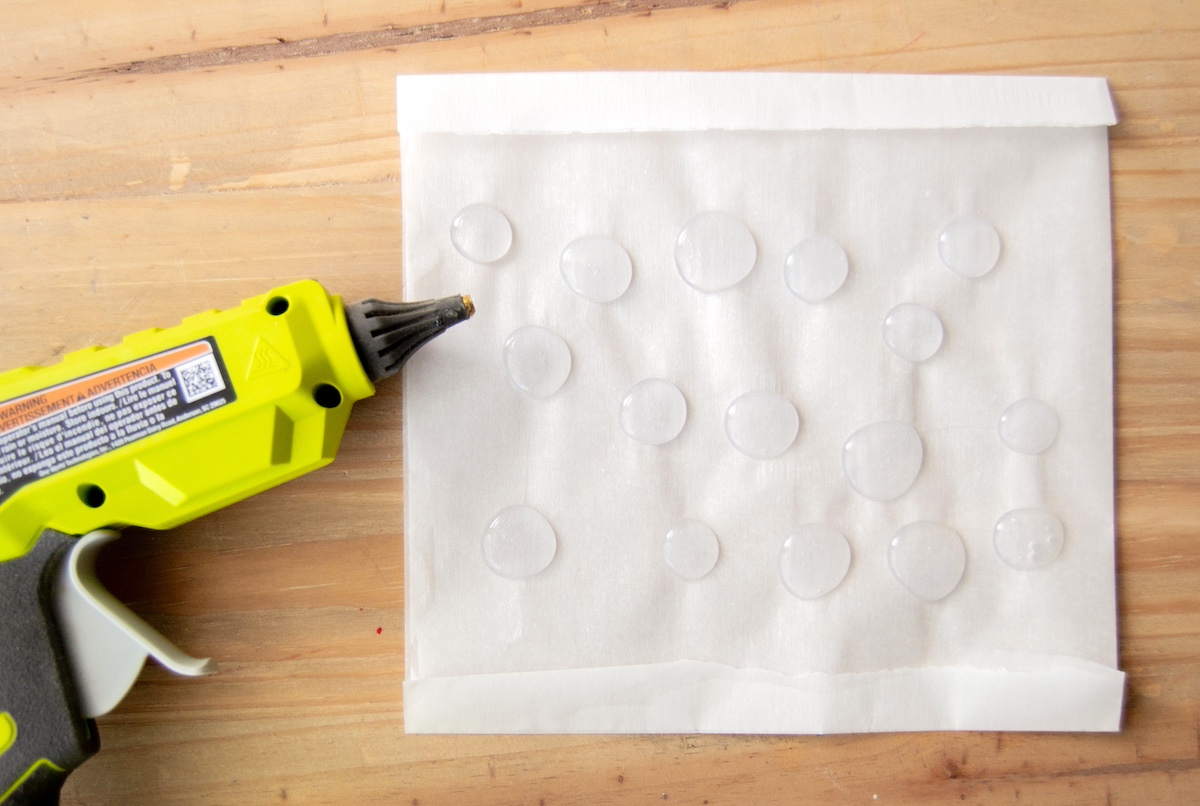
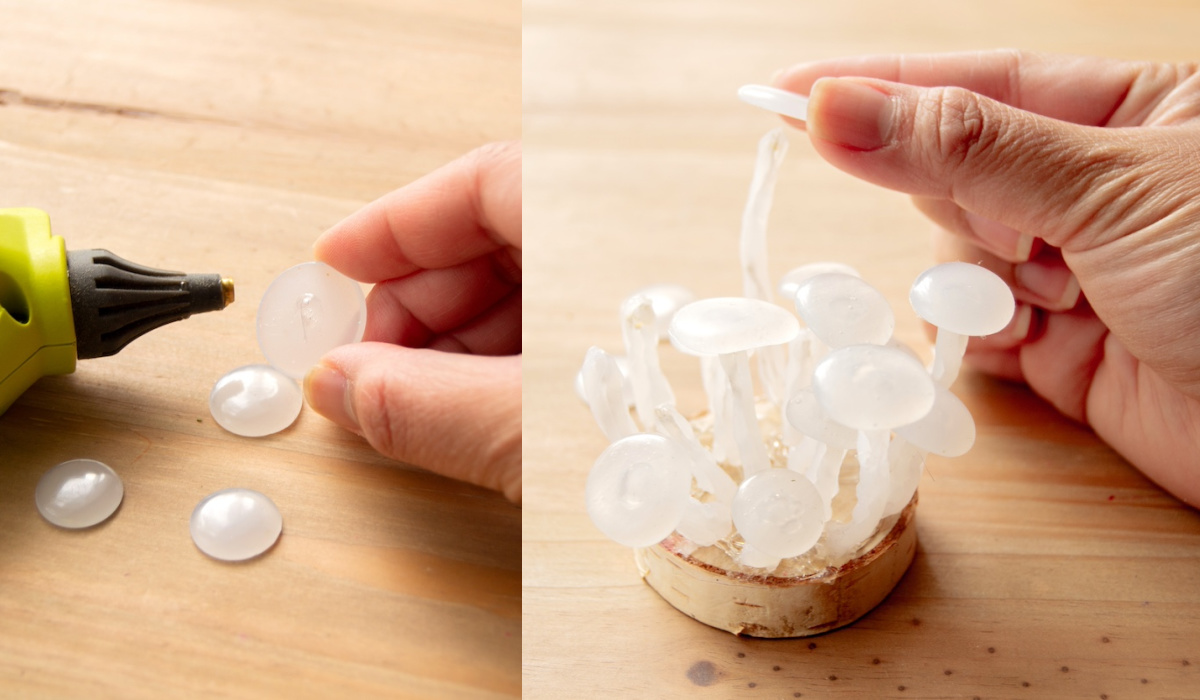
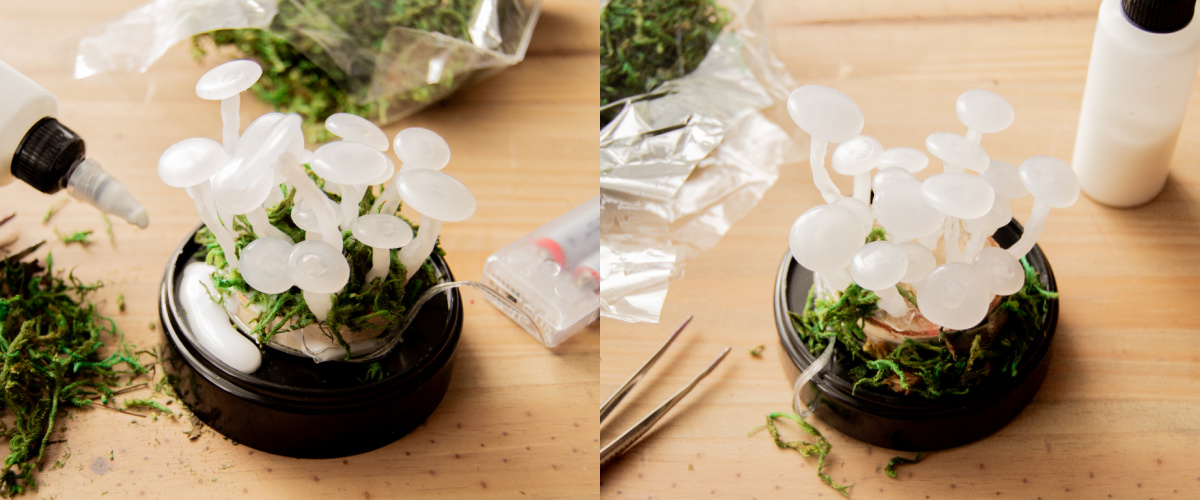
- Create your mushroom tops by squeezing a glob of glue onto a flat piece of parchment paper. It might take a few tries to make them completely round. Create big and small ‘mushroom tops’ for variety.
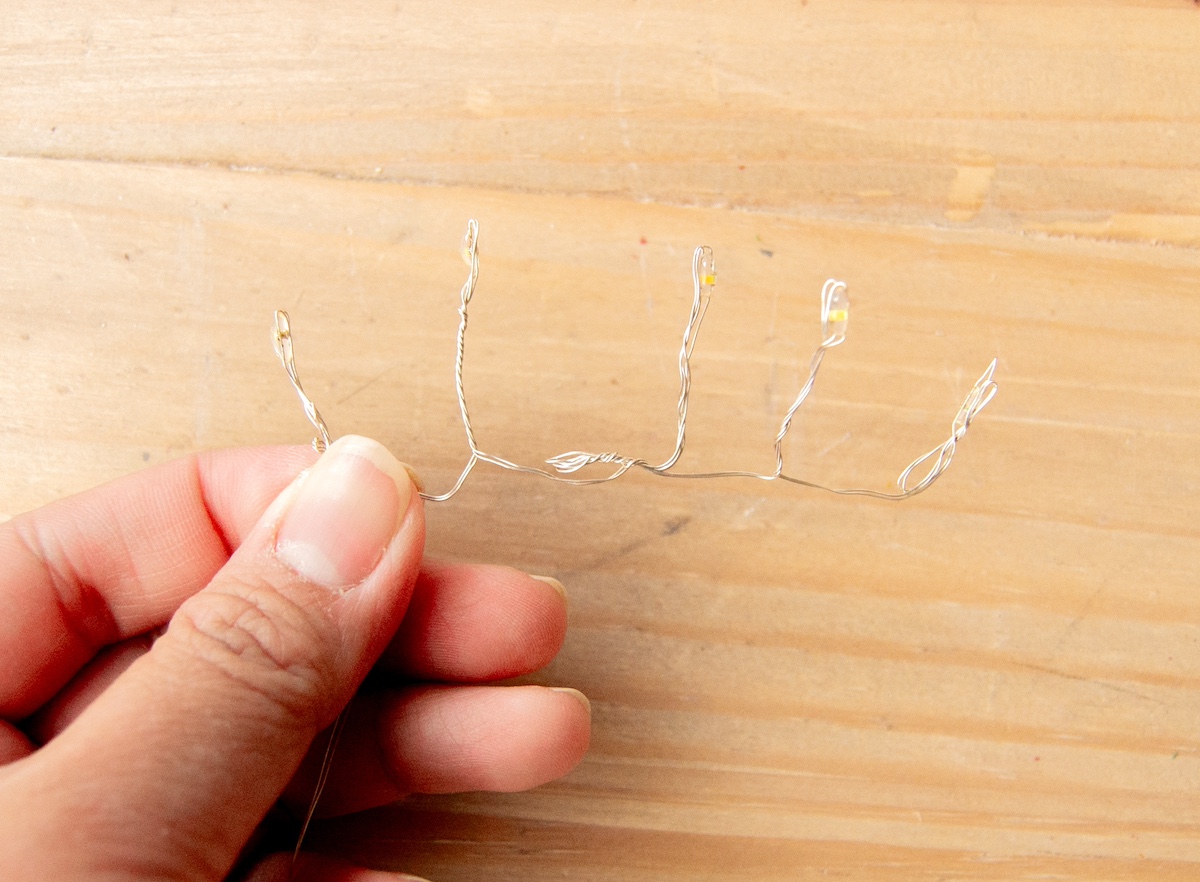
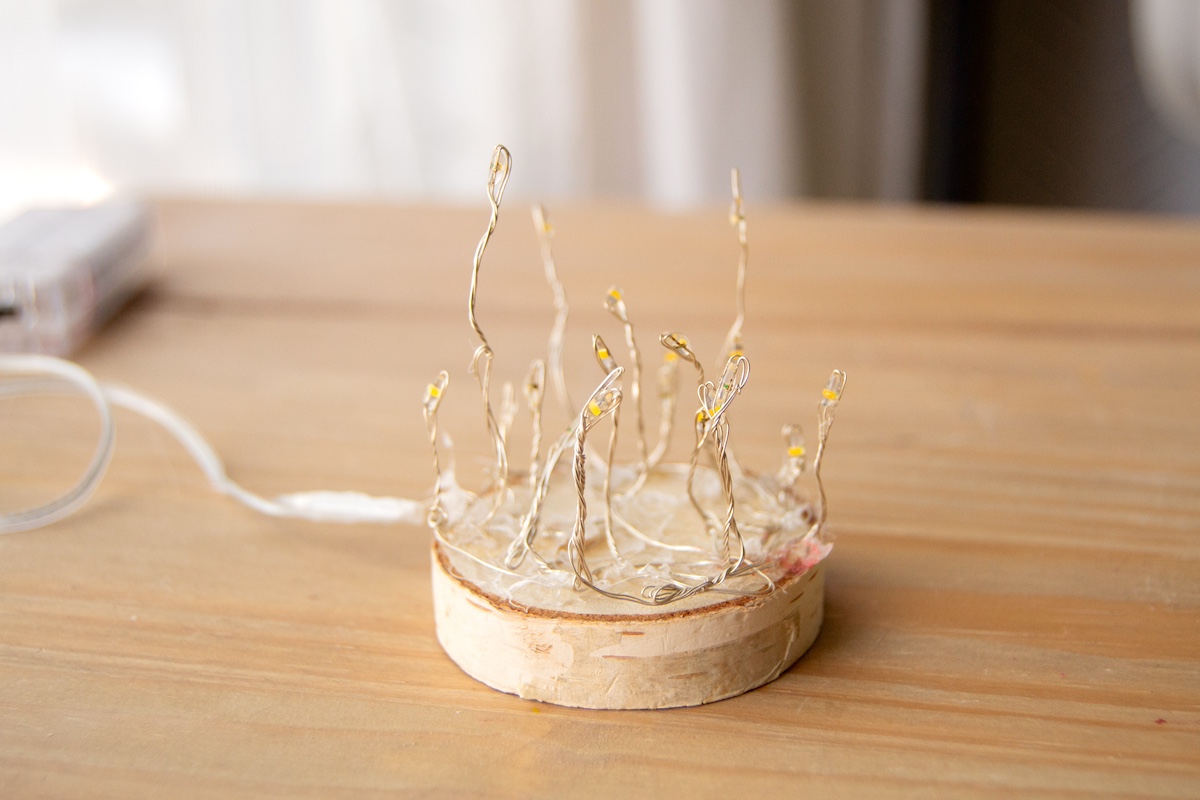
- Start forming your mushroom stems by twisting your LED string light, making sure you twist it with the LED light on top. Create taller and shorter stems by either twisting it once (for taller) and folding and twisting a few times (to make them shorter).
- Arrange the LED lights onto the wood slice, distributing the shorter and taller stems.
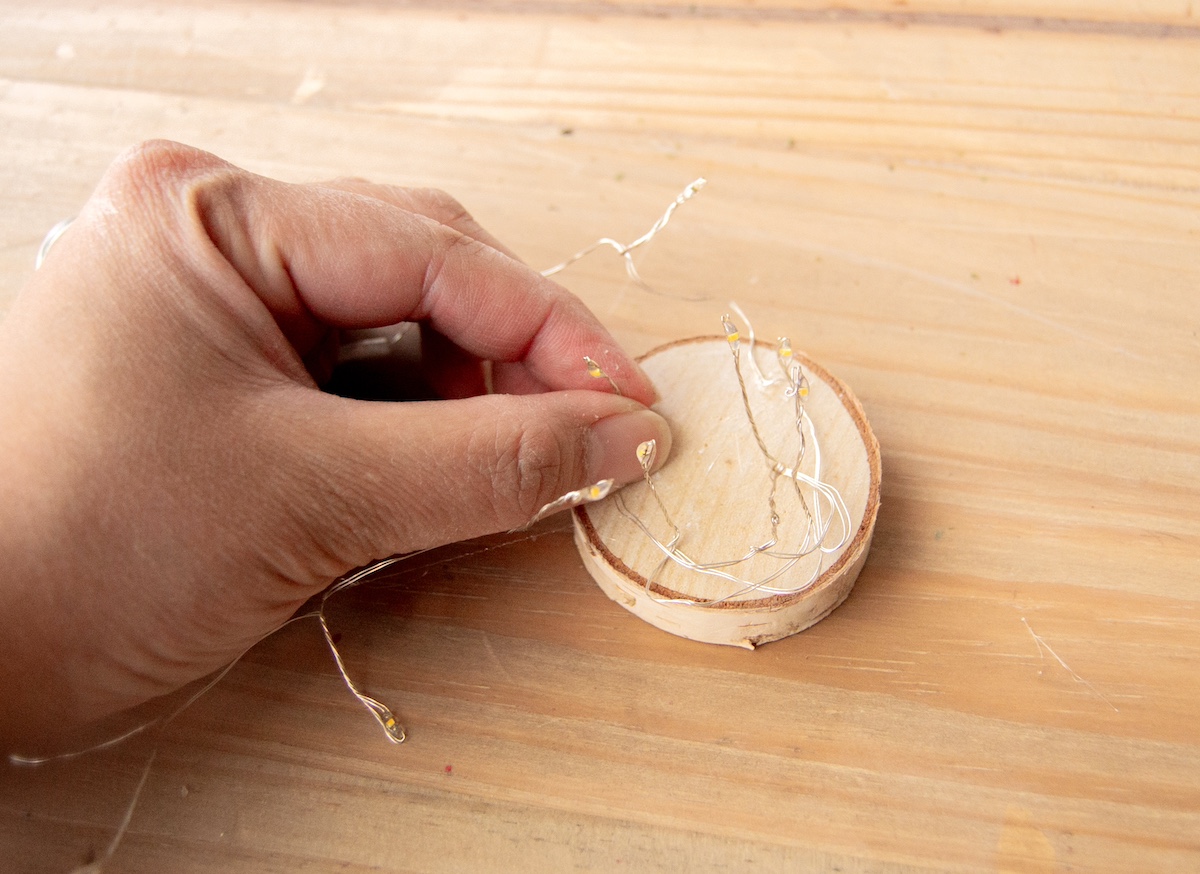
- Once you are happy with the placement, use hot glue to secure the bases of the ‘twists’ onto the wood slice.
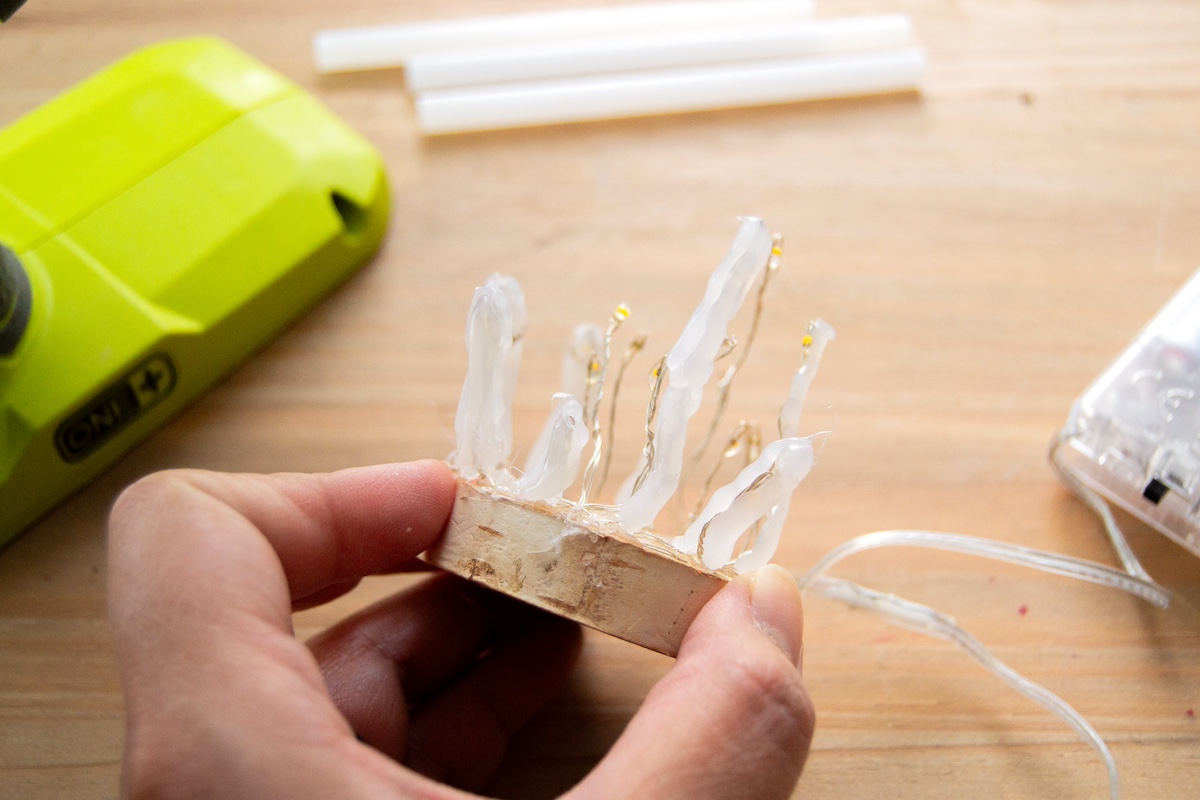
- To create a chunkier stem, use hot glue and cover the twisted LED ‘stems’ with it. If you find your stems looking drippy, use a heat gun briefly to soften the hot glue and shape it with your fingers to make it smoother.
- Attach the mushroom tops to the stems by pressing the center of the underside of your mushroom top onto the tip of your heated hot glue gun. Squeeze a small amount of hot glue onto it and press onto the tip of a stem. Repeat until you’ve attached mushroom tops to all your stems.
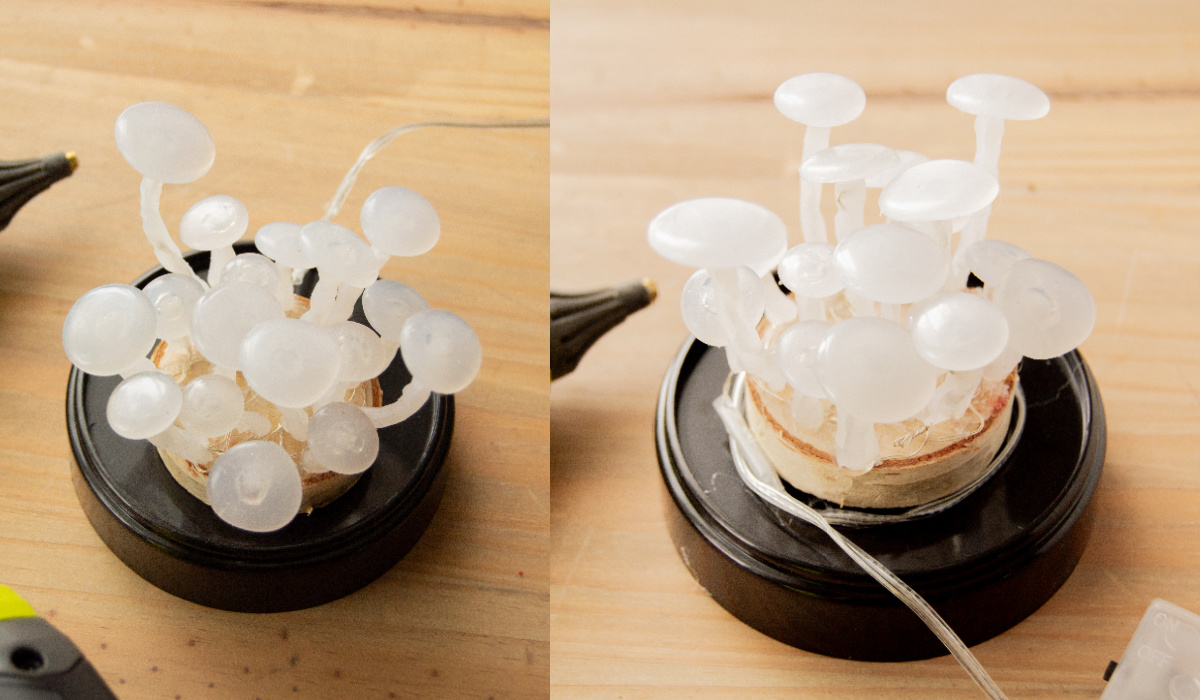
- Prior to attaching the mushroom scene to your cloche, remove any protruding parts from the bottom. I used a heat gun to soften the plastic before snapping it off with a wire cutter.

- Attach the wood base onto the cloche by hot gluing it. Wrap the cord around the base and secure if necessary.
- Add some moss to hide the LED cords onto the base of your mushrooms. Glue the moss on with white glue, and use tweezers to help you put moss around the base of the mushrooms.
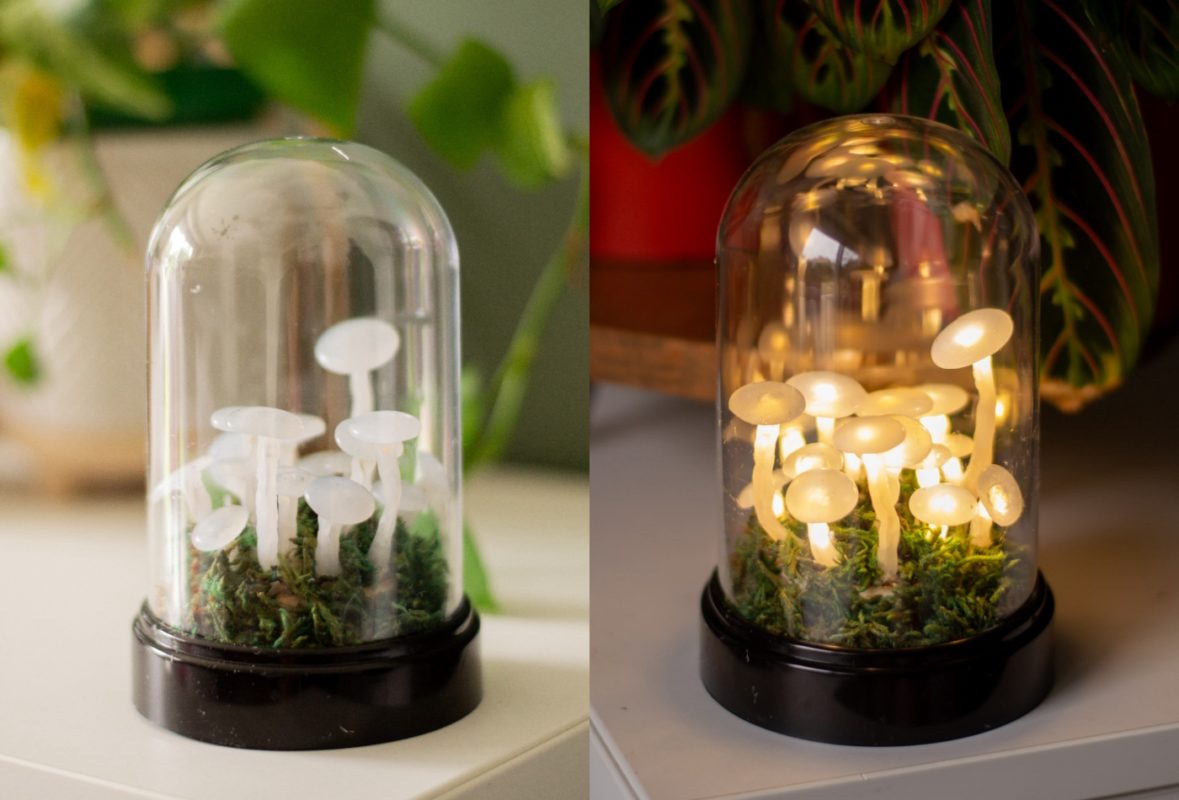
- Add the cover and turn on the light. Your hot glue mushrooms should glow peacefully.
Did you enjoy these cute glue gun mushrooms? Let me know what you think in the comments! I’d also love for you to check out the following projects:


These are awesome! Such a unique craft project! These would make great gifts too! Thank you for the inspiration! ❤️