How to Paint Nesting Dolls the Easy Way
Learn how to paint nesting dolls with spray paint and some acrylic paint details. These got a revamp, and I’ll show you how it’s done!
Skills Required: Beginner. You’ll be doing a lot of painting – but it’s simple painting, so don’t worry if you’re not Van Gogh. This is a great starter project for getting handy with brushes.

Well, hello again! It’s Jennifer of Brave New Home here to share a refresh project today. I love taking once loved items, breathing new life into them and falling in love with them all over again.
I have a set of nesting dolls that I received as a present from my mother when I was a little girl. There used to be five of them total but they somehow got into my four-year-old’s hands and two went missing.

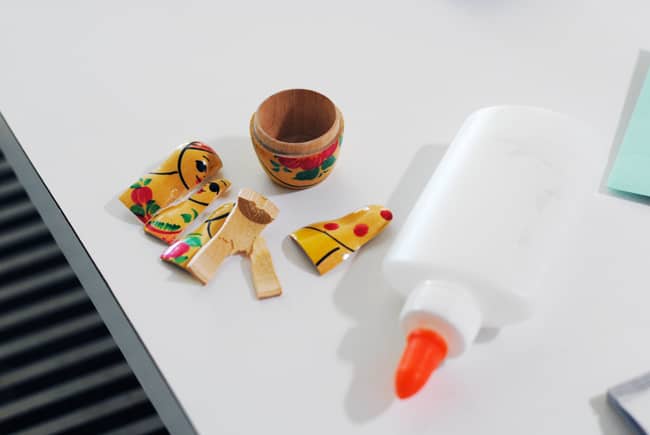
A third got broken. These dolls have sentimental meaning to me and try as I might, I could never find a way to work them into my home decor. So rather than safely store them away, I decided to breathe new life into them to display and enjoy them.
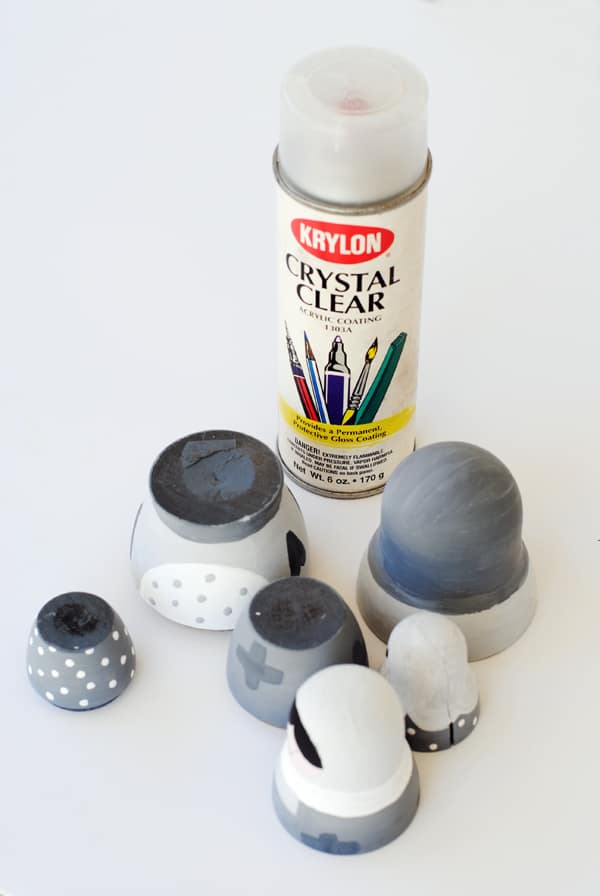
For this project, you will need a set of wooden nesting dolls (you can buy unfinished wooden ones so you don’t have to paint over a design), primer, acrylic paints, and clear acrylic spray paint.
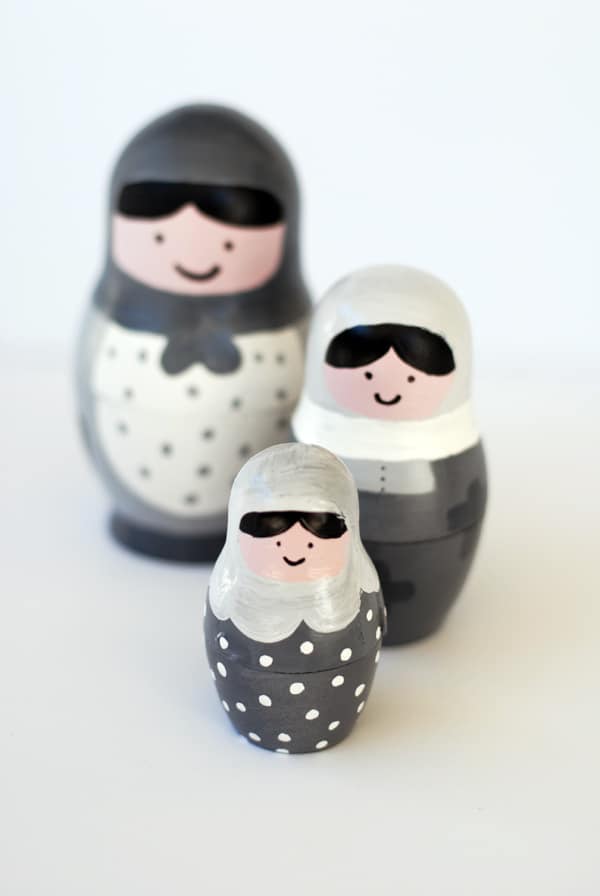
Looking at my images (which are actually larger than the dolls themselves), I see now that I could have mixed my paint a little more thoroughly. Having said that, it just adds to the uniqueness of the project!
I think these stacking dolls could work with everyday decor, but could also have a place in holiday decorating. Especially if you use Christmas colors.
Are you ready to get crafty? You can get the printed how to card for this project here:

Paint Russian Nesting Dolls
Equipment
- Pencil(s)
- Sandpaper optional
Materials
- 1 set Wooden Nesting Dolls
- Acrylic paint
- Clear acrylic sealer
- Sharpie(s)
Video
Instructions
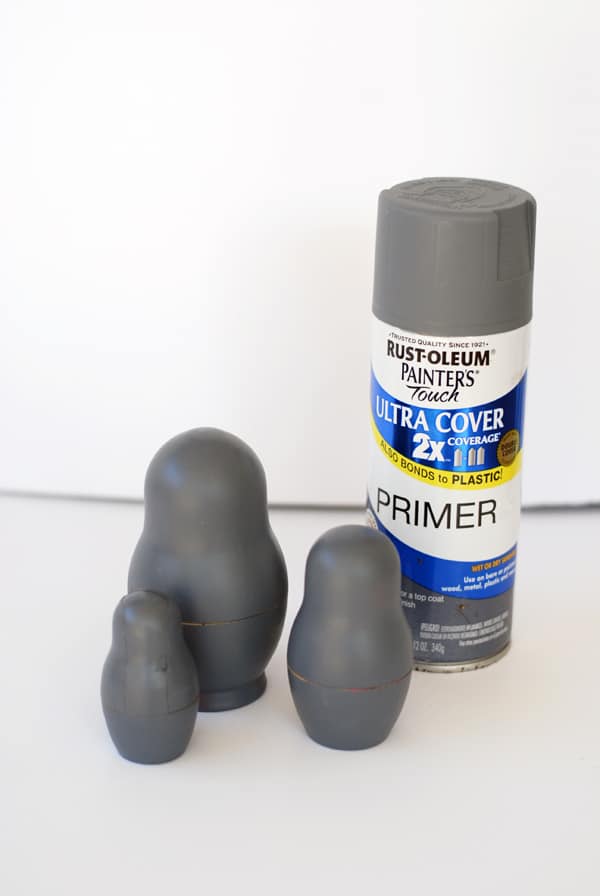
- Sand the unfinished wood or painted surface if necessary. Remove sanding dust. Add a coat of primer. Let dry.
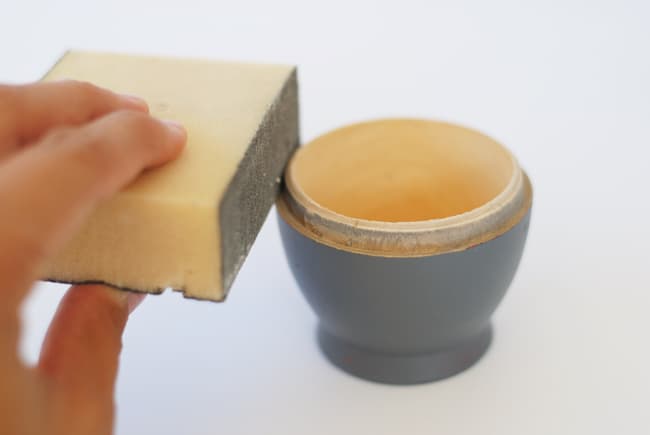
- I got some spray paint on the part of the wood where the top and bottom parts meet so I sanded it off. Any paint in this area will make it excessively difficult to open and close your nesting dolls, so you want to remove it.
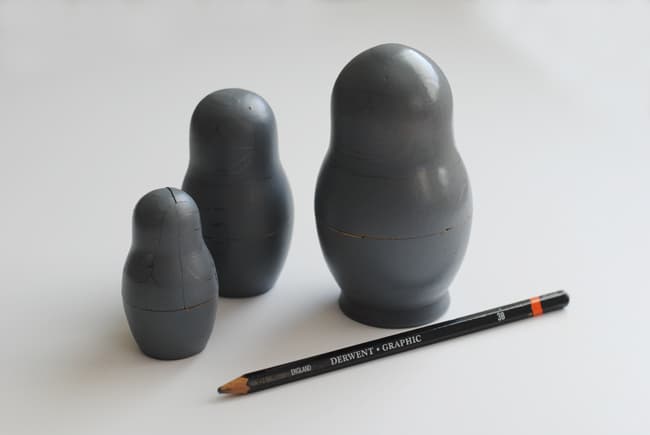
- Pencil in the design directly on top of the spray painted areas.
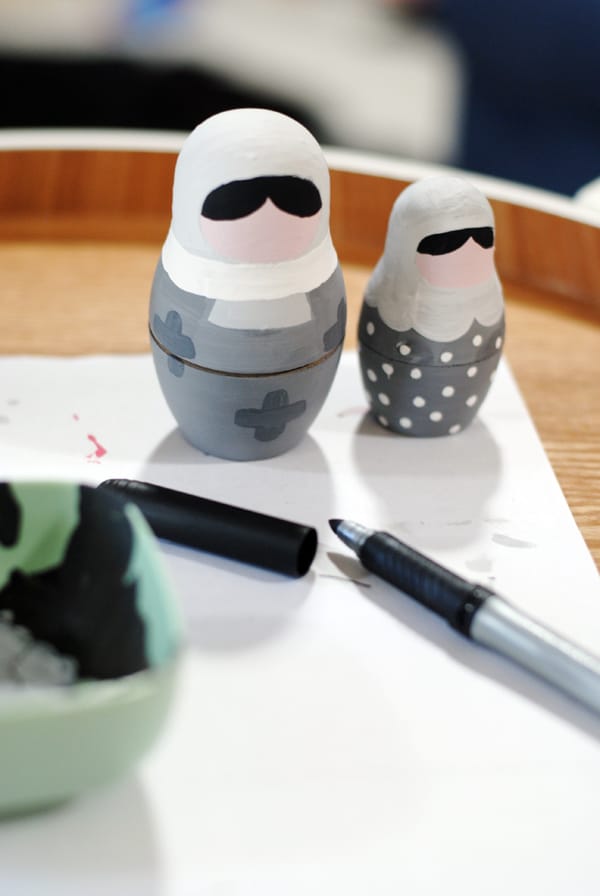
- Paint the design with acrylic paint and let dry. Think about layering the paints for the neatest finish possible. This means you'll want to start with the paints that cover the largest area then work your way in.
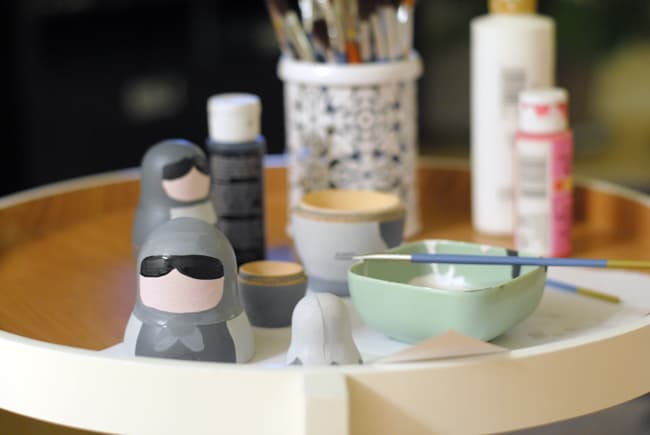
- Draw in additional details and faces with the Sharpie to allow for more precision. You can also use paint pens.
- Seal all of the wood with clear acrylic sealer. Let dry for a while before using or stacking.
Notes
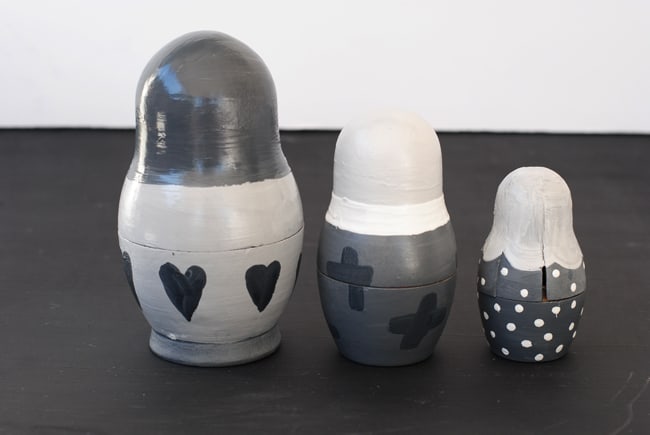 I wish I would have included some hearts from the front view. They up the sweet factor just a bit more!
Let me know what you think of this project in the comments! For other painted projects we love, check out the following posts:
Bean Art Mosaics • Kilim Basket • Painted Mugs • Trinket Dishes • Wooden Nativity Set