Kilim-Inspired Painted Basket in Three Easy Steps!
This Kilim-Inspired painted basket tutorial is an easy way to try out a fun new color palette quickly and inexpensively. It’s so simple to make!
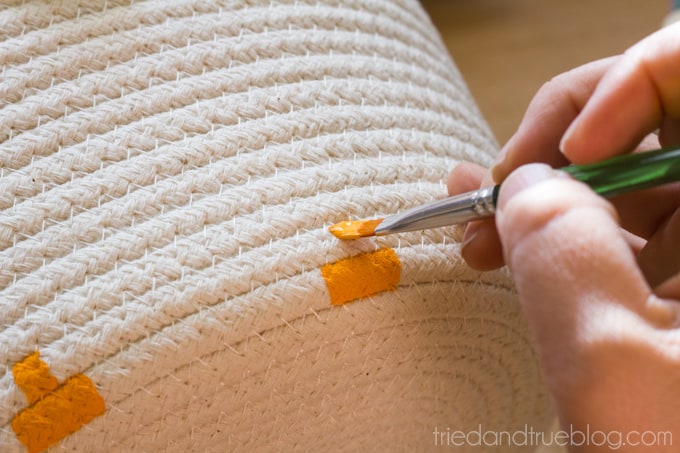
Skills Required: None. Even if you’ve never crafted before, you can accomplish this project. Getting a corded basket will help you keep your painting strokes even and in the right place, so I recommend finding one of those.
I’m a huge fan of all the gorgeous Turkish Kilim tapestries that are showing up everywhere lately. I love the wide variety of colors that are used in an unpredictable pattern.
So unlike the monochromatic style I usually stick with! This Kilim-Inspired painted basket tutorial is an easy way to try out a fun new color palette quickly and inexpensively. It’s a perfect easy craft for adults!
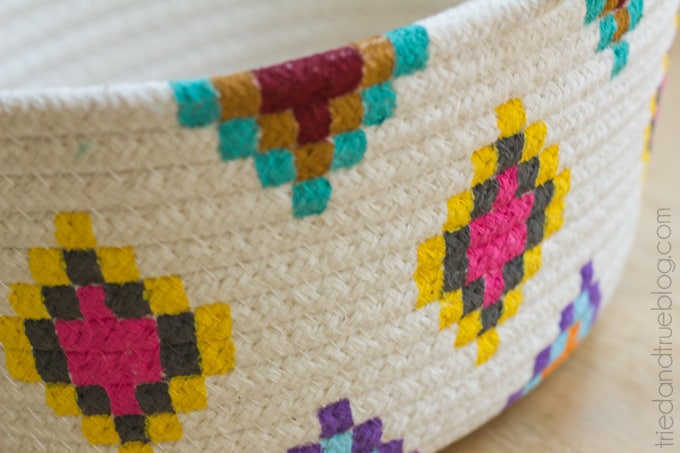
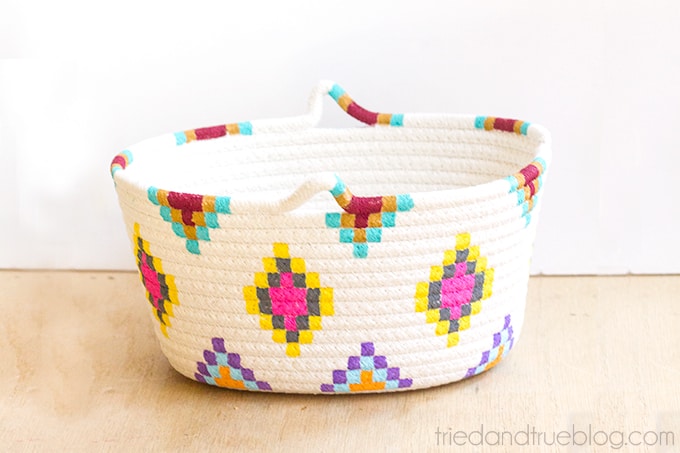
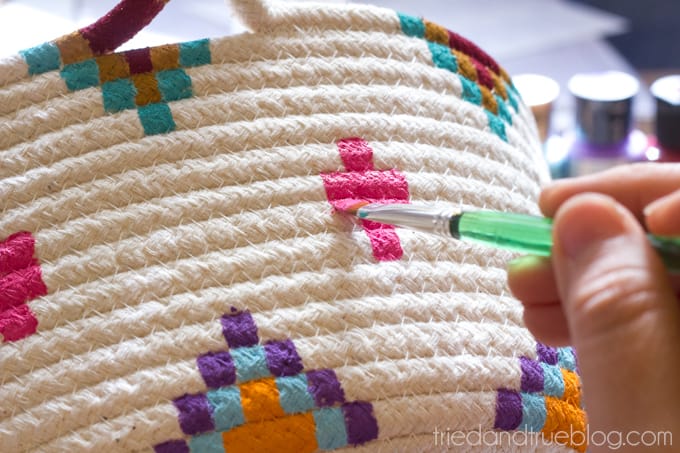
Here is the finish look of the painted basket! I love how all the different shades of colors look together. The possibilities for customizing this basket to match your home decor or preferences is endless!
I love the idea of giving this for a gift filled with goodies to a neighbor for a housewarming or for a Mother’s Day gift loaded with stuff for pampering.
Gather These Supplies
- Woven basket
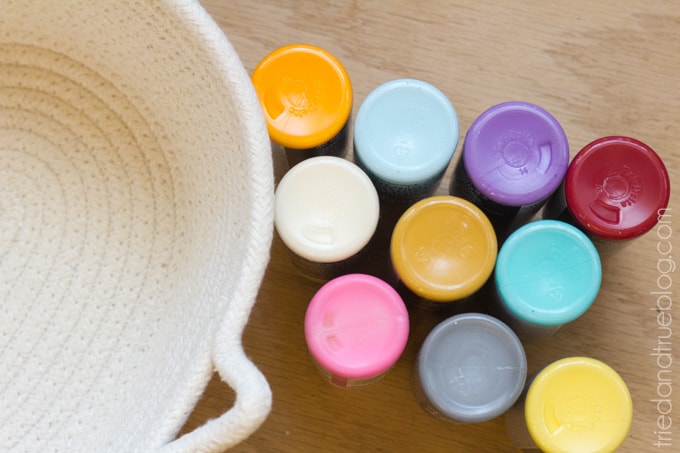
- Acrylic paint
- Paintbrush
- Tape measure
- Pencil
I found this small woven basket in the dollar section of Target and selected these colors after looking through a ton of Kilim tapestries on a Google search. I would never have thought to pair these colors together but love how they look!
Get the printable how to for this project below:
Painted Basket
Equipment
- Pencil(s) optional
- Ruler optional
Materials
- Woven basket
- 9 bottles Acrylic paint I used nine total colors
Video
Instructions
- Begin painting the diamond pattern. You can use the paintbrush and the weave of the basket as a ruler, or you can use a real ruler and pencil to mark off the center of your design.
- Finish painting the pattern using the various colors and the photo as inspiration. Allow to dry before using.
Notes
Hope you found this Kilim-Inspired Painted Basket useful! For another craft idea that’s just as simple, learn how to make canvas wall art with glue. Or you can visit these other projects:
Clay Photo Holders • Clothespin Clock • Coffee Filter Wreath • Comic Book Frame • Concrete Candle Holders • DIY Bulletin Board • DIY Plant Hanger • Felt Ball Garland • Modern Nesting Dolls • Paint Fake Flowers • Painted Doormat • Poster Hanger • Song Lyric Art • Twig Candle Holders • Wood Bead Garland • Yarn Wall Art

Is it washable ? After painting and drying. Thanks for your answer.
You’d have to use fabric paint and then follow the instructions for setting, which I didn’t do. But if you used fabric paint AND the basket is washable, and you follow the setting and washing instructions you should be good 🙂
Going to try these 😊
Yay! I hope it turns out well.
I just found your blog. This basket is so creative. Awesome job!
Thank you so much! Welcome.
I love this basket, but I’m having the hardest time finding a woven basket like yours! Is it a cotton fabric? Or what is it made of? Thanks!
That’s so cool! Thanks for sharing this idea. I will keep it in my mind.
So beautiful, love it!
I can’t believe you found the basket in the dollar section at Target!! Wow I need to tell my Target to get better items in theirs!! I really love what you did and can’t wait to get my hands on a basket so I can try this!!