Effortlessly Elegant Wood Bead Garland You Can Make Cheaply
Learn how to make a stylish DIY wood bead garland on a budget! This easy tutorial shows you how to craft beautiful decor in no time. This garland will bring the perfect touch to complete your vignette, mantel, or centerpiece. And it was made for less than $10.
Skills Required: None. Even if you’ve never crafted before, you can make this project. All you’ll need to do is string beads, and I’ll answer your pressing questions and show you how to make the tassels to complete it.
If you’re reading this post, you know exactly what a wood bead garland is – I’m sure you’ve seen them everywhere! And I’ll be honest, I love them too. There’s something so beautiful about their simplicity, and there are so many ways to style them (which we’ll discuss).
The great thing about this DIY wood bead garland is that it is made for less than $10.
Yep, I’m going to show you not only how to make this garland, but how to find it on the cheap. You can buy wood garlands pre-made pretty cheaply online, but mine costs even less.
Plus you can personalize yours when you make it yourself with exactly the size beads you like, AND combine them any way you like. I love the options for customization.
This home decor can be made in three simple steps! You’re going to prepare the beads (painting them if you need), string the beads, and make the tassels.
People love using these garlands to add a splash of color or interest to an otherwise boring space. They’re definitely an accessory, perfect for a side table, display, or mantel. They also look quite charming on a Christmas tree during the holidays.
How many wood beads do you need for a garland?
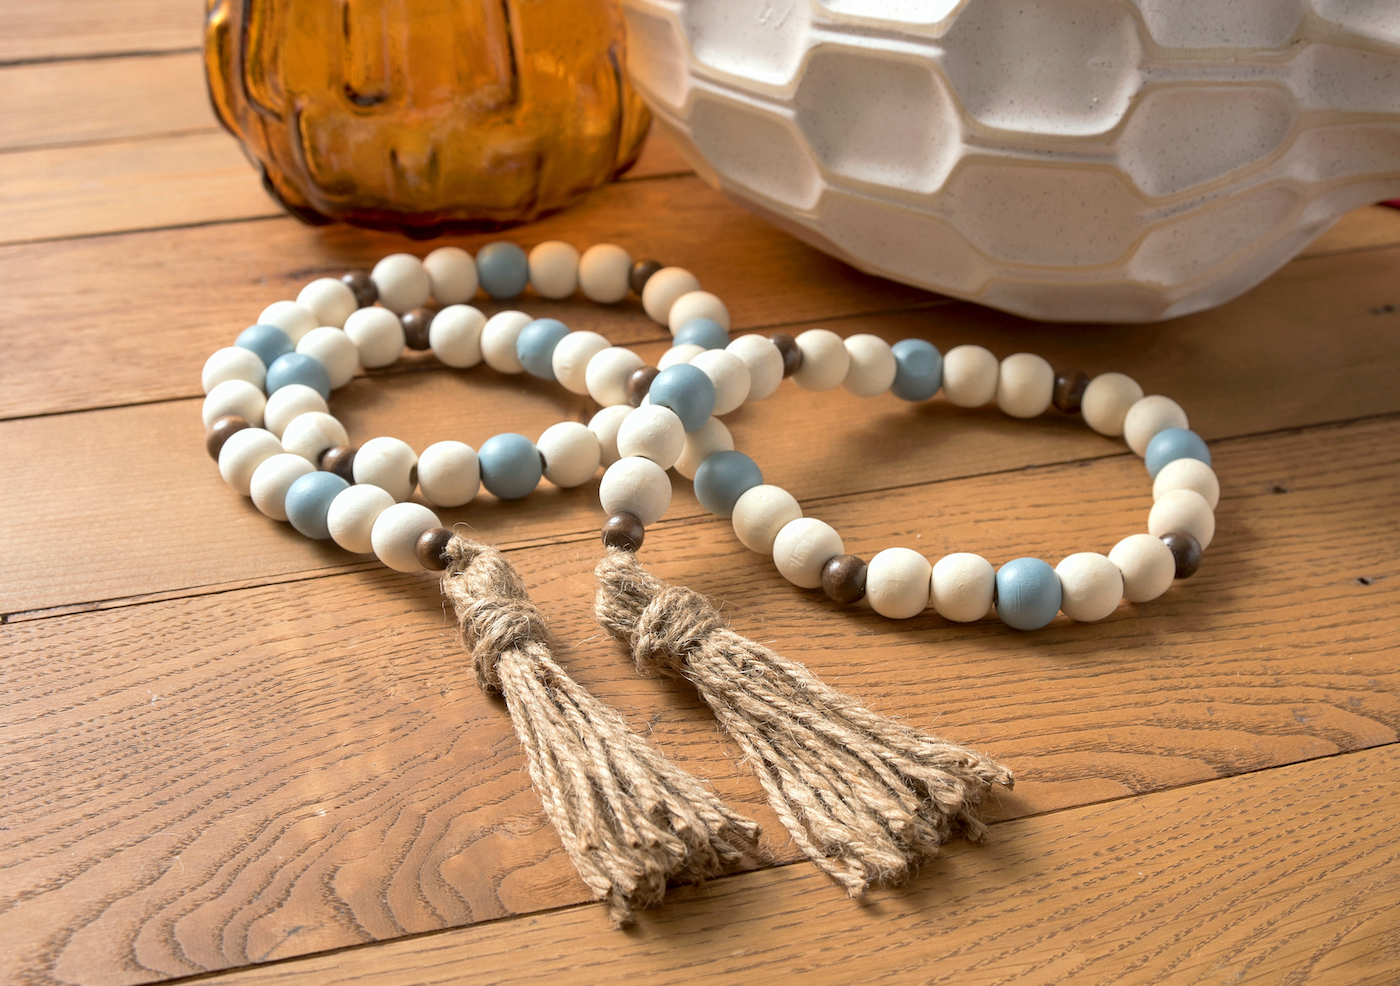
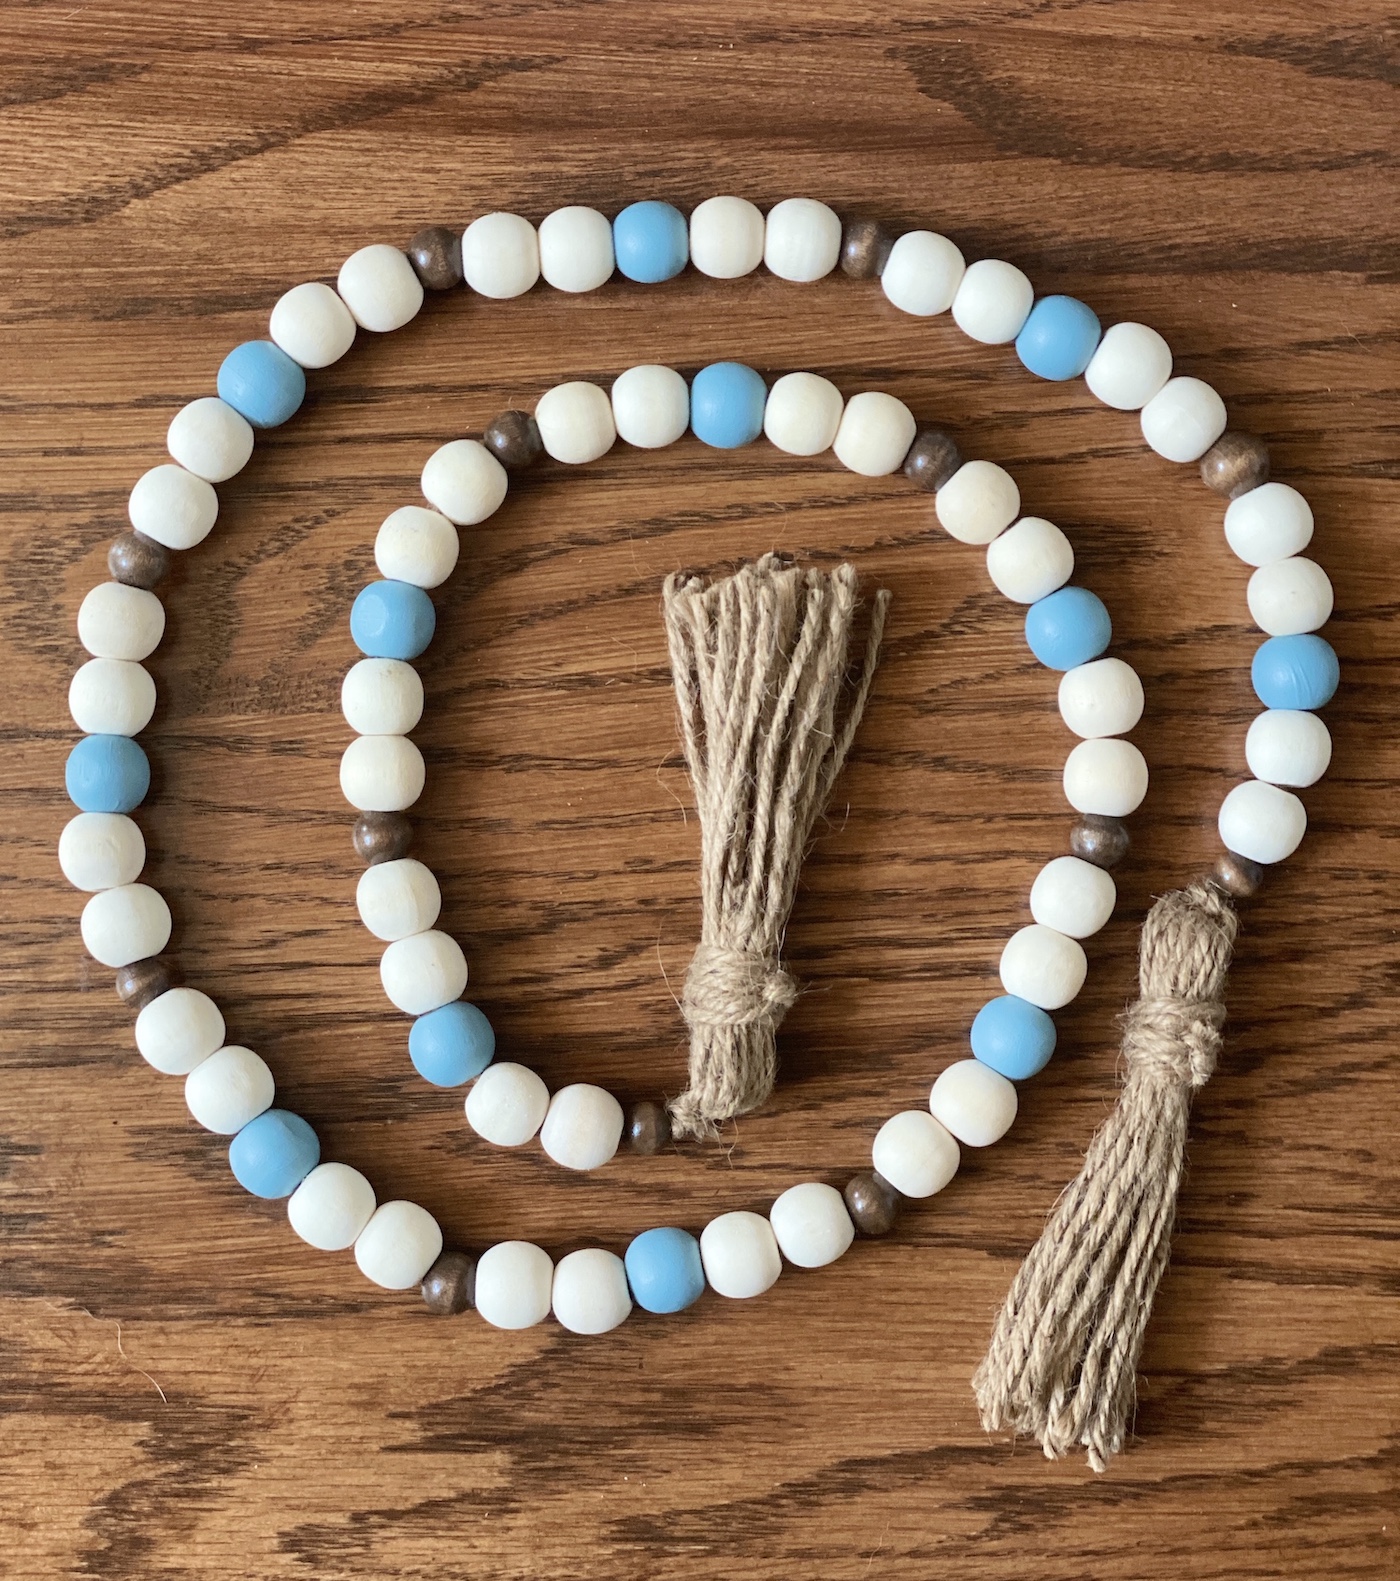
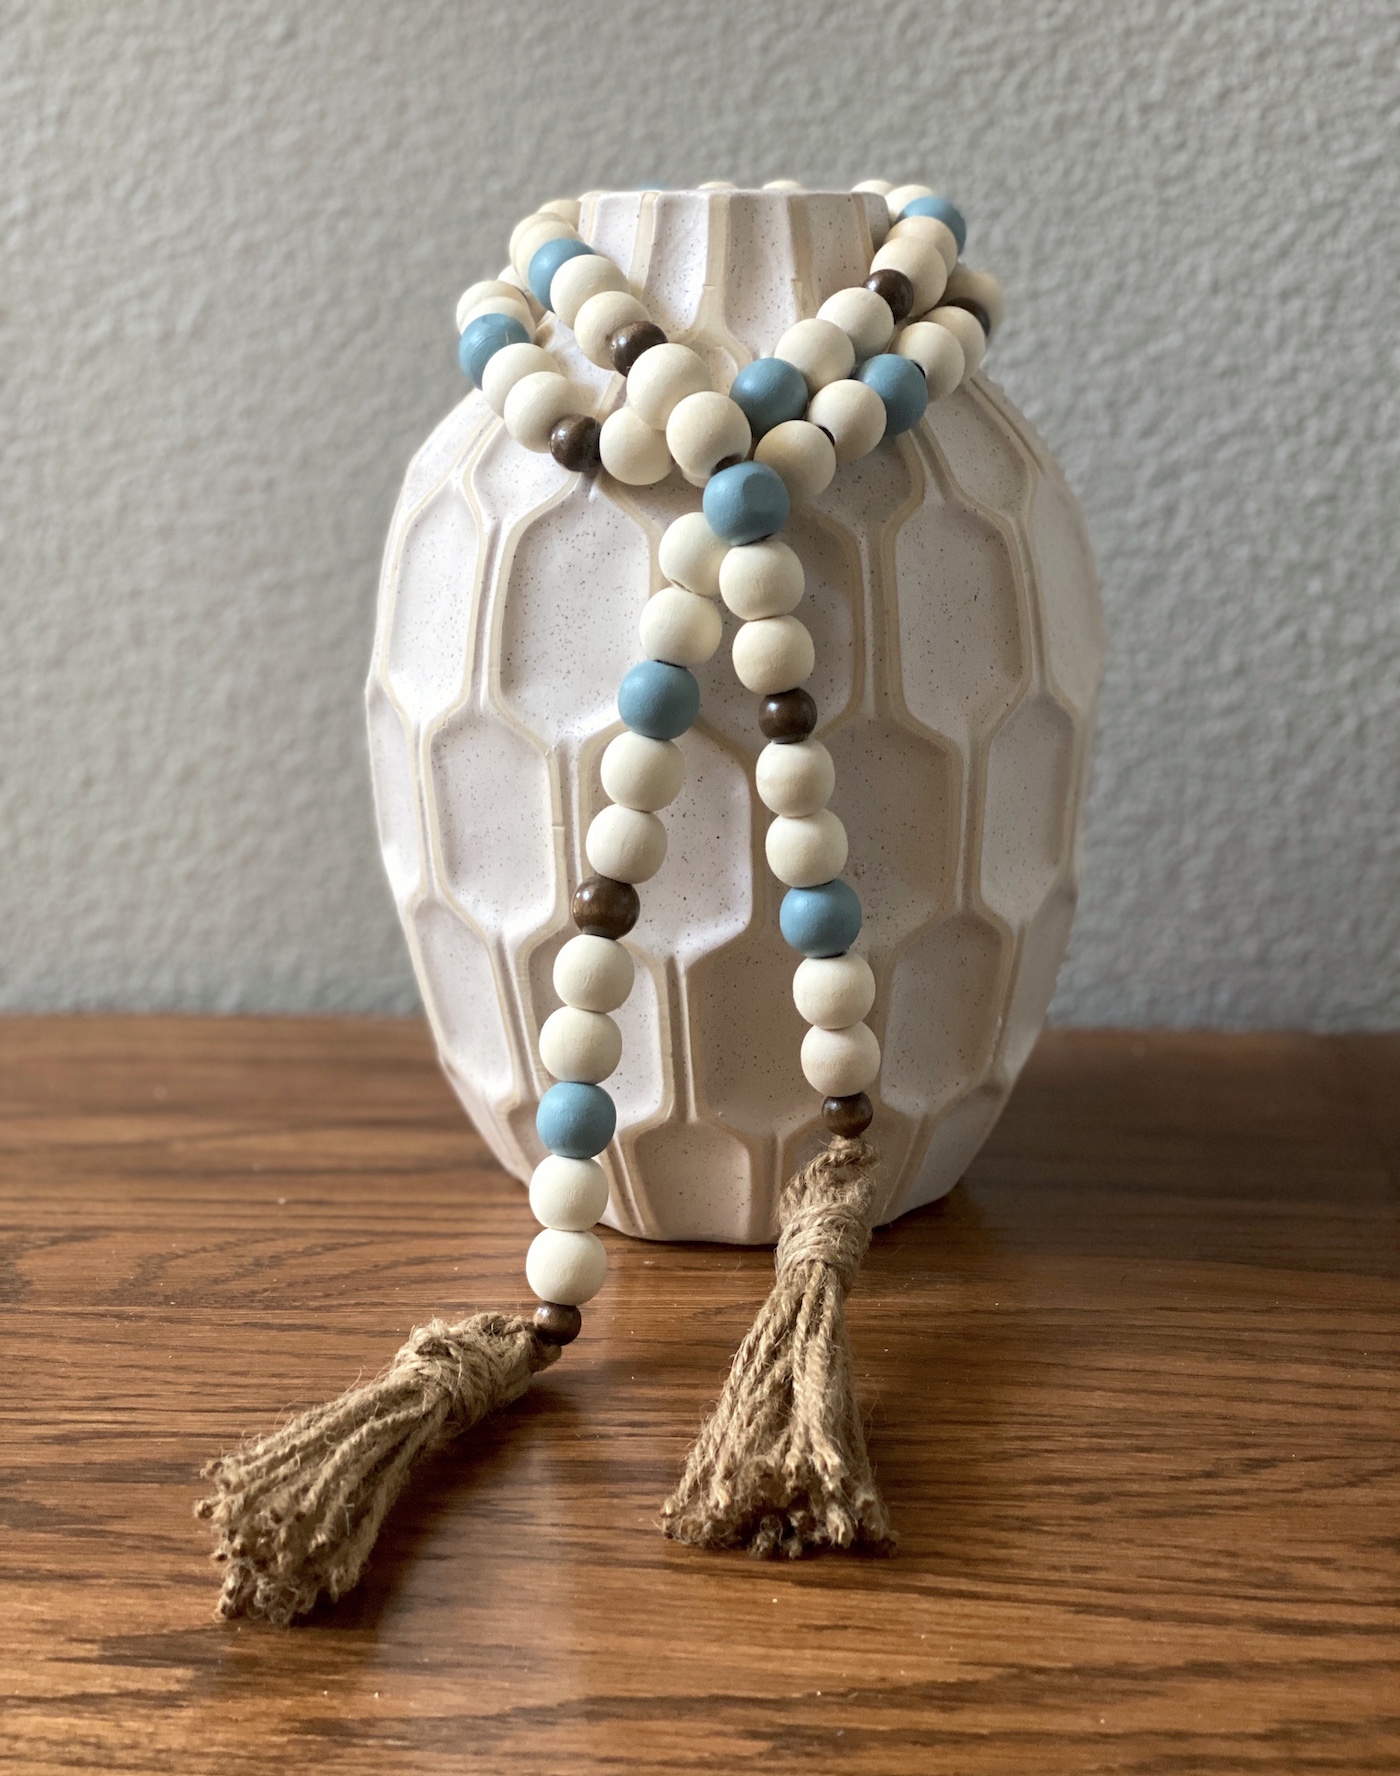
For my project, I used 60 unfinished wood beads (some of which I painted blue) as well as 13 smaller (already stained) beads I had left over from another project. That brings me to a total of 73 beads.
My larger beads were slightly over 1/2″, making the entire garland 47″ including a 4″ tassel on either end.
Are you ready for the tutorial? Here’s what you’re going to need:
Gather These Supplies
- Wood beads – my unfinished beads were 5/8″
- Acrylic paint (optional)
- Jute twine
- Pen or pencil
- Scissors
- Paintbrush (optional)
- Needle
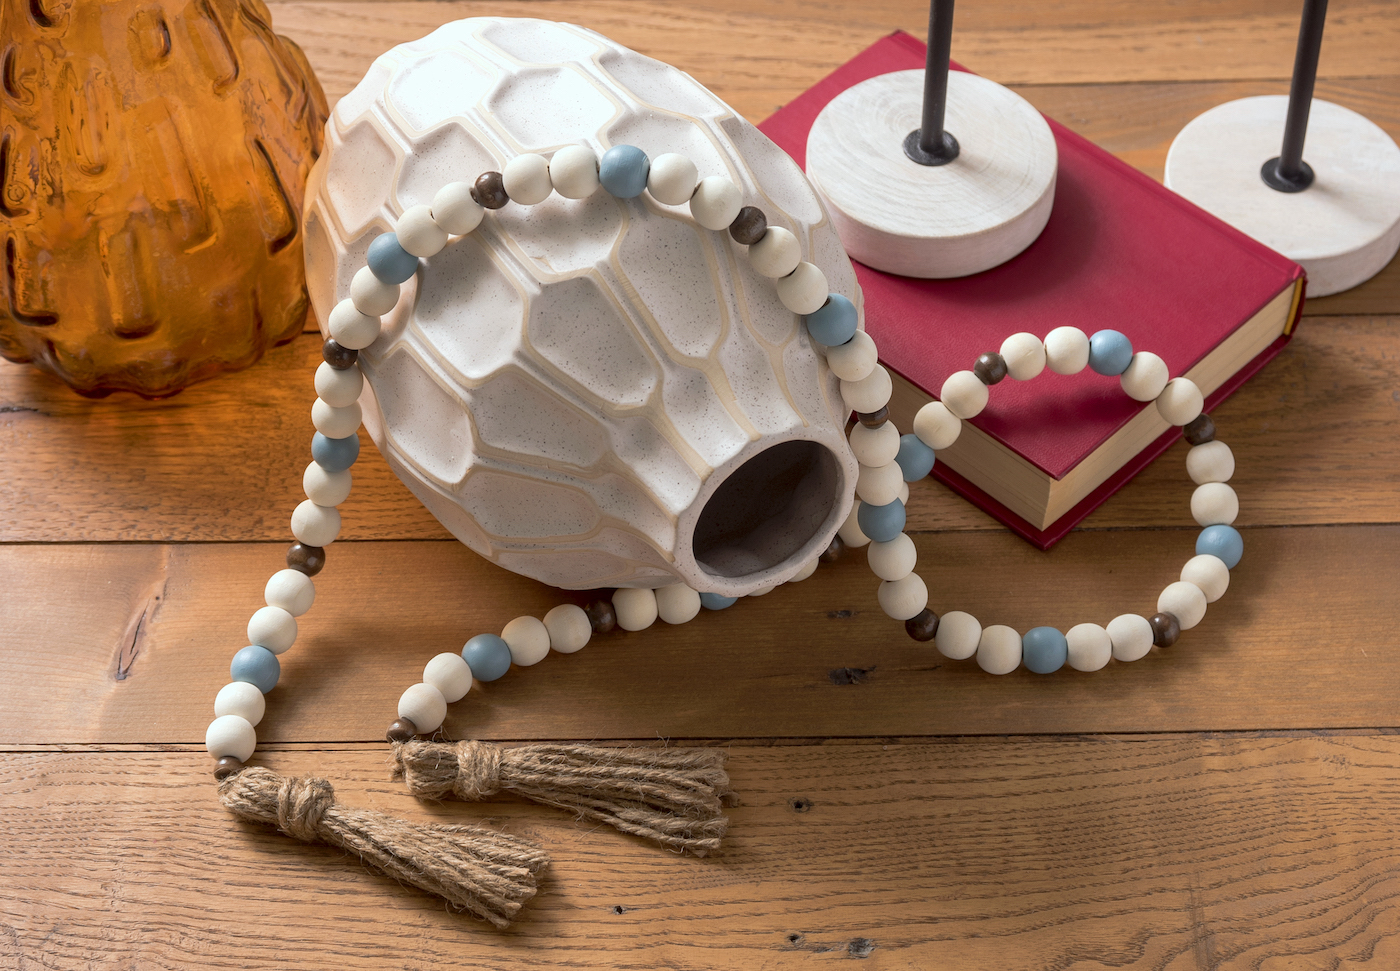
I hope you enjoy this project. I love displaying my garland wrapped and layered on a vase in my entryway.
It’s probably one of the easiest home decorating projects I’ve ever done in my life! Get the printable how to below:

Wood Bead Garland
Equipment
- Pen or pencil
- Needle(s)
- Paintbrush(es) optional
Materials
- 60 Wood beads
- 13 Dark brown medium wood beads
- Acrylic paint optional
- Twine
Video
Instructions
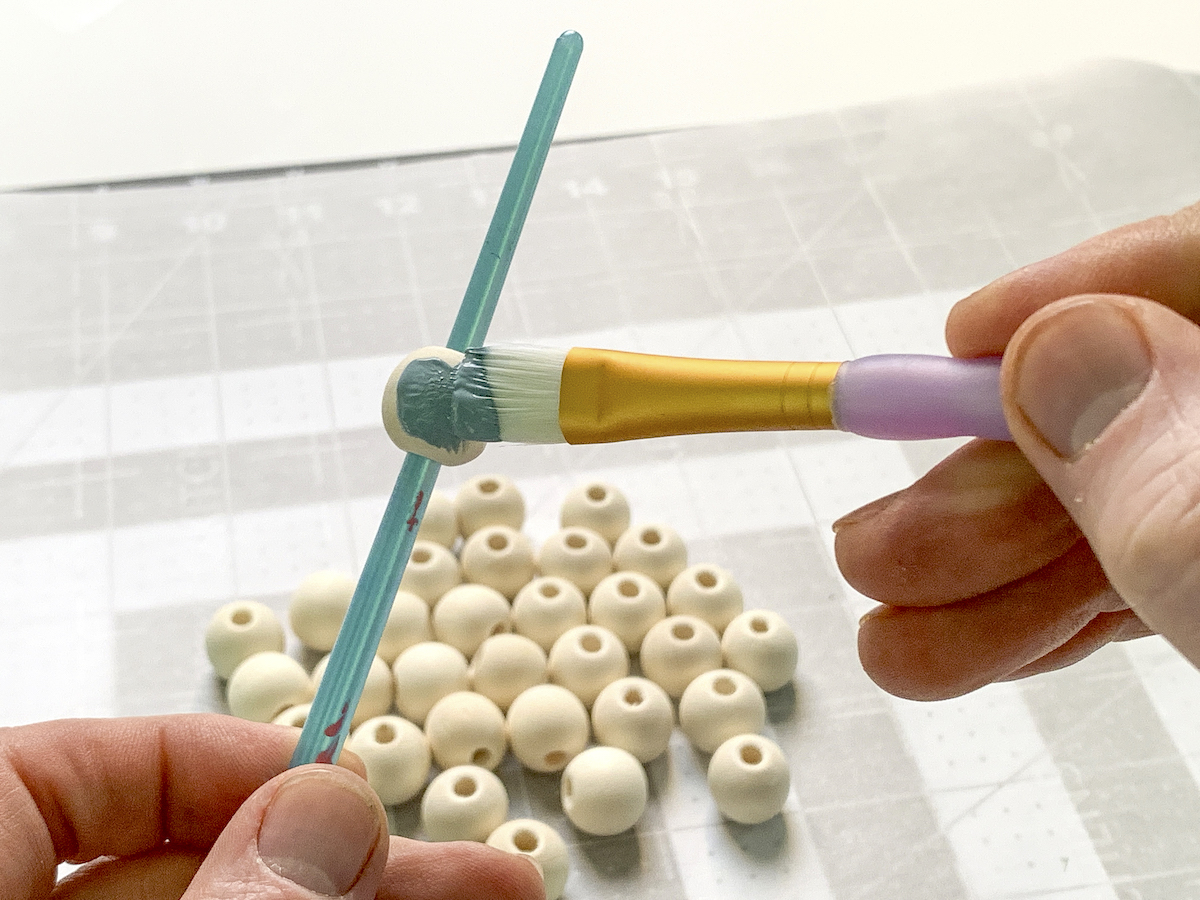
- Decide how many of the beads you would like to paint. Use a paintbrush to hold each bead – then paint it with a different brush. Repeat and then let all the beads dry.
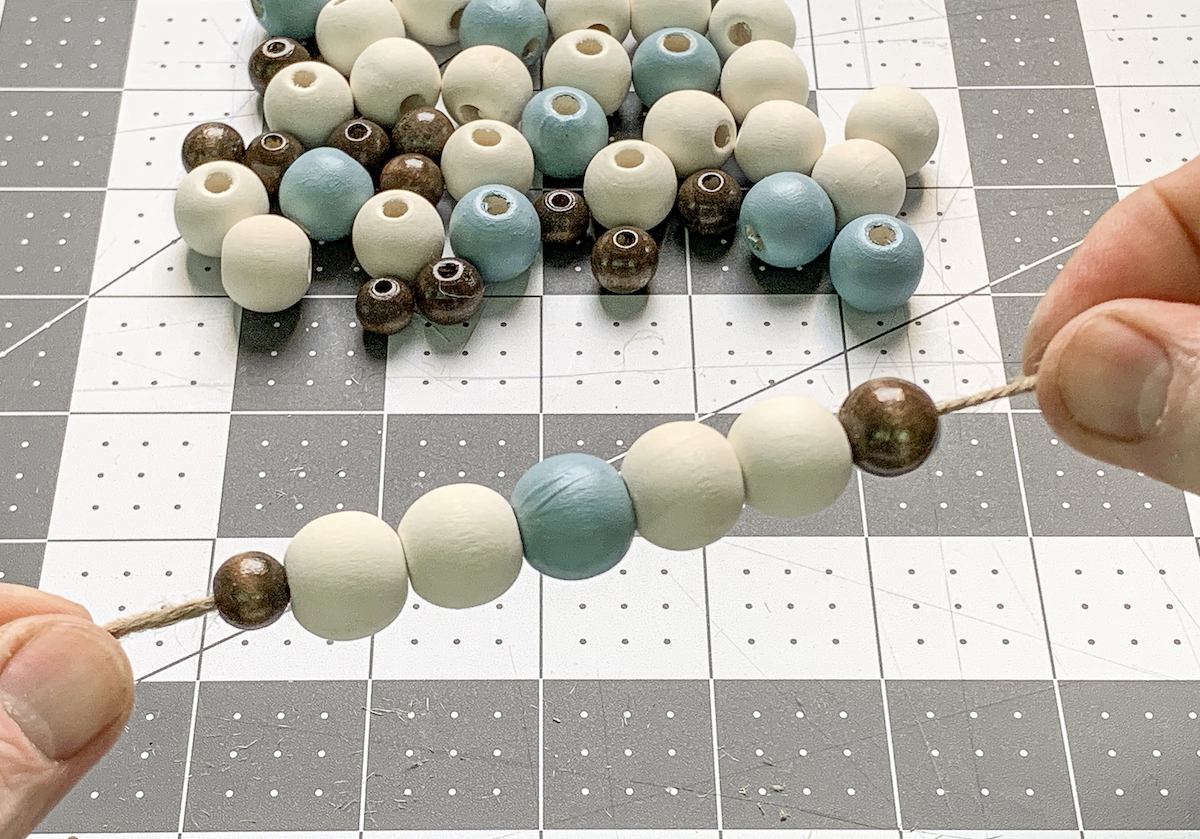
- Cut the twine to be the length you like, leaving several inches at either end for attaching tassels. Knot at one end (again, leaving length for tying) and start stringing beads in your preferred pattern. Continue until the wood bead garland is at the desired length. Then tie a knot at the other end.
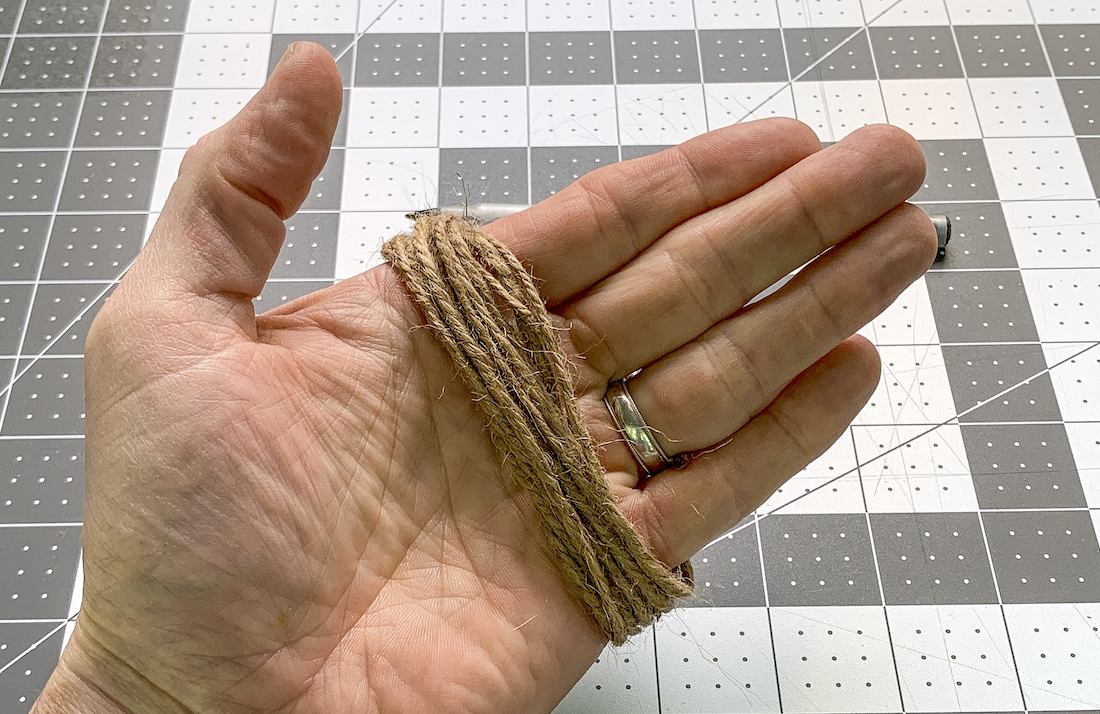
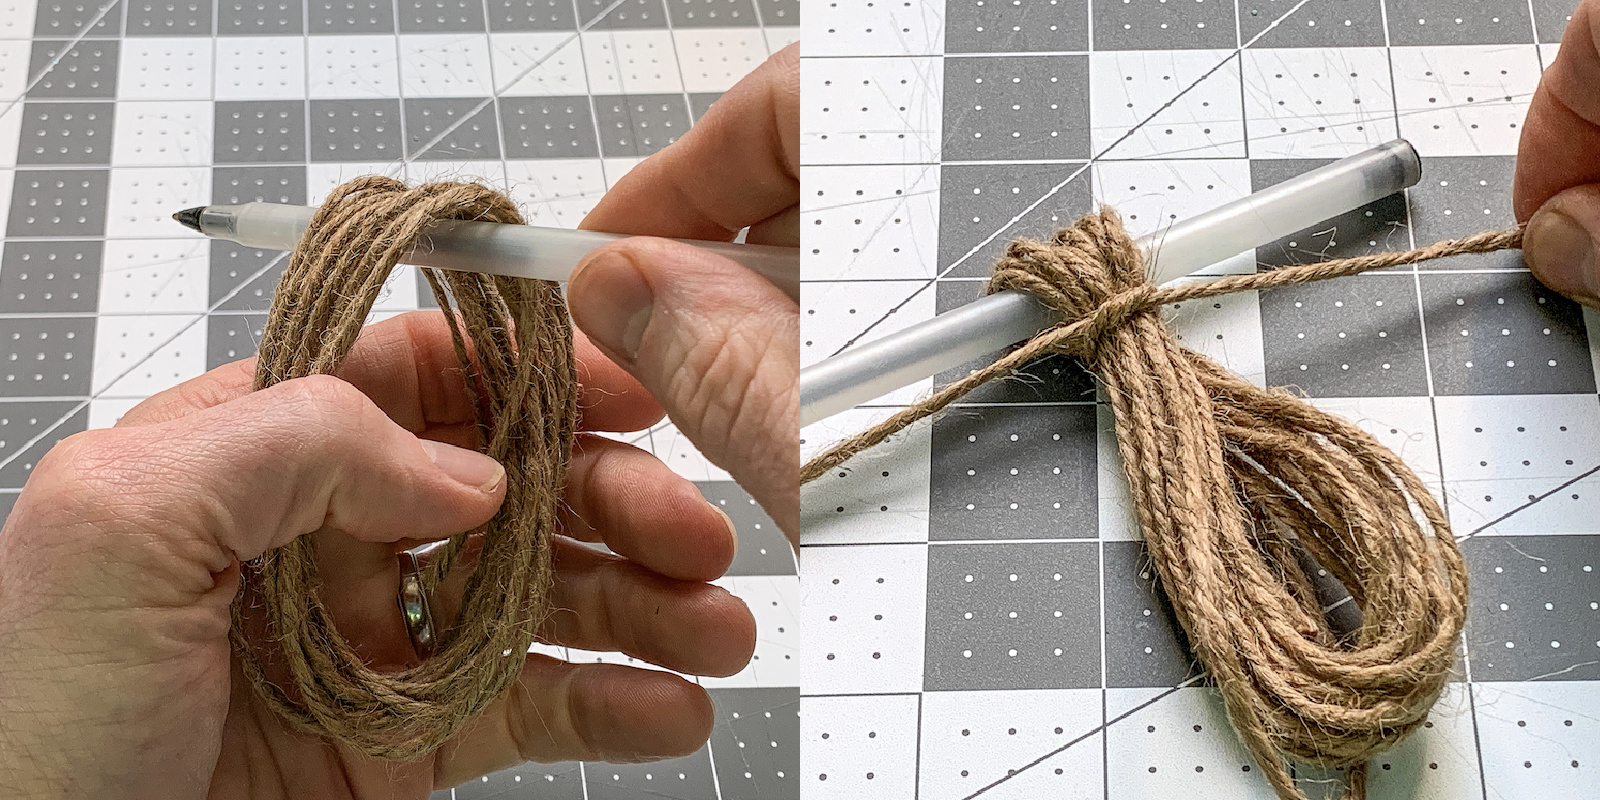
- Begin by wrapping the twine around your hand several times – about 10 to 12. You can also use a piece of cardboard.
- Remove the loop from your hand, place on the pen, and cut an additional length of twine (about 18"). Tie around the loop tightly right underneath the pen.
- Wrap the twine around multiple times and then tie a knot. Cut the excess.
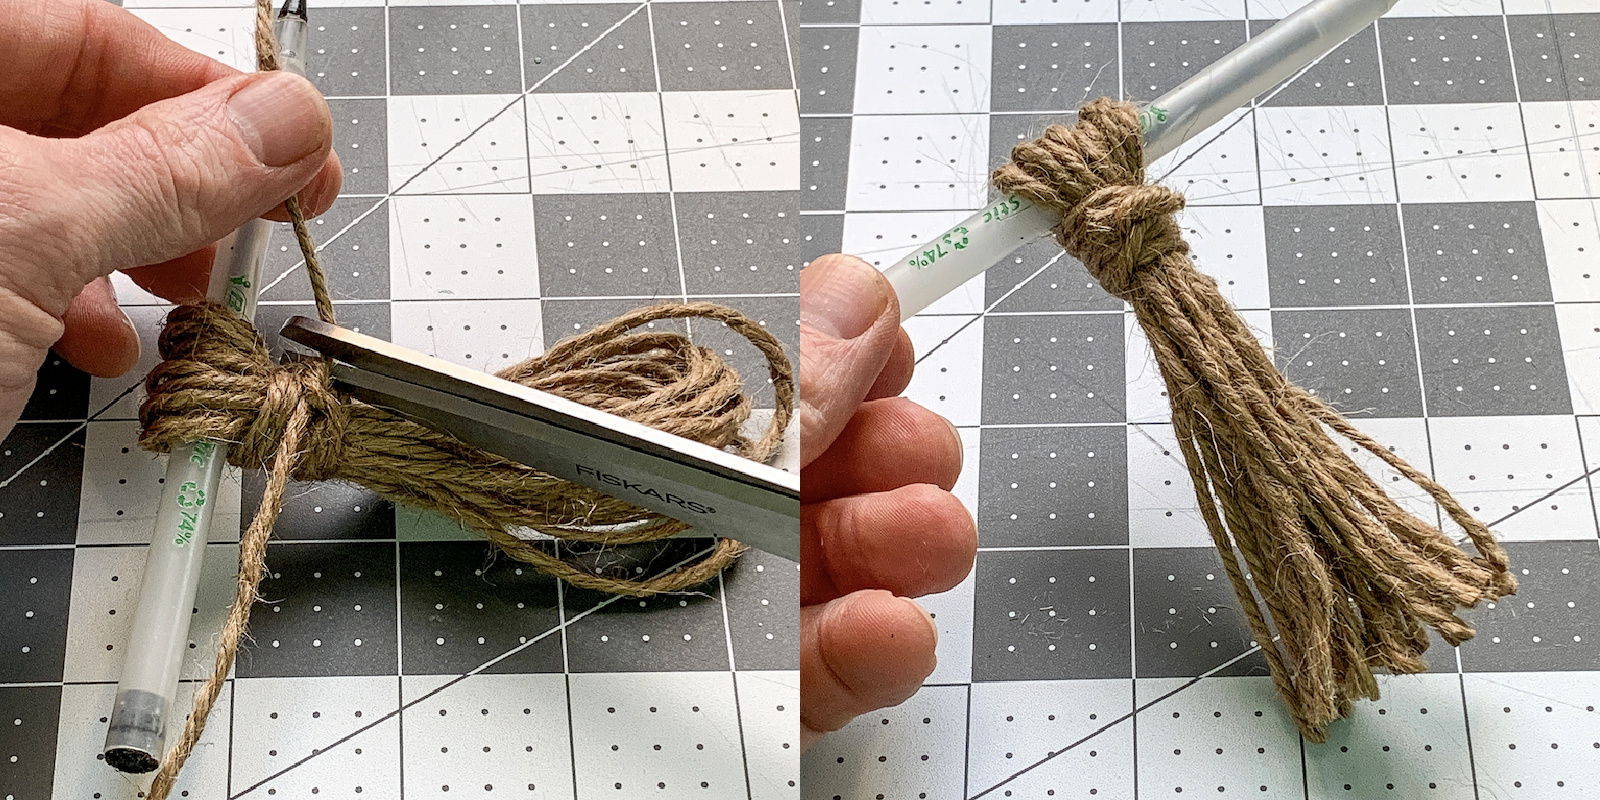
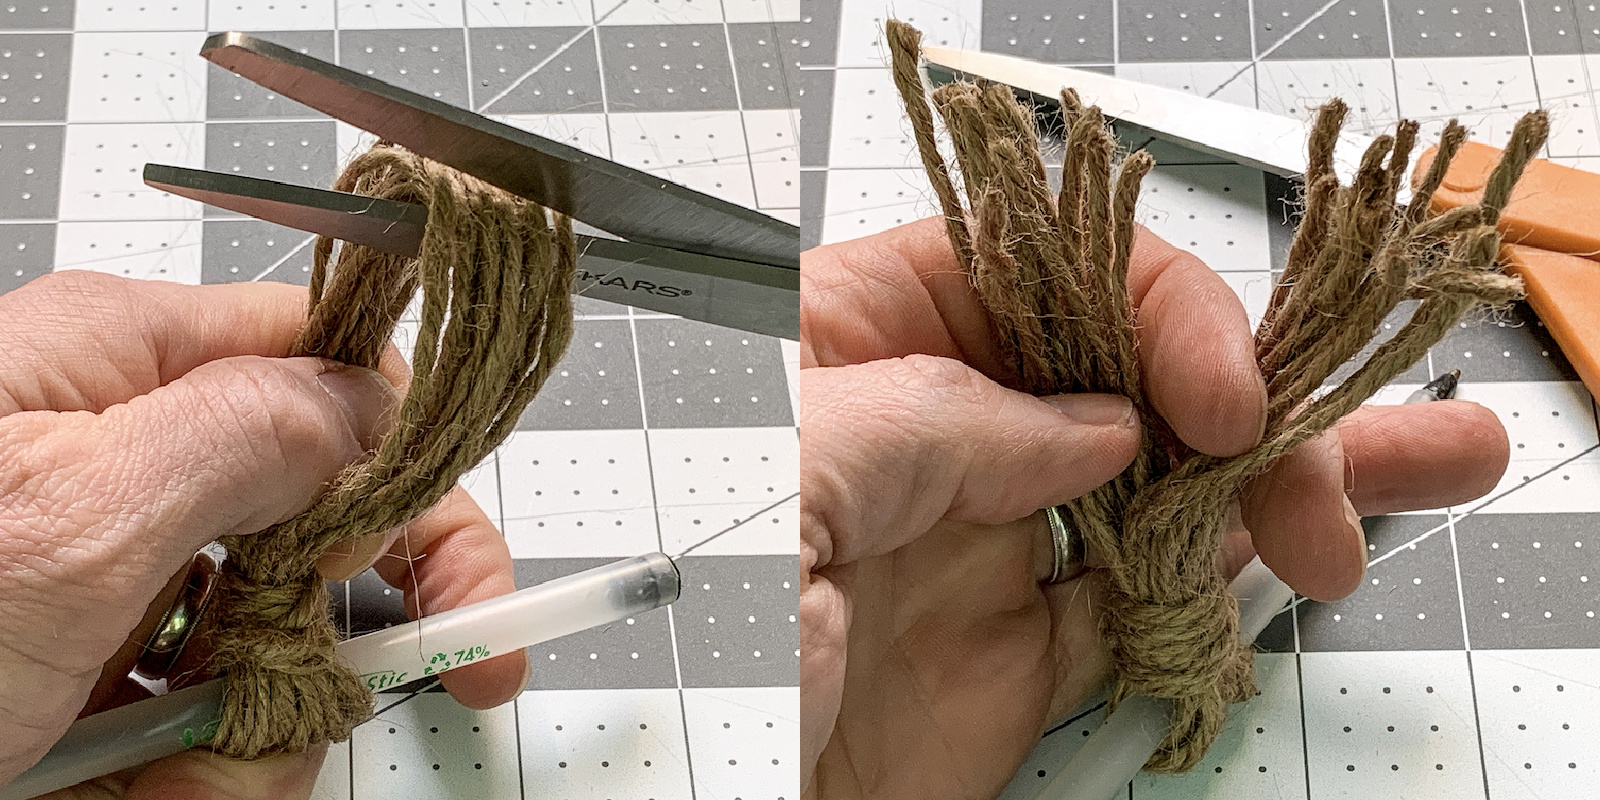
- Cut the end of the loop at the other end of the pen to create a tassel. Trim with scissors at the ends of the yarn to make them even. Repeat so that you have two tassels.
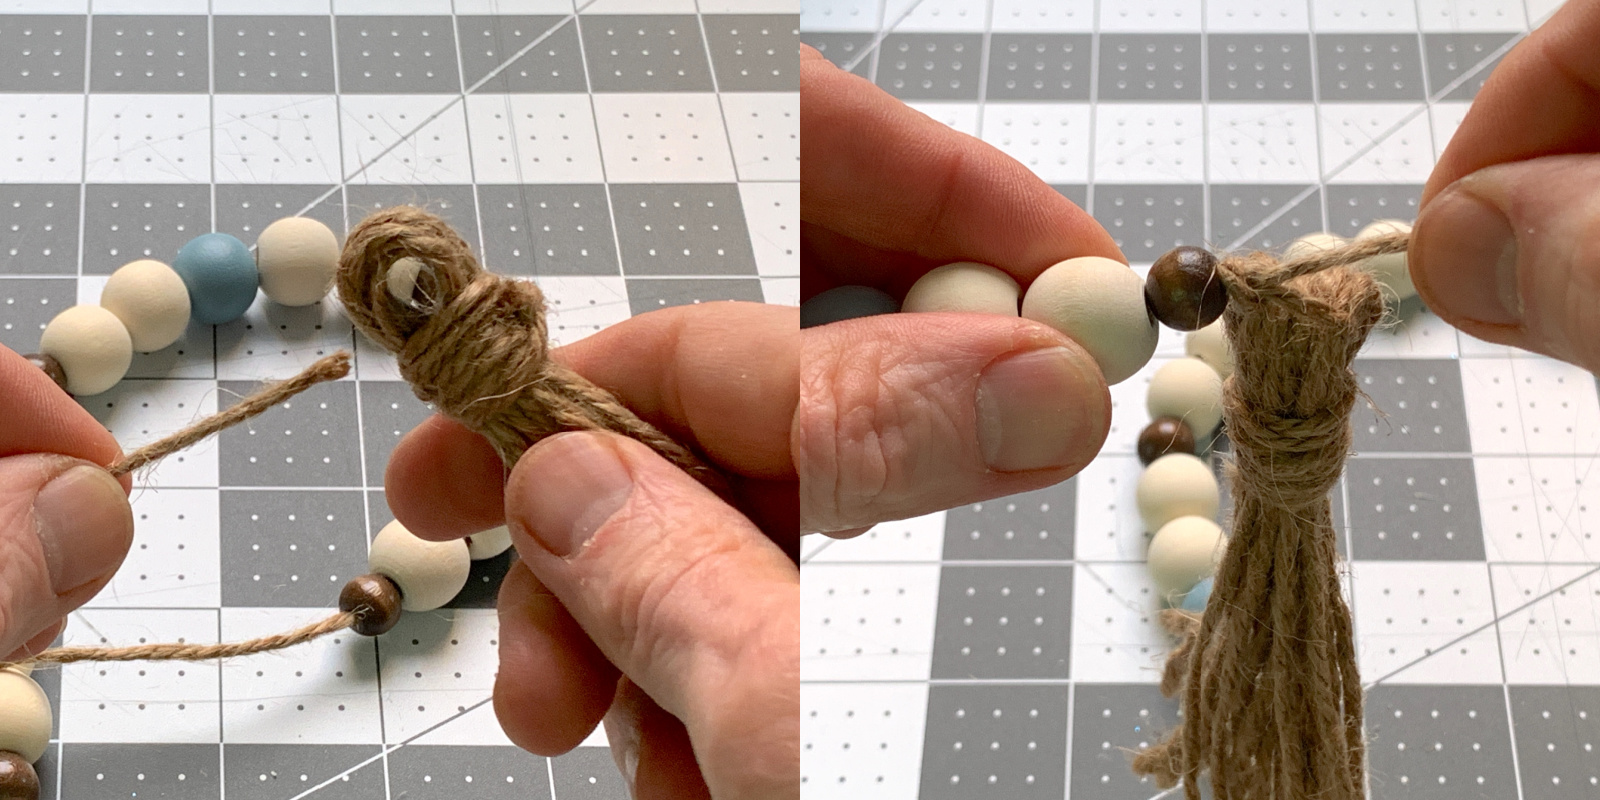
- Tie the tassels into each end of the bead garland, knotting to secure. Cut excess twine with the scissors.
Notes
Did you enjoy making this garland? I’d love for you to check out these other home decorating ideas:
Clay Photo Holders • Coffee Filter Wreath • Concrete Candle Holders • DIY Bulletin Board • DIY Tassel Crafts • Faux Terrarium • Felt Ball Garland • Floral Hanging Frame • Glue Art • Hot Glue Mushroom Lights • Magazine Collage Art • Mini Dry Erase Board • Mini Planters • Paint Fake Flowers • Painted Doormat