This Clothespin Clock is Easy to Make
Learn how to make a clothespin clock to decorate your home! If you want to make a cute clock from scratch, this is a fun project.
Skills Required: Beginner. It helps to have experience with spray paint simply because there are a lot of nooks and crannies. Keeping that in mind, it’s a very simple project.
Have you ever made a craft with a supply (like pom poms, clay, yarn, etc) – then after you used said supply, you wanted to make more projects? Just to see what you could make?
Because I have.
I just recently had that type of experience with clothespins. There were clothespin butterflies, then clothespin trivets, then a napkin holder. Then after that, there were STILL more clothespins!
So what happens when you have more supplies you don’t know what to do with? You brainstorm. And then you make a clothespin clock!
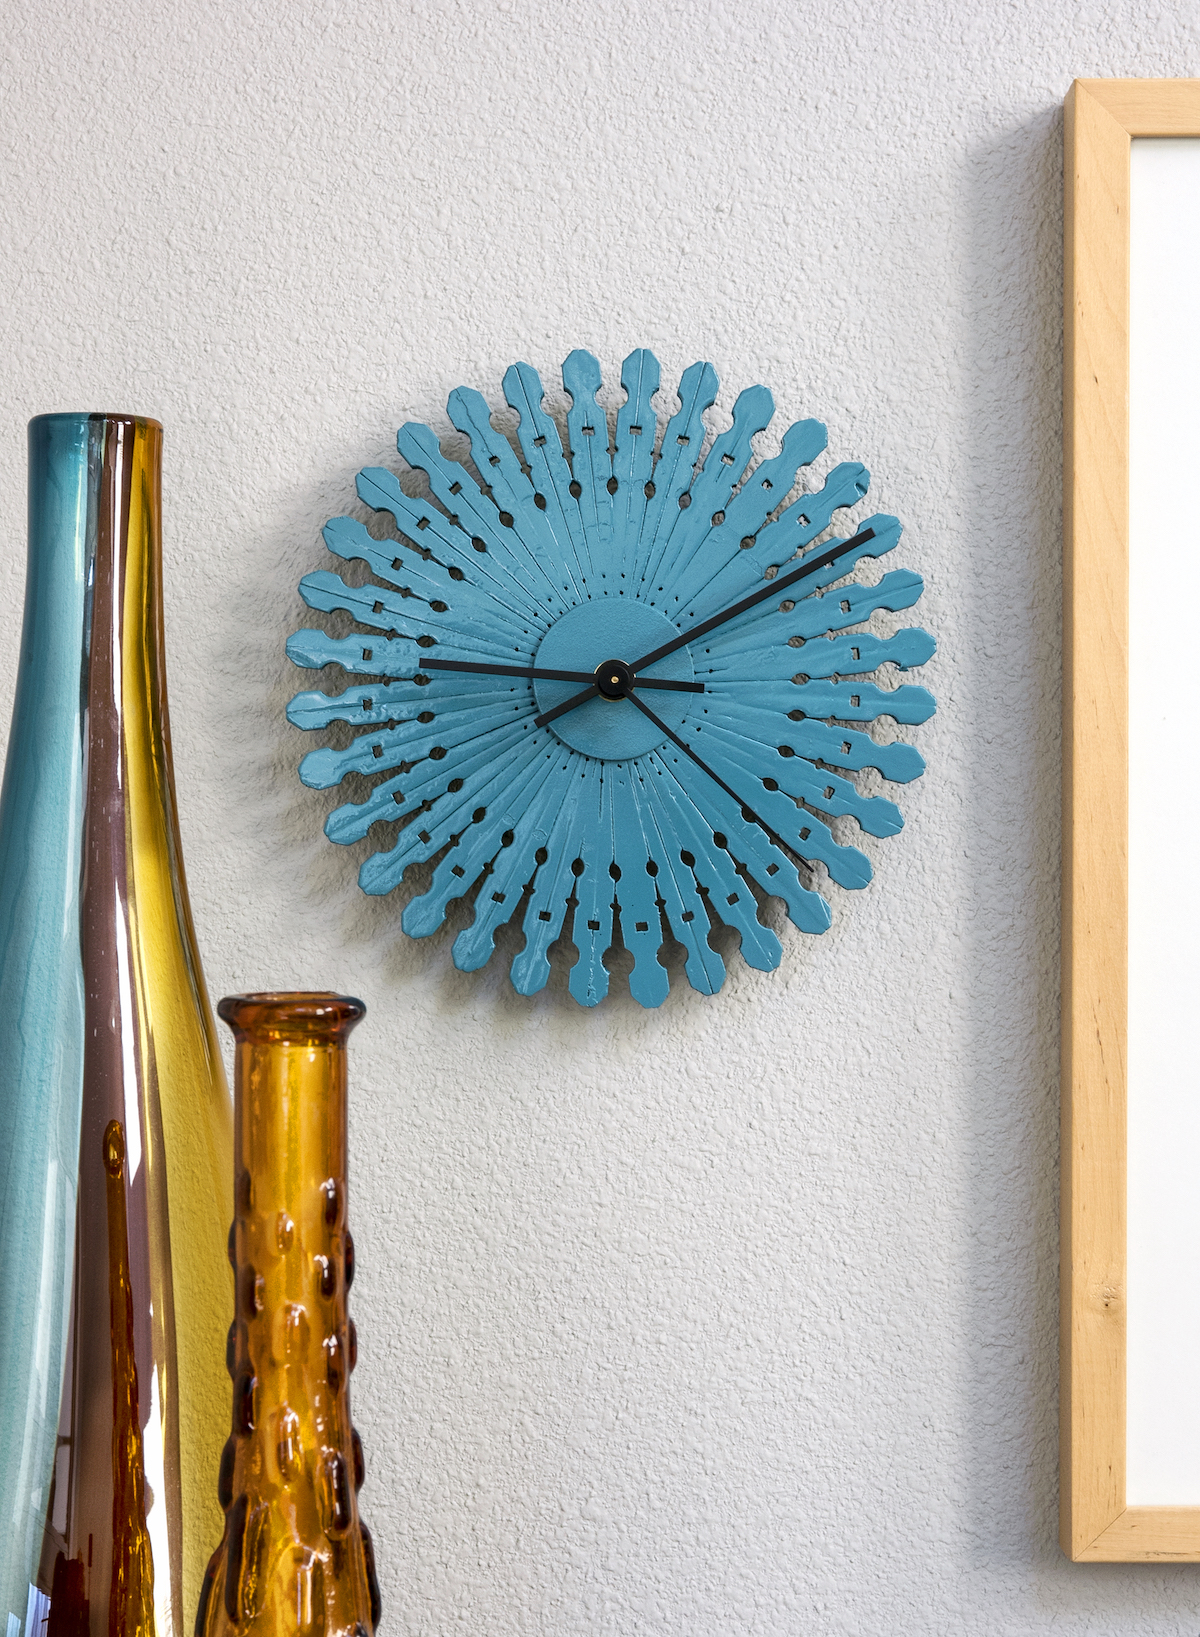
I feel like this clock is good for a variety of home decor styles. I can see it simply stained in a farmhouse setting. I can also see it spray painted orange for a bit of mid-century style.
This project actually resides in an office, but I think it would be fun in the kitchen. Or a living room. Really anywhere! And it’s simple to make.
Make a Clock with Clothespins
You’re going to make this clothespin clock in four easy steps. You’ll remove all the clothespin clips, then glue the pins together to form a circle. Then you’ll paint everything. Finally, you’ll attach the circles and insert your clock movement.
Adding a clock movement to just about anything is easier than you think. The movements come in kits with hands, and instructions for putting it all together. Basically you’ll just need a hole for the movement to go through, and then the hands attach.
Are you ready to start? Here we go!
Gather These Supplies
- Wood clothespins – 32 (these are the 3.3″ length)
- Craft glue
- Clock movement
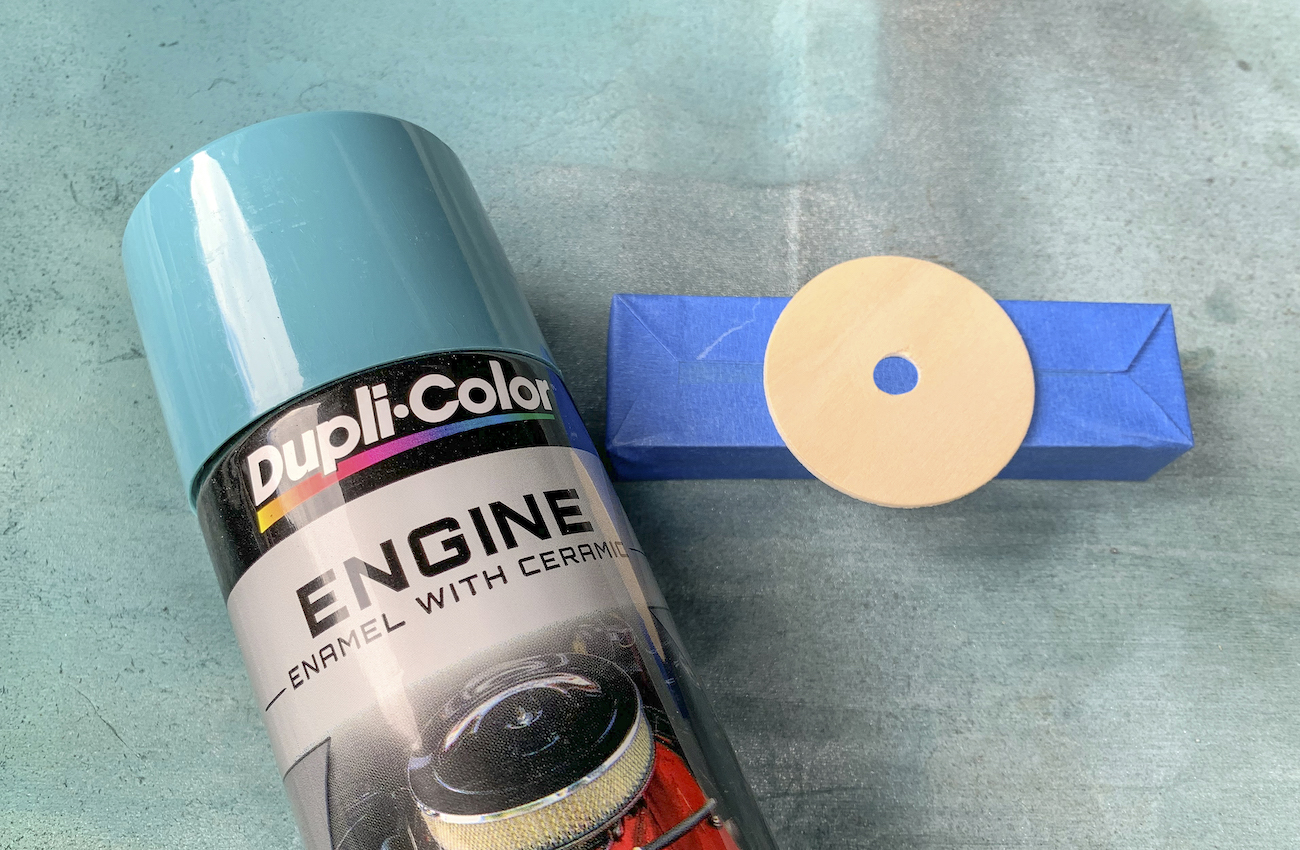
- Spray paint – color of your choice
- Wood circles (2 1/2″) – 2
- Drill (bit to fit your movement)
Separate the Clothespins

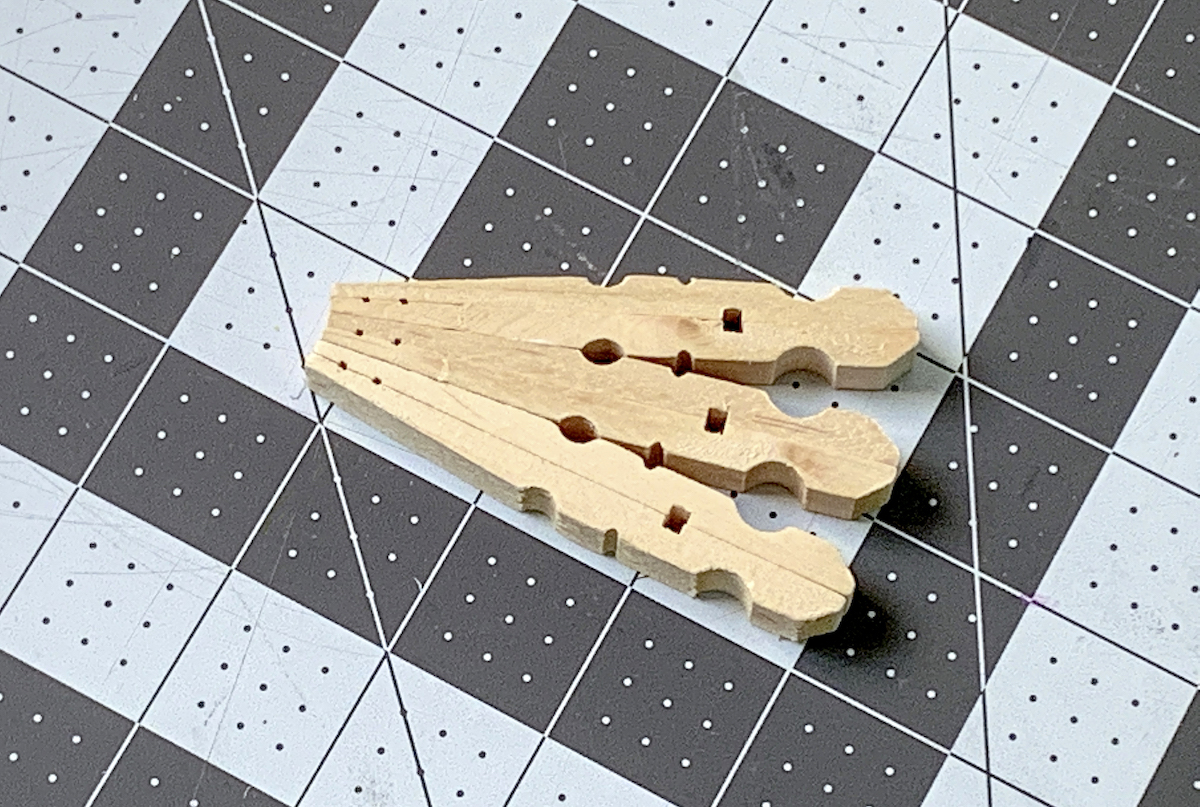
You’re going to use the clothespins without the springs – so the first thing you need to do is remove them! Begin by twisting the two half of the clothespin and removing one side. Then you’ll easily be able to remove the clip from the other half.
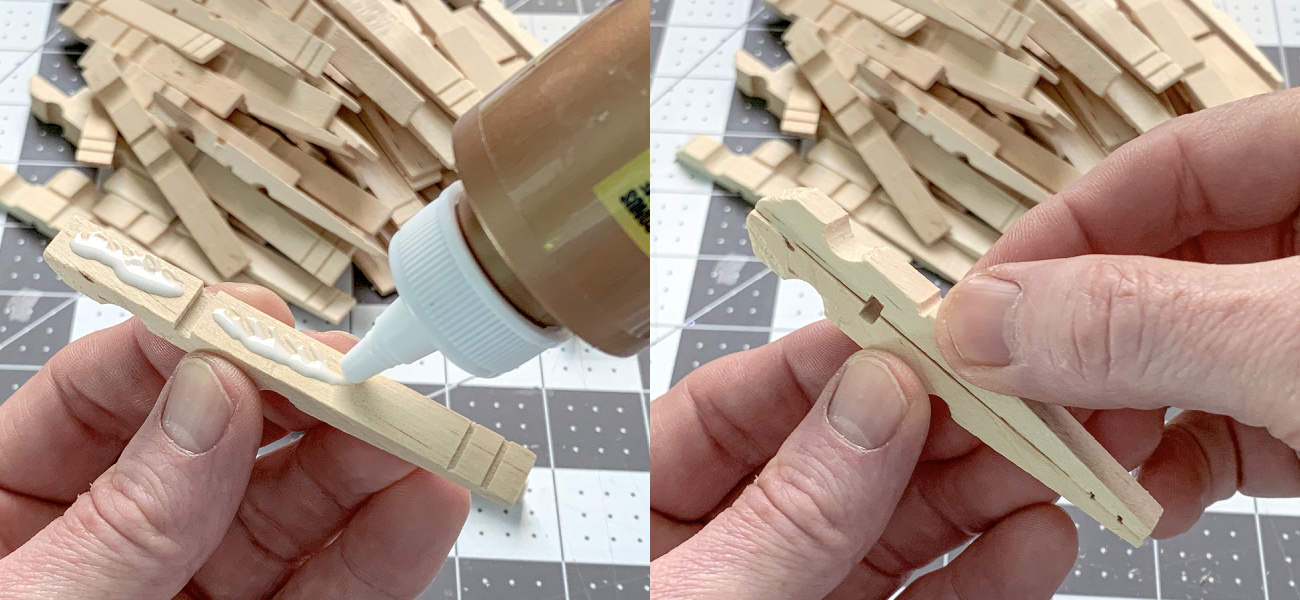
Glue the Clothespins Together
Keep your clothespins and your glue handy, because you’re going to glue a bunch of pairs together! You’ll start by gluing flat sides of clothespins together.
You’ll need 32 of these pairs, which are 32 clothespin halves.
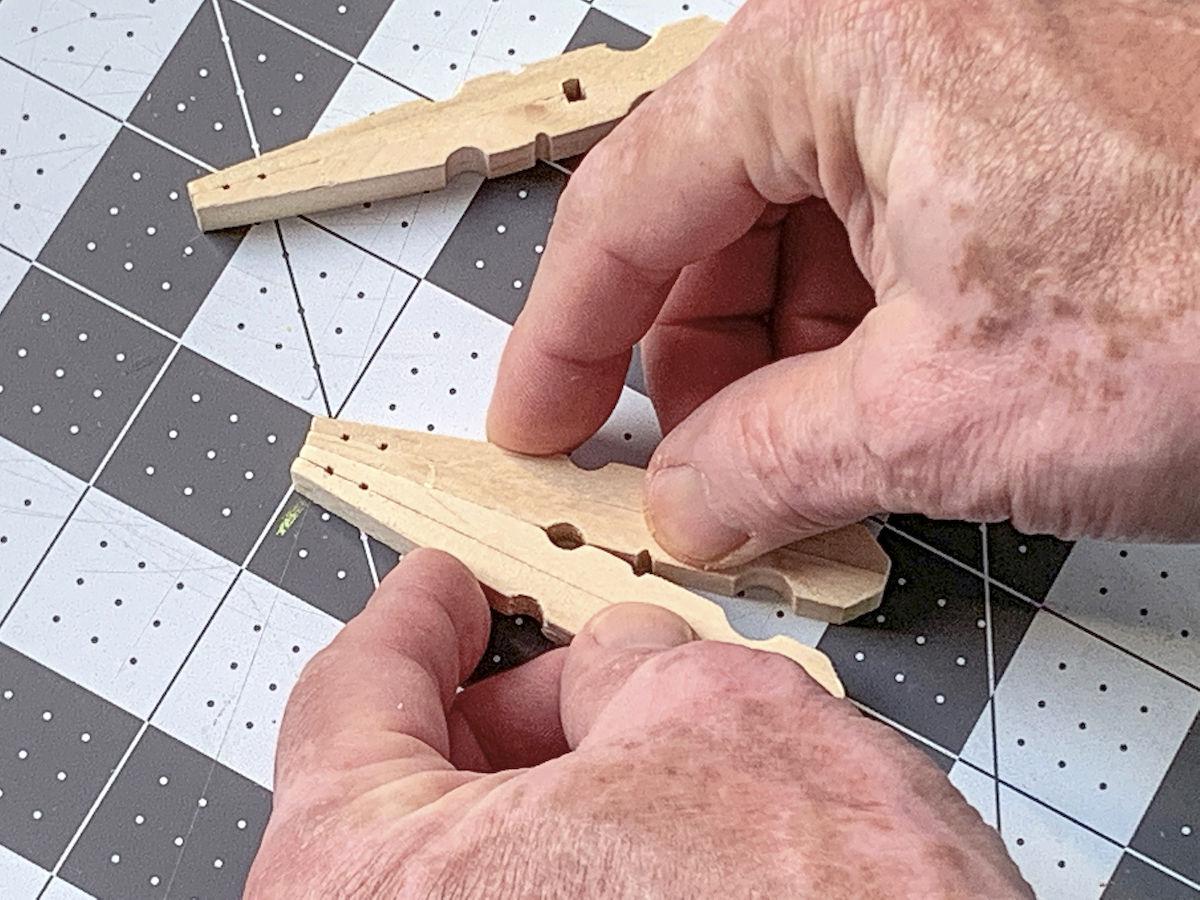
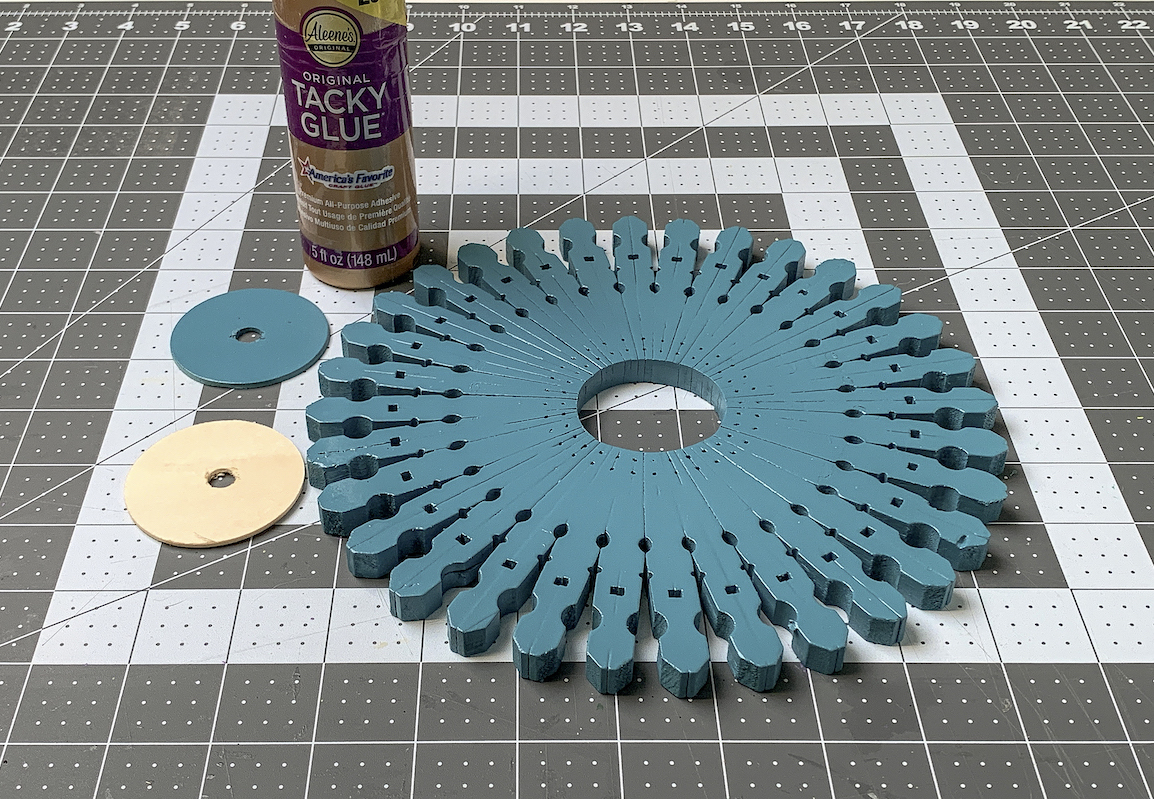
Now you’re going to create the clock base. The best way for you to do this is to first lay out your clothespins into the circle shape before you glue, just to make sure everything fits together.
Then start gluing! Place glue on the side of a clothespin, and then sandwich another clothespin to it . . .
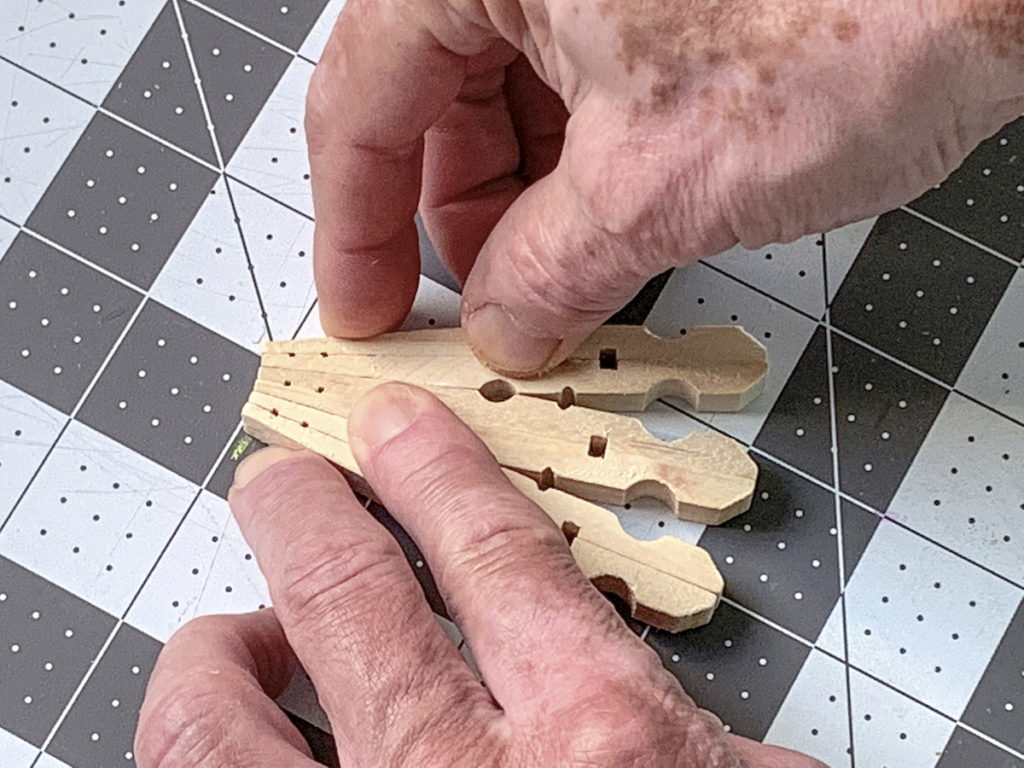
Continue working your way around the circle, gluing clothespins together and holding.
Continue working around the “imaginary circle” in the middle, gluing the pins to make your clothespin clock face.
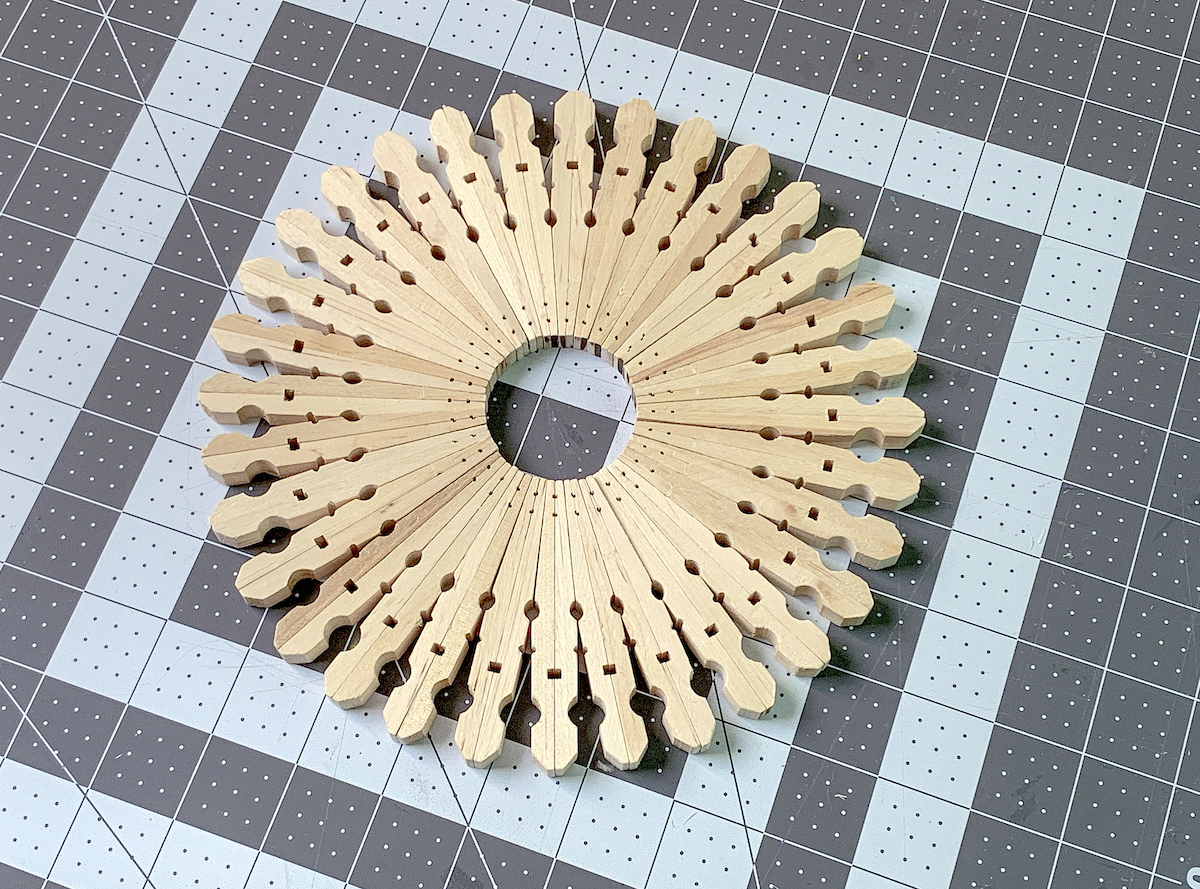
Once you finish, your clock should look like this, and you should let it dry completely.
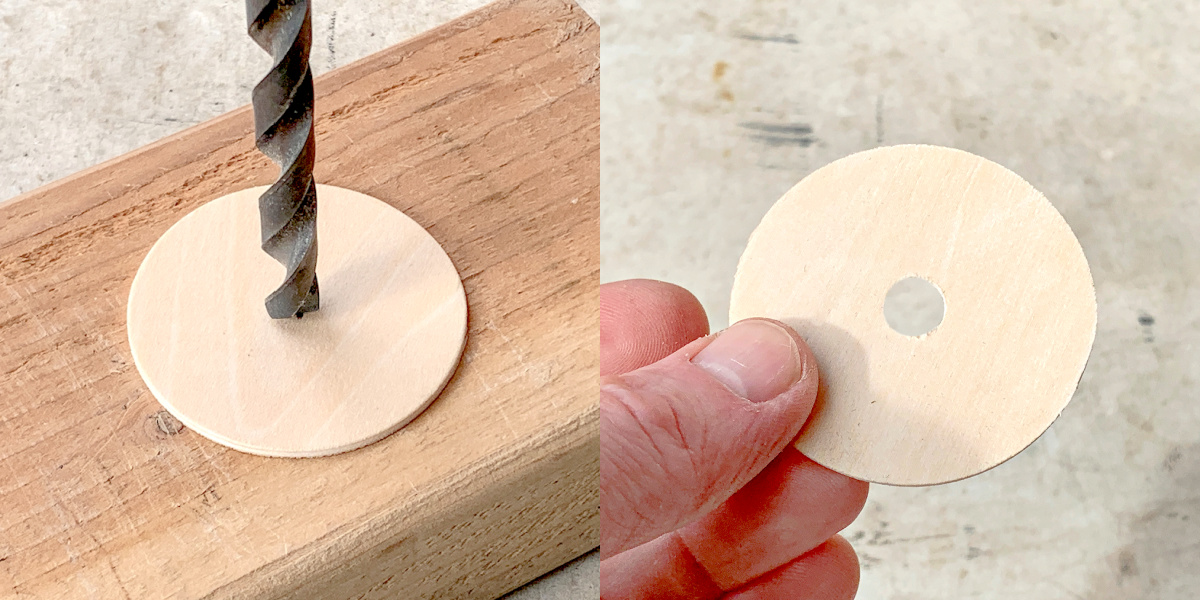
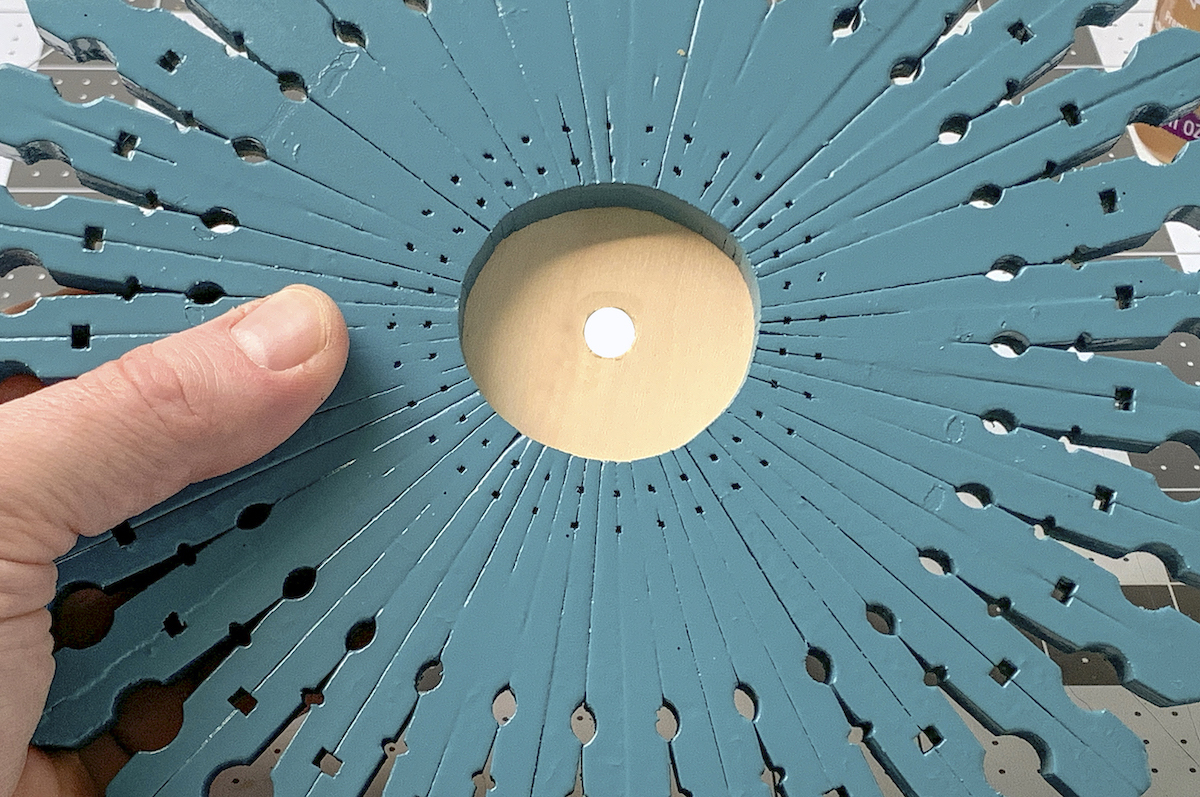
Use a drill to drill a hole in the center of both wood circles, matching the bit with your clock movement size.
Paint the Parts
Place your clock face and one of the circles outside or in a well ventilated area. Use the spray paint to several light coats. You’ll want to do several light coats since you have so many small areas on the clothespin clock.
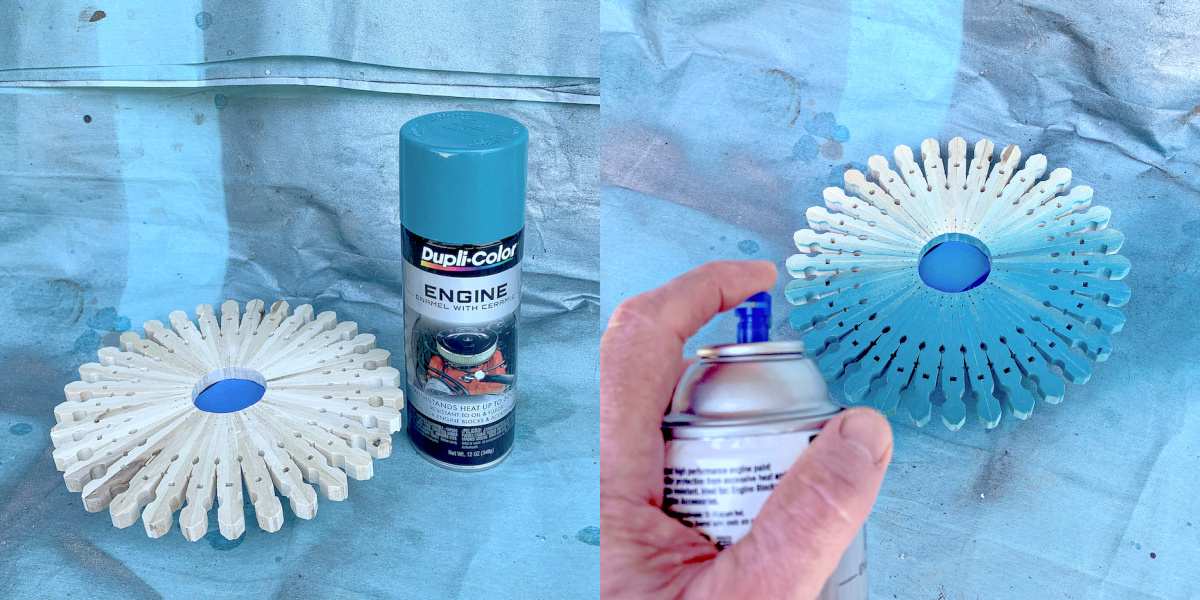
Let dry and then tilt as needed to get all the areas covered. There’s no particular reason why I used engine paint; I just happened to have it on hand and liked the color.
You can use any type of spray paint! You can even paint with craft paint.
You’re also going to paint one of the circles, because it’s going to go on the front of the clock face.
Once you’re done spray painting, this is what you have.
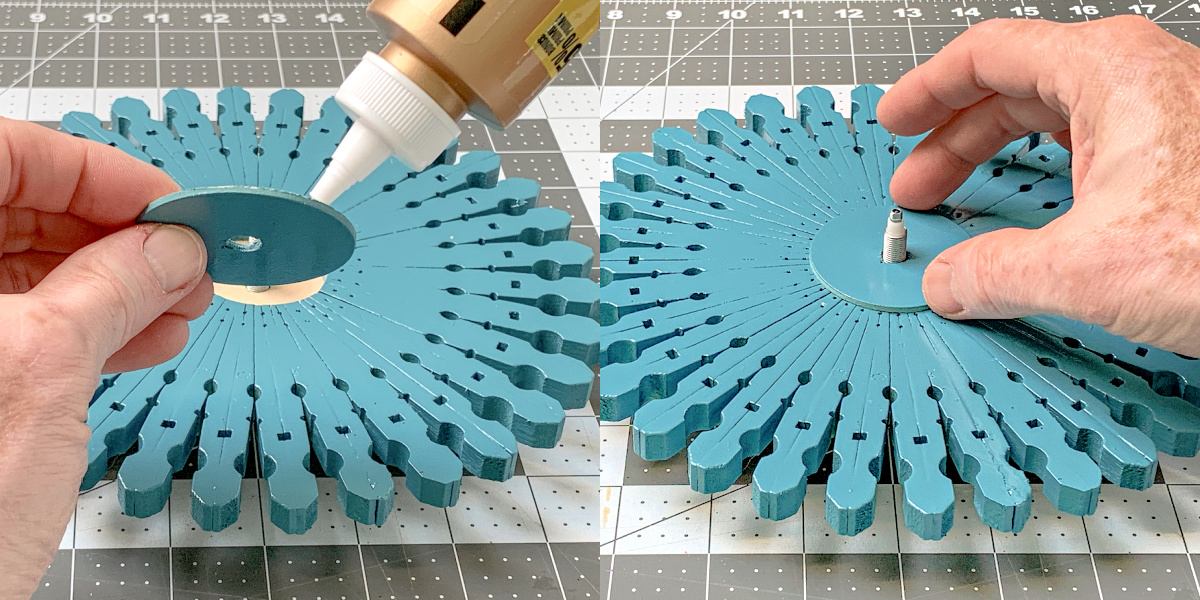
Attach the Circles and Movement
Glue one of the wood circles on the back in the center. Let dry.

This is how it will look from the front.
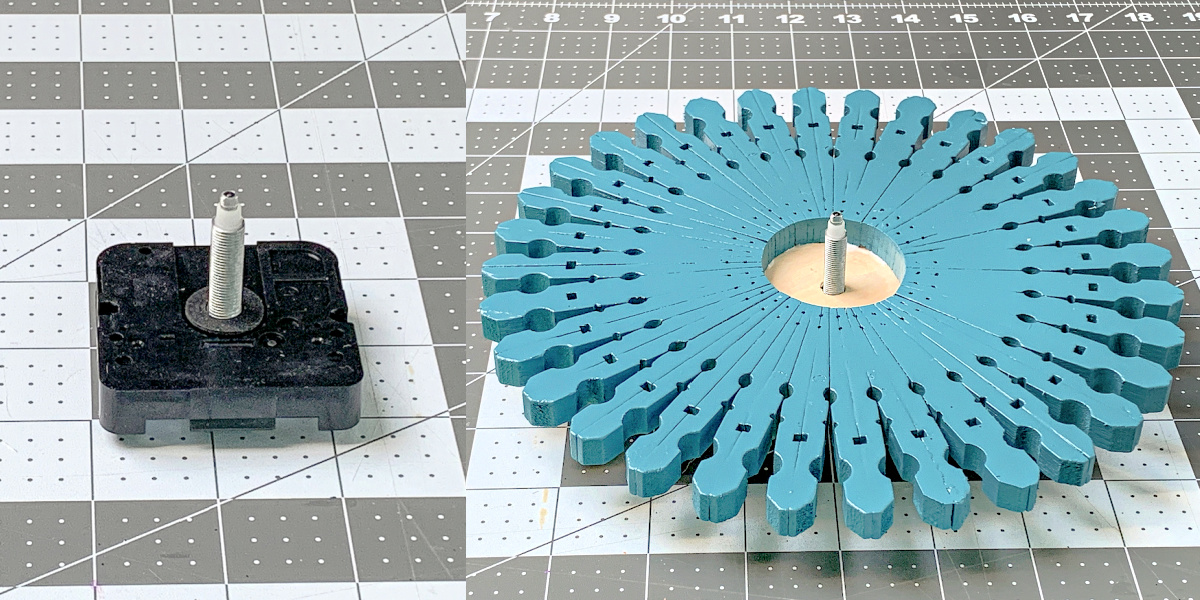
Place glue on the movement, then place the clock face down onto the movement. The wood circle should sit in the glue and, as it dries, attach the movement to the back.
Take the spray painted circle, place glue on the back, then place down onto the front of the clock over the movement.
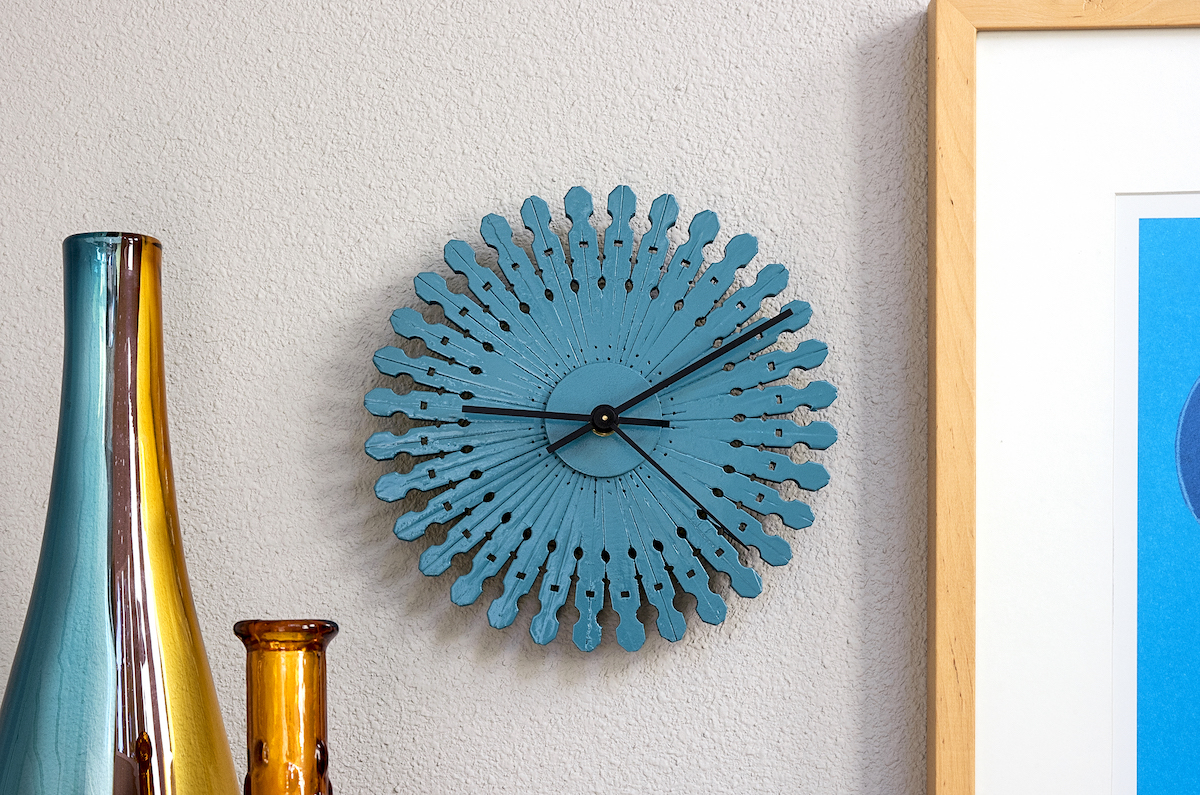
Attach the hands, and life is good! Because now you can tell the time.
WHICH – if you want to add numbers or dots to your clothespin clock in some way, you can. I chose to leave the clock plain, and I find it easy to tell the time for the most part. Get the video to make it here:
What do you think? Would you make this clock and put it in your home? Leave me some comments!


I love the clock I started making one tonight I’ll let you all know how it came out thanks for showing all information on the clock can’t wait until it’s done I’m going to try out all the clocks I’ve got a new crap now
I like the clock and trive idea
Yes will try your clock and trive clothes pin
Thank you for sharing. I love this idea, I am going to try this. Keeping my fingers crossed it comes out as beautiful as yours. Thanks again!
I love this clock! I’m going to make it but my biggest problem is deciding what color to make it. Thank you for sharing this. I enjoy your crafts so much.
Thank you so much for reading Dana! Much appreciated!