DIY Table Lamp from Recycled Ribbon Spools
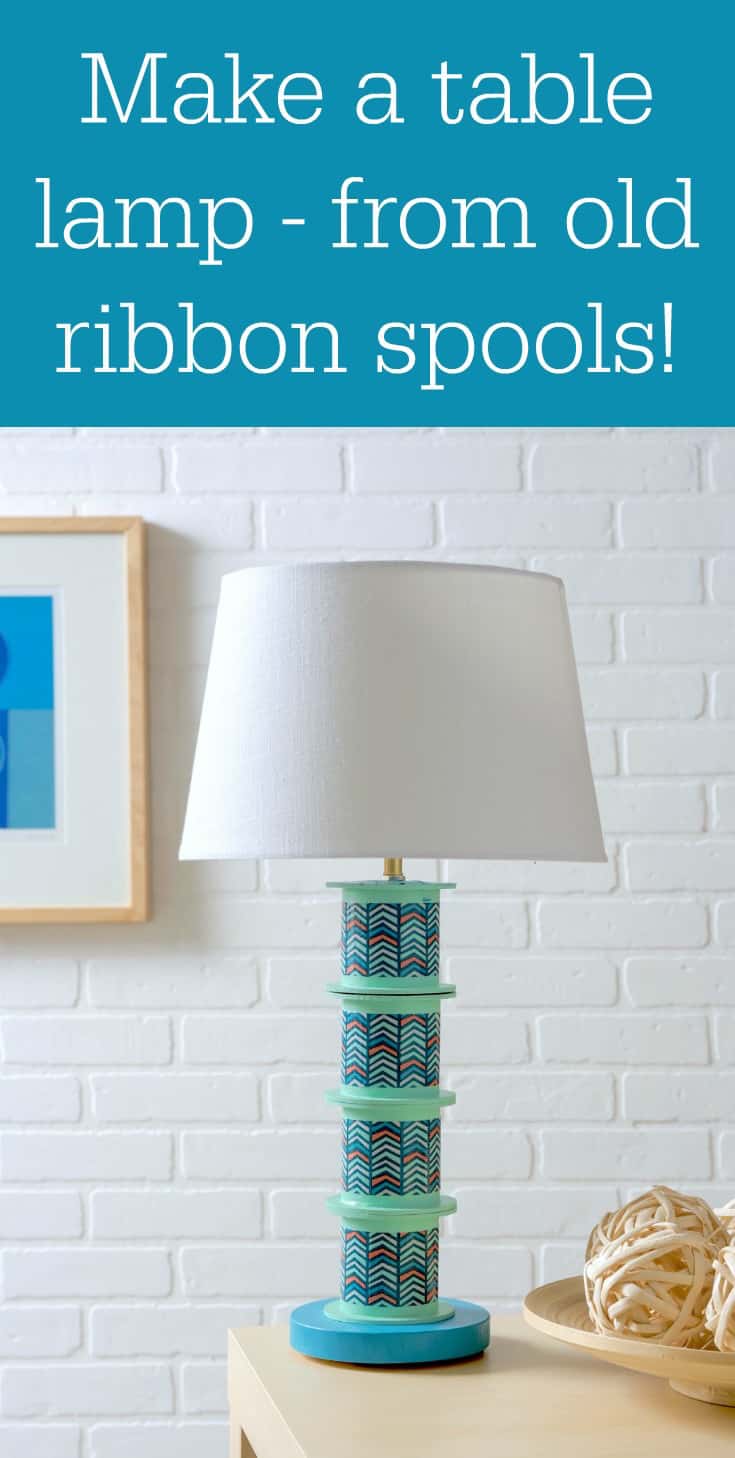
Learn how to make a DIY table lamp – out of old ribbon spools! You can use this tutorial to make a lamp out of anything. It’s easy and you don’t have to be an electrician.
Skills Required: Beginner. This is such an easy way to build a lamp, and all you’ll need is a lamp kit. Trust me, you can handle this if you have some experience with crafting. Work slowly!
I never thought I could make my own DIY table lamp. I’ll be honest, I was a little intimidated by wiring. I’ve seen many objects over the years that made me think, “that would be amazing as a lamp,” but thoughts of catching my living room on fire always kept me from doing it.
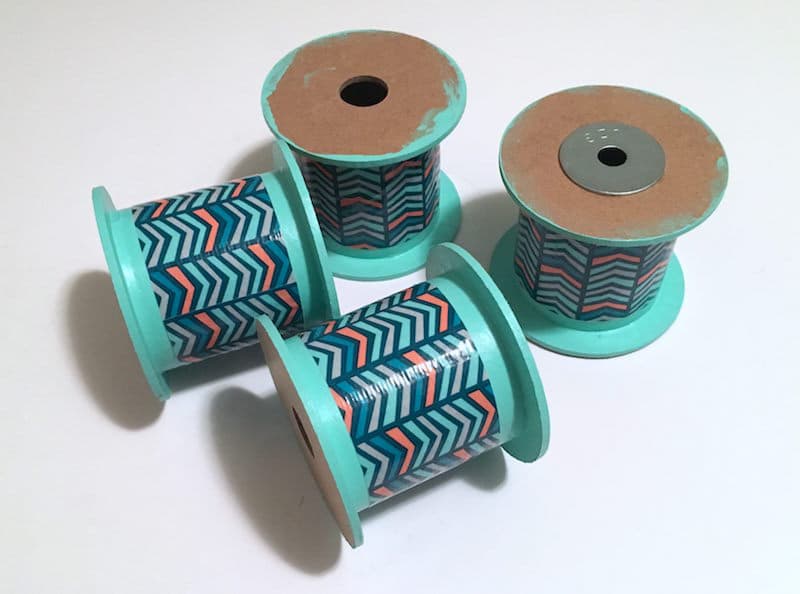
But then I complete a different project, and afterward was left with four very sturdy MDF spools. I just couldn’t bring myself to throw them away. So I recycled them! In my mind the spools were a lamp, just waiting for me to assemble them.
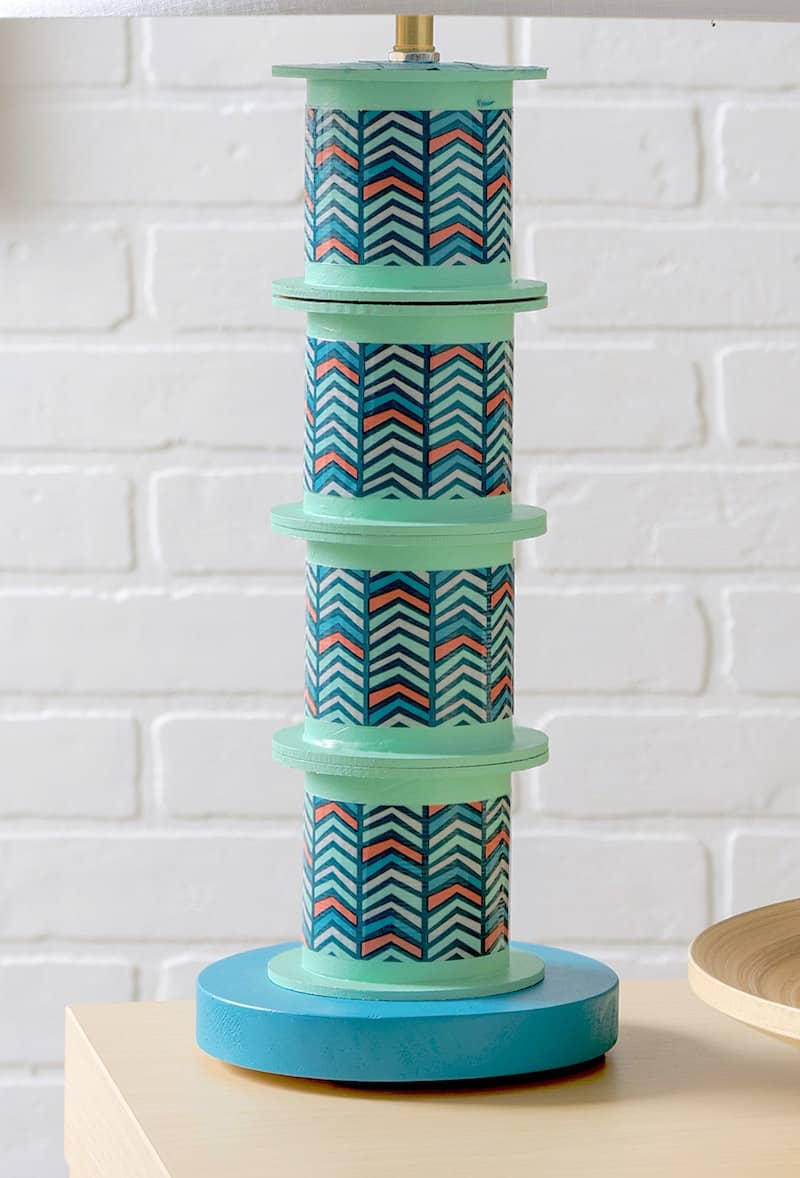
Not only that, but the spools were also the perfect width to place a delightful pattern of Duck Tape. I had the perfect pattern in mind, so it was time for the DIY table lamp to come to life.
Let me tell you what I discovered with this project, my friends: DIY lighting is way easier than I thought it was. I should’ve known there were tutorials online for everything anyway (hello, I’m a blogger!).
But also Home Depot has fabulous do it yourself lamp kits, so we were able to buy one and then just a few extra supplies. There’s actually a lamp section at HD with all the parts you’ll need except for the flat washers (which are easy to choose).
We bought the lamp assembly parts in that one section, which made it quite easy. Here’s how to construct a DIY table lamp from ribbon spools!
DIY Table Lamp
Gather These Supplies
- Paper mache, MDF, or wood spools – we used four
- Wood plaque
- Duck Tape in the pattern of your choice – with one complimentary color
- Acrylic paint – two colors to coordinate with your Duck Tape
- Lamp kit – we used a white cord, 2 fastening nuts, 2 flat washers, one fixture pipe (that fits inside the spools), and one coupling
- Craft knife and mat
- Craft glue
- Tool kit with wrenches
- Slip Uno shade (the harp/wire fitting is attached to the shade so you don’t need a separate harp)

I first want to provide a picture of the supplies we used for our DIY lamp so you can see everything. As far as the base, we used the four ribbon spools I mentioned as well as a wood plaque from the craft store.
You might be asking yourself where the heck you’re going to get spools – well, check out eBay! They have a ton in various sizes (begging to be made into a lamp!).
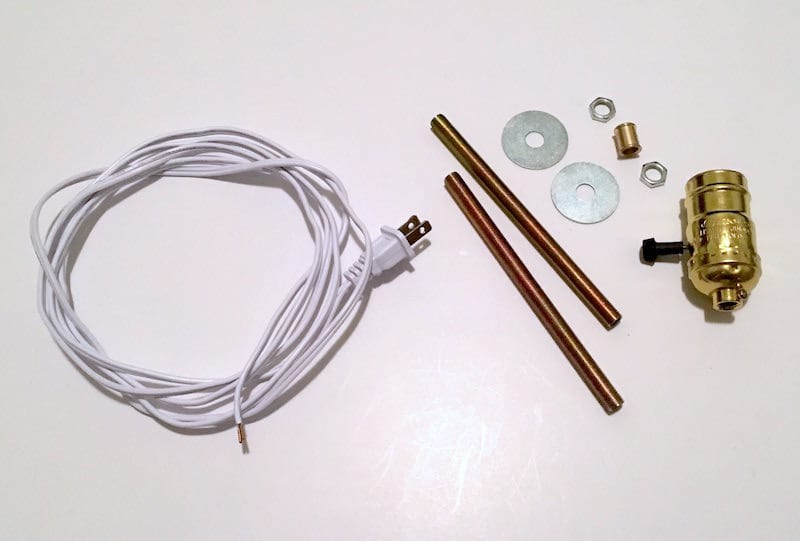
Here are the DIY table lamp supplies we used! The only thing we didn’t use was one of are the fixture pipes (the long brass pipes in the picture). We only needed one, so we returned the extra one.
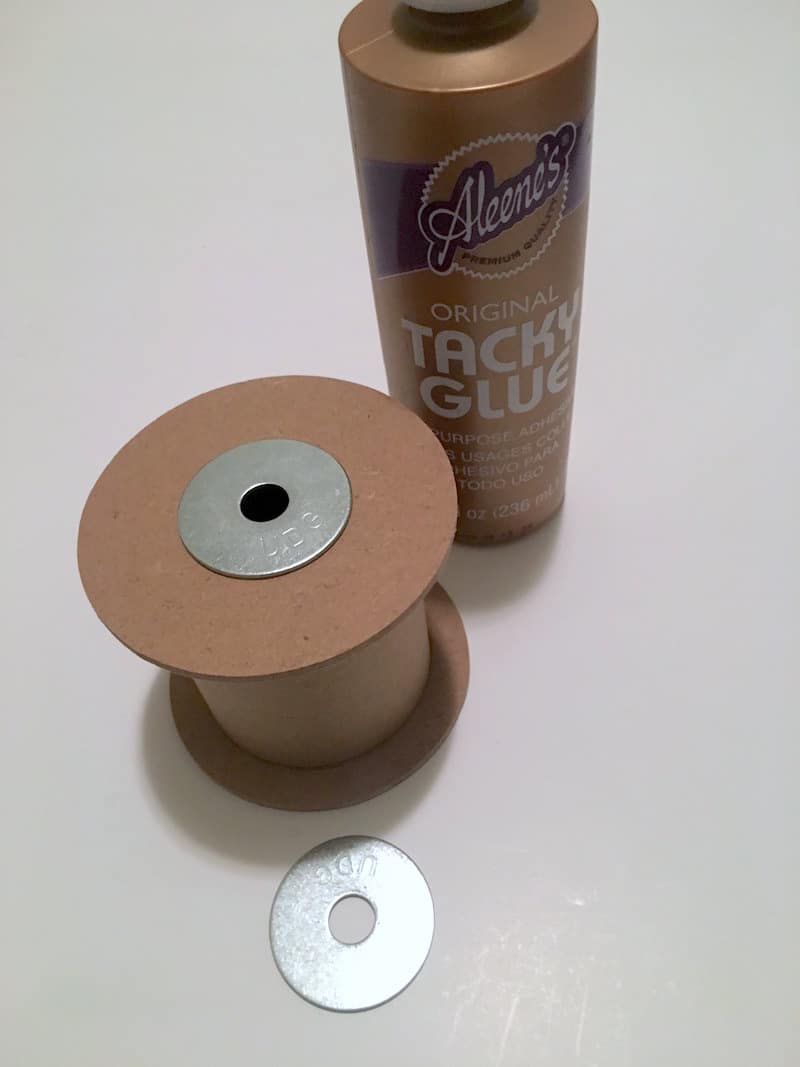
To begin your DIY lamp project, you’re going to glue washers to the top and bottom of one spool. This means that you’ll need to select flat washers from the hardware section of Home Depot that 1) cover the hole of your spool and 2) also allow the pipe to go through easily. The center hole of the washers should be slightly larger than the fixture pipes.
The WHOLE reason for doing this washer/pipe combo on the top spool is so your pipe doesn’t wobble around inside the spools. You want the pipe to be secure and stable.
Once you decide on the washer size, glue one of the washers on to the top of one of the spools – then glue another washer onto the bottom. You want the holes to be in the center of the spool hole. Just eyeballing it is fine. Let dry.
Once your washers are dry, paint the spools in a coordinating color with your Duck Tape. Let dry and cover all spools with Duck Tape in the centers.
At the same time, paint your wood plaque with a contrasting color and let dry. The wood plaque is going to be your base.
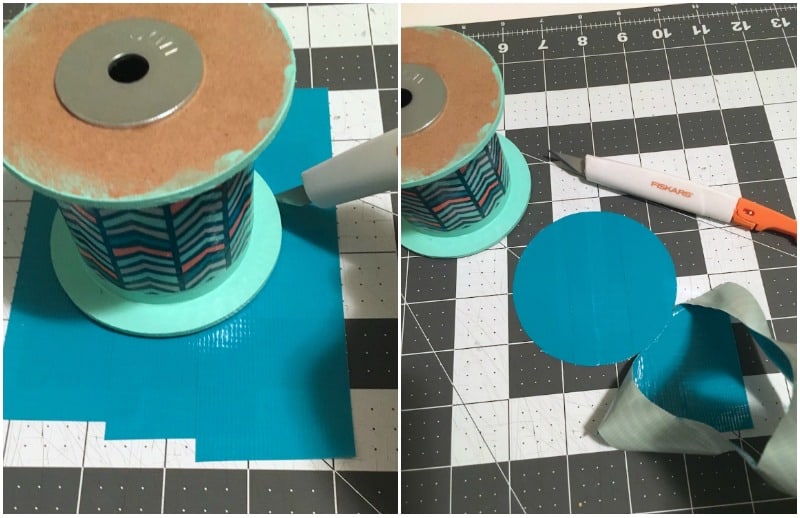
On the spool with the washers, you’ll going to cover one end (that is going to be the top of your DIY table lamp) with Duck Tape.
Do this by placing three pieces of Duck Tape down, overlapping, on a craft mat. Place the spool down and trim a circle out with a craft knife.
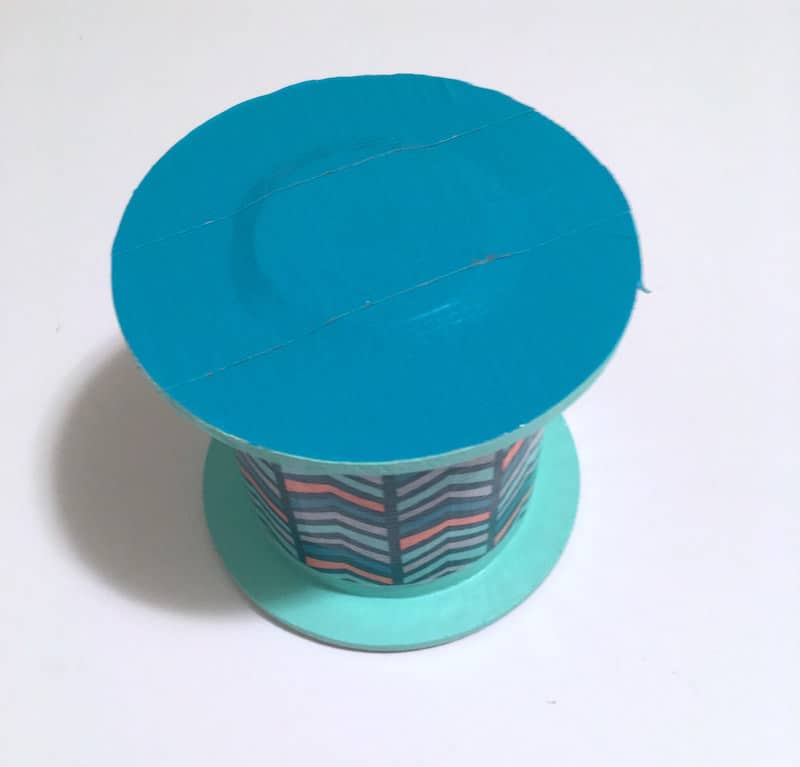
Place the Duck Tape circle on one side of the spool with the washers and smooth down.
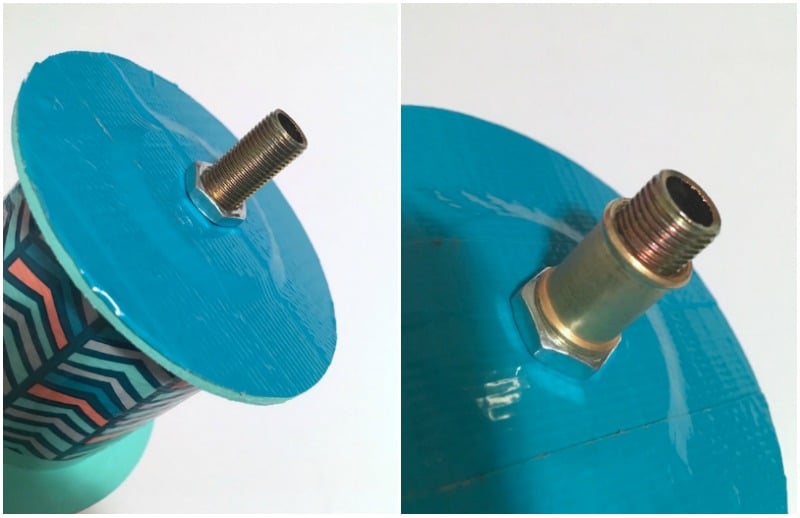
Cut a hole into the top Duck Tape with the craft knife and stick the fixture pipe through. Leave about 1/2″ of the fixture pipe exposed and tighten down a locking nut with the wrench. Then put a coupling on top of that and tighten down. This is the top of your DIY lamp.
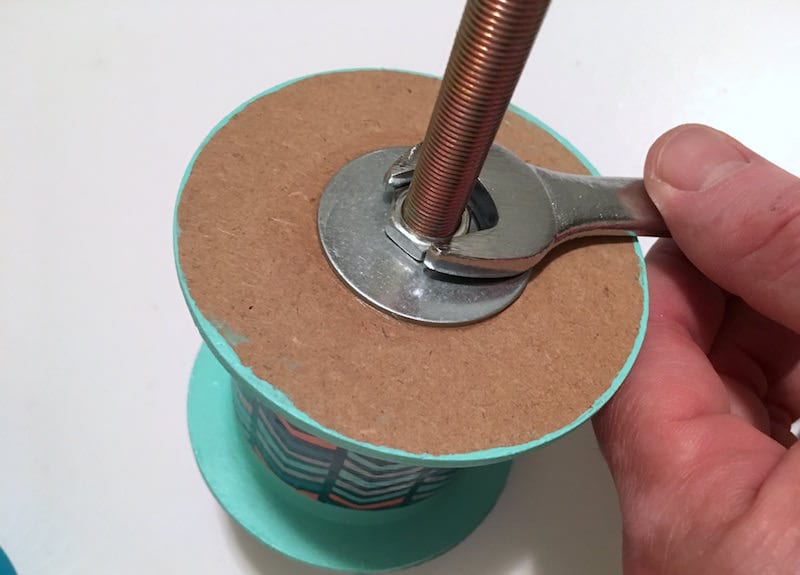
Turn the spool over and tighten down a locking nut on the other side as well. Your fixture pipe should be nice and secure inside your top spool.

Select one spool that is going to be the bottom. You’ll want to cut a hole or drill on the lower portion on one side so that the cord can come out to plug into the wall.
Yes – you can have the cord come out the bottom of the spool – but then you’ll have to drill a hole through the wood plaque and make a recess for the cord to sit inside the plaque. This is much easier.

Now you’re going to string the lamp! You need the spool with the cord coming out at the bottom – and the spool with the metal tube at the top. Besides that, you can have the other two spools in the middle.
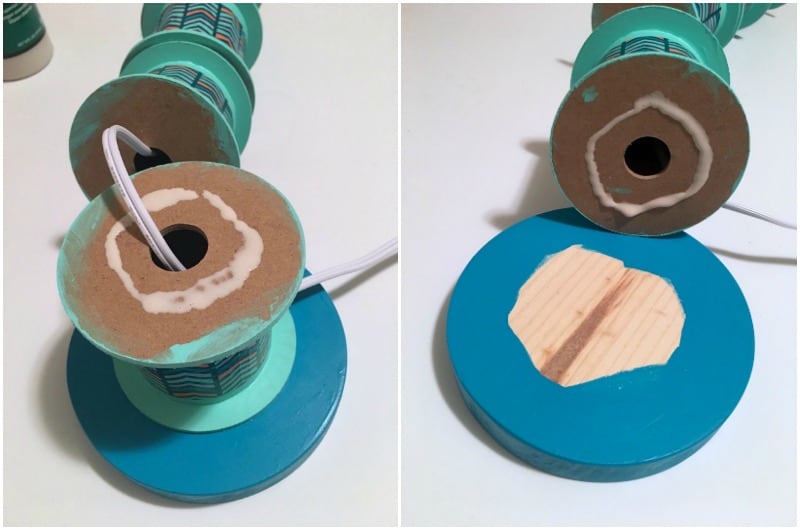
At this point you’re going to glue the spools. You should have a length of wiring coming out the top – but then use glue to attach the spools to each other, making the cord coming out of the lamp as long as you like (yes, you can clip the cord).
The next step is to wire the lamp. You’re going to tie an underwriter’s knot and then attach the two wires to the socket. You’ll pull the cord and the knot will tighten – and the socket terminal will sit into the socket base. Your lamp kit will come with instructions but here’s a video as well:
It’s REALLY an easy process. Way easier than I thought!
I’m so in love with my DIY table lamp! I really can’t believe I made it myself.
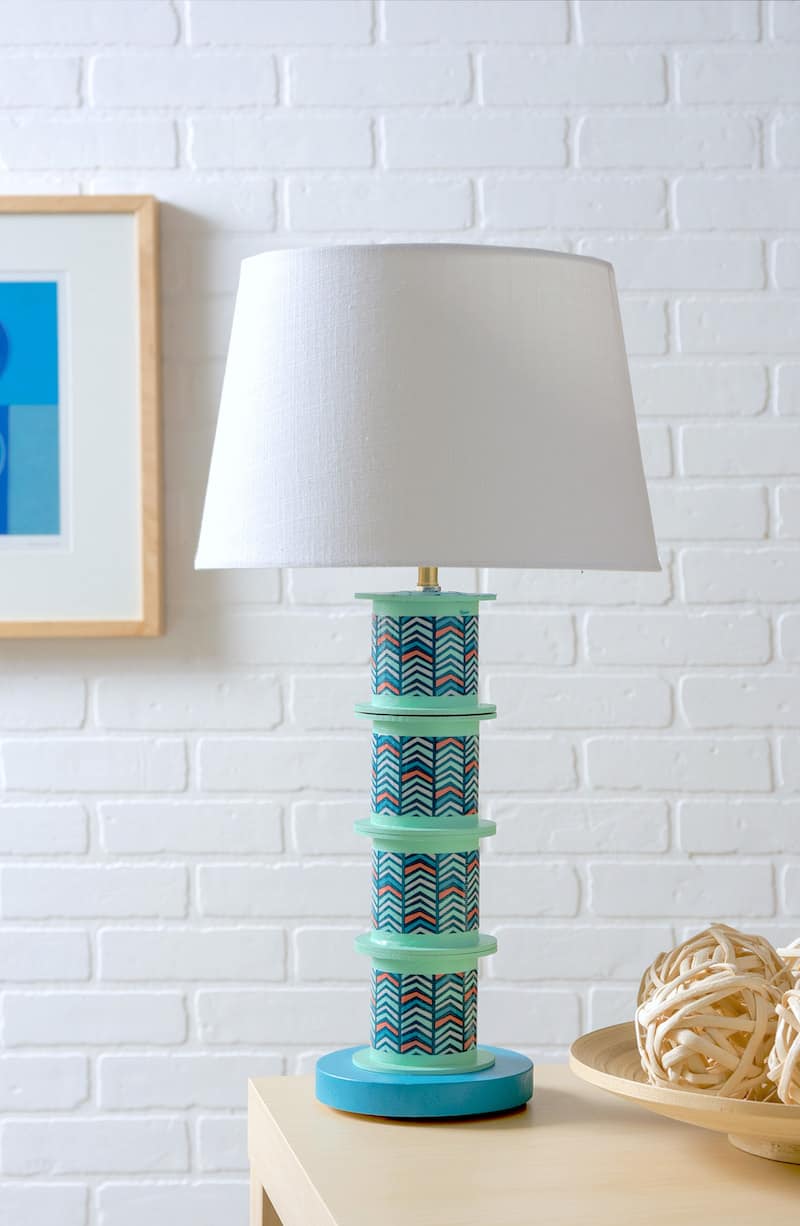
Oh, and in terms of a lamp shade, I used a Slip-UNO shade. This type of shade has the harp in the shade so you don’t have to purchase a separate harp. My lampshade is from Target.
Do you feel comfortable making your own DIY lighting now? I promise it’s not hard. Give it a try!
If you enjoyed this homemade table lamp, I’d love for you to check out these other ideas from myself and my friends:


This project turned out amazing! The lamp looks so unique. Do you think this would work with larger spools too? I’ve got a few from my craft stash and would love to try this version!”
Yes it would definitely work with larger spools!