Packing Tape Transfer: The Easiest Craft Ever!
Learn how to do an image transfer from a magazine using a packing tape transfer. This is SO easy and has so many creative applications!
Skills Required: None. Even if you’ve never crafted before, you’ll enjoy this project. The process is very easy; perfect for kids as young as teenagers.
I always love learning new techniques. Especially when it comes to creative pursuits, I’m kind of addicted to it. I’m going to really pay attention to a new technique if it’s easy, and that’s what these packing tape image transfers are.
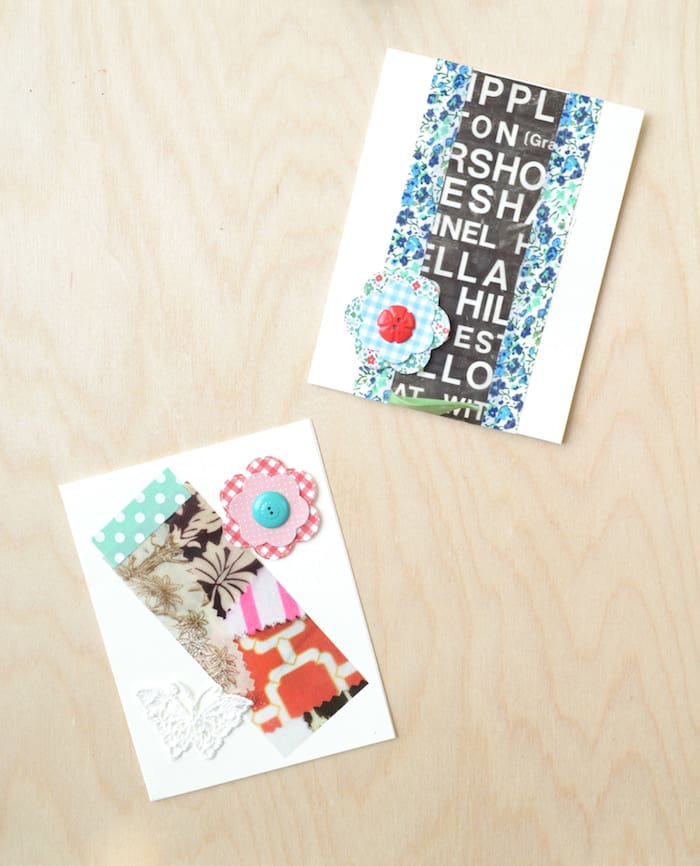
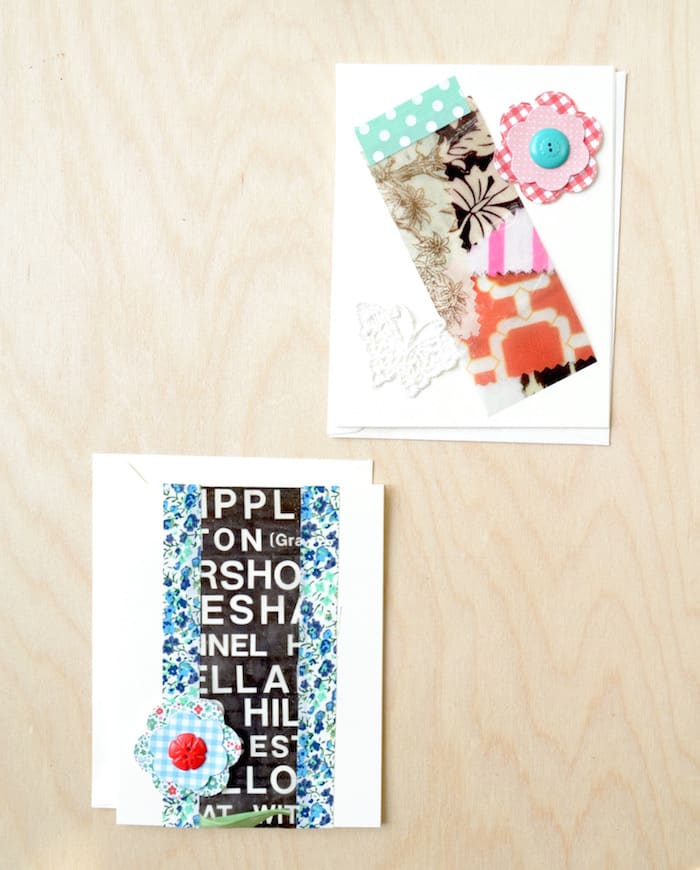
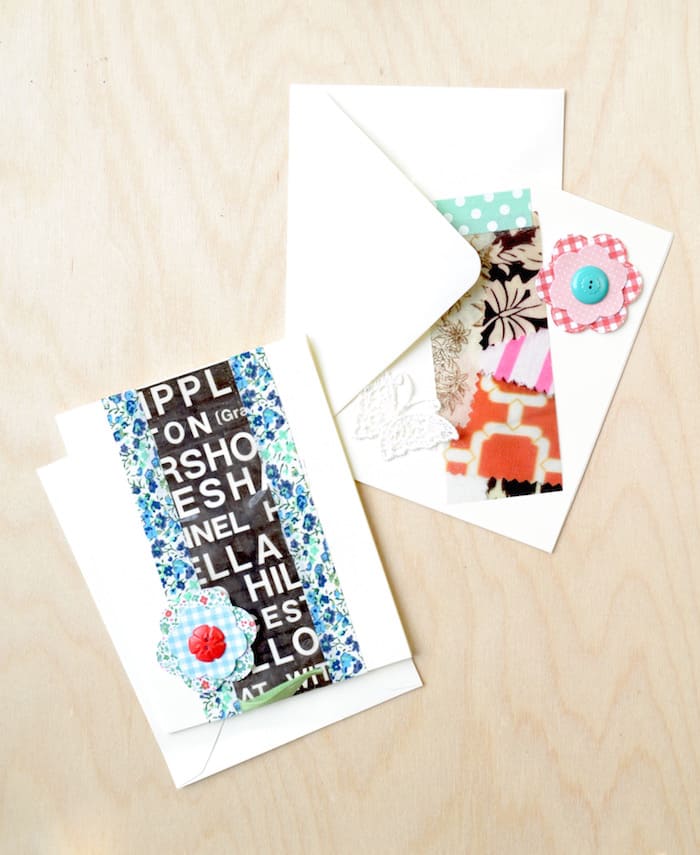
Yep, I recently learned how to do packing tape transfers from magazines via a Creativebug class, and I’m so excited to share the results with you. I’ve been writing a lot of letters lately so I turned my transfers into awesome notecards!
But before I begin, let me tell you about how this class came to be.
This year DIY Candy was selected to be a Michaels Maker – a team of 50 creative bloggers working with Michaels stores who have been assembled to “fuel your creativity” through various projects.
And the program started last week with an amazing Michaels Makers Summit in Santa Rosa, California. Unfortunately I wasn’t able to go due to a foot injury . . . but my blogging friends and Michaels are so sweet, they represented me anyway:

The summit looked like such a good time, and I wish I could have gone! My fellow Michaels Makers got to participate in four amazing classes (weaving, watercolor, paper flowers and image transfer) taught by Michaels education partner, Creativebug.
Since I wasn’t able to attend, I was given the opportunity to try one of the Creativebug classes at home. Yes, please! I decided to tackle image transfers with packing tape. Why? Well, it looked like an easy craft idea. And I had magazines . . . and packing tape . . . so why not?
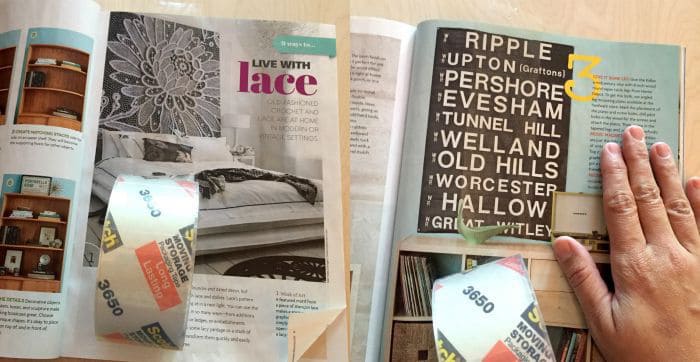
I opened the Creativebug course on my computer and followed along. I simply selected my chosen images from magazines and smoothed the tape down on the surface, making sure not to get any bubbles within.
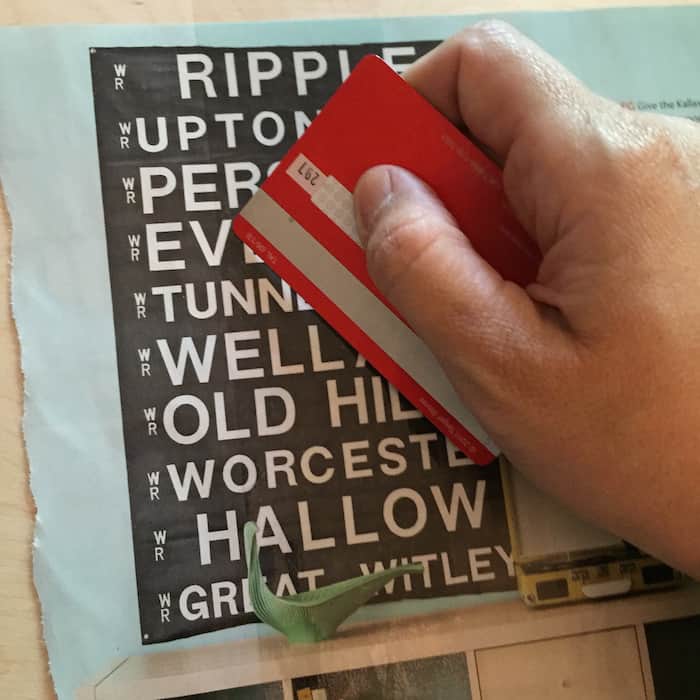
Then I burnished the tape to the surface with a credit card.
And if you’re wondering if you could place two pieces of tape together and then smooth that down on the magazine, the answer is yes. You might see a seam, but it will work!
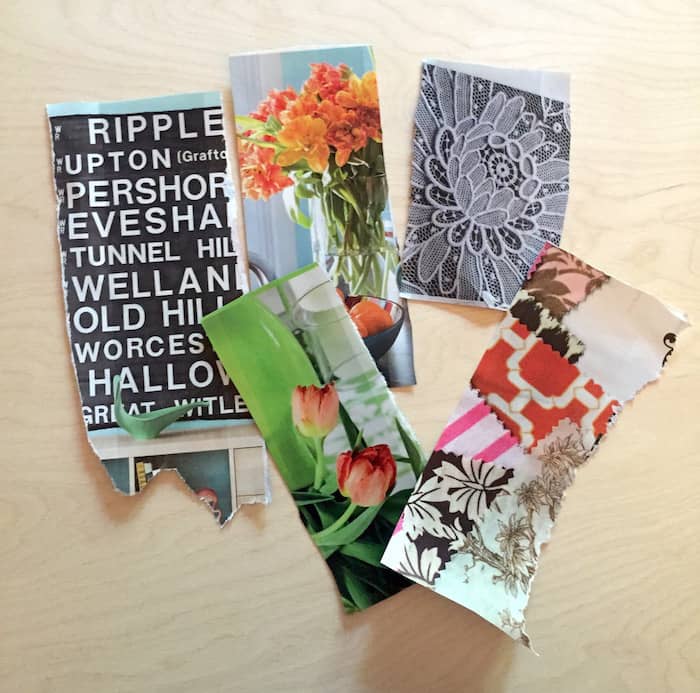
I tore all of my chosen images with tape on top out of the magazines.
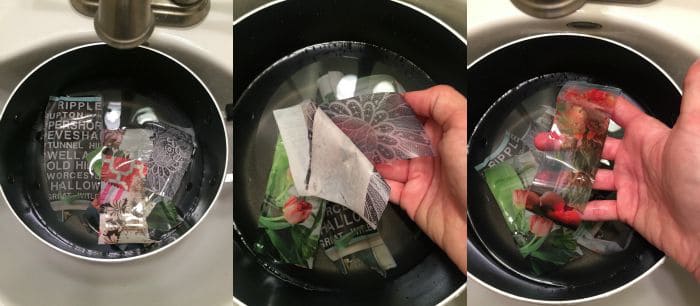
Then I soaked them in warm water for a few minutes and the magazines literally FELL off of the tape, leaving behind images (some magazines work better than others, some need to soak longer than others).

Then I set the image transfers aside to dry.
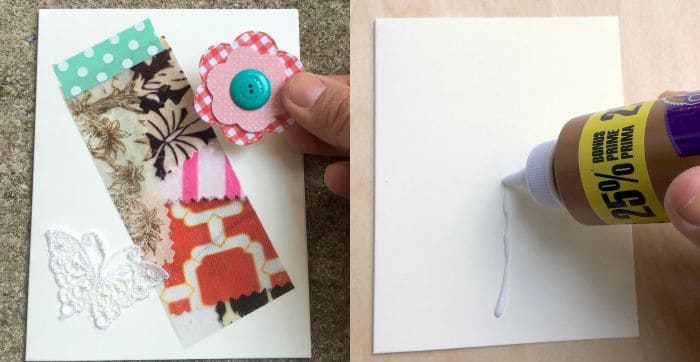
I simply trimmed my image transfers and used embellishments I purchased at Michaels to trim out some of their Recollections notecards. Instant gratification!
Aren’t packing tape transfers cool? I did just one and now I’m completely addicted! This would be a fun project for tweens and teens too.
Now I think you should take the Creativebug class and try it!!

Packing Tape Transfer
Equipment
- Large bowl or sauce pan
- Credit card
Materials
- Magazine(s)
- Packing tape
Instructions
- Open a magazine and choose an image.
- Unroll a length of packing tape and place down on the page. Smooth down with a credit card (or similar burnishing tool).
- Cut the pages out from the magazine with the scissors.
- Soak the taped magazine pieces in the water for several minutes. The magazine will fall right off.
- Your tape image transfer is complete – cut down to the size and shape of your choice to use in projects.
If you enjoyed this packing tape transfer, I’d love for you to check out these other easy craft ideas:


Hi ~ I love the labels you made for the pantry and would love to make some for myself. I have tried my best to figure out the font that you used, but have been unsuccessful. Would you mind sharing the name of the font? I don’t think my eyes can stand another day of looking at fonts! Thank you.
Hi Julie! What labels are you speaking of . . . nothing is coming to mind right now!
How is this different than just pasting the image directly from the magazine?
It’s pretty transparent – it gives more of a cling effect that a solid page. You can see light through it. Plus it just looks cool! 😀
Hello and thank you for the tutorial. Did you need to glue these to the cards you made or was the tape sticky enough on its own?
The tape was sticky enough on its own! 😀
Will the image transfer with packing tape work on glass?
Hi Kim! That’s a great question and I don’t know the answer – If you used clear, strong glue I would say yes. But you would have to do a test.
Would the tape transfer work on scrapbook paper or pages out of a book or does it need the glossy finish you get from magazine pages?
I don’t have many magazines but I’m drowning in scrap paper, lol
I honestly am not sure but I will try it next time I do this. I’d give it a go. I think it would work!
I think it will be an awesome craft for my granddaughter and me to try.
I have tried this several times with scotch packaging tame several time butthe image does not transfer and it falls off immediately when putting in water. What am I doing wrong?
I would try a different packing tape! I find sometimes the Scotch doesn’t work great even for boxes.