Mushroom Perler Beads (25+ Patterns!)
Learn how to make the cutest mushroom perler beads perfect for spring or summer! Both kids and adults will enjoy these 25+ patterns.
I’ve always been drawn to mushrooms. I don’t know about you, but I think they’re super cute.
I definitely didn’t love eating them when I was little, and it took me a bit of time to appreciate them as an adult. But now I love the food AND the symbol!
In fact I didn’t know the symbolic meaning of mushrooms, so I looked it up. And apparently it’s good luck and health, energy, and transformation. Um, yes please!
I knew I loved them.
If you like them too, then you’ll appreciate these mushroom perler beads. I had SO much fun with my nieces doing these projects! Everyone from kids to adults will enjoy these projects!
There are over 25 patterns that I know you’re going to love. They’re a super easy spring or summer craft if littles get bored. But of course, you can make them any time of year.
Oh, and you definitely have to see our gnome perler beads! We’ve got some fun characters over there, in addition to fairies. They look great with mushrooms.
Perler beads are recommended for ages six and up, so this is a very fun craft to try with your elementary age children. All kids seem to love perler beads (also known as hama beads, fuse beads, or melty beads).
Are you ready to try the patterns? Check them below! Don’t forget, you can customize them with your own colors. You don’t have to do what I did. Happy crafting!
Mushroom Hama Beads
Make sure to check out these notes:
- A few of these patterns are larger than a 29 x 29 pegboard, so you’ll either need a extra large pegboard (49 x 69 tall) or to put multiple square peg boards together to form a larger “canvas.”
- Some of these patterns use a round pegboard; you’ll definitely want in your arsenal just generally speaking.
- Most of the easy patterns are at the top. Keep scrolling if you want to get more difficult patterns (I’ve got all levels!).
- You’ll see a couple of the pattern backgrounds below aren’t white – that’s simply to give contrast so you can see where all the white beads should go. You don’t need to add the background (but you can if you want to).
Mario Mushroom Perler Beads
These patterns use 78 black, 123 white, and 102 red beads.

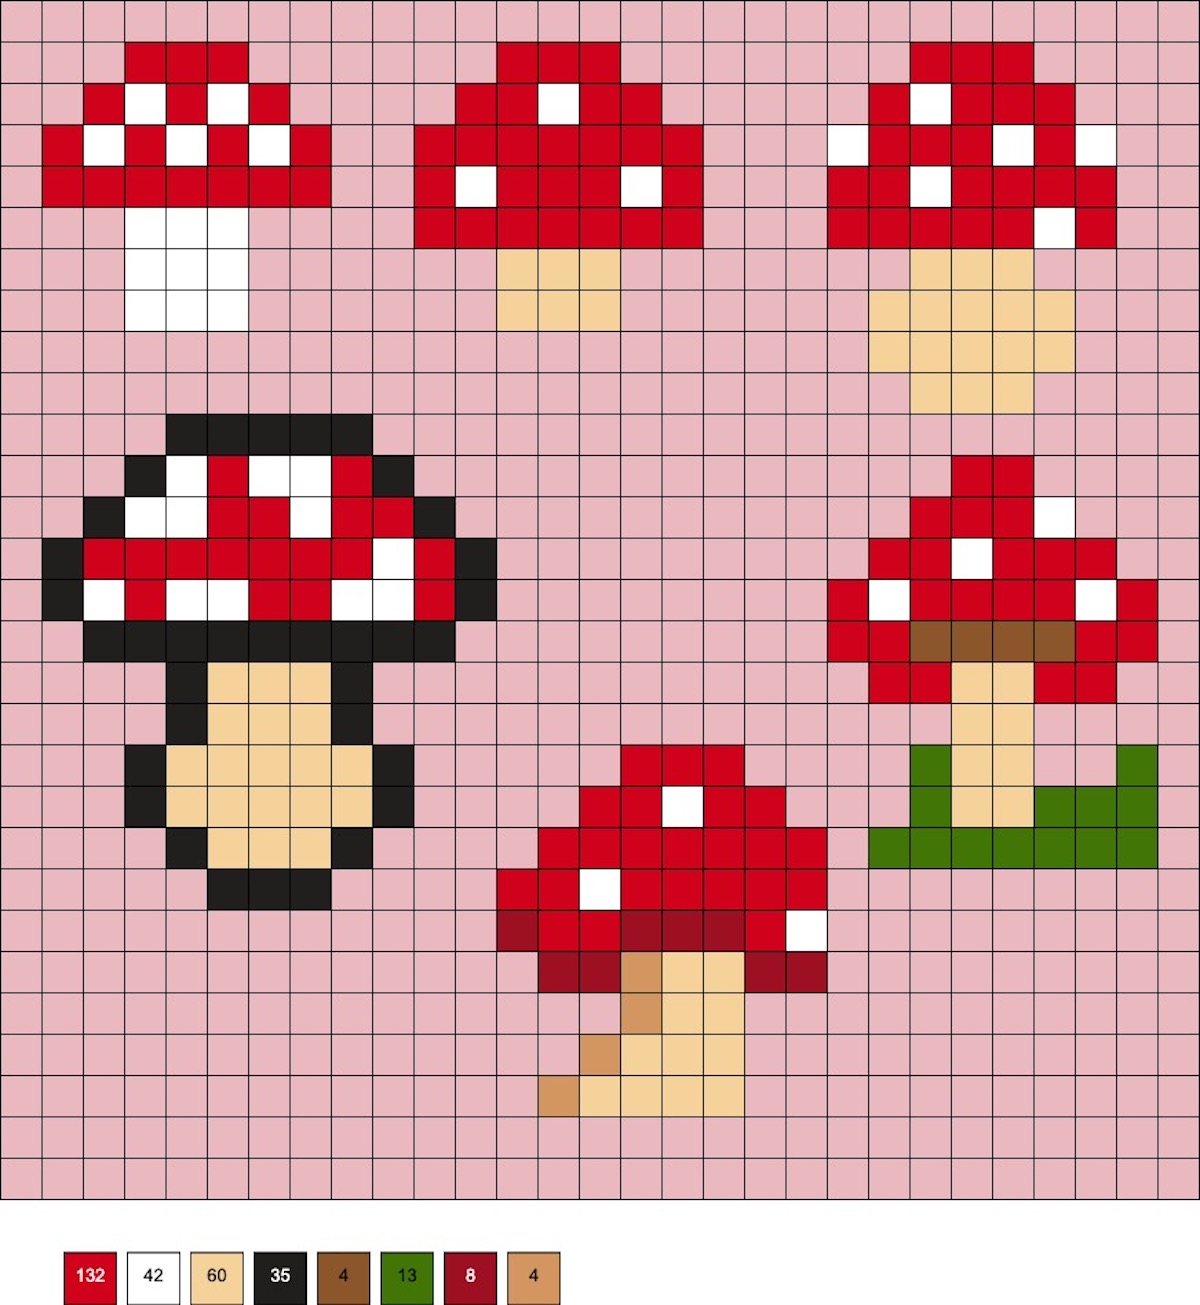
Collection of Mini Mushrooms
These patterns use 132 red, 42 white, 60 sand, 35 black, 4 brown, 13 dark green, 8 rust, and 4 tan beads.
Small Red and White Mushroom
This little cutie uses 110 white, 57 black, 72 red, and 5 sky beads.

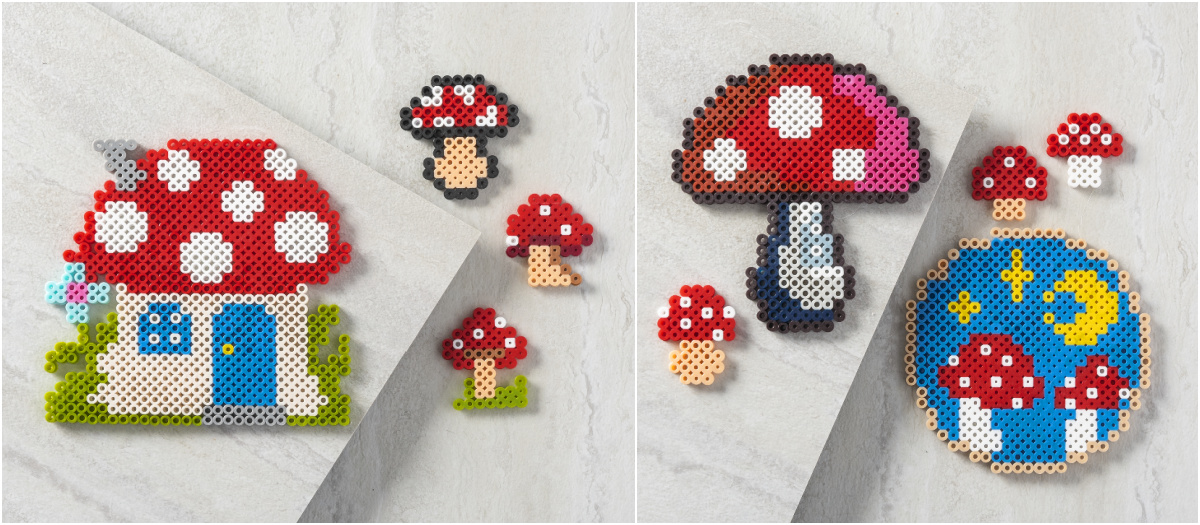
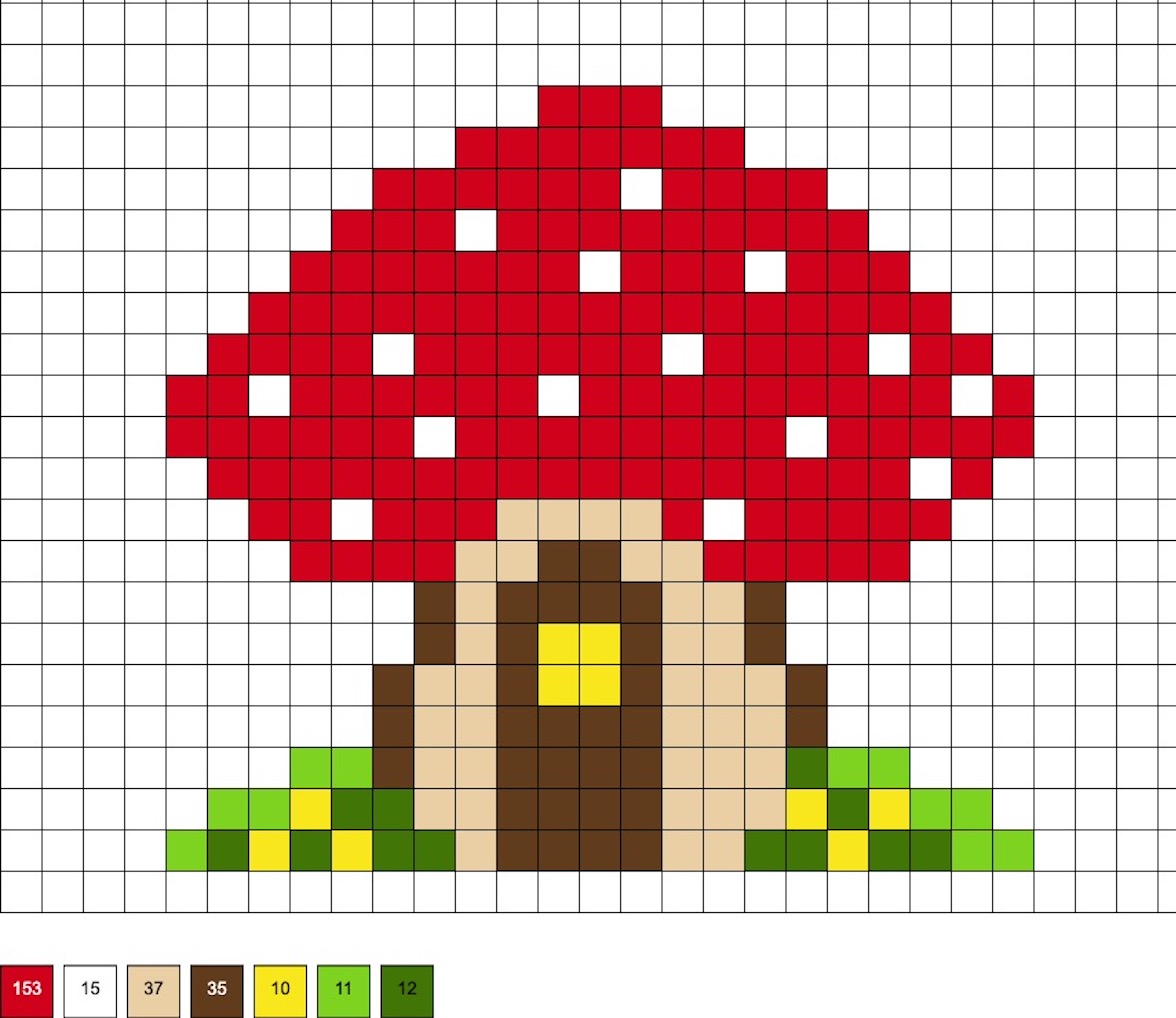
Small Mushroom House
This pattern uses 153 red, 15 white, 37 flesh, 35 brown, 10 yellow, 11 kiwi green, and 12 shamrock beads.
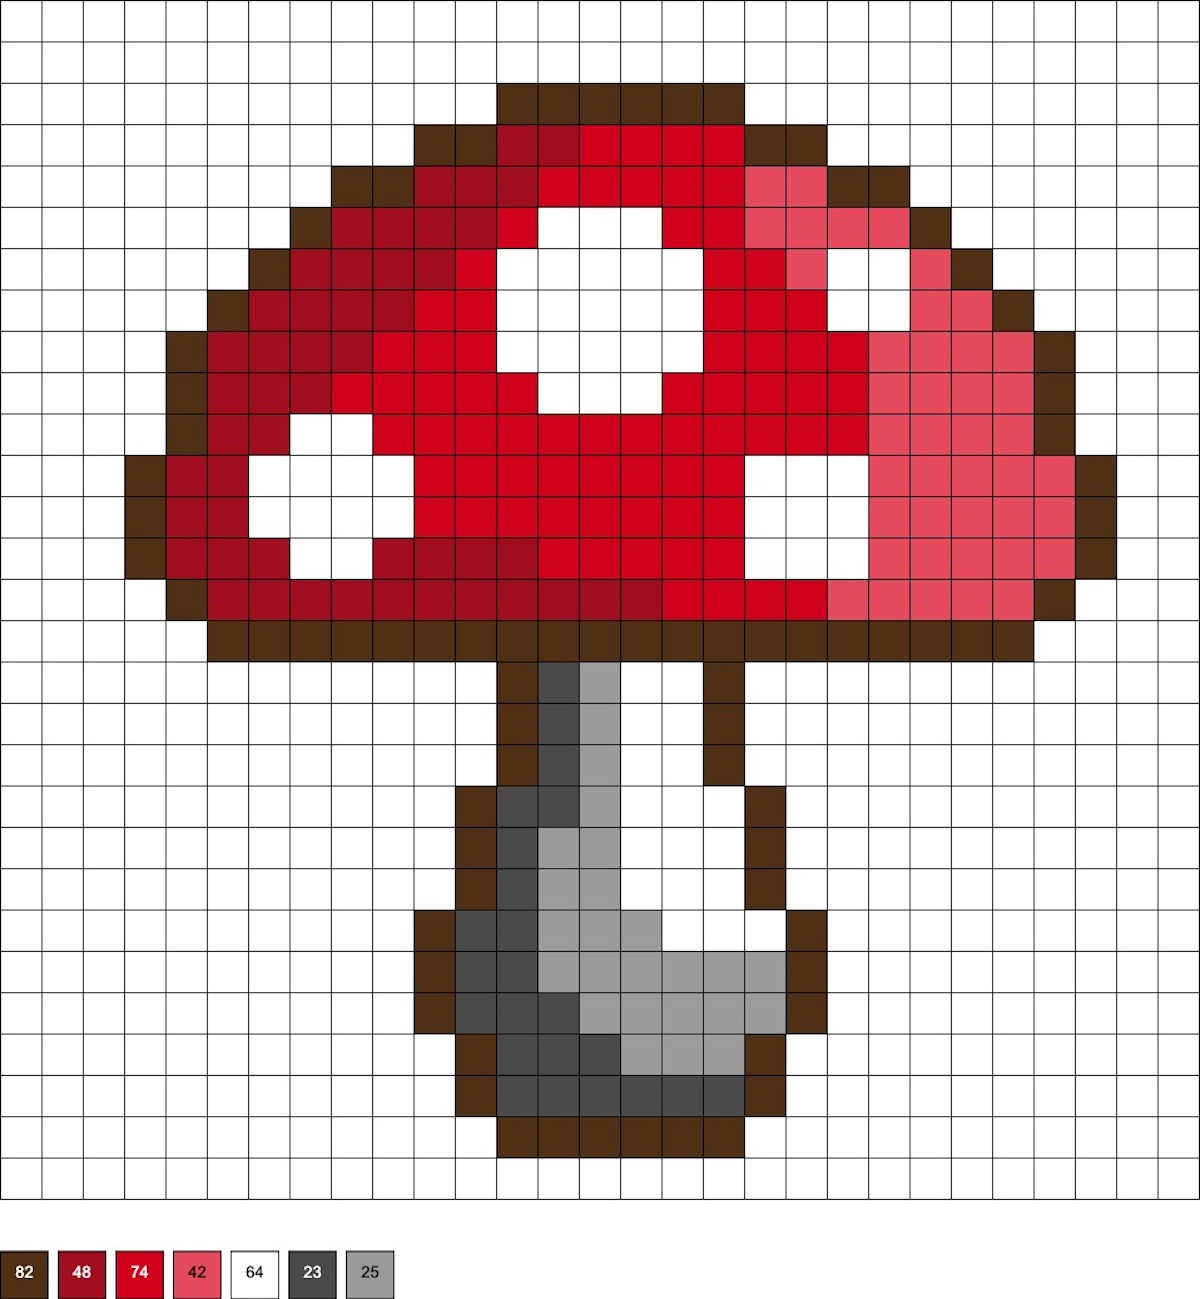
Medium Mushroom with Gray Accents
This pattern uses 82 brown, 48 cherry, 74 red, 42 rose, 64 white, 23 dark gray, and 25 gray beads.
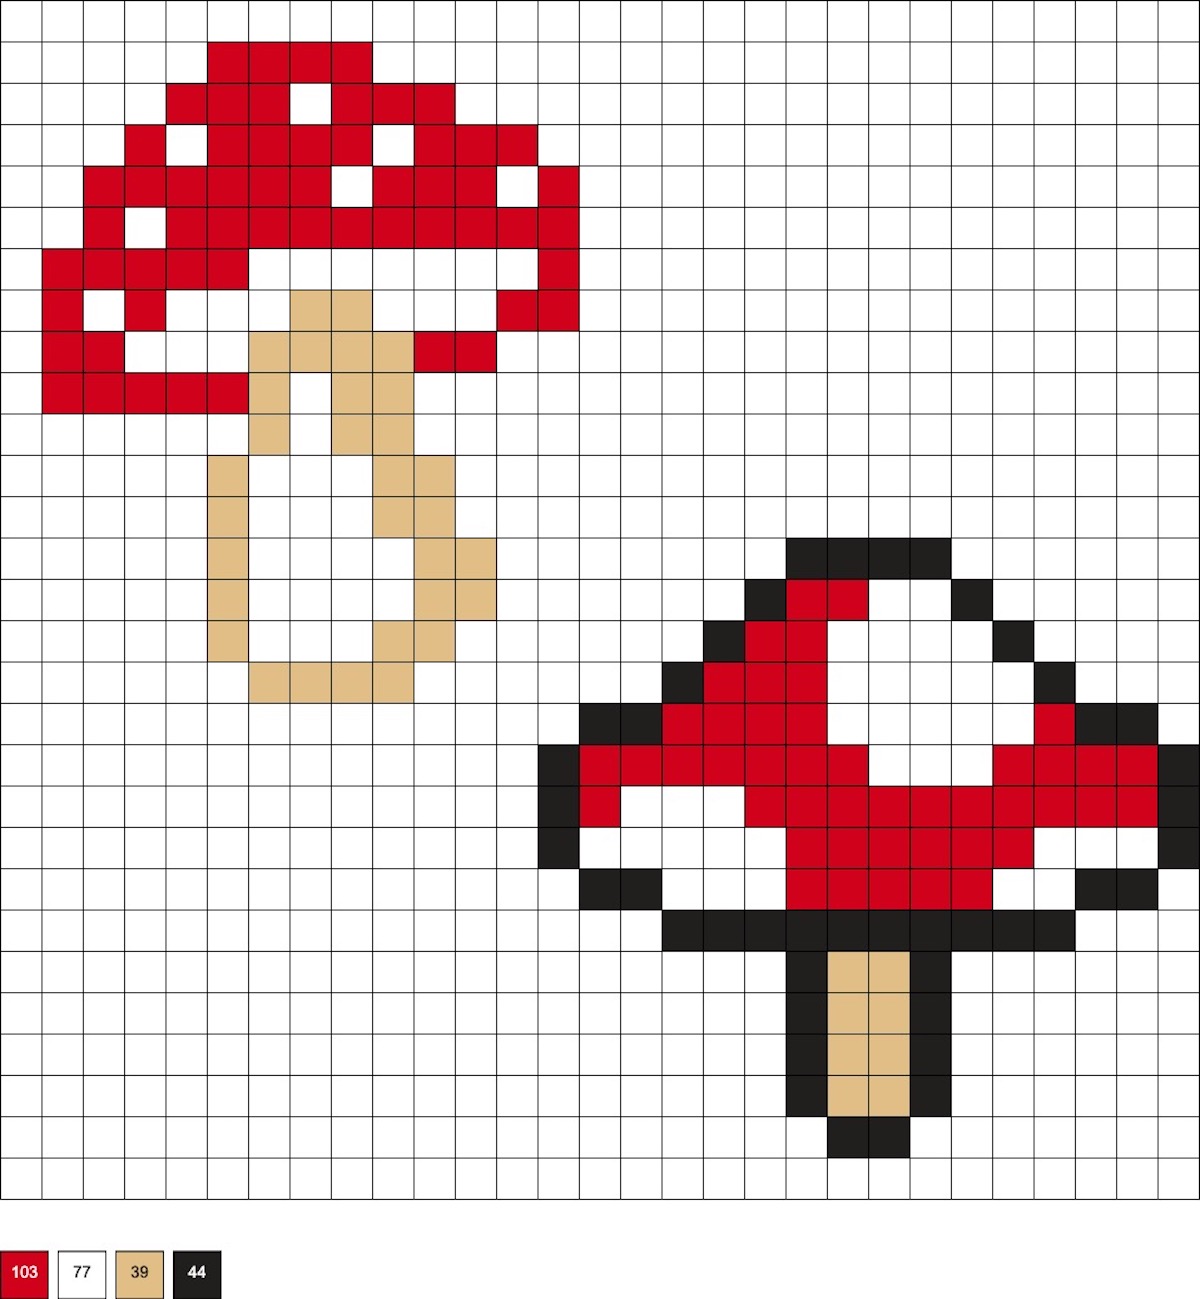
Two Tiny Mushrooms
These patterns use 103 red, 77 white, 39 sand, and 44 black beads.
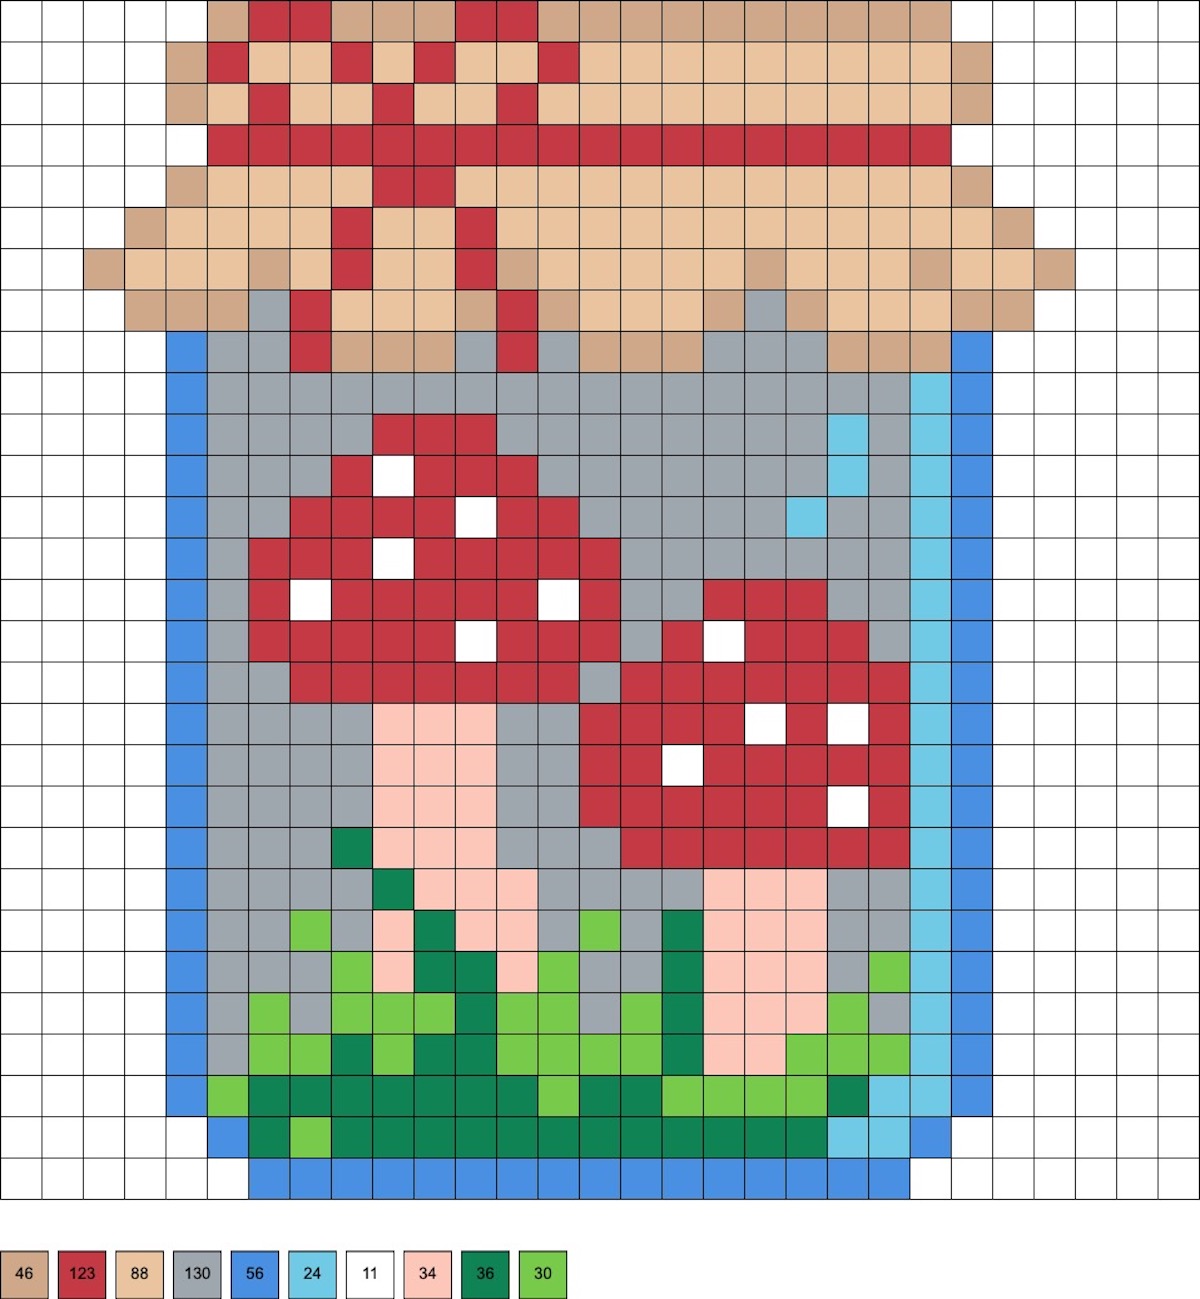
Mushroom Mason Jar
This pattern uses 46 fawn, 123 cherry, 88 sand, 130 clear, 56 light blue, 24 sky, 11 white, 34 flesh, 36 shamrock, and 30 light green beads.
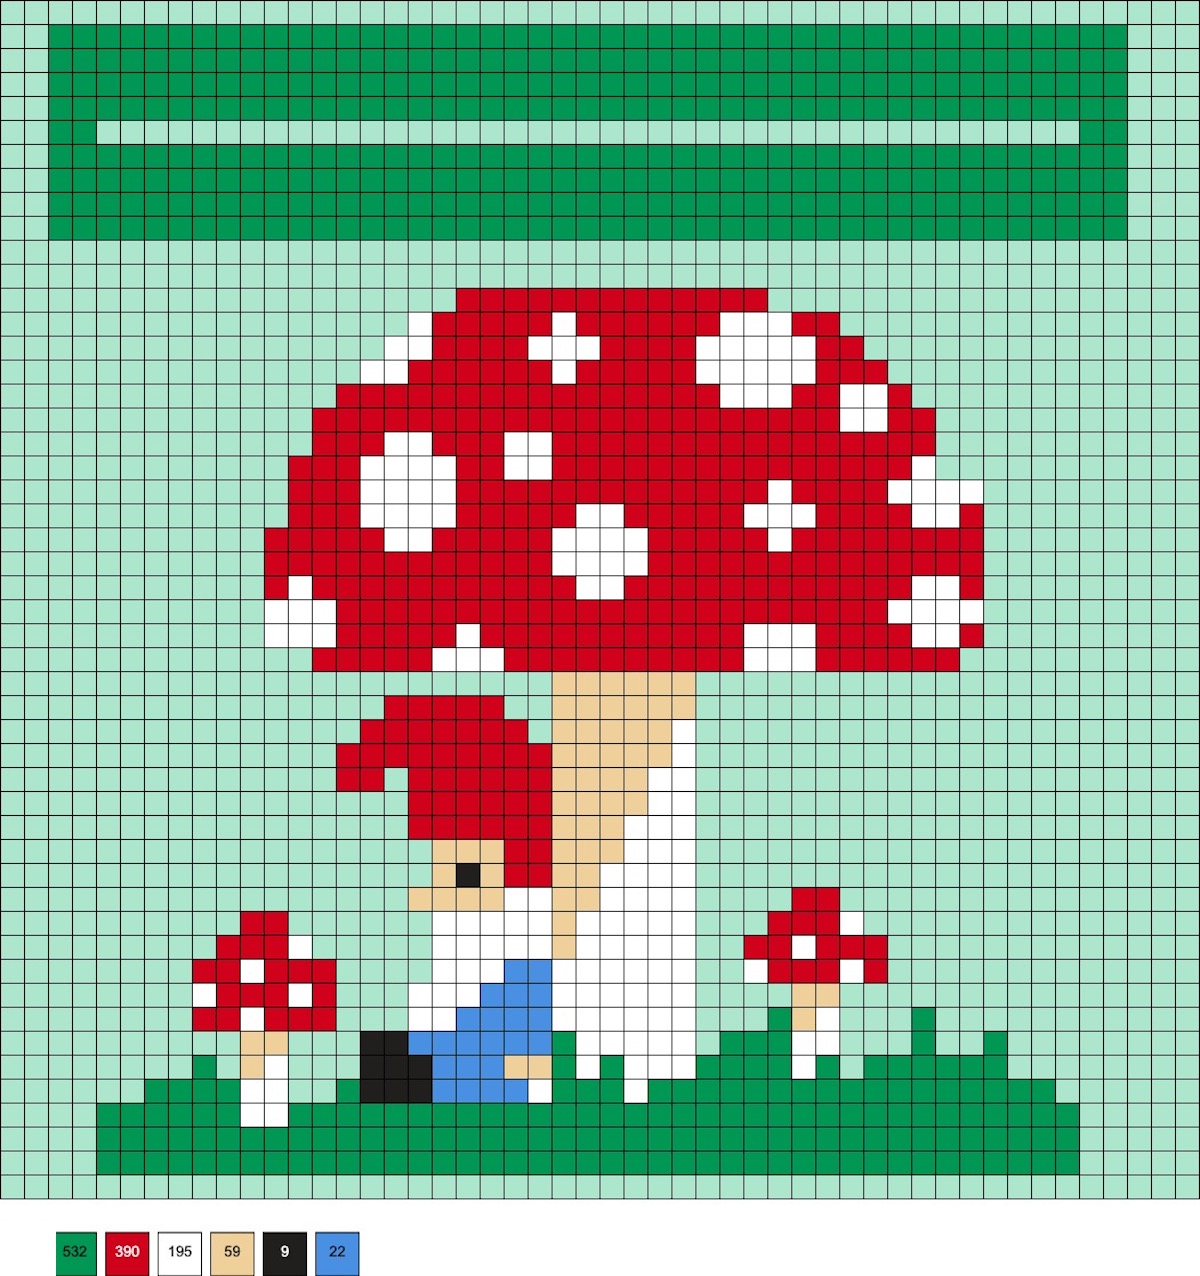
Gnome Relaxing on a Mushroom with Stand
This pattern uses 532 shamrock, 390 red, 195 white, 59 sand, 9 black, and 22 light blue beads.
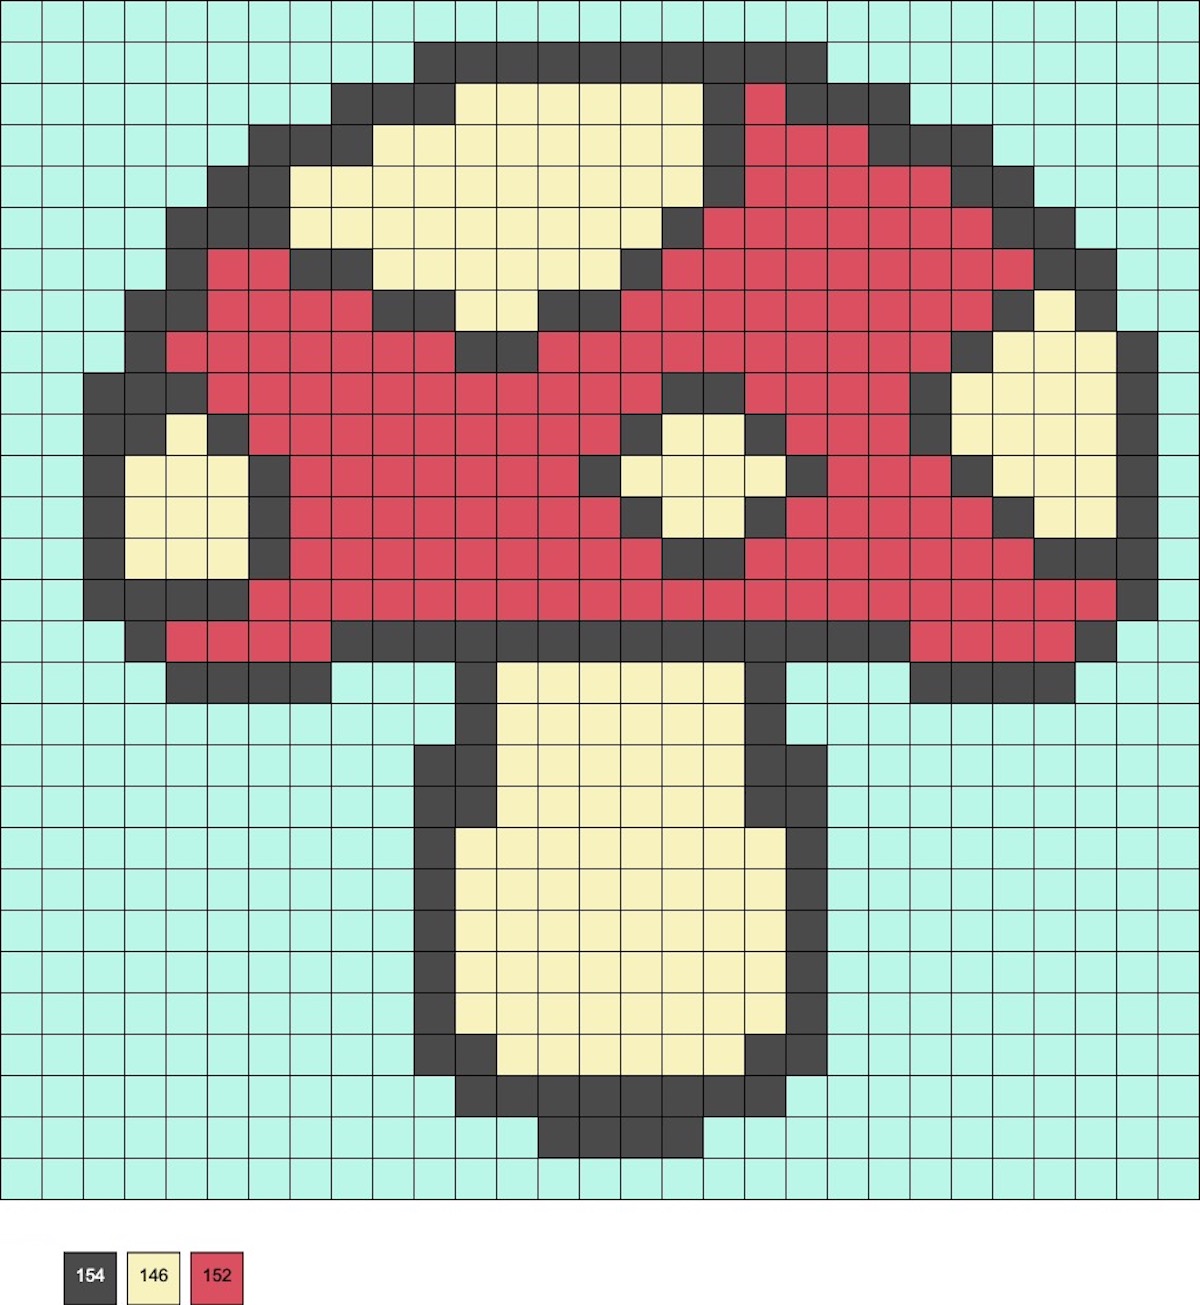
Cartoon Mushroom
A little less detail but just as cute! This pattern uses 154 dark gray, 152 red, and 146 cream beads.
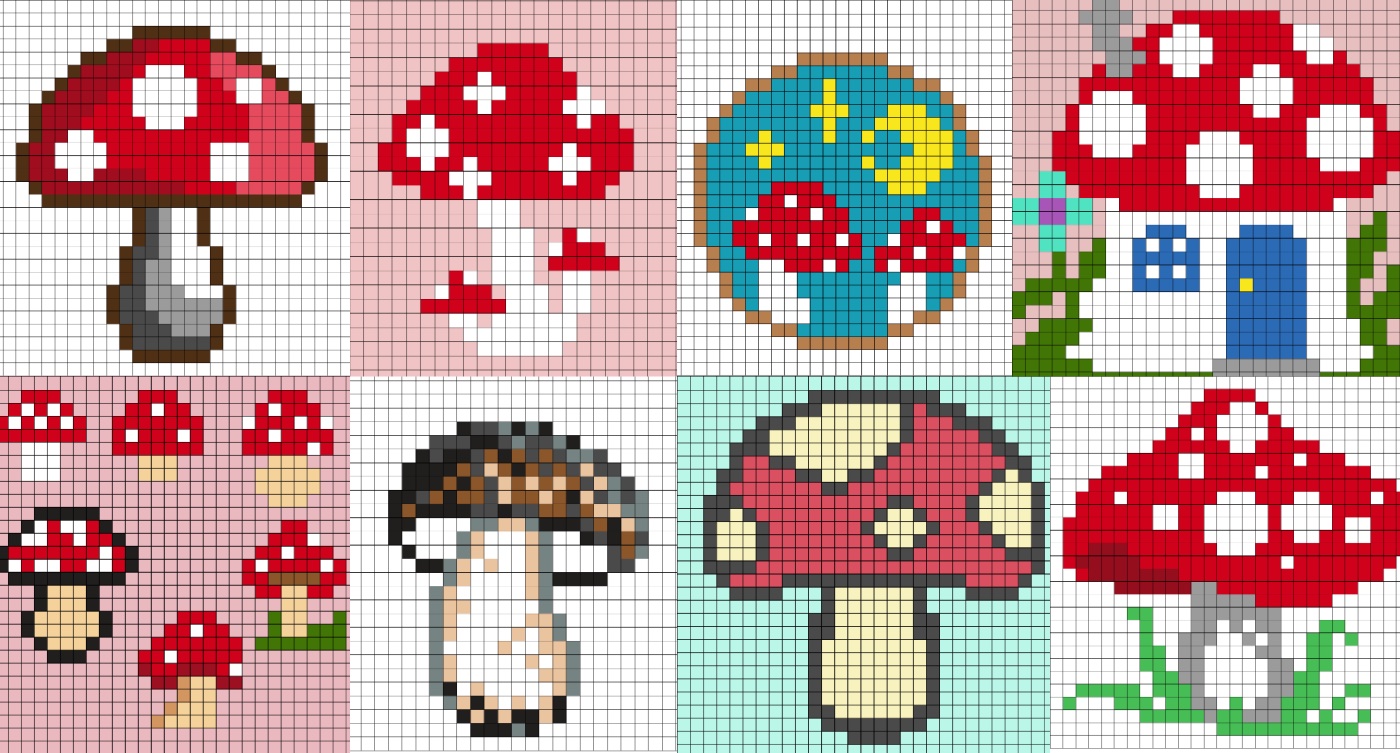
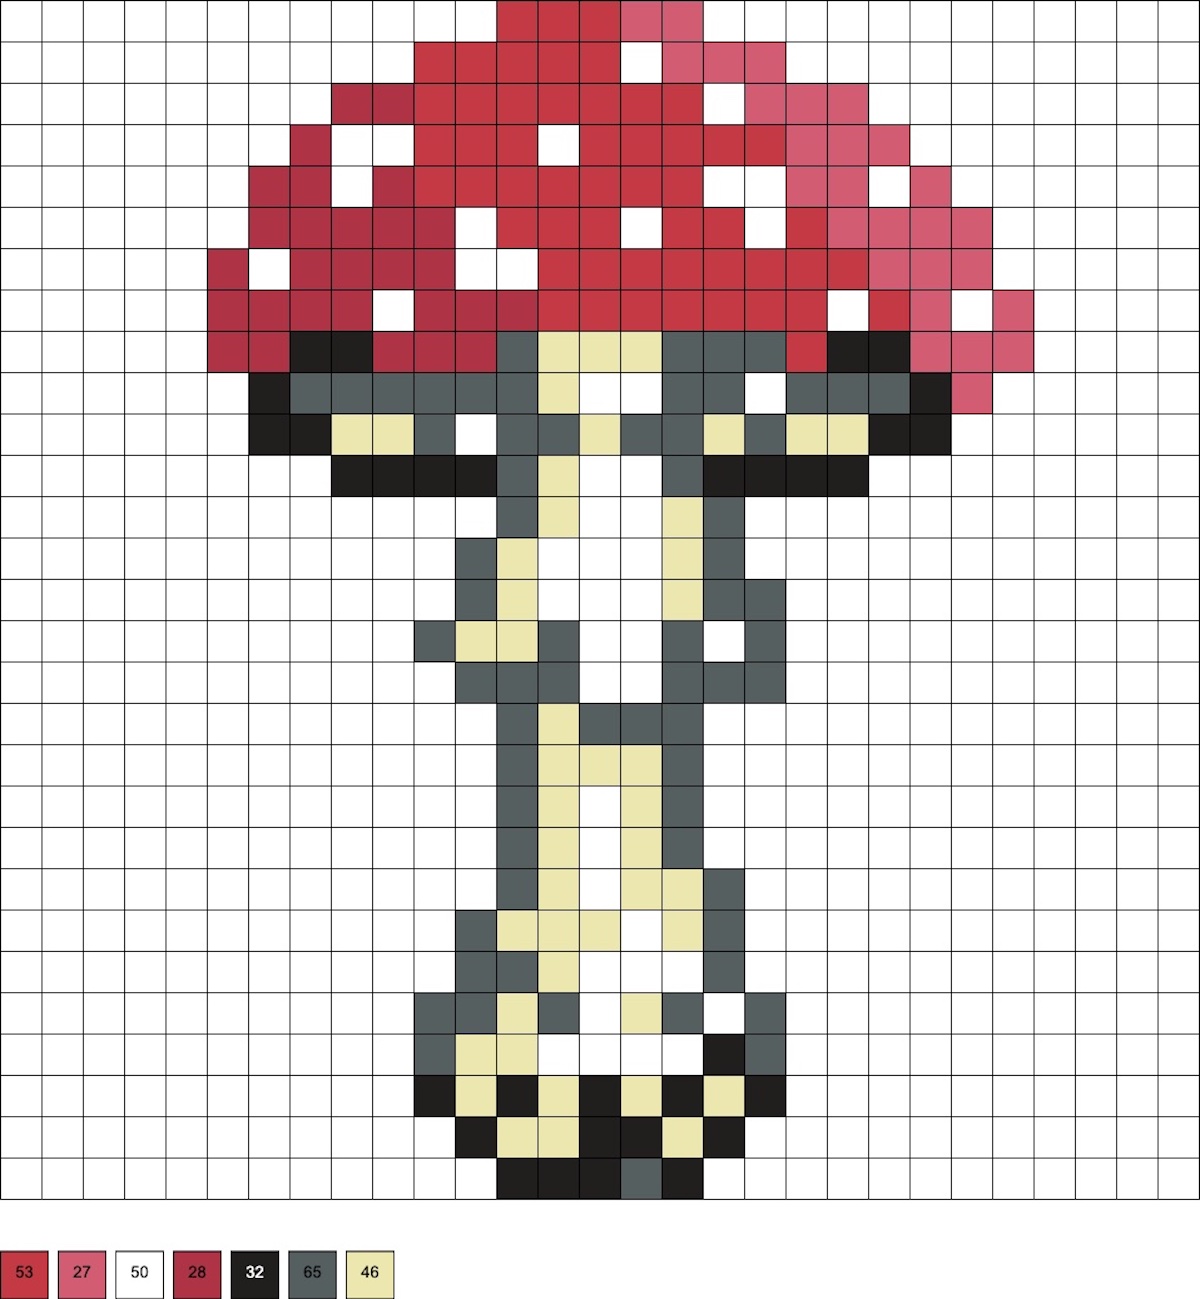
Tall Amanita
This pattern uses 53 red, 28 cherry, 27 rose, 50 white, 32 black, 65 dark gray, and 46 cream beads.
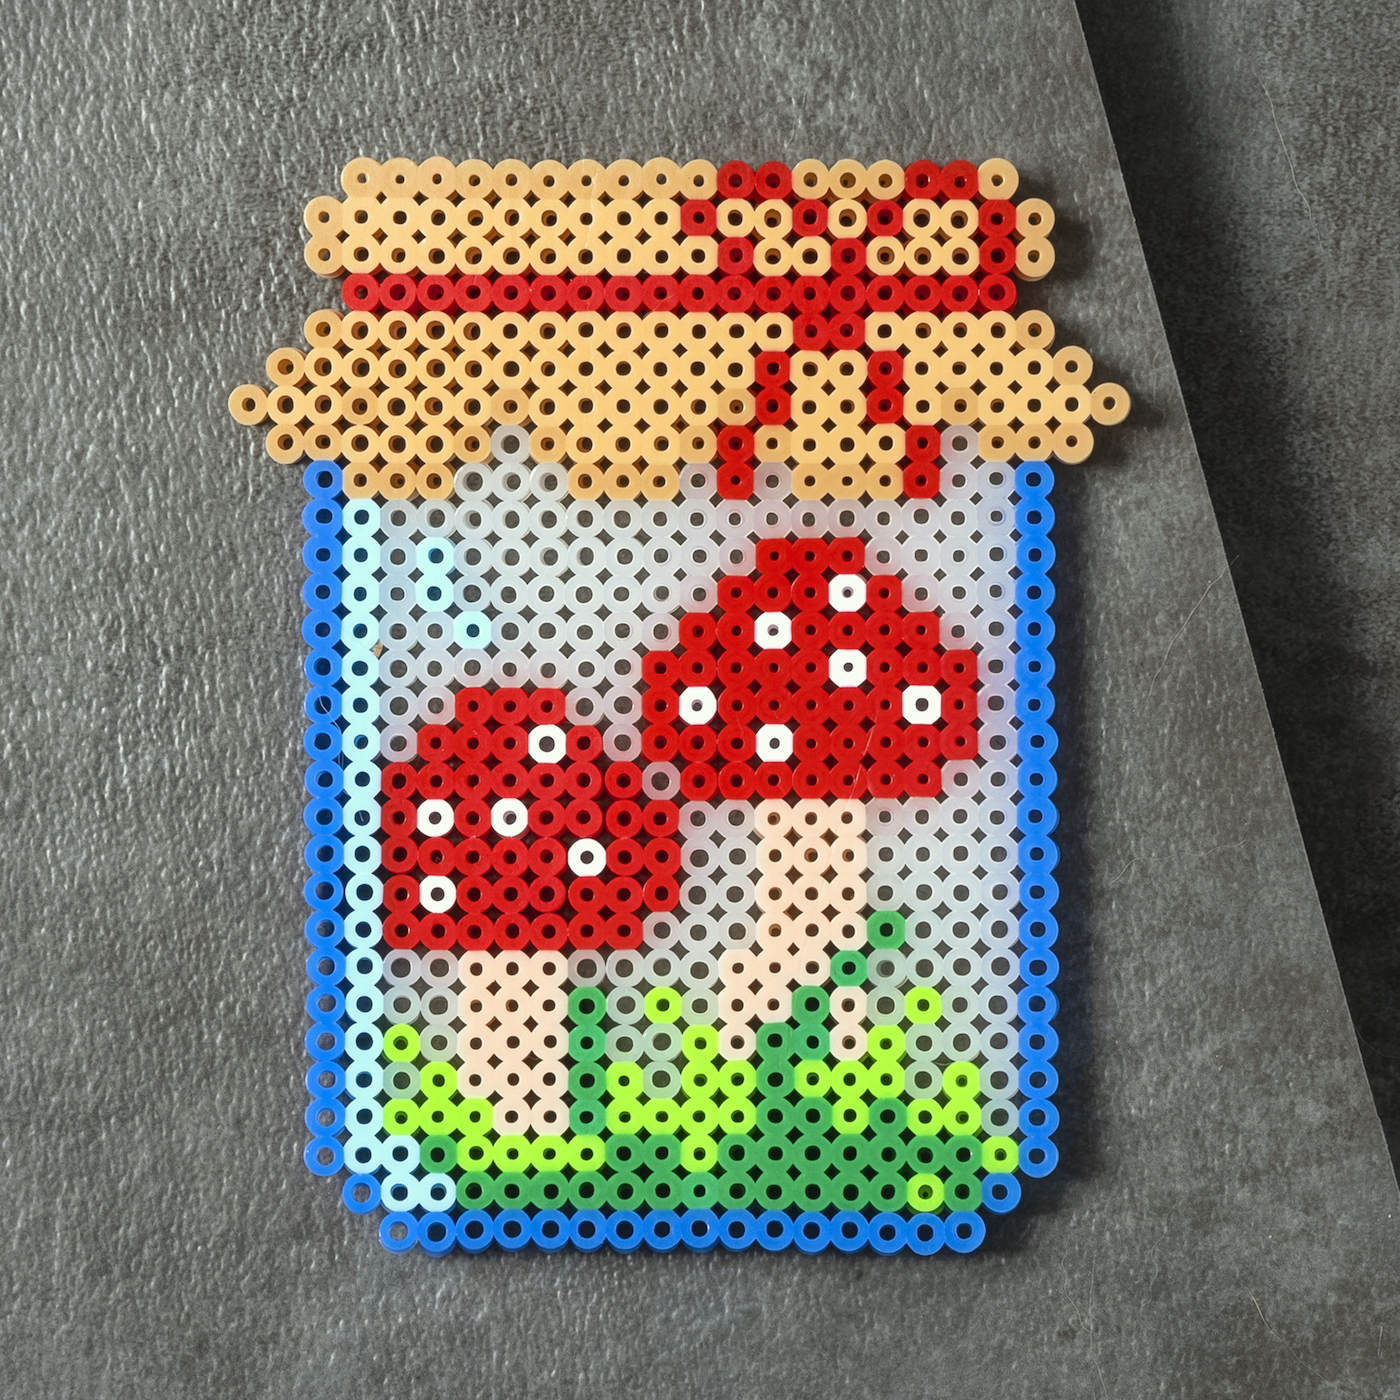
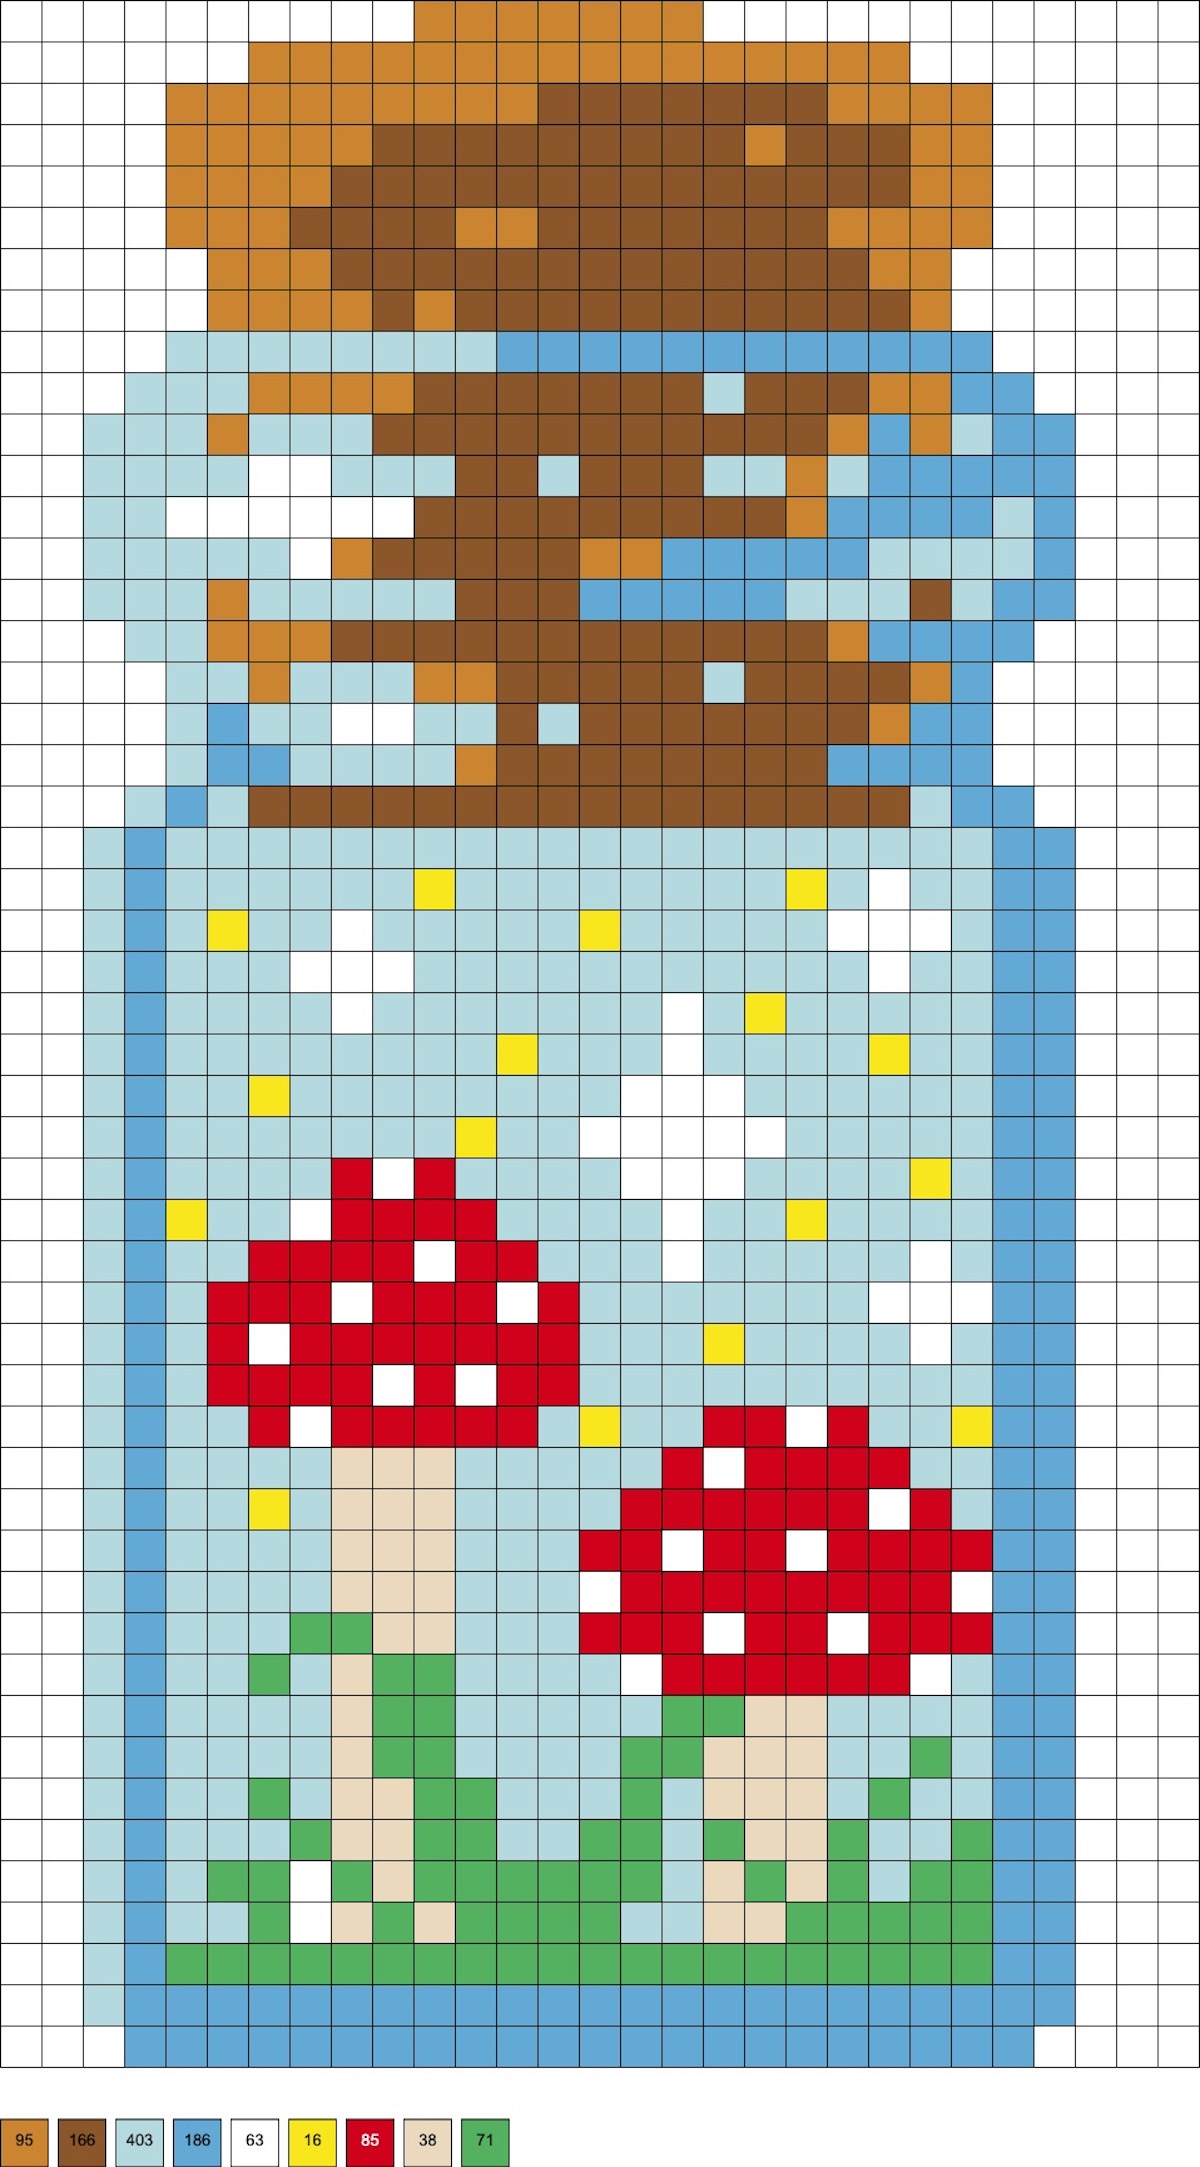
‘Shrooms in a Bottle
There’s a little bit of magic in there too! This pattern uses 95 honey, 166 light brown, 403 mist, 186 pastel blue, 63 white, 16 yellow, 85 red, 38 toasted marshmallow, and 71 bright green beads.
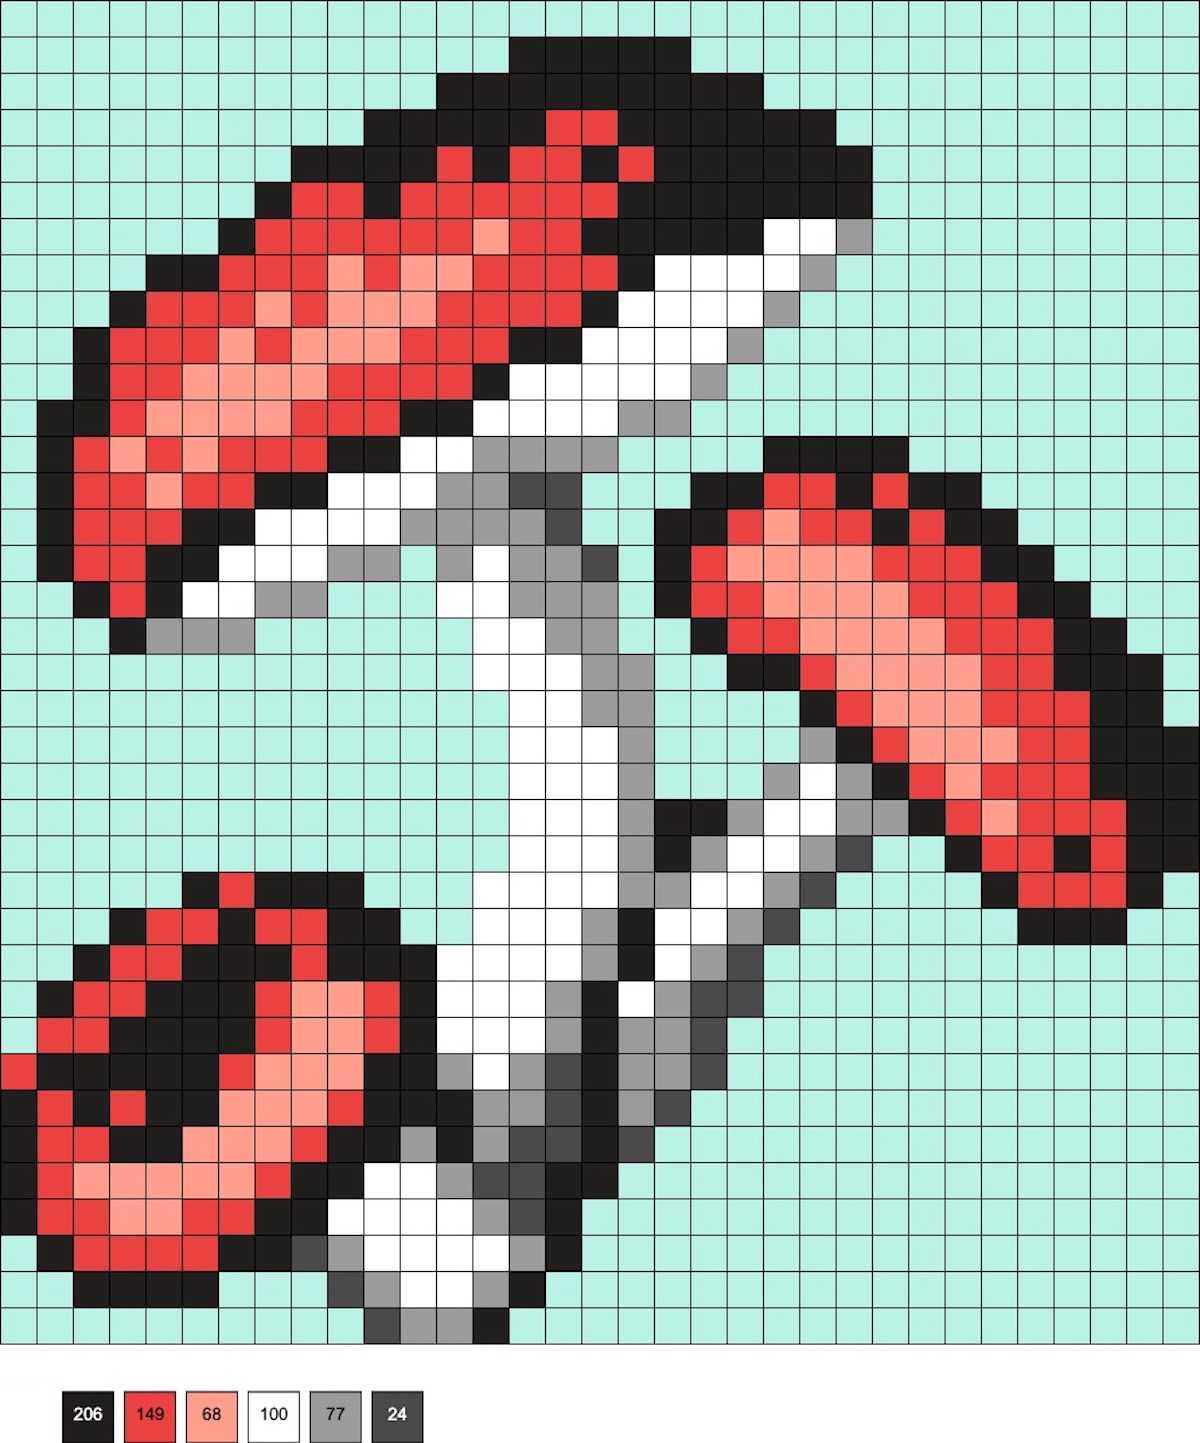
Honey Agaric
This pattern uses 206 black, 149 red, 68 blush, 100 white, 77 gray, and 24 dark gray beads.
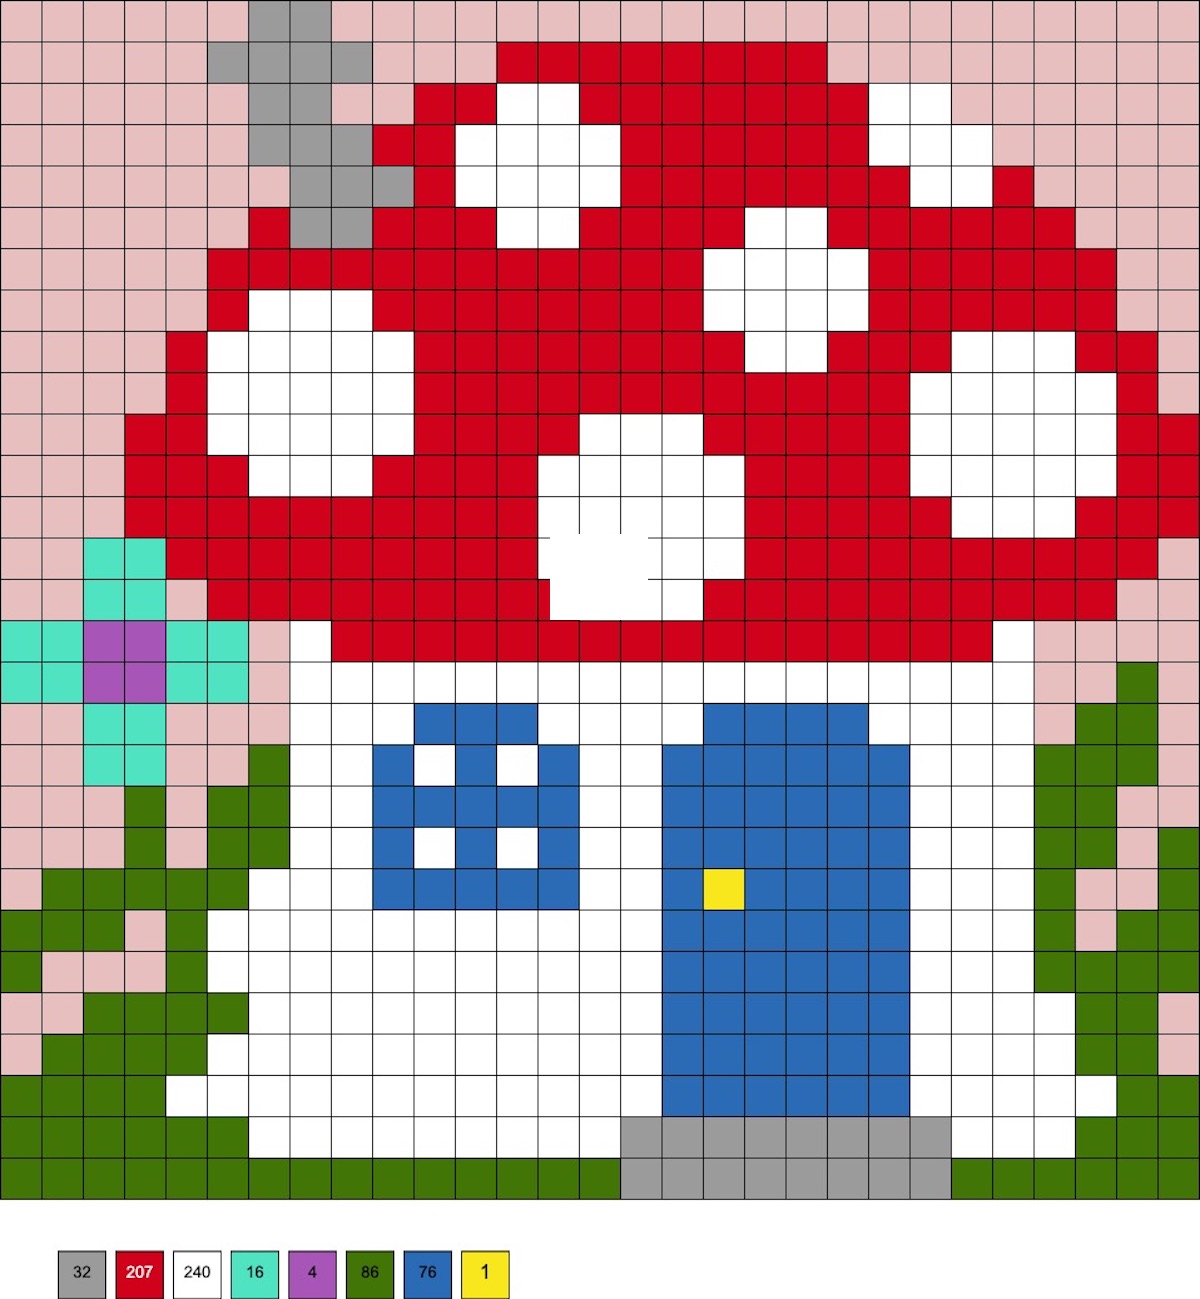
Mushroom House with Garden
This pattern uses 32 dark gray, 207 red, 240 white, 16 light green, 4 purple, 86 shamrock, 76 cobalt, and 1 yellow bead.
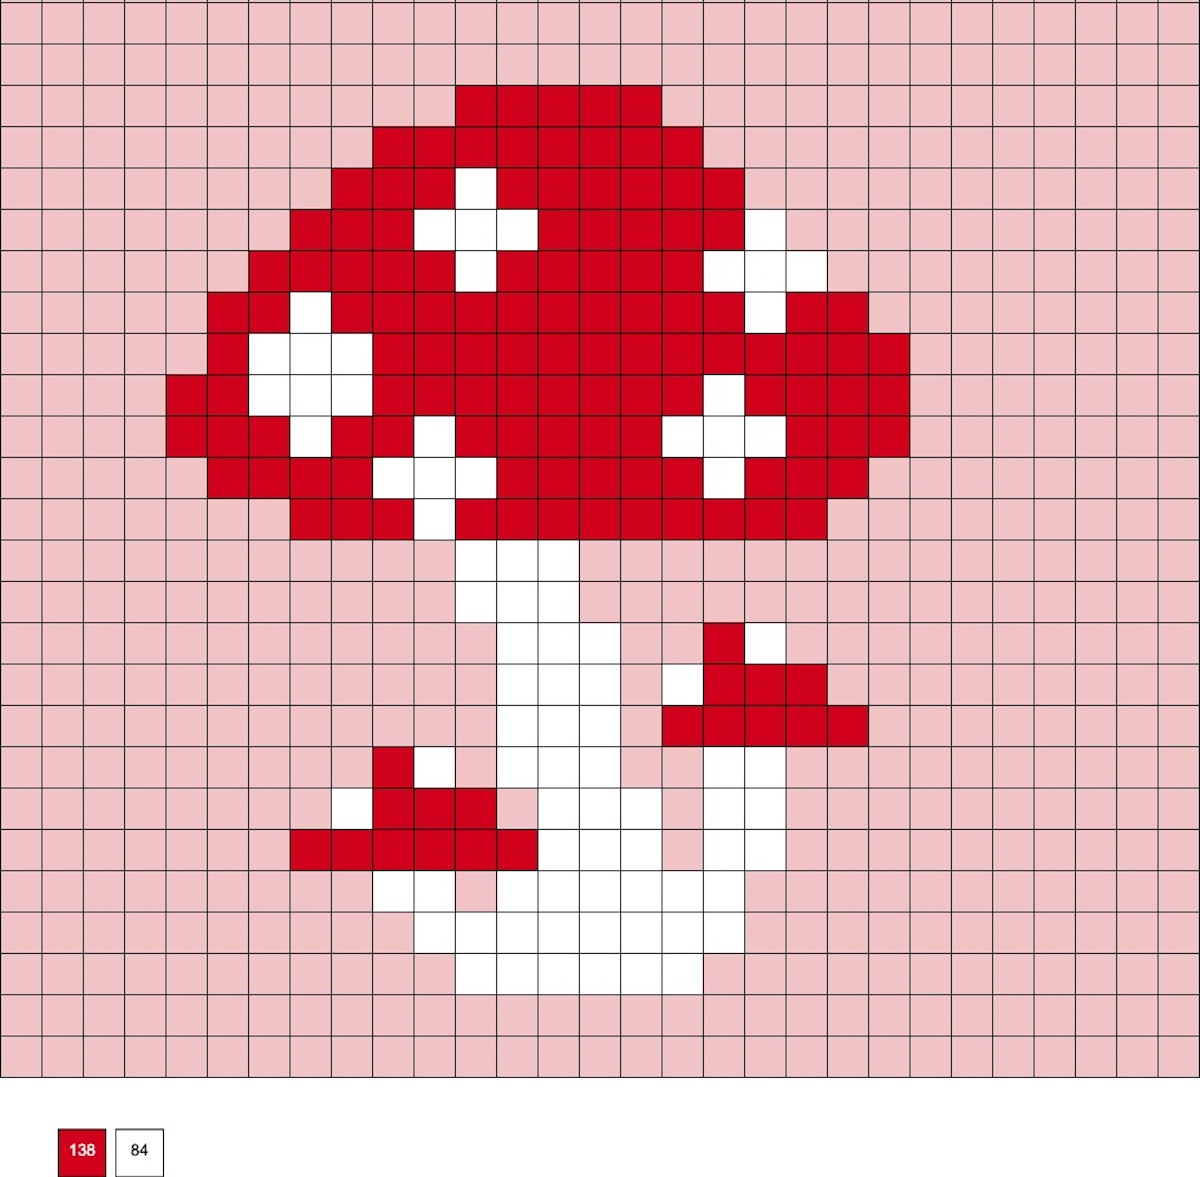
Mushroom Trio
This pattern uses 138 red and 84 white beads.
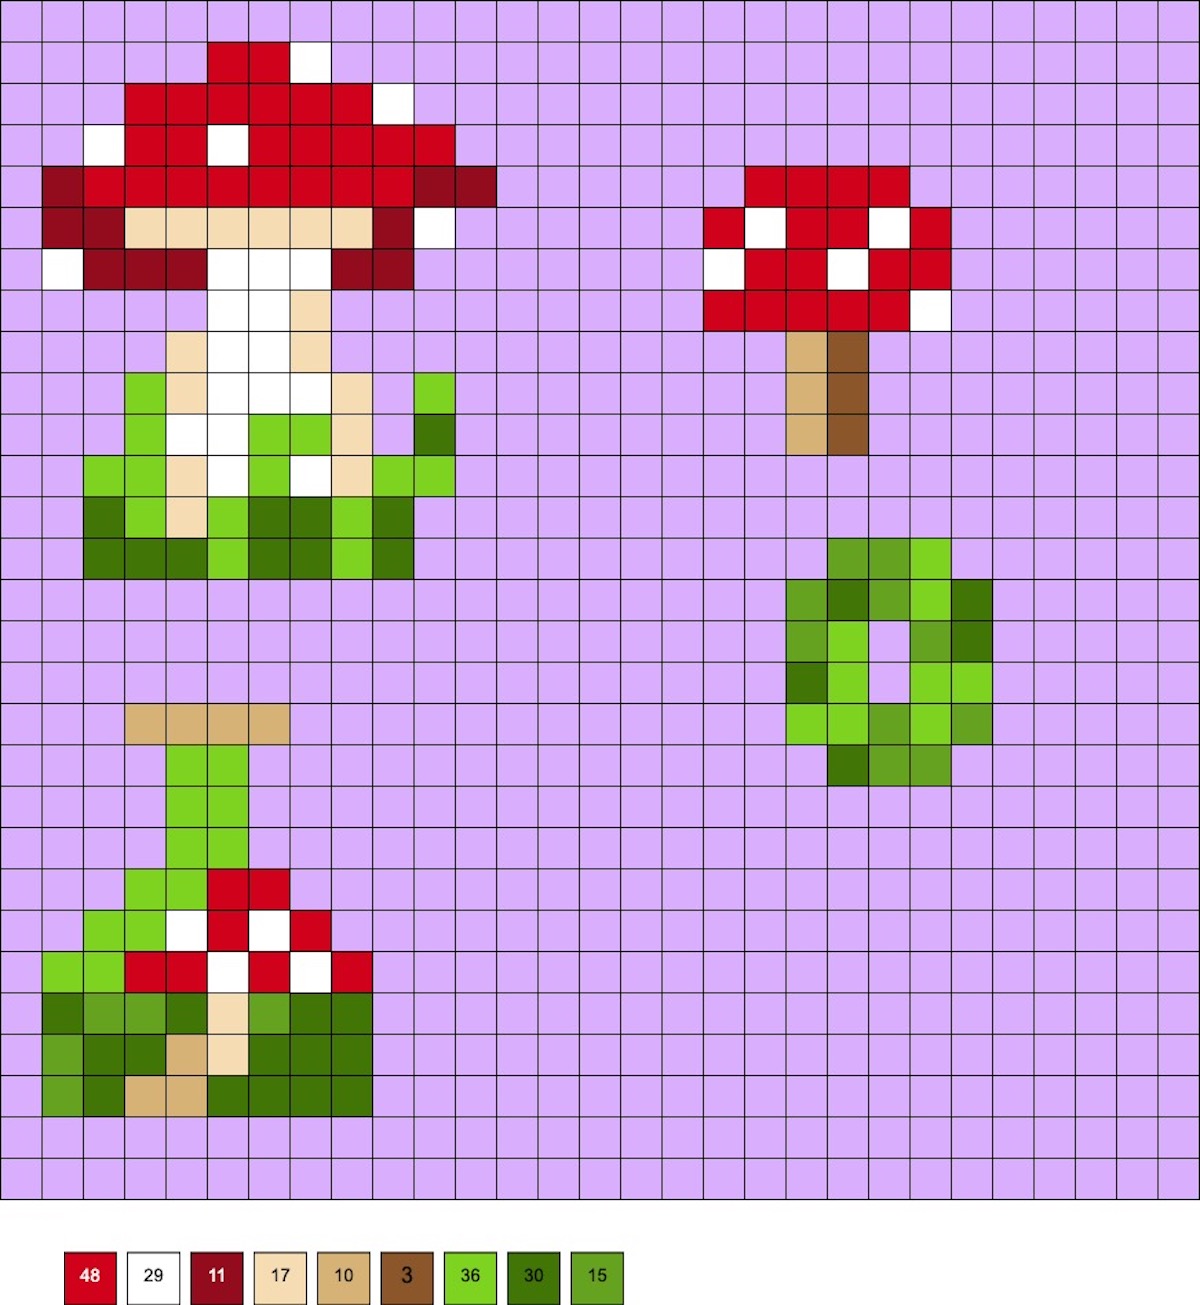
Mossy Mushrooms
Below you’ve got a little mushroom with greenery, one in a bottle, a tiny one with a small stand. These patterns use 48 red, 29 white, 11 rust, 17 sand, 10 fawn, 3 brown, 36 bright green, 30 dark green, and 16 shamrock beads.
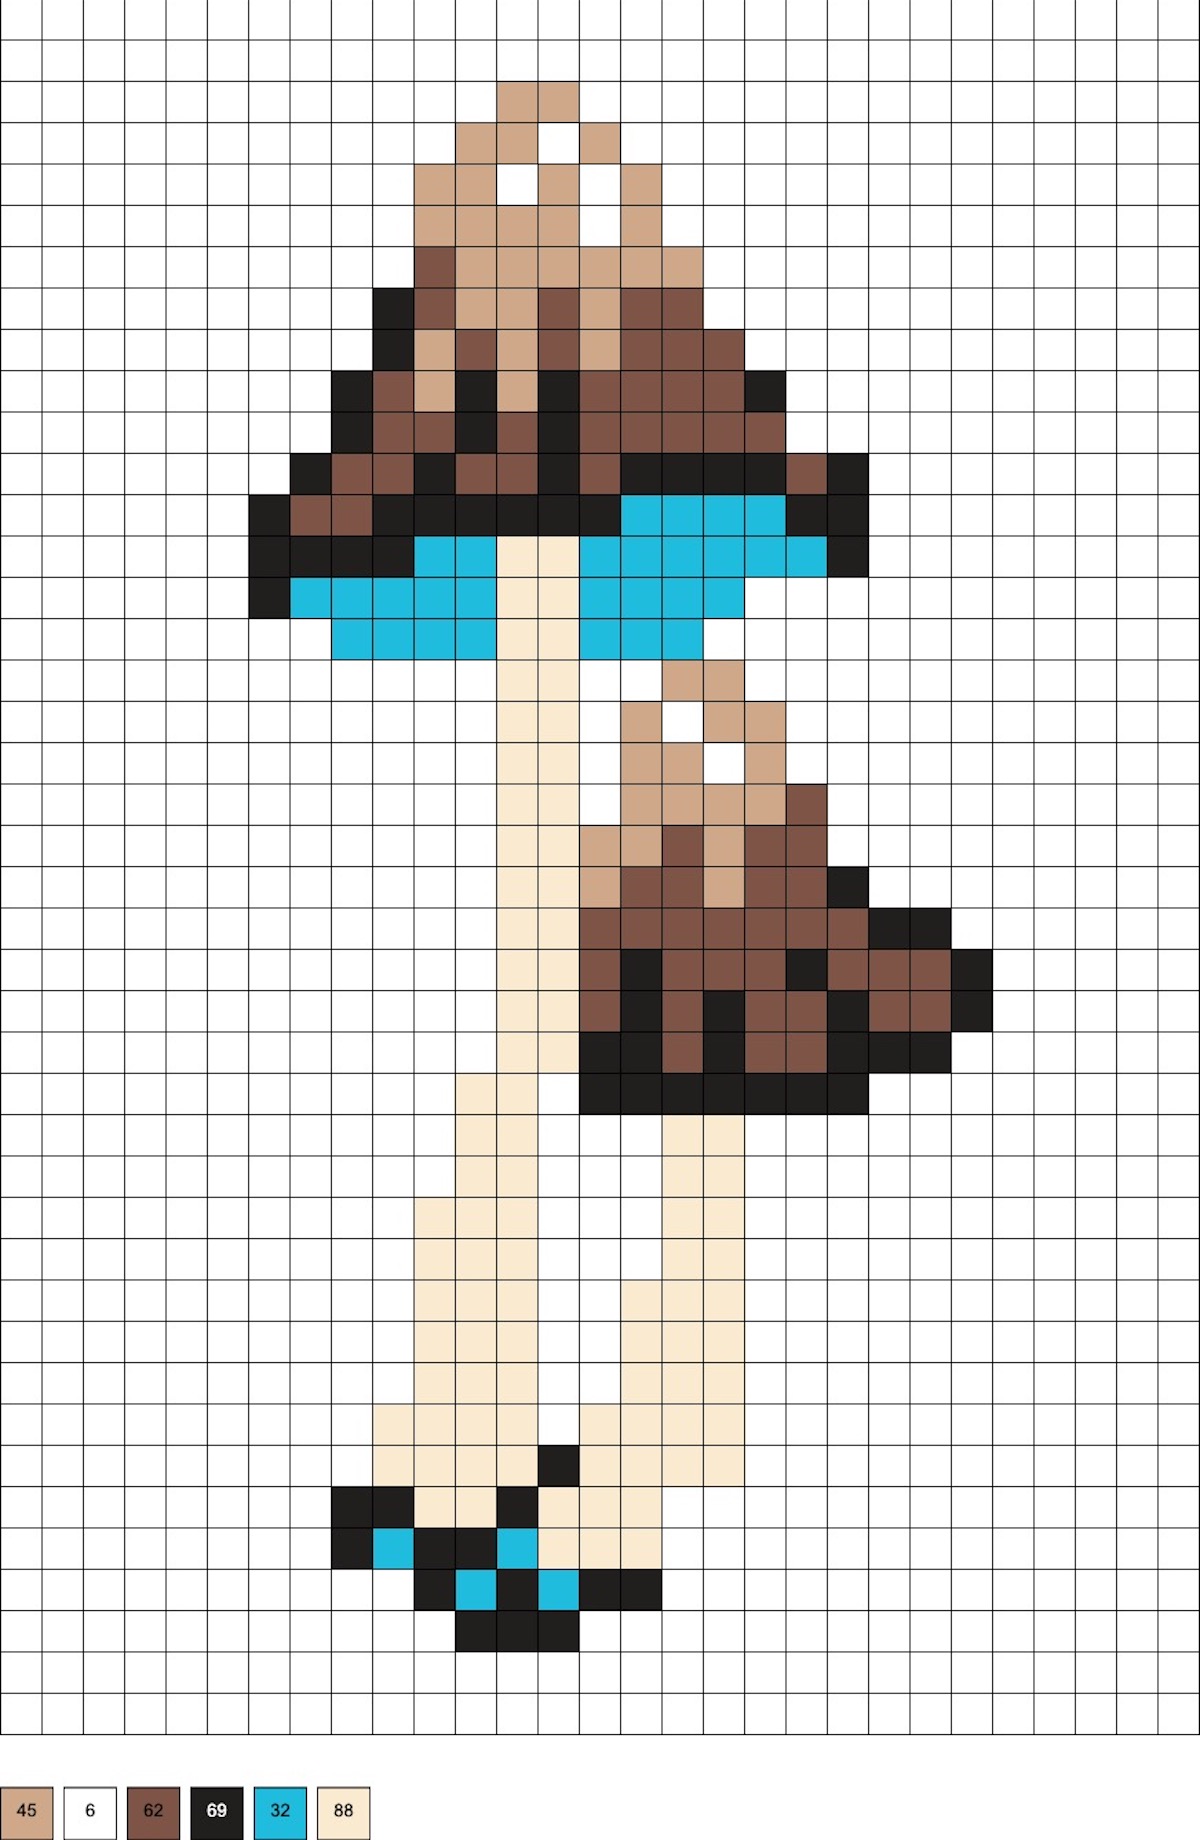
Oyster Mushrooms
This pattern uses 45 tan, 6 white, 62 gingerbread, 69 black, 32 turquoise, and 88 toasted marshmallow beads.
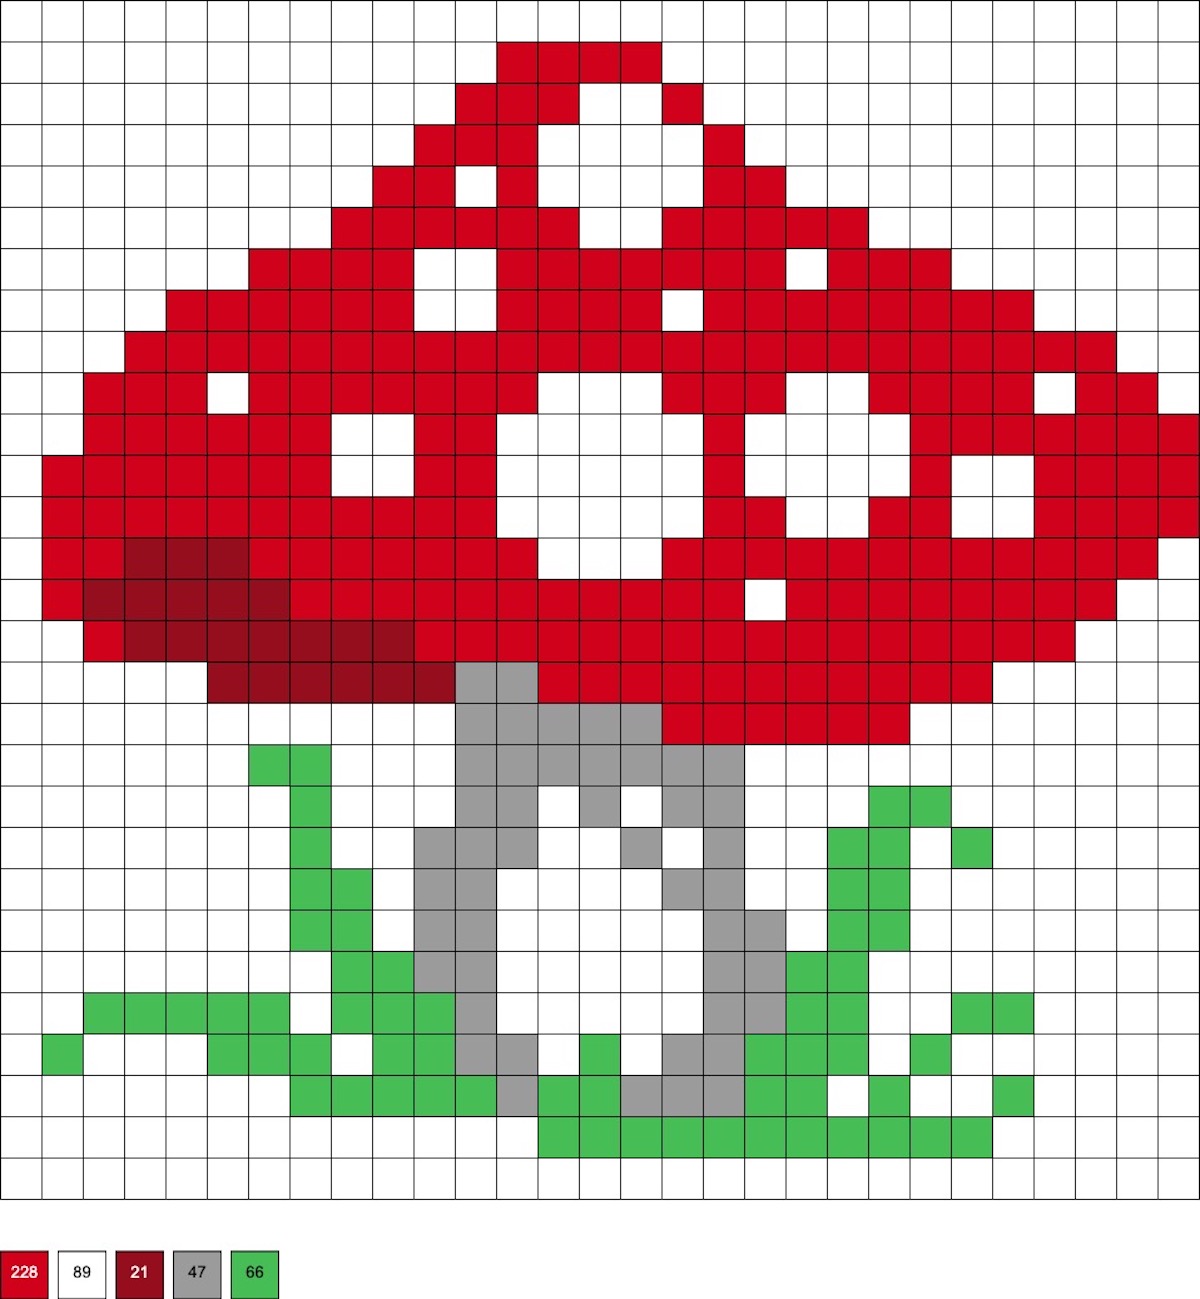
Mushroom with Grass Growing Around the Base
This pattern uses 228 red, 89 white, 21 rust, 47 gray, and 66 bright green beads.
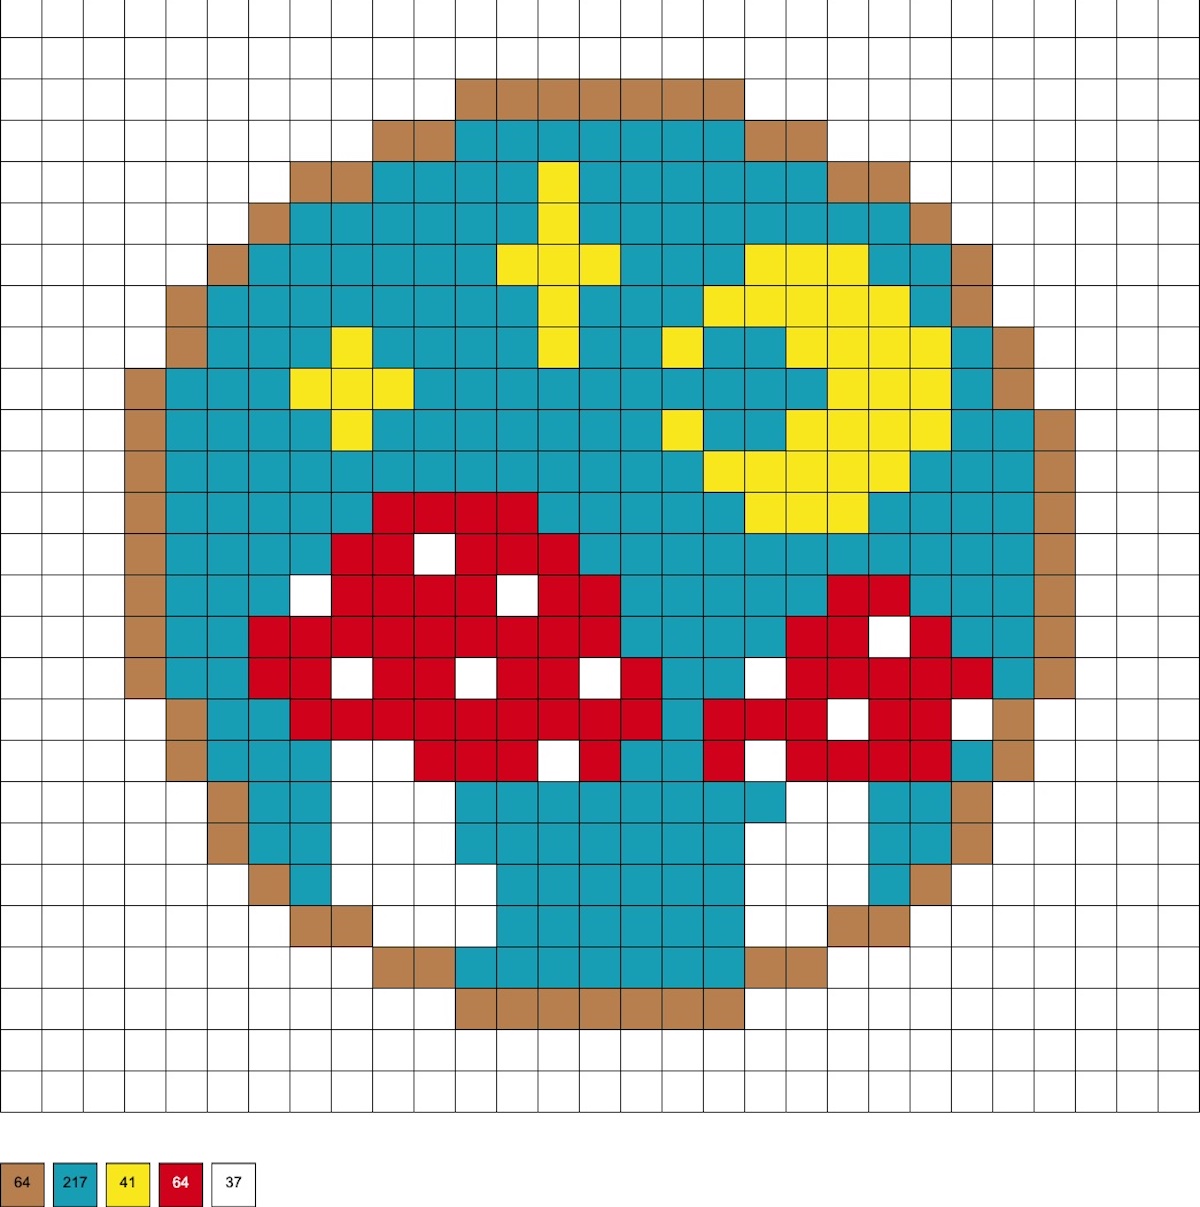
Under the Stars
This pattern uses 64 honey, 217 teal, 41 yellow, 61 red, and 37 white beads.
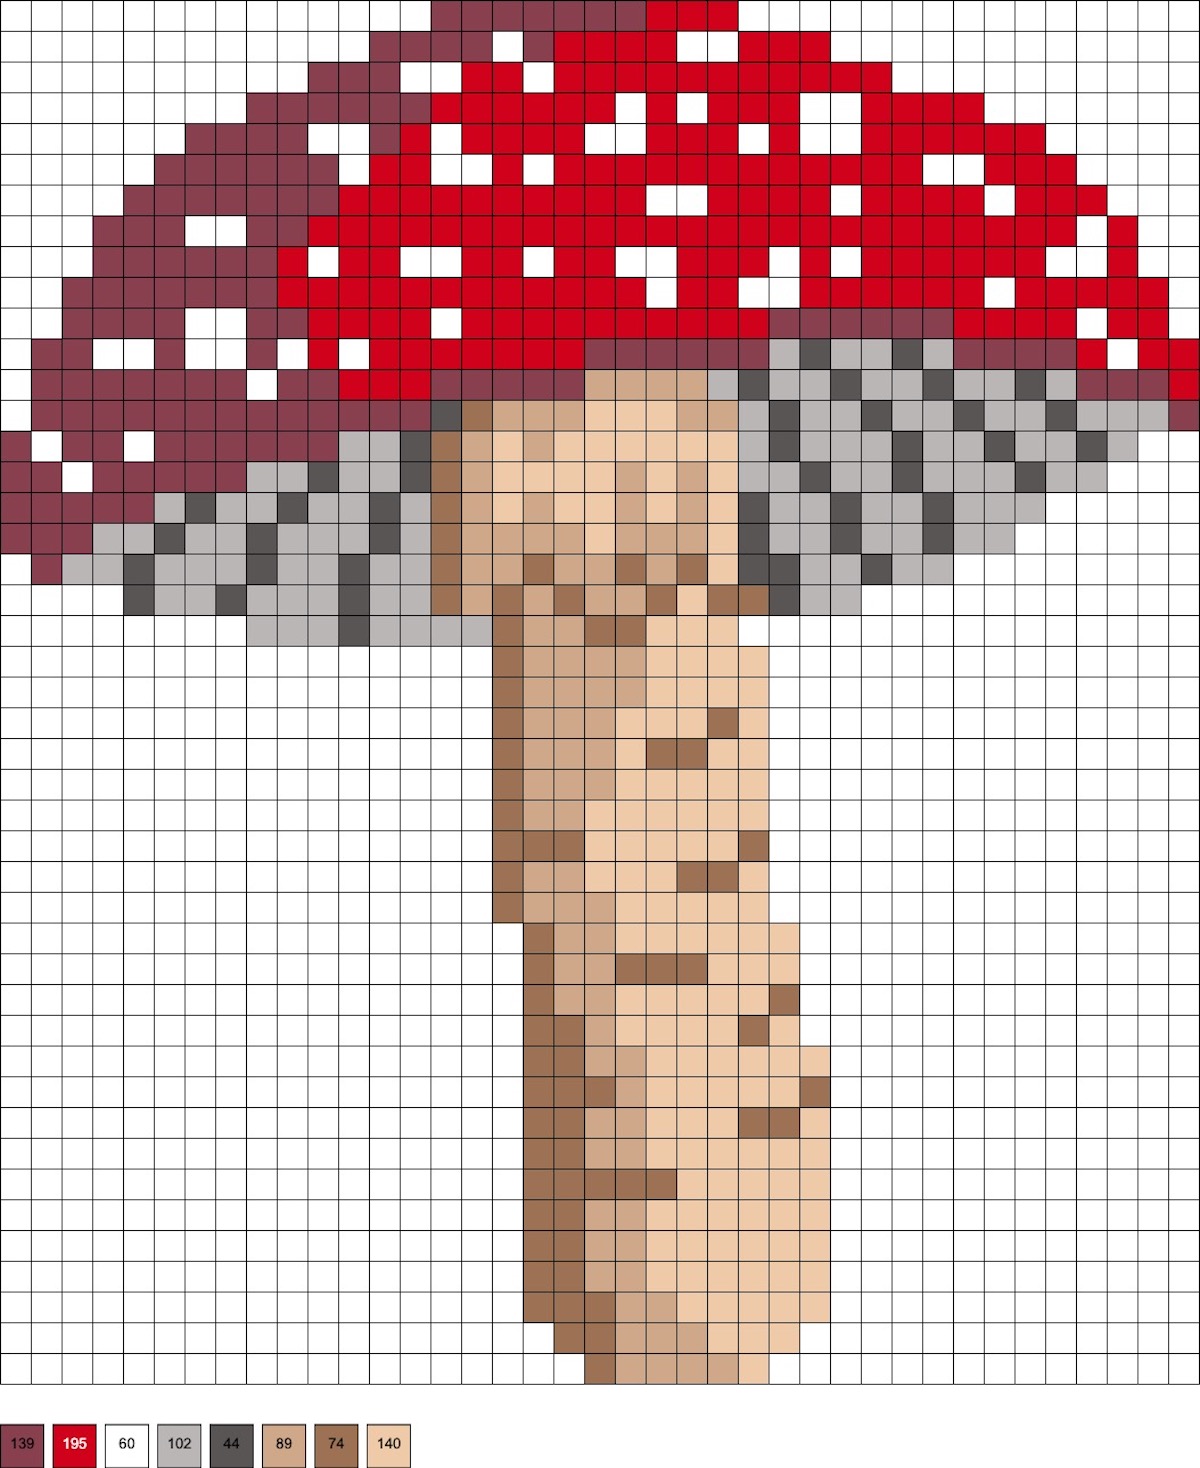
Large Amanita
This pattern uses 139 cranberry, 195 red, 60 white, 102 light gray, 44 dark gray, 89 tan, 74 light brown, and 140 sand beads.
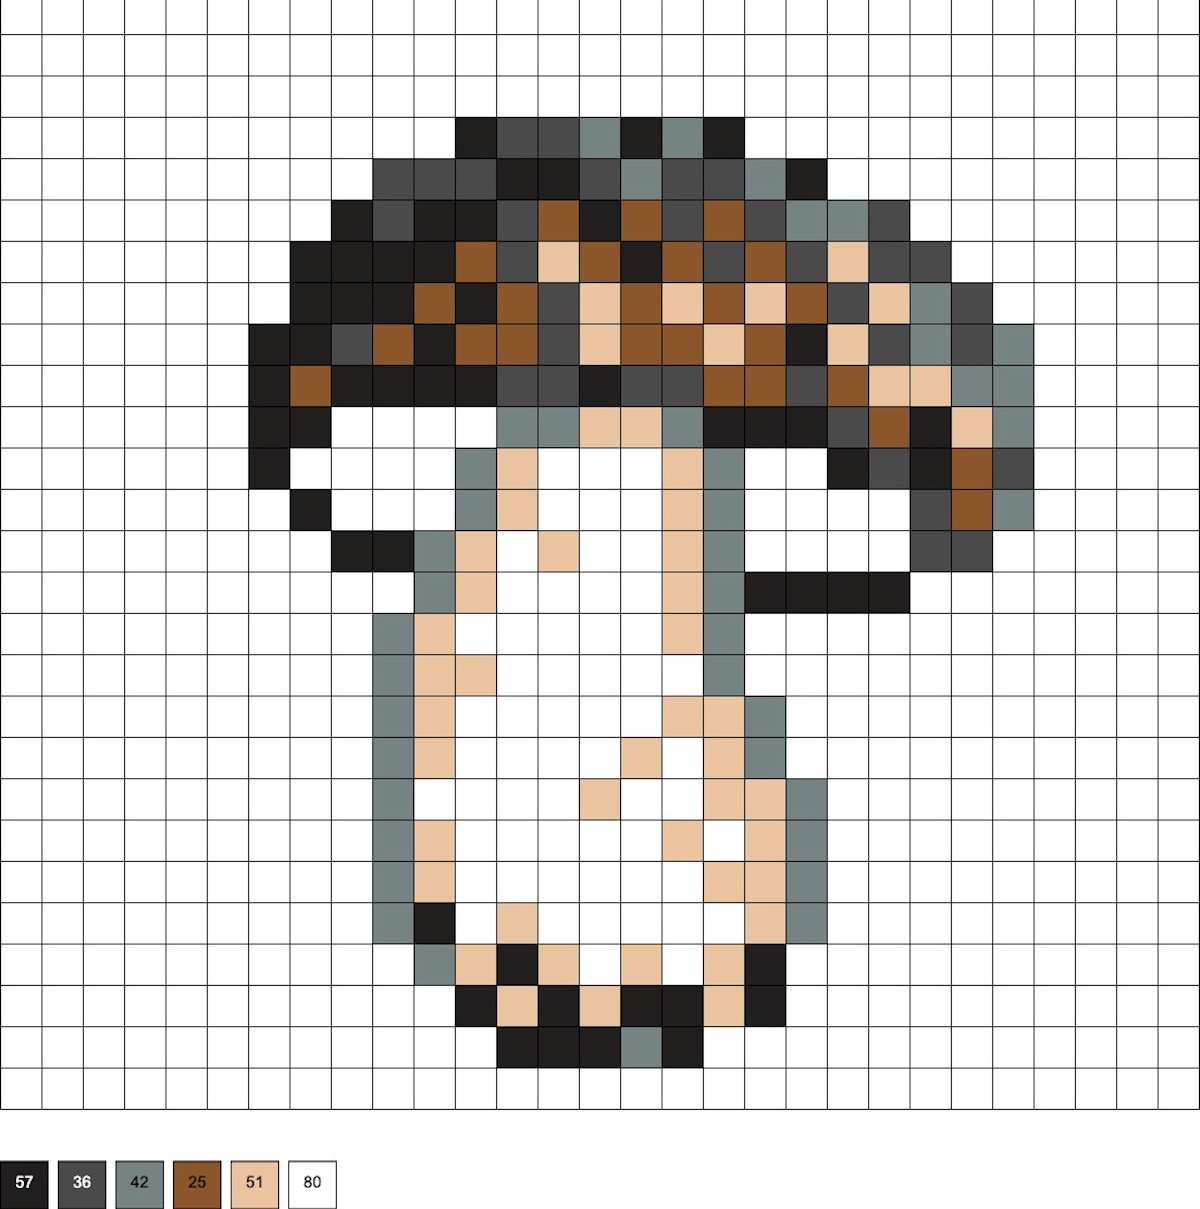
Medium Porcini
This pattern uses 57 black, 36 dark gray, 42 pewter, 25 light brown, 51 sand, and 80 white beads.
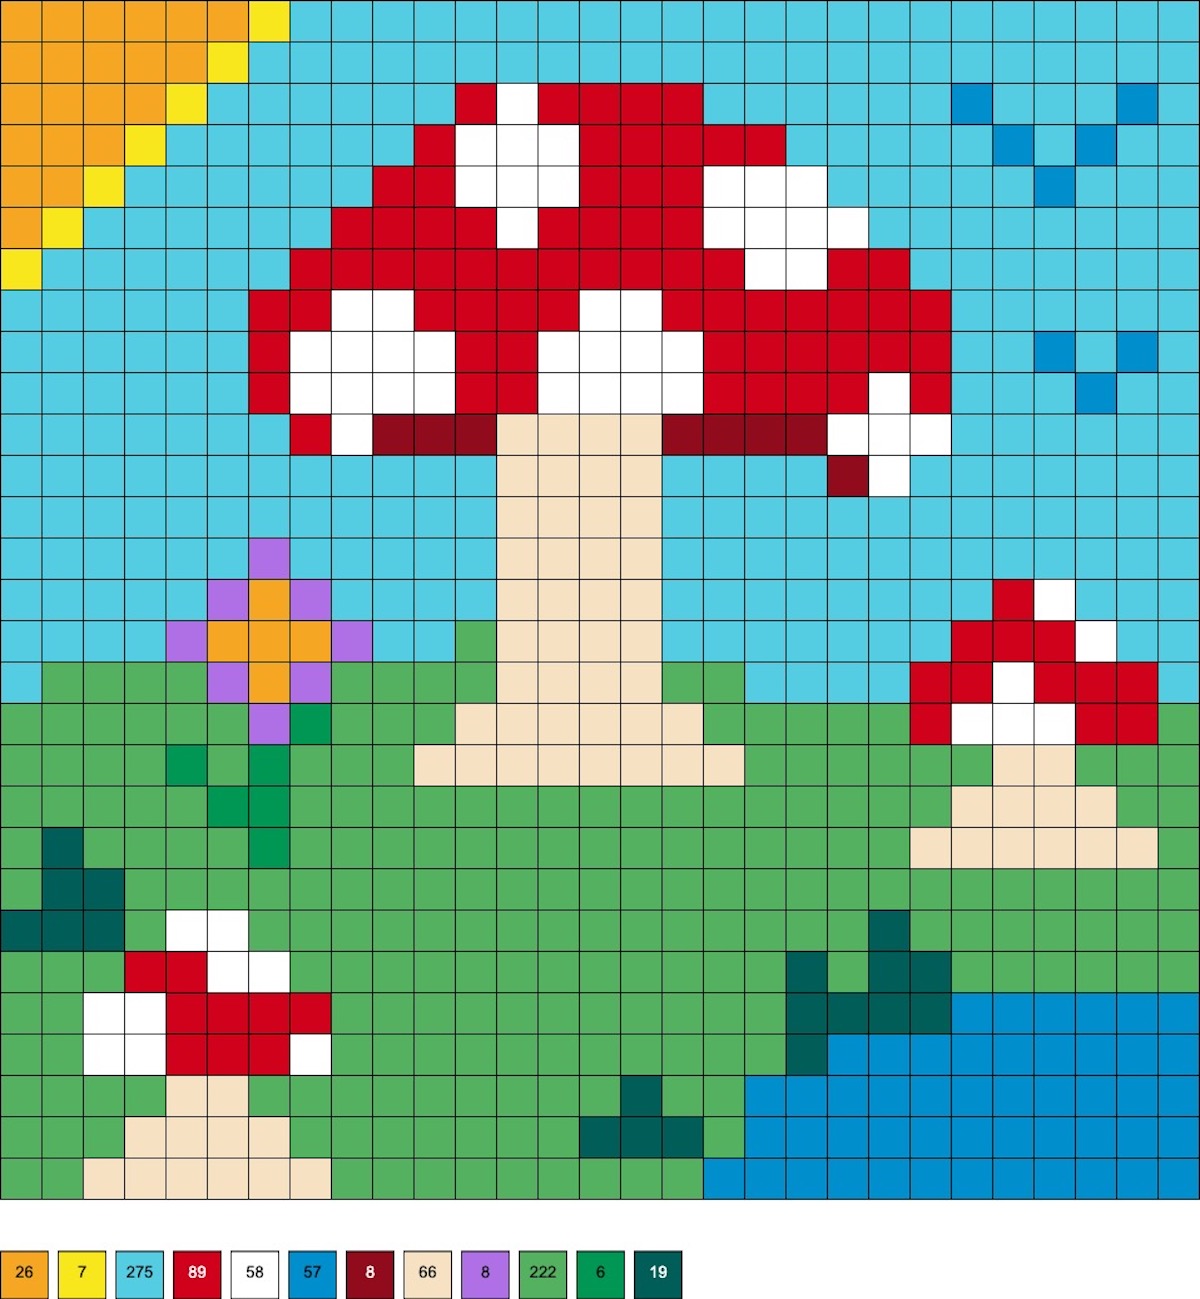
Mushrooms in the Sun Scene
This pattern uses 275 beads for the sky and 222 beads for the grass. Besides that, you can use up a lot of extra beads by customizing the colors for everything else!
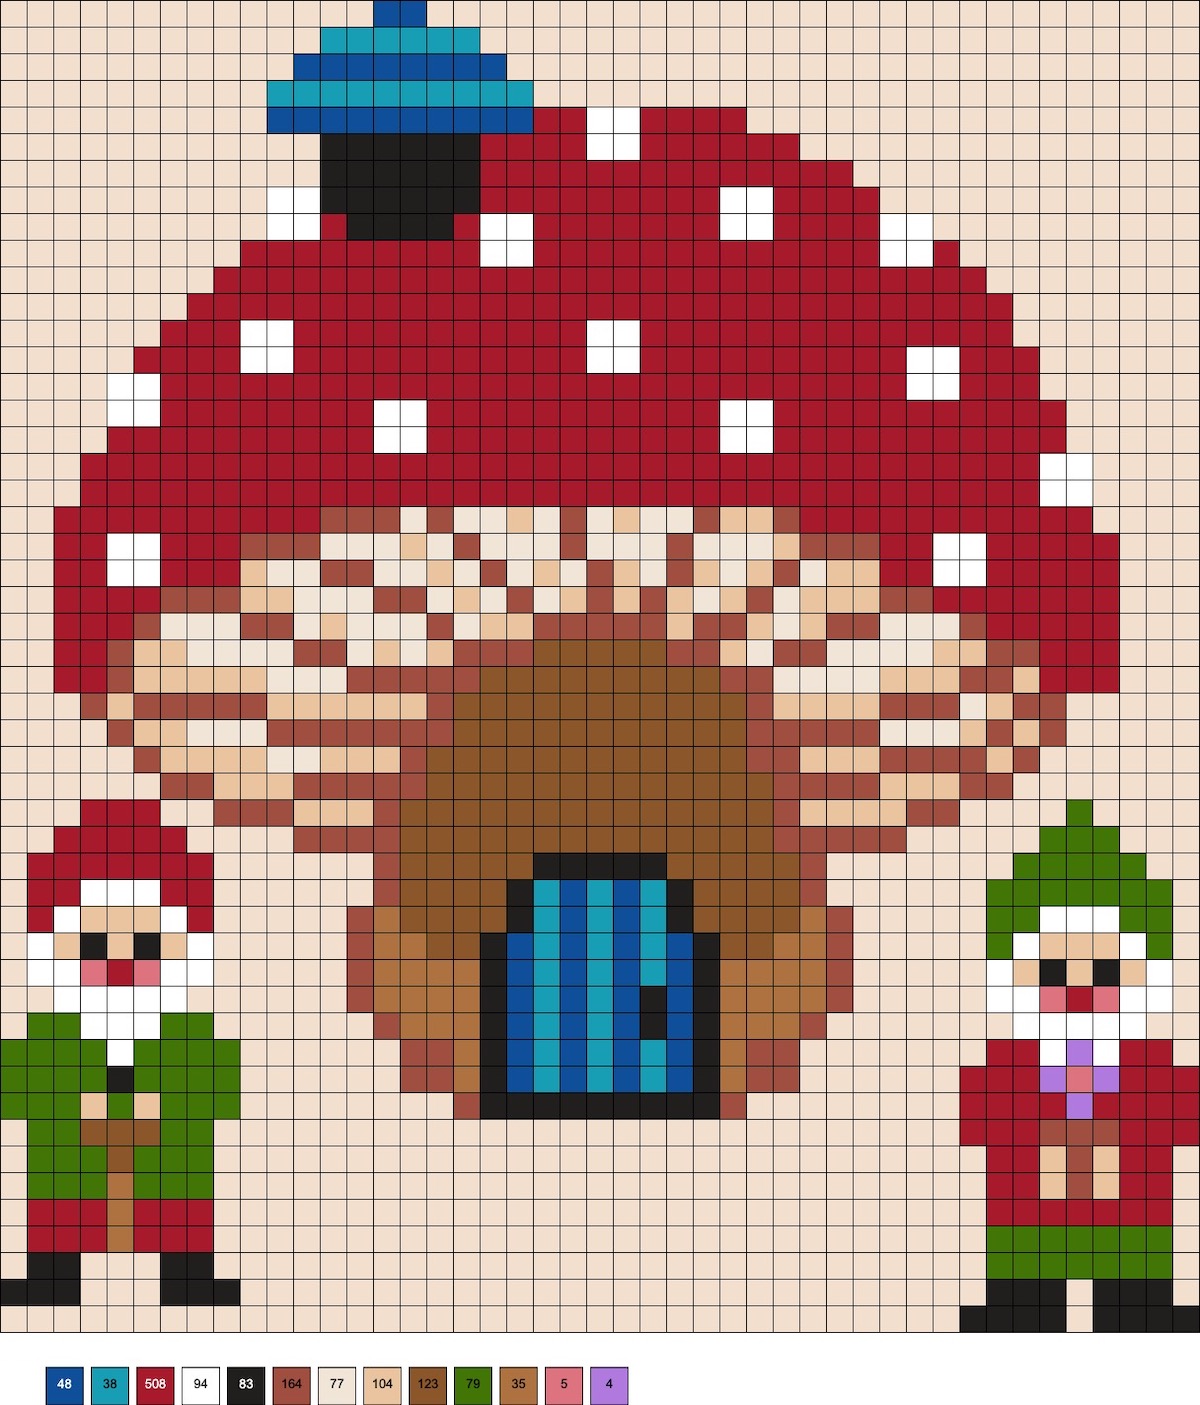
Two Gnomes with a Mushroom House
The most important color for this pattern is the 500 red beads, give or take. Besides that, customize this pattern with any colors you like!
If you’re ready to make some mushroom perler beads, let me know in the comments! I’d also love for you to check out these additional perler ideas:
Animal • Birds • Butterflies • Flowers • Frog • Hearts • Rainbow • Stars • Summer • Unicorn