St. Patrick’s Day Deco Mesh Wreath
This St. Patrick’s Day deco mesh wreath is perfect for your front door! It’s easy to make, and you’ll love the leprechaun hat and mustache.
Skills Required: None. You’ll be cutting mesh, rolling it, and attaching it to a wire form with pipe cleaners. You’ll also be cutting craft foam and attaching it to the wreath.

I said it before and I’ll say it again – this is the year of the mesh wreath! I’m continuing my pattern from the last six months of putting a handmade wreath on my front door, and so far I’ve had quite a few.
It started with the Halloween mesh wreath, then went to the candy cane and the metallic mesh wreath. And for Valentine’s Day? I made the heart mesh wreath.
So you absolutely had to expect that I was going to continue the trend for St. Patrick’s Day. Especially with my orange front door? All I have to do is add a little green and white and I’m Irish holiday ready!
I decided to make a St. Patrick’s Day deco mesh wreath in a few shades of green and white. I bought the mesh in a kit and knew that I wanted something on my door for the holiday.
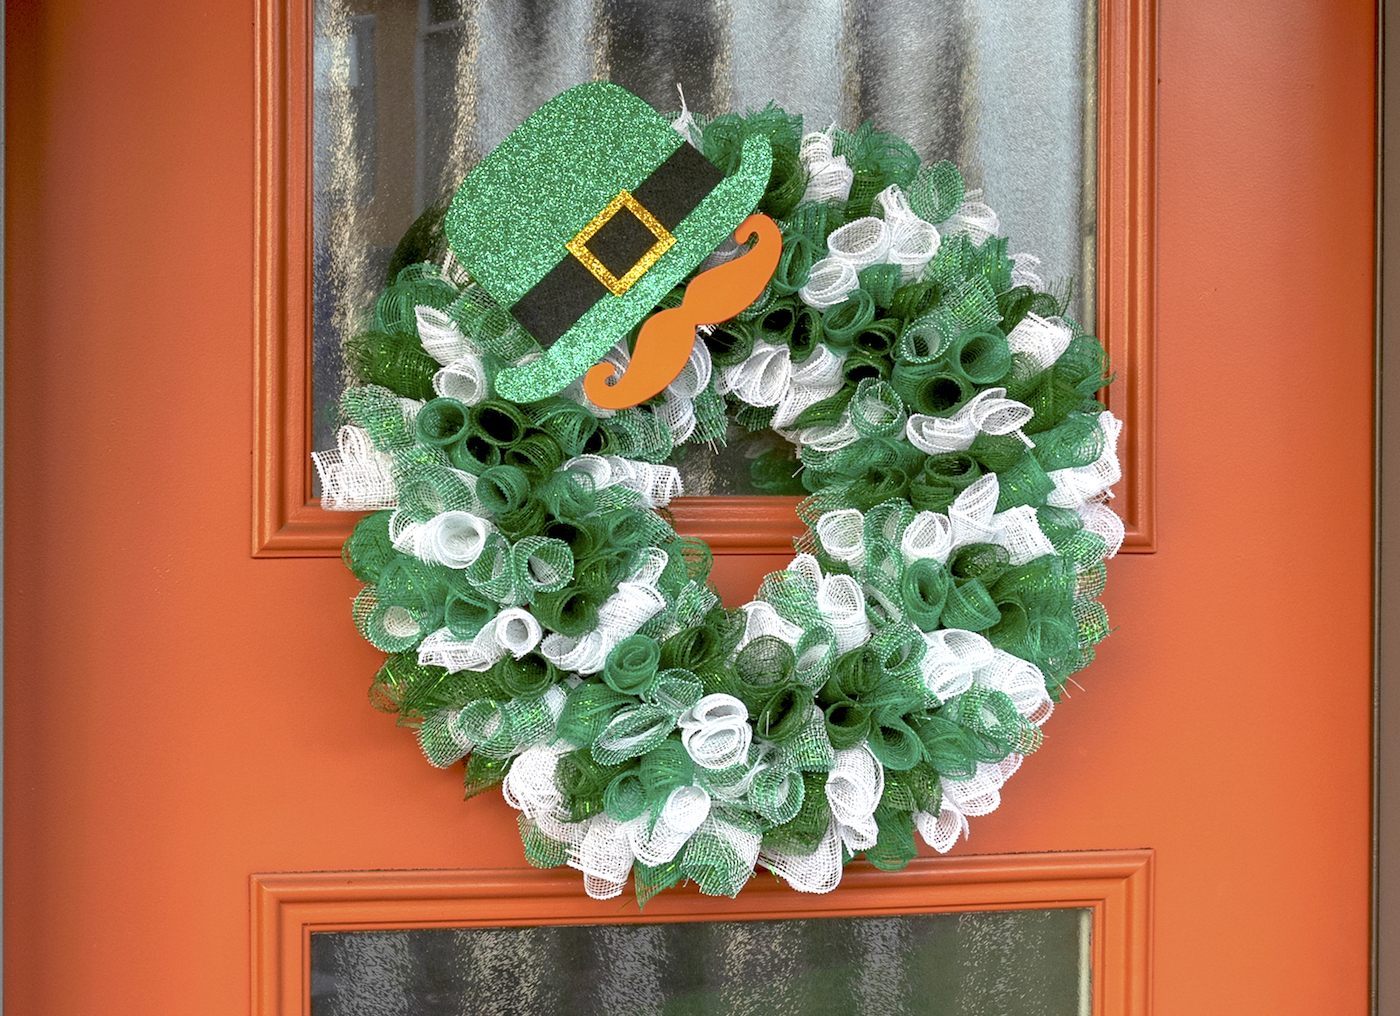
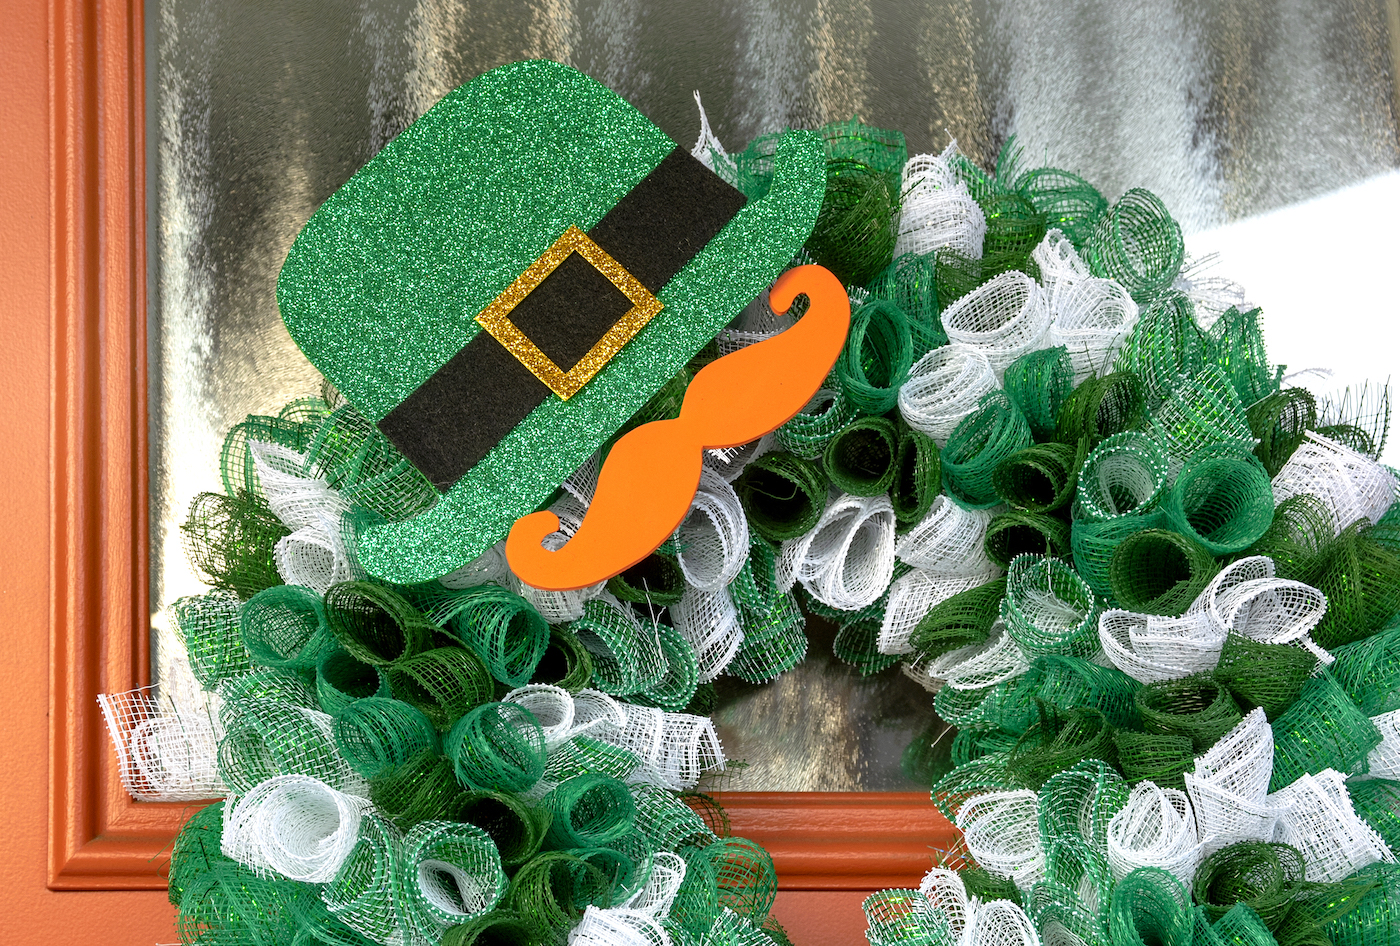
But it wasn’t until the wreath was made that the idea for an amazing addition came to fruition: a green glitter bowler hat and a orange mustache!
I feel like this shows the world that my house is really leprechaun friendly. Or that I listen to a lot of House of Pain. Or both!
Either way, I’m excited to show you how to make this wreath.
The thing about mesh wreaths is that they are easy, but they do take a bit of time to assemble. My suggestion is to grab yourself a Lifetime movie or a true crime series and get into the crafting groove.
St. Patrick’s Day Mesh Wreath
You’re going to make this project in four easy steps. You’re going to cut the mesh, then cut the pipe cleaners. Then you’re going to attach the mesh to the wire form. The hat and mustache are an optional step four, but I really think it adds something.
Mesh to Use
A few notes because mesh comes in different widths: this uses 6″ deco mesh. Depending on the craft store, you might only find 10″ rolls or wider (there are some good sets on Amazon). You can definitely use 10″ mesh for this project.
I also want to note that it didn’t take all four of the rolls of mesh to make this wreath. There was a little bit left over from each of the colors. With the lengths they come in, it’s nearly impossible to not have some left over. Plus if you want to go a little larger with the form, you can.
Where to Get a Form
You can get wire wreath forms at the dollar store if you’re lucky. They get sold out pretty quickly though, especially in the seasonal patterns like a clover (which, you can definitely use the same method as you see here).
These forms are also available at craft stores in the floral section (usually) OR you can get a wire wreath form on Amazon here.
Are you ready to make this St. Patrick’s deco mesh wreath? Here’s how it’s done below!
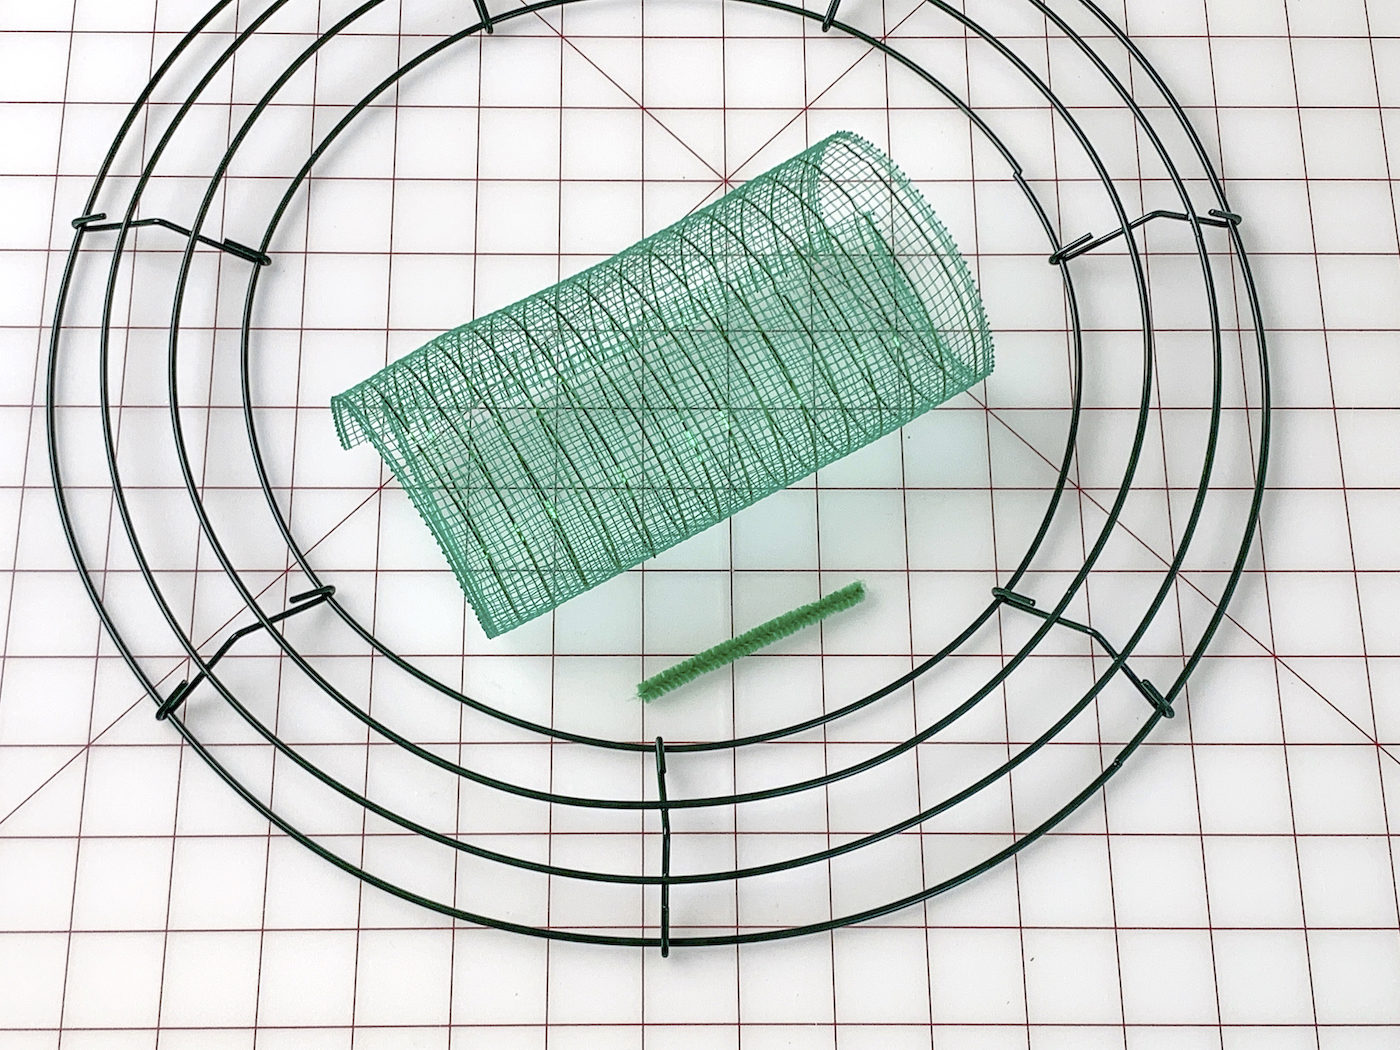
Gather These Supplies
- Wire wreath form – 14″ (you can also use a 12″ if that’s what you can find)
- 6” X 30 ft rolls of decorative mesh (bought a set of four)
- Green – 1
- Dark green – 1
- White – 1
- Green and white striped – 1
- Chenille pipe cleaners, 12″ – 1 package
- Heavy duty scissors or wire cutters
- Ruler
- Cutting mat
- Rotary cutter (scissors work too, but this makes it easier)
- Craft foam (kids’ section) – green glitter, gold glitter, black, orange
- Craft Scissors
- Hot glue gun and hot glue
Cut the Mesh
You’re going to start your project by cutting tubes of mesh approximately 10″ in length. The width of the mesh should be around 6″, and so you’ll be working with a bunch of 10″ x 6″ pieces you’ll roll into tubes.
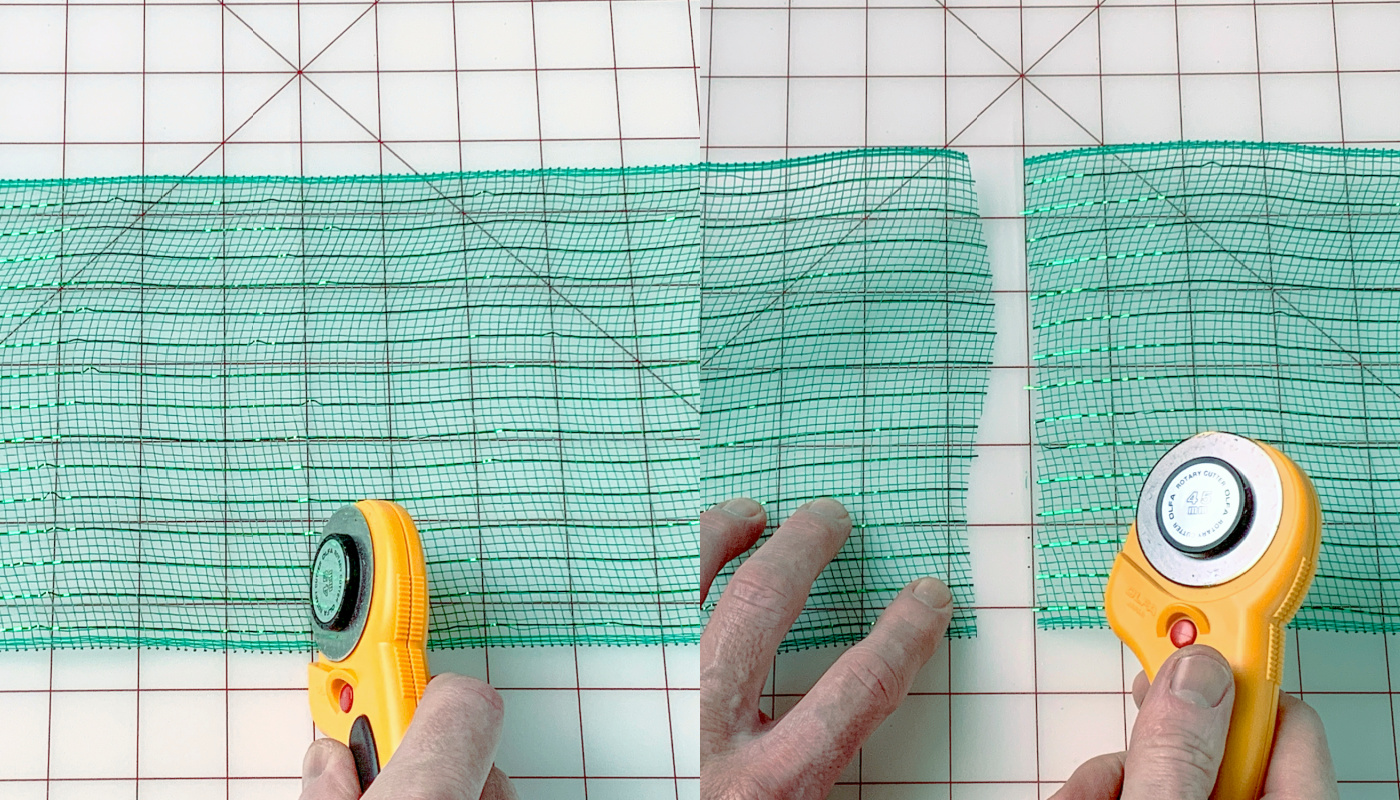
Cut several pieces of the various greens and the white all at once. I found it easiest to use a rotary cutter (with a ruler if you want to make sure the line is very straight). However, you can definitely use scissors. The rotary just sped up the process.
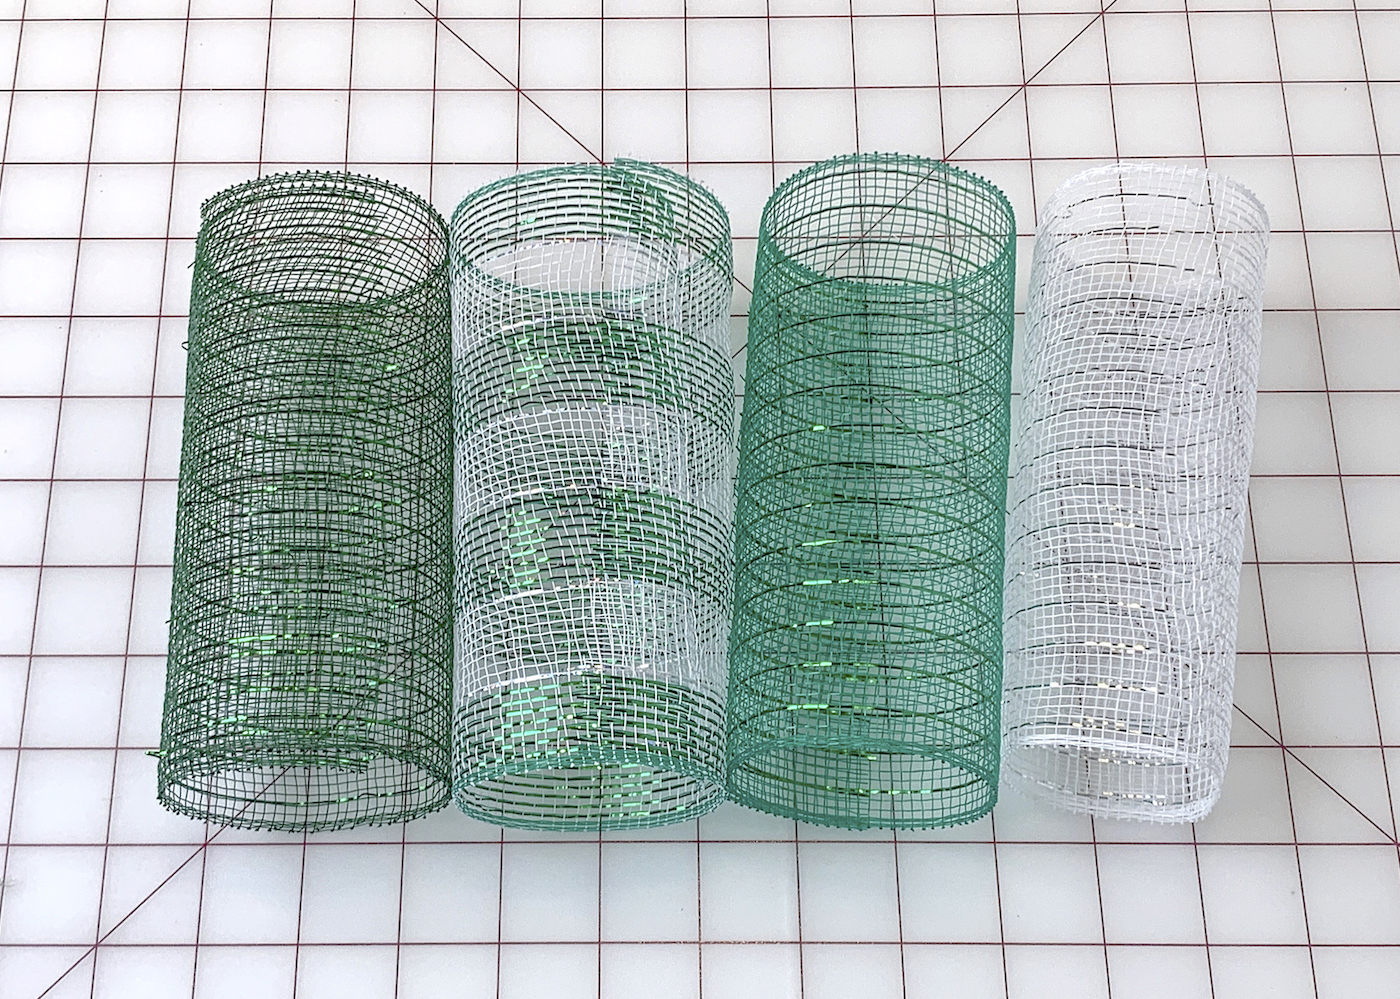
I usually start with about 15 tubes of each color because I know I’m going to need at least that many. Then I add as needed.
Cut the Pipe Cleaners
Grab the package of pipe cleaners and cut each one into four pieces. Honestly, you can use any color pipe cleaners – you won’t see them. I usually try to coordinate with one of the colors in my wreath or use white.
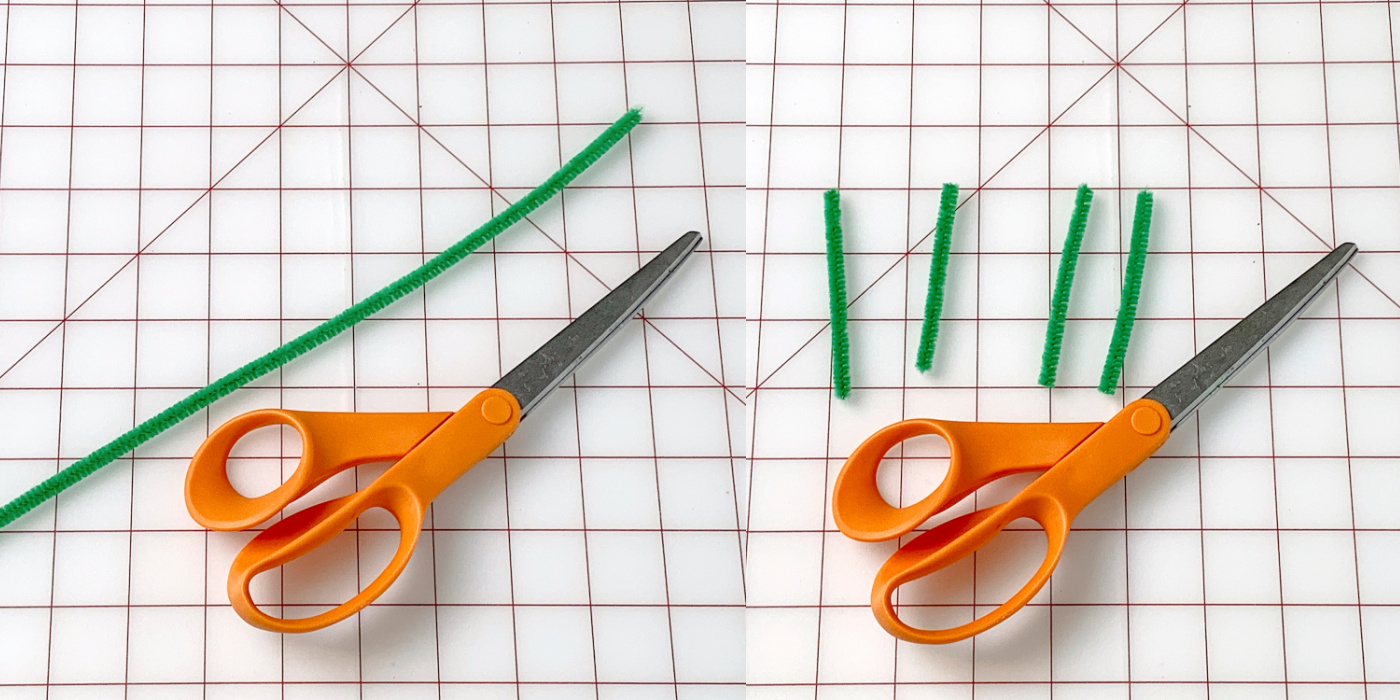
Just cut enough pipe cleaners to get you started.
Once you’ve got little stockpiles of mesh pieces as well as pipe cleaner pieces, grab the wreath form because you are ready to begin assembling your St. Patrick’s mesh wreath.
Attach the Mesh to the Wreath Form
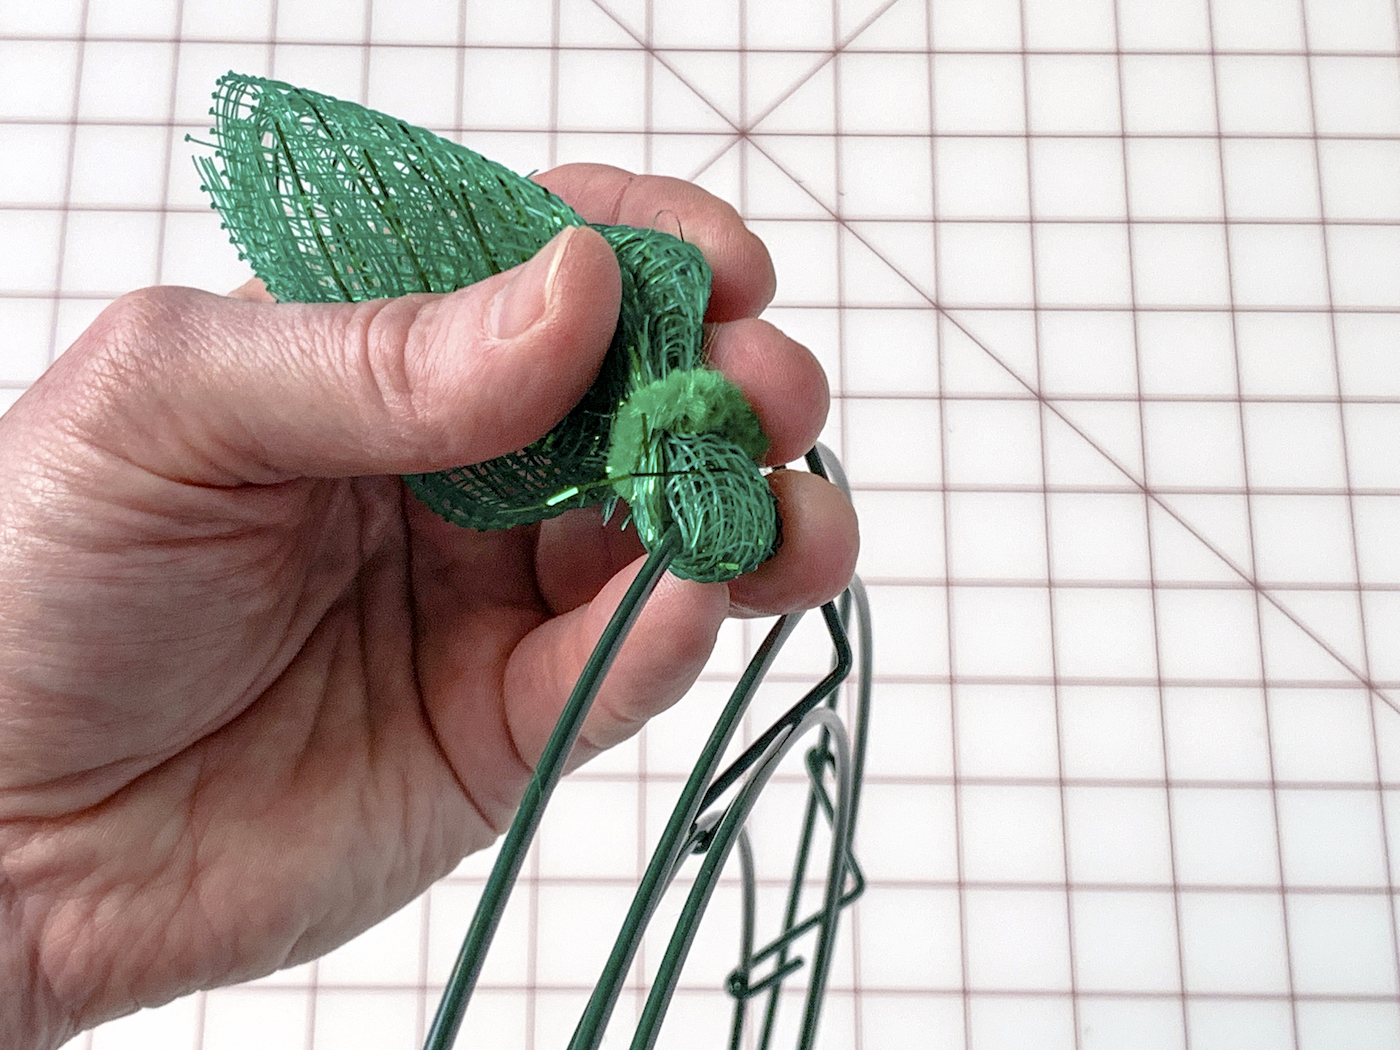
The process of attaching the mesh is really easy. You’ll start with a mesh piece and roll it into a tube. It should be relatively tight – you can see the image below.
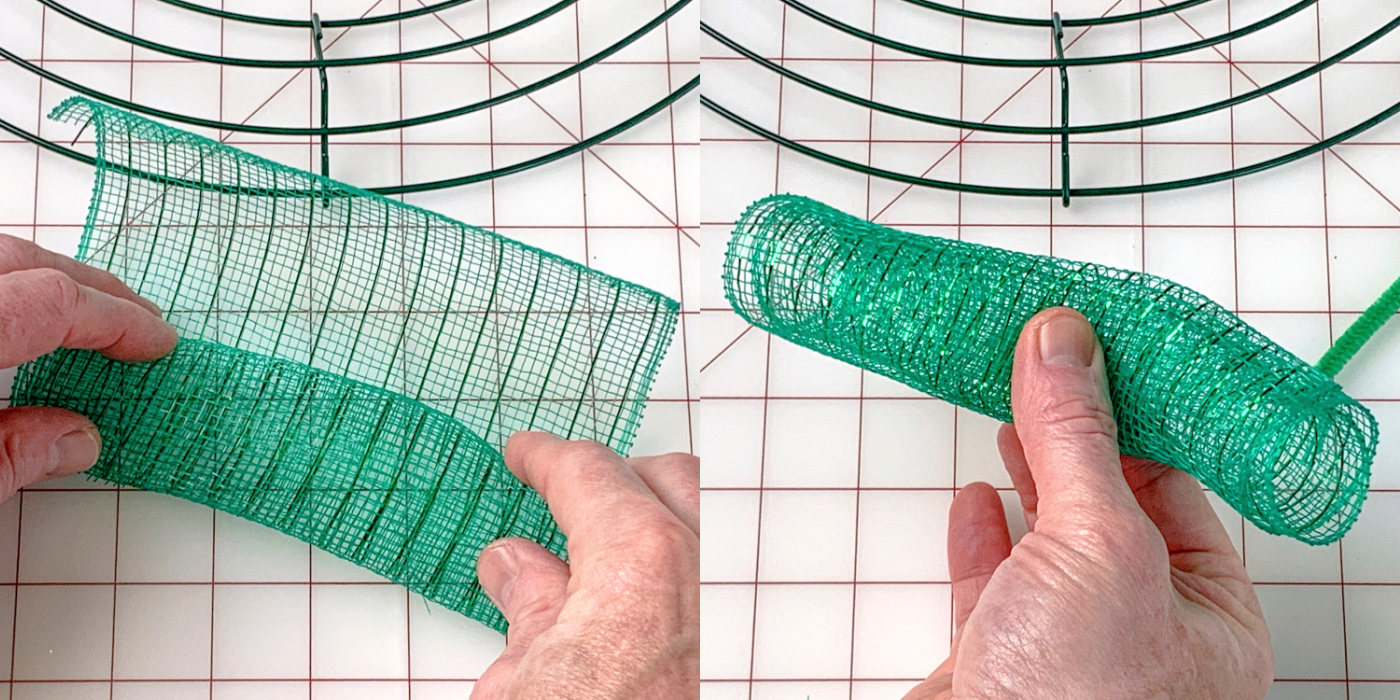
Hold the tube in one of your hands and pinch and twist between your fingers.
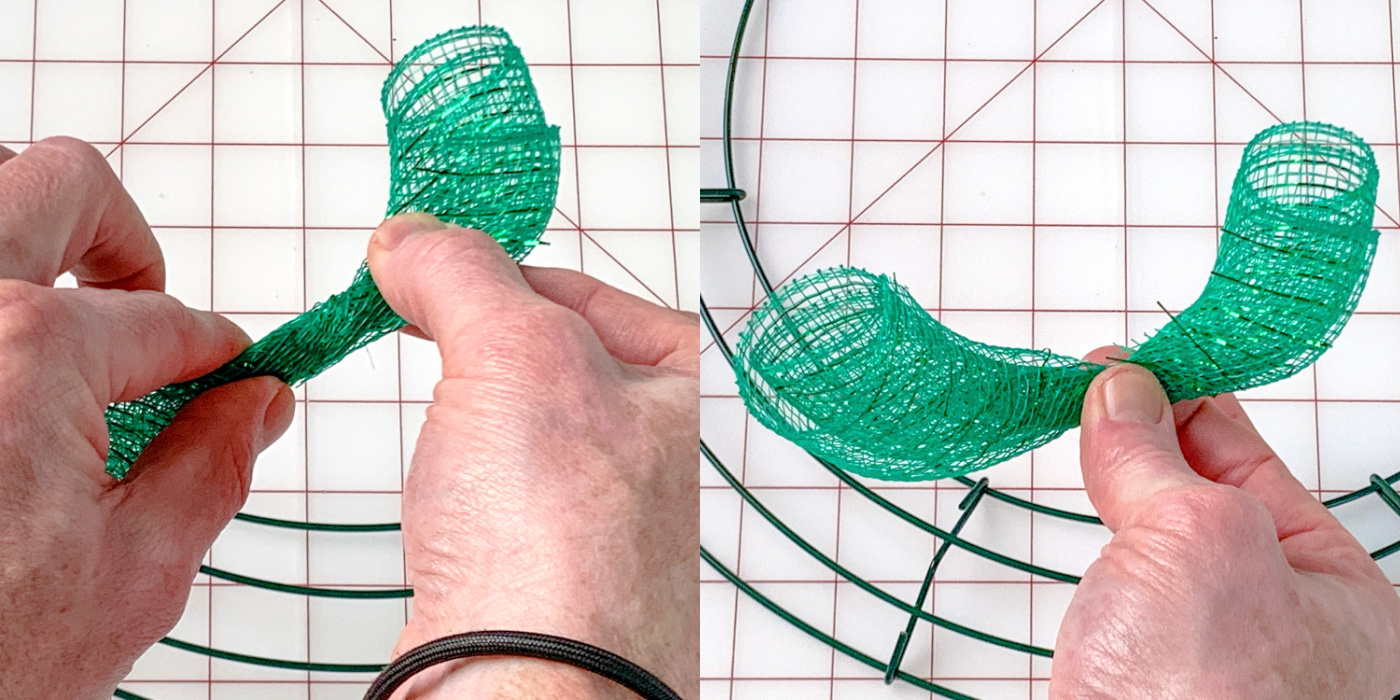
Wrap this tube around any spot on the wreath form. I recommend starting anywhere on the form, but towards the outside.
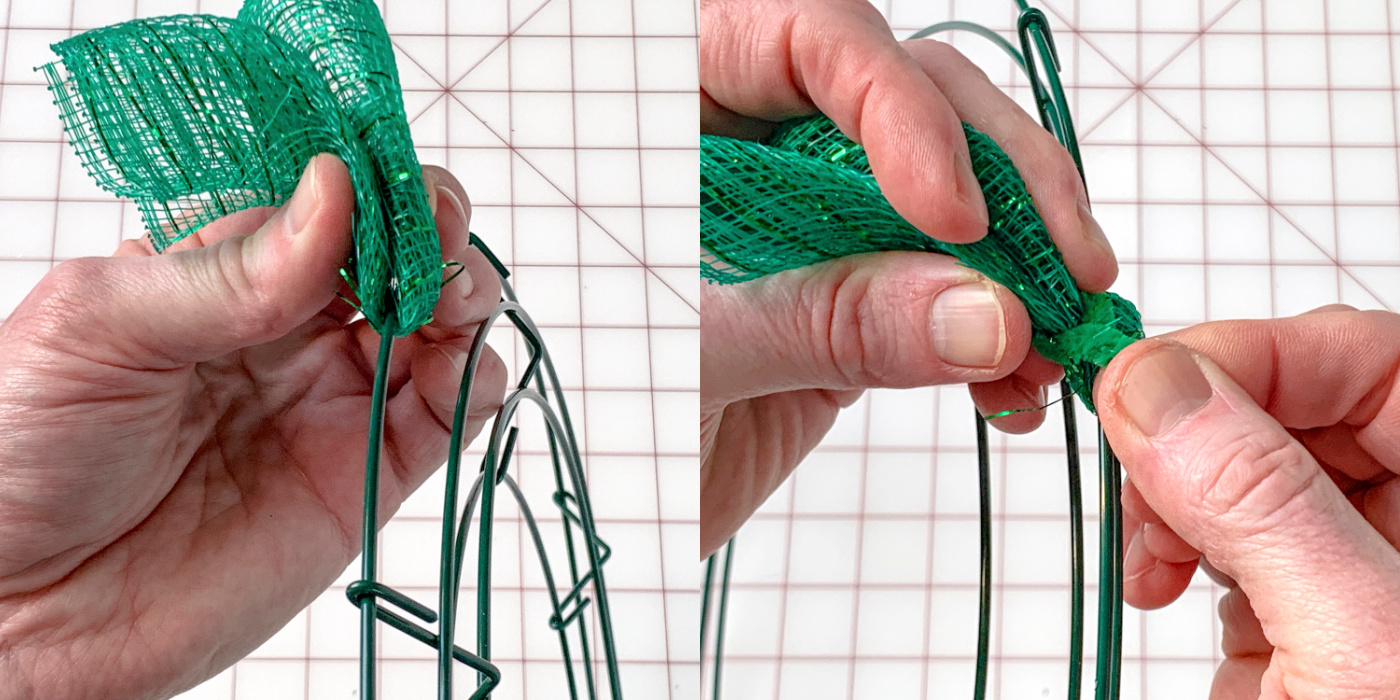
Bring the ends of the mesh around to touch each other, and then wrap a pipe cleaner piece around and twist.
You are going to repeat this above process over and over and over again from wire to wire until the wreath form is full. And that’s how it’s done!
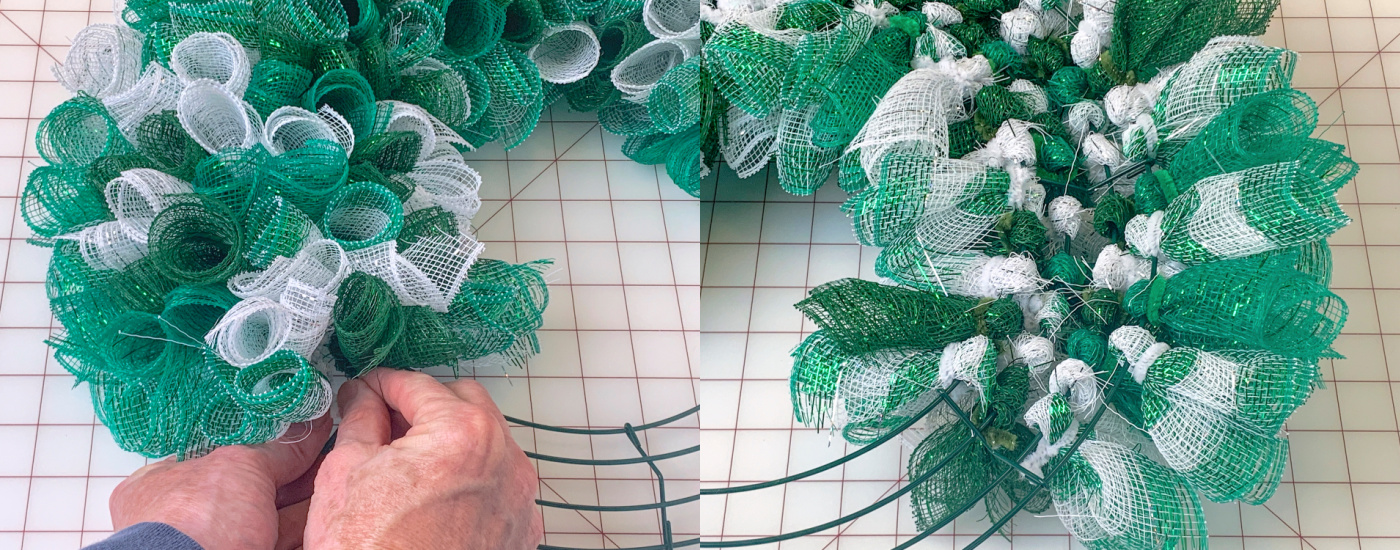
Once you select one color, keep working through the other colors and randomly placing the mesh tubes so the colors are spread out. This is what your wreath will look like as you add the curls. It will start to get very full:

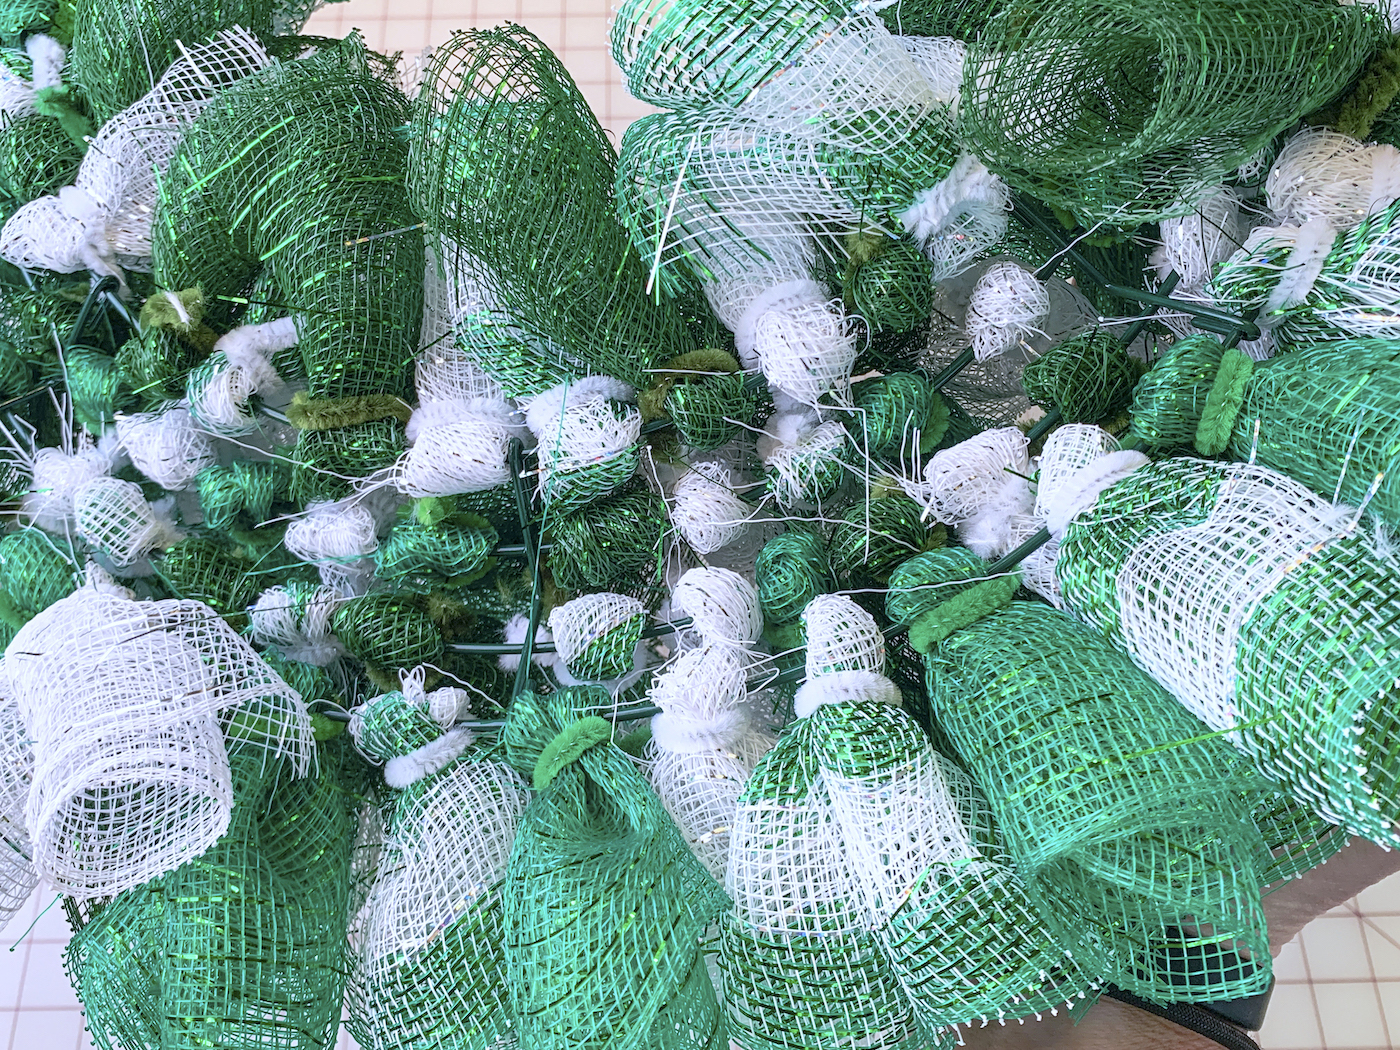
And for reference, here’s how it looks from the back. You can see how randomly I attached the tubes.
Continue working your way around the wreath form, adding tubes of mesh and securing them with pipe cleaners.
Usually I like to work from the center out, but it doesn’t really matter. You can start anywhere and just keep adding tubes. Notice where the sparse parts are and add mesh to fill in.
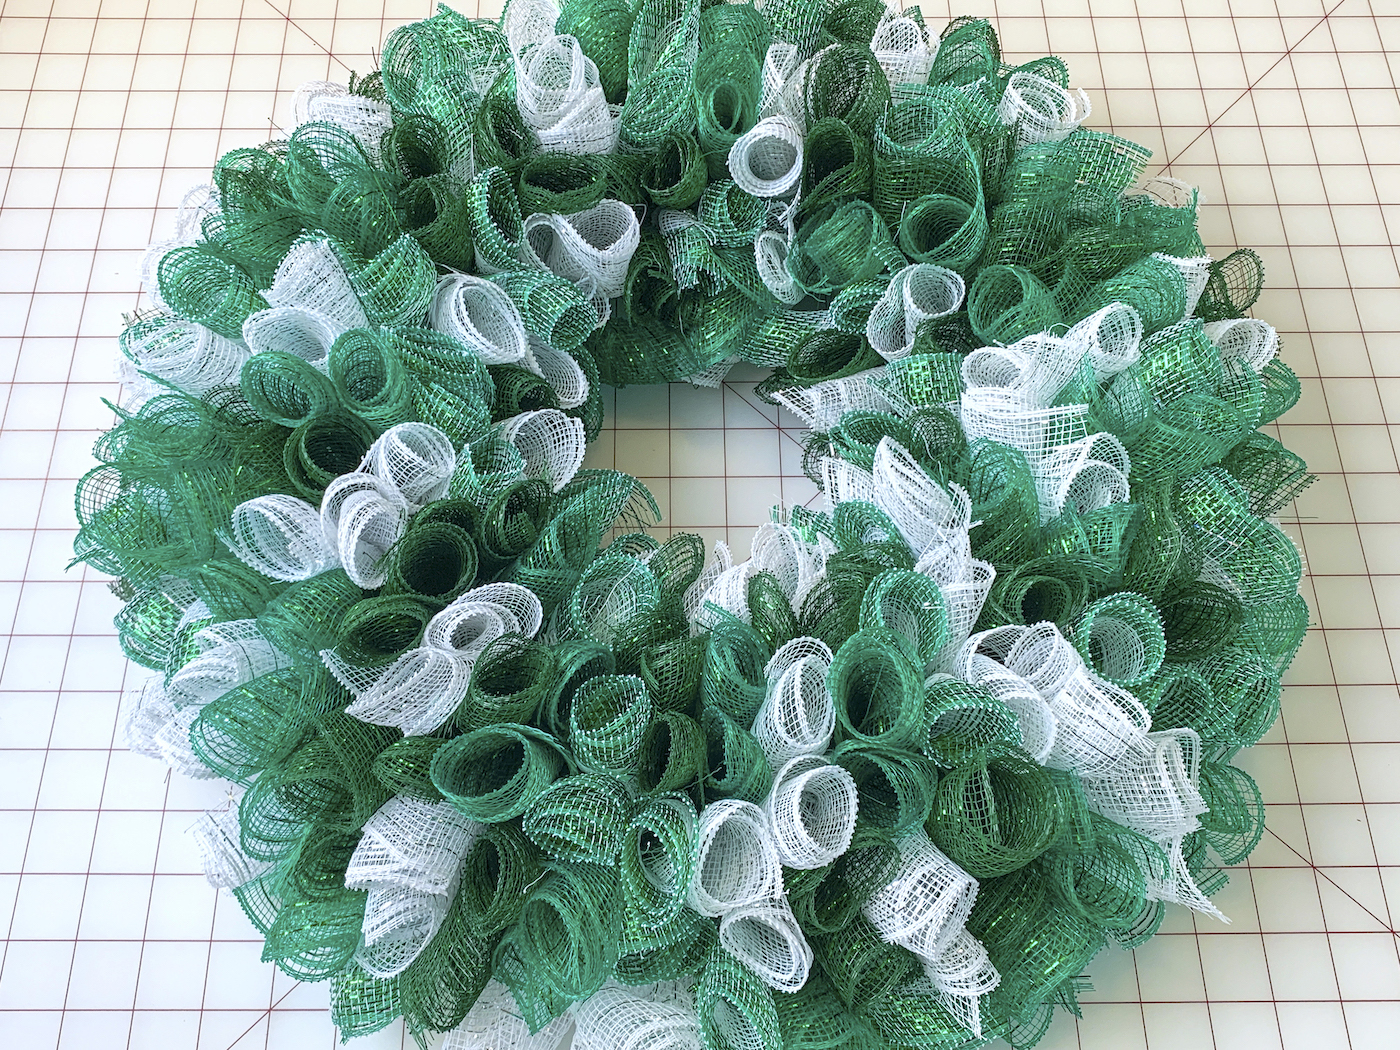
Finish the wreath by wrapping all the way around, and your St. Patrick’s Day wreath is complete.
THEN comes the hat and mustache. Here’s what you’re going to do.
First, you’ll draw a hat on the back of the green glitter foam, and a mustache on the back of the orange foam. You can use a Sharpie or pen. AND you can try drawing it as many times as you like because no one is going to see your pen marks!
Cut the hat and the mustache out. You’ll also want to cut out a band out of the black glitter foam as well as a square of gold glitter foam. Attach the black strip to the green foam hat with hot glue, as well as the gold rectangle (and another little black rectangle on top of that).
Hot glue both the hat and the orange mustache directly to the mesh on the wreath. Hot glue in several areas so it stays attached. Let cool and you’re finished and ready to hang.
Find a special place on your door – or wall – to place for the spring season! Here’s the video on how to make it:

Let me know what you think of this St. Patrick’s Day wreath in the comments! How else do you decorate for the holiday? I’d love for you to check out these other projects too:


I think your ST.Patricks Day wrearh is beautiful.Is there any other kind of wreath form that you use in place of the metal forms?
There’s something called a flower frame: https://www.craftoutlet.com/uitc-wreathing-board-16-flower-frame
This is about the only other thing you could use because you need several attachment points for the mesh. 🙂