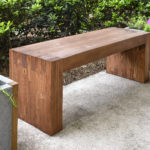
DIY Outdoor Bench: Stylish and Simple on a Budget
Build a stylish DIY outdoor bench with this easy tutorial! Perfect for your garden, patio, or backyard, and budget-friendly too. No nails or screws required!
Skills Required: Beginner. You’ll learn how to make a bench the easiest way possible. I believe the most difficult part of this DIY project is using a table saw, which isn’t really hard (take your time!).
Every porch or outdoor space needs a bench, at least that’s what Steve and I decided the other day. Actually Steve has had the concept for this beautiful bench in his head for a while.
He had looked around at garden benches and wanted to make something without screws and hardware . . . completely with adhesive.
Yet he had some other qualifications as well – the bench had to be modern, inexpensive, load bearing (no falling apart please), and look great. We also wanted it to be an easy woodworking project so anyone could do it.
This DIY outdoor bench project meets all those qualifications and more!
Here’s how this bench came about. It was quite a coincidence that we were flipping through a Williams Sonoma Home catalog the other day and found this Larnaca Outdoor Coffee Table that looks somewhat similar . .
yet has one BIG difference. The Larnaca coffee table costs $1,295, while Steve’s version is $35. Now, ours is outdoor seating while the Larnaca is technically a coffee table, but the idea is the same. You can always modify the size of this DIY outdoor bench to fit your desired specifications.
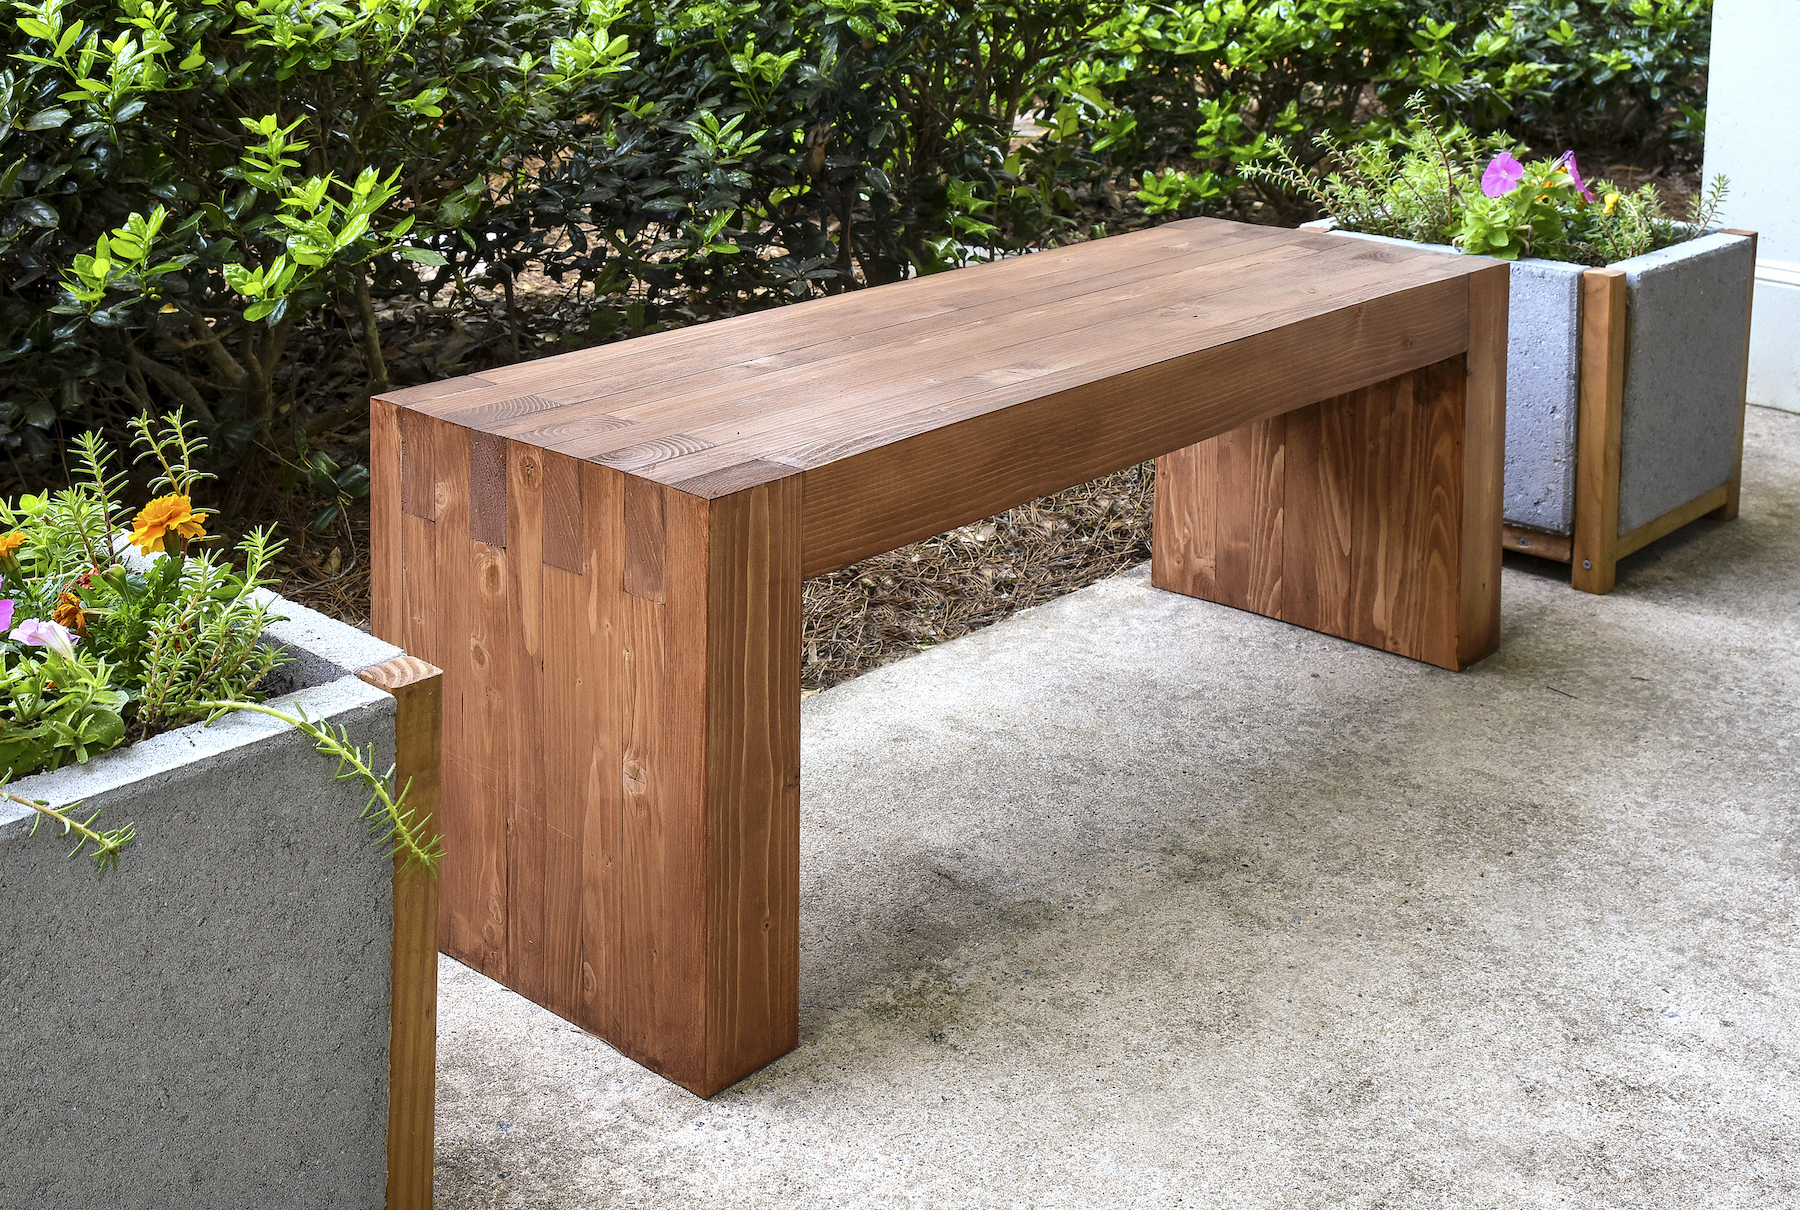
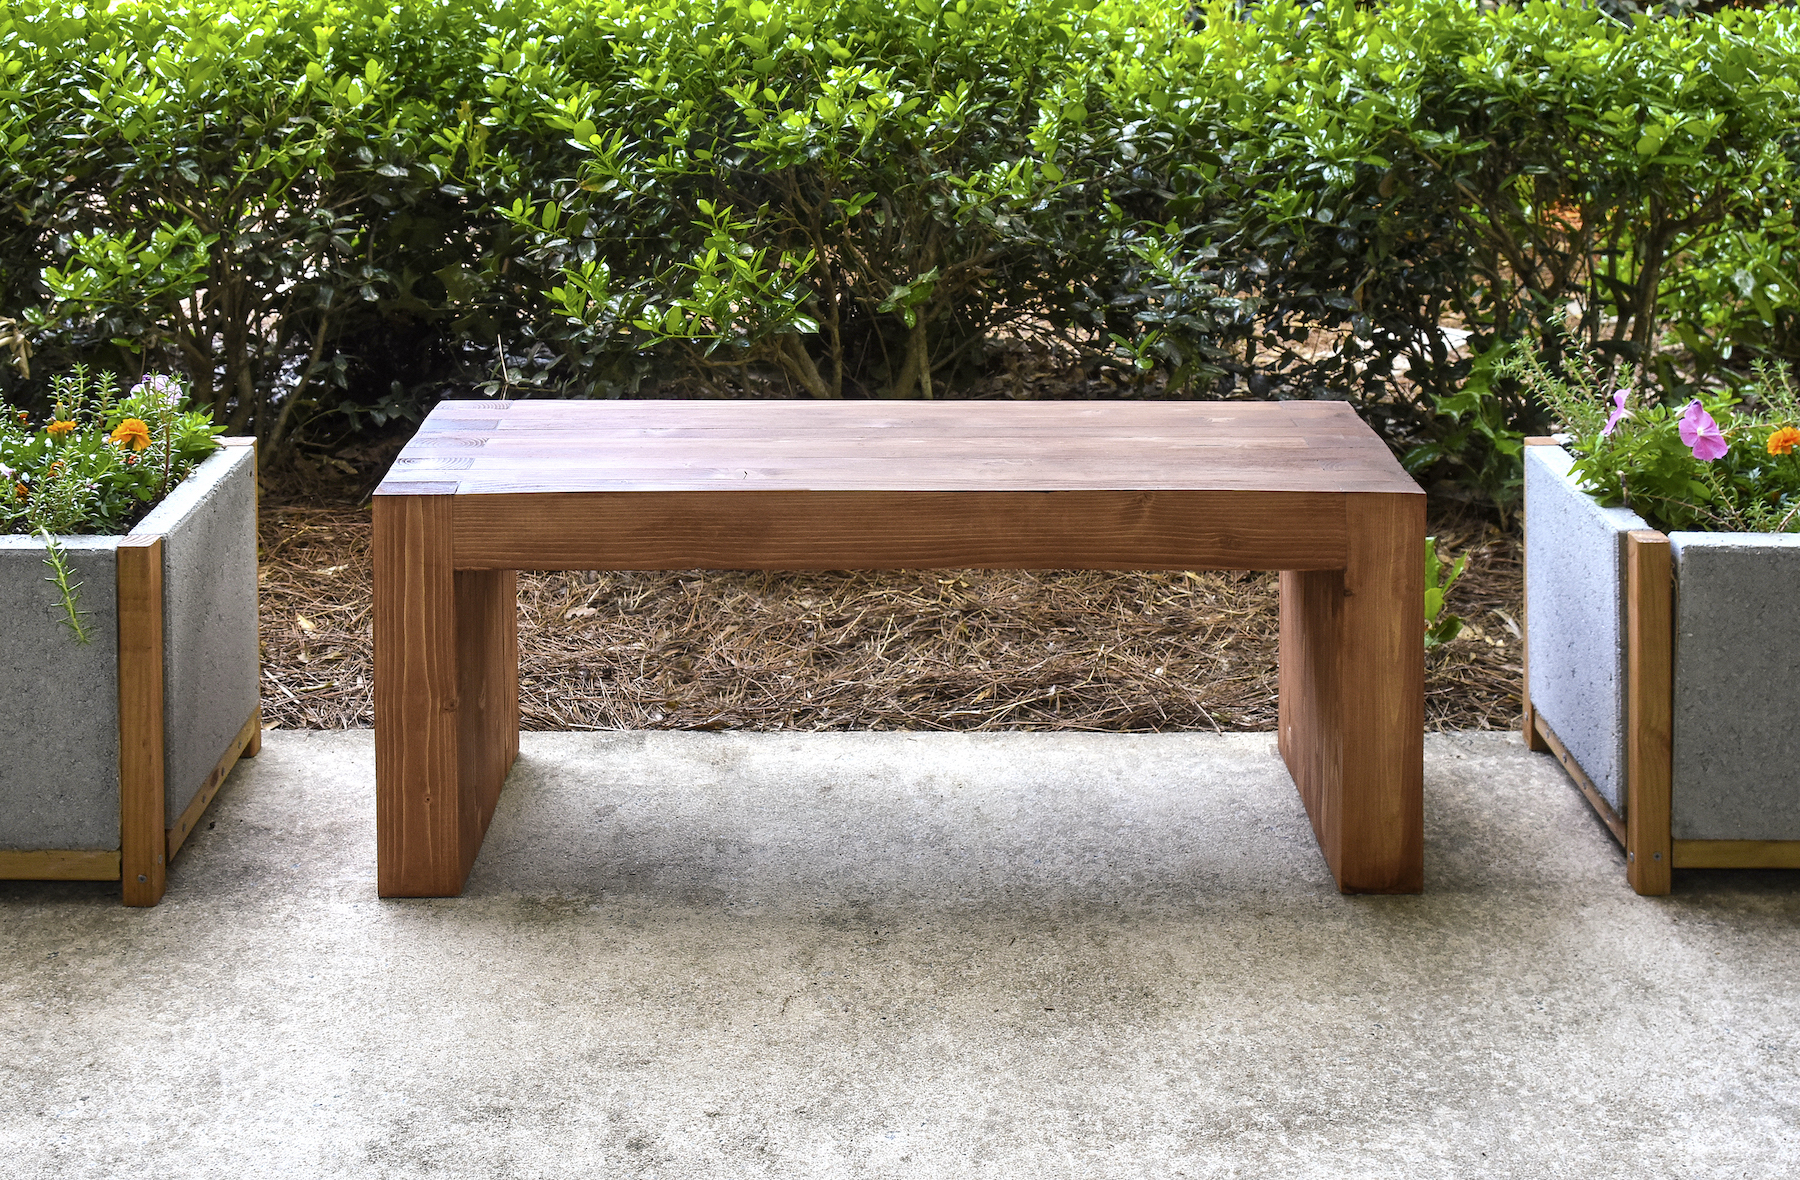
So here’s how to build this bench, with a finished size of 16″ high x 40″ long x 13.5″ deep. You’ll find that building a bench is much easier than you think! Here’s how we built this piece of furniture.
Gather These Supplies
- Regular 2 x 4s – pine, not pressure treated (see Cut List below; also you may want to use pressure treated wood if your bench is going to be exposed to the elements, though it is more expensive)
- Exterior grade Liquid Nails or Titebond III (or other construction adhesive made for wood)
- Bar clamps
- Thompson’s WaterSeal and Stain (Nutmeg)
- Paintbrush
- Rag
- Table saw
- T-square – or something to make sure edges are square
- Hand held belt sander with a 80-grit and 120-grit
- Sanding blocks – 80-grit and 120-grit
- Surface protection – cardboard box, tarp, etc
- Optional – drill and four feet if you don’t want the bench to touch the patio or ground directly
Cut List – you might notice that the measurements don’t quite add up – this is because the ends were milled off and sanded to get the resulting finished size bench.
- 33.5″ long (five pieces)
- 40″ long (four pieces)
- 16″ long (ten pieces)
- 12.75″ long (eight pieces)
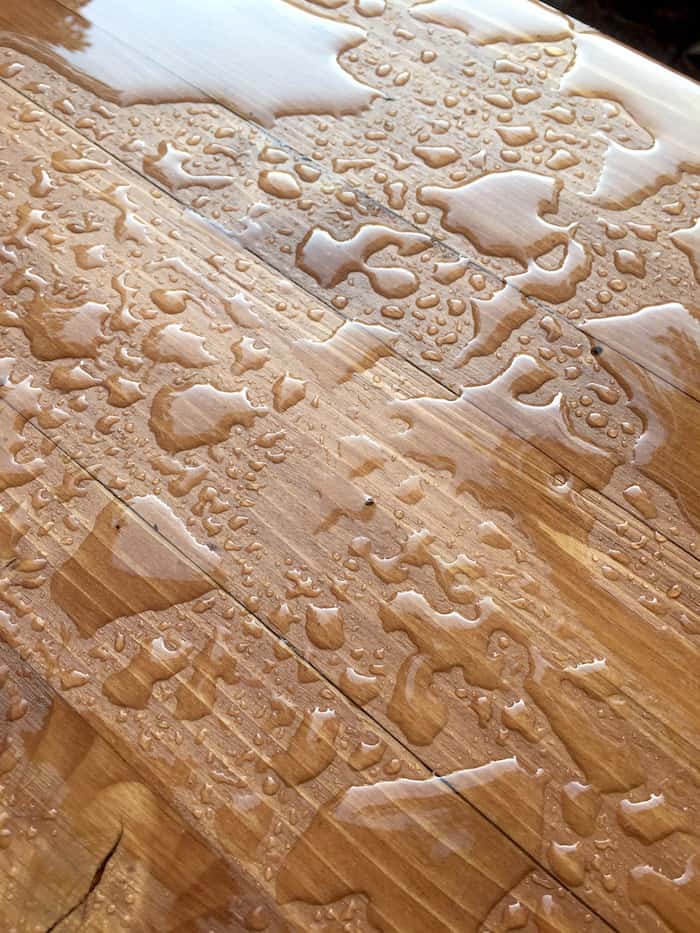
We already had a rain here so I also wanted to show you how well the stain works – the water just pools on top and comes right off . . . no soaking into the wood!
We hope you enjoy our DIY outdoor bench! The printable tutorial is below. Also I keep getting questions about the planters – I did make those as well! Find them here.
DIY Bench
Equipment
- Bar clamps
- 1 Belt sander
- 1 T-Square
Materials
- Regular 2 x 4s – pine see cut list in notes
- Wood glue we used Titebond III
- Thompson's WaterSeal
- Rag(s)
- Sanding block 80-grit and 120-grit
- Cardboard box or other surface protection
Video
Instructions
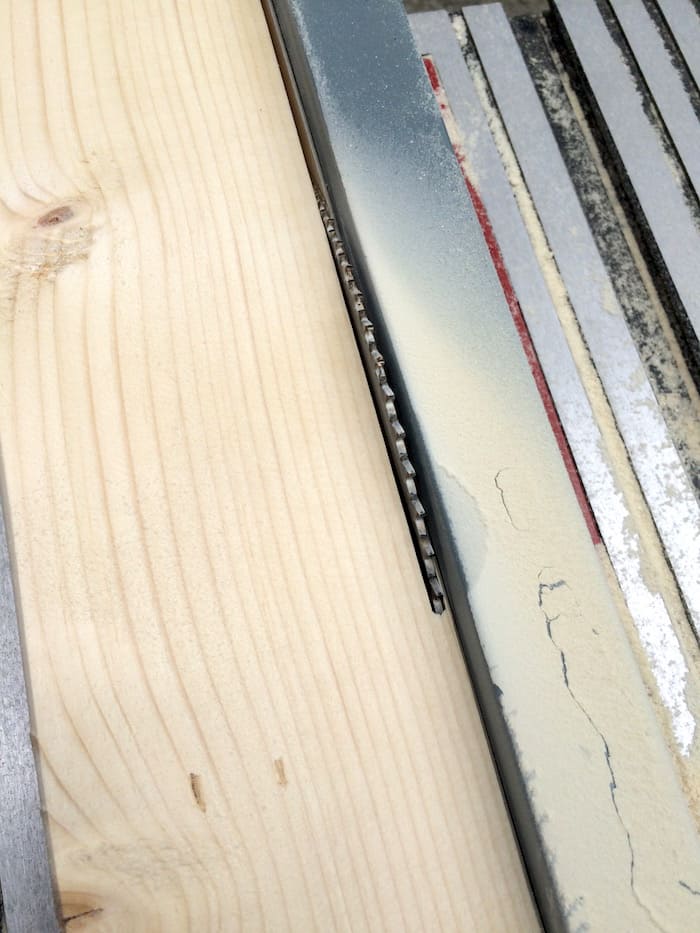
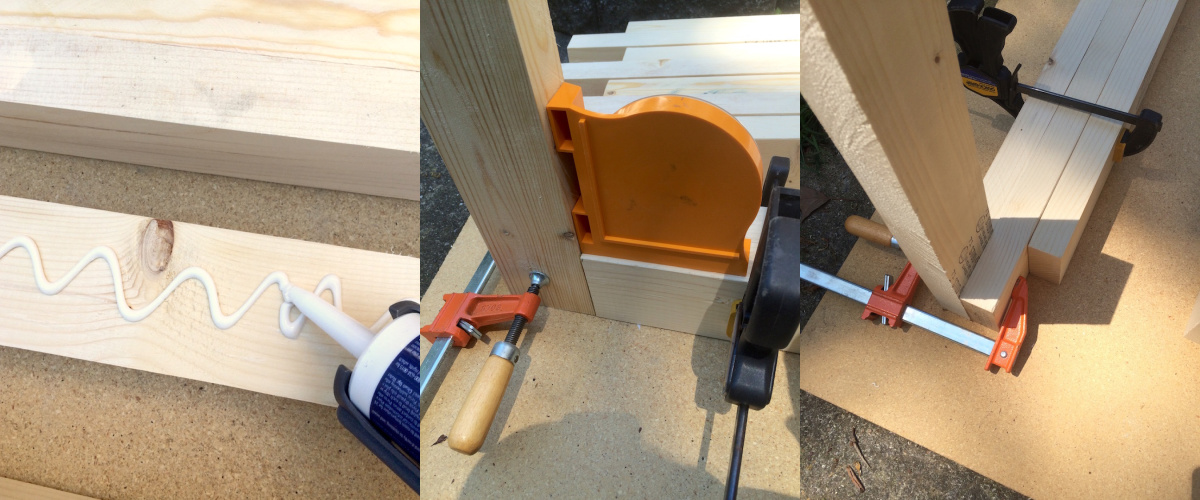
- Using the table saw, “mill” the 2″ edges of every piece of wood so that you get a very square edge (as opposed to the rounded edges that come on a 2×4). This will give your bench a more modern look.
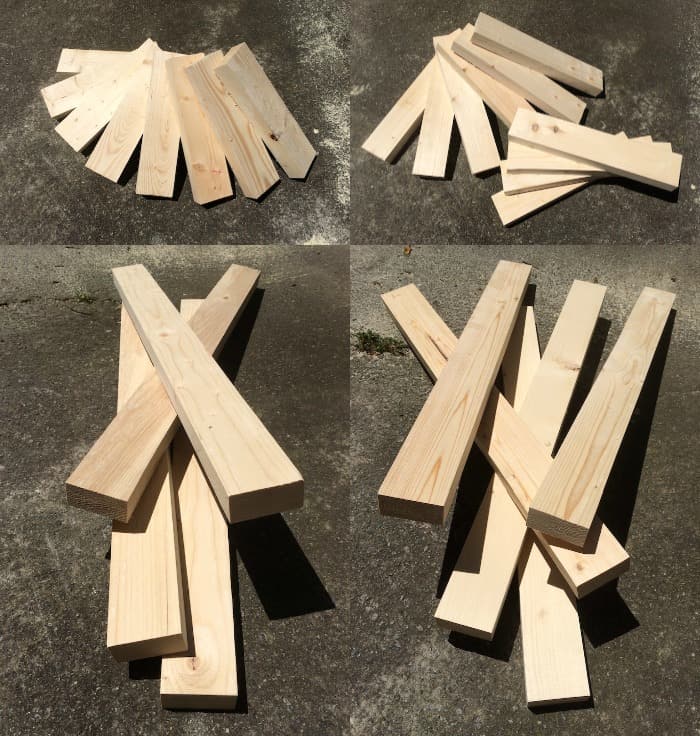
- Cut the pieces of wood according to the cut list in the notes. Keep in mind, these measurements produced a finished bench that is 16″ high x 40″ long x 13.5″ deep . . . AND a little extra was left for the milling and sanding process. If you want to customize the size of your bench, you’ll need to adjust these cut lengths.
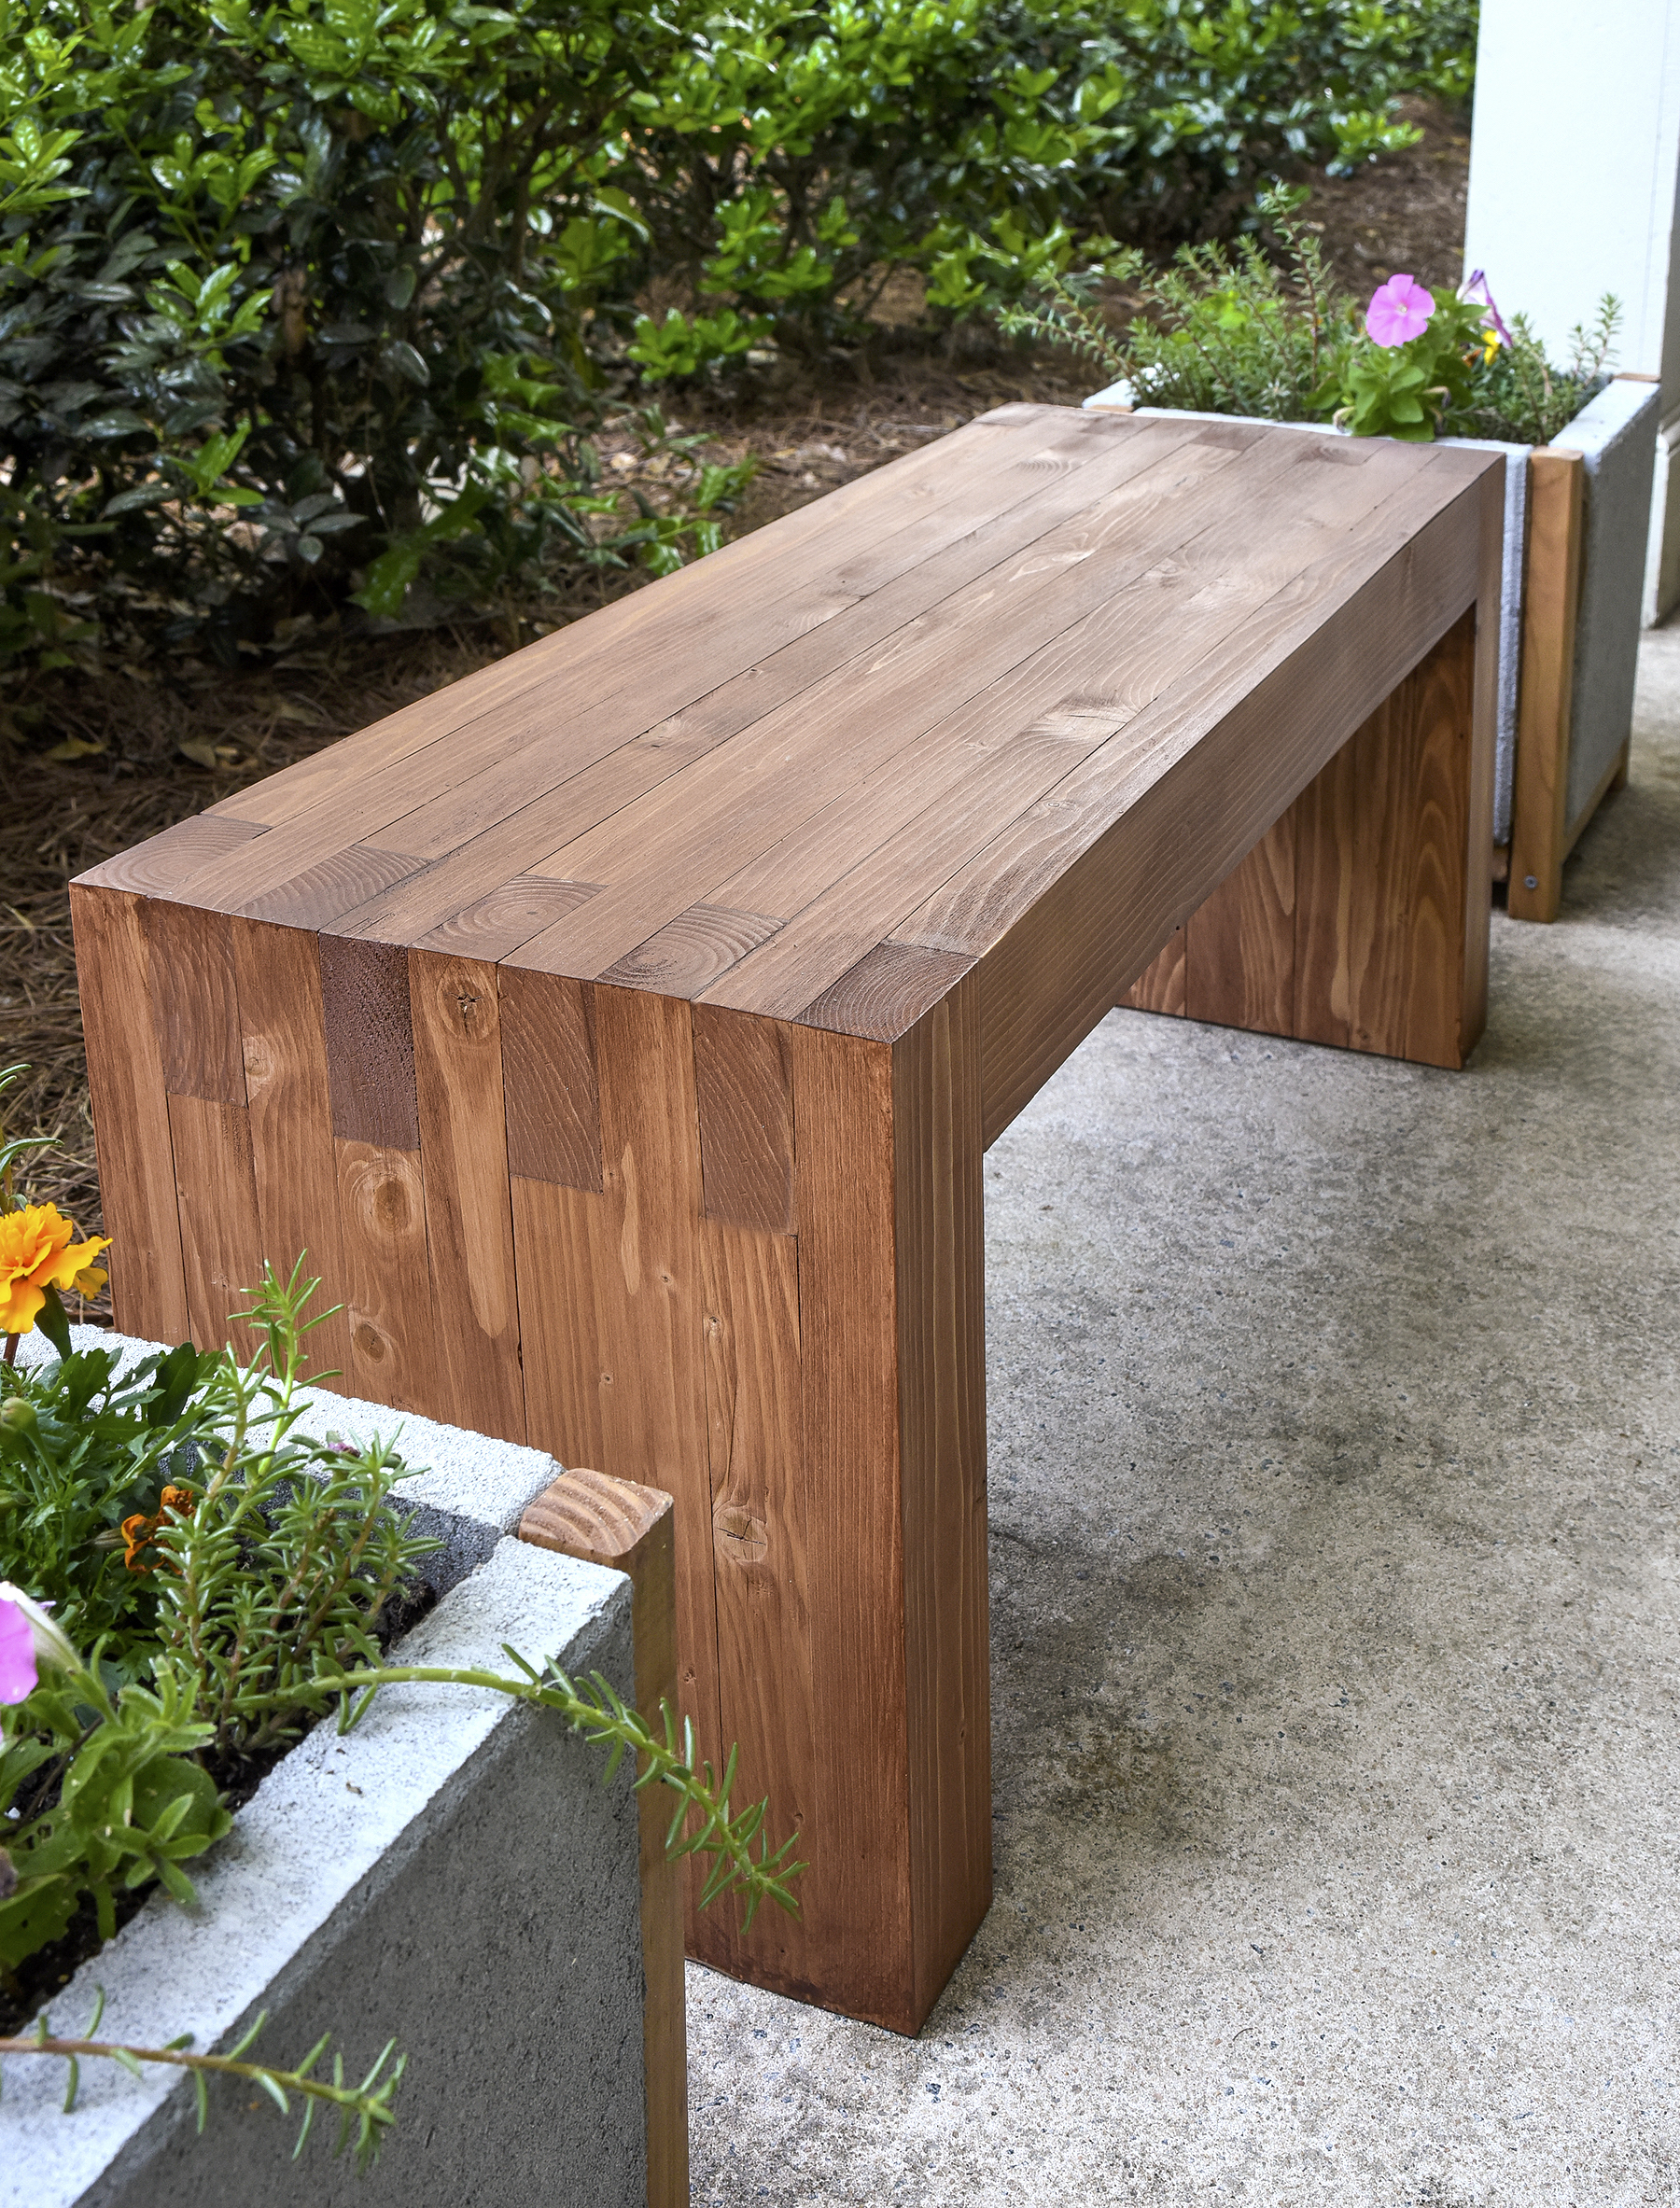
- Use your pieces to create a box joint. Place a 40″ piece of wood on the ground, with a 33.5″ piece in the center. On each end, you’ll place a 16″ long piece perpendicular to the other two pieces, as shown in the photo above. Make sure everything is even and as flush as possible (and use a t-square or other item if necessary to for a right angle), then glue into place and clamp.
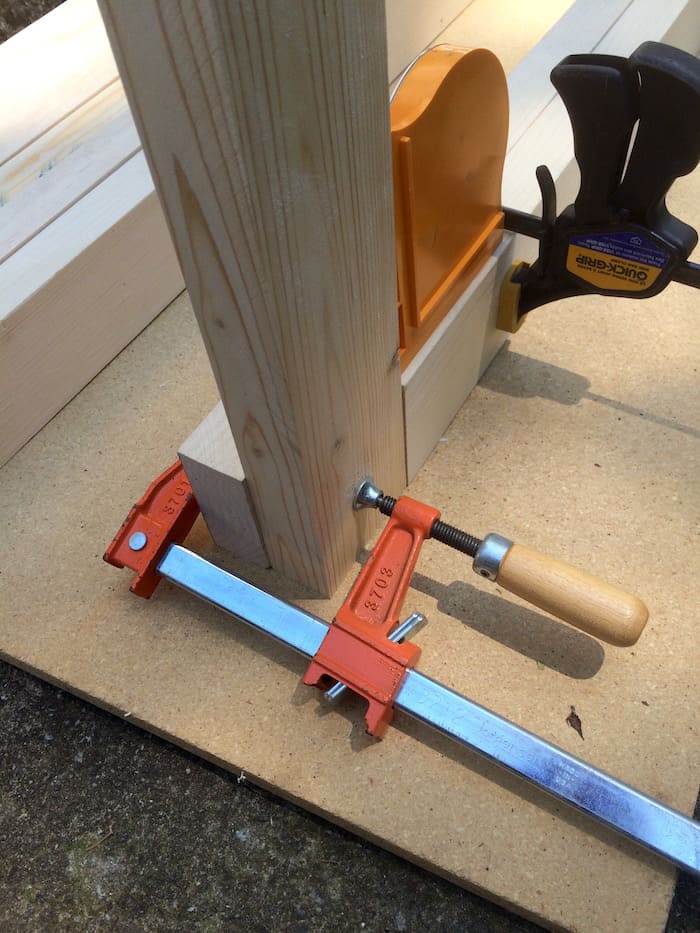
- Add Liquid Nails to the wood, setting it up in your pattern as shown in the final image then adding clamps to hold it together. Remember that you’re doing a modified box joint, so you’ll have one long piece of wood, then one short piece, then long, then short, and so on.
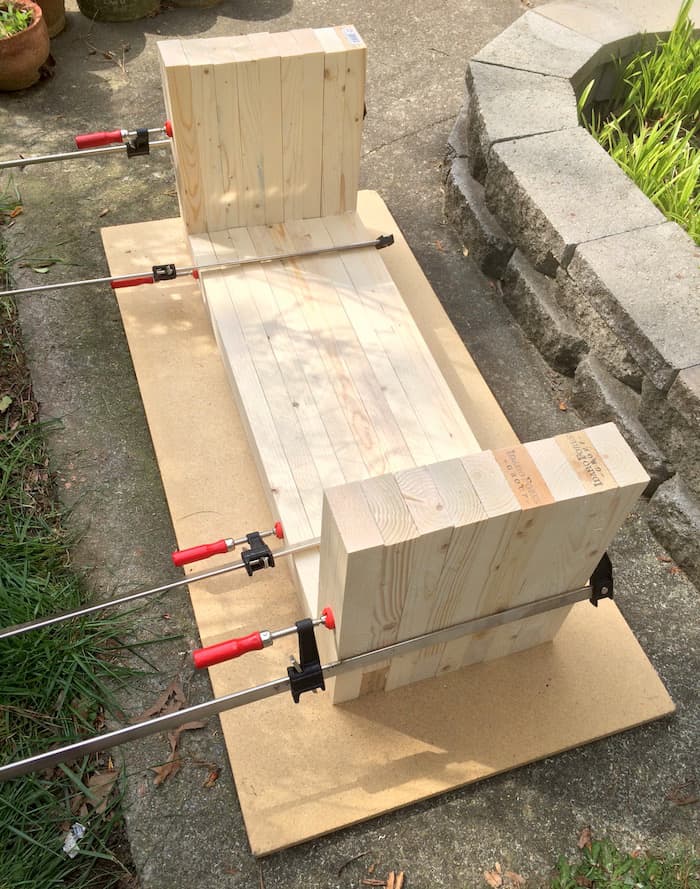
- Once your bench is full assembled, keep it clamped and let it dry overnight.
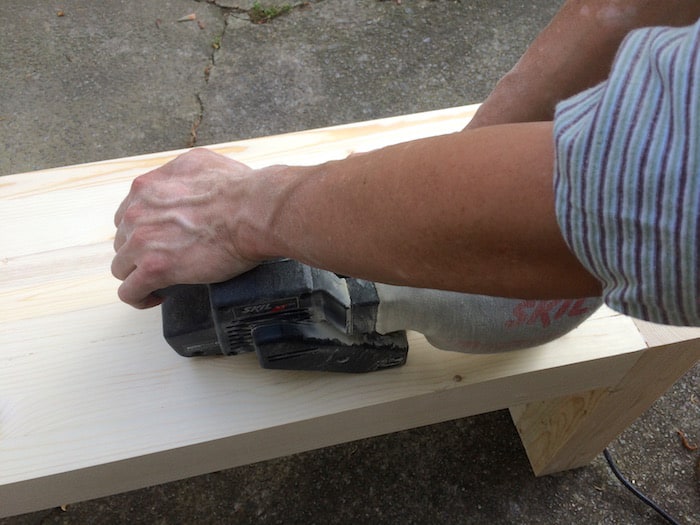
- Undo the clamps and sand with the belt sander to get everything even. Don’t forget to sand with the grain! Sand until it’s completely smooth and flat. Do this on the legs, too. Then wipe away all of the sanding dust.
- Use stain to paint the bench. Applying stain is relatively easy. You can use a brush, paint it on, then wipe it off. Seal with Thompson's Water Seal.

- Add furniture feet to keep your bench off of the ground. Drill a hole, insert the foot, and repeat on all four corners of the bench bottom.

Notes
- 33.5″ long (five pieces)
- 40″ long (four pieces)
- 16″ long (ten pieces)
- 12.75″ long (eight pieces)
- organize the pieces of wood without gluing FIRST so that you understand how the bench goes together;
- begin at one end of your bench and start assembling with the Liquid Nails, using the clamps as placeholders as you go along;
- continue add Liquid Nails, wood, and increase the size of your box clamps until the bench is fully assembled
What do you think? If you have any similar projects or if you’ve done something like this and would like to share your tips, we’d love to hear them in the comments! Thank you!
If you love DIY benches, I’ve got another one you’re going to want to check out: Crate and Barrel Inspired Entry Bench. AND if you want to see another inspired knockoff we did – check out our West Elm DIY coffee table. We made it for $45 . . . original price of $999!


Amazing!!! I will definitely gonna try this…
I just built a table version of this design and it turned out great. Super design and easy to follow instructions. I wish I could share a picture of my table. Thank you.
I’d love to see it!
Hi Jose, can you post pictures? What were the dimensions? I want to use this design to create tables as well!
I love how you painted it darker. Great DIY project, thank you!
Can you turn your bench into a counter top table for a kitchen…36Hx48Wx24D? How heavy would that be? Thank you.
Hi Jeannie! Honestly I have no idea! I’m sorry – we aren’t experts at woodworking so I don’t know how to answer your questions.
How many 2×4 do you need in total
Amazing, Thanks for this amazing project.
90x45mm DAR pine is about 25AUD for 2.4m and i think i need 11 of them which pushes the price up.
Any recommendations for cheaper material?
I have made to of these benches and absolutely love them. Great job on coming up with the design. I had to let you know that someone else has posted your work and had no given you any credit.
https://www.youtube.com/watch?v=Sk27faHa90w
I found this video on youtube and it contains all of your pictures along with a link to their site that contains all of your directions. I hate when people don’t give credit where credit is due.
Thank you so much Daniel! And I reported that person’s video and his blog post. I appreciate you letting me know . . . and so glad you love your benches!
Great bench. Will certainly try this project. Question: did you also back the concrete/wood planter box? Seems a rather unique design. Would like to find out about that one if possible.
Hi Joshua! Those are on my other blog 😀
https://diycandy.com/paver-planter/
Hope it’s okay, I linked to your post on my blog post at
Great tutorial, thanks for sharing!
I was thinking, would you be able to use a jointer to square the edges of the 2x4s and just do 1 or 2 1/8 inch passes on each side if your table saw is broken and you don’t have a track saw?
Thanks
– Sam
Steve has never used a jointer; however, we looked at one and he said yes. As long as it takes off enough material to get rid of the rounded edges of the 2 x 4.