Nautical Flag Sign That Says Home
Create a unique nautical flag sign that says “Home” using the nautical alphabet and bold tape! This is an easy craft and makes great decor or a gift.
Skills Required: None. You’ll be measuring a background with a ruler and cutting tape to make squares. You’ll layer the tape as well. The process is relatively easy no matter the size you want to make your project.
Have you ever seen the show Southern Charm? It’s a reality show (I know, I know) about living in Charleston, SC and I’m hooked. There’s always a lot of drama on Southern Charm, so it’s the perfect thing to have on in the background while crafting.
And, as it turns out, it’s also the perfect show to get inspiration for nautical style and home decor. And one thing that really piqued our interest on a recent episode was when one of the characters Cameran bought a housewarming gift for a friend in the form of a nautical alphabet flag:
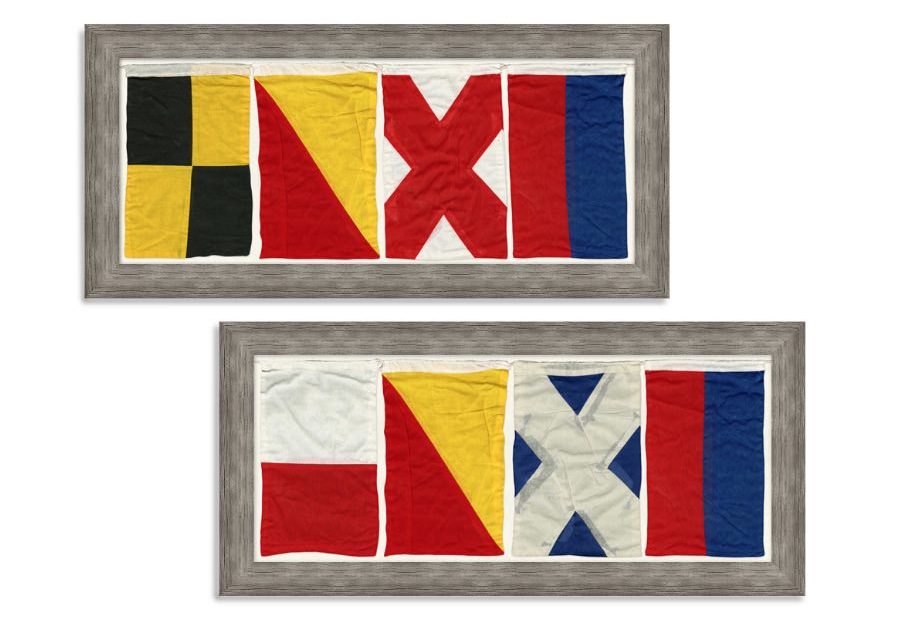
The nautical flag signs above are from Bed, Bath & Beyond (long discontinued) and very similar to what I saw on the show. The top sign says “LOVE” and the bottom sign says “HOME” in nautical alphabet flags.
And the moment I saw Cameran give one of these signs as a gift, I said these seven important words out loud:
“We could do that with Duck Tape!”
I realized very quickly that it wasn’t just a pipe dream. I could totally do this beach decor project in Duck Tape! I have a lot of colorful tape around here, so I already had the colors I needed. The only thing I didn’t have was a frame, so I decided to head to the craft store the next day.
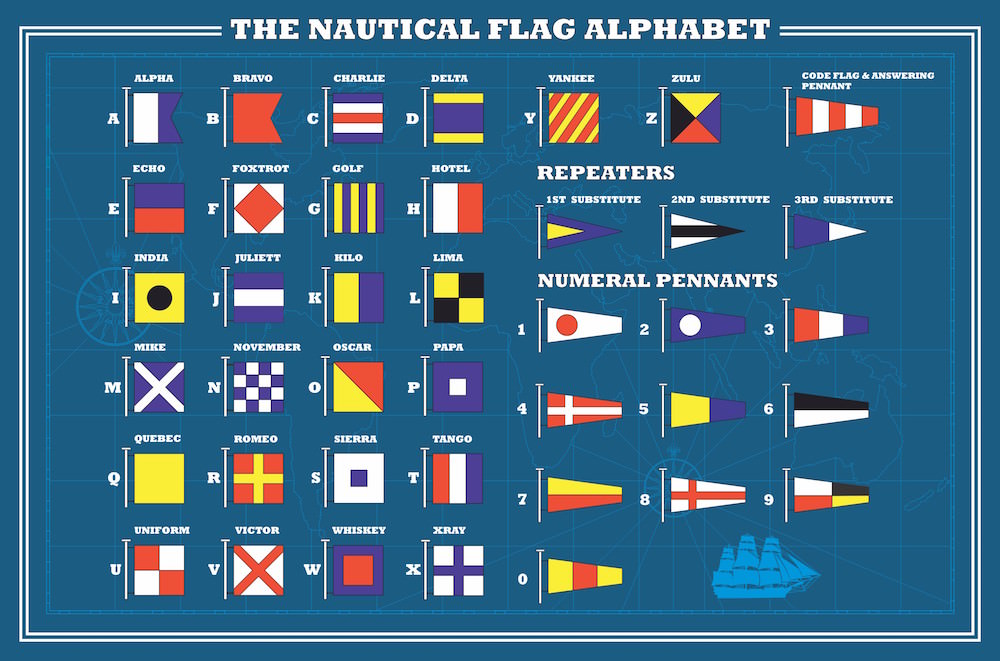
Something kind of funny: in between the time that I saw the nautical alphabet sign on Southern Charm and went to the craft store, I forgot the designs that were used – so I had to look up the nautical flag alphabet so I could be sure I used the correct flags.
I’m sharing the alphabet with you below so you can use it for reference . . . and perhaps you want to spell something different? Wouldn’t a name be fun in a nautical themed bedroom?
Or maybe there’s another word that you’d like to use. Once you see this Duck Tape method, you’ll quickly realize that you can customize this DIY sign any way you like.
My favorite part of this project (and for a lot of nautical items in general) is the bold primary colors. This is a great way to make a DIY sign that people will notice, and I guarantee you’ll get folks asking what it means.
For those smarty pants who already know how to ready nautical flags and can tell you what your sign means – bonus points for them!
Are you ready to learn how to make it? Keep reading!
DIY Nautical Sign
Gather These Supplies
- 12 x 36″ wood frame or surface
- Duct Tape in the colors needed for your flags – we used Black, Blue, Red, White, Yellow
- Craft mat
- Ruler
- Craft knife
- Washi tape (for taping out areas)
- Pencil
Picking a Surface
We were able to find a 12″ x 36″ framed piece at JoAnn with a white background and a total crafting area (excluding the frame) of 10 1/2″ x 34 1/2″.
This was in the seasonal section, and I realize that you might not be so lucky to find the exact surface we used. Here are my recommendations for options/substitutions:
- Cut a piece of wood to 10 1/2″ x 34 1/2″ and paint it white (no frame)
- Purchase a 12″ x 36″ frame and flip the paper or backer that comes with it so you have a white surface
- Purchase a 12″ x 36″ canvas (I’d still paint it white so the tape sticks better)
- Alter the size of your flags to fit a rectangular surface of your choosing
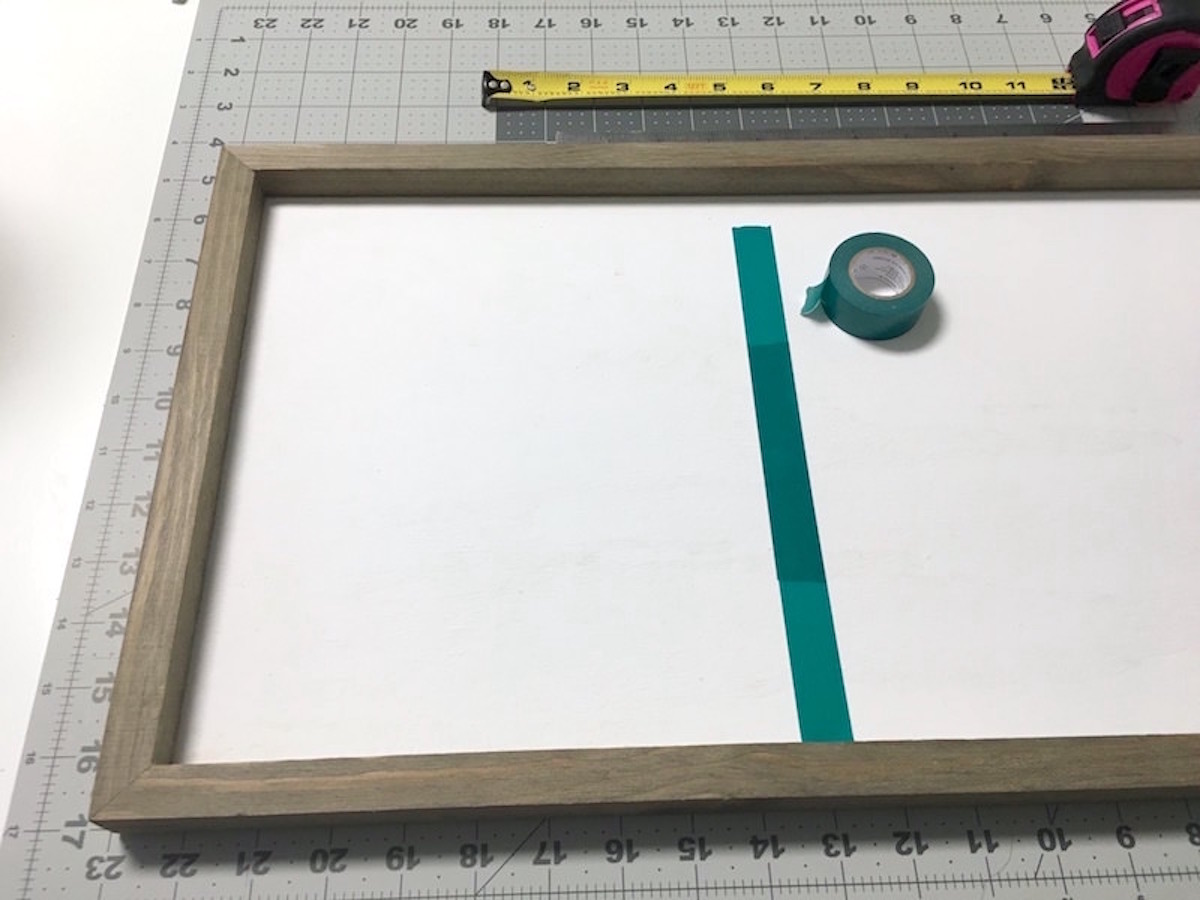
Your first task is to divide your frame, board, or surface into the correct number of quadrants or sections.
Our total length across was 34 1/2″. We decided to do four 7″ squares for a total of 28″ of taped area. Between each flag we allowed for a 1.5″ width, and on each end we placed a 1″ border. The results:
28″ + 4.5″ total between flags + 1″ on the left border + 1″ on the right border = 34.5″
This method should allow you to come up with appropriate calculations for your project. Then you’re going to begin cutting your Duck Tape nautical alphabet flags.
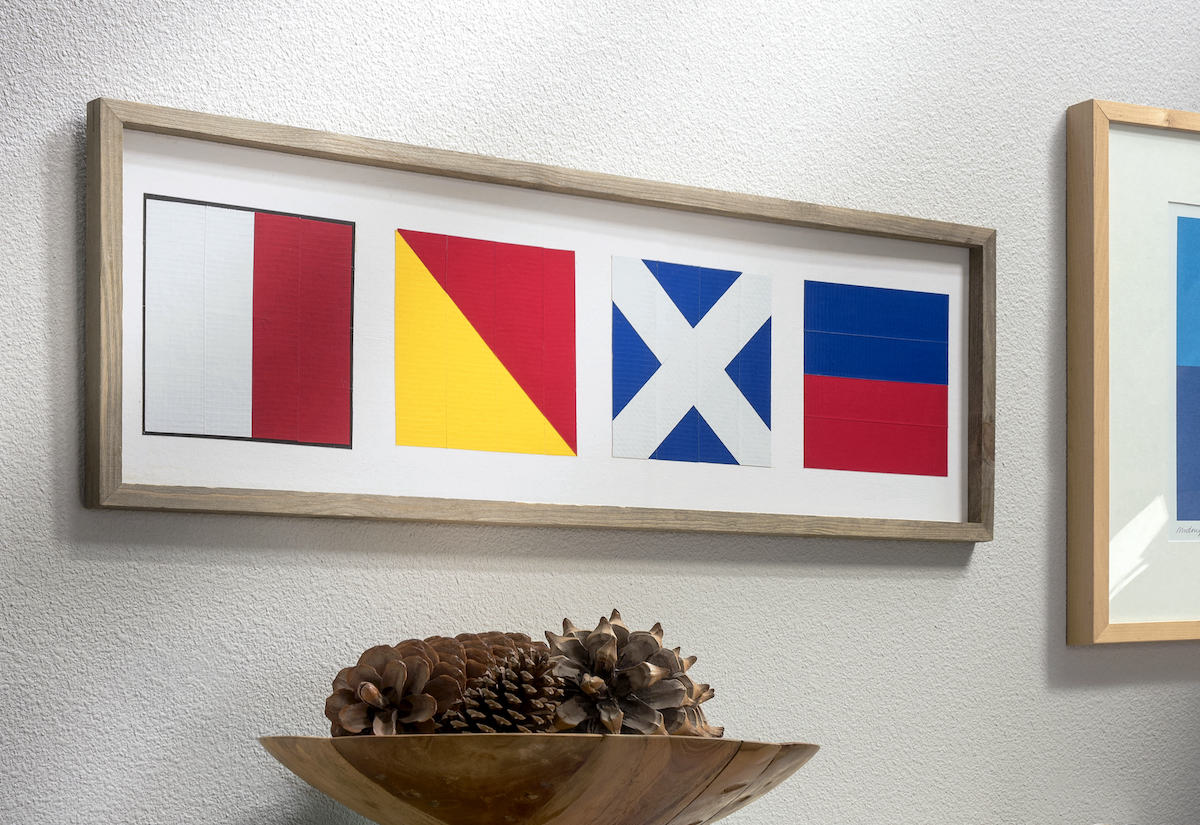
The first flag for our sign was for the letter “H”, which is a square with half white and half red. Given that the background of our surface was white, we realized we had a bit of a challenge with making the white portion of the nautical flag show up. You may also run into this same challenge.
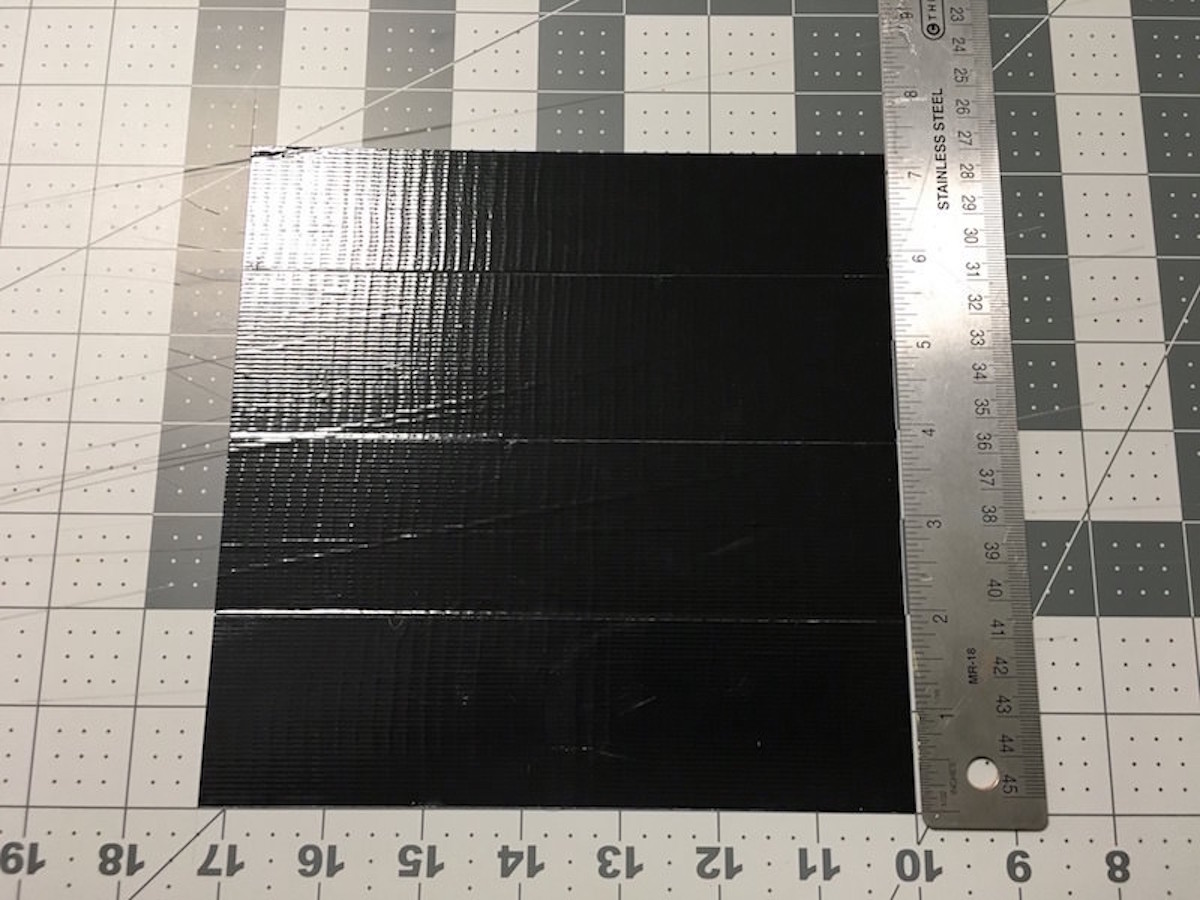
And if you do, I suggest you solve it the same way we did. With a black square in the background that is 1/8″ larger than your flag all the way around.
So our first order of business was to make a black Duck Tape square approximately 7 1/4″. So YES – this flag is slightly bigger than the other flags – but it’s hardly noticeable as there is only a 1/8″ extra border around all sides.
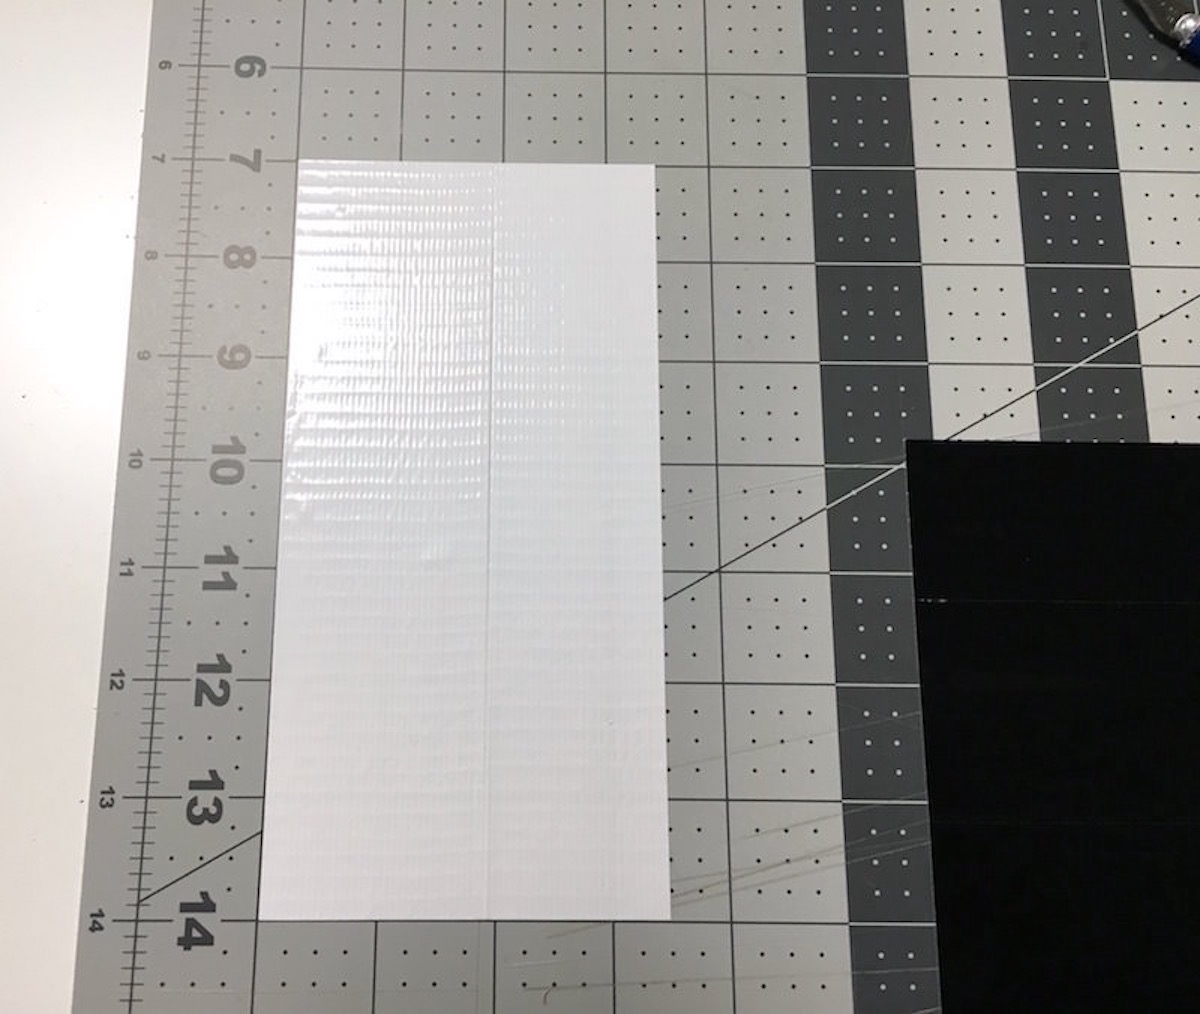
As you are making your nautical flag sign, overlap the tape so that you are able to peel up the pieces easily. For the “H”, we made a band of white tape that was 3.5″ wide and 7″ tall. We peeled it up and placed that on the black Duck Tape very carefully.
Then we peeled up the black square and placed in on the back board as shown above. We cut a 3.5″ width of red tape and placed it right next to the white.

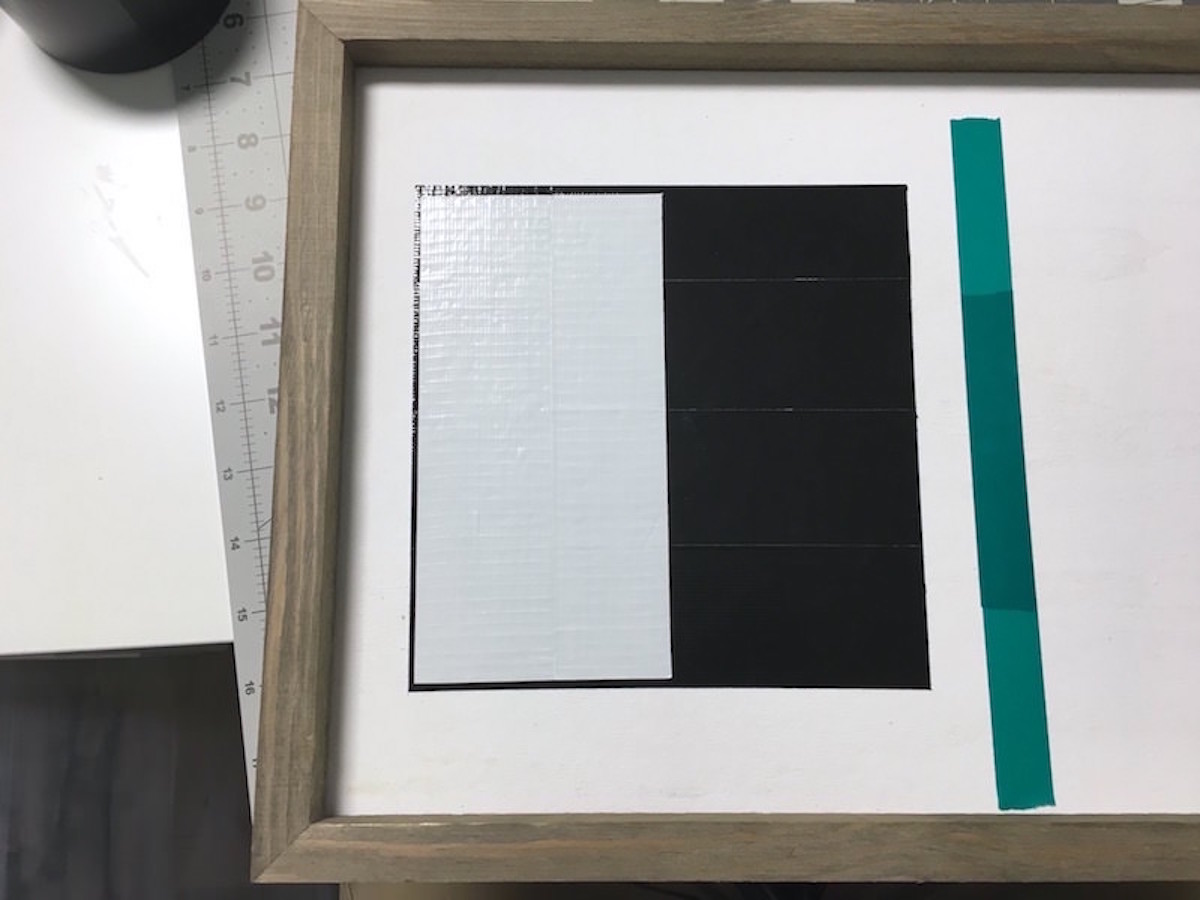
We used washi tape to help us section off our letters. Washi tape is 3/4″ wide (typically), so two strips next to each other was right for the 1.5″ we wanted between each flag. We continued making our nautical alphabet flags with Duck Tape on the craft mat.
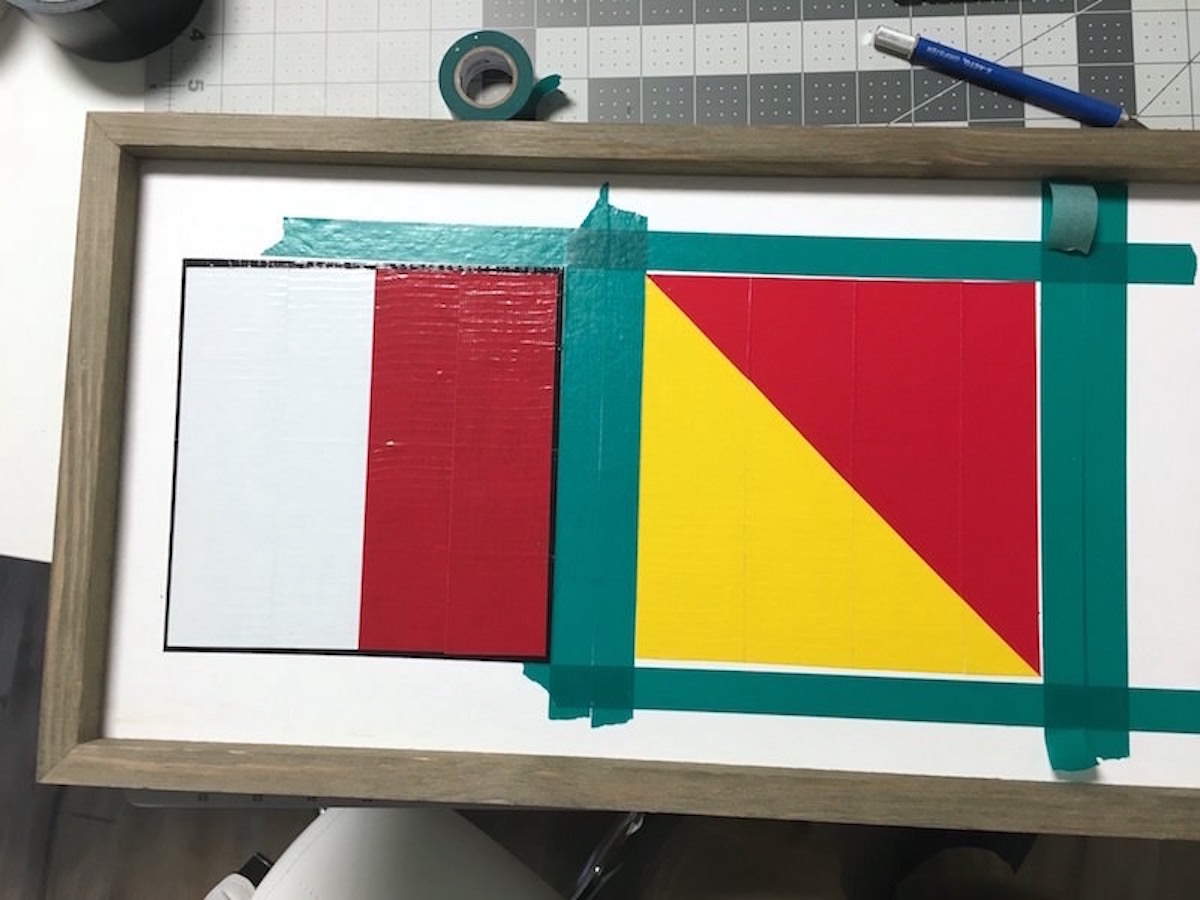
For the “O”, we made a yellow box with Duck Tape 7″ square and then cut it on the diagonal – then peeled it off the craft mat and placed it. Then we repeated with the red.
For the “M”, we made a blue 7″ square Duck Tape box and placed two white Duck Tape pieces in a criss cross and trimmed. The “E” was done similarly to the “H”, though we didn’t need a border since we weren’t using white.
We are loving our nautical alphabet sign and no one that comes through the door would ever guess it’s made of Duck Tape! Our neighbors thought we painted it . . . my parents thought it was printed. Our DIY sign is now one of our favorite summer decorations. Let me know if you make it in the comments.
PS – if you are looking for more DIY summer decor, try these other projects:


What was the width of the duct tape that you used for the flags?
It’s this tape so it is 1.88 inches wide! https://www.duckbrand.com/products/duck-tape/colors/yellow-188-in-x-15-yd