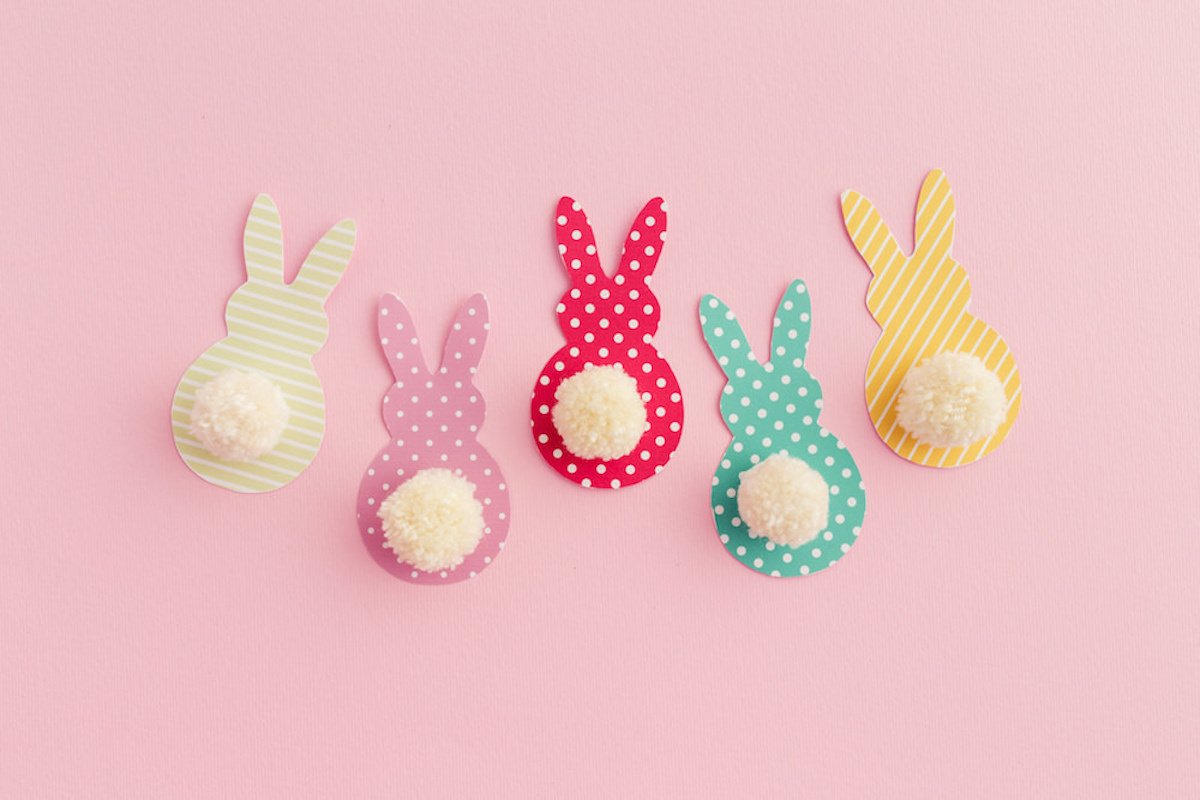
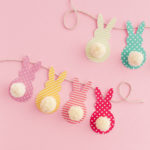
Easter Bunny Garland in a Few Easy Steps!
This cute and colorful Easter garland is so easy to make with scrapbook paper and yarn! Who doesn’t love a sweet bunny? Both kids and adults will love making this together.
Skills Required: None. Even if you’ve never crafted before, you’ll be able to do this Easter bunny garland. You’ll be cutting paper as well as wrapping yarn. It’s pretty easy!
When you have a niece that is getting into holiday crafting, you encourage her. At least that is what I do with my niece! I want her to follow her aunt’s footsteps . . . whether she likes it or not. Ha!
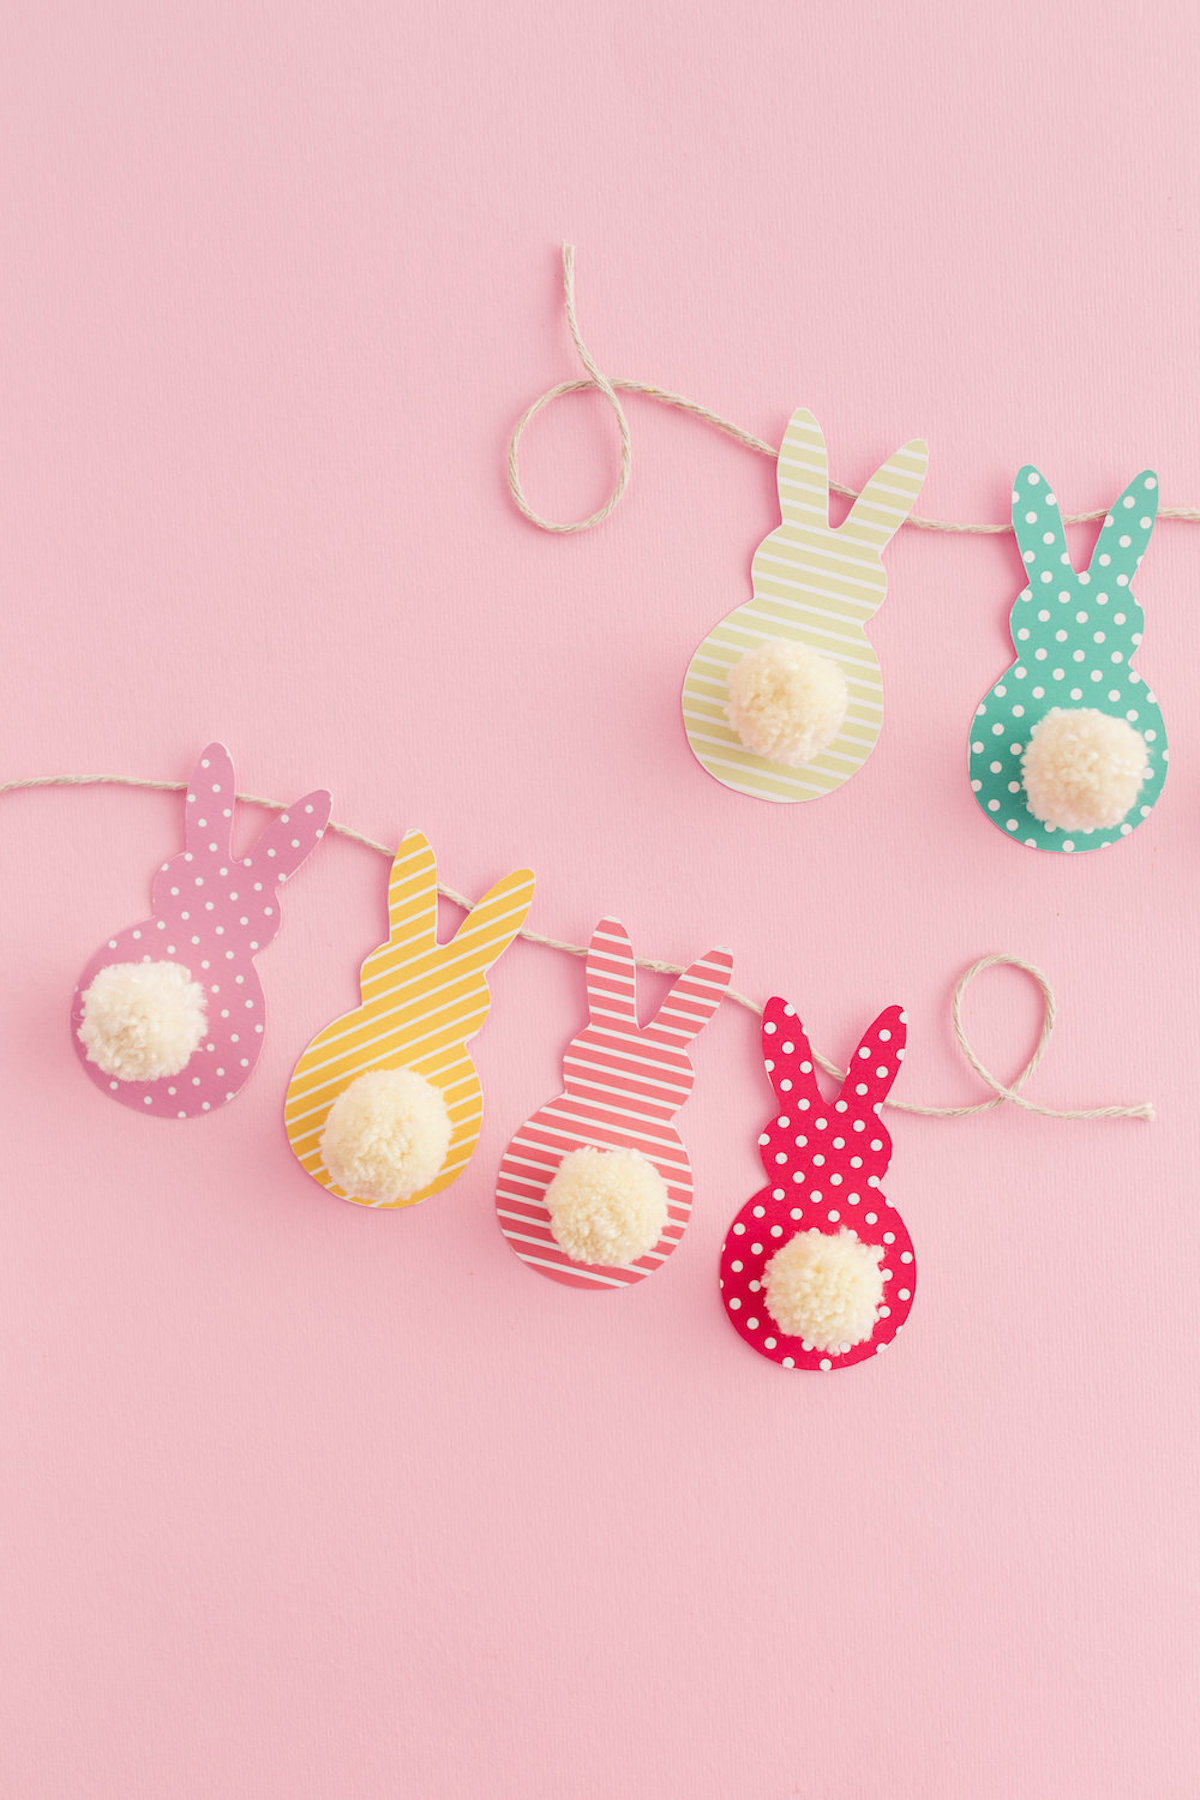
This year one of the holiday home decor projects we did together was this Easter garland – with cute little pom pom bunny tails!
This bunny garland could NOT be any easier. You’re using a template to cut out the rabbit shapes – and then you can use a fork to make the pom poms. Then you glue it all together.
What I love about this Easter garland is that even though it’s easy enough for a child to make, it’s something you won’t mind hanging up in your home.
We all know sometimes Easter kids’ crafts end up in the drawer, but not this one. Just pick your favorite papers and get crafting! You’ll be decorating for Easter in minutes.
Easter Garland
Gather These Supplies
- Scrapbook paper – various colors, scraps work too!
- Bunny garland template HERE
- Yarn – one skein of a light color
- Fork
- Craft glue
- Scissors
Print and Cut Out the Bunnies
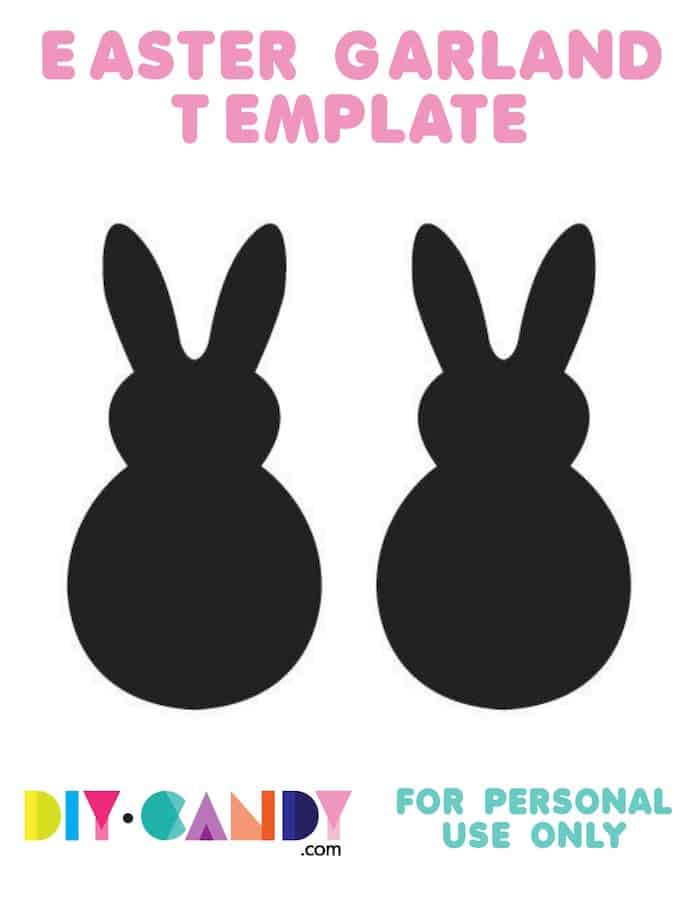
The first thing you’ll want to do to make your Easter decor is print out the template you see above – GET THE FULL SIZED COPY HERE. You can print it out in black and white – I just added the color for fun.
Print out a copy and cut out at least 9 – 10 bunnies (if not more!) from the scrapbook paper.
Note: I recommend using thicker paper for your bunnies. The thin sheets of scrapbook paper aren’t as stable for this project, and can also wrinkle if you attach anything with glue.
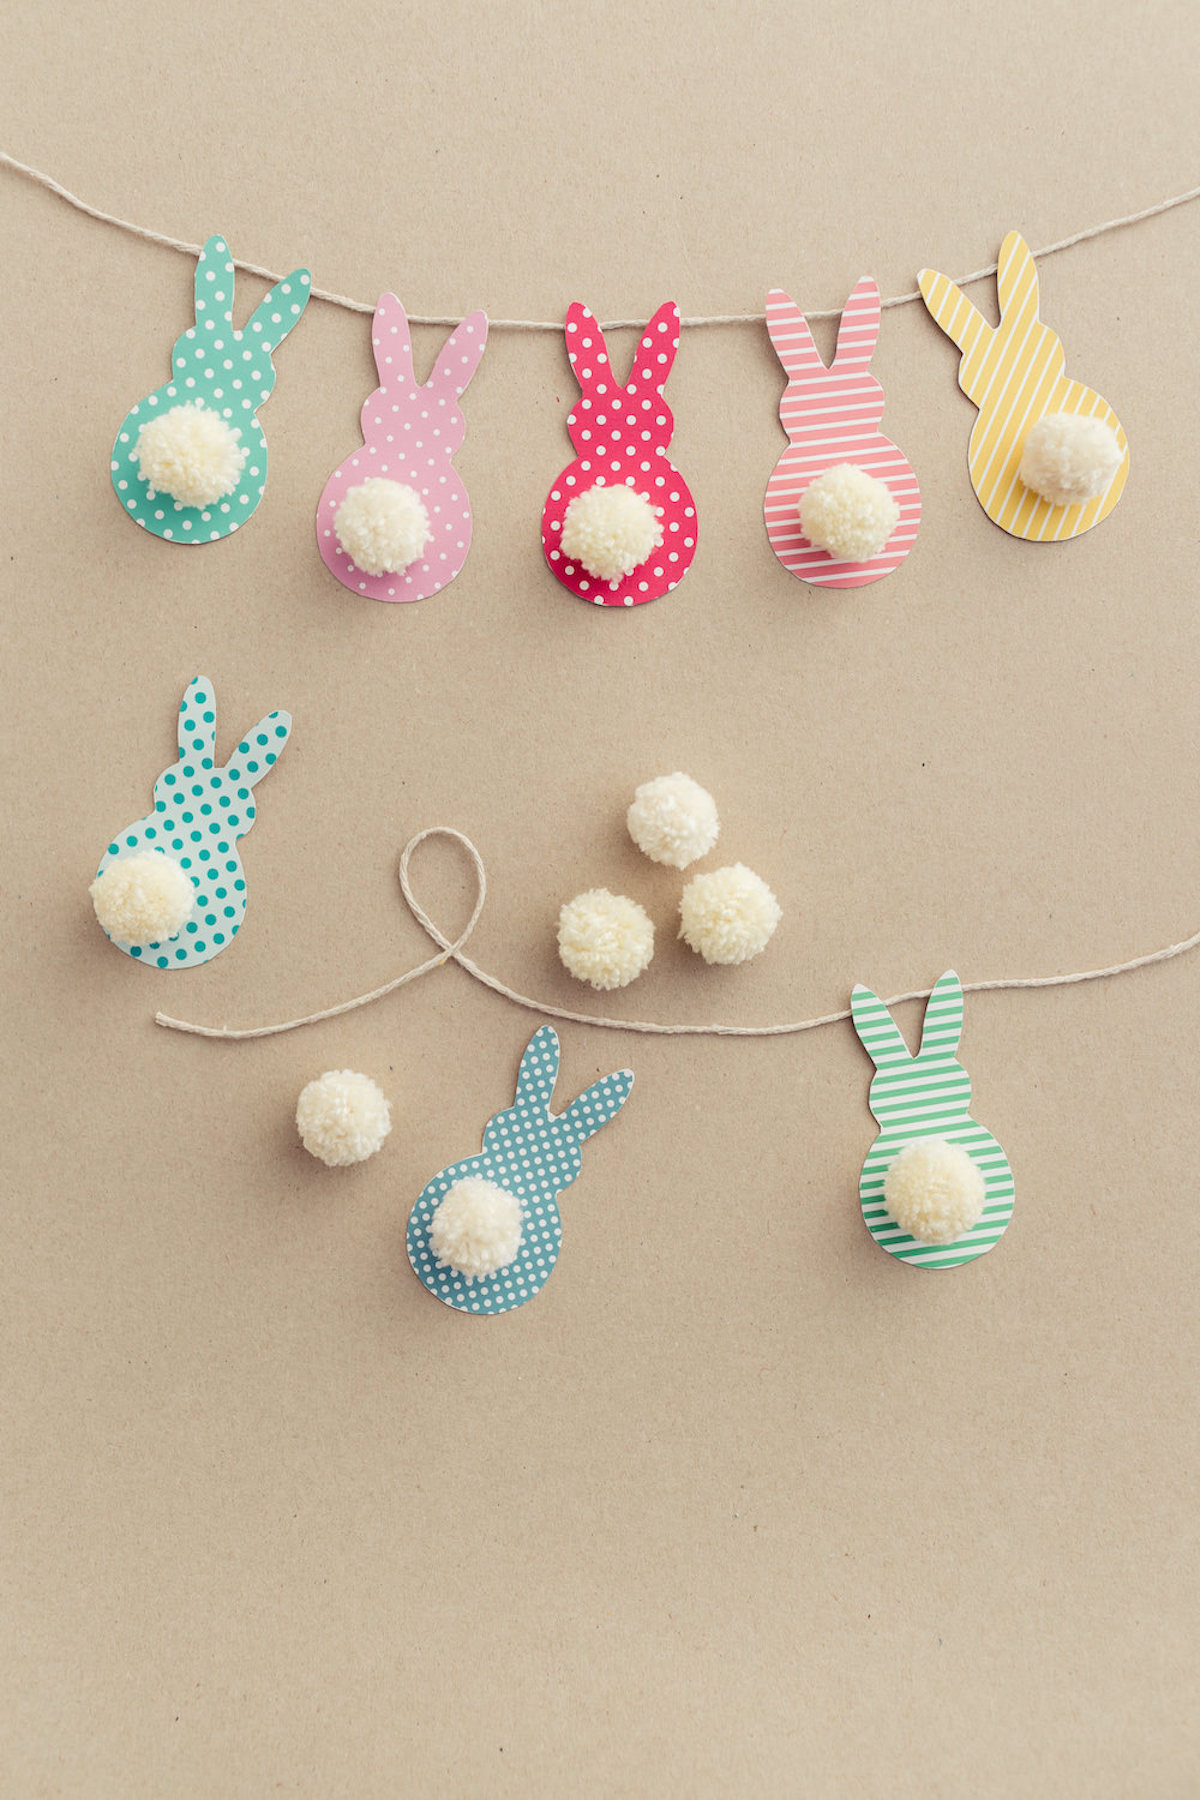
Make the Pom Pom Tails
Then you’re going to make one pom pom per bunny using a fork. To make a pom pom with a fork:

Wrap the yarn around the outside of a four-pronged fork about 40 times. If you want your pom pom thicker, try 50 or 60 times. You can also use a pom pom maker if you have one. That makes it really easy!
Cut an 8-inch piece of yarn and tie off the yarn in the middle prong. You’ll tie the top and bottom together. Tie the loop and knot as tightly as you can.
Cut both loops on each side and fluff! You can trim around the edges of the pom to make it more tidy looking as well.
If you are more of a visual person, you can see a video here.
Attach the Bunnies and Hang
Cut a length of yarn for your garland. Make it as long as you like depending on where you’re going to hang it.
Use craft glue to attach the pom poms to the bunnies, and then to attach the bunnies to the yarn. Another option, at least for hanging by the ears, is tape. Tape is harder to use to attach the tails.
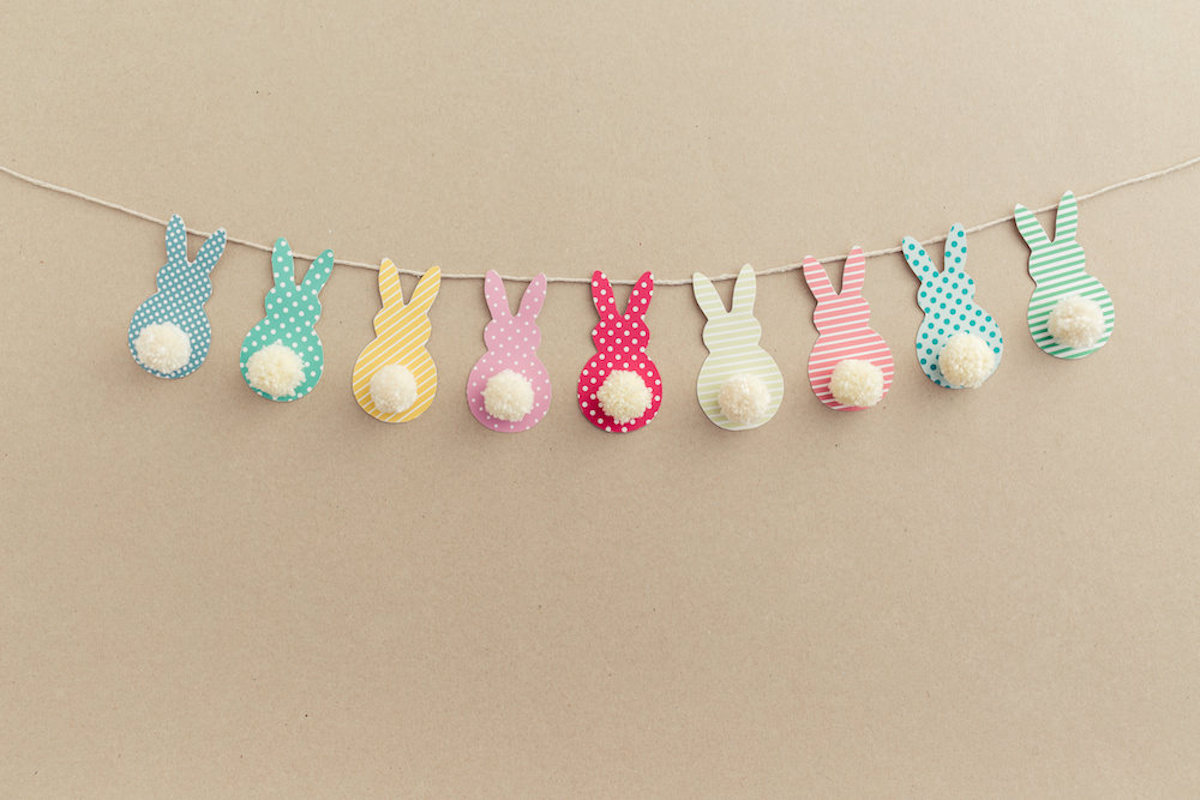
Your Easter garland is complete . . . and ready for hanging! This Easter decor looks great on a mantel or the side of a table. SO cute!
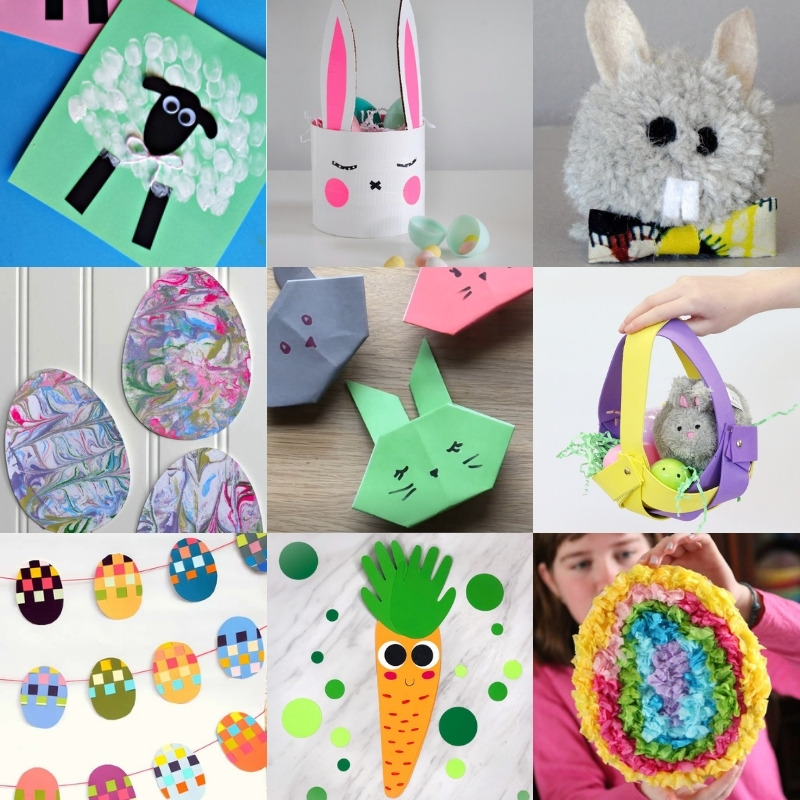
Of course if you love the bunnies, you can use them in other Easter crafts, too.
How would you customize your project? Would you add a pom pom nose? Googly eyes? There are a lot of options for the kids to have some fun.
Easter Banner
Equipment
- Computer and printer
- Fork
Materials
- Scrapbook paper
- Bunny garland template
- 1 skein Yarn light color
- Craft glue
Video
Instructions
- Print the template out on regular printer paper. Cut out as many bunnies as you like from the scrapbook paper using the template and a pair of scissors.
- Make one pom pom per bunny using a fork. To make a pom pom with a fork, wrap the yarn around the outside of a 4-pronged fork approximately 40 times. If you want your pom pom thicker, try 50 or 60 times.
- Cut an 8-inch piece of yarn and tie off the yarn in the middle prong. You’ll tie the top and bottom together. Tie a knot as tightly as you can.
- Cut both loops on each side and fluff.
- Use craft glue to attach the pom poms to the bunnies, and then to attach the bunnies to the yarn.
- Let dry completely before hanging.
If you make this bunny garland we’d love to know . . . leave a comment! And if you’d like to see another Easter banner, check out this one made of paint chips. Also don’t forget to check out these other ideas:
Bunny Canvas • Gold Foil Eggs • Mesh Wreath • Peep Canvases • Peep Magnets • Perler Beads • Rainbow Eggs • Tattoo Eggs

Thanks for your idea. I will try it
Amazing
I love the hanging bunnies
I love what you wrote !! It was very useful.
This rabbit wreath is so cute!! Especially the way to make pompoms with a fork, I will definitely try it!
These are so cute! I am partial to bun buns, and now I can’t wait for Spring and Easter! Thank you so much for sharing the instructions and pattern!
Hahaha so glad you like it! I love bun buns too!
I like your idea of hanging bunnies..!!
Cute bunnies. Thanks for sharing the tutorial!
Thank you so much for the template! I love this and can’t wait to make it with my family!
My pleasure!