Craft Your Own Wooden Beer Caddy in Just Six Steps
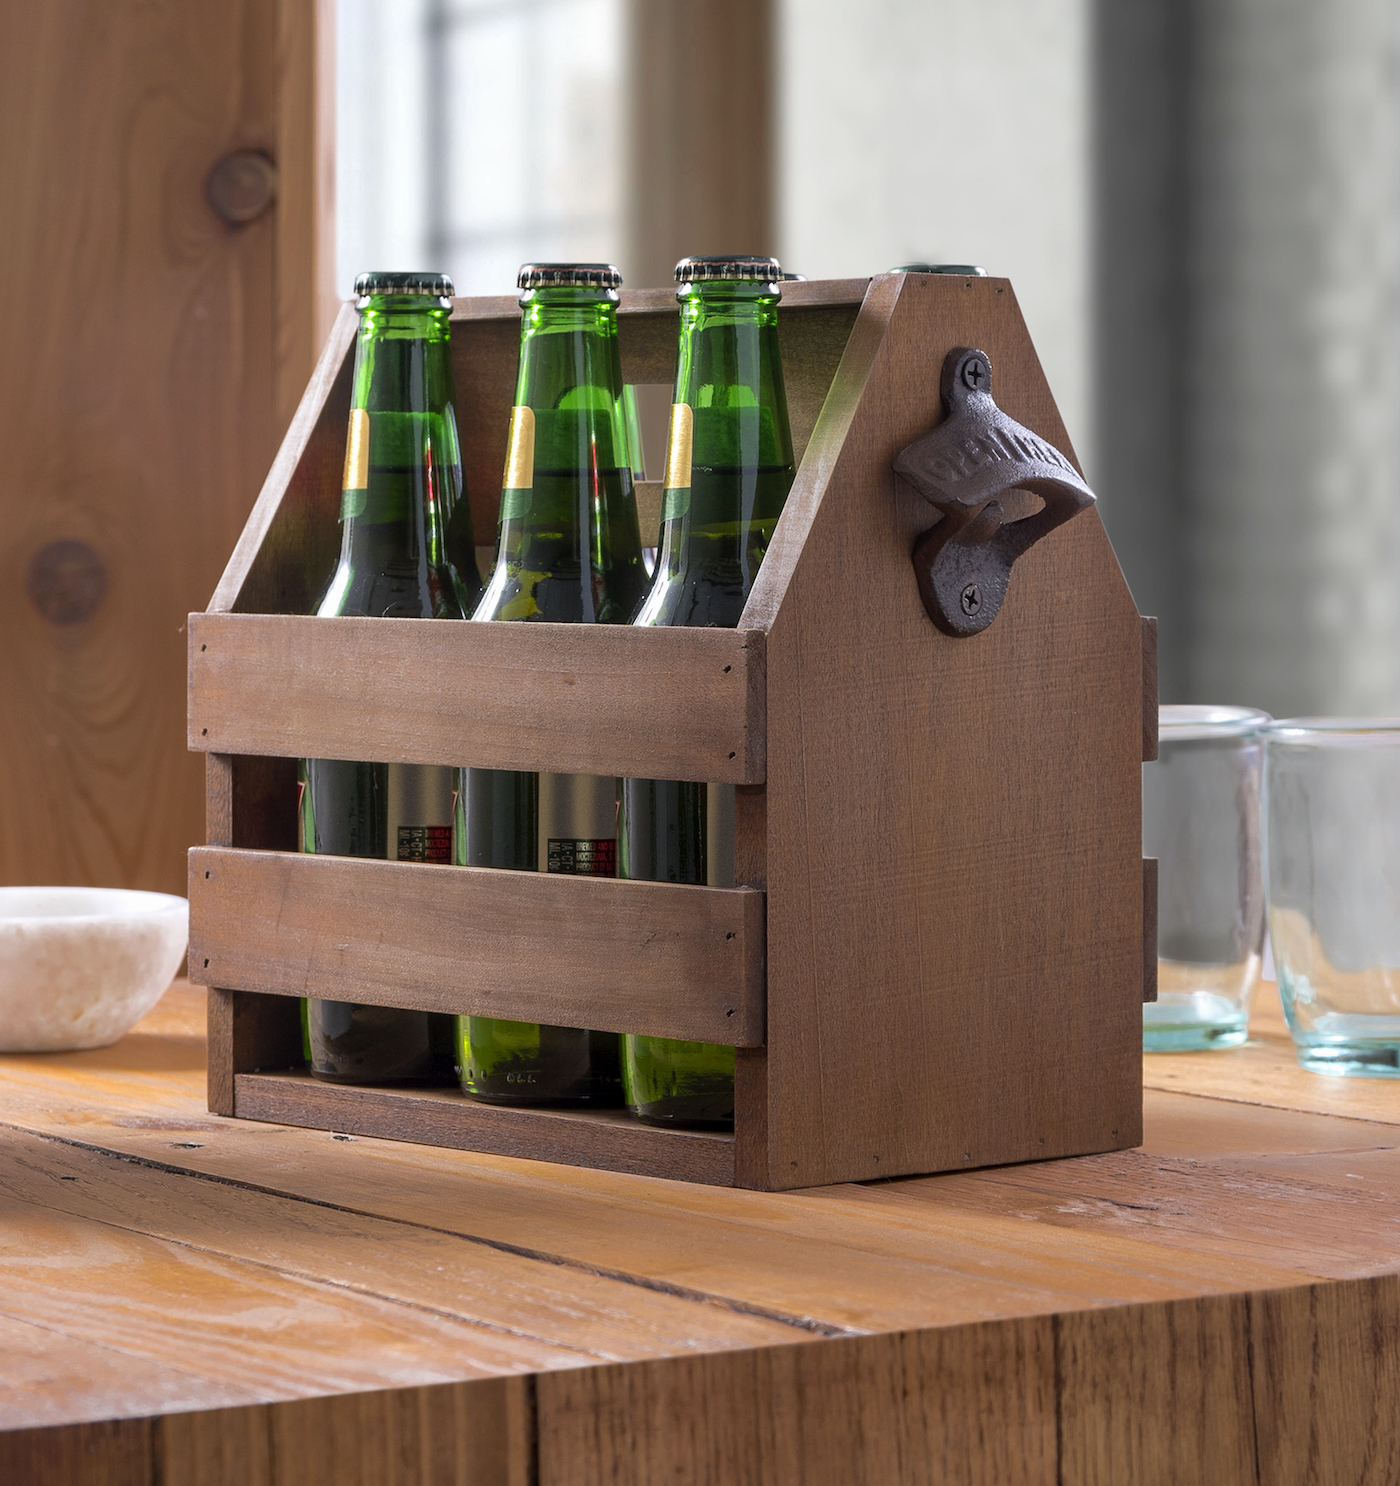
Learn how to make a DIY wooden beer caddy with a bottle opener using these plans. This beer carrier has a bottle opener on the side . . . and makes the perfect gift!
Skills Required: Intermediate Beginner. You should have some experience with the tools required. Most of it is cutting straight lines, however, you’ll have to shape a handle. It’s not hard, so if you’re an absolute newbie, just be patient.
We aren’t huge beer drinkers around here, but every now and again we enjoy some suds. While I might not be a beer connoisseur, we do have a few in the family.
I love the idea of making another one of these for one of the guys for Father’s Day (man cave decor), a birthday, or any other occasion that requires a homemade gift. I’m saving this one for me!
This DIY wooden beer caddy is a great gift for the enthusiasts in your family. We actually made several for gifts but also made one for ourselves to take to parties. We can put any bottled beverages in it – not just beer!
What do I love about this beer carrier? It can be made in six easy steps:
- Make Your Cuts
- Shape the Handle
- Cut Angles
- Nail Pieces Together
- Sand
- Finishing

I’ve seen some inexpensive versions of this beer carrier at places like Target, etc. I haven’t been impressed with the construction of the inexpensive versions, and a lot of them don’t have bottle openers.
Of course you could add a bottle opener to the cheap version . . . but if you enjoying wood working (or even if you’re a beginner), this DIY wooden beer caddy is perfect because you can wrap it up in a nice little bow in an afternoon. And this beer carrier is solid quality for only $10 – $15.
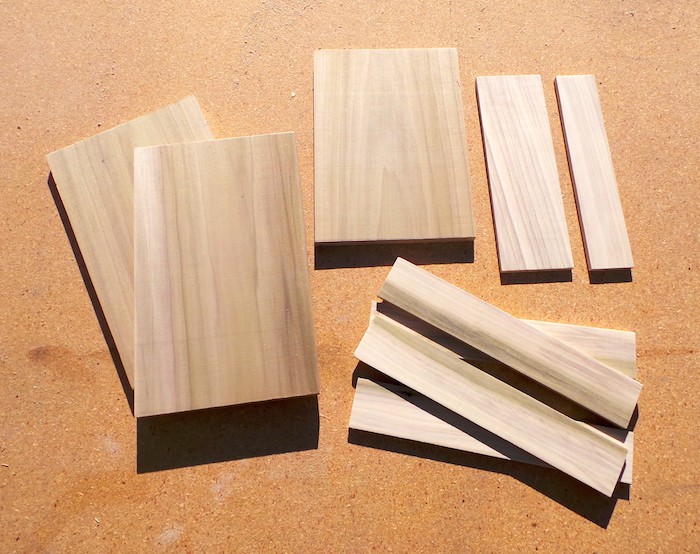
Wood to Use
We recommend poplar for these beer caddy plans. It’s so easy to work with poplar, and it’s lightweight and reasonably water resistant (for perspiring bottles). It stains really well too.
If you want to make your project a little more inexpensive, just use pine. You can really use any type of wood – poplar just happens to be one of our favorites.
Here’s what you’re going to need:
Gather These Supplies
- 1/2″ x 6″ x 4′ poplar hobby board
- 1/4″ x 3″ x 4′ poplar hobby board
- 1/4″ x 1 1/2″ x 4′ poplar hobby board
- 3/4″ brad nails
- Wood glue
- Sandpaper
- Danish oil or stain
- Tack cloth
- Wall mounted bottle opener (with two screws)
Tools
- Miter saw or circular saw
- Power drill
- Jigsaw
- 18-gauge nailer
- 1″ Forstner bit
- Phillips bit
Cut List
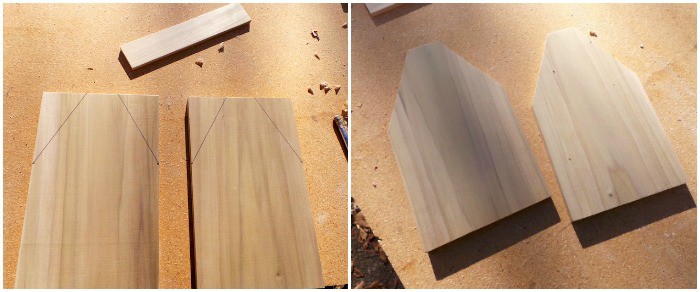
- 1/2″ x 6″ board – cut into three pieces: (1) 7 3/4″ in length, (2) 9″ in length
- 1/4 x 3″ board – cut to 7 3/4″ length
- 1/4″ x 1 1/2″ board – cut into five pieces: (1) 7 3/4″, (4) 8 3/4″ in length
Wait until fully dry or preferably overnight before inserting the beer bottles. Wouldn’t this be fun for the person who loves craft beer? You could pick six different bottles and make a variety pack.
We are absolutely thrilled with our finished DIY beer caddy. If you try it, we’d love to hear about your experience in the comments!
DIY Beer Caddy
Equipment
- Miter saw or circular saw
- Drill with drill bits 1″ Forstner bit, Phillips bit
- Jigsaw
- 18-gauge nailer
Materials
- 1 piece 1/2″ x 6″ x 4′ poplar hobby board
- 1 piece 1/4″ x 3″ x 4′ poplar hobby board
- 1 piece 1/4″ x 1 1/2″ x 4′ poplar hobby board
- 3/4″ brad nails
- Wood glue
- Sandpaper
- Danish oil or stain
- Tack cloth
- Wall mounted bottle opener with two screws
Video
Instructions
- Cut the boards using your saw according to the cut list in the notes.
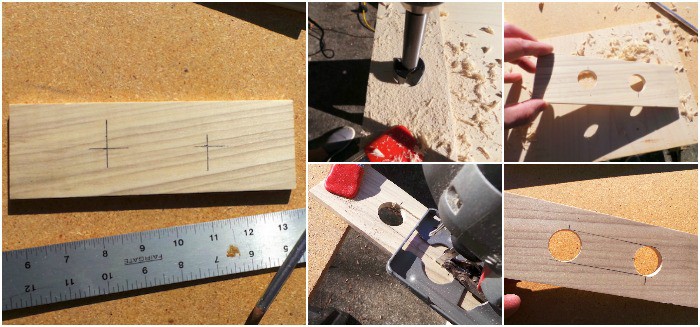
- Shape the handle. Mark the 7 3/4" x 3" piece of wood 1 1/4" from the top and then 2 1/2" from each side. Use the Forstner bit to drill two holes. Connect them with lines at the top and bottom of the circles, then cut those lines with a jigsaw to create a handle.
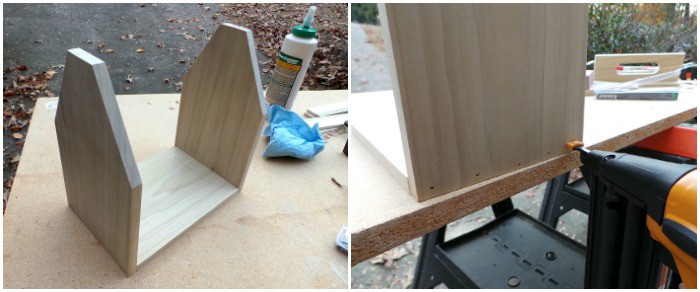
- Cut the angles. On the 9" pieces of wood, mark each side 5 1/2" from the bottom. Mark the middle of each piece at the top and use a 1 1/2" strip to create a point on each side of the middle. Connect those two points with a straight edge and cut the angles with a jigsaw.
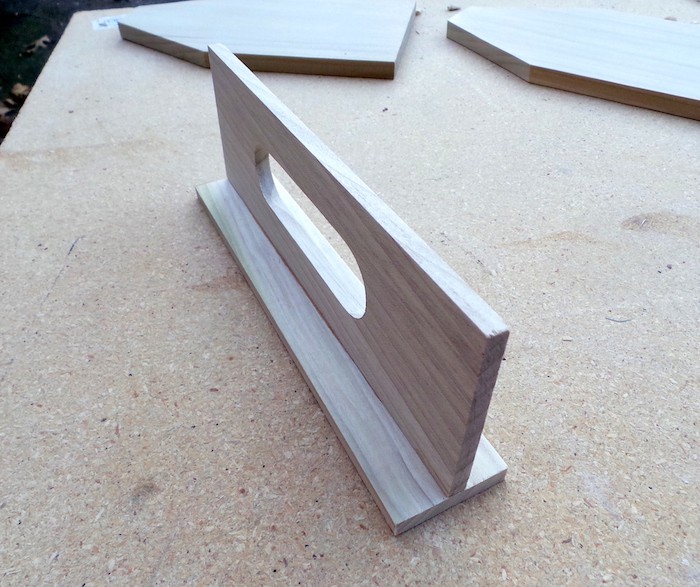
- Nail pieces together. Use the brad nailer to completely nail the frame together. Attached the angled sides to the base with wood glue and then secure with the nailer.
- Align the 7 3/4" piece on top of the handle. Glue together. Attach the handle to the sides with wood glue and nail into place. Apply wood glue to the 8 3/4" sides and nail into the place.
- Sand the entire caddy with 80 grit sandpaper to start – then progress to 150 and 220 grit sandpaper to make it very smooth.
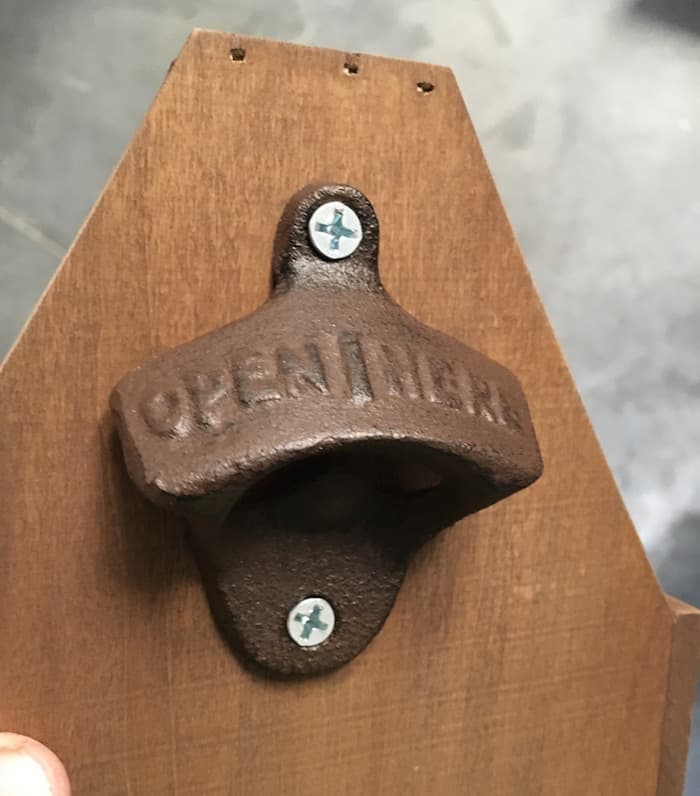
- Finish by staining or oiling the caddy and then adding your bottle opener with screws. Let dry before using.
Notes
- 1/2″ x 6″ board – cut into three pieces: (1) 7 3/4″ in length, (2) 9″ in length
- 1/4 x 3″ board – cut to 7 3/4″ length
- 1/4″ x 1 1/2″ board – cut into five pieces: (1) 7 3/4″, (4) 8 3/4″ in length
If you like our DIY wood beer caddy, let me know in the comments. You might also like the following projects:
House Number Plaque • Industrial Pipe Shelving • Lack Endtable Hack • Mirror Frame • Nolmyra Chair Hack • Poster Hanger • Table Lamp • TV Riser • Wood Slat Doormat • Wood Sign • Wood Step Stool Chair

hey can you answer what Alvin was saying? I got to know!!! from 2021 September 21
• 9″ wide (side to side)
• 5½″ deep (front to back) — determined by the true width of a 1/2″ × 6″ board
• 11–12″ tall (to top of handle) — depending on how you shape the handle arc
What dimensions does this design have (length, width, height). Thankful for a quick answer
@Alvin, have you looked at the size of the board for the bottom piece?
Take your time answering. Best of luck to you!
• 9″ wide (side to side)
• 5½″ deep (front to back) — determined by the true width of a 1/2″ × 6″ board
• 11–12″ tall (to top of handle) — depending on how you shape the handle arc
Does it matter if I stain first then put it together or not?
Hi Joe! I don’t think it would matter. I mean you could end up chipping something accidentally . . . but you can always touch up with stain and a small brush if needed!