DIY Drawer Organizer in 30 Minutes on a Budget
Learn how to make a DIY drawer organizer in about 15 minutes using scrap wood! This DIY drawer divider has no nails or screws required.
Skills Required: Beginner. I’ll teach you to make this drawer organizer using nothing but a table saw in about 30 minutes. Let’s get started.

Before I tell you where the idea for this DIY drawer divider came from, I feel I should explain something about myself. When trying to come up with project ideas, I love it when I can make something look or work better while solving a problem (I’m a little nerdy that way).
That being said, I was in the garage one morning looking at my pile of wood leftovers and wondering what my next project would be when Amy walked in saying how she thought we needed to better organize our common bathroom drawer.
I agreed and then had a light bulb moment: a DIY drawer organizer. 1. Organize and straighten out a crowded drawer; 2. Use up some of my wood leftovers.
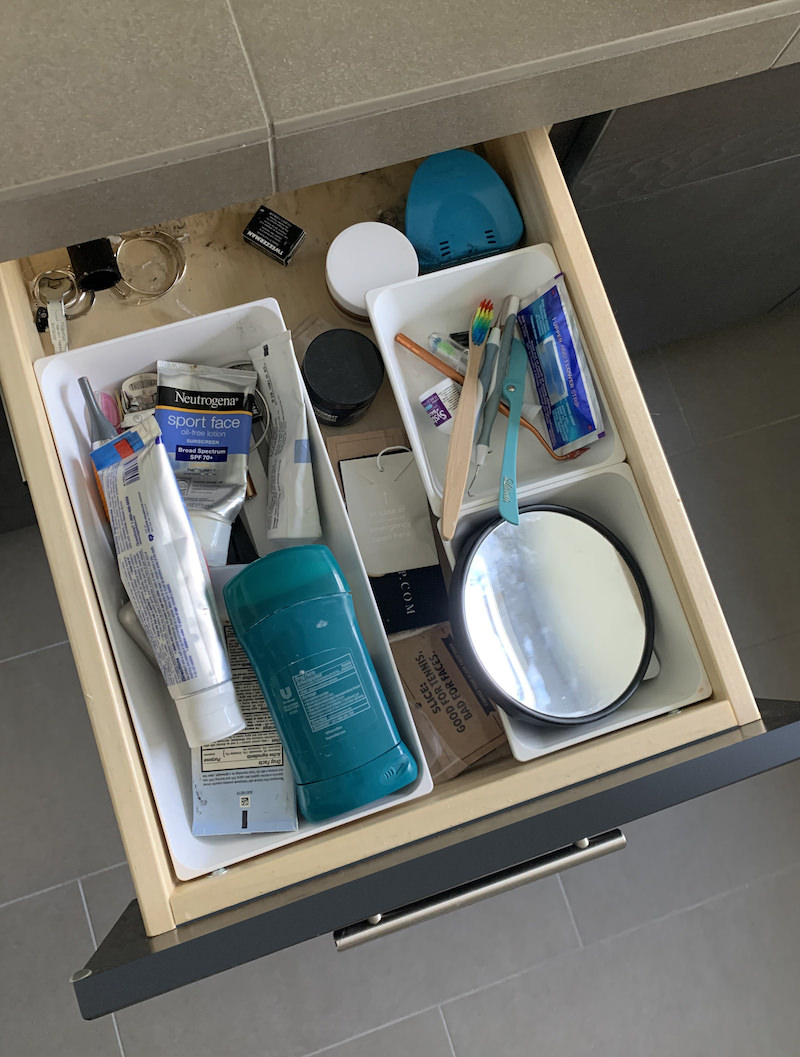
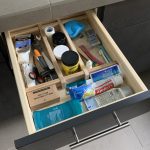
It is a rather small bathroom vanity drawer that Amy and I both use so you can imagine how packed it could get. We tried organizing it better with some small trays but it made it seem more crowded and more difficult to find what we were looking for, thus creating the need for organization.
Looking through my pile of leftover wood I definitely had what I needed without having to buy any additional pieces. This is so simple to make! If you like easy woodworking projects, give this a try.
Make a Drawer Divider
Gather These Supplies
- Slats of wood (size depends on the size of your drawer and how you want to lay out your organizer)
- Table saw
- Tape measure
- Pencil
STEP ONE
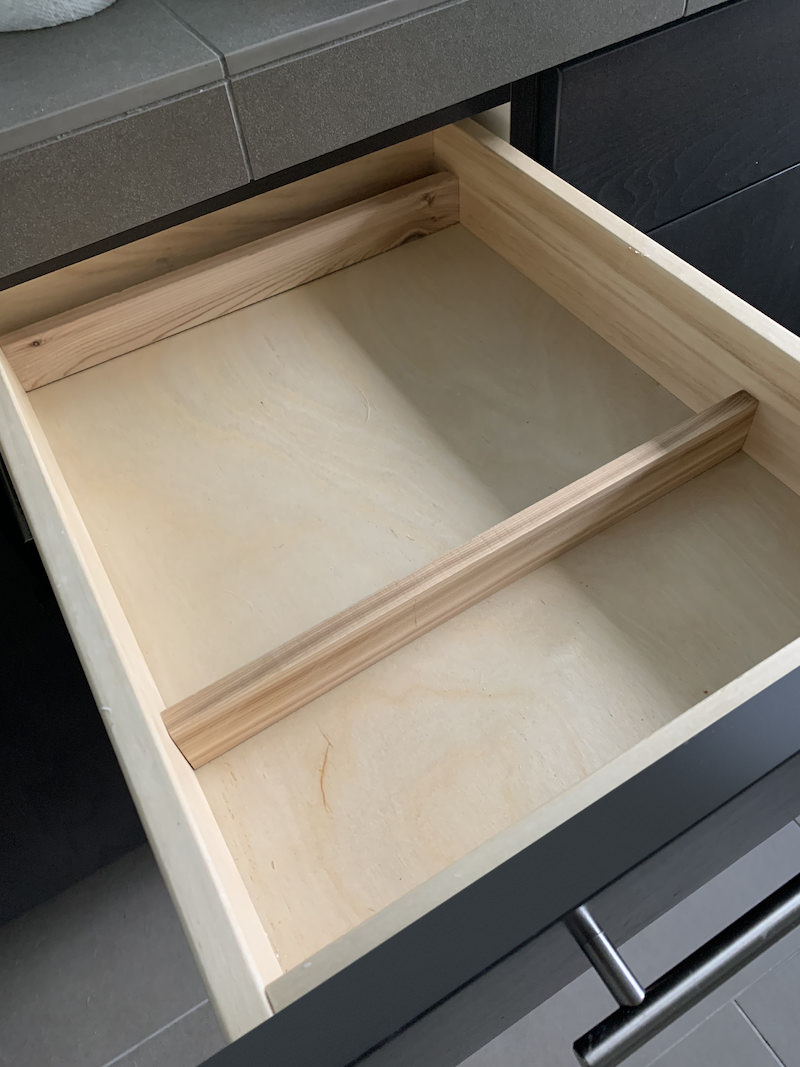
**This project will have two divider pieces and two cross pieces – a total of four pieces of wood with notches cut in them – to complete the project.
I decided to use some leftover pieces of cedar I had on hand. I thought cedar would be a good way to go because I’m making this DIY drawer organizer for a bathroom drawer. Cedar has some water resistant properties and would resist warping from humidity created from showering.
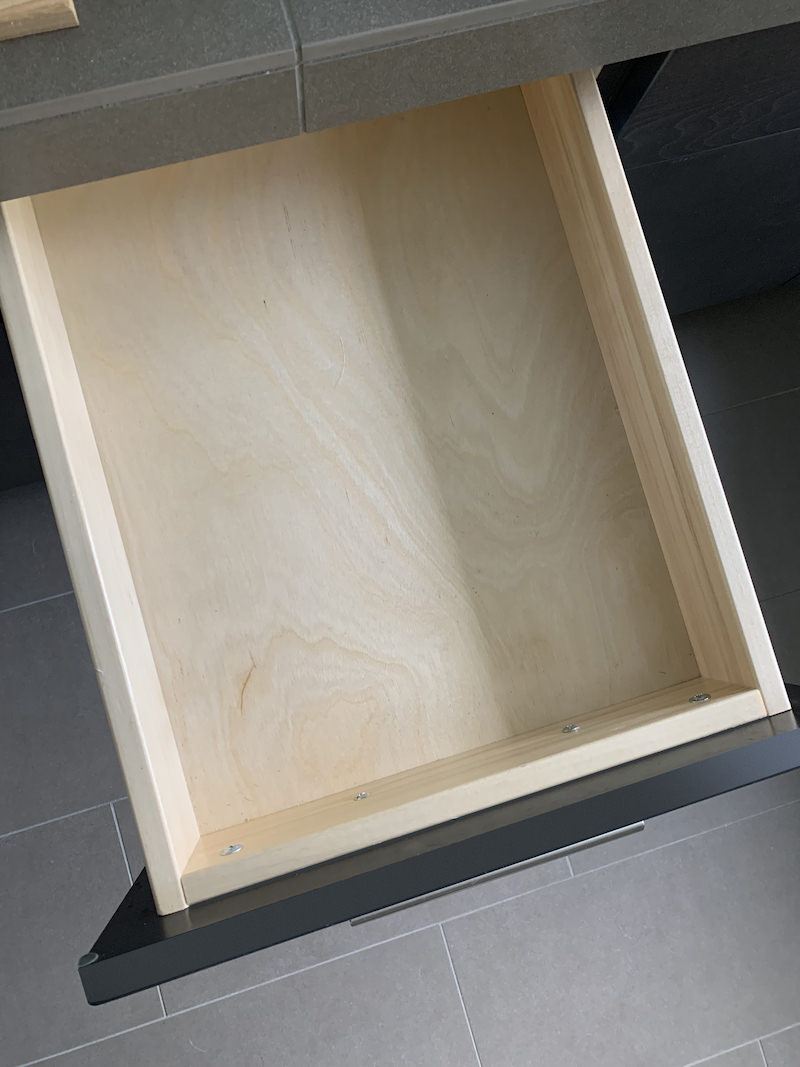
Starting with an empty drawer, I measured the width of the drawer to determine the length of my cross pieces. Using my table saw, I cut my two cross pieces 1/32” longer than the width of the drawer so I could friction lock the pieces in place without stressing the sides of the drawer too much.
This will enable the organizer to be removed and replaced for occasional cleaning.
STEP TWO
Determine where you would like to place your divider pieces vertically in the drawer and mark on both pieces of wood. Use your table saw to cut notches in your cross pieces to lock them together.
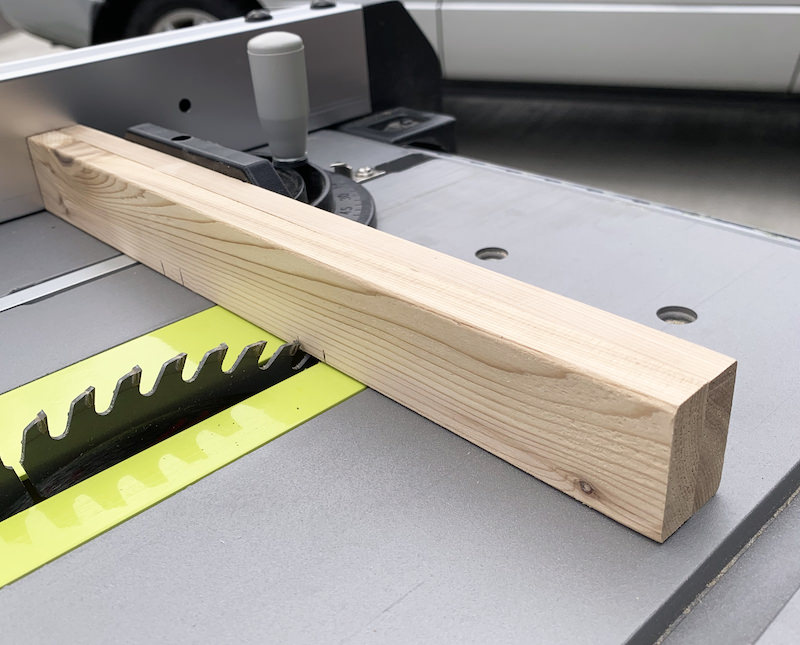
To determine the depth of your notches, set your table saw blade to exactly half the height of your cross pieces. Next, measure the exact width of your divider pieces and mark that measurement in pencil on your cross pieces in the place you would like them to lock together.
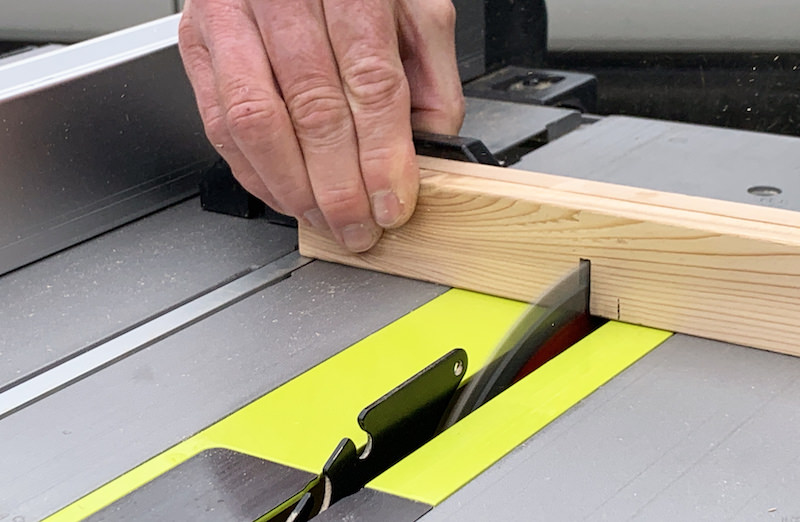
Now holding your two cross pieces together, use your table saw to cut out your notches for your divider pieces. Cutting notches in both pieces at the same time ensures your notches will be cut in the same place in both pieces – and will keep your organizer square.
Cutting your notches the exact width of your divider pieces ensures that your cross pieces and your divider pieces lock together tightly requiring no nails or glue.
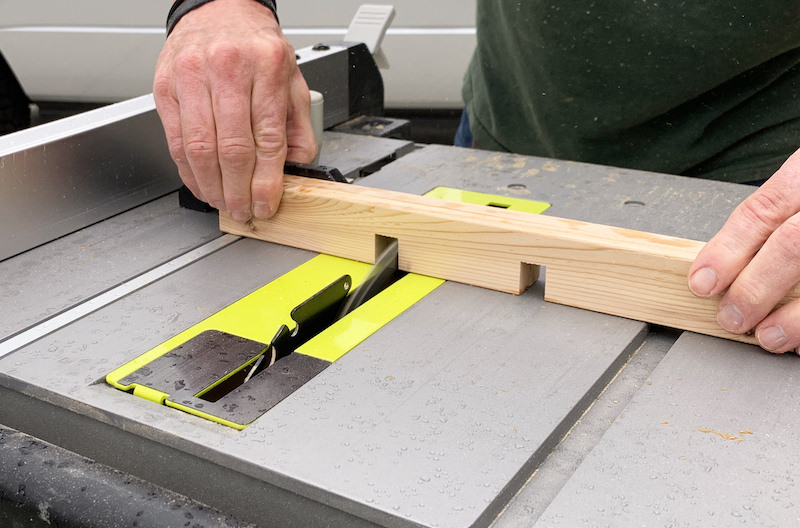
Next you will want to cut notches in your divider pieces. You shouldn’t have to change your blade height or notch width, being that your cross pieces and your divider pieces should be the same height and width.
Again, using your table saw and holding your divider pieces together, cut your notches at the same time to ensure an exact match.
You will notice that I cut the notches in my divider pieces about ⅜” from each end leaving a small piece on each end. This was because cedar is a little softer than a lot of other woods and I was worried it might splinter.
I probably could have made the end piece a little shorter had I a more fine-toothed finishing blade on my table saw.
STEP THREE
You will lock your DIY drawer divider pieces together using your notches. They should lock together tightly without nails or glue.

Here’s a quick video of this technique in action below! Only one more step for your DIY drawer organizer.
STEP FOUR
This is the best step of all – because it’s the easiest step . . .
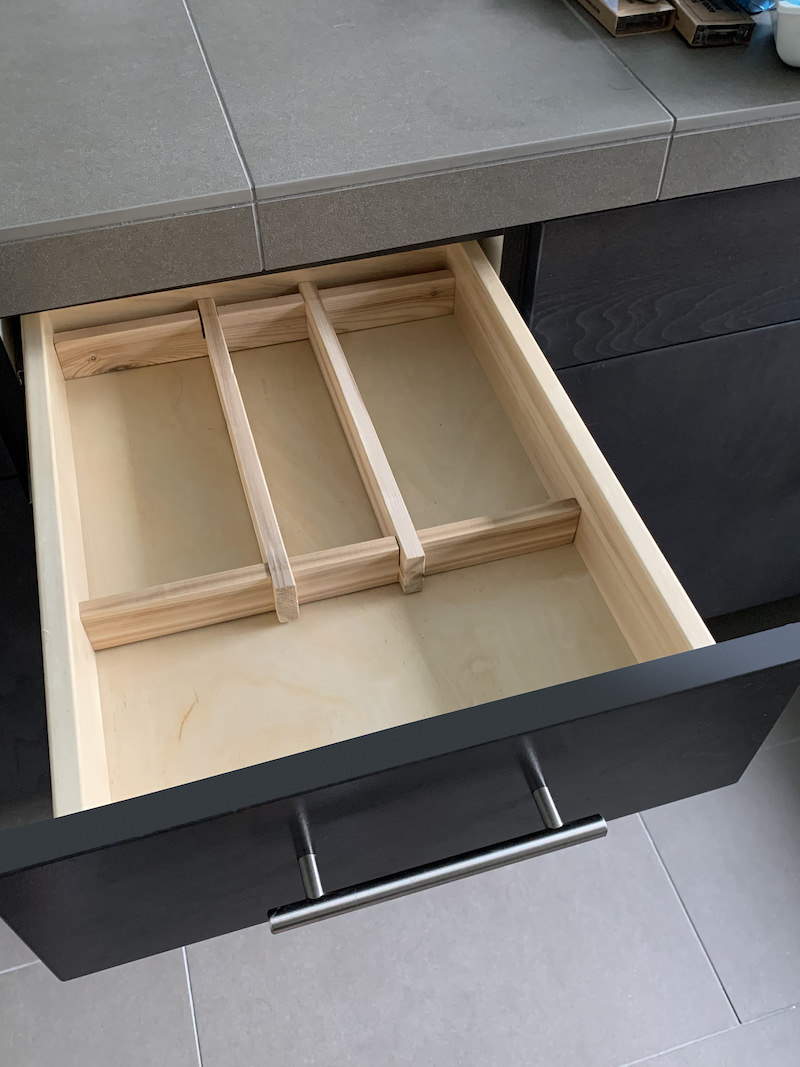
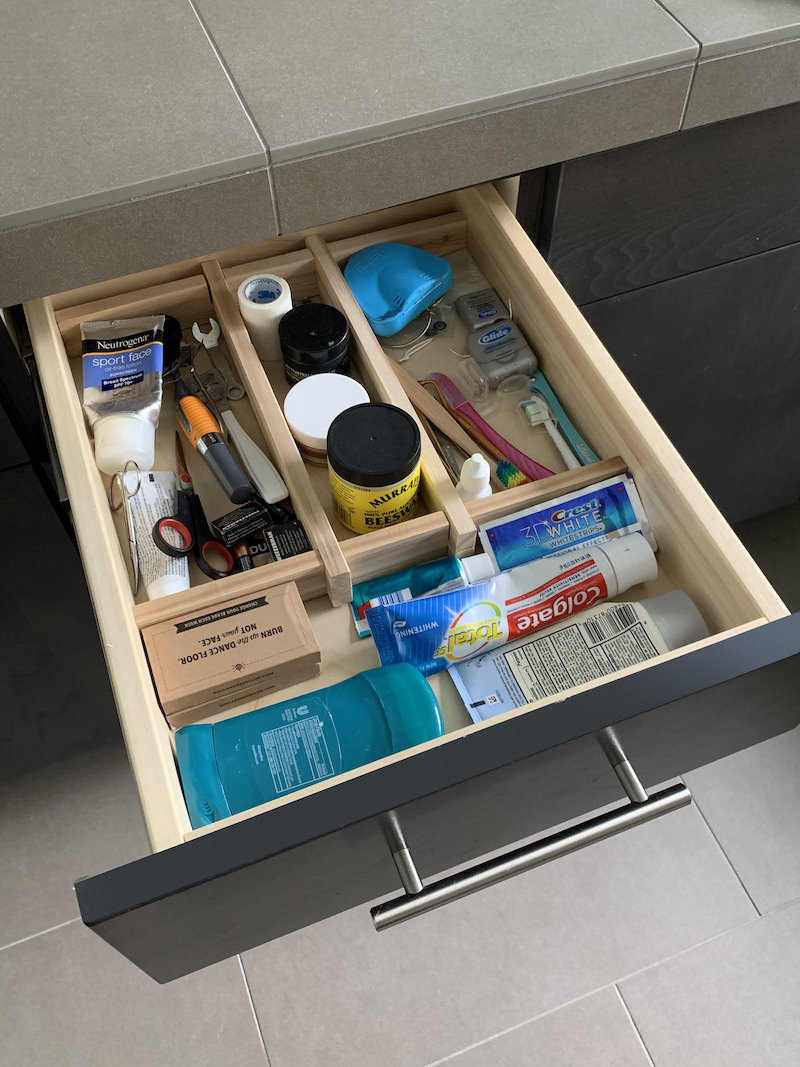
You simply add your drawer divider to the drawer! If you have any fitment issues, I’d use a piece of sandpaper to sand the edges until it fits. Then, put all your crap back in the drawer, like so.
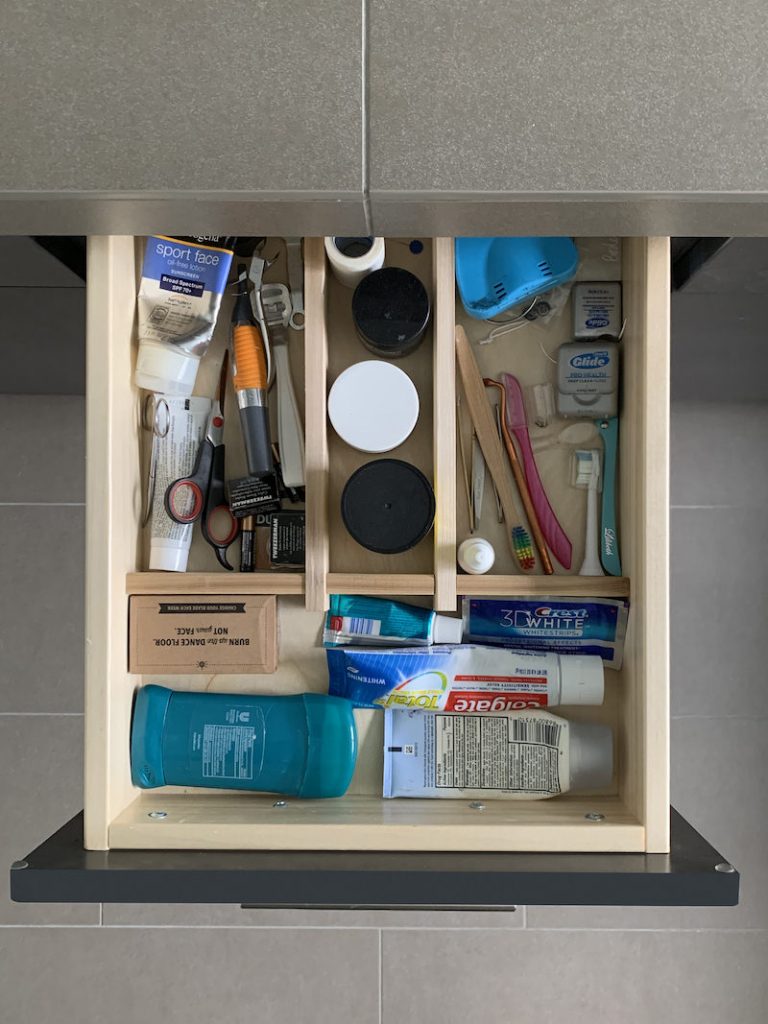
The DIY drawer organizer just makes it feel so much more . . . organized! Nothing is sliding around anymore, which is really nice.
So much better – don’t you think? I’d love for you to try this project!
DIY Drawer Organizer
Equipment
- Pencil(s)
Materials
- Scraps of cedar
Instructions
- Measure the width of the drawer to determine the length of the cross pieces.
- Using a table saw, cut two cross pieces 1/32” longer than the width of the drawer.
- Determine where you would like to place your divider pieces vertically in the drawer and mark on both pieces of wood. Use your table saw to cut notches in your cross pieces.
- Set your table saw blade to exactly half the height of your cross pieces.
- Measure the exact width of your divider pieces and mark that measurement in pencil on the cross pieces in the place you would like them to lock together.
- Holding the two cross pieces together, use the table saw to cut out notches for the divider pieces.
- Next you will want to cut notches in your divider pieces in the same manner as the step above.
- Lock the drawer divider pieces together using your notches. They should lock together tightly without nails or glue.
- Slide the drawer organizer in your empty drawer and load up your drawer.
If you enjoyed this DIY drawer divider, you might also like some of these other organization projects:


Wonderful!