DIY Unicorn Valentine’s Box with Duck Tape
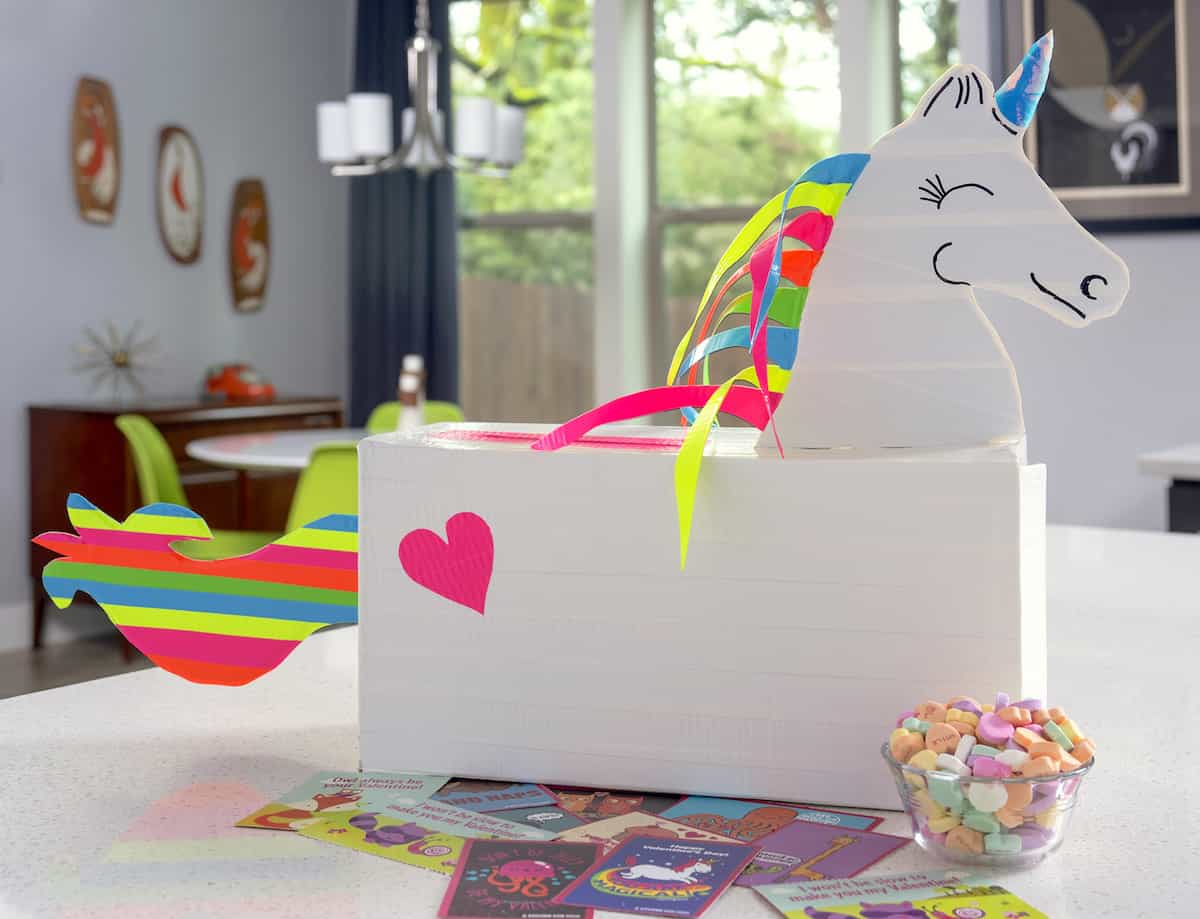
Learn how to make a very unique unicorn valentines box with Duck Tape! Grab a shoebox and the free patterns – kids will love to make this!
Skills Required: Beginner. Okay, so there are some steps to this project, but this is a great one for first graders or older. There’s a template that kids can use to cut, and the rest is just taping.
I remember one of the greatest joys of my elementary school career came around the first week of February every single year – making my valentines box! I’ve never been into the romance aspect of Valentine’s Day, but I’ve always loved the crafts. There are so many reasons!
I’m not really a pink and red person, but you get to go “all out” with those colors for Valentine’s Day. Same with glitter. I like to keep my glitter usage around the holidays, and Valentine’s Day is the perfect time to use it!
But back to my valentines box. I’m loving the unicorn trend this year, and I had to make a unicorn valentines box. My little neighbor Audrey is going to take this one to school!
She’s all about unicorns, so this DIY unicorn valentines box is perfect. It’s really easy to make with Duck Tape too. If you love crafting with your children, this is the perfect Valentine’s Day craft to make together!
One last note . . . I have two special things to call out about this unicorn valentines box. The first is I’m giving you templates for the head and tail so you don’t have to do those yourself.
The second is that this project uses the Duck Mirror Crafting Tape which is FABULOUS if you haven’t used it yet. It’s perfectly hologram for unicorn crafts. I love it so! Here’s how we made this DIY valentines box.
(get more ideas for valentine boxes here!)
Gather These Supplies
- Shoebox
- Extra pieces of cardboard for head and tail
- Unicorn head and tail patterns – get them here
- Duck Tape in five colors – White, Pink, Yellow, Blue, Green
- Duck Mirror Crafting Tape (or silver or gold)
- Craft knife and mat
- Scissors
- Sharpie
Before I give you the how to, here are some notes on this craft:
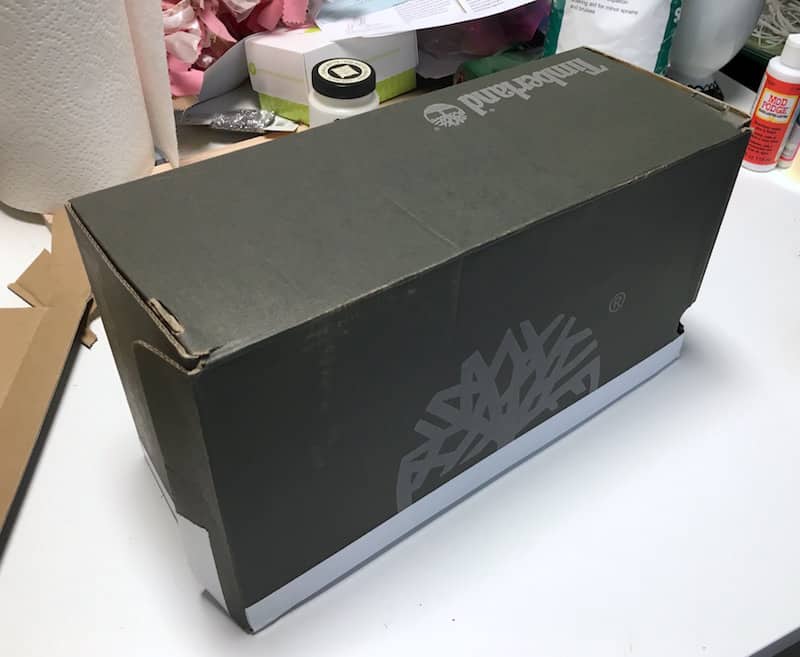
- Start with an adult sized shoebox. You can also make this project with a small shoebox, but you may need to reduce the size of the templates I provide.
- I recommend using the box with the lid on one side (so that it’s taller than wider) so that you can easily remove the valentines when the time comes. But I’ll leave that up to you!
- You can add any kind of accents on the side of your unicorn valentines box that you like! I added a heart on each side.

If you’re ready to try this easy project, check out the printable how to below.
Don’t forget to check out our unicorn perler beads or unicorn pumpkins for some additional fun activities.
Unicorn Valentine Box
Equipment
Materials
- Shoebox
- Extra pieces of cardboard for head and tail
- Unicorn head and tail patterns – get them here
- 5 rolls Duck Tape White, Pink, Yellow, Blue, Green
- Duck Mirror Crafting Tape
- Sharpie(s)
Video
Instructions
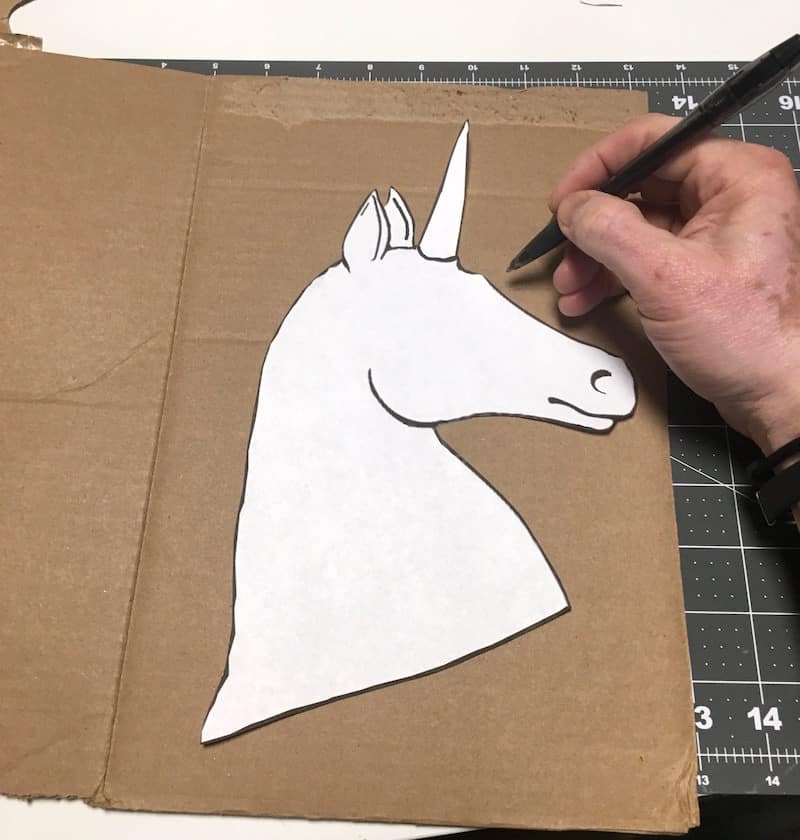
- Start with an adult sized shoebox and open it open flat. Print out the templates for the unicorn head and tail and trace onto a piece of the cardboard.
- Add 2 – 3 tabs at the bottom so that you'll be able to insert them into the box for stability. Cut out.
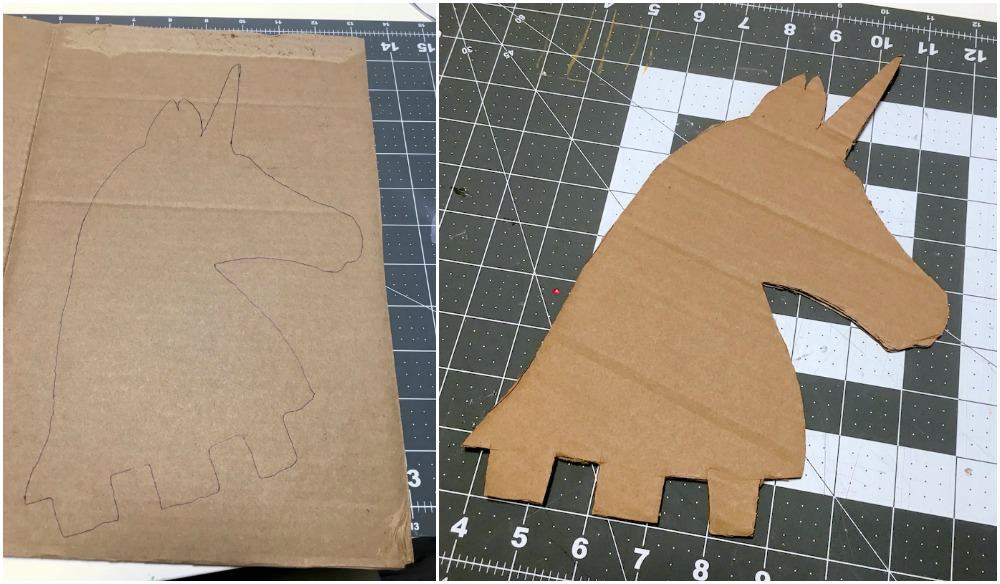
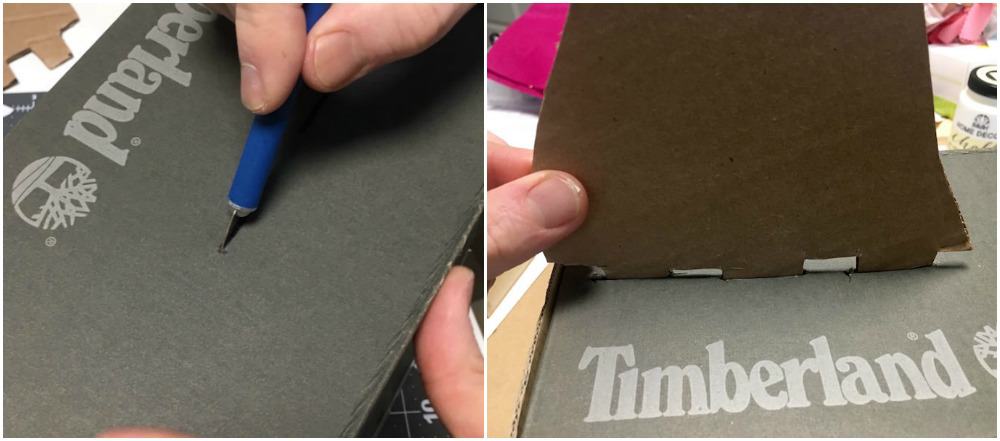
- Trace lines on the top of the box where you are going to insert the tabs.

- Pierce the end of the box with a craft knife where you are going to insert the head and then insert to make sure it fits. Remove the unicorn head again.
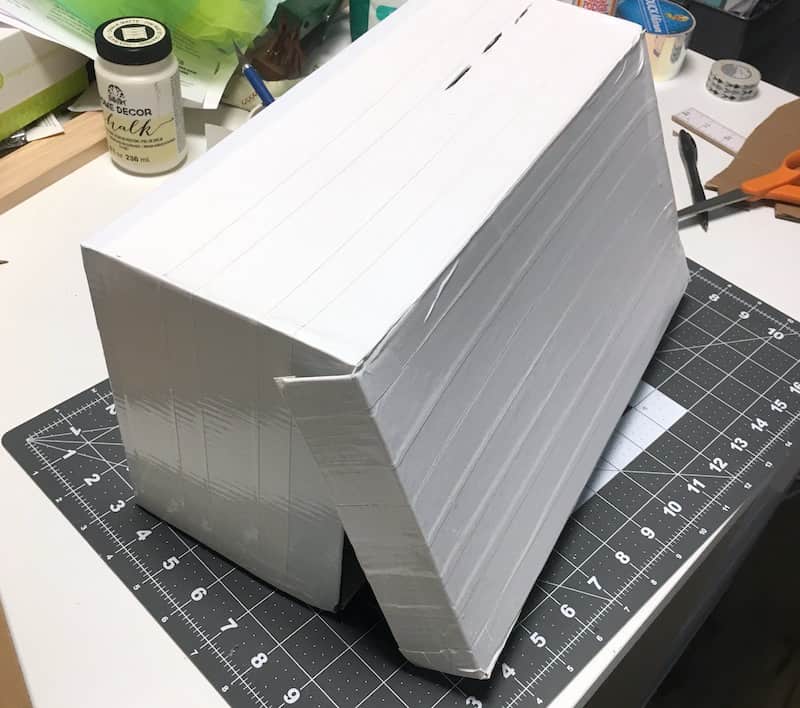
- Tape the entire box with white Duck Tape, including the lid. Make sure to use your craft knife to cut the lines to insert the head again.
- Place the unicorn head down on your craft mat and tape over with white Duck Tape. Flip over and cover the other side with Duck Tape too.
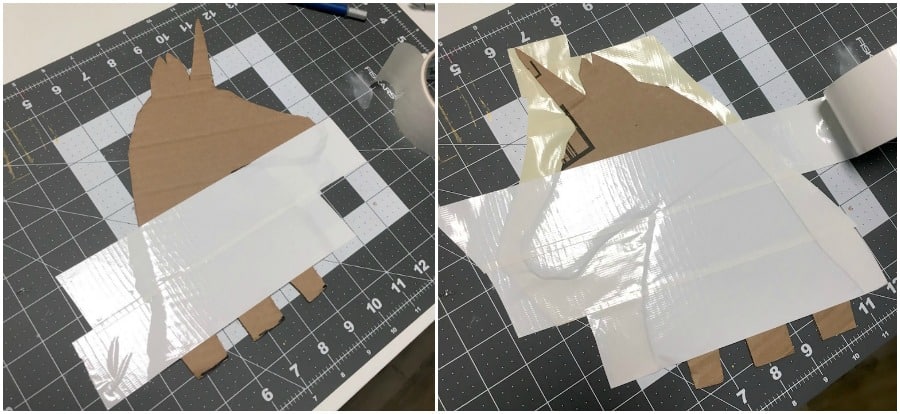
- Trim the head out with a pair of scissors.

- Draw a face on the unicorn head with a Sharpie. Let dry (so it doesn't smear) and then flip over and repeat on the other side.
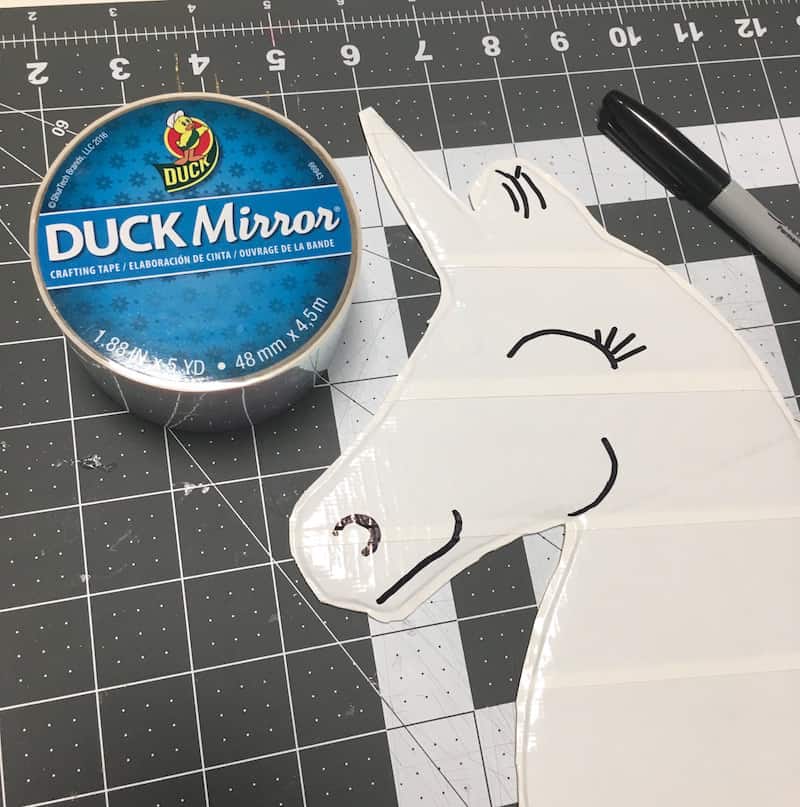
- Cover the horn with Mirror Duck Tape (or gold or silver) and trim.

- Use the remaining colors of Duck Tape on the mane and tail. Lay a piece of Duck Tape (about 7 1/2" – 8") down on the craft mat and cut a 1" slit in the middle at one end.

- Peel the tape up and fold it over but DO NOT close the end with the slits.

- Use those two flaps to attach the mane piece to the head and trim carefully with a craft knife or scissors.

- Use scissors to cut a wave into that piece of tape so it looks more like horse hair . . . and repeat. Finish the mane that way.
- One you are done, insert the head into the box. Open the box and fold the tabs opposite ways.
- Use the tail template to cut the tail piece out of cardboard. You'll want to make a tab here too.
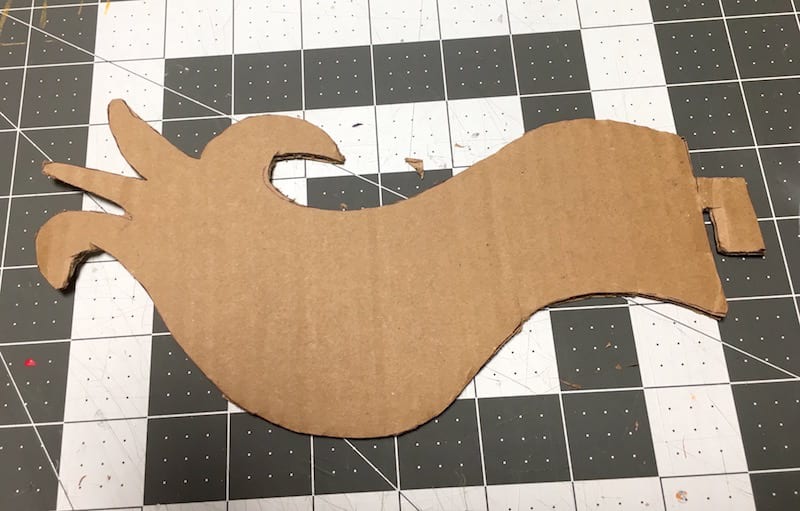
- Cover the tail pieces with 1" thick pieces of Duck Tape. Trim out the tail with scissors.

- Cut slits into the back end of the box and insert the tail piece.
- Cut a slit into the top of the box. This is where the valentine cards will be inserted. You can line this opening with pink Duck Tape if you like.
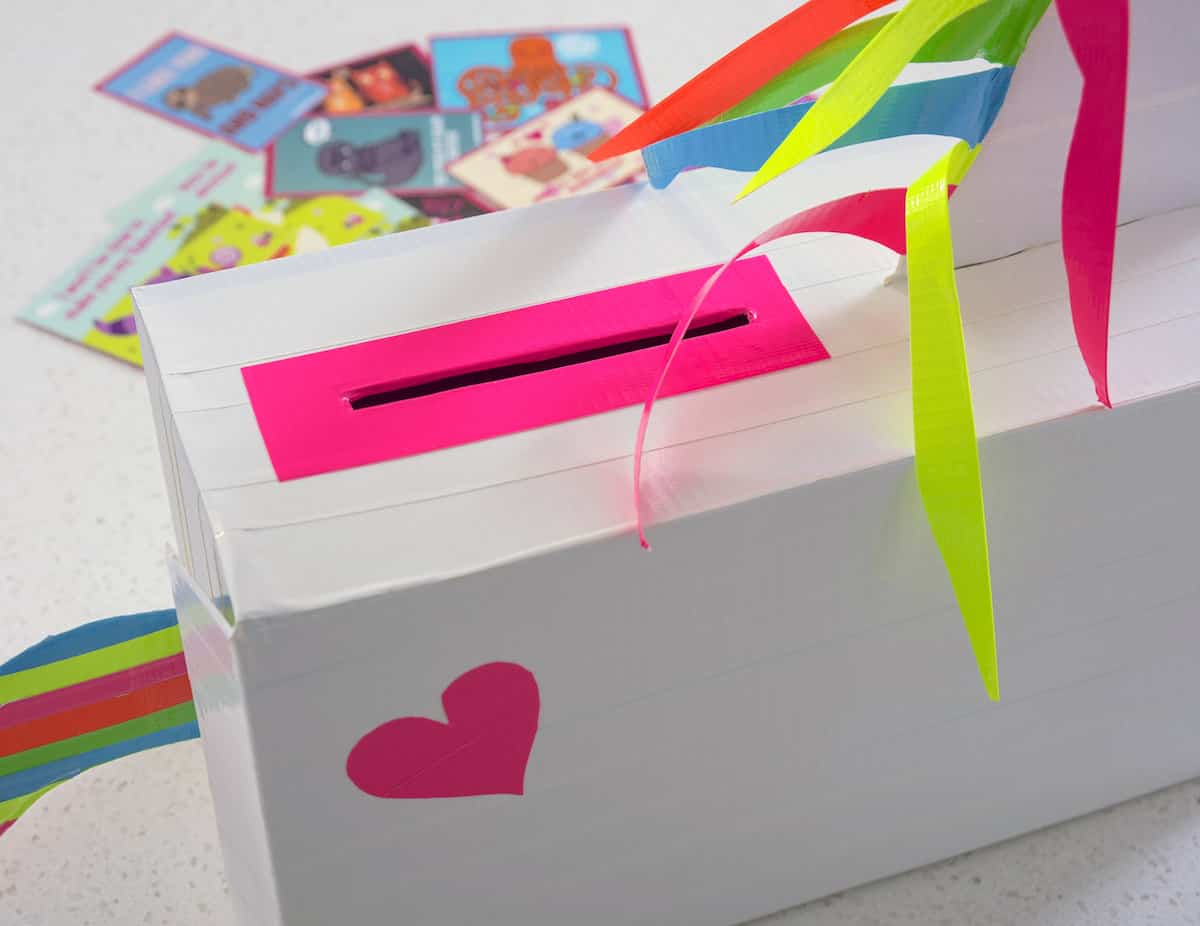
What do you think of my unicorn valentine box?? Isn’t it fun?! It’s ready to receive TONS of valentines!
Happy Valentine’s Day! Let us know if you make this project in the comments. If you want to get more ideas related to Valentine’s Day that the kids might enjoy, check out the following posts:


