DIY Christmas Topiary with Santa Hats
Use mini Santa hats and glass vases to create this cute and festive DIY Christmas topiary! This will look amazing on your holiday table.
Skills Required: Intermediate Beginner. You’ll be painting, cutting, sewing, and more. None of the steps are hard, but there are a few of them . . . you can reuse this year after year so it’s worth it!
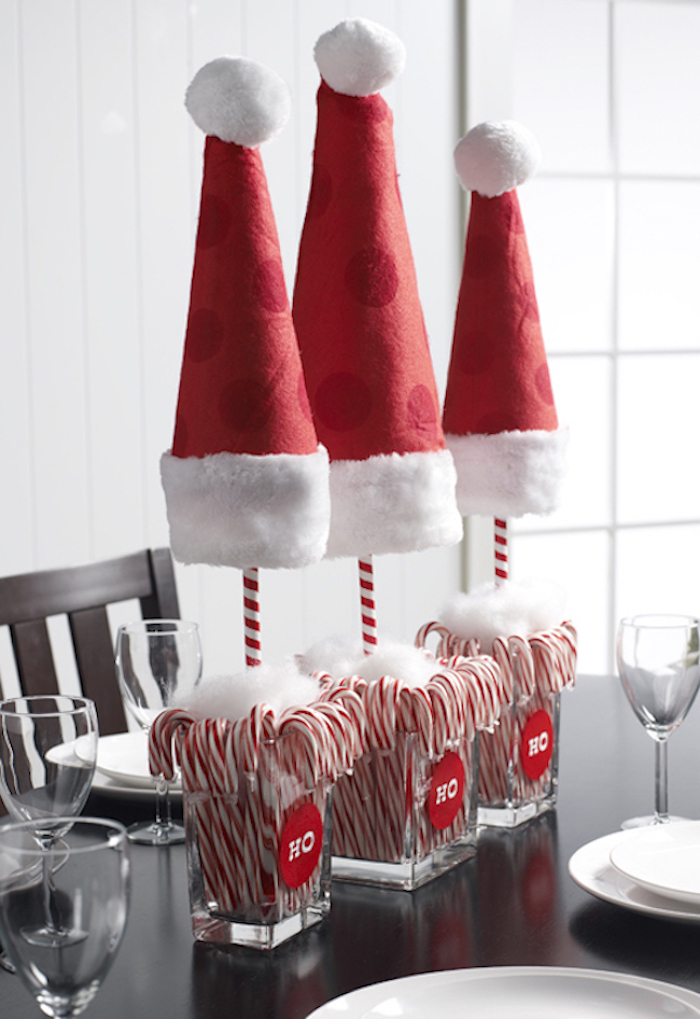
Looking for an inexpensive holiday table centerpiece? This DIY Christmas topiary is the ticket! It takes dollar store Santa hats and scales them down to fit foam cones . . . making them looking quite Who-villian as far as I’m concerned.
This entire display reminds me of the Grinch Who Stole Christmas, and the stripes and polka dots are key in that sentiment. And interestingly enough, you can get most of these items at the dollar store, so this is a perfect budget craft idea for Christmas.
(see all of our DIY Christmas ideas here!)
Gather These Supplies
- FolkArt Enamel paint – Wicker White, Lipstick Red
- FolkArt Acrylic paint – Wicker White, Lipstick Red
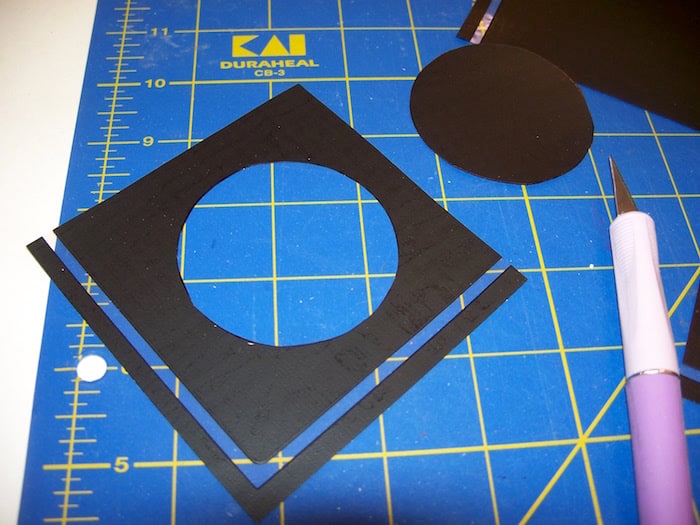
- Plaid 8 × 10 circle stencil
- Plaid Peel and Stick Painting Blank Stencil
- Adhesive holiday stencil with “HO” – you can also cut this yourself on the blank stencil
- Plaid dauber set
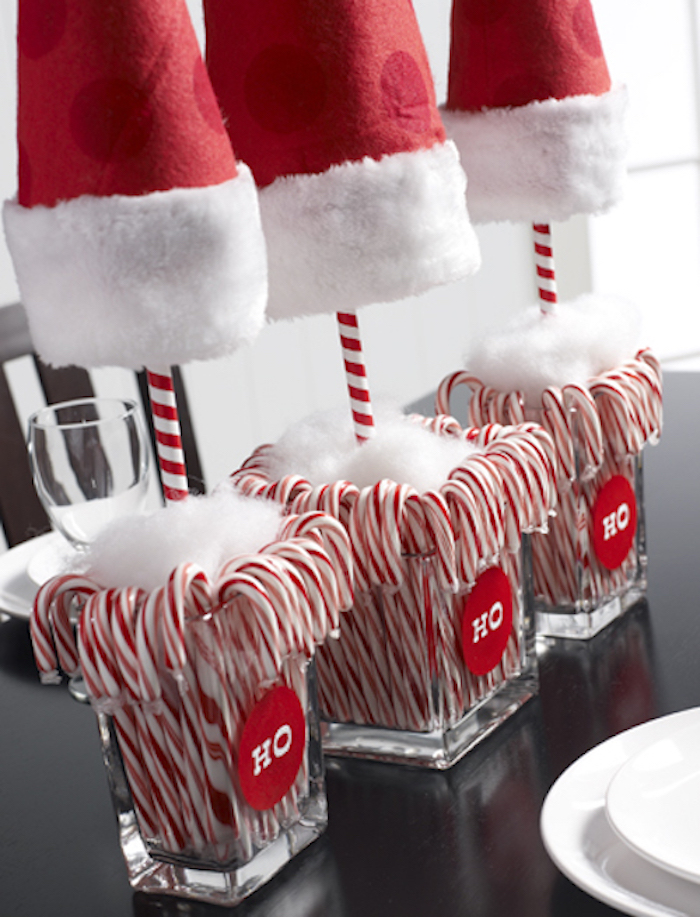
- Three glass vases
- Three santa hats
- Three foam cones
- Three 1/2″ x 12″ dowel rods
- Craft knife
- Quilt batting
- Polyfil
- Small candy canes – enough to fill your vases
- Scrap pieces of Styrofoam
- Liner brush
- Pencil
- Ruler
- Hot glue
- Sewing machine
- Scissors
- 1/4″ stencil tape
Doesn’t this Santa hat centerpiece look amazing? Simple . . . though there are a few steps, you’ll be surprised at how easy it is to make. If you try this Christmas topiary, let me know in the comments. Happy Holidays!

Santa Hat Centerpiece
Equipment
- Daubers
- Liner brush(es)
- Pencil(s)
Materials
- Acrylic glass paint Wicker White, Lipstick Red
- Acrylic paint Wicker White, Lipstick Red
- Circle stencil 8 x 10
- Plaid Peel and Stick Painting Blank Stencil
- Adhesive holiday stencil with “HO”
- 3 Glass vase(s)
- 3 Santa hats
- 3 Foam cones
- 3 Dowel rod(s) 1/2" x 12"
- Quilt batting
- Polyfil
- Candy canes small
- Scrap pieces of Styrofoam
- 1/4″ stencil tape
Video
Instructions
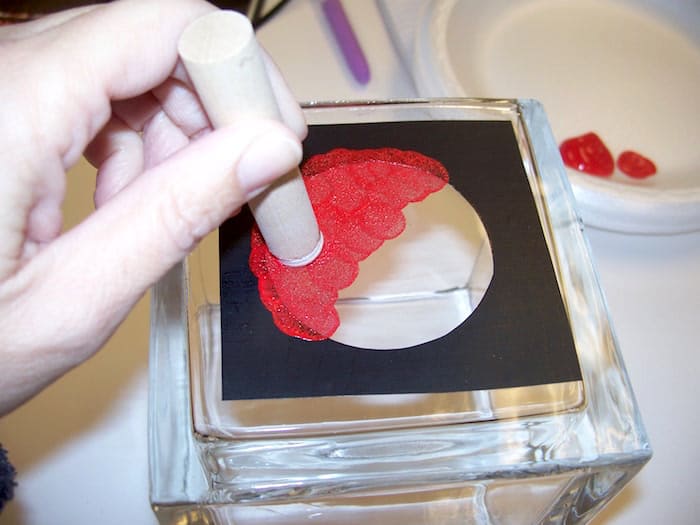
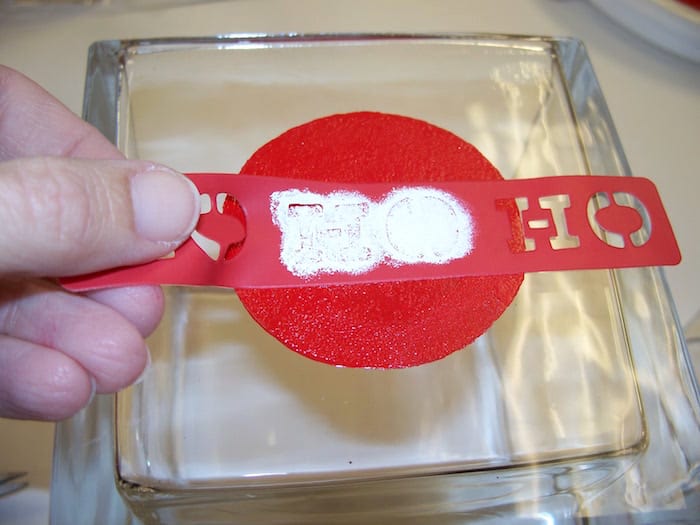
- Using the circle stencil, cut out a circle from the adhesive stencil sheet. Use the craft knife to cut the stencil out.
- One at a time, place the circle stencil in the center of the glass vase and smooth. Using the 5/8″ dauber, paint the circle with the red. Remove the stencil immediately while the paint is wet, wash, and let dry. Repeat.
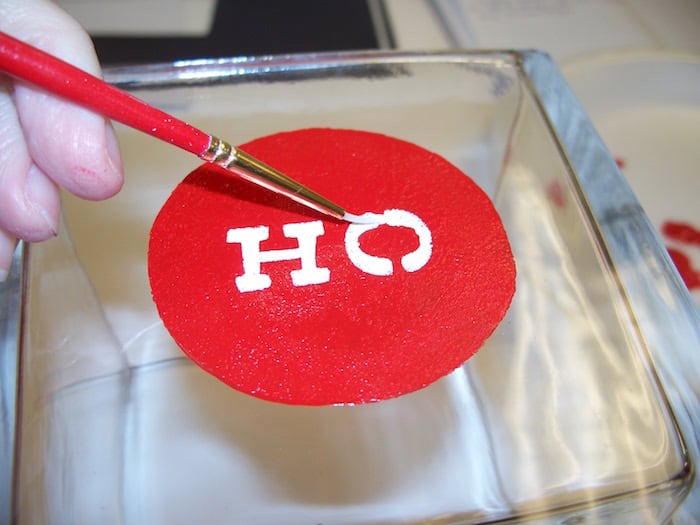
- When the red is dry, stencil “HO” on each of the vases in the center of the circle, using the white enamel paint. Peel the stencil up immediately.
- Fill in the letters where the line is broken with a liner brush.
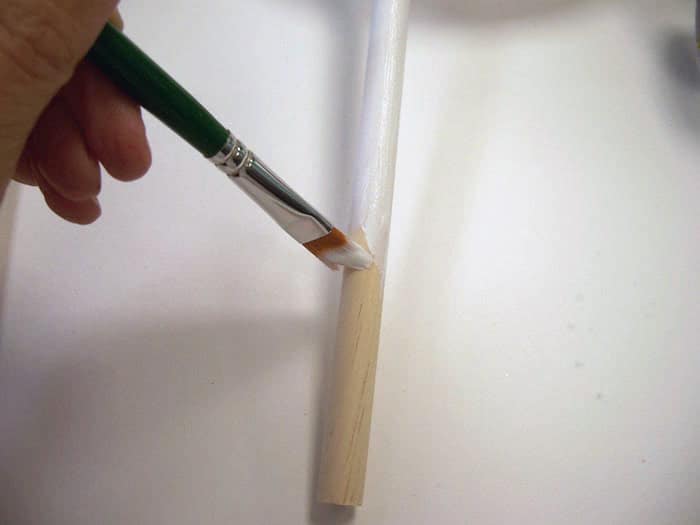
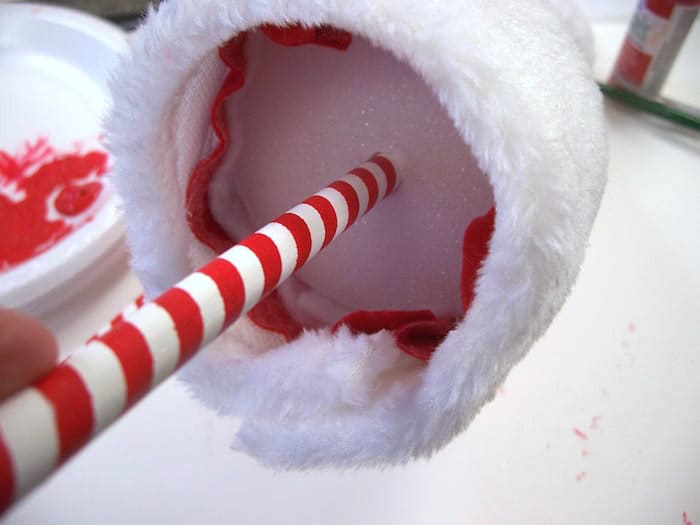
- Basecoat the three dowel rods with Wicker White. Let them dry.
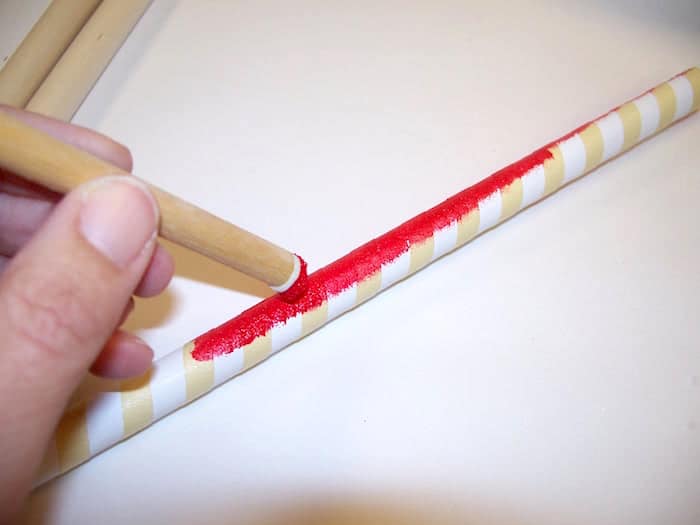
- Wrap the 1/4″ masking tape around the dowels as shown in photo, making a spiral like on a candy cane. Using the dauber, paint the dowels with Acrylic Lipstick Red. Remove the tape immediately and let the rods dry.
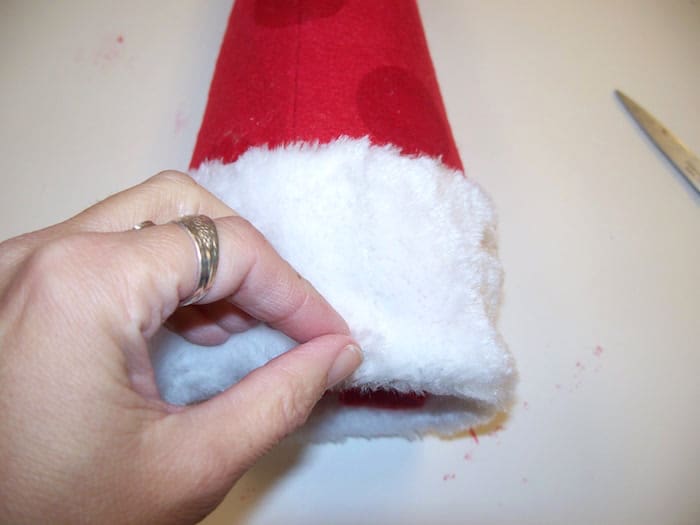
- Cut the trim off the bottom of all three Santa hats.
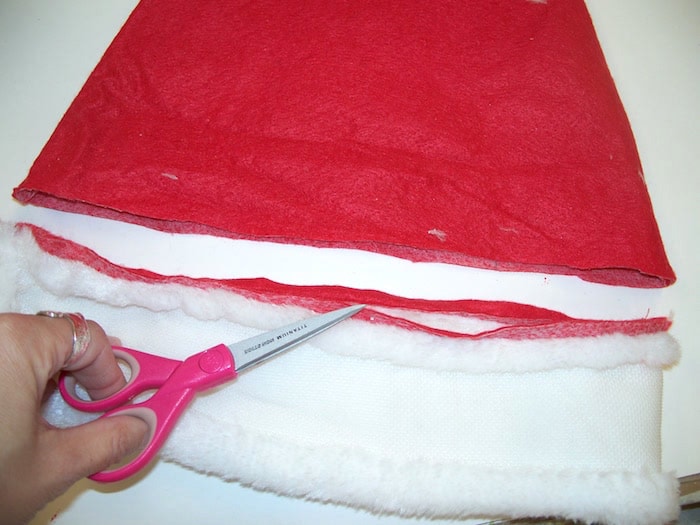
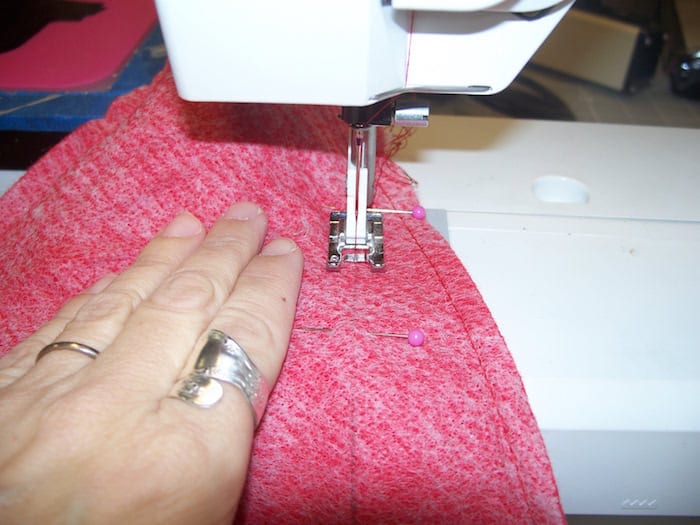
- Measure the foam cones and the sew the sides of the hat so that it will fit snugly on the cone. If you don't have a sewing machine, you can also hot glue it, but this will look better. After you've sew down the hat to make it smaller, trim the excess fabric.
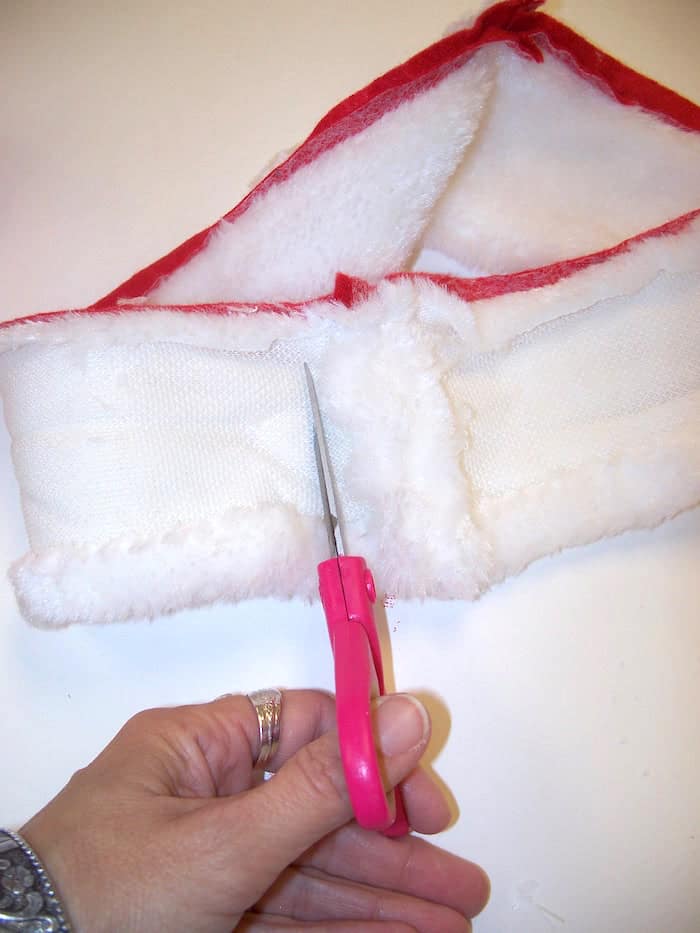
- Pick up the trim that you cut off; cut it and open up flat.
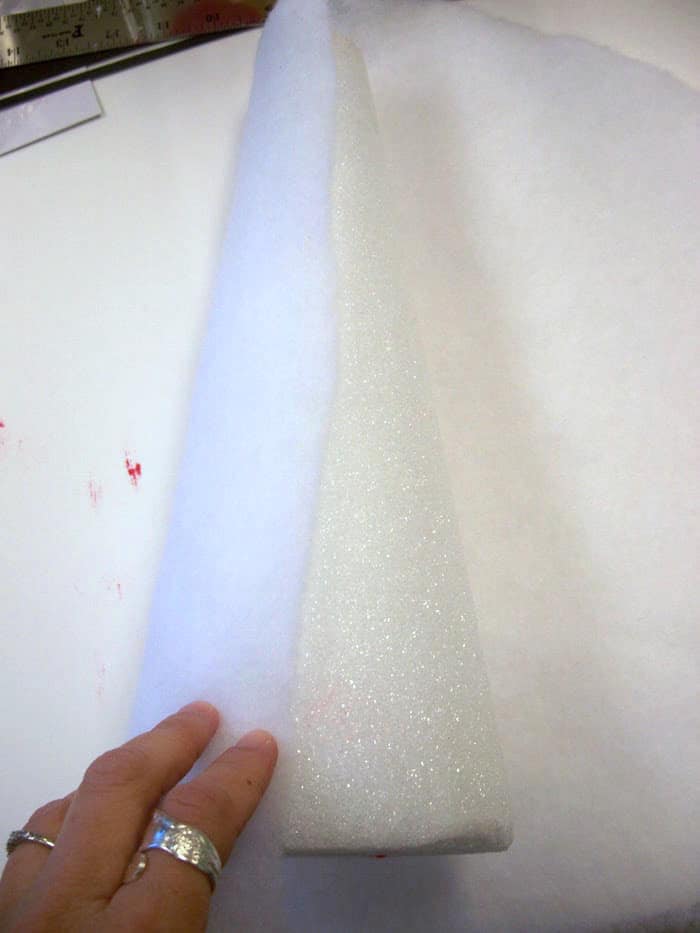
- Cut a piece of quilt batting to wrap around the cones. Hot glue in place.
- Place your sewn hat down over the cone and the quilt batting. Hot glue the white trim back around the base of the hat and cut as needed.
- Then use your adhesive stencil to make circles on the hat using your Acrylic Lipstick Red paint. Repeat with the other two hats and let dry.
- Cut a piece of styrofoam from scraps and glue to the bottom of a vase with hot glue.
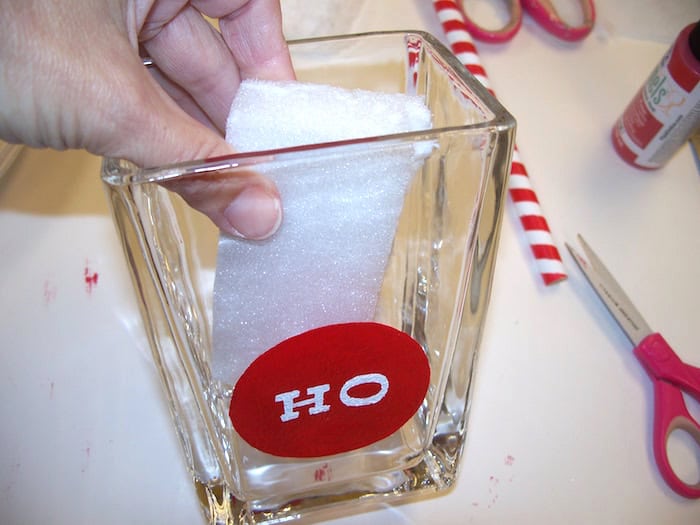
- Stick dowels into the bottoms of cones – then stick the dowel rod into the foam piece in the vase.
- Use the candy canes and polyfil to fill the vases.
If you like this project, check out these Christmas apothecary candy jars! I’d also love for you to check out the following ideas:
Candy Cane Centerpiece • Candy Cane Wreath • Christmas Magnets • Christmas Shadow Box • Decorative Candles • DIY Christmas Decorations • DIY Nativity • Felt Mistletoe • Gnome Decor • Magazine Christmas Tree • Mesh Christmas Wreath • Pom Pom Garland • Santa Mason Jar • Santa Napkin Rings • Snowman Mason Jar • String Art • Wine Cork Snowman
I found this post a year ago and decided to make them for a Christmas party. Found painting the dowels red and used white pinstripe tape to make the “candy canes” was neater than painting them. I also used stickers for the “HO” with white stencil. This was a lot more complicated than it looked but I think they will look great on the tables.
Hi!
I have been looking at these and loving them for a year. I was wondering if I could make the hats out of fur stockings I already have?
How do you know how to measure to make the narrow hats?
Thanks!
Katrina
Hi Katrina! I definitely think you could! And as far as how to measure them – I would do it “manually.” Sew a wide triangle with the stockings, place the cone inside and mark how tight you would to sew to with a fabric marker. If all else fails and you don’t feel comfortable doing that . . . Just glue the fur stocking fabric onto the cone and keep the seam in the back.
These are so adorable! Visiting from i heart naptime and pinning – thanks for sharing! Have a happy holiday season!
These are beyond CUTE!