DIY Pounded Flower Tote: A Fun Craft with Real Flowers
Make a stunning pounded flower tote bag using real blooms! This easy DIY is perfect for gifts and lets you turn nature into wearable art.
Skills Required: None. Children can make the project, however it will require preparation and finishing by an adult. It’s simple and will keep kids busy for a while.
Have you ever wished you could capture the beauty of fresh flowers and keep them forever? Well, with a hammer, some blooms, and a little DIY magic, you can!
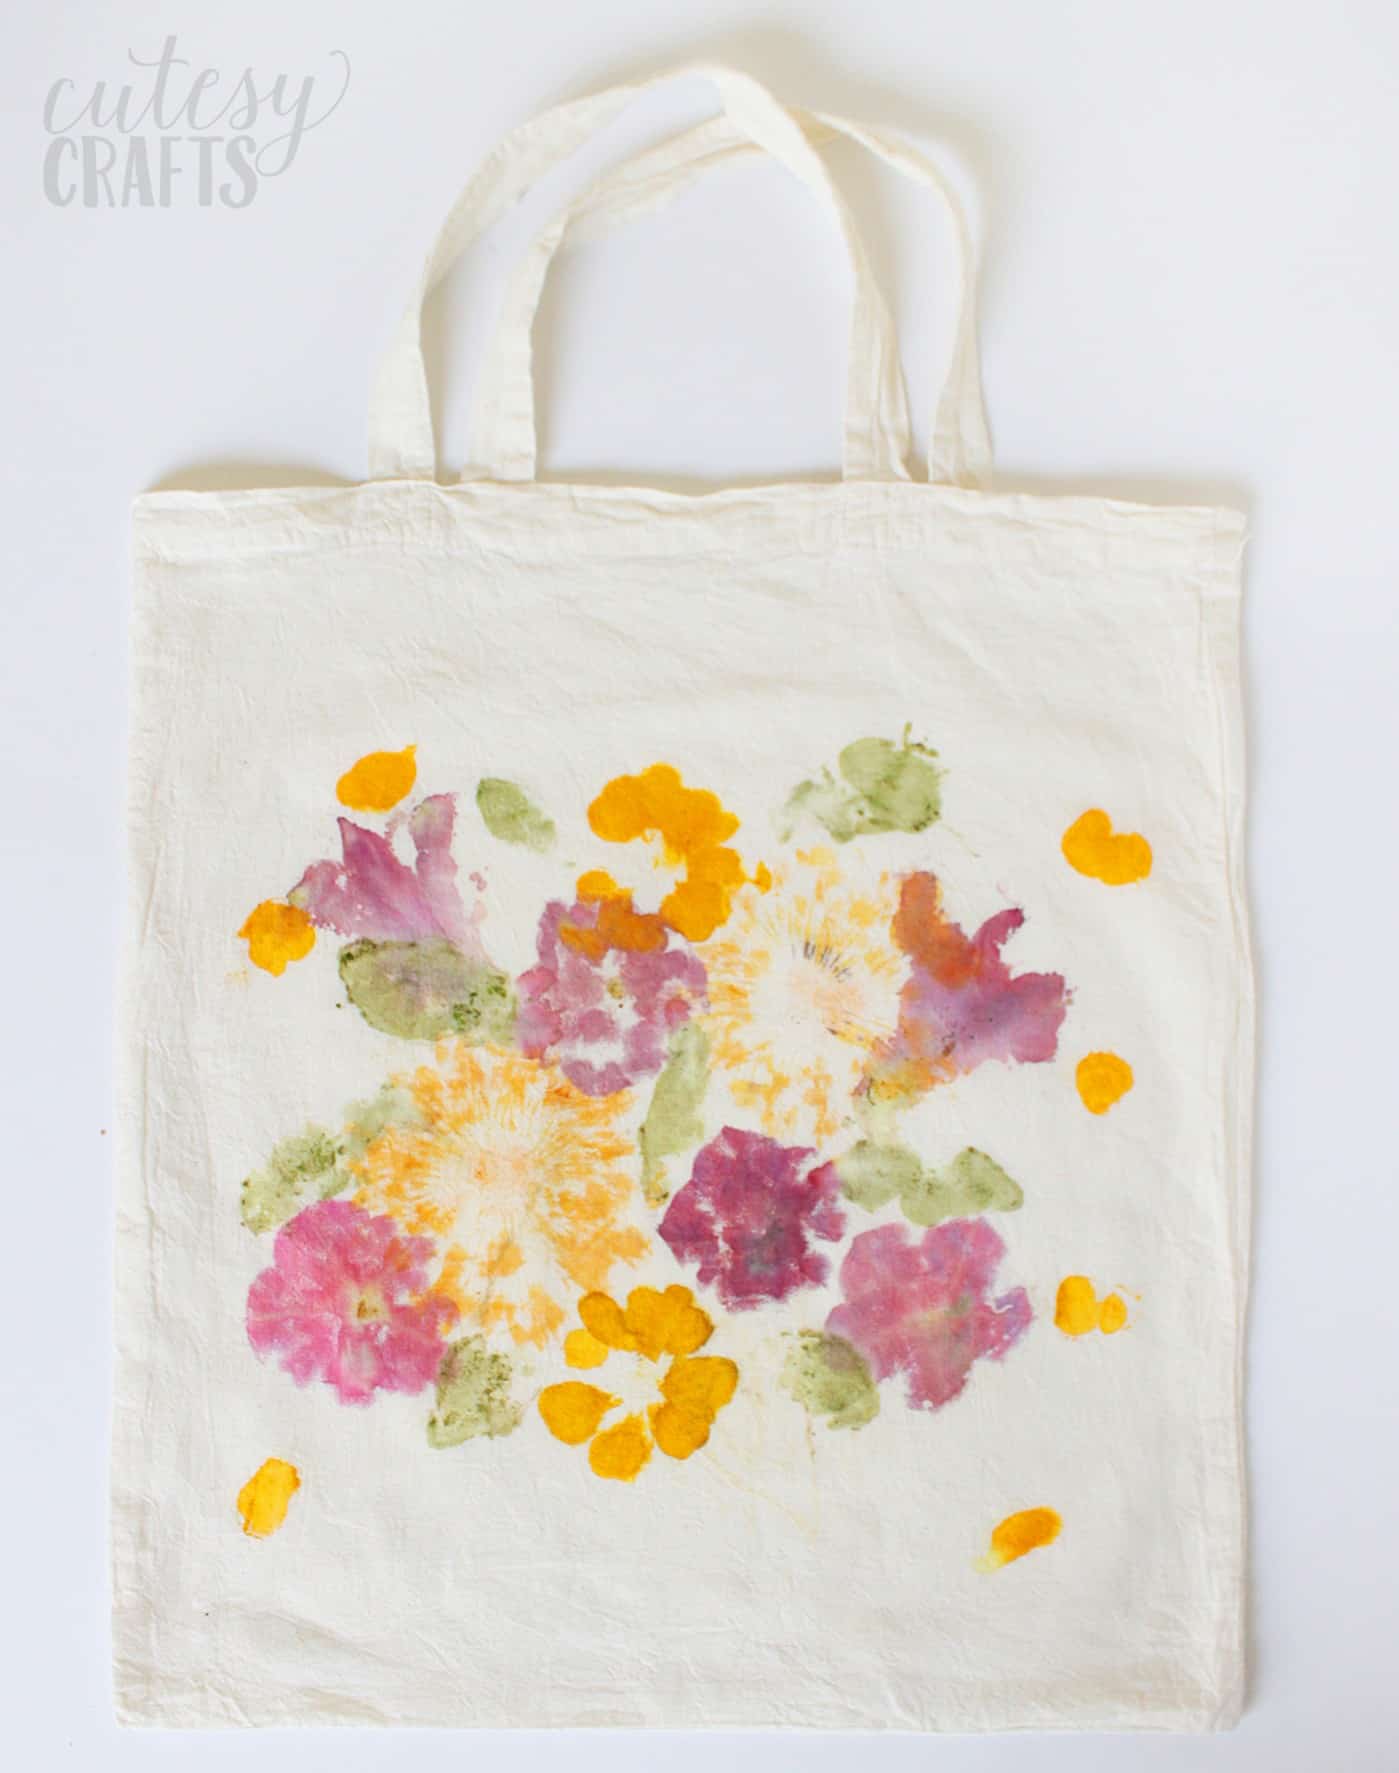
This pounded flower tote bag is one of those craft projects that feels a little bit like science, a little bit like art, and a whole lot of fun. It’s an easy way to transfer natural flower dyes onto fabric, creating gorgeous, botanical prints that look almost watercolor-like.
What makes this project even better? It’s simple enough for kids to help with, but the results are impressive enough to gift to just about anyone.
Think Mother’s Day, birthdays, or even a thoughtful teacher or friend gift. Because let’s be real – who wouldn’t love a handmade tote covered in real flower prints?
One of the coolest things about this technique is that no two bags will ever turn out the same. You can experiment with different flowers, leaves, and layouts to create something completely unique every time.
And since tote bags don’t need to be washed often, your floral masterpiece will stay vibrant for a long time.
So, grab some blooms, get your hammer ready, and let’s turn a plain tote into a botanical work of art!
Get the tutorial below:
Flower Pounding Tote Bag
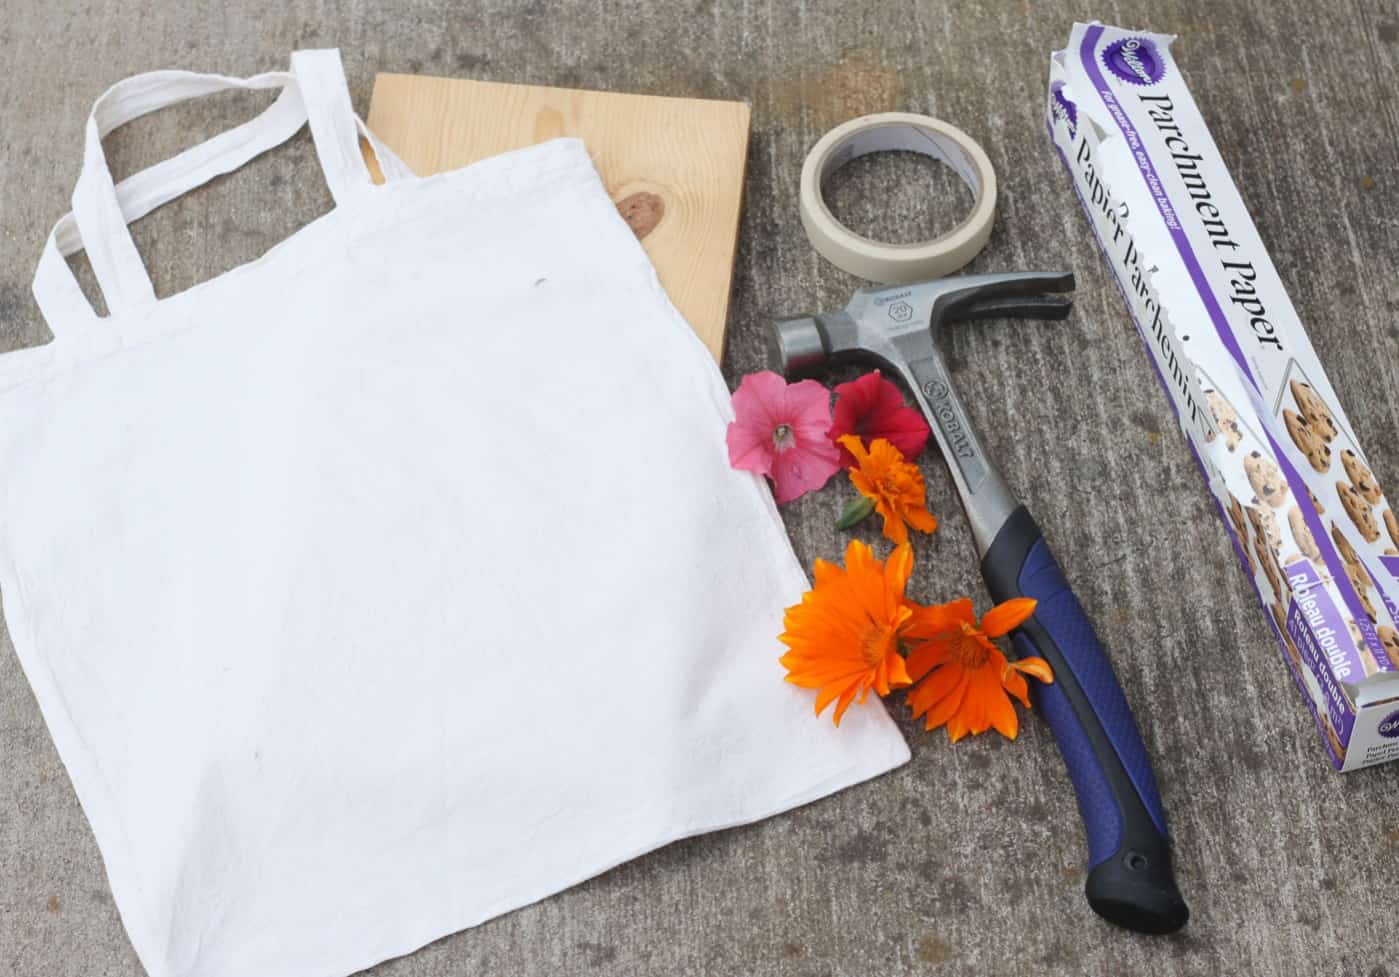
Equipment
- Rubber gloves
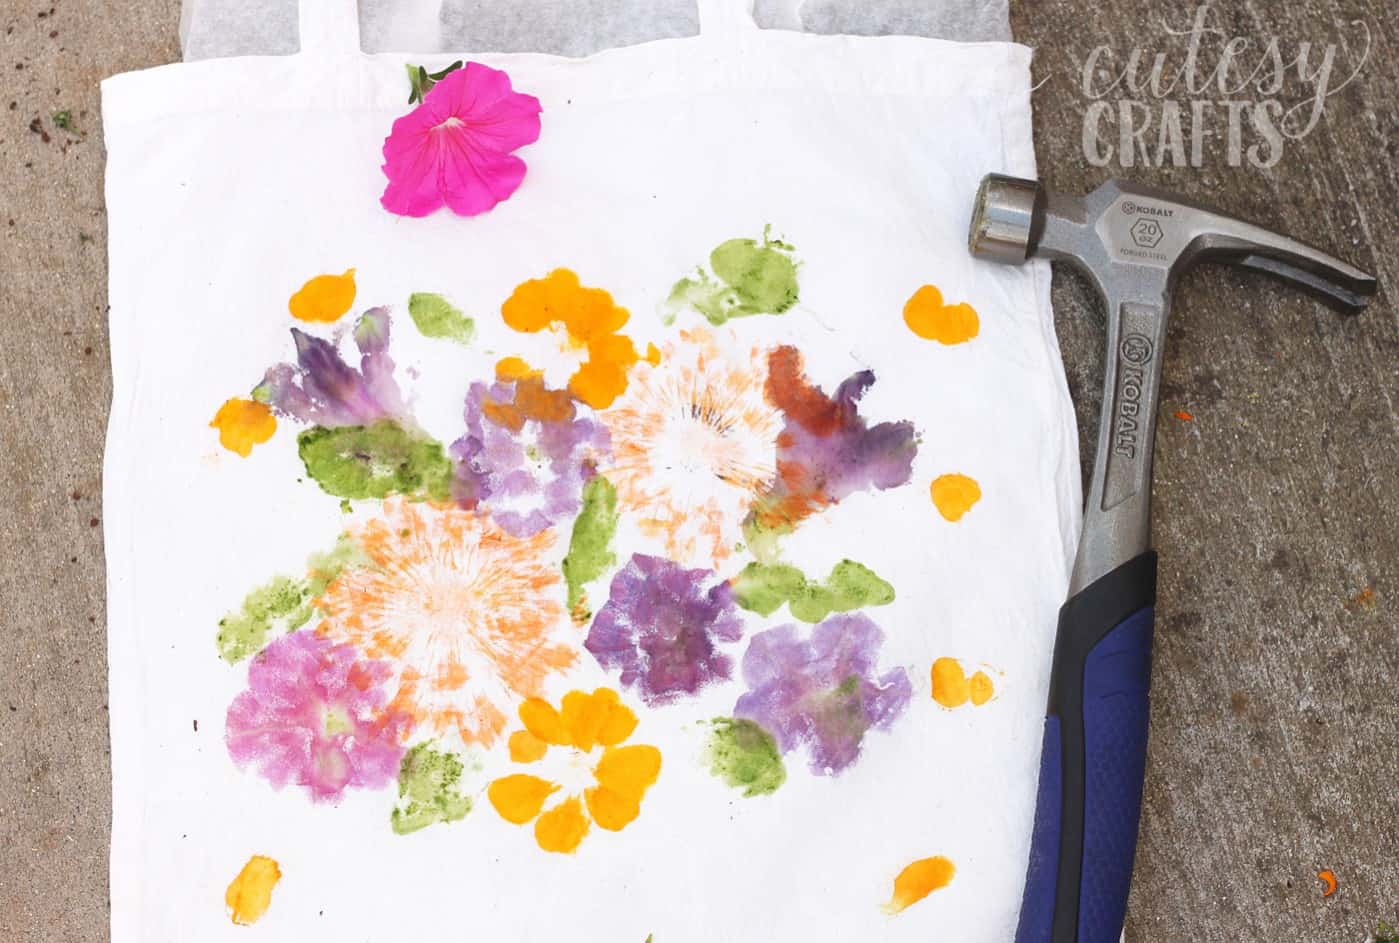
- Board
- Hammer
Materials
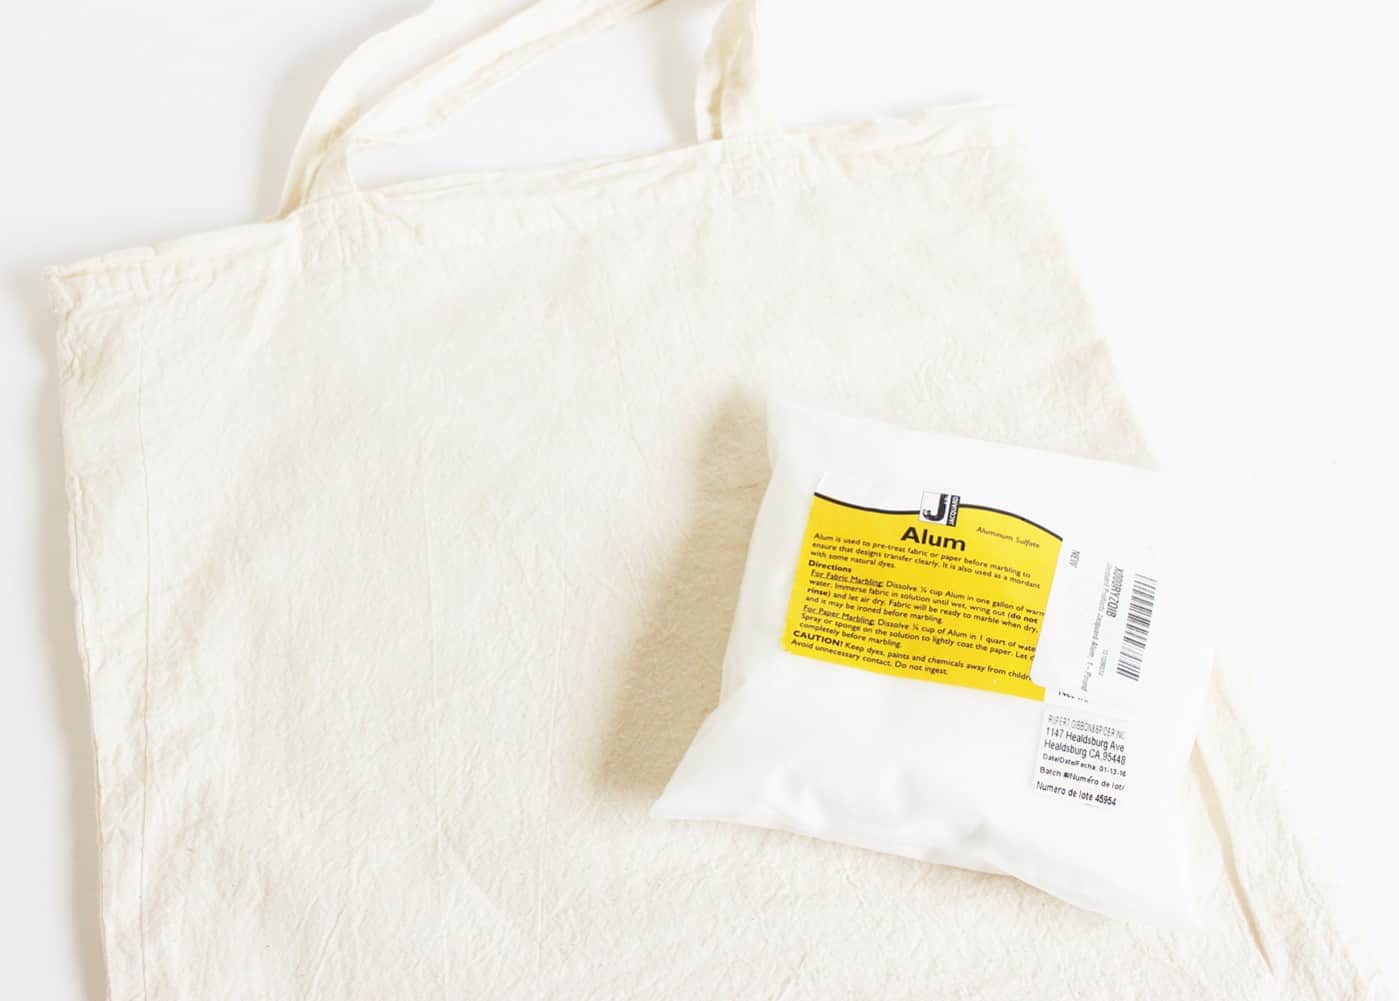
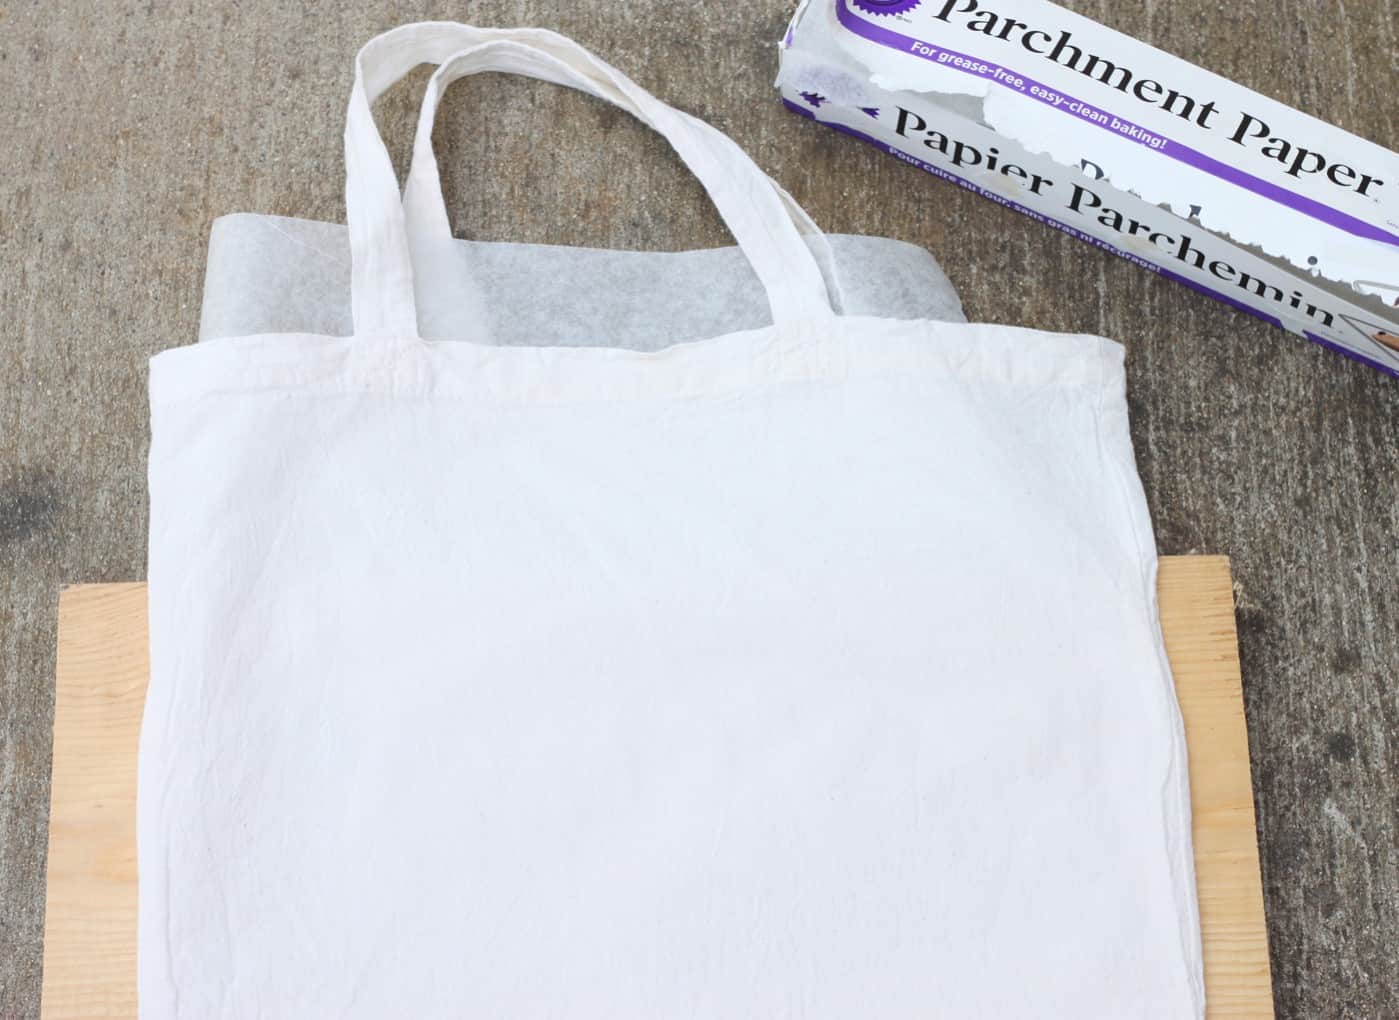
- Cotton tote
- Alum powder
- Parchment paper
- Masking tape
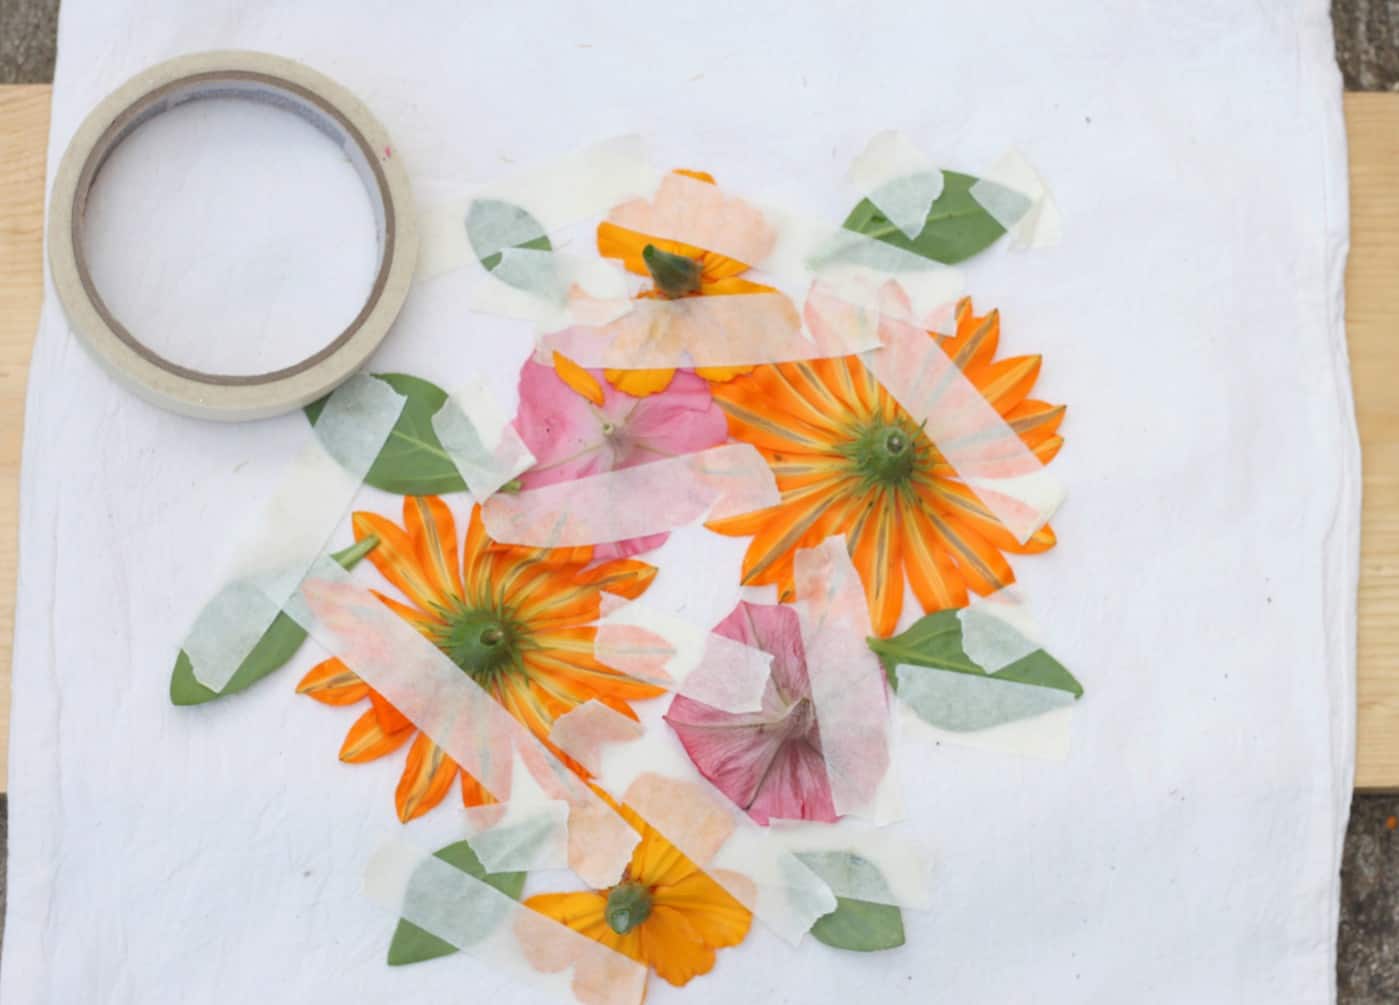
- Flowers
Video
Instructions
- To help the natural dyes take to the fabric, you need to prepare the bag first. Wash the bag to get rid of any residue.
- Dissolve 1/4 cup of alum in two cups of hot water. Soak the bag in the mixture, wring it out, and let it air dry. Iron to get out the wrinkles.
- Slip a piece of parchment paper inside to keep the dye from leaking through.
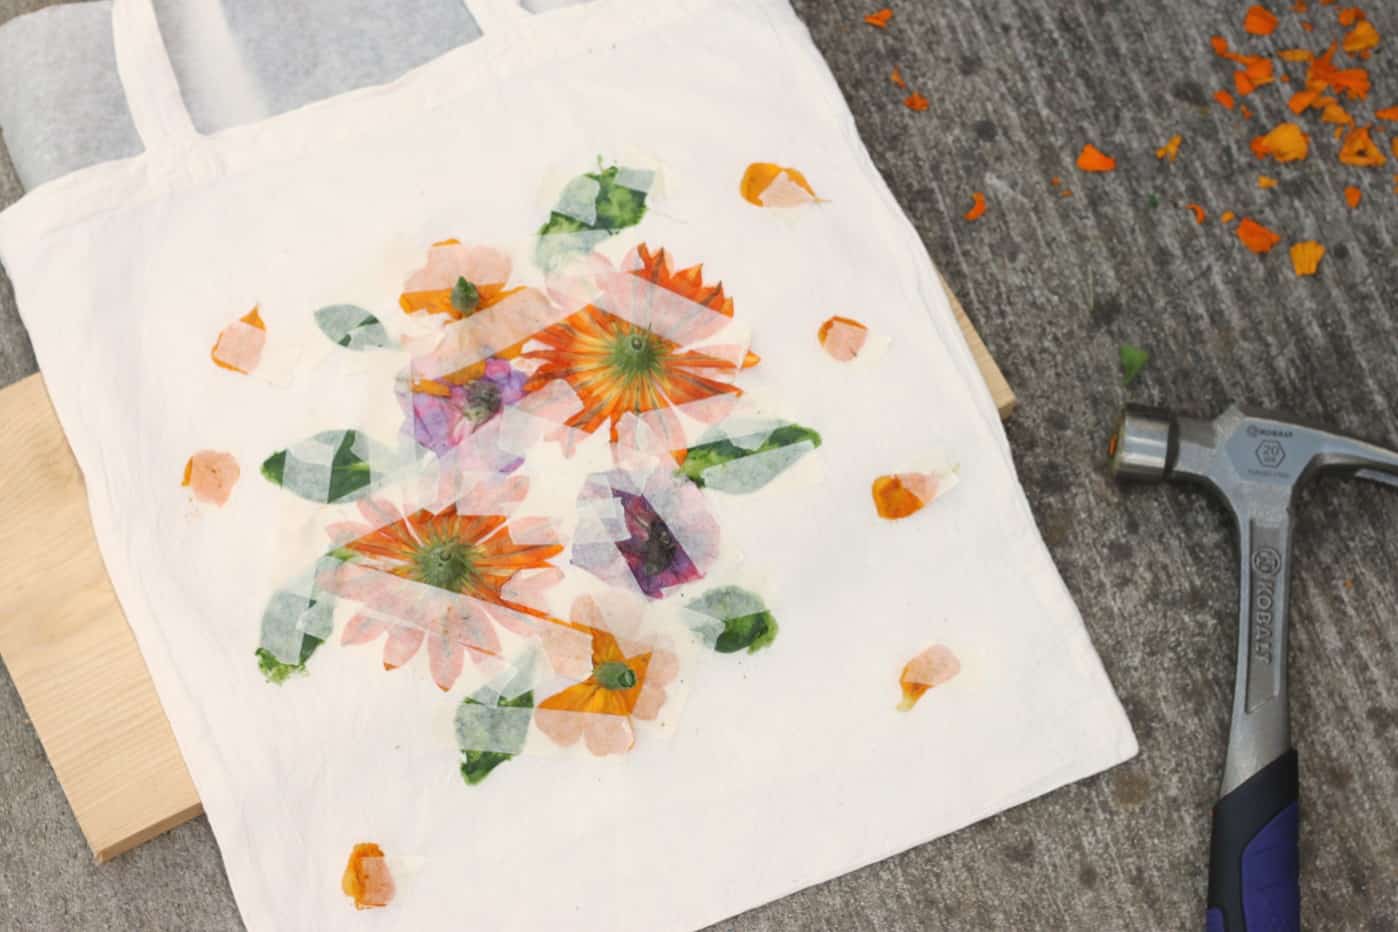
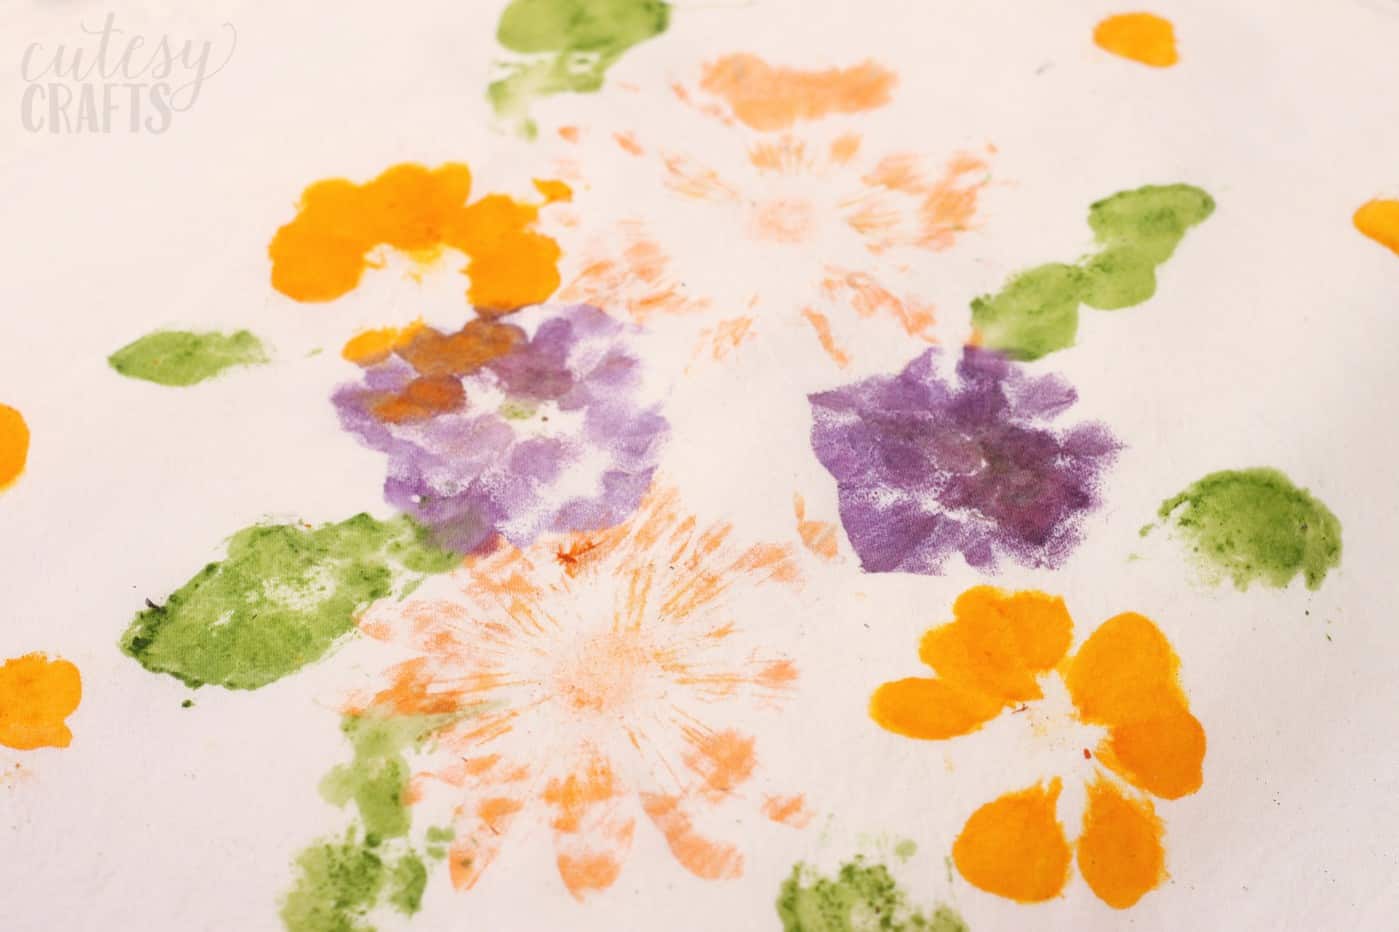
- Gather flowers and leaves. If the flower is really full, with lots of layers of petals, you'll want to pluck a bunch off first, so the prints come out nicer. Lay your flowers out on the bag, and secure them with lots of masking tape.
- Put the bag on top of your board and hammer away. Make sure you hit every part of the flowers.
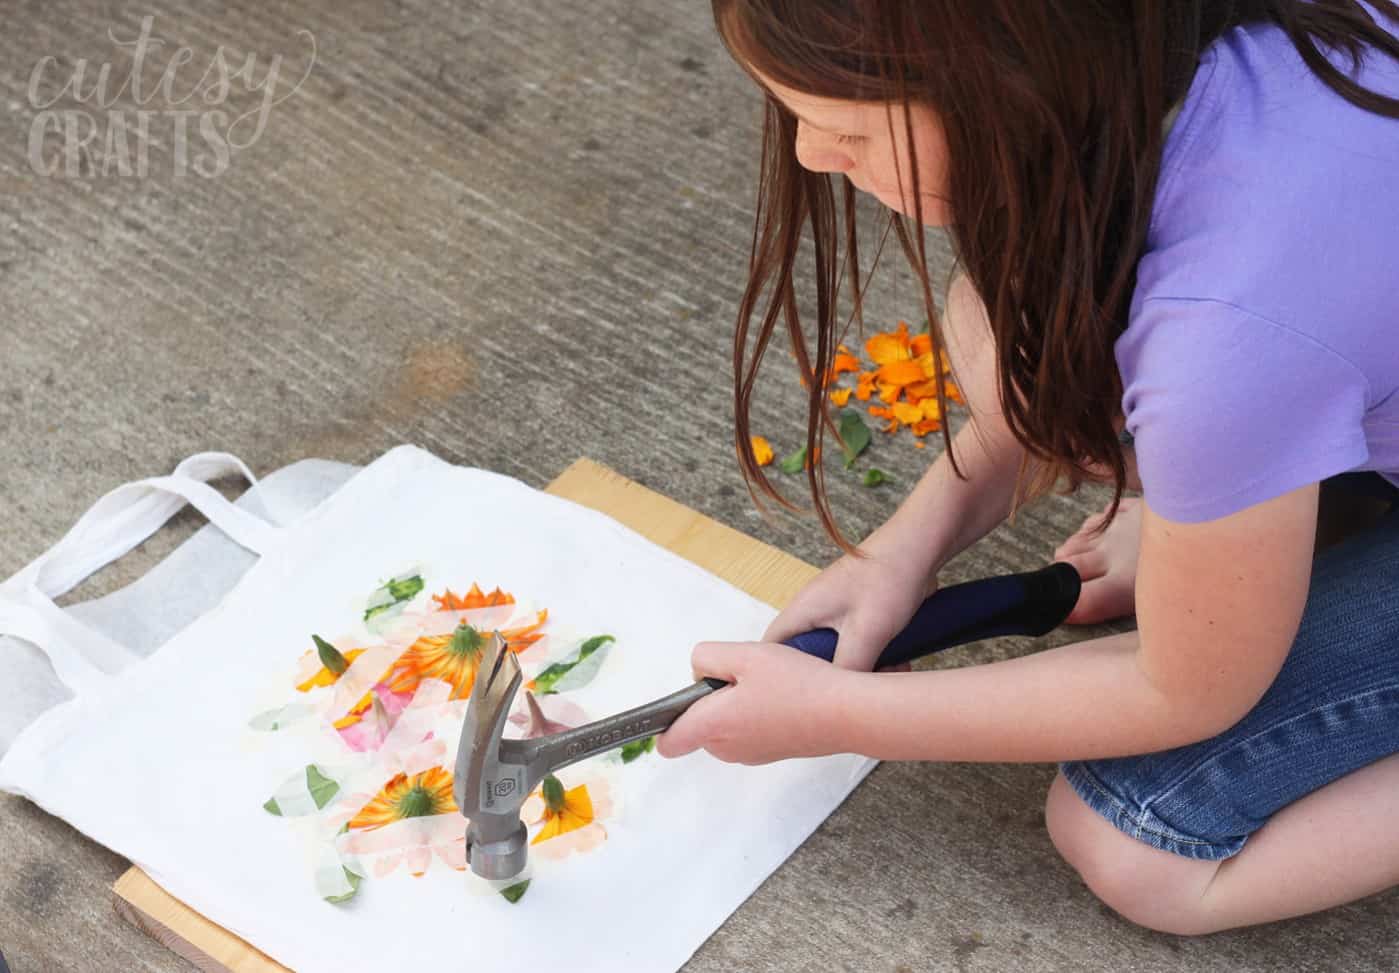
- Peel the flowers and tape off to reveal your print. Add some additional flowers in random areas and hammer as needed.
- When you are done, let everything dry, then put another piece of parchment paper on top of the bag and iron over your design with a hot, dry iron on the highest setting. This will help the colors set in and keep them from fading.
Notes
For more crafts like this, check out the following ideas – these are some of my favorite for Mother’s Day:

Hello 🙂 such a fun idea. I basically use this process to make my art prints 🙂 I haven’t thought of using it on cotton. Love it. Wondering if you washed the bag after, or what would the after care process be?
Lovely idea. Thanks for posting this diy project.
Can’t wait to try to make one for my mom as a mother’s day gift.
Hello! 😀
Wow, I really like this tutorial. It turned out great! I would really like to know how the colors turned out after a while. Did they loose the saturated look?
All the best, Margrethe ????
Is the alum powder the same alum that is in my spice cabinet? I can’t find the bag you posted anywhere that I can get it delivered before Mother’s Day. Wondering if I can just use what you buy in the grocery store?
Thanks,
Rhonda
It is! However, I recommended the Amazon source because of how expensive it is 🙂
Do you think you could use the flowers more than once? Or does each bag need fresh flowers?
Hi Carrie! It depends on how “juicy” the flowers are. You want lots of pigment from the flavanoids! I would be inclined to try on more than one bag if I had very fresh flowers.
I loved this idea and followed directions exactly. Very disappointed. Only the yellow flowers came through. We tried several different types of floeers but the pink ones all came out brown. I was doing this with my grandchildren for their mothers and they didn’t like how it came out either. They ended up painting their bags
Thanks for the feedback Leslie! Sorry it didn’t work out for you. It probably depends on the flowers. We had success, but sometimes projects just don’t work out!
Hi!! Do you think you could do this on a tee shirt for Mom?? Or…constant washing would fade the print?? Have you tried and what’s your thoughts??
Thank you!!
Wonder if there’s something you could iron over the design to protect it??🤔🤔
Hi there! I’m thinking you could do this on a t-shirt but that it would fade . . . hmmm I’m not sure what else you could use!
Does it still work if the bag is not prepared with alum? I hope to do this tomorrow at school, but I haven’t washed them first. And… they are at school and not my house!
Hi Shannon! The alum acts as a mordant, or fixative – so you need that for sure! At least if you don’t want it to be washed out 🙂
Wonderful art! I’m currently working on flour sack towels! Setting the color has had me worried. Thanks for the Ironing suggestion! I will wash one and see how it works. Any other suggestions/ideas please let use know.
How long do you let the fabric sit in the alum water?
Leave the fabric to soak for 40-60 minutes, stirring every 15 minutes for even absorption.