Painted Coffee Mugs You Can Make at Home (Dishwasher Safe!)
You’ll love these DIY painted mugs made easy! Learn what paint to use, how to cure them, and tips for dishwasher-safe designs.

If you’ve ever wandered through IKEA or the dollar store and seen those plain white mugs, you’ve probably thought, “Eh, boring.”
But with a little paint, those boring mugs can become some of the coolest, most personal gifts you’ll ever give . . . or just your new favorite coffee cup. Painting mugs is one of those crafts that’s inexpensive, quick, and way easier than it looks.
The best part? You don’t need to be an artist. If you can tape off a stripe, punch out a circle, or doodle some polka dots, you can paint a mug.
And because you get to pick the colors and designs, you can customize them for literally anyone: sports fans, kids, teachers, friends, or just yourself when your kitchen needs a little personality.

I’ve even seen people do car-inspired mugs, watercolor looks, and fun handprints from little ones (those always make grandparents melt).
Now, you may have seen “Sharpie mug hacks” on Pinterest floating around. Hate to break it to you, but those often don’t last.
The trick to making painted mugs actually hold up (yep, even in the dishwasher) is using the right supplies and curing the paint the right way. Don’t worry, I’ll walk you through it.
So grab a couple of mugs, your favorite paint colors, and let’s get creative. Once you make one, you’ll probably want to paint a whole set. And honestly, for the price, why not?
FAQs About Painting Mugs
What kind of paint should I use on ceramic mugs?
Use enamel paints or paint markers specifically labeled for glass and ceramics. Brands like FolkArt Enamel, Pebeo Porcelaine, or professional ceramic paint pens work best. Avoid regular acrylics unless they are marked dishwasher safe.
Can I really use Sharpies on mugs?
Oil-based Sharpies can sometimes work, but they are not as durable as enamel paints. Standard Sharpies will fade or wash off, so skip them if you want long-lasting results.
How do I make painted mugs dishwasher safe?
Two main curing methods work:
- Bake Method: Place mugs in a cool oven, heat to 350°F, bake for 30–60 minutes, and let cool in the oven.
- Air Dry Method: Allow mugs to cure in a dry place for 21 days.
Follow the paint brand’s instructions for best results.
Can I paint inside the mug where drinks go?
No. Even though most craft paints are non-toxic, they aren’t food safe. Keep designs on the outside and at least 1/4 inch below the rim.
What if I make a mistake while painting?
Use a cotton swab dipped in rubbing alcohol to wipe away fresh paint before it dries. A craft knife can also carefully scrape off small dried spots.
Will the paint color change in the oven?
Occasionally, very bright or pastel colors (like yellow) may darken slightly during baking. Always test paints first if you’re unsure.
Can I paint on glazed mugs?
Yes, just clean them thoroughly with soap and rubbing alcohol before painting. The paint will still adhere and cure properly.
Are you ready to get started? Check out the how to card below:

DIY Mug Painting
Equipment
- Circle punch mine is 2-inch
- Spouncers
Materials
- ceramic mug ours are from IKEA
- FolkArt Enamel Paint or other enamel paint
- Stencil tape I used 3/4" and 1/4"
- Cardstock or wax paper, something you can punch through with the tape on
Instructions
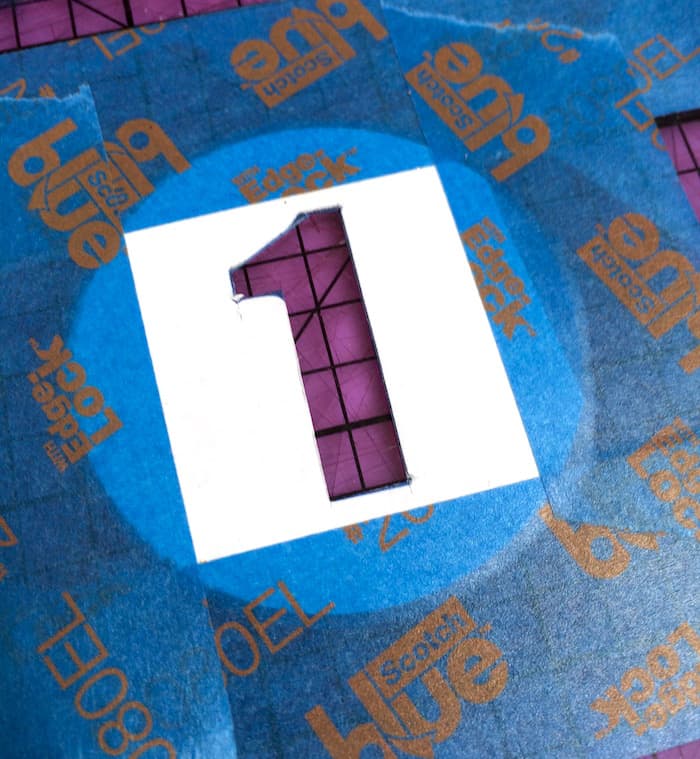
- Place some painter's tape (overlapping) down on cardstock. Wax paper could work too; you just need something that is stiff enough to punch through.
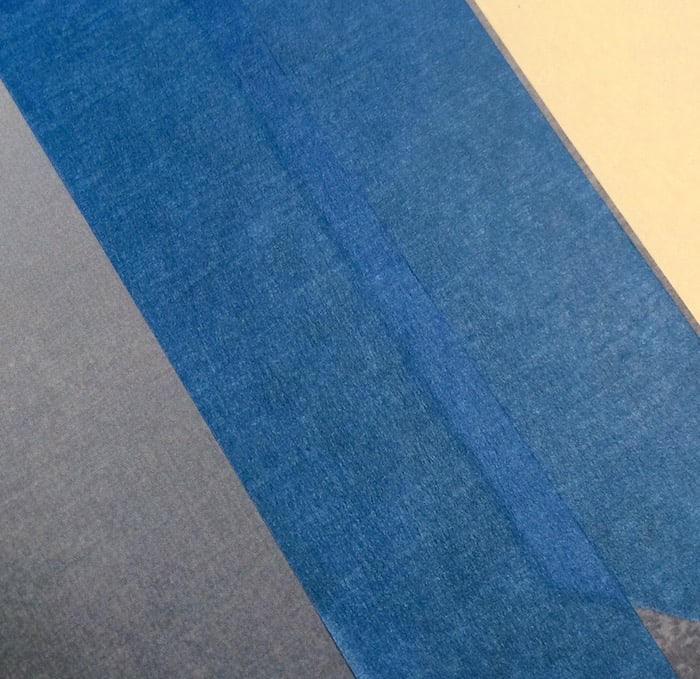
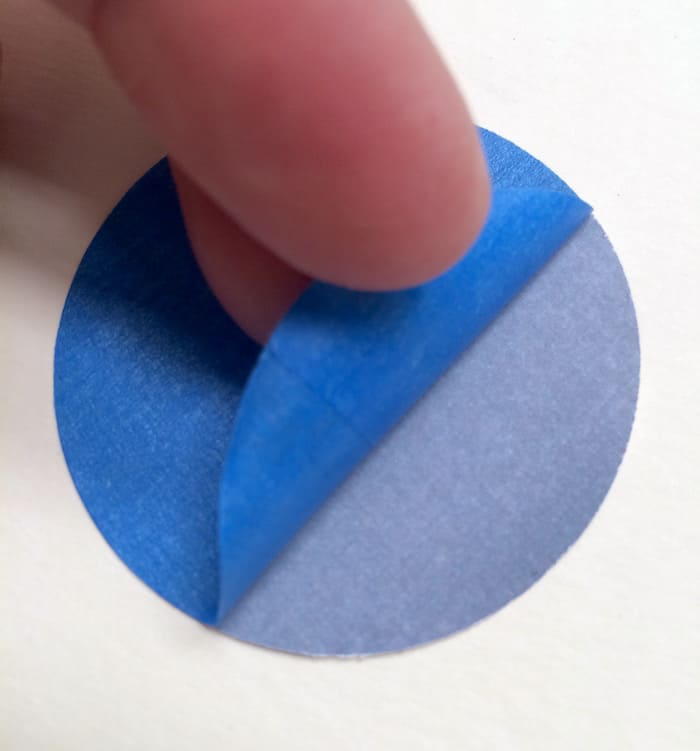
- Use the 2 inch punch to punch a circle out of the cardstock, through the painter's tape.

- Peel the painter's tape circle off of the cardstock. I might seem like it's not going to come off of the cardstock, but I promise you that it will.
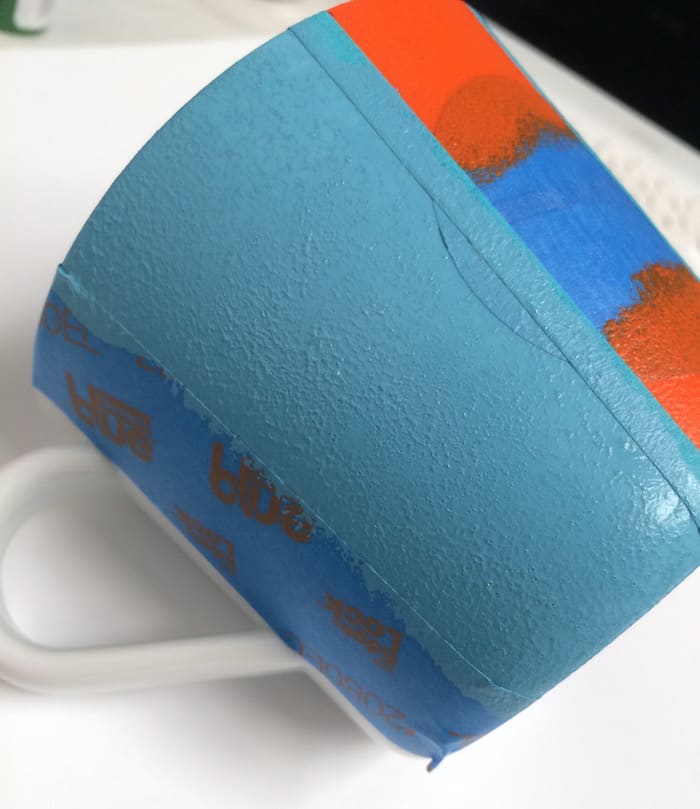
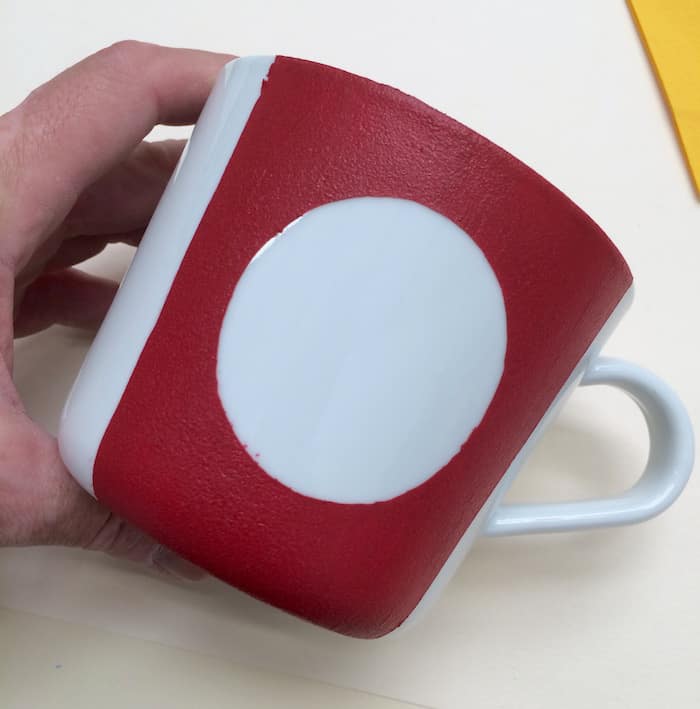
- Place the tape circle down in the center of the mug. Then place painter's tape stripes down either side of the circle.Use a spouncer to apply the paint to the mug in the open spaces as shown. Use an up and down motion. Do one layer, let dry, and repeat.
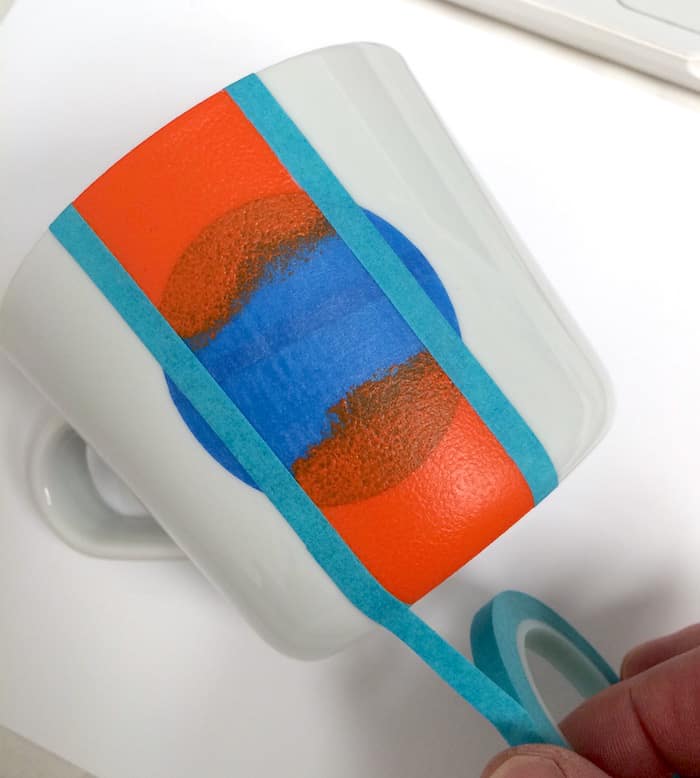
- Remove the painter's tape stripes . . . and add the 1/4" inch tape down the side of the first color (orange). Be careful not to tape on top of the paint . . . you'll peel it off as you peel up the tape.
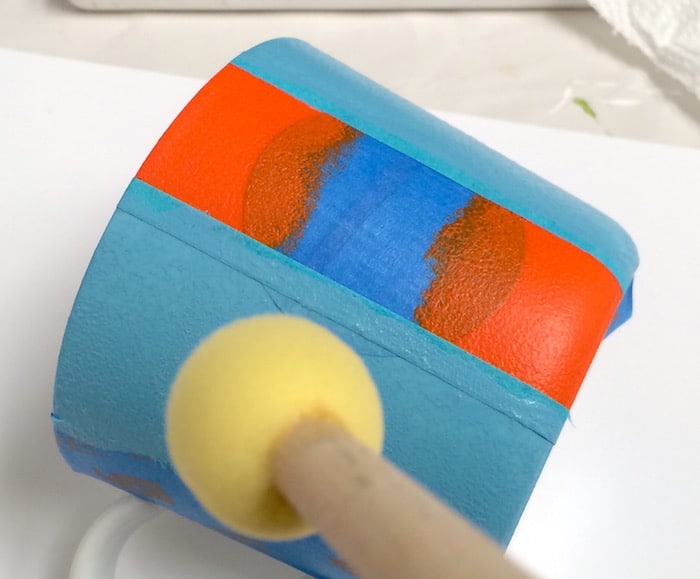
- Put painter's tape on the outside to make your second stripe. Use your spouncer to apply the second color. You're going to see texture in your paint from the spouncer. That's okay.
- Carefully peel up the tape. If you need to, run a craft knife down the side of the painter's tape to split the paint and tape from each other.
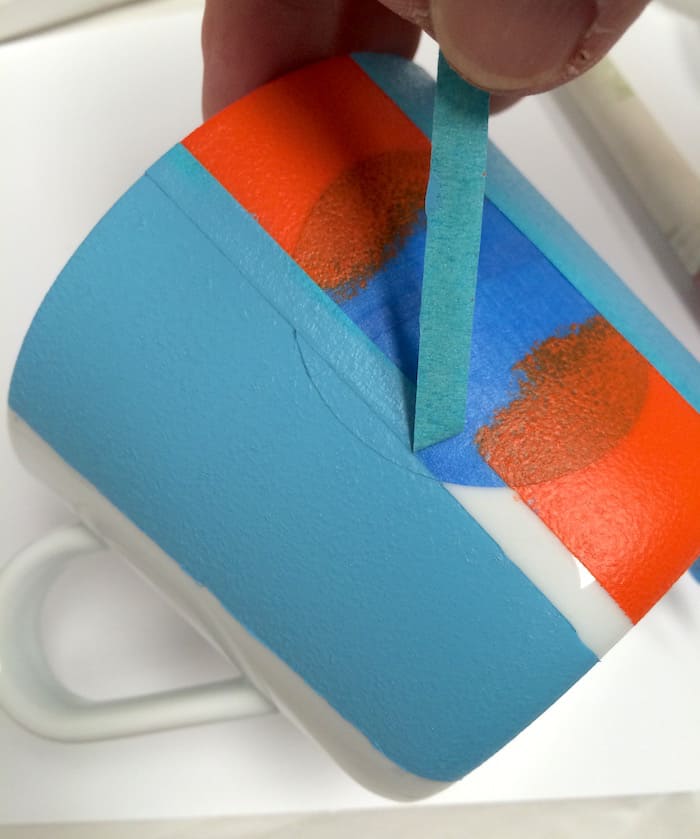
- Remove the smaller stripe and the circle. Cure according to bottle instructions.
Notes
If you need a DIY gift, here are some other options you might be interested in:
DIY Bath Salts • Flower Pot Craft • Fruit Stamped Towels • Handmade Magnets • Marbled Mugs • Mini Planters • Wooden Beer Caddy


What a GReat idea! It’s so hard gifting for men, but this is a perfect gift idea. Pinned.