Color Changing Slime That Changes Right in Your Hands
Learn how to make color changing slime! Our guide shows you how to create mesmerizing, thermochromic slime for hours of sensory play.

Regular slime is fun. But slime that changes color in your hands? That’s a whole different level of cool.
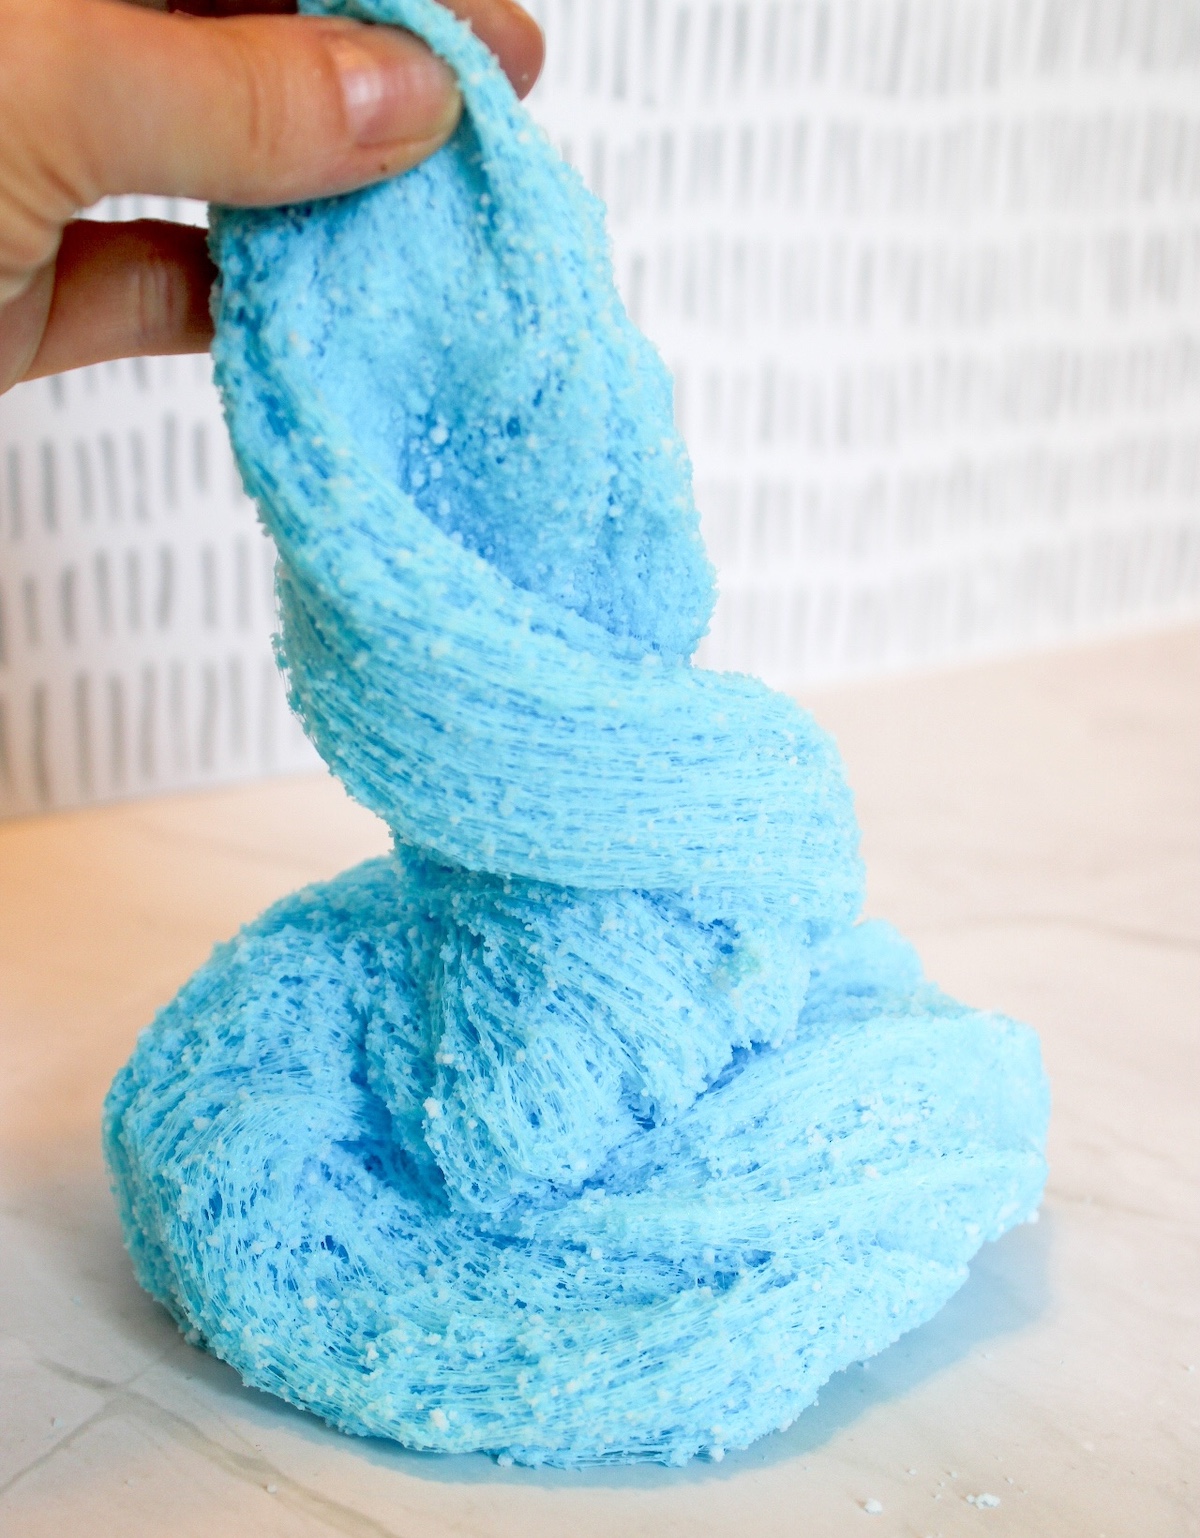
This color changing slime reacts to temperature, which means the warmth from your hands can completely transform the color while you play with it. Stretch it, squish it, wrap it around an ice pack, or leave it in the sun for a few minutes and watch the colors shift right in front of you.
Honestly, it feels a little like playing with a mood ring — except way stretchier and much messier.
And yes, it is way too entertaining.
The best part about this project is that it looks wildly impressive even though the recipe itself is surprisingly simple. If you can mix a few ingredients together, you can make this slime.
This version uses color changing glue, which makes the process incredibly easy. But if you can’t find it locally, you can absolutely make your own version using clear glue, thermochromic pigment, and a few drops of food coloring to customize the shades.
That’s where things get really fun.
What Makes Slime Change Color?
The magic comes from special pigments that react to temperature changes. These pigments shift colors when they warm up or cool down, which is why the slime transforms while you play with it.
That’s also why this project is sometimes called thermochromic slime.
The science sounds fancy, but the effect is simple: warm slime changes one way, cooler slime changes another. Hold it in your hands for a while and the color starts shifting almost immediately.
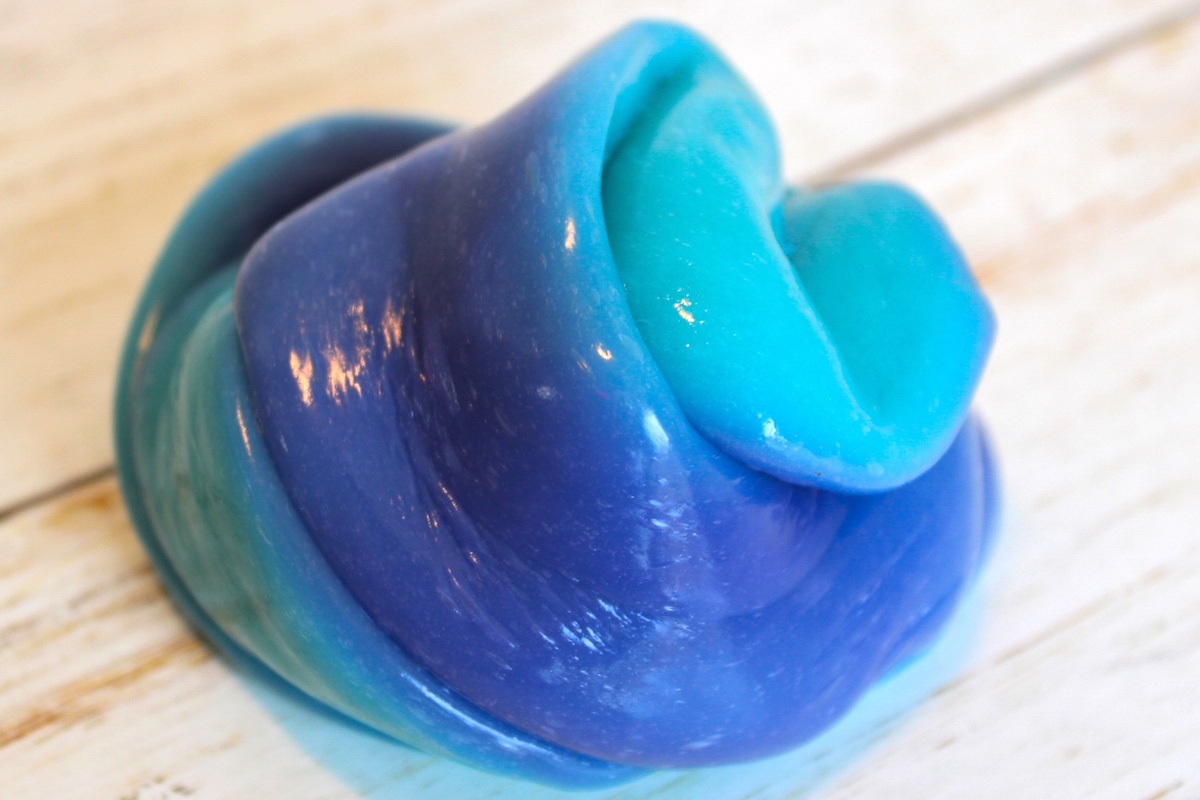
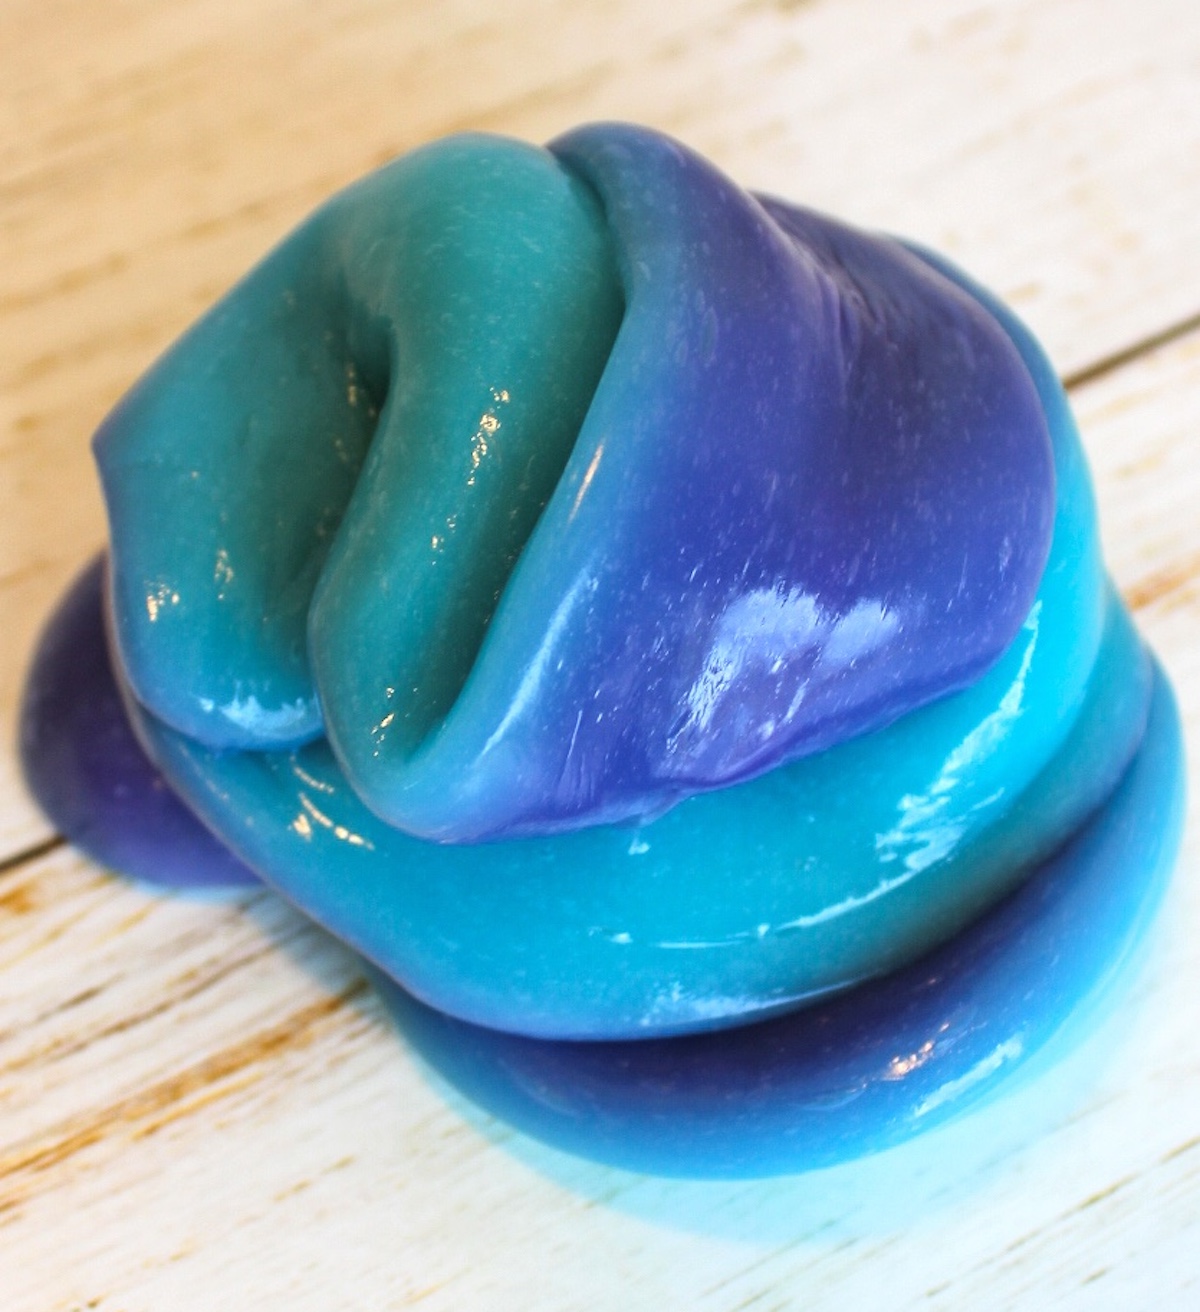
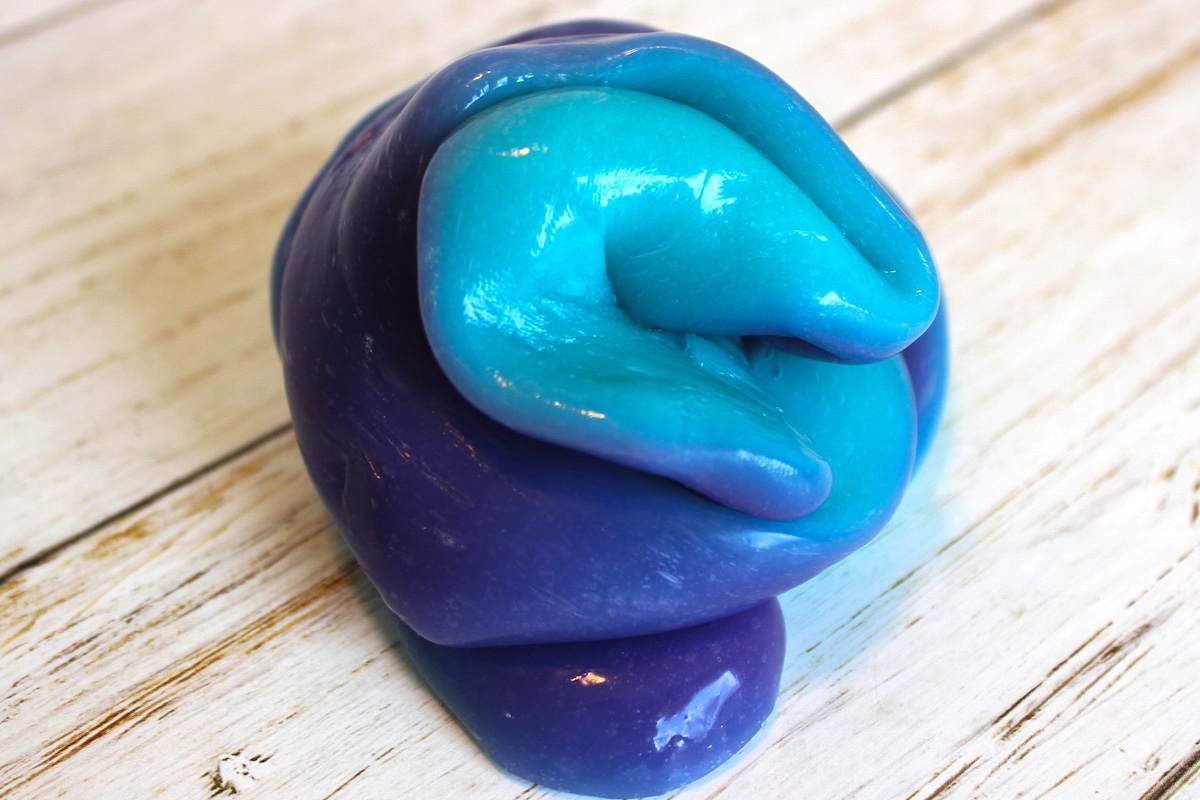
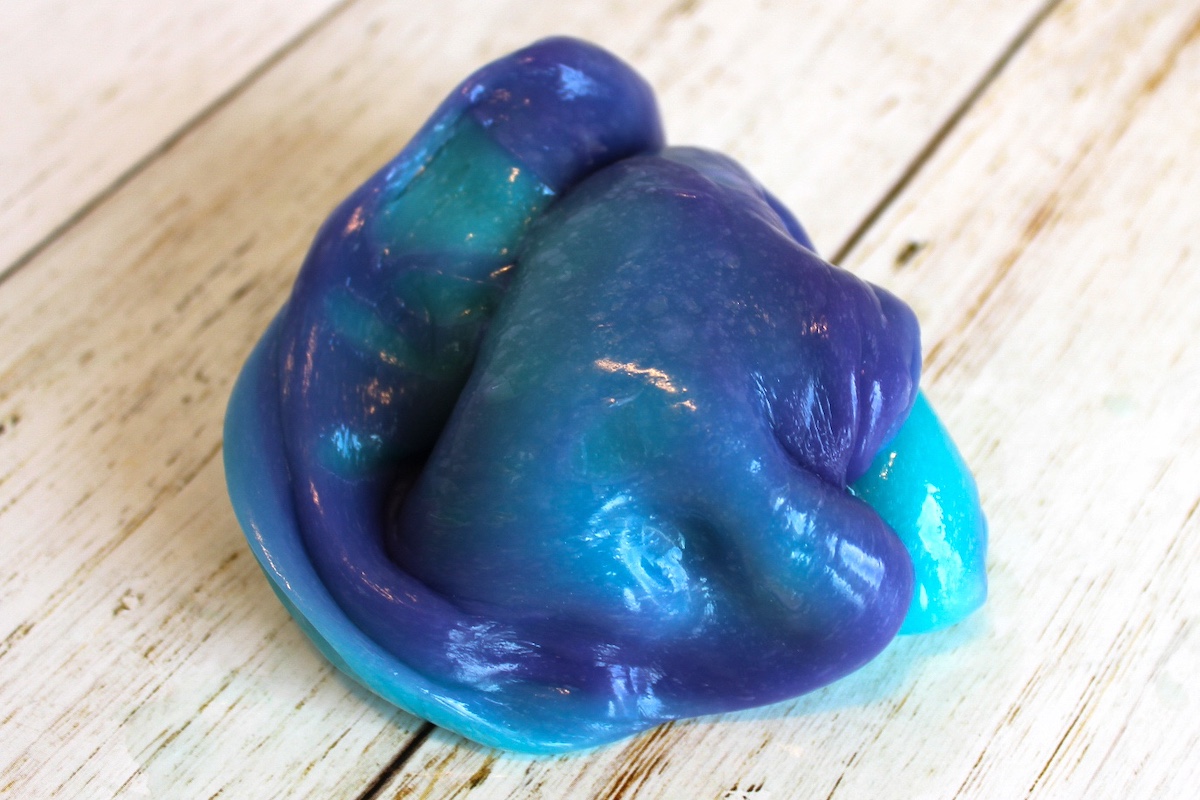
Some versions transition dramatically, while others create softer blends between shades. Purple and blue combinations look especially cool because the transition feels almost galaxy-inspired.
You can also experiment with placing the slime against cold objects to make the color shift happen faster. An ice pack works really well for this.
Why This Slime Is So Addicting
There’s already something satisfying about stretching and squishing slime, but the color-changing effect makes people want to keep playing with it longer.
You start testing everything to make the slime change color.
Cold drinks. Warm hands. Sunny windows. Cold counters.
You basically turn into a tiny slime scientist for twenty minutes.
And honestly? That’s part of why kids love it so much.
It combines sensory play, creativity, and science without feeling educational in the annoying way. The project just feels like much fun from beginning to end.
Tips for the Best Color Change
A few things can make the effect stronger and more noticeable.
First, warmer hands usually create a faster transition. If your house is chilly, the slime may take longer to react.
Second, some pigments create more dramatic changes than others. Certain shades shift from dark to bright, while others transition more subtly between colors.
Purple combinations tend to photograph especially well because the color contrast is easier to notice in pictures.
If you’re making your own version instead of using color changing glue, pay attention to your color combinations. Thermochromic pigment already has its own base color, so adding additional tint can completely change the final look.
You also want to avoid muddy combinations. Some colors blend beautifully while others turn into something that resembles swamp soup.
Not ideal.
Easy Variations to Try
Once you make one batch, it’s hard not to start experimenting. Try:
- adding glitter
- neon shades
- galaxy-inspired colors
- pastel combinations
- glow-in-the-dark add-ins
You can even make separate batches and swirl them together for a marbled effect.
And because the effect depends on temperature, every batch behaves a little differently depending on the room, your hands, and the surrounding environment.
That unpredictability honestly makes it more fun.
Helpful Slime Tips
If your slime feels too sticky at first, keep kneading before adding extra activator. Slime usually improves after working it with your hands for a few minutes.
Store it in an airtight container between uses so it stays stretchy longer.
If it stiffens over time, warming it slightly in your hands can help soften the texture again.
And yes, this is one of those projects where kids suddenly become extremely emotionally attached to slime and start carrying it around the house like a beloved pet.
You’ve been warned.
Final Thoughts
Heat sensitive color changing slime is one of those crafts that immediately grabs attention because it feels oddly futuristic.
Between the stretchy texture, the shifting shades, and the science experiment vibes, it’s one of those hands-on projects people keep playing with long after they planned to stop.
Get the recipe below:

Heat Sensitive Color Changing Slime
Equipment
- Mixing bowl
- Stir stick
Materials
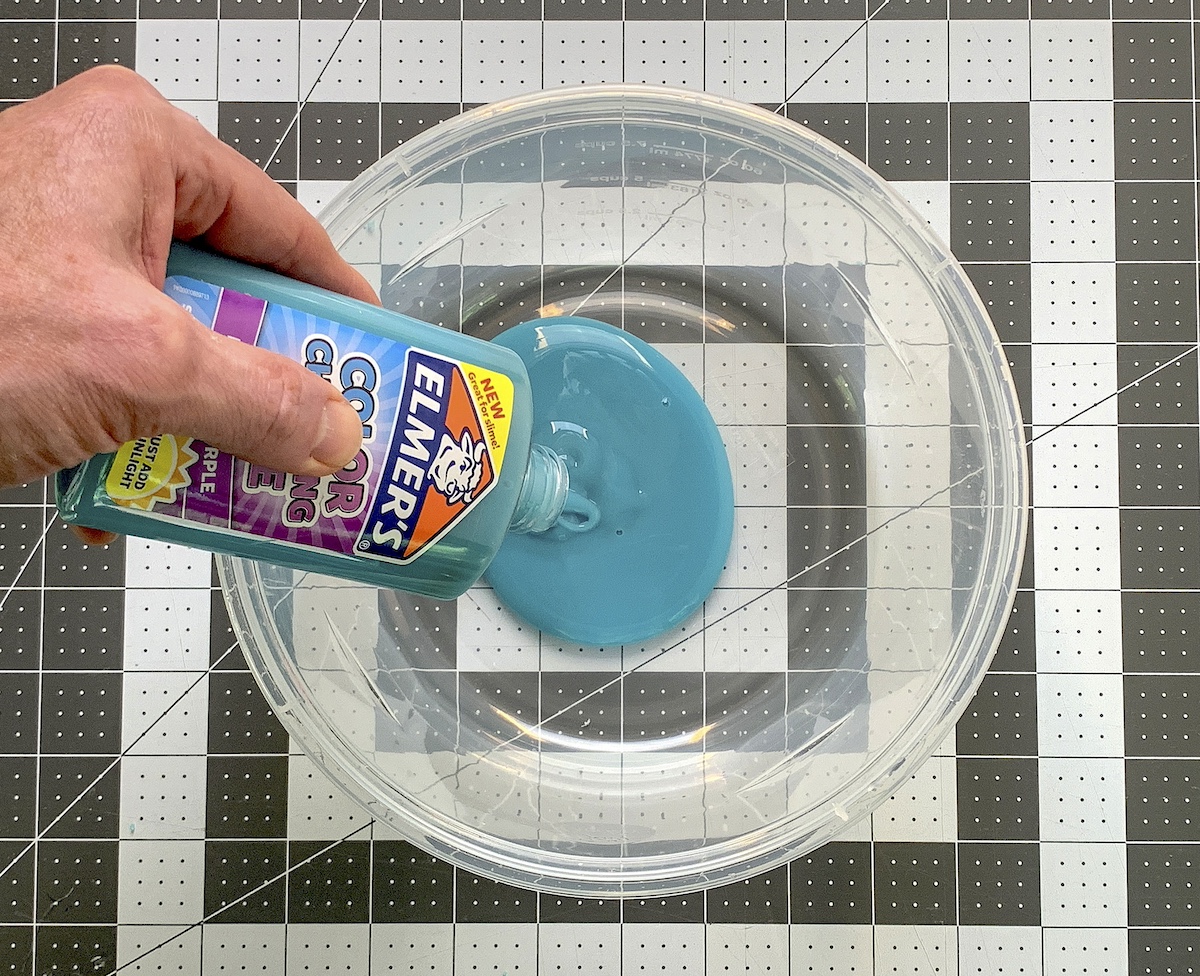
- 1 bottle Color changing glue 5 oz
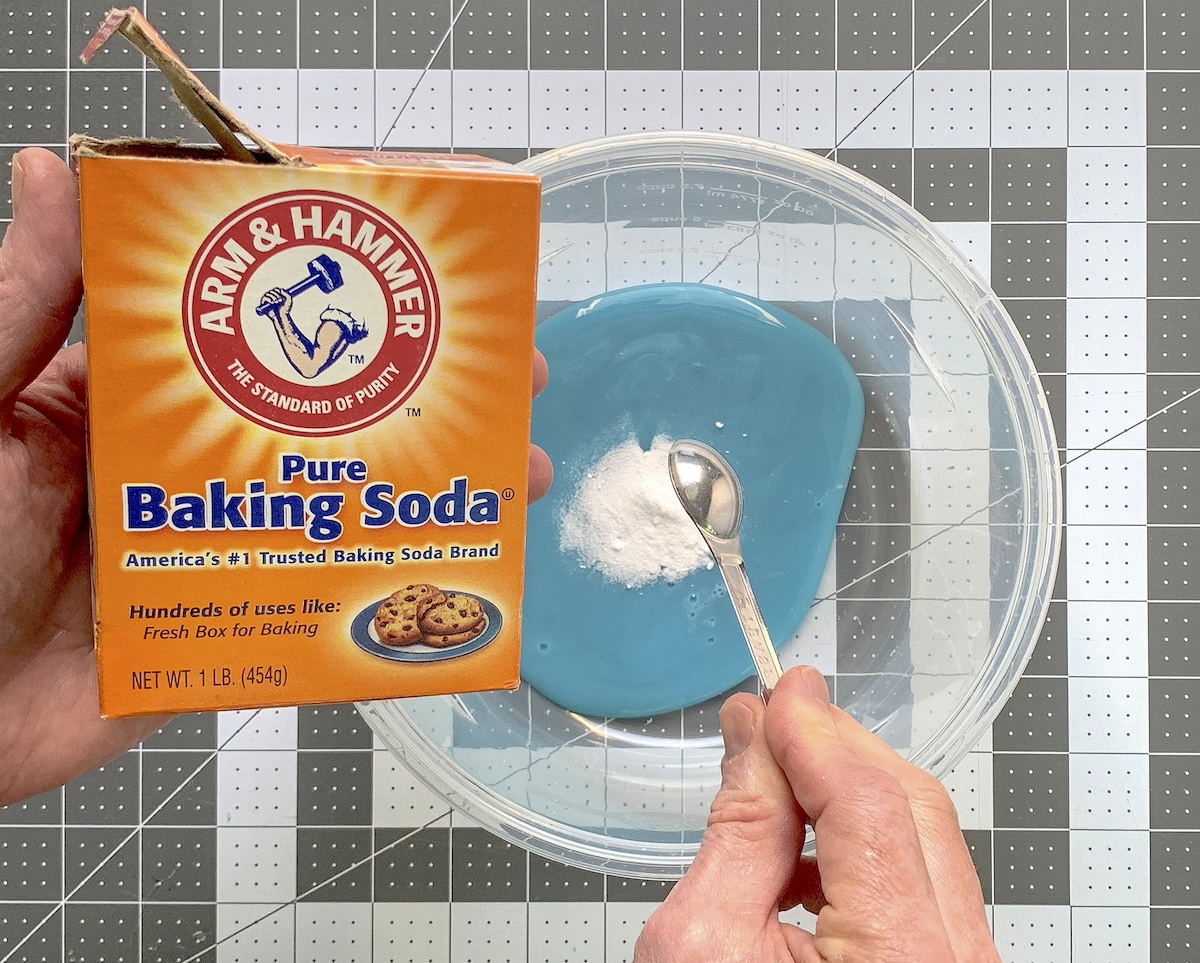
- 1/2 teaspoon baking soda
- 1 Tablespoon contact lens solution
Video
Instructions
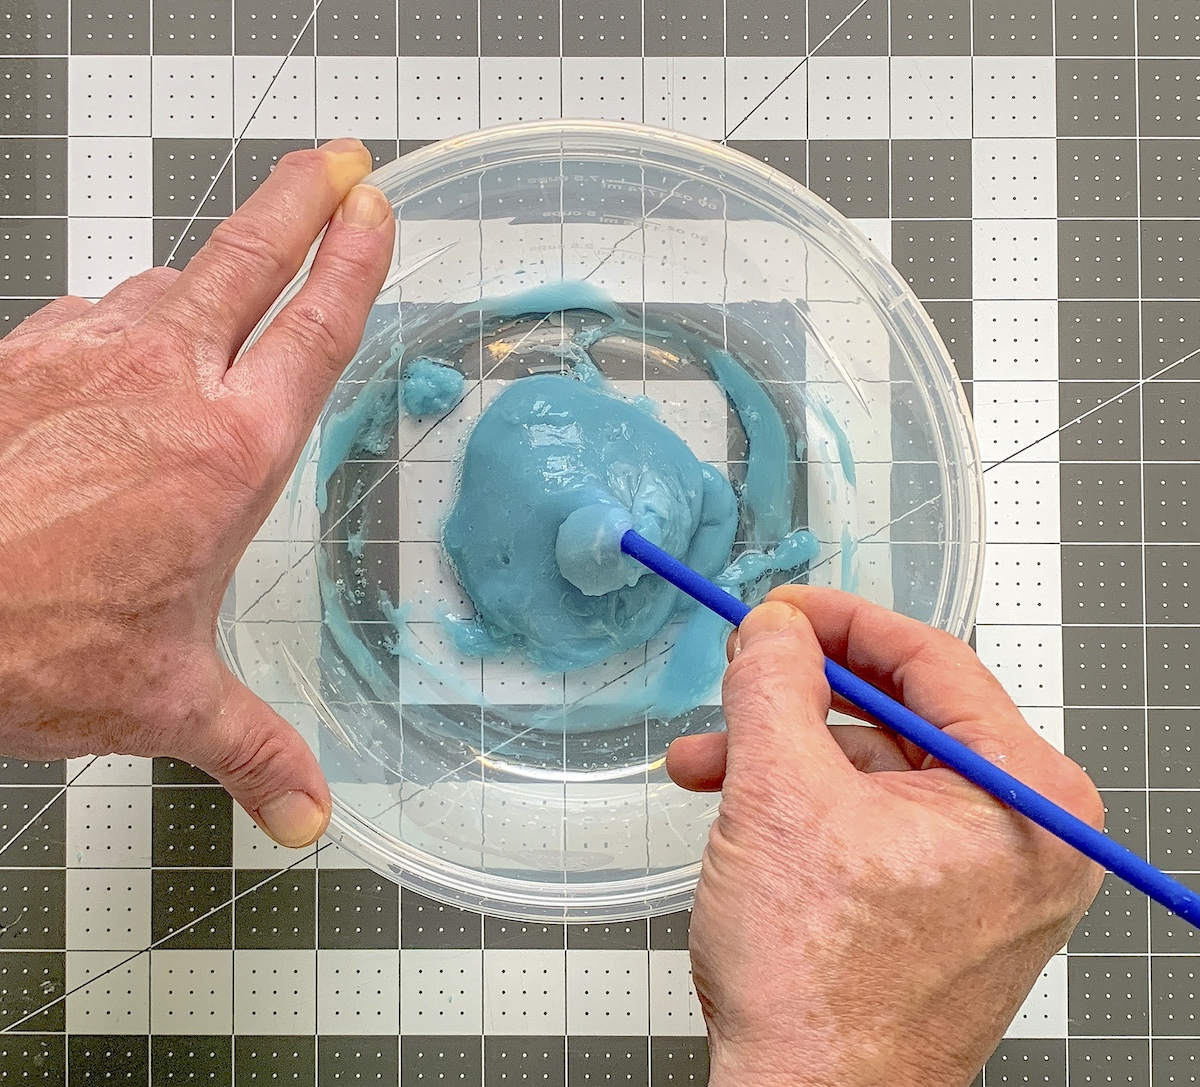
- Empty the bottle of color changing glue into the bowl. Make sure to let all the excess glue drip out (keep upside down for a minute or so).
- Add baking soda to the color changing glue.
- Add contact lens solution to the glue and baking soda.
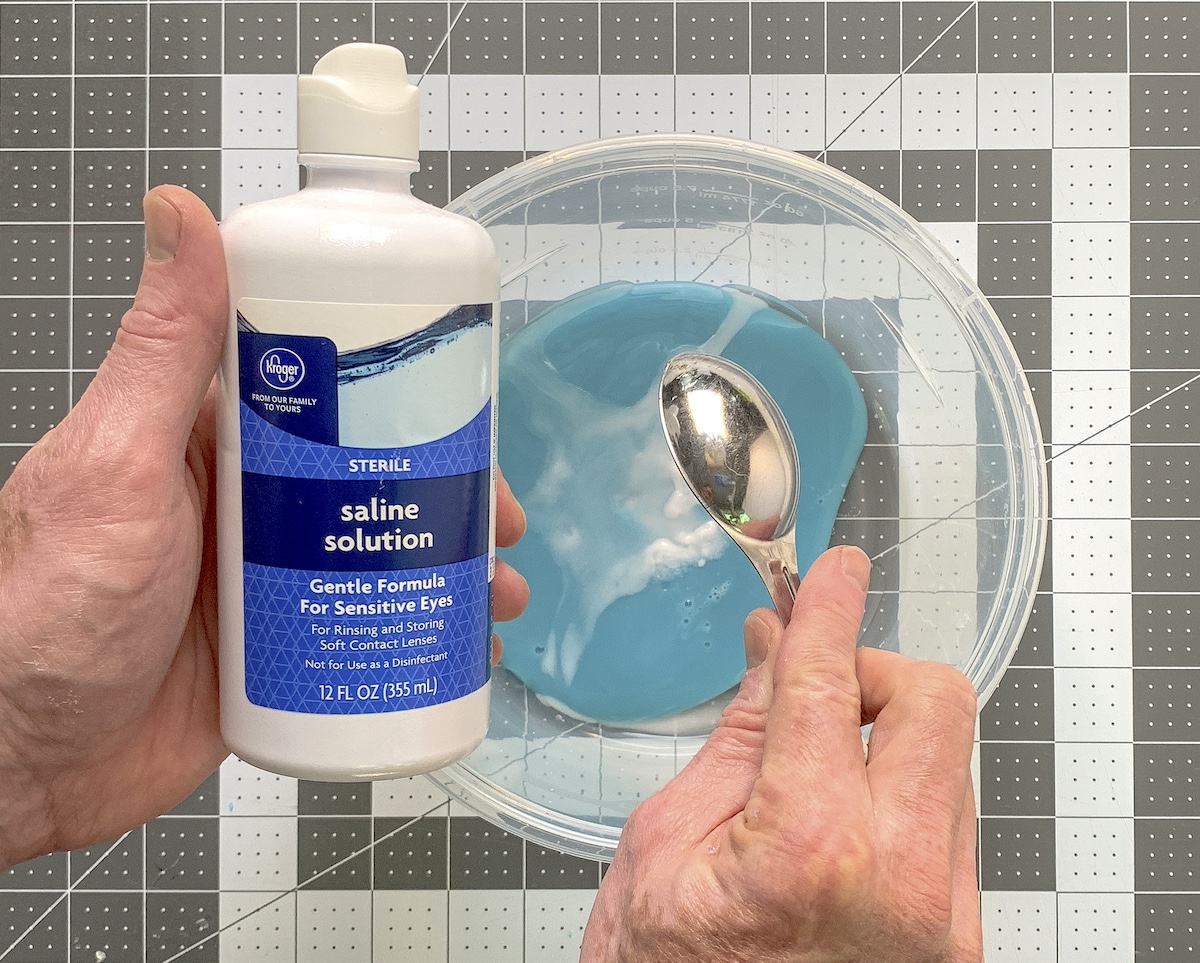
- Stir the ingredients in the bowl with a stir stick until combined.
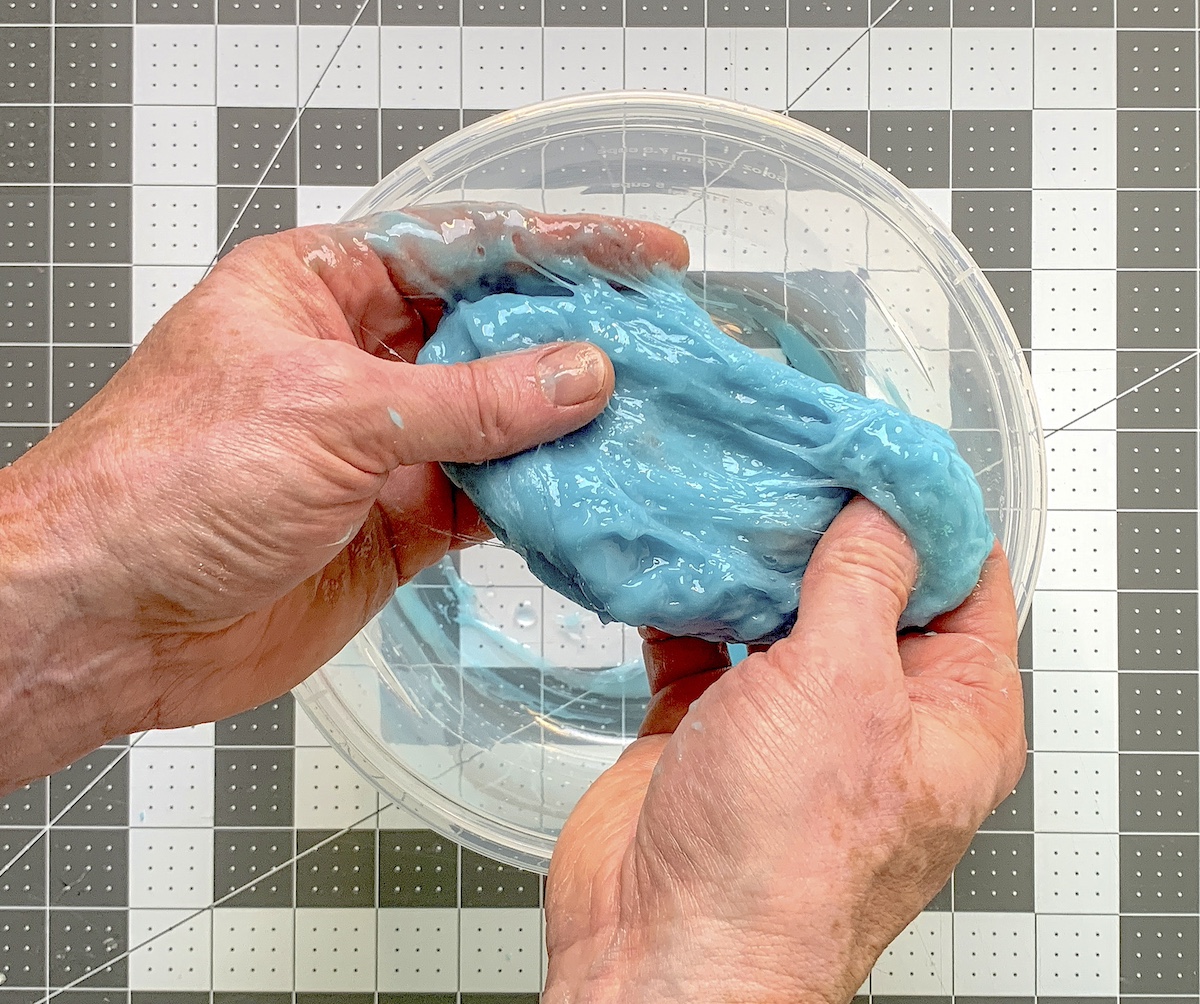
- When the slime is too difficult to stir, remove it from the container and continue kneading it the rest of the way with your hands to finish.
Notes
I hope you enjoyed this fun activity! Please let me know what you think in the comments. I’d love it if you’d go check our other slime posts:
Clay • Clear • Cloud • Crunchy • Edible • Fluffy • Galaxy • Green Booger • Laundry Detergent • Glitter • Glow in the Dark • Halloween • Play Doh • Rainbow • Sand • Unicorn