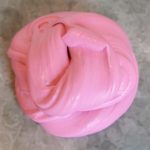
Clay Slime Recipe (Soft and Stretchy Butter Slime)
Learn how to make clay slime with this step-by-step guide! This version (often called butter slime) is soft, spreadable, and has a smooth, almost fluffy feel that’s completely different from traditional slime.
Skills Required: None. You’re simply mixing ingredients and kneading everything together – perfect for beginners and kids.
What Is Clay Slime?
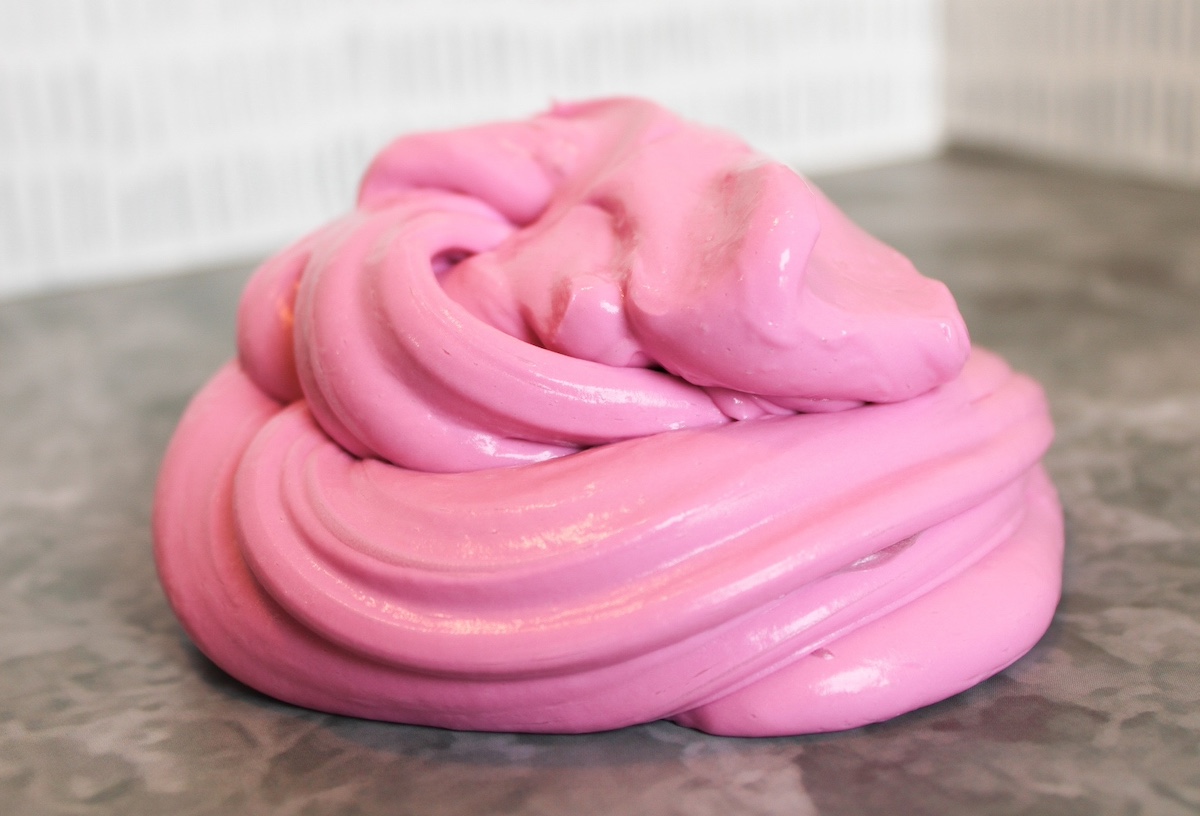
If you’ve never made DIY clay slime before, you’re in for something seriously satisfying. This isn’t your typical stretchy slime. By adding soft clay, you transform it into a thicker, more moldable version often known as butter slime.
The result is a smoother texture that’s easy to spread, stretch, and shape. It feels less sticky than regular slime, with a soft, almost whipped finish that many people describe as buttery slime.
You’ll also hear it called slime clay because of the combination – part slime, part clay. That hybrid gives it a totally different feel compared to classic recipes.
Why Kids Love Butter Slime
There’s a reason butter slime continues to trend—it’s just plain satisfying. The soft, spreadable feel makes it one of those fun slime recipes that kids come back to again and again.
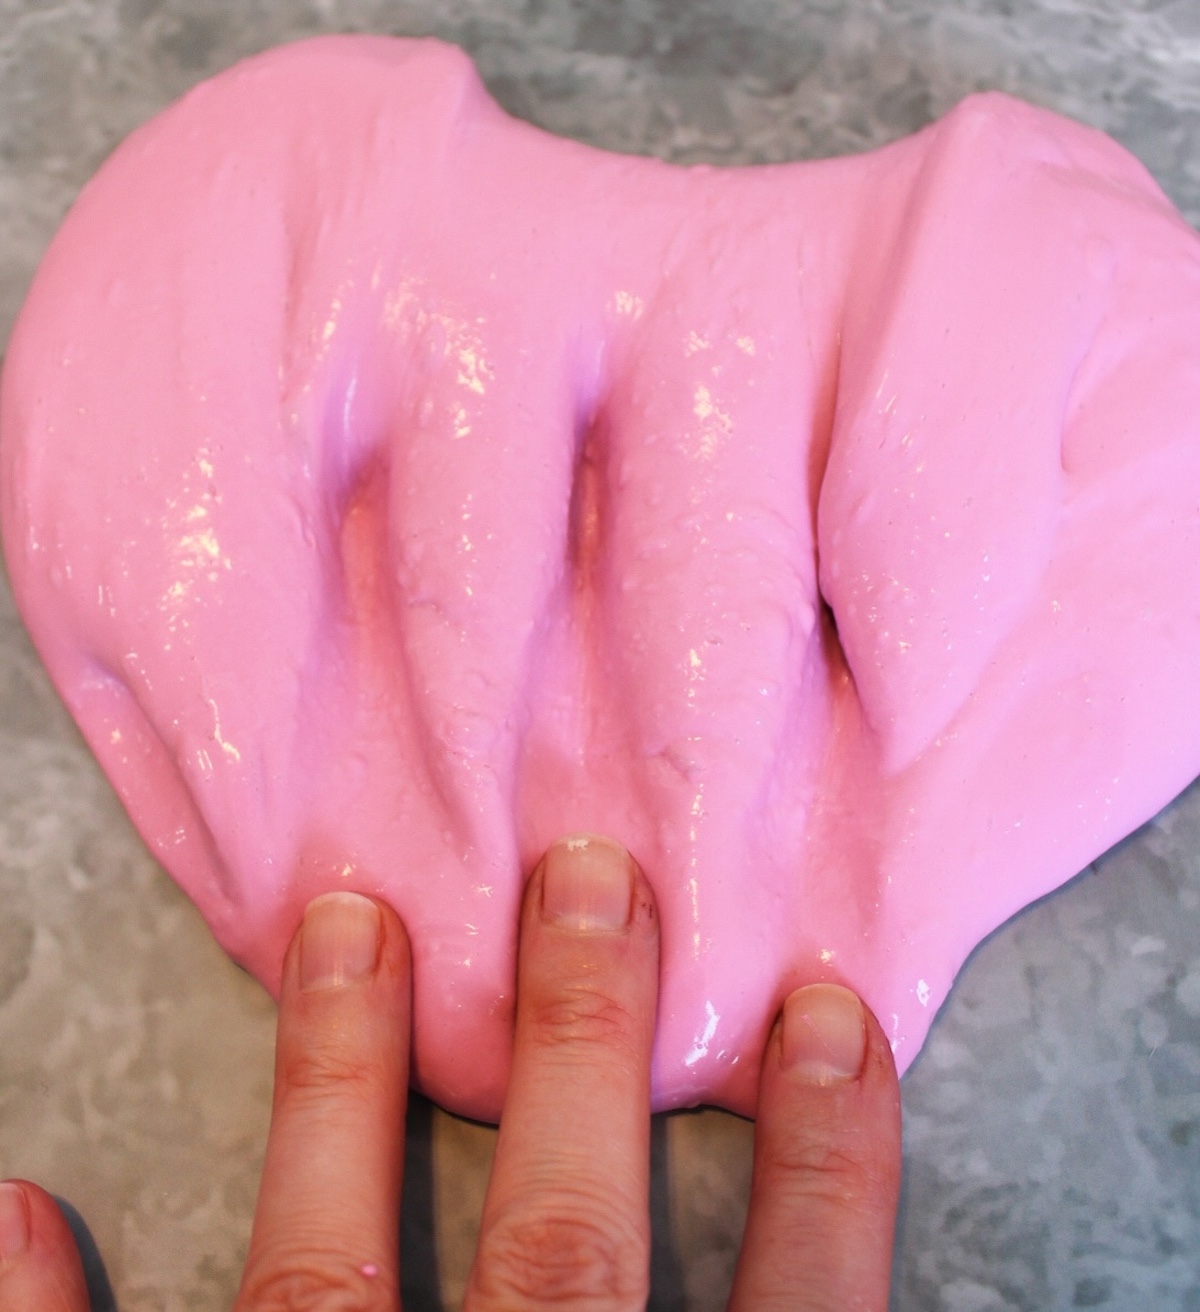
Unlike traditional slime that can have more stickiness, this version is easier to handle and less messy overall. The improved consistency makes it ideal for younger kids, while still being fun for older ones too.
It’s also great for sensory play. The soft texture, combined with stretching and folding, keeps hands busy and minds engaged. And yes . . . it’s just so much fun.
What Makes This Recipe Work
This is an easy recipe built on simple ingredients you probably already have. The base uses glue, baking soda, and contact solution (which contains boric acid, one of the key slime activators).
Some people use Borax separately as an activator, and you’ll see Borax mentioned in other tutorials. While Borax works, this version keeps things simple with contact solution, which already contains boric acid.
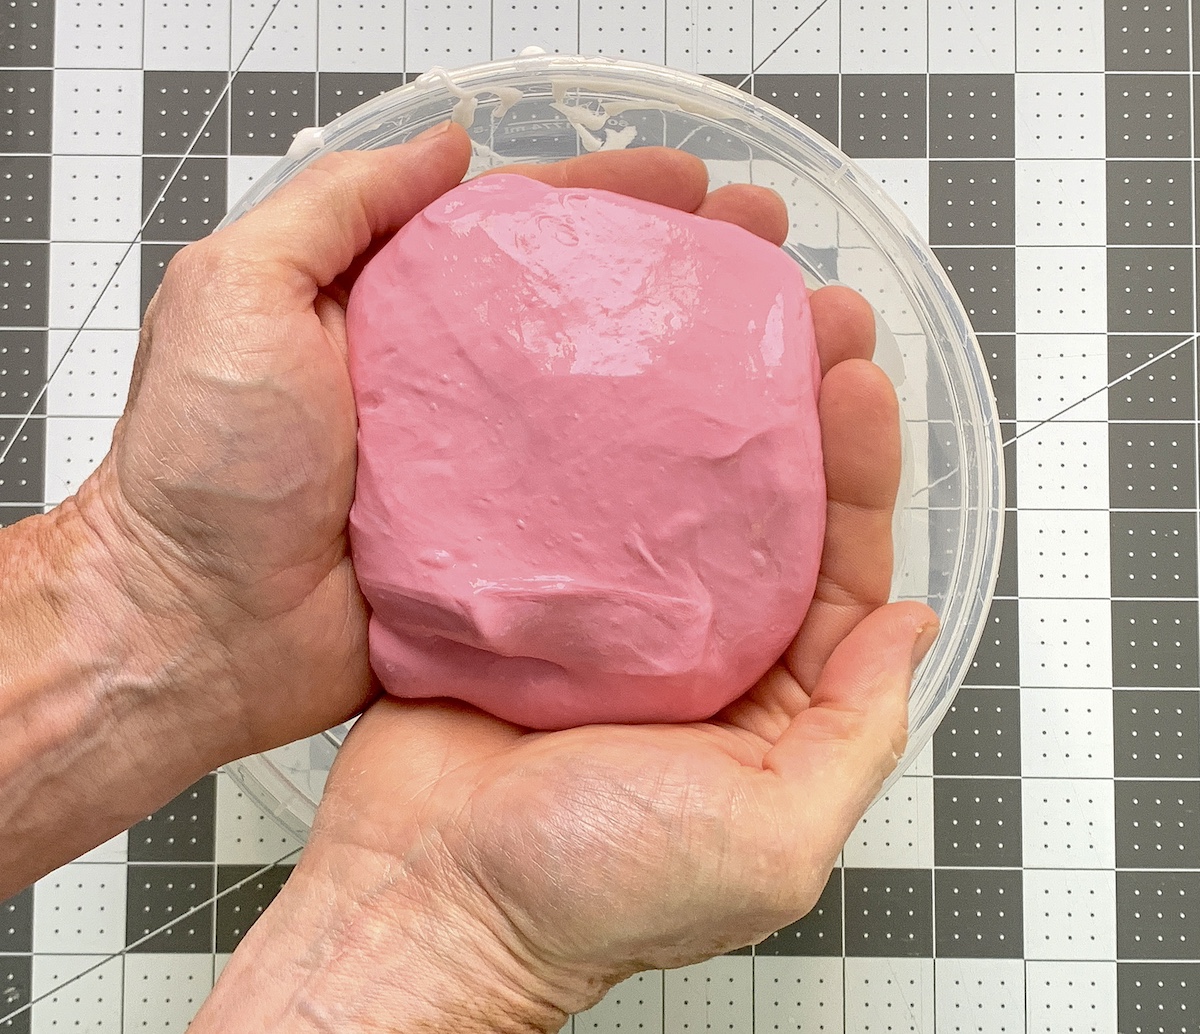
The magic happens when you add soft clay. That’s what turns regular slime into butter slime and gives it that smooth, spreadable feel.
Tips for the Best Texture
Getting the right texture is all about balance. Here’s how to dial it in:
- If your slime feels too sticky, add a bit more activator (remember, these are your slime activators)
- If it feels too stiff, knead in a tiny amount of water or glue
- Always mix gradually—your ingredients react quickly
Once your slime forms, use your hands to knead it. This step is key to reducing stickiness and improving the final feel.
Optional Add-Ins (Customize Your Slime)
Once you’ve mastered the base, you can start experimenting. This is where DIY clay slime really shines.
- Add a little shaving cream for extra fluff and a lighter feel
- Mix in body lotion to soften the slime even more
- Try a small amount of foam beads for texture contrast
- Use model magic instead of standard clay for a slightly different finish
You can even combine a bit of shaving cream and body lotion together to create a softer, stretchier result.
These tweaks can turn your slime into one of your favorite butter slime recipes.
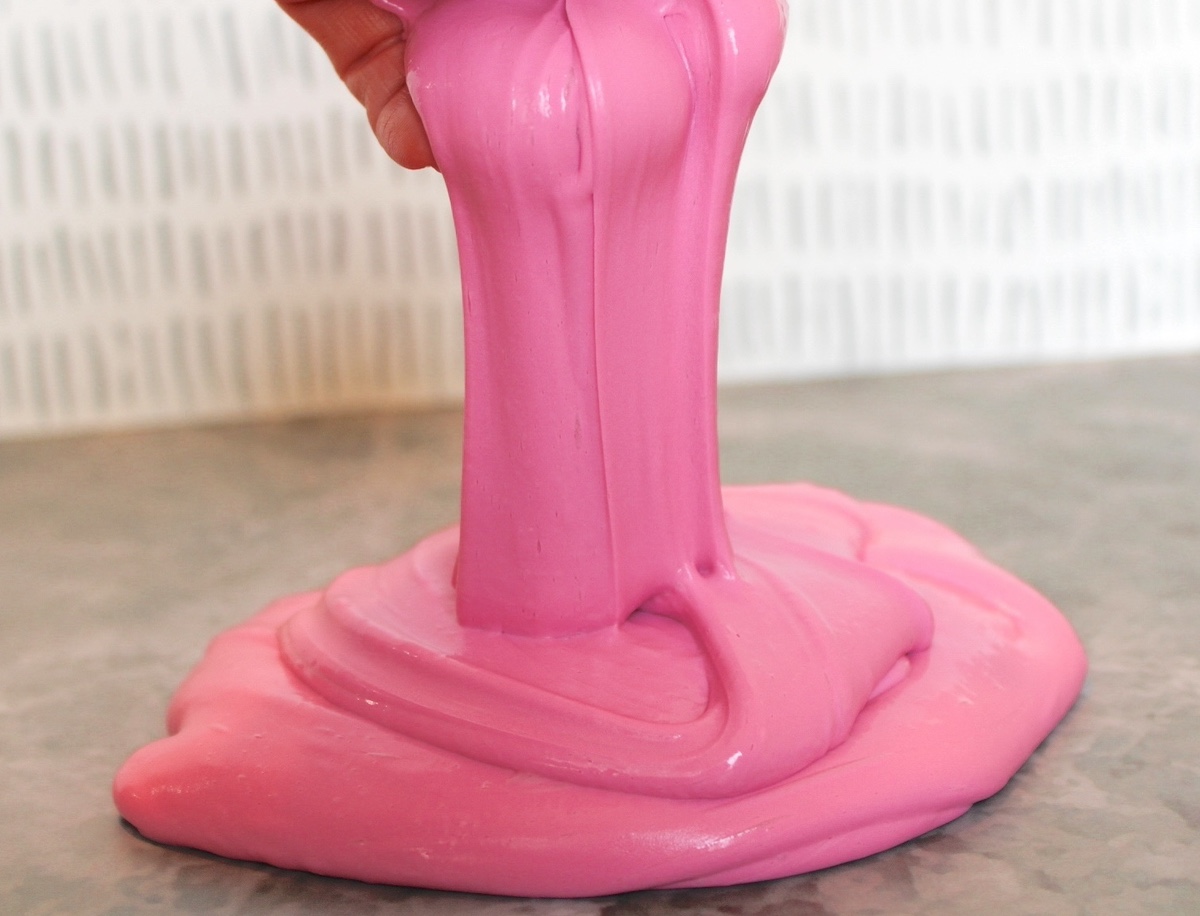
How Clay Changes the Slime
The addition of clay completely changes how the slime behaves.
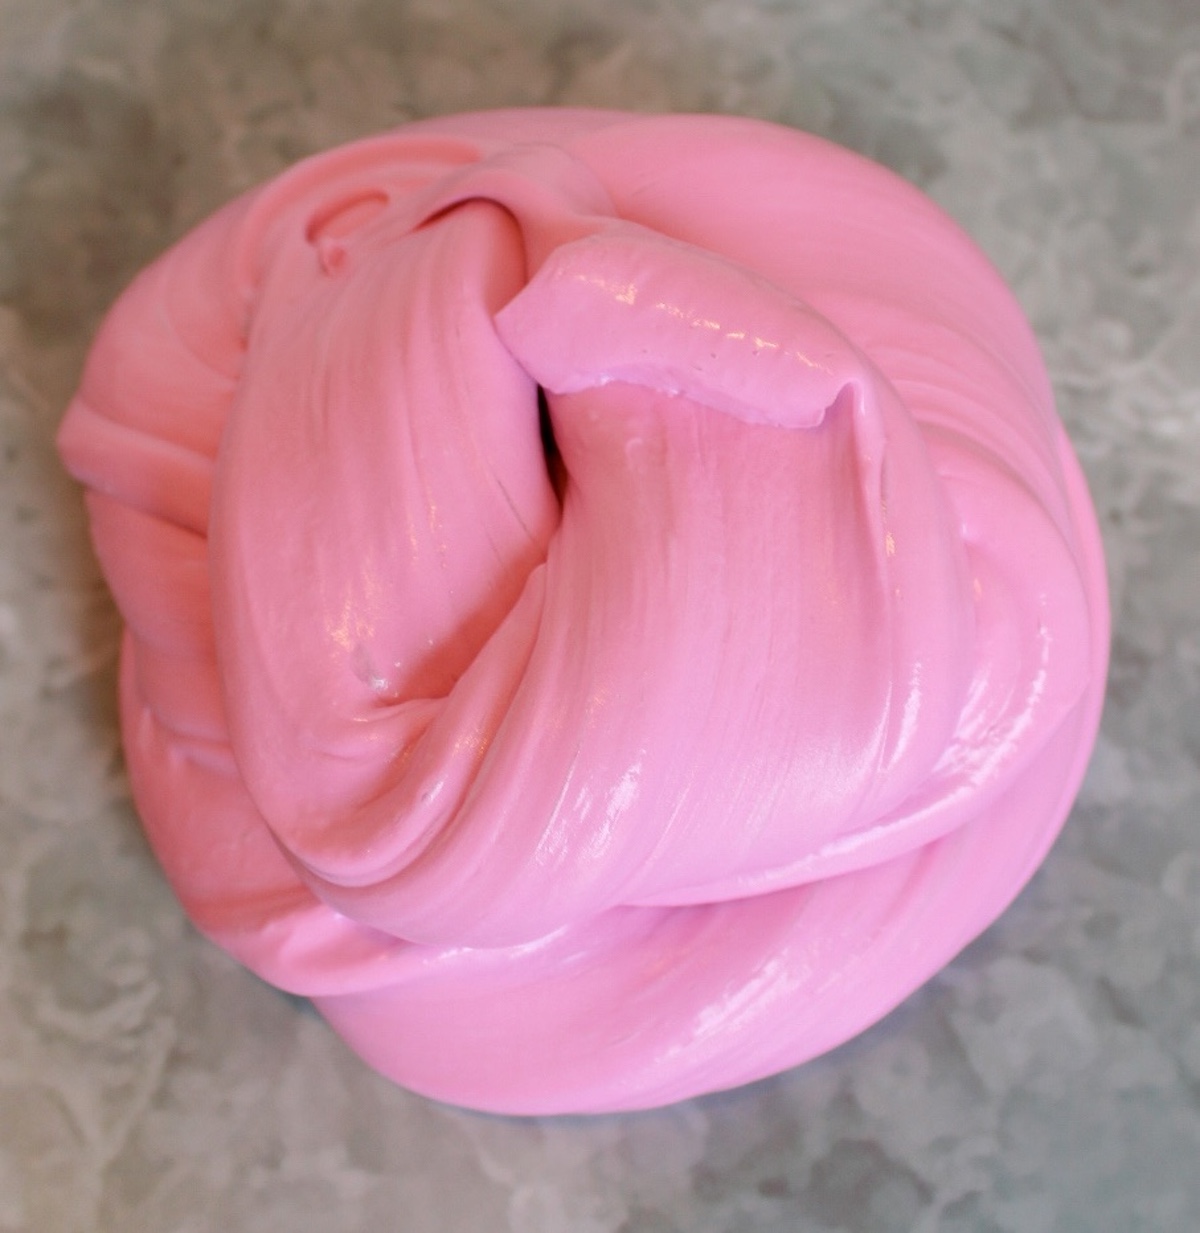
Instead of a stretchy, stringy slime, you get a thicker clay mixture that spreads easily and holds its shape better. That’s why people love slime clay so much—it’s more versatile.
You can press it flat, fold it, and even sculpt it slightly. This makes it one of the most satisfying textures in all fun slime recipes.
Troubleshooting Your Slime
If things don’t go perfectly the first time, don’t worry—that’s normal when working with slime.
- Too sticky? Add a little more activator
- Too stiff? Add water or glue slowly
- Not smooth? Keep kneading—it makes a huge difference
Remember, small changes go a long way when working with these ingredients.

Storage Tips
To keep your slime fresh, store it in an airtight container. This prevents it from drying out and helps maintain that soft, smooth buttery slime feel.
If it stiffens over time, knead in a tiny bit of water or lotion to revive it.
Why This Recipe Stands Out
There are a lot of butter slime recipes out there, but this one keeps things simple and consistent. You’re using basic ingredients, reliable slime activators, and a straightforward process that works.
The end result is a smooth, satisfying slime that’s perfect for kids and adults alike.
Ready to Make It?
Scroll down for the full instructions and exact measurements. This is one of those projects that’s quick to make and seriously hard to put down.
Clay Slime
Equipment
- Mixing bowl
- Stir stick
Materials
- 1/2 cup Elmer’s school glue or white glue
- 1/2 cup water
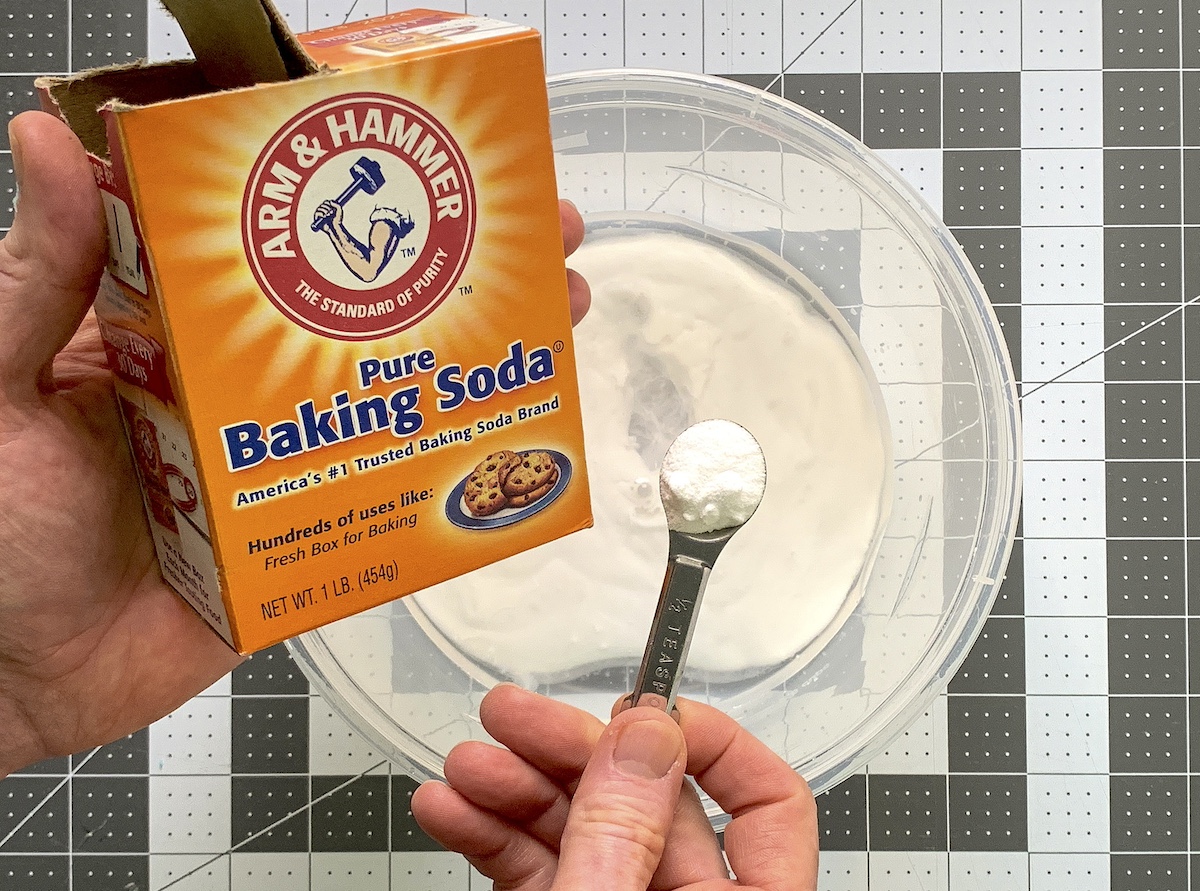
- 1 teaspoon baking soda
- Food coloring
- 2 oz Polymer clay
- 2 Tbsp contact lens solution
Video
Instructions
- Add the glue to the mixing bowl. Make sure to get all the glue out of the measuring cup.
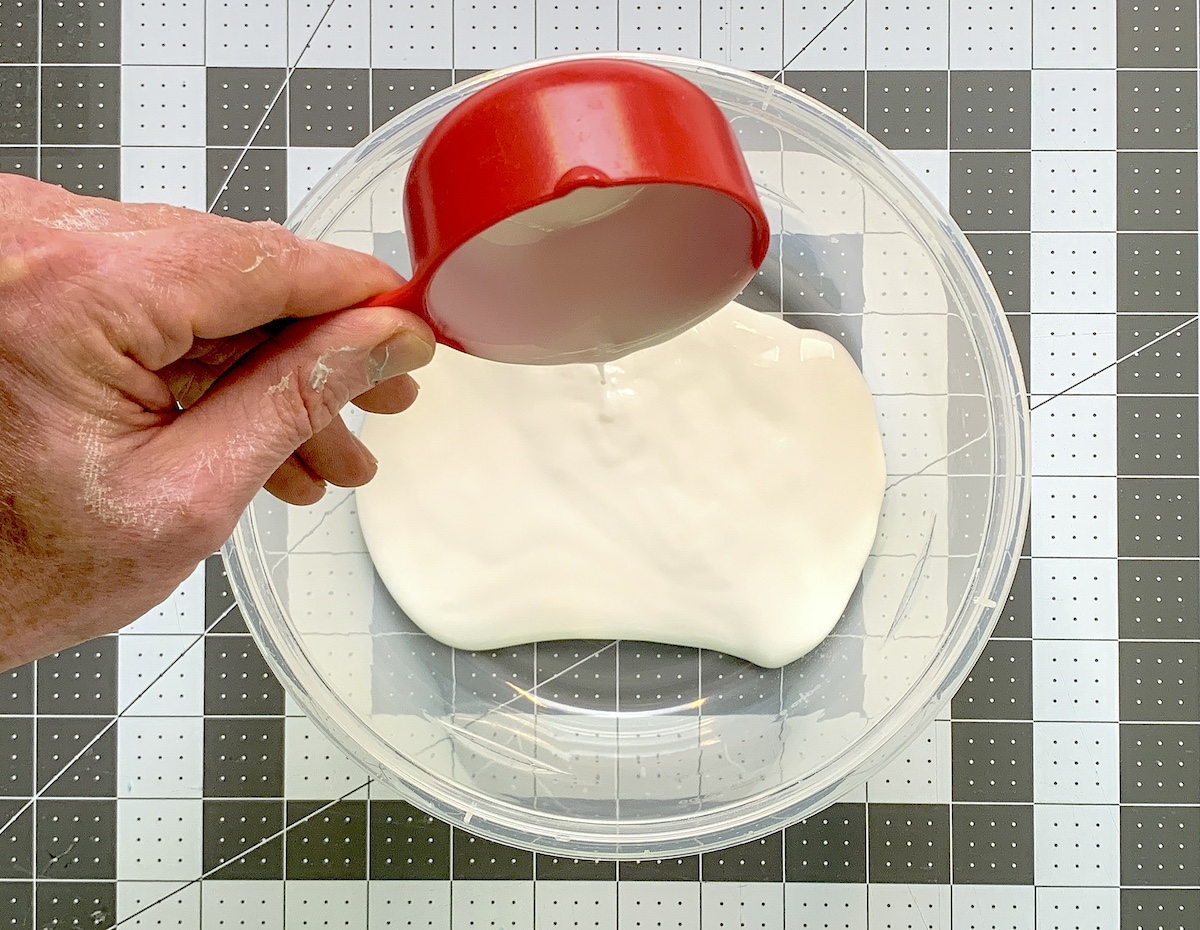
- Add the water to the glue.
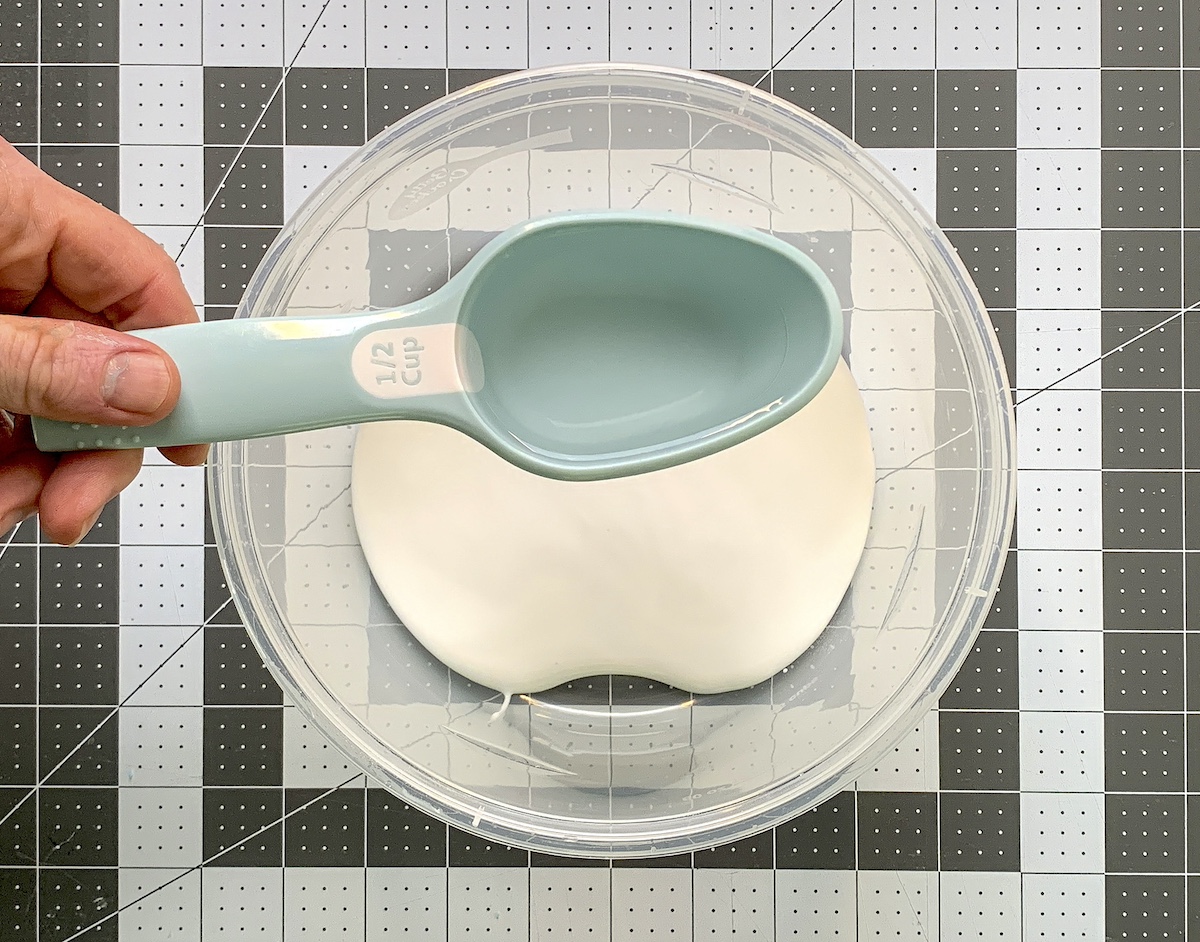
- Add baking soda to the water and glue.
- Add contact lens solution to the glue, water, and baking soda.
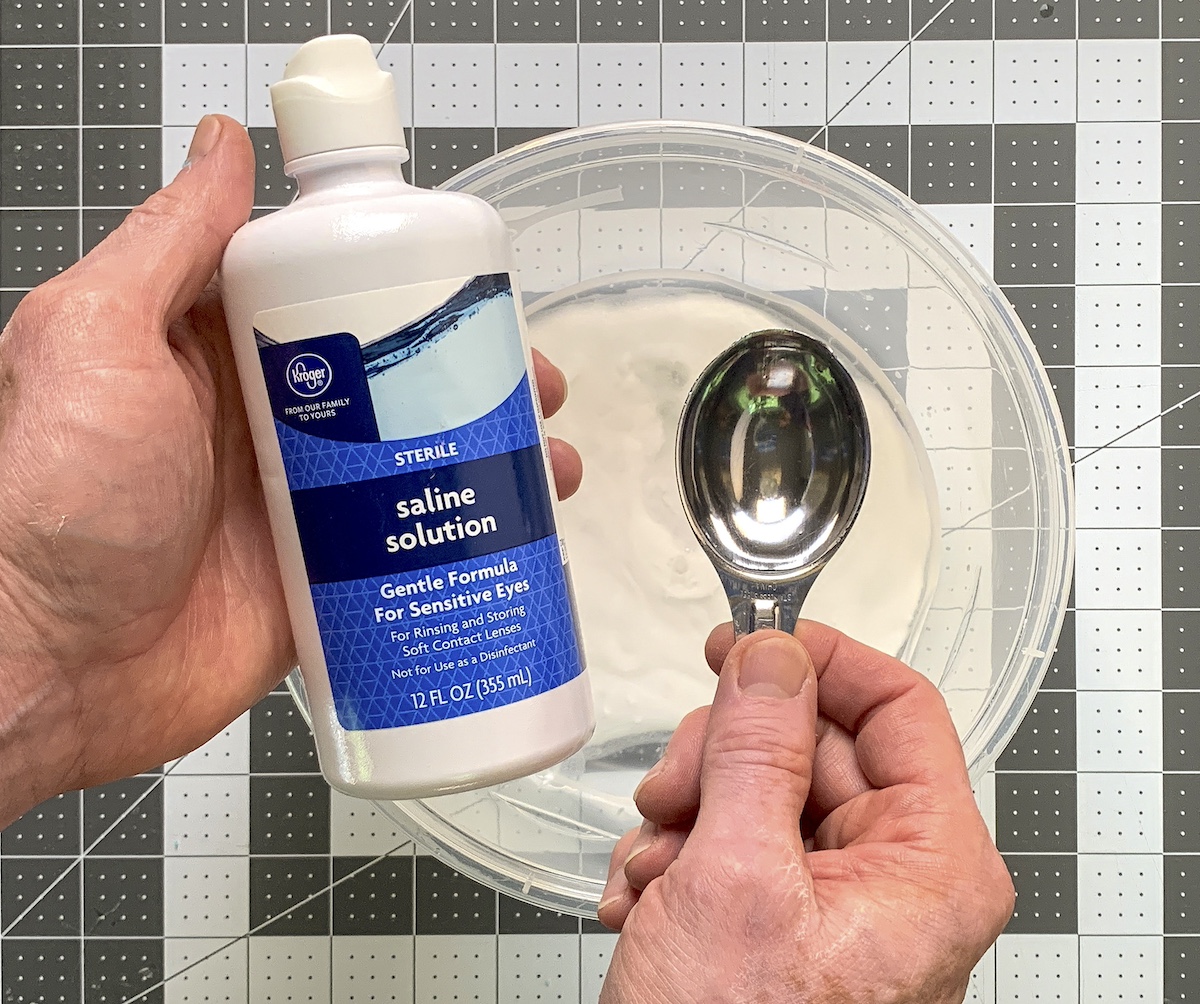
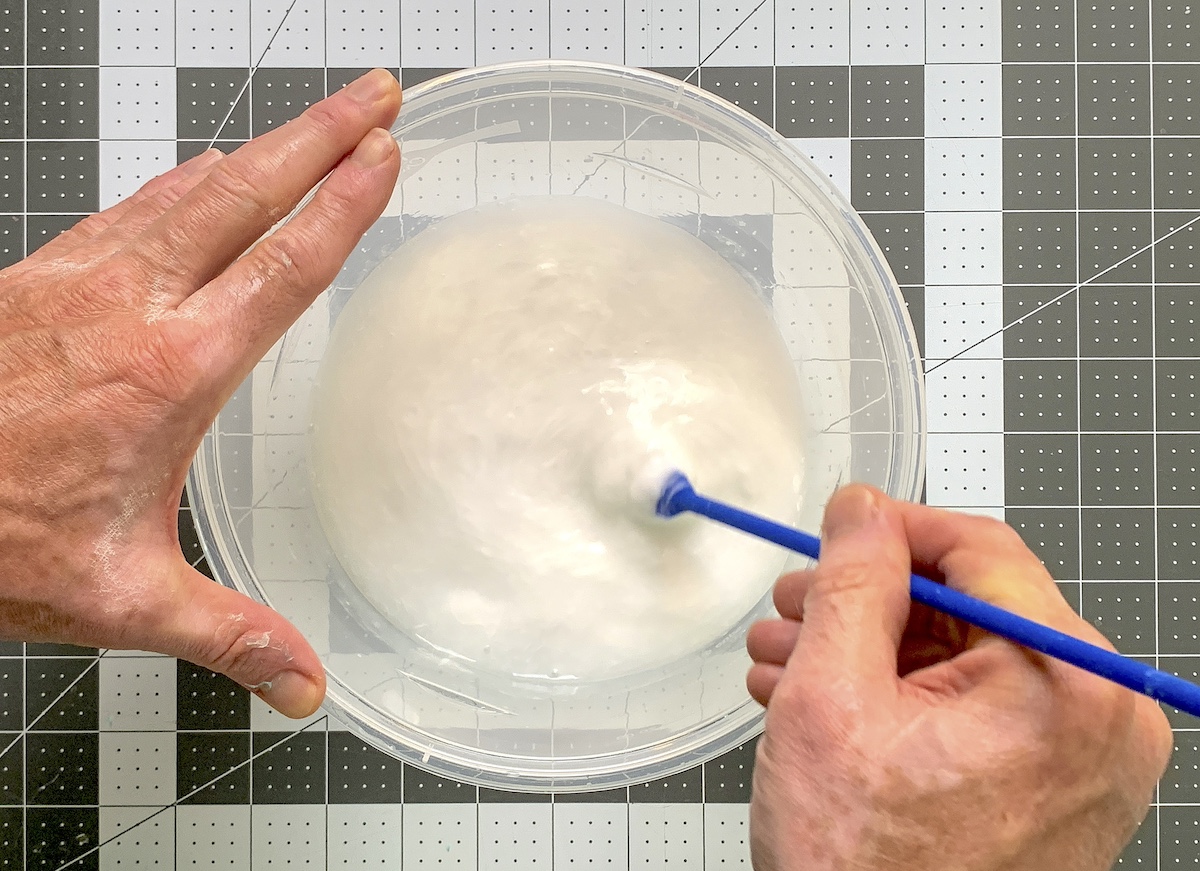
- Stir the ingredients in the bowl with a stick until combined. Scrape the sides of the bowl to get everything.
- Take a hunk of clay and start mixing it into the glue. You'll need to use your hands.
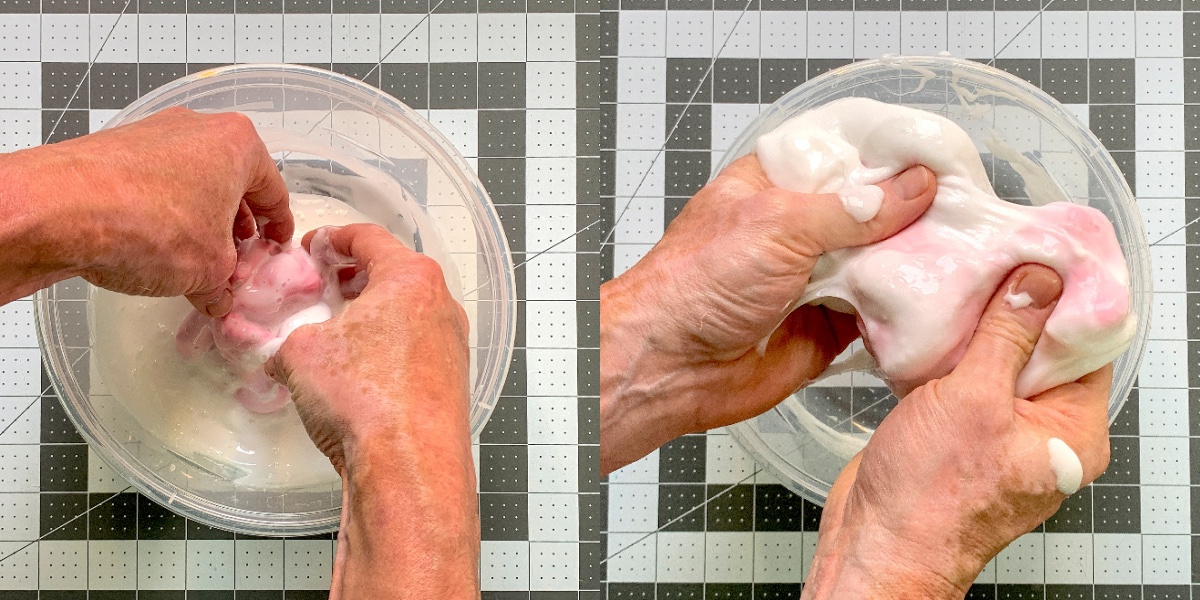
- Continue kneading the clay into the slime until it's completely combined to finish.
Notes
I hope you enjoyed this fun activity! Please let me know what you think in the comments. I’d love it if you’d go check our other slime and tactile posts:
Clear • Cloud • Cloud Dough • Color Changing • Crunchy • Edible • Fluffy • Galaxy • Glow in the Dark • Green Booger • Laundry Detergent • Glitter • Halloween • Homemade Playdough • Kinetic Sand • Magic Hydrophobic Sand • Moon Sand • Play Doh • Rainbow • Sand • Silly Putty • Unicorn