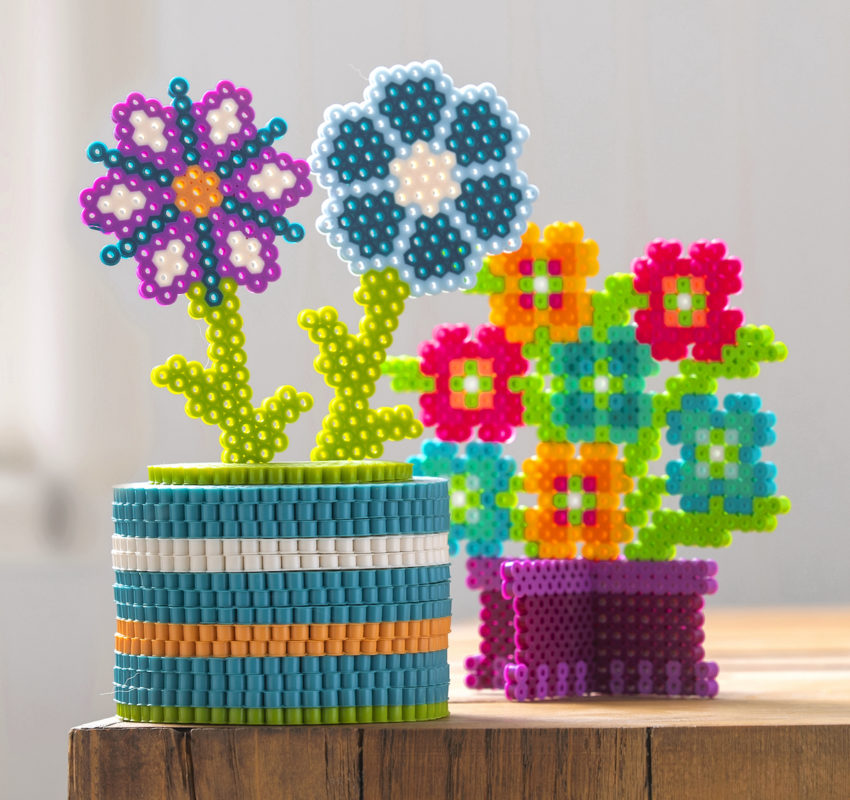
Mother’s Day Perler Beads (15+ Free Patterns!)
Kids will love these Mother’s Day perler beads, perfect for crafting and gifting to mom. Get over 15 pretty patterns that are easy to make.
Mother’s Day. I find it hard to choose Mother’s Day gifts, what do you think? Whether it be for a mom I know, or my own mom. I don’t think I’m alone here.
And let’s not forget mothers come in all forms, shapes, and sizes . . . and can be anyone in our life. There are even dog moms!
There can be a lot of pressure around how to show appreciation for a mother but over the course of time I’ve learned something.
Moms just want to be appreciated. No matter how it’s done!
A lot of what a mother is looking for is just a little something that says I know how hard you work and thank you. It can even be a craft.
And if you’re into perler beads like we are, I’m going to give you some cute ideas that I think are appropriate for the holiday.
Perler beads are recommended for ages six and up, so this is a very fun craft to try with your elementary age kids. All children seem to love perler beads (also known as hama beads, fuse beads, or melty beads). But don’t be shy – adults love them too!
You might want to gift these projects on their own, or include them as part of a larger gift. Or turn them into something else like wall art. It’s up to you! I’m excited for you to check out these patterns.
Perler Beads Mother’s Day Ideas
Make sure to check out these notes before starting. Enjoy!
- A few of these patterns are larger than a 29 x 29 pegboard, so you’ll either need a extra large pegboard (49 x 69 tall) or to put multiple square peg boards together to form a larger “canvas.”
- In addition to square pegboards, you’ll see hexagon pegboards. These are fun to have in your arsenal if you plan to do a lot of perler-ing.
- You’ll see a couple of the pattern backgrounds below aren’t white – that’s simply to give contrast so you can see where all the white beads should go. You don’t need to add the background (but you can if you want to).
- Don’t stick to my colors necessarily. Customize with your favorite color beads. Some of these patterns are great for using up extra beads.
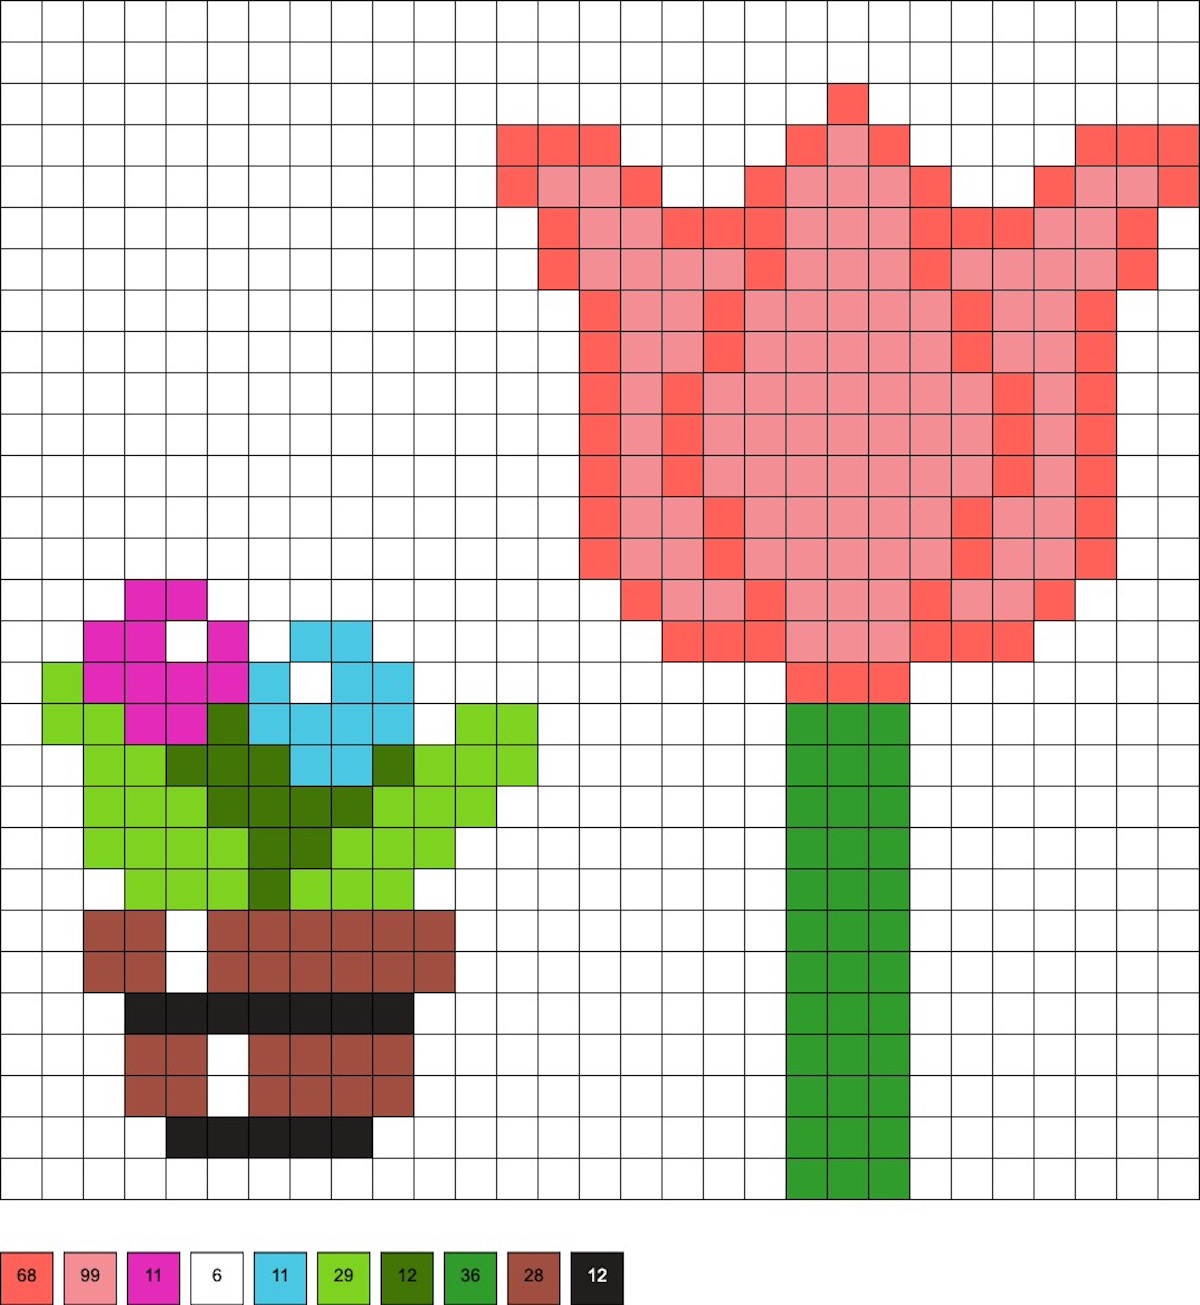
Small Vase of Flowers and a Tulip on a Stem
The small vase pattern uses 12 black, 28 rust, 11 fuchsia, 11 sky, 6 white, 29 kiwi lime, and 12 dark green beads. The tulip uses 68 hot coral, 99 blush, and 36 shamrock beads.
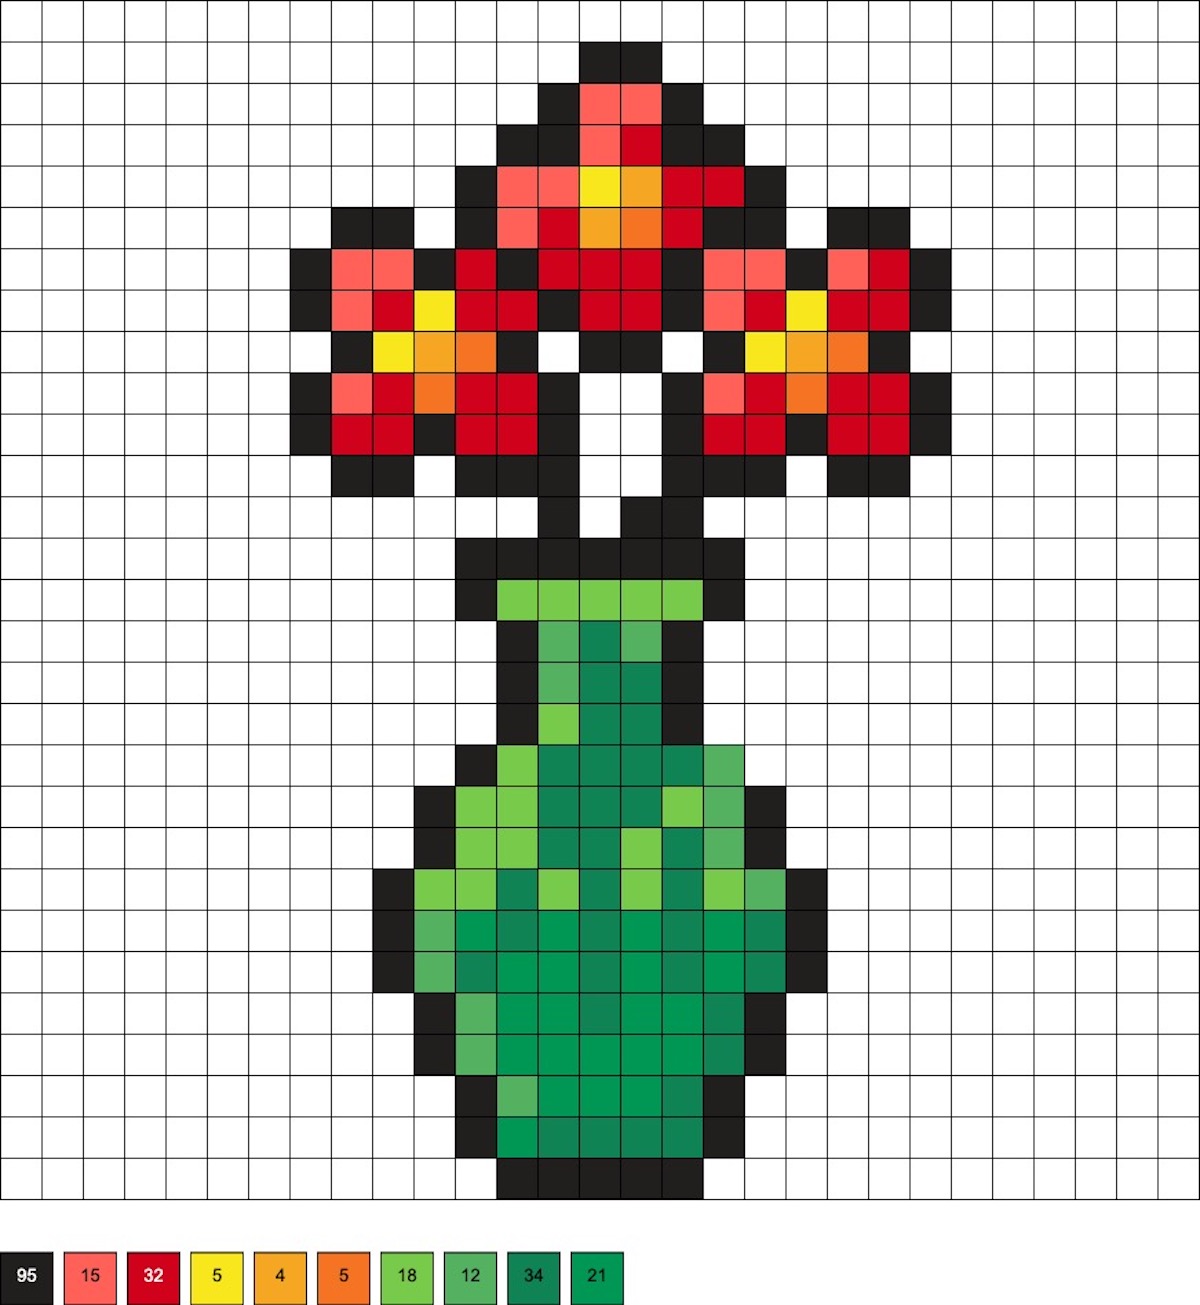
Flowers in a Vase
This pattern uses 95 black, 15 hot coral, 32 red, 5 yellow, 4 cheddar, 5 orange, 18 kiwi lime, 12 bright green, 34 dark green, and 21 shamrock beads.
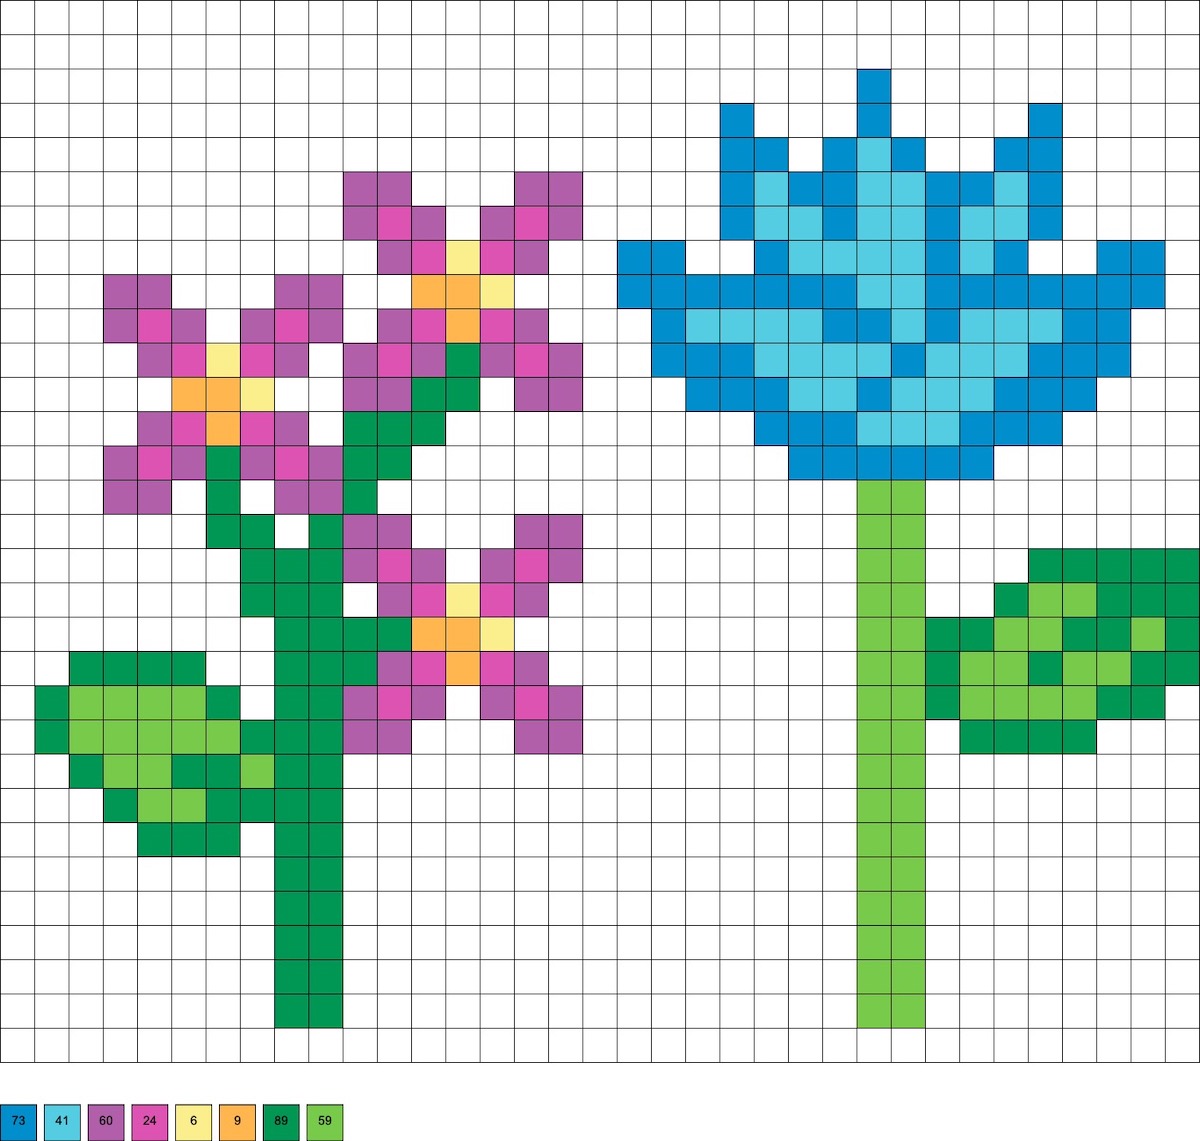
Bright Florals on Stems
These patterns use 73 light blue, 41 sky, 60 plum, 24 fuchsia, 6 pastel yellow, 9 cheddar, 89 bright green, and 59 kiwi green beads.
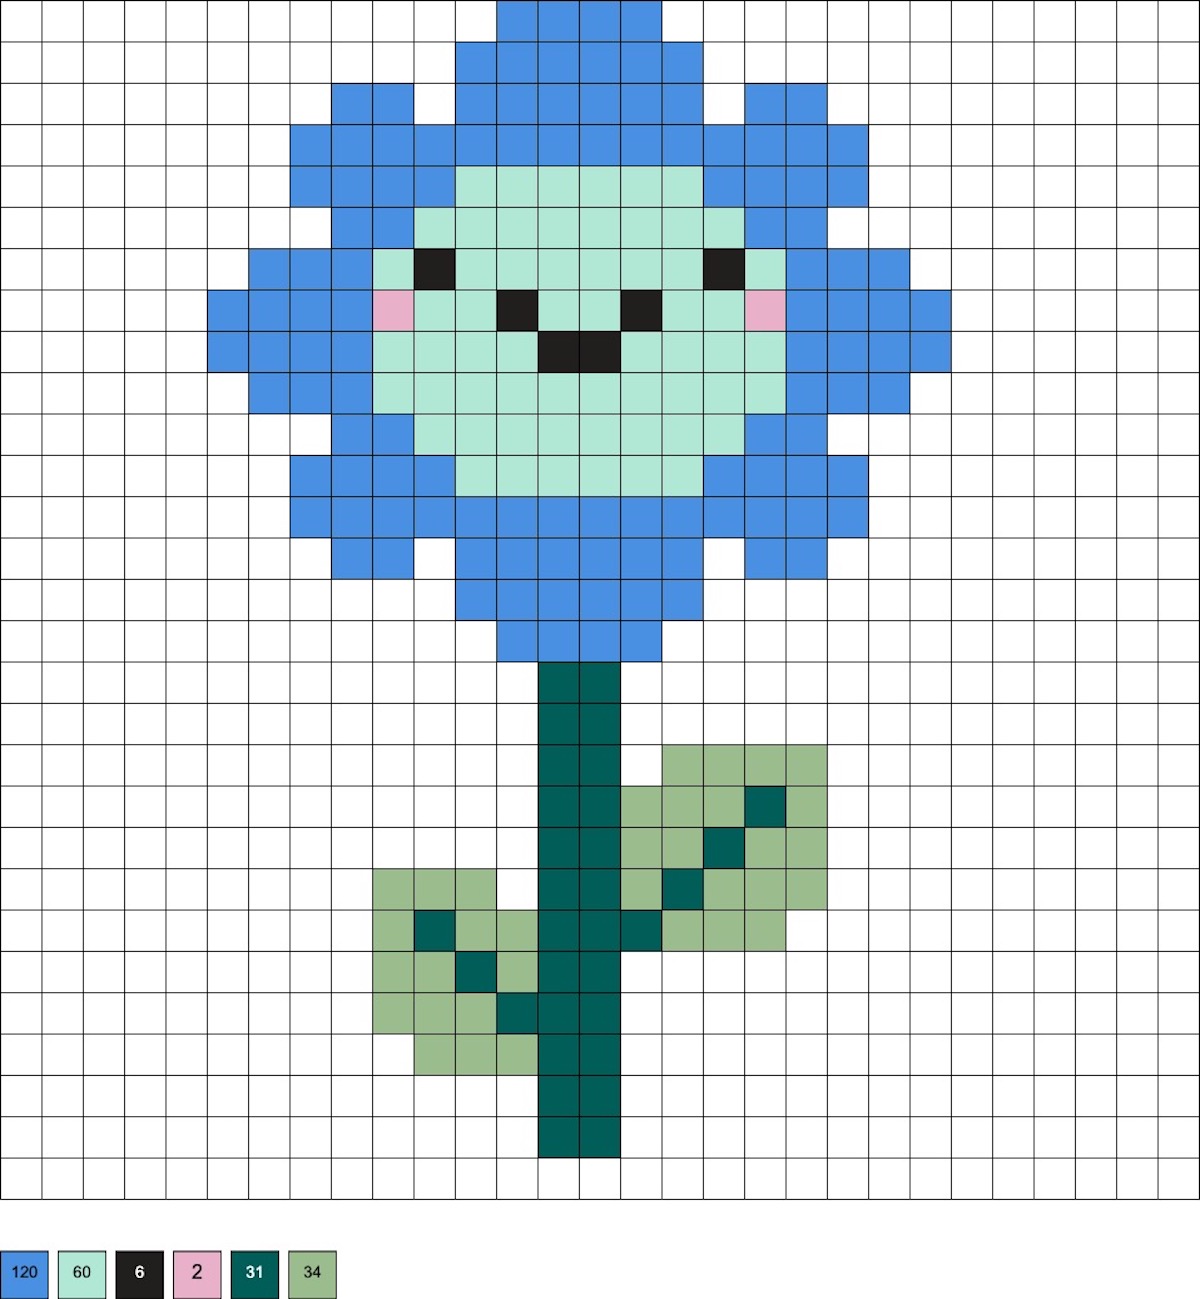
Smiling Flower
This pattern uses 120 light blue, 60 mint, 6 black, 2 flamingo, 31 dark spruce, and 34 sage beads.
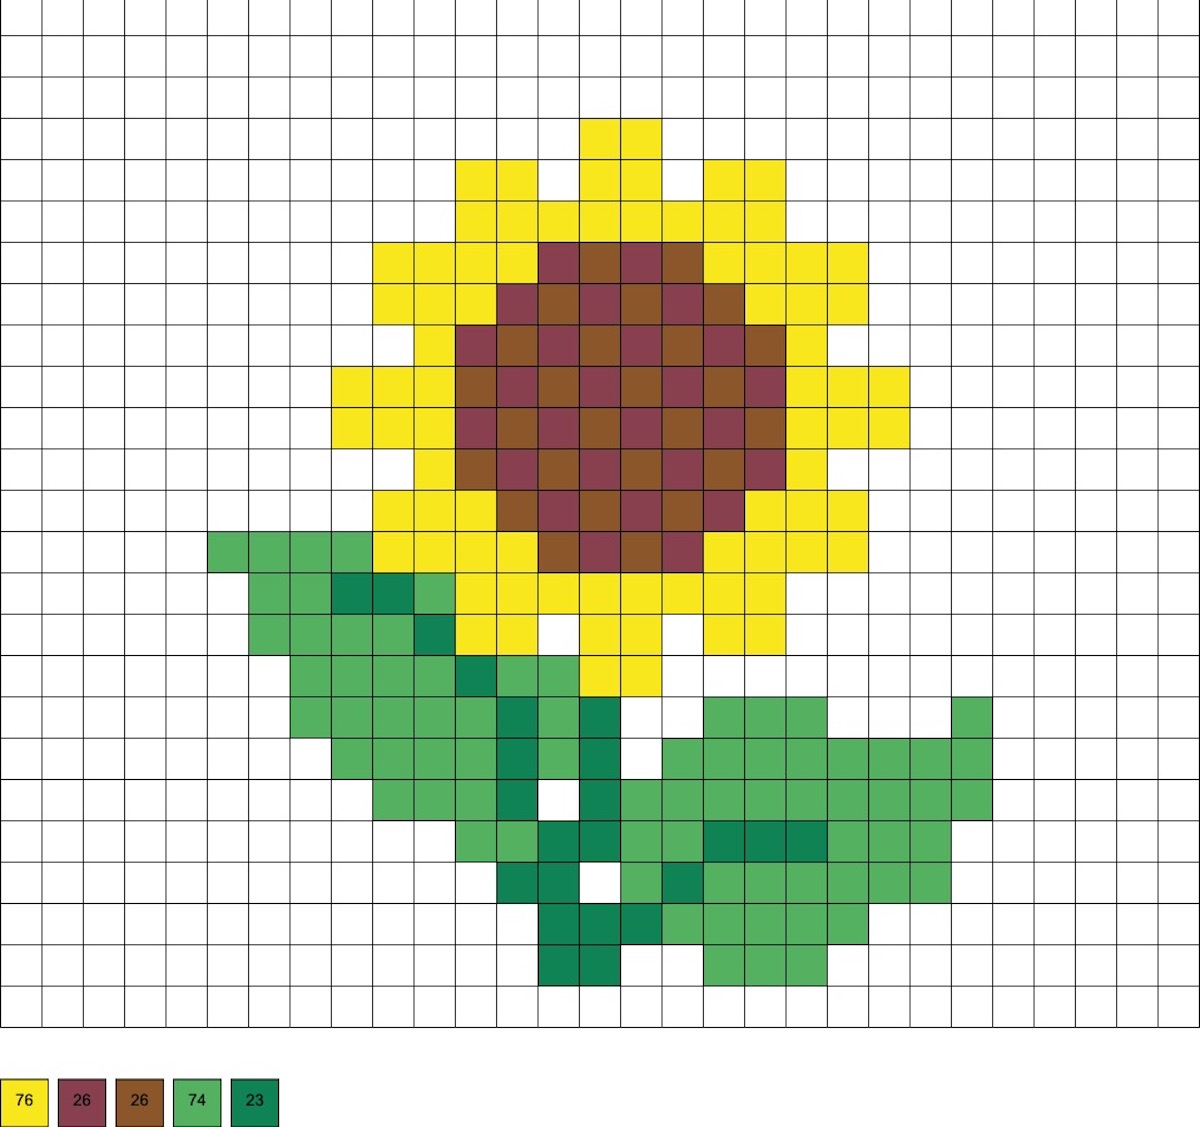
Sunflower
This pattern uses 76 yellow, 26 cranapple, 26 gingerbread, 74 bright green, and 23 dark green beads.
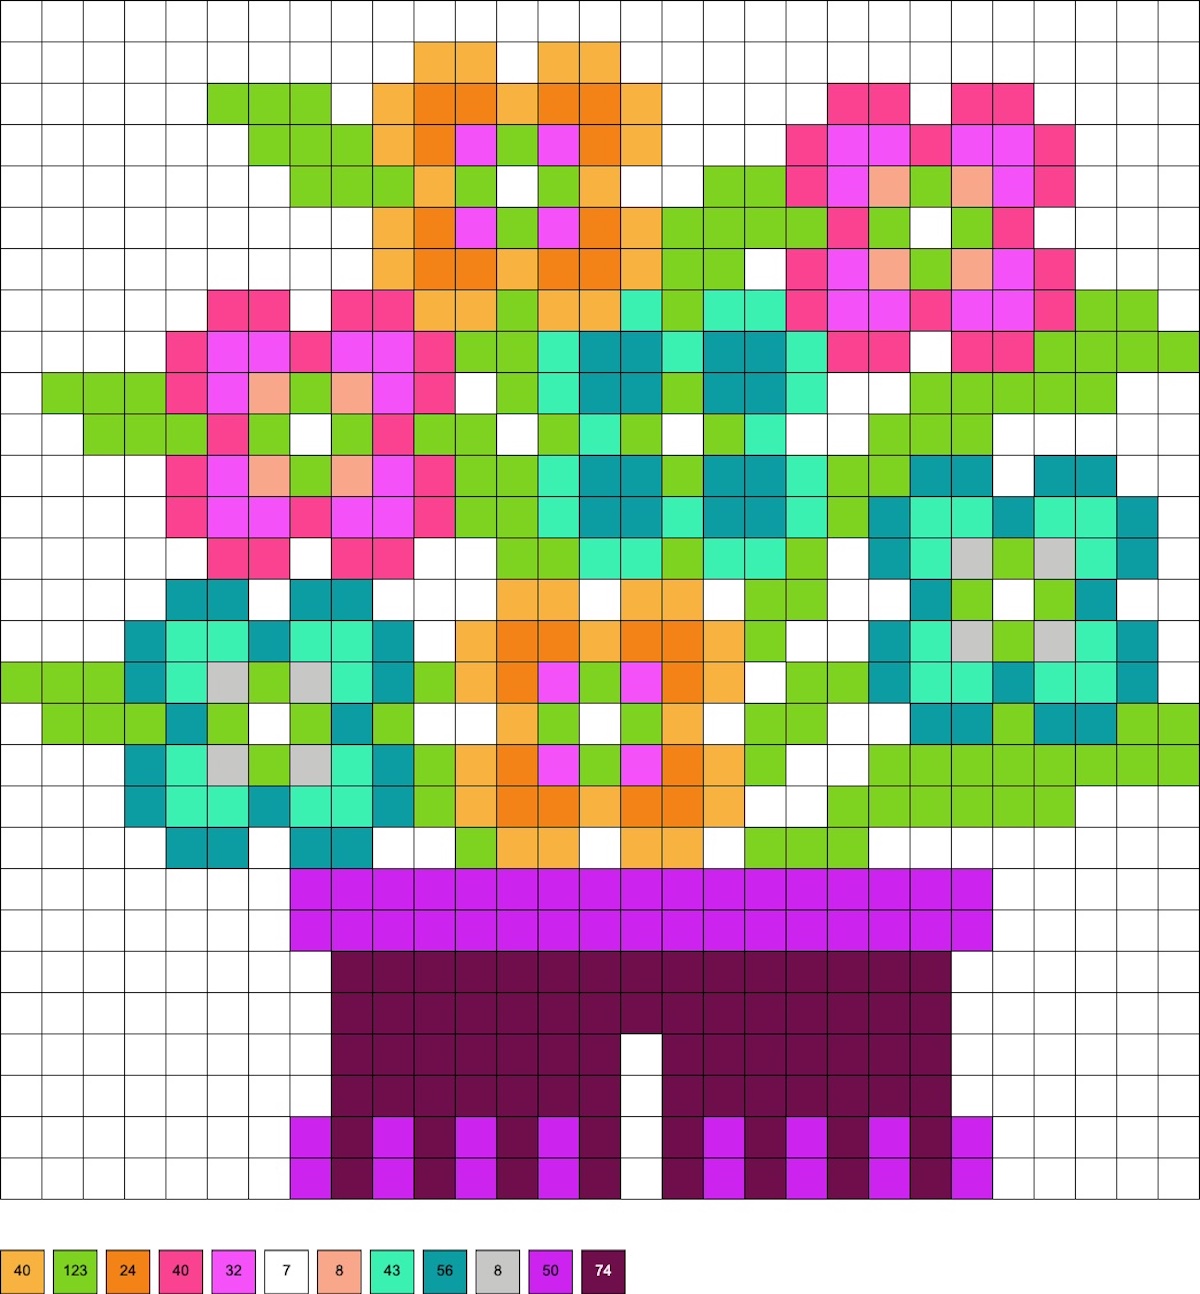
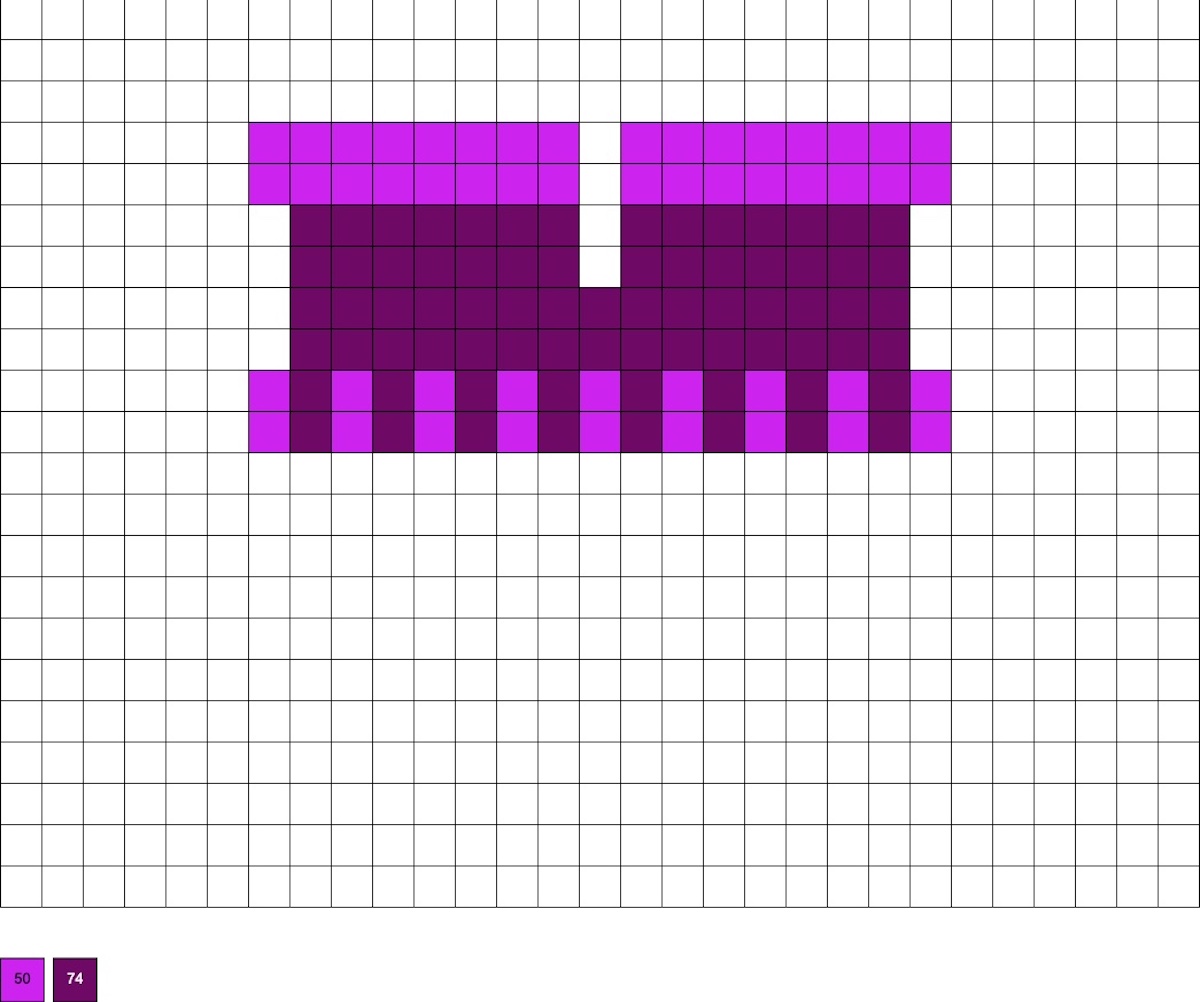
3D Flowers in a Pot
This pattern uses 40 cheddar, 123 kiwi green, 24 orange, 40 magenta, 32 fuchsia, 7 white, 8 blush, 43 light green, 56 parrot green, 8 light gray, 100 plum, and 148 eggplant beads. Once both pieces are done, you’ll insert the stand to make the flowers 3D.
Cross Stitch Design
This pattern uses 22 plum, 15 cheddar, 95 salmon, 274 peach, 70 light green, 82 blush, 40 fruit punch, 21 parrot green, and 6 cranapple beads.

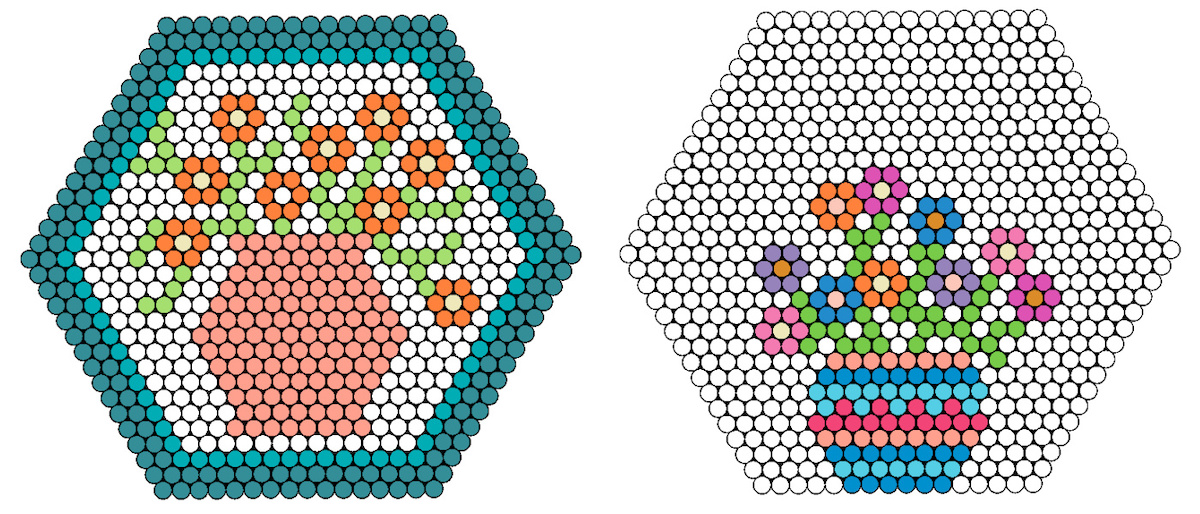
Vases of Flowers
If you love flowers in vases, these patterns are going to be fun for you! The background of the design on the left is white beads.
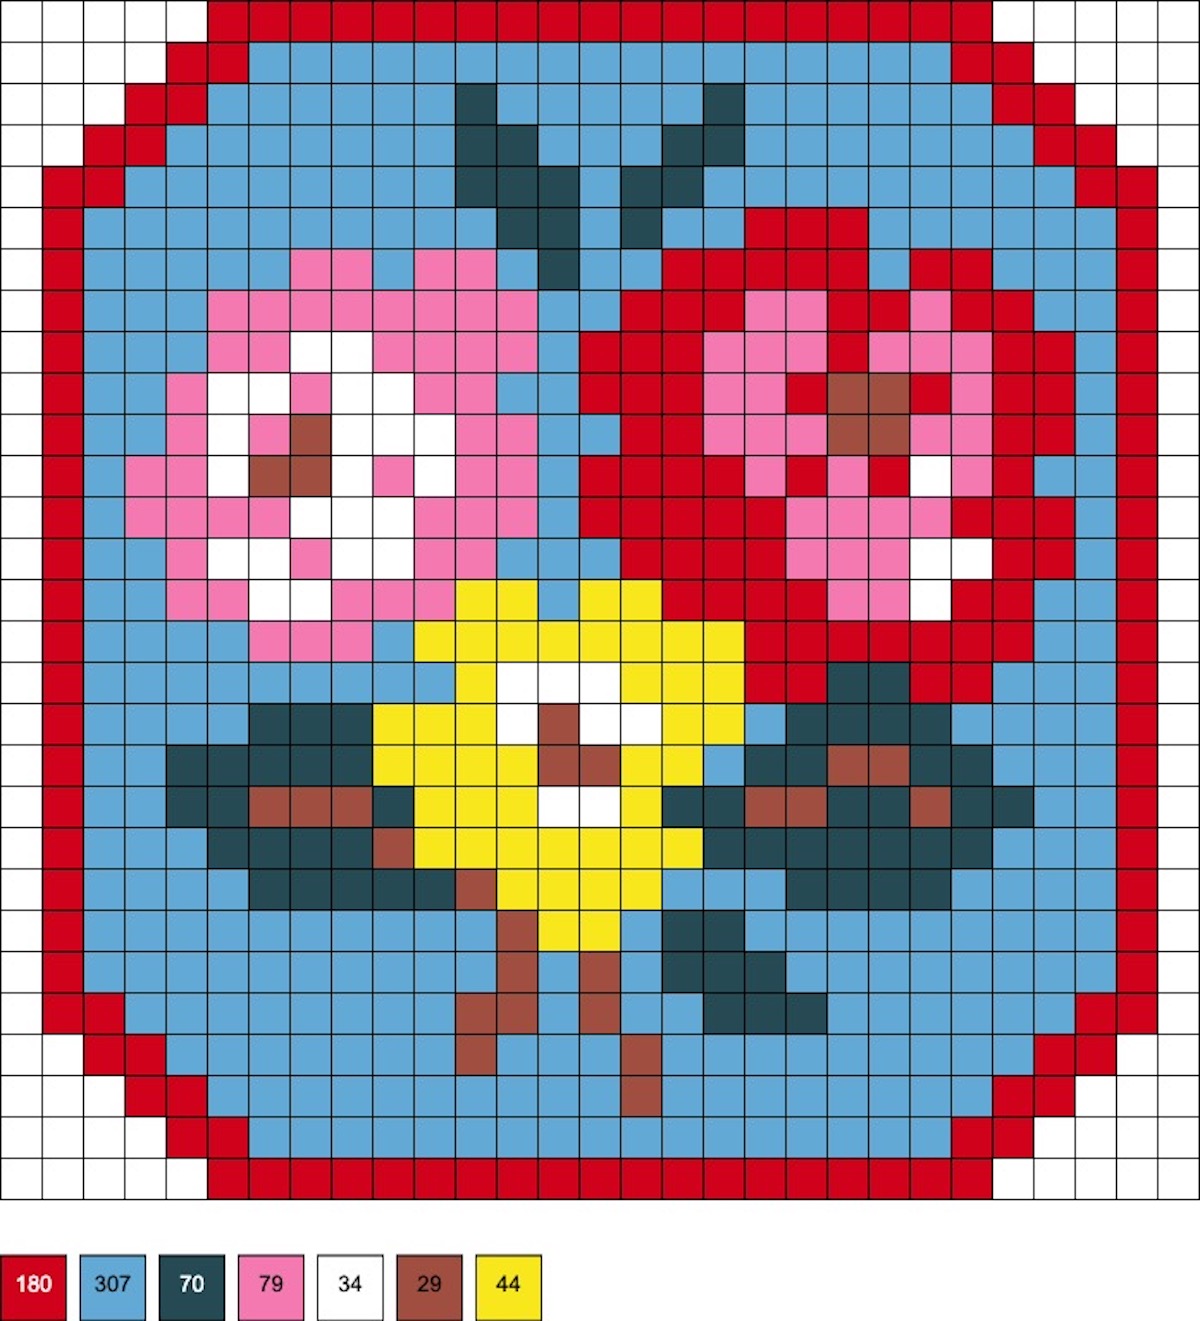
Vintage Flowers on a Plaque
This pattern uses 180 red, 307 pastel blue, 70 dark spruce, 79 cotton candy, 34 white, 29 gingerbread, and 44 yellow beads.
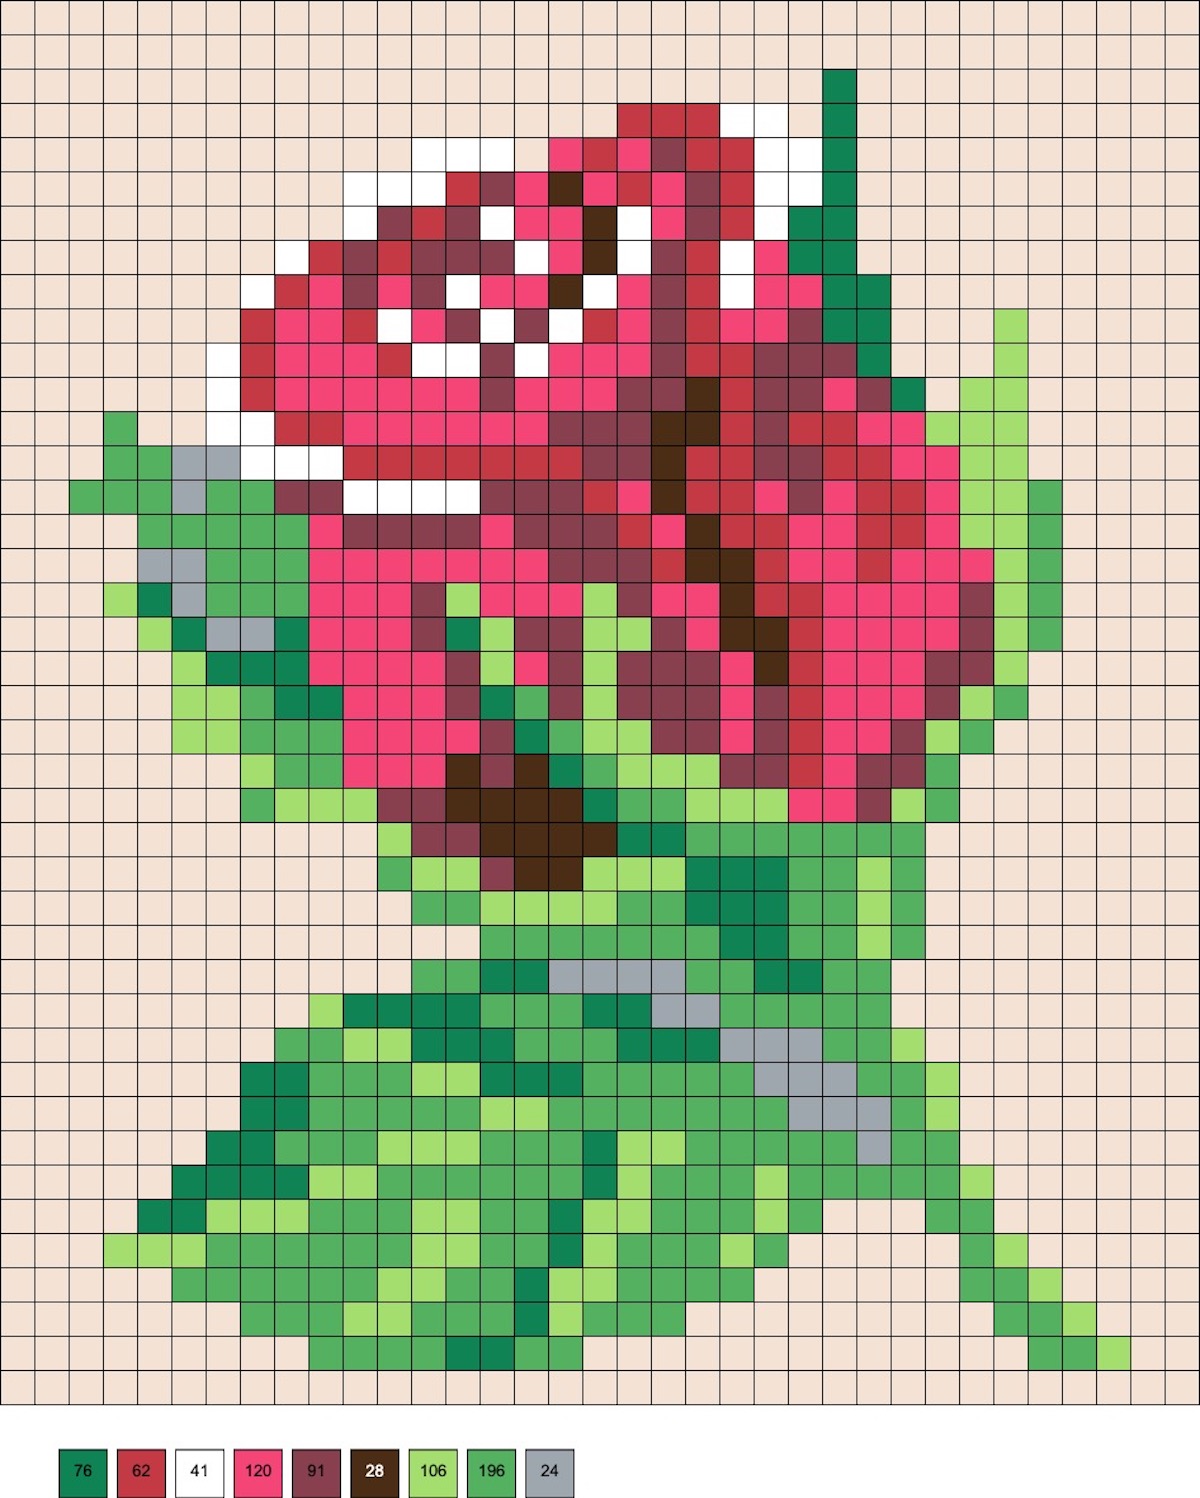
A Rose By Any Other Name
This pattern uses 76 dark green, 62 cherry or red, 41 white, 120 magenta, 91 cranapple, 28 eggplant or raspberry, 106 sour apple, 196 bright green, and 24 clear beads as indicated by gray.
The clear beads attach the leaves to the rose and make it less fragile. You might want to omit these depending on what you are doing with the project.
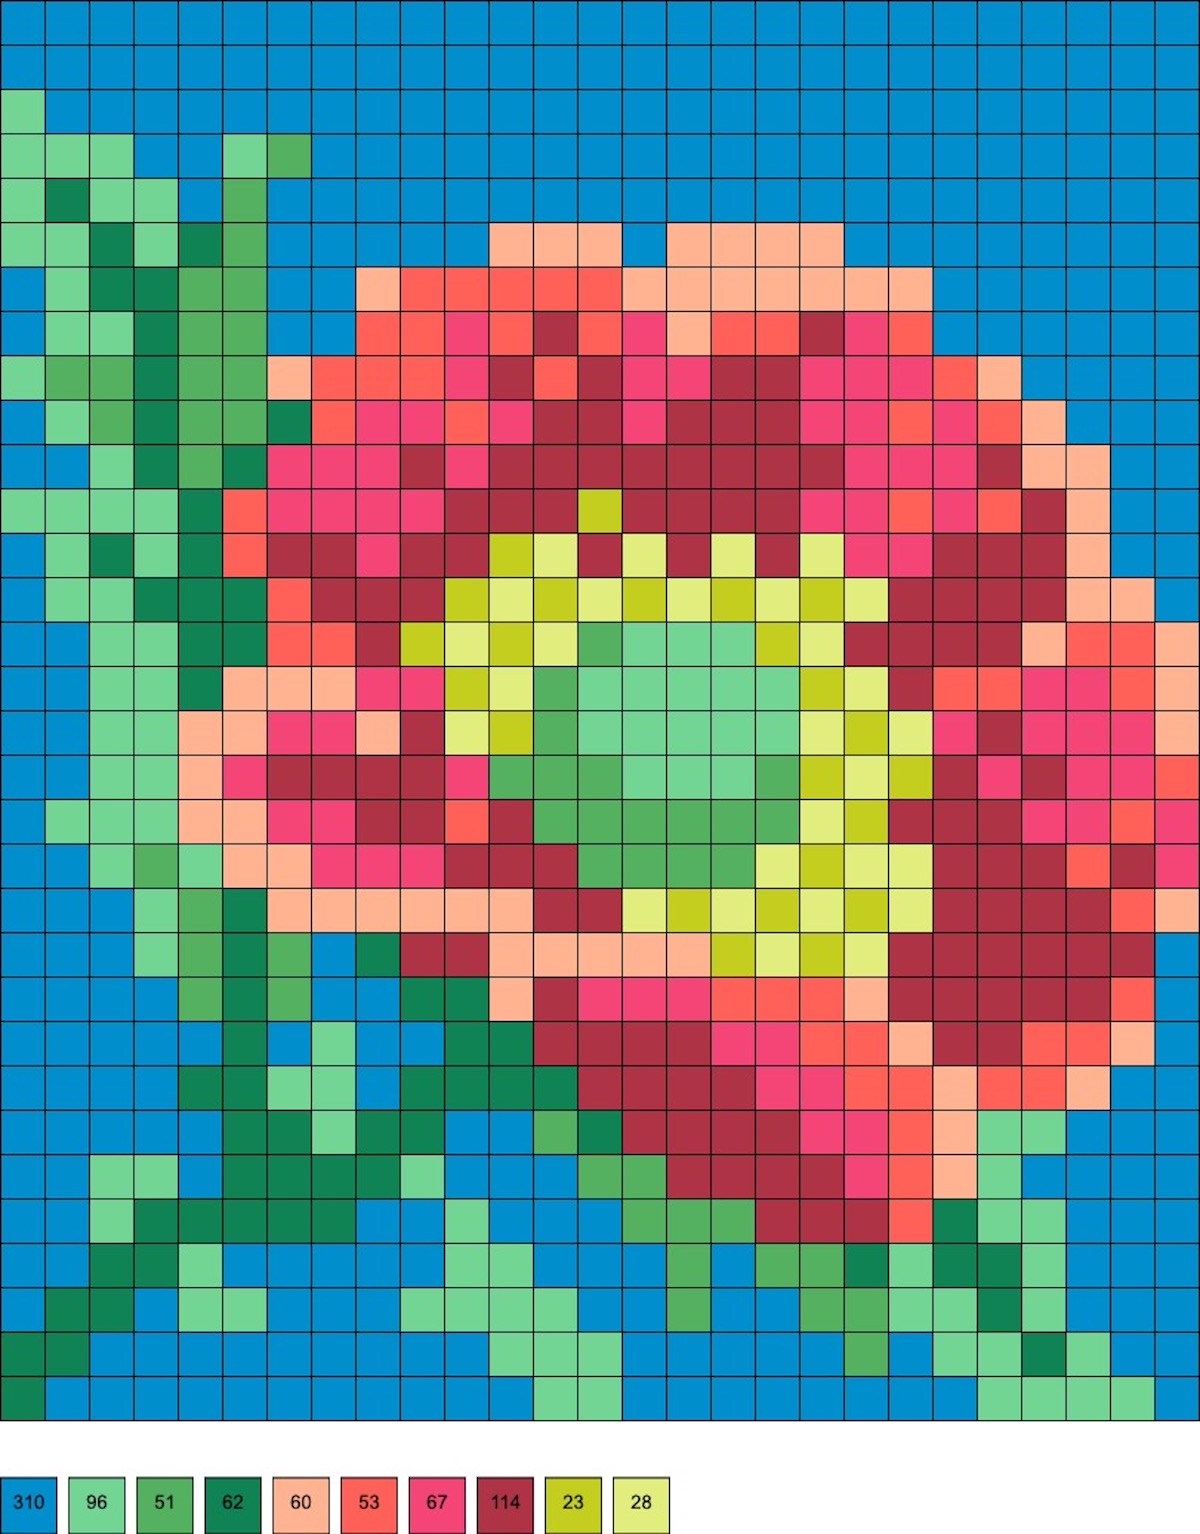
Pretty Peony
This pattern uses 310 light blue, 96 pastel green, 51 bright green, 62 dark green, 60 orange creme, 53 hot coral, 67 magenta, 114 cherry, 23 prickly pear, and 28 sherbet beads.
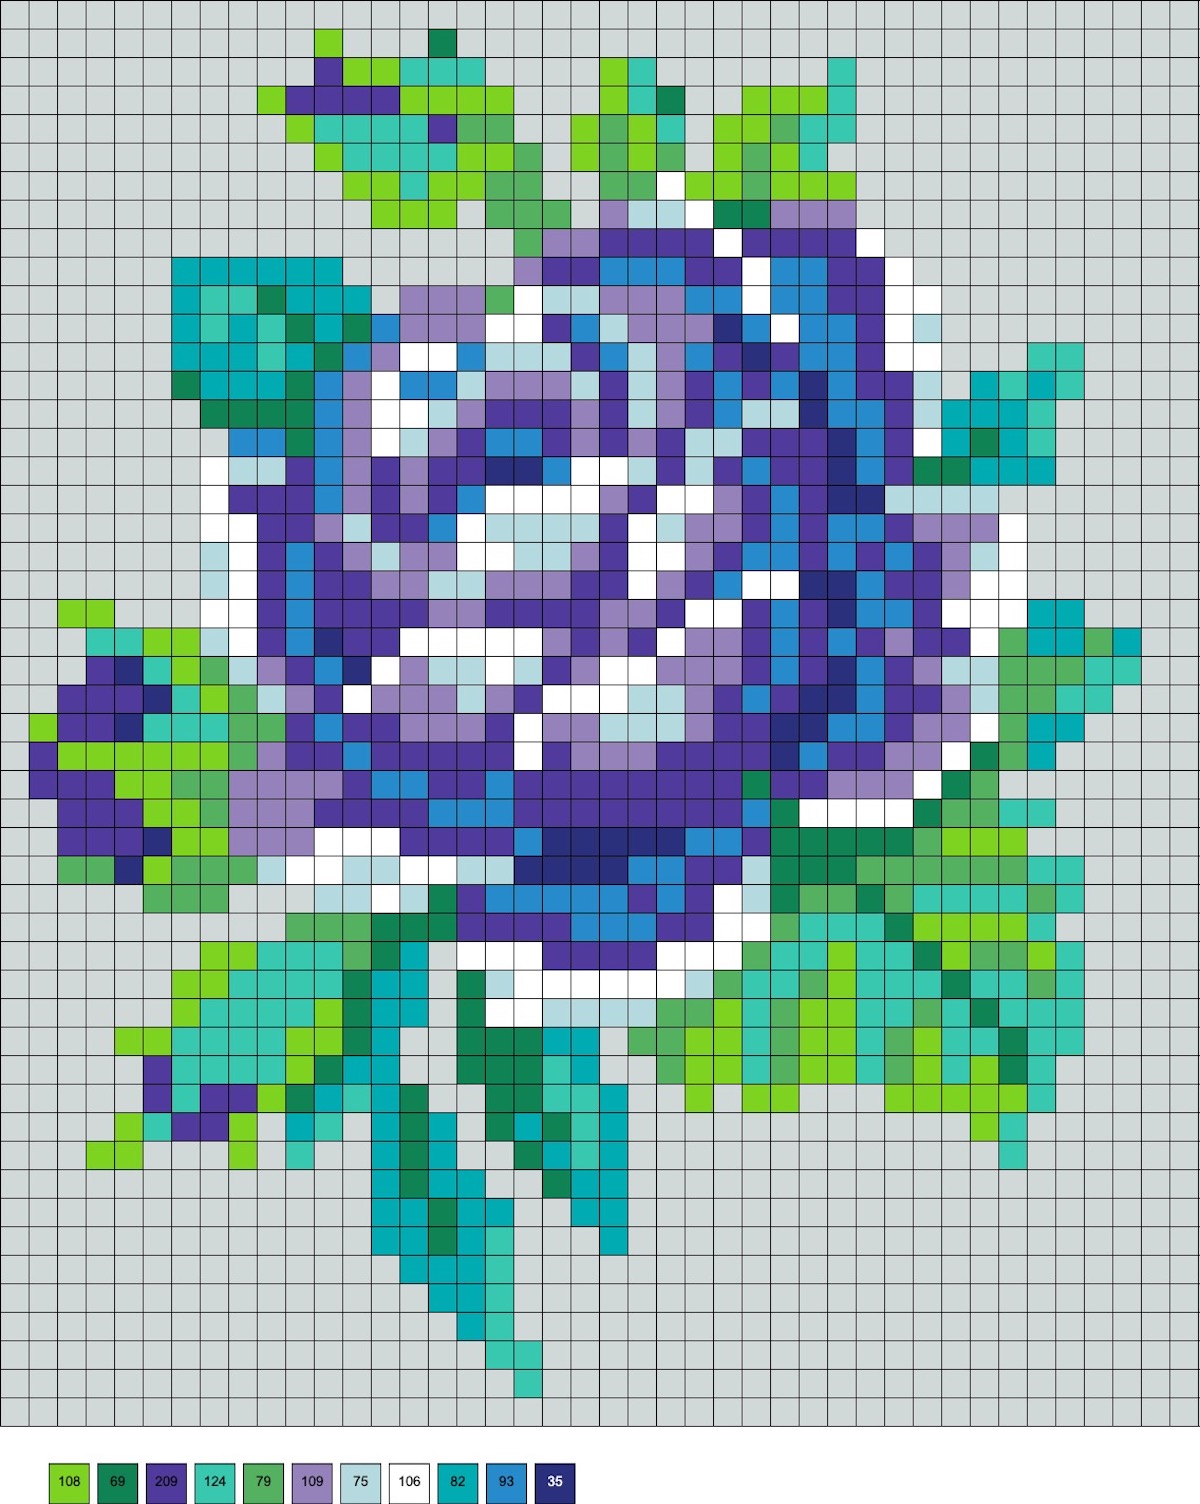
Large Rose
This pattern uses 108 kiwi lime, 69 dark green, 209 grape, 124 lagoon, 79 bright green, 109 pastel lavender, 75 robin’s egg, 106 white, 82 Caribbean sea, 93 light blue, and 35 dark blue beads.
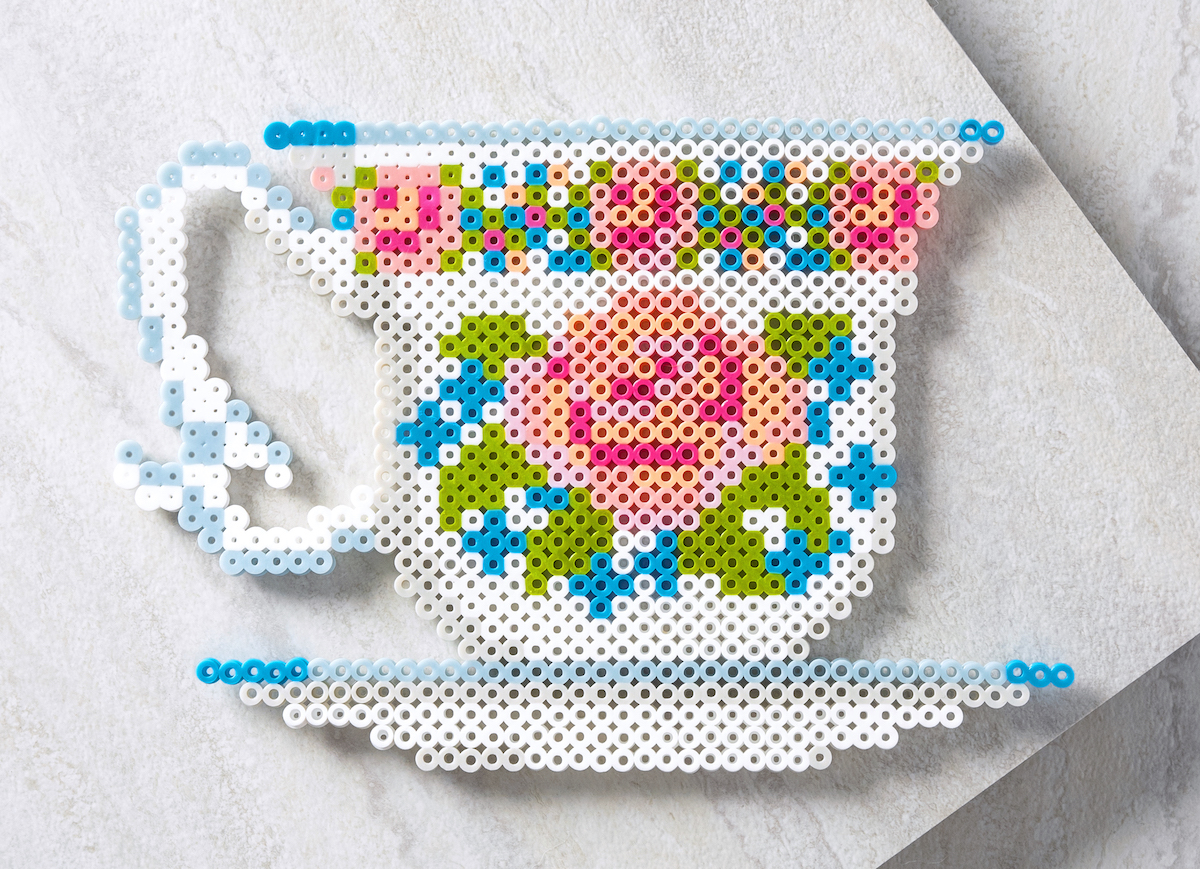
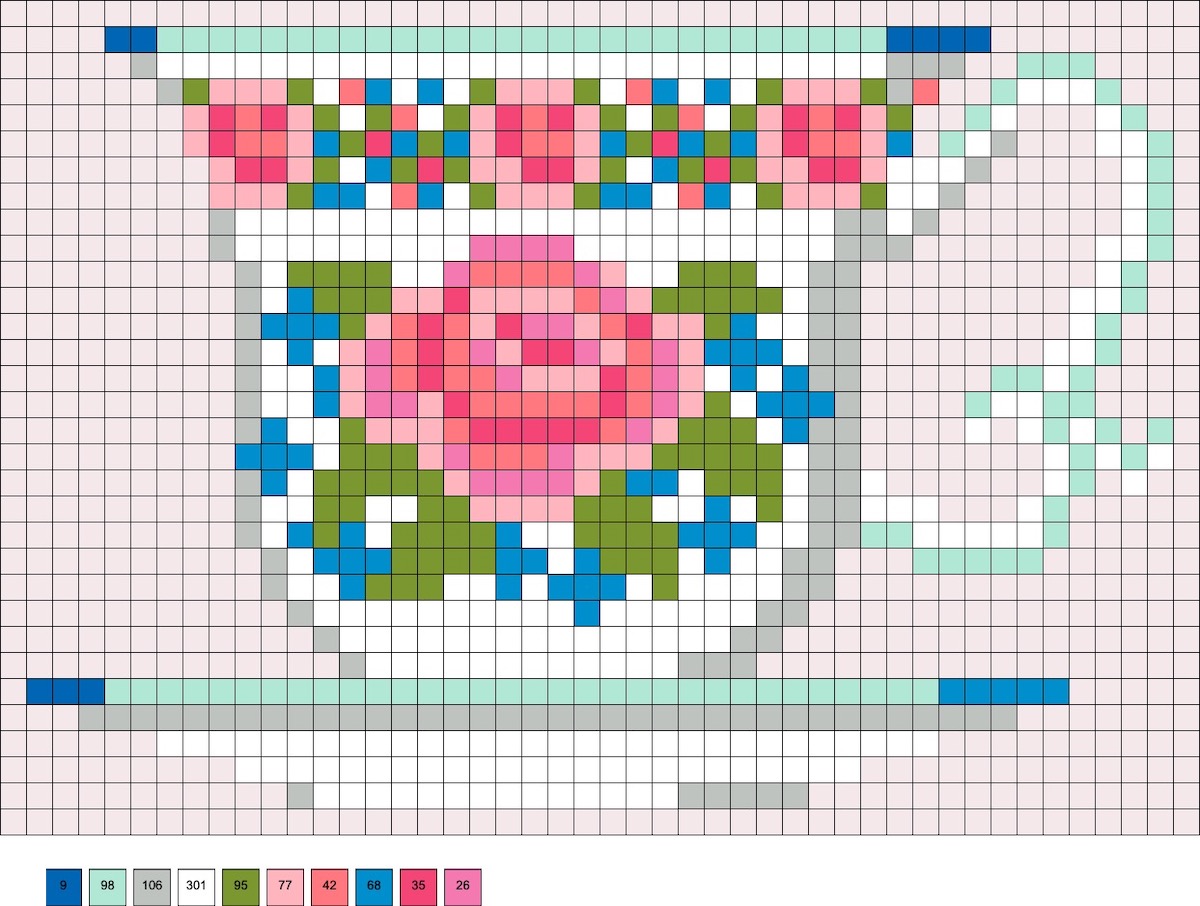
Floral Teacup
I love this one because my mom had a teacup collection! This pattern uses 9 cobalt, 98 mint, 106 light gray, 301 white, 95 fern, 77 flamingo, 42 salmon, 68 light blue, 35 magenta, and 26 pink beads.
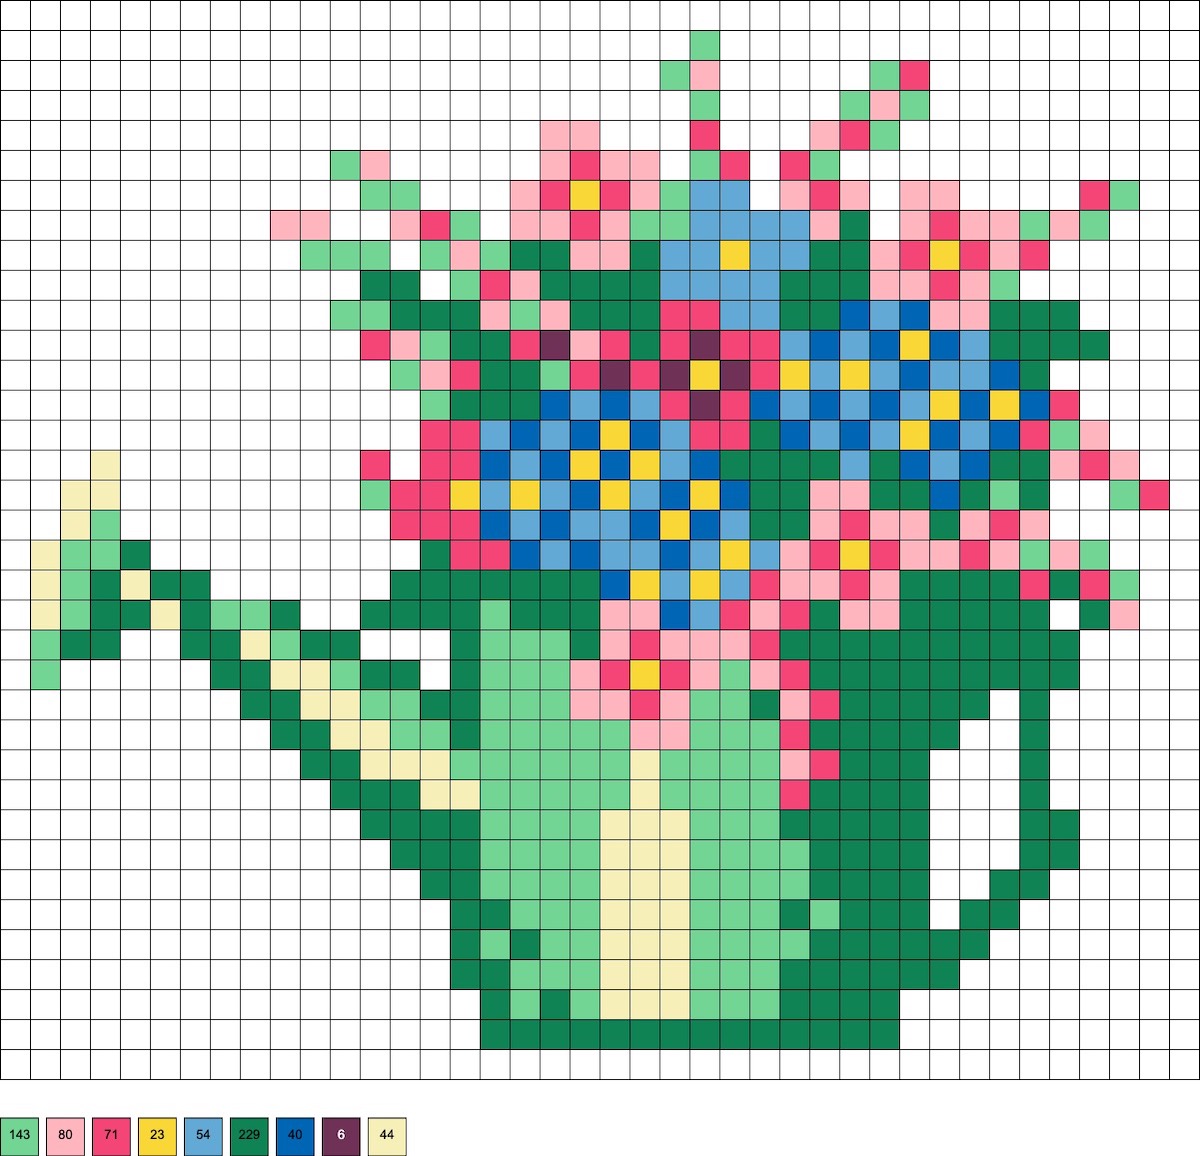
Flowers in a Watering Can
This pattern uses 143 pastel green, 80 flamingo, 71 magenta, 23 yellow, 54 pastel blue, 229 dark green, 40 cobalt, 6 cranapple, and 44 cream beads.
If you try these Mother’s Day perler bead ideas, let me know in the comments! I’d also love for you to check out these additional perler ideas:
4th of July • Birds • Butterflies • Coasters • Easter • Fairy & Gnome • Hearts • Letters • Mushrooms • Stars • Summer • Unicorn • Valentine’s Day