Spray Paint a Filing Cabinet: Easy DIY Makeover for Under $10
Learn how to spray paint a filing cabinet with this easy, budget-friendly DIY! Transform a thrifted cabinet into colorful, modern office decor.

Have you ever walked past an ugly old filing cabinet and wondered, “Can I spray paint a filing cabinet to make it look cute?” Or maybe, “What kind of spray paint works on metal?” Or even, “Will this thing ever not look like office furniture from 1987?”
If you’ve asked any of those questions . . . welcome, friend. You’re in the right place.
I used to walk right by the sea of sad, abandoned filing cabinets at my local thrift store. But then I learned that new file cabinets can cost upwards of $100 (seriously!). And that’s without casters.
Add wheels and you’re heading into luxury filing territory. I saw $200 and upwards. That was all I needed to start seeing those thrift store castoffs in a new light.
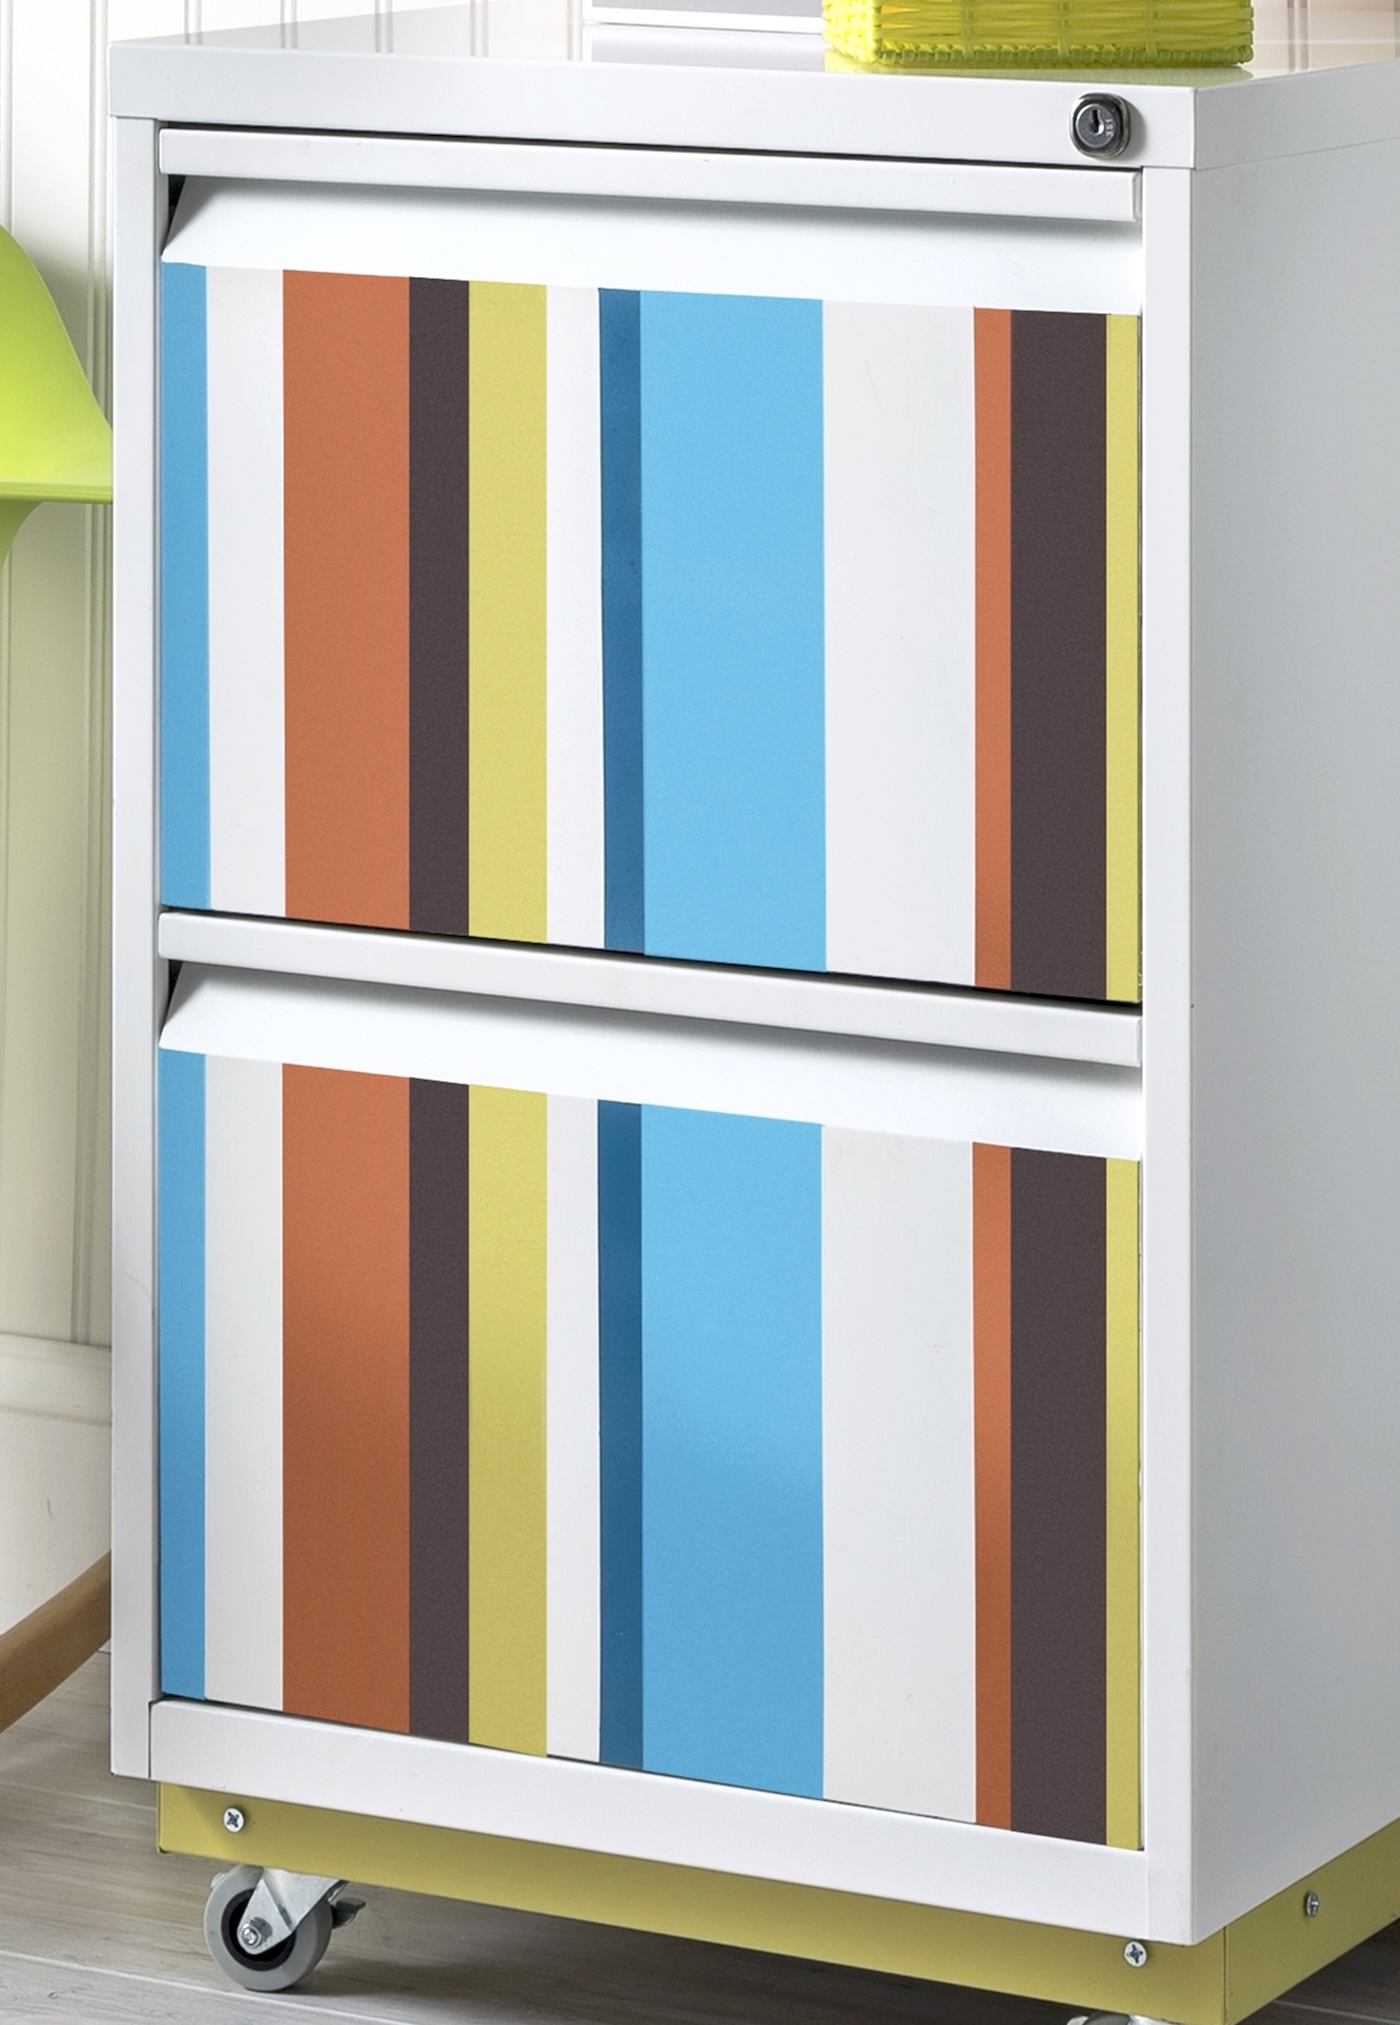
A lot of thrift store file cabinets are not white – meaning, they are black or some other weird color. However I got lucky with this one. I purchased this bad boy for $5:

Then I raided my spray paint stash, and got to work. Spoiler alert: spray painting a filing cabinet is not only totally doable, it’s super fun.
With a little painter’s tape and patience, you can transform a boring beige beast into something colorful, modern, and uniquely you.
In this tutorial, I’ll show you exactly how to spray paint a metal filing cabinet, including how to prep the surface, what paints I used, and how I created the colorful striped drawer fronts.
I’ll also walk you through the optional step of adding wheels – because sometimes your home office setup needs a little extra mobility.
Get the printable how to below!
Spray Paint a File Cabinet
Equipment
- Screwdriver
- Drill
- Miter saw
Materials
- 1 Filing cabinet
- Spray paint Various colors
- Wood screws at least 10 either 1.5" or 2"; more if you're going to use casters
- Butcher paper or newsprint
- 3 x 3 turning blank, 36" long
- 4 Casters we got ours from Home Depot
Instructions
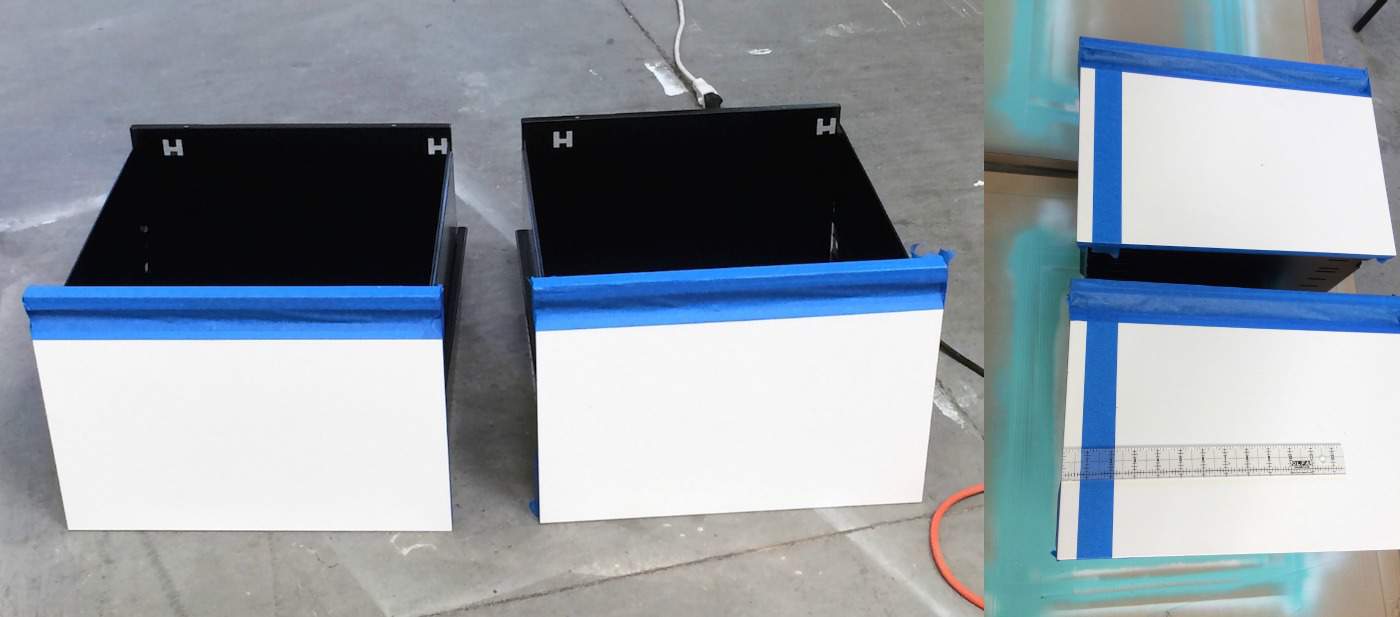
- Your first step will be to clean the cabinet if it needs it. I recommend it just because it's likely been handled a lot. We used soap and water, plus Goo Gone. The sticker on the front was easily removable and the residue removed.
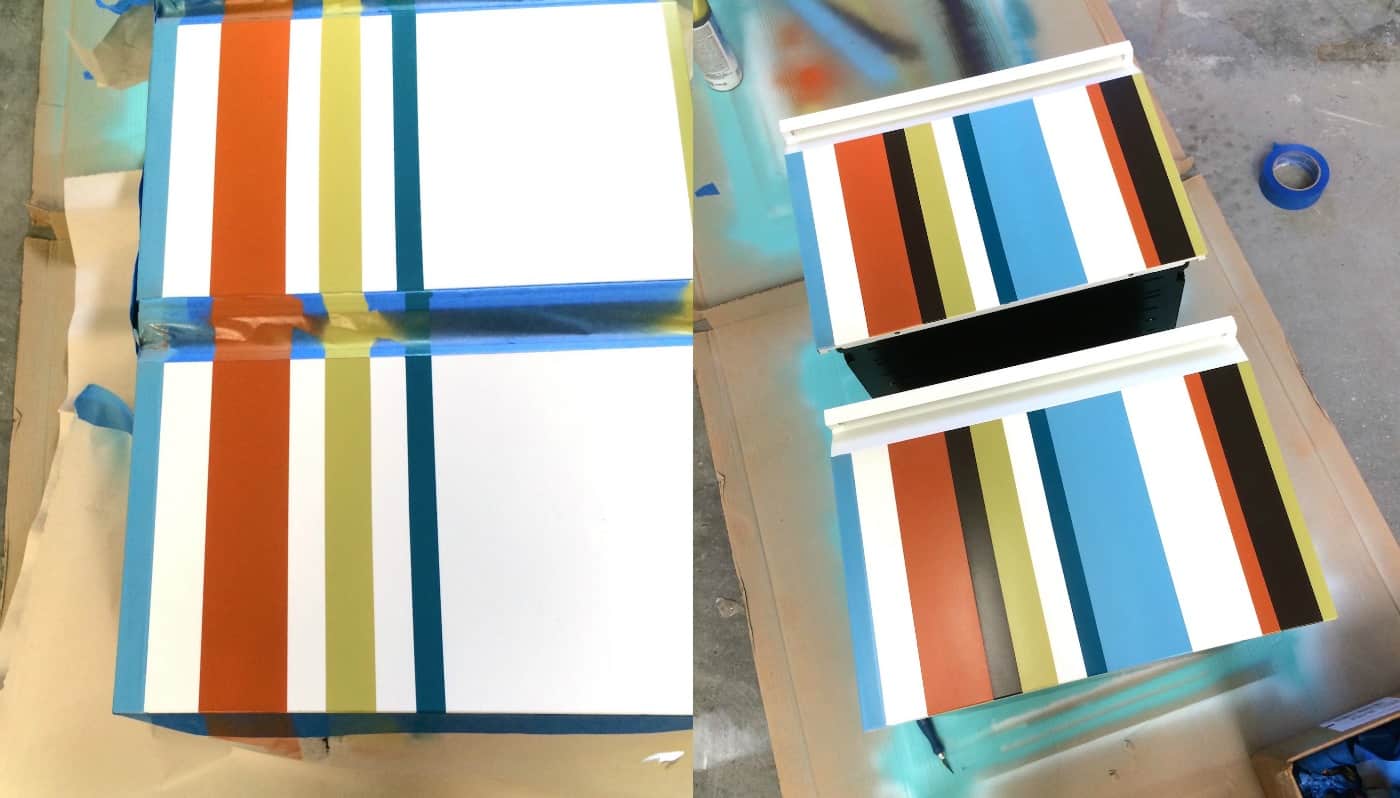
- Remove the drawers and use the painter's tape to section off the area you're going to paint. Then tape off a stripe on the far left.Use your ruler to make sure that the painter's tape is even and that it is the same on the bottom and top drawer. Smooth the tape down thoroughly.
- Start spray painting the drawers. Use the butcher paper to help you out – tape off the section with painter's tape as shown. Spray several light coats until the area is covered. Let dry for a minute if necessary. Then remove the tape and paper and let dry.
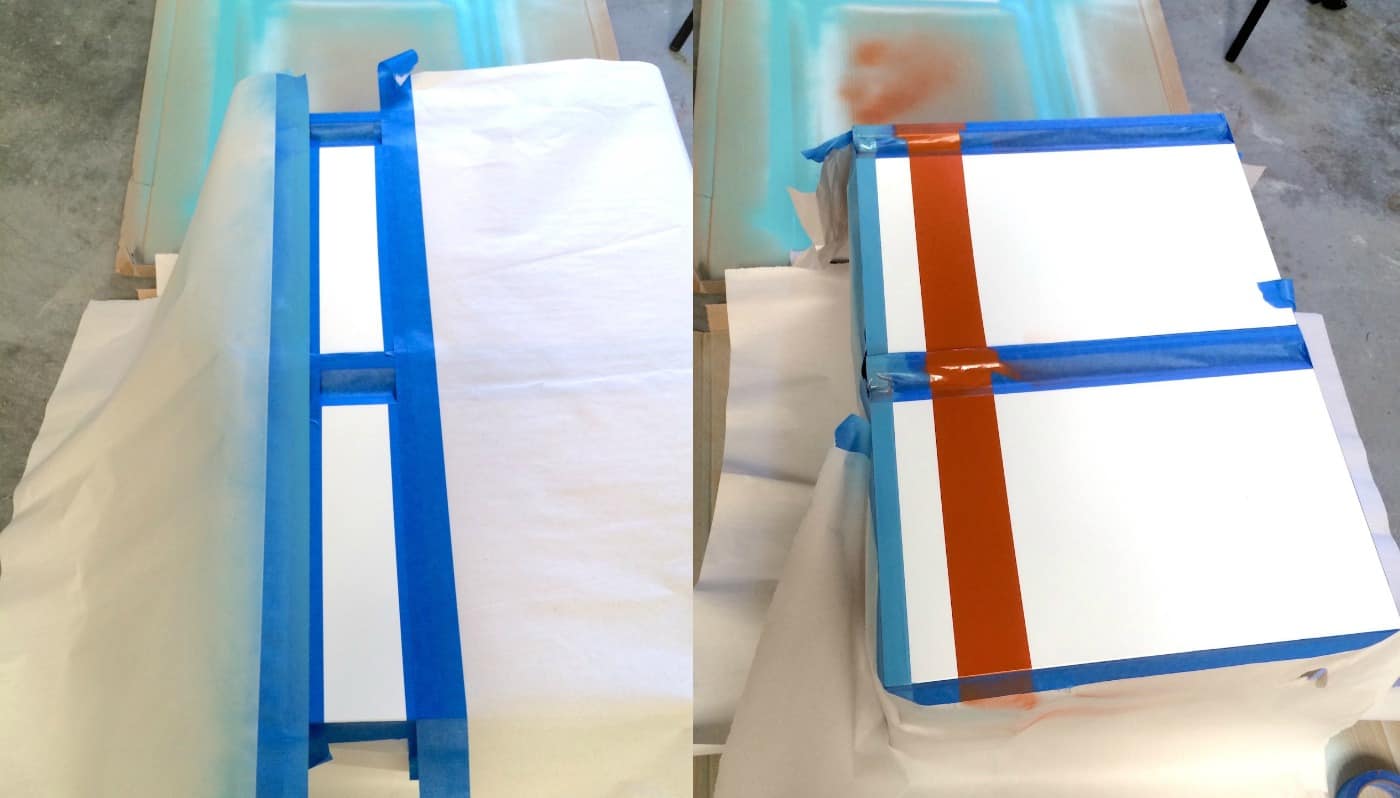
- Now, it's going to take you some time to do the stripes, just because of the drying. So paint a stripe, let it dry for a few hours, then come back and do another one.Work your way across the front of the cabinet . . then come back and fill in additional stripes if you like. As I said before – the whole process was very random
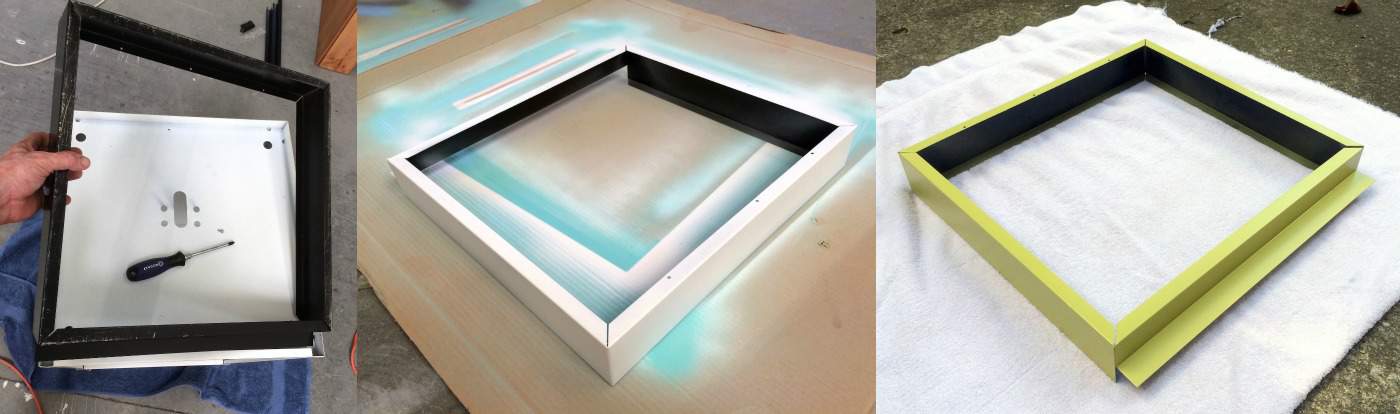
- We used the white spray paint/primer on the base. Unscrew , prime, paint. Let dry.
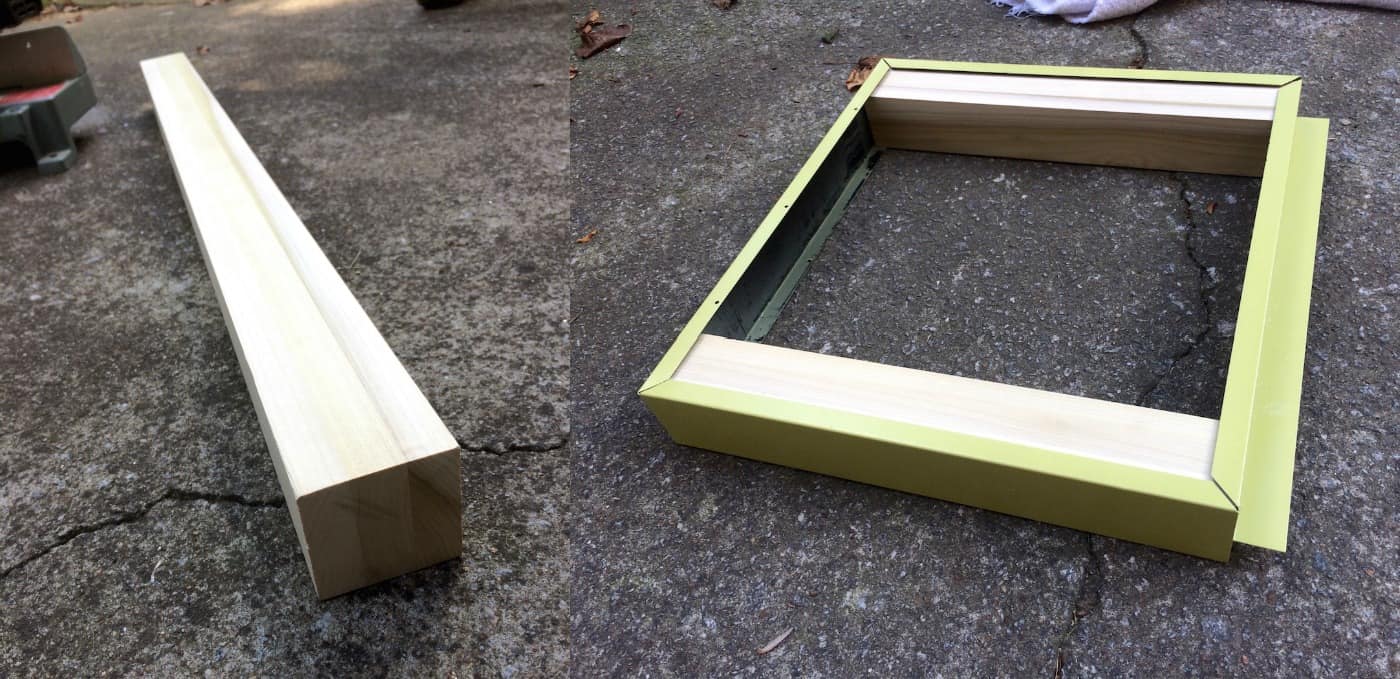
- Next you will add a base for wheels. Measure carefully inside the base of your filing cabinet. We cut the 3 x 3 to exactly fit inside along two edges of the base – this is to add support.
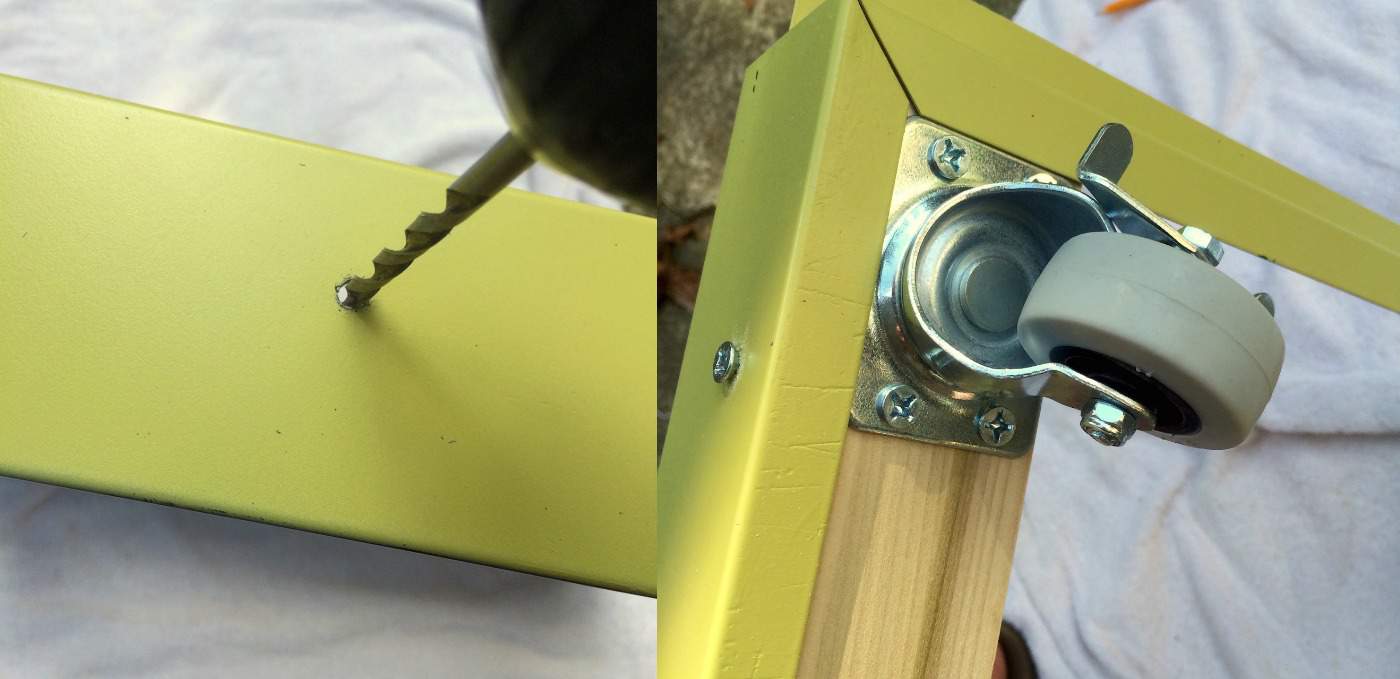
- Drill into the sides of the base/wood and add the screws. We secured the wood pieces with three screws down the long side and one at each end. Attach the casters to the wood with more wood screws. You are ready to set the cabinet upright.
Notes
- We should have used flat head screws. But we had these slightly tapered ones on hand, so that’s what we used.
- Looking back we should have probably waited to paint the base until we added the wood and the screws – so that the screws would be the same color as the base! Lesson learned.
-
Here’s what we used:
-
Rustoleum American Accents Lagoon
-
Valspar Outdoor Satin Spring Sprout
-
Valspar Outdoor Satin Dark Night
-
Valspar Outdoor Satin Dried Peppers
-
Krylon ColorMaster Satin Island Splash
-
Krylon ColorMaster Paint + Primer Flat White
-
If you like using paint or enjoy painting style effects, try out these other projects we’re inspired by:
Blow Painting • Bubble Wrap Painting • Flower Pot Painting • Paint a Basket • Paint Fake Flowers • Paint Nesting Dolls • Spray Paint Cookie Tins


cuanto????
Perdón?
This looks fab. I love the idea of adding wheels. How did you get the drawers out?
Hi Claire! Thank you! There are typically two ways – 1) there are latches in the back that you unhook the drawers or 2) you bring the drawers out as far as they can go and then lift them over the track thingy. Ours was #2. Each filing cabinet is different but it’s probably one of those two!