Polymer Clay Pens Kids Will Love to Make!
Kids will love playing with clay in this polymer clay pens project! They’ll learn to marble, and the pens make great gifts for friends and family.
Skills Required: None. Even if you’ve never crafted before, you’ll be able to accomplish this project. You’ll be mixing clay, pressing it onto pens, and then baking in the oven. This is a perfect idea for older children and younger kids with adult supervision.
Looking for a simple way to pretty up some old pens? Hi! It’s Leslie from Pink Stripey Socks. Today I’m sharing a really easy and unique clay project that’s perfect for kids and adults. If you love back to school crafts or summer crafts for kids, this is a fun idea that everyone is going to love.
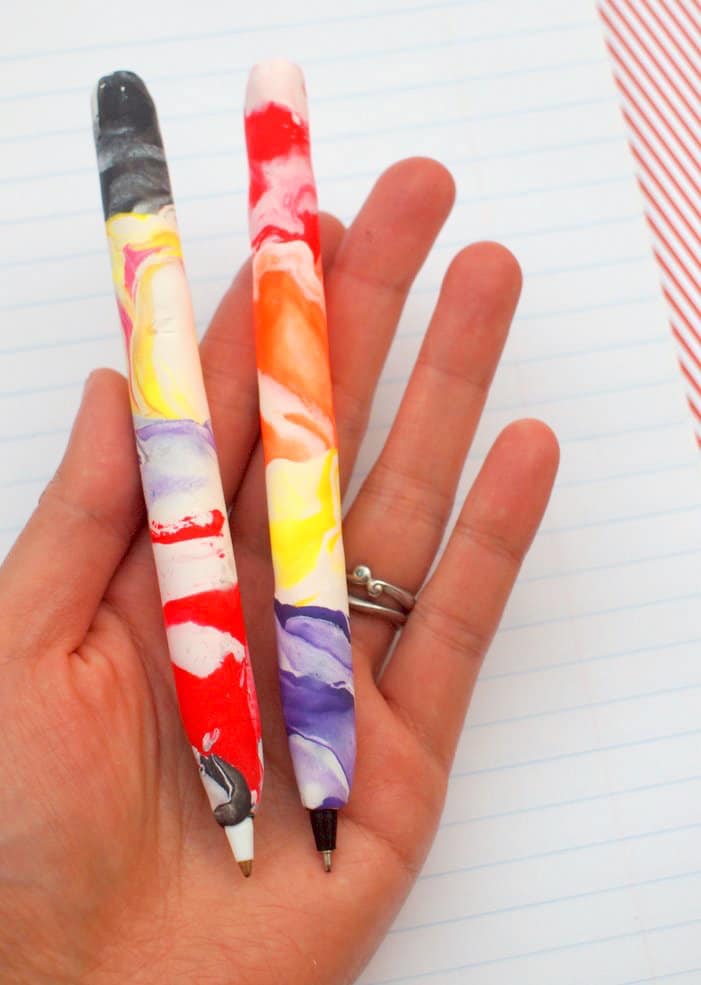
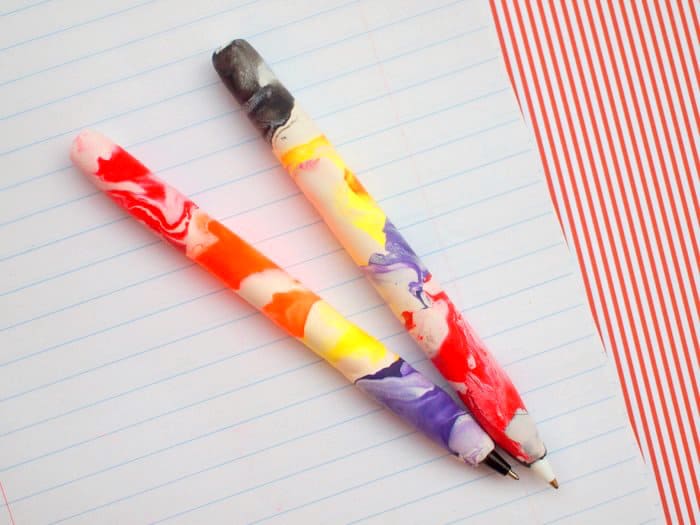
Have you ever made clay covered pens? My son and I recently made a batch and loved the results. The marbled pens turned out really beautiful. It’s a great way to use up those clay scraps you have no idea what to do with.
We’re going to keep ours, but these DIY pens would certainly make special gifts for teachers, friends, or relatives!
Clay Pens
Here are the materials needed to make this project:
- Sculpey clay
- Pens
- Baking pan
- Aluminum foil
- Craft mat or other non-stick surface
Let’s make some clay covered pens! This is a great way to use up those extra clay scraps from other projects.
For this project, you’ll want to select the pens that have the white smooth plastic versus the hard plastic clear barrels. If you can remove the ink from the pen barrel, do that. We had a few sample pens that were given to us as freebies, so decided to test the polymer clay pens both with the ink in and out while baking.
Both ways worked! However, all pens and ink are different, so if you can remove the ink cartridge, do it.
Roll Out the Clay
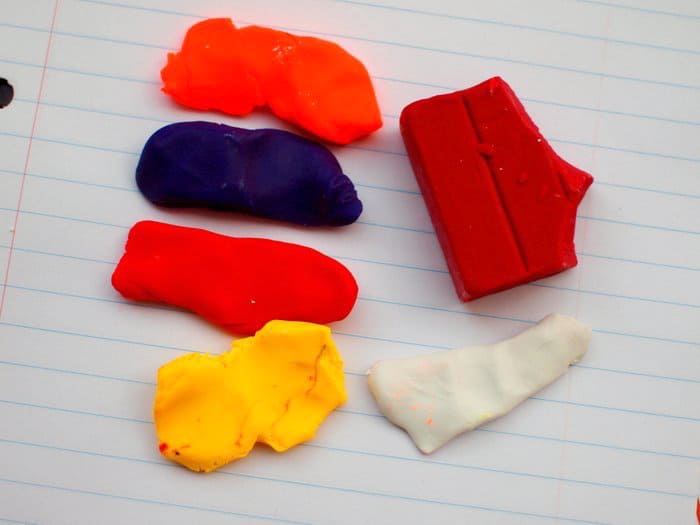
Step 1: Roll your clay around in your hands to make it pliable and soft. This was hard for my 5-year-old to do, so I helped him out. You’re going to marbelize the clay together using various colors.
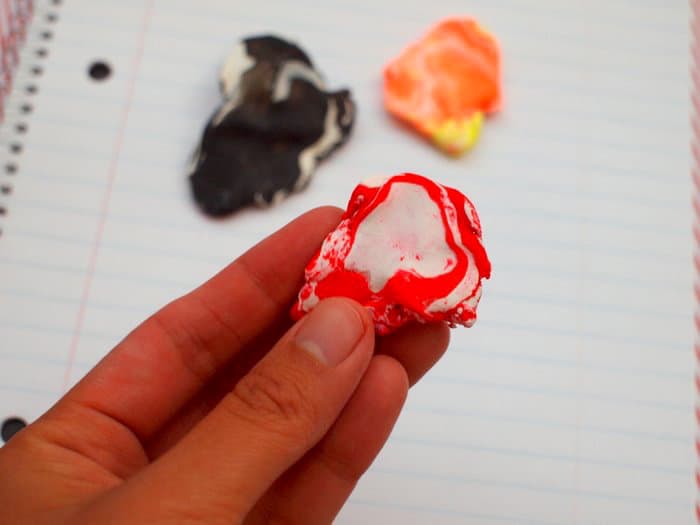
Step 2: Blend two or more colors of clay together to create a beautiful marbled effect. Do this by pressing the clay out on your surface and pressing in lighter colors. Fold and roll several times.
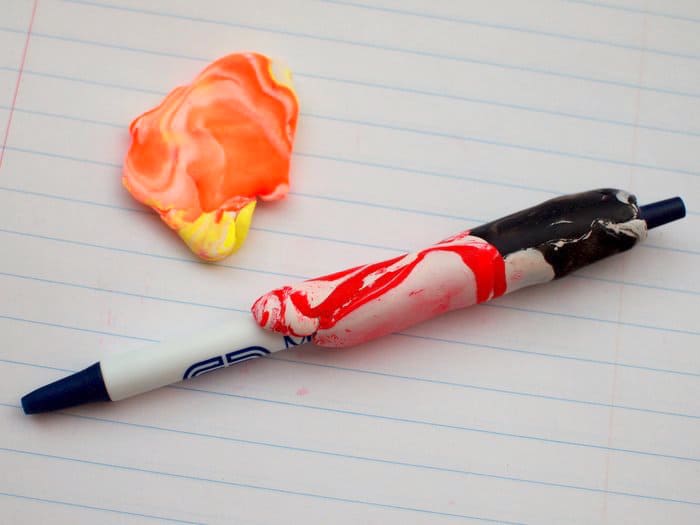
Cover the Pen
Step 3: Cover your pen by wrapping flattened pieces of clay, bit by bit, over the barrel. We rolled the pen on the table and between our hands to make it less lumpy. Once you’re finished adding all the clay, roll on a non-stick work surface to get the barrel as smooth as possible. It doesn’t have to be perfect, but you’ll find that rolling it makes the clay surface pretty smooth.
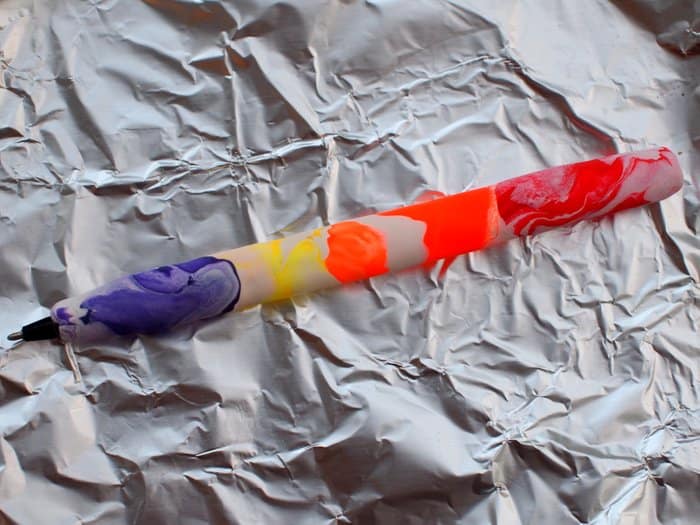
Bake the Pens
Step 4: Once you’ve covered your pen, place it onto a foil covered baking sheet. Bake it according to the directions on the package (typically 275 degrees for 15 minutes or so). Check your clay pens about halfway through baking just to make sure everything is going well.
Use adult supervision when working with children while baking clay. Use oven mitts when taking the baking pan out of the oven.
Once it’s finished baking, wait till your pens cool. Insert any ink cartridges that you removed. Then, they should be ready to use. Writing is definitely more fun when you’re using these one-of-a-kind pens!
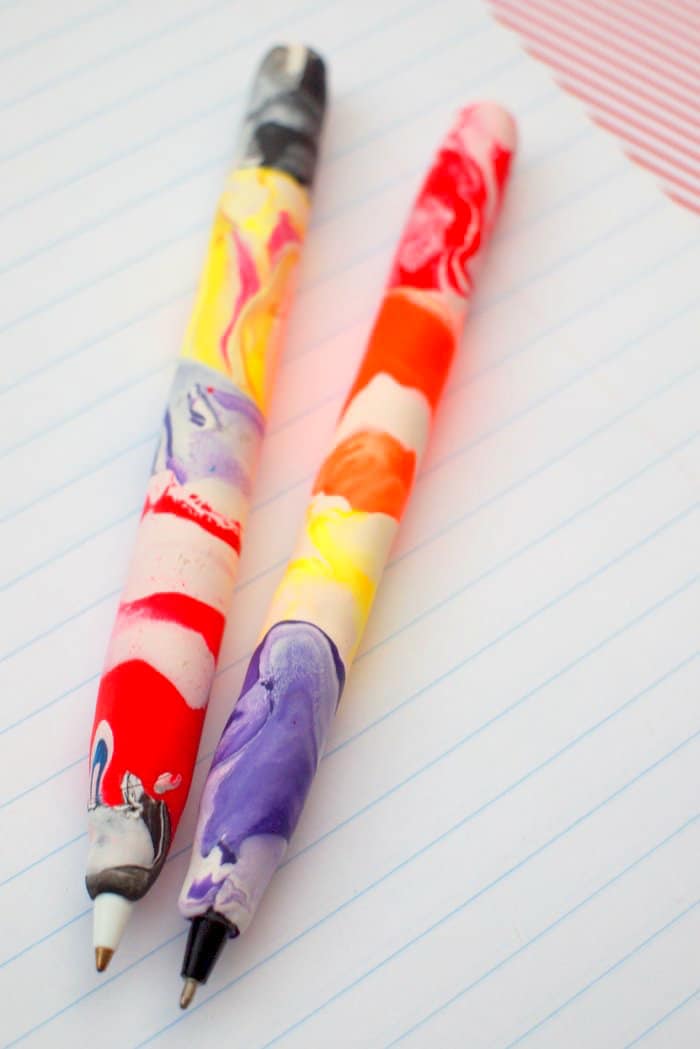
Kids are going to love this cute clay project. You might be wondering if you can reuse these pens. The answer is yes if the cartridge is removable. You can simply remove the ink and add another cartridge.
If you use some “swag” pens like we did, you might only get one use out of the pen. Having said that, we don’t go through pens very fast around here. They hang around for quite awhile!
I hope you enjoy making these polymer clay pens with your kiddos too! Please check out my blog, Pink Stripey Socks for more easy and modern family friendly crafts. I’d also love for you to check out these other craft ideas:
Blow Painting • Bubble Wrap Painting • Clay Photo Holders • Cloud Dough • Food Coloring Art • Fun Flower Pens • Marbled Mugs • Moon Sand • Outer Space Jewelry • Polymer Clay Necklace Ideas • Polymer Clay Necklace for Kids • Spin Art • Weaving for Kids
Happy making, friends!
Did u remove the ink cartridge before baking? I would think it would melt even at the low baking temperature of the clay. Love the idea, thank you.
Hi Galey! Leslie did not have any problems baking hers 😀 You could always remove it just in case!!