
Industrial Pipe Shelving DIY: Custom Look for Less
Learn how to build beautiful pipe shelving DIY style using black iron pipe and wood. This budget-friendly industrial bookshelf costs about $475 and is easy to customize. Updated June 2026
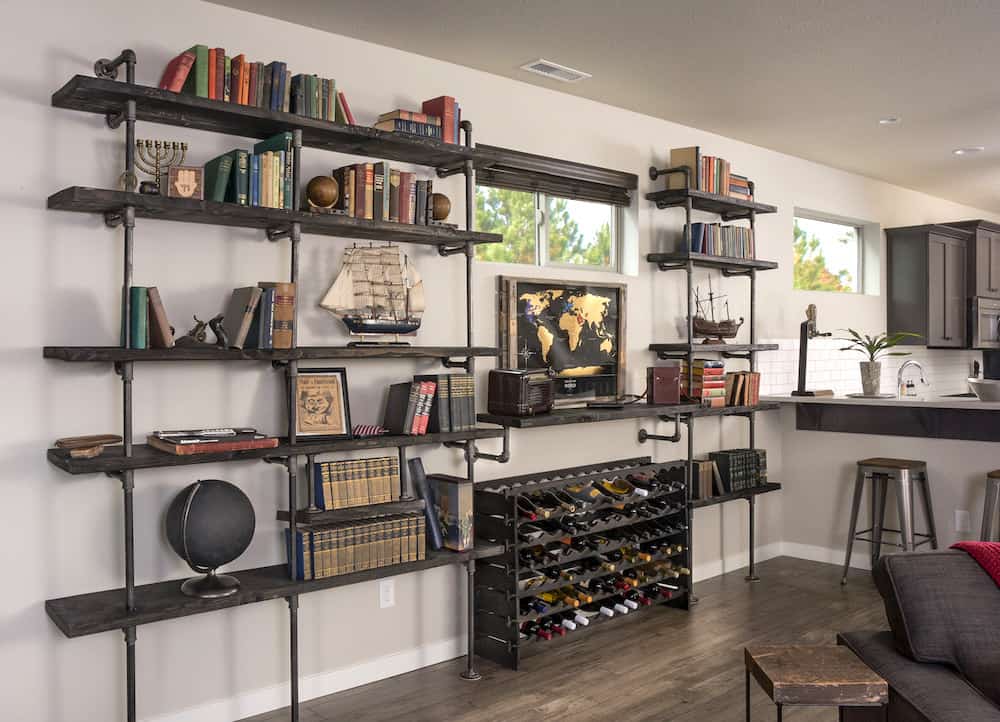
If you’ve priced industrial pipe shelving lately, you already know it isn’t cheap. A single bookshelf can cost hundreds of dollars—and a full wall of shelving can easily run into the thousands.
That’s exactly why I was so impressed when I walked into my neighbor’s house and saw this DIY pipe shelving. It stretched across an entire wall, looked like something from a high-end furniture store, and I immediately assumed he’d spent a fortune.
Nope.
He built the whole thing himself over the course of a weekend for around $350. Note – this was the original price he built it for. With cost increases, it’s about $475 now.
Even better? Once he showed me how everything fit together, I realized this project is much more approachable than it looks. If you can drill a few holes, stain wood, and screw pipe fittings together, you can absolutely build these shelves.
I’ll walk you through the entire process—including where to buy affordable pipe, how to customize the dimensions for your space, and a few lessons learned that will save you time (and help you avoid wasting a board or two).
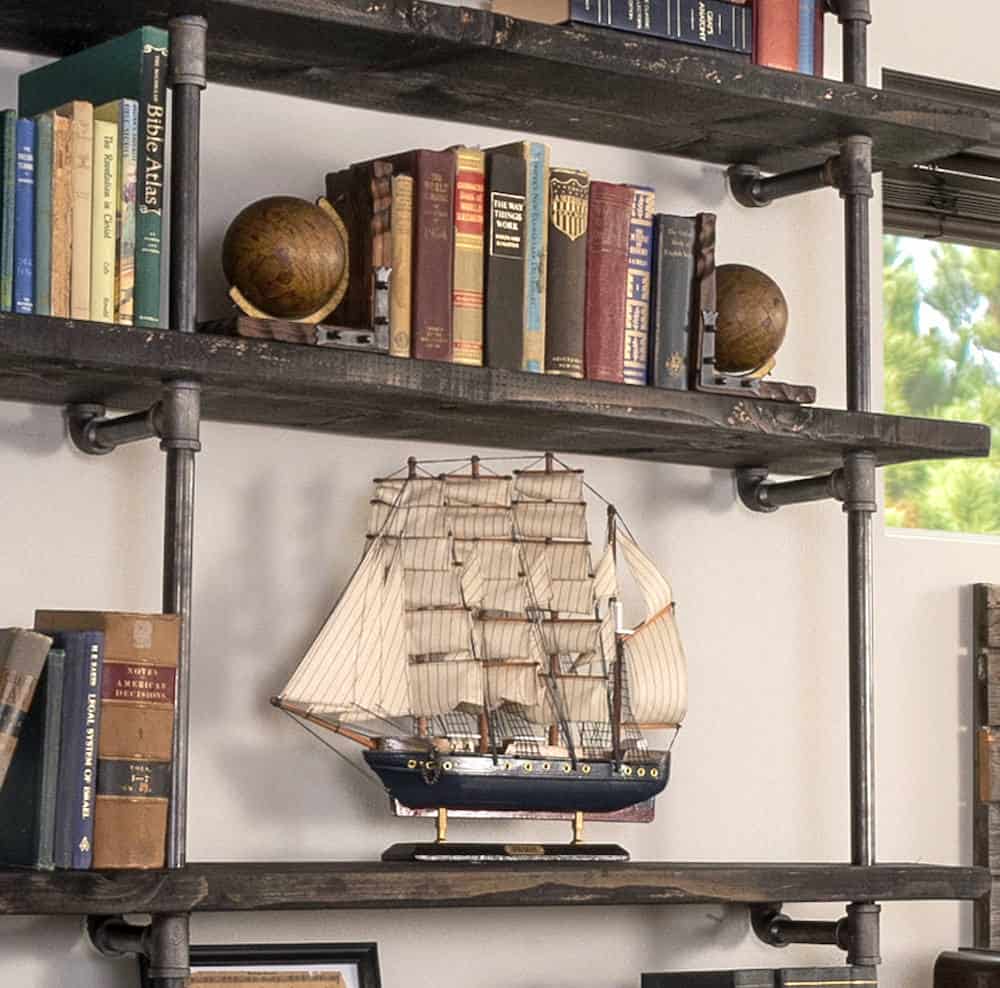
Industrial Pipe Shelves
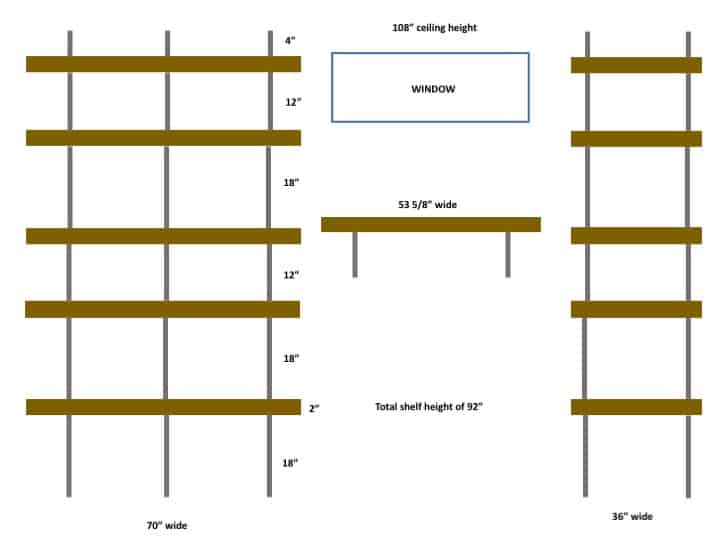
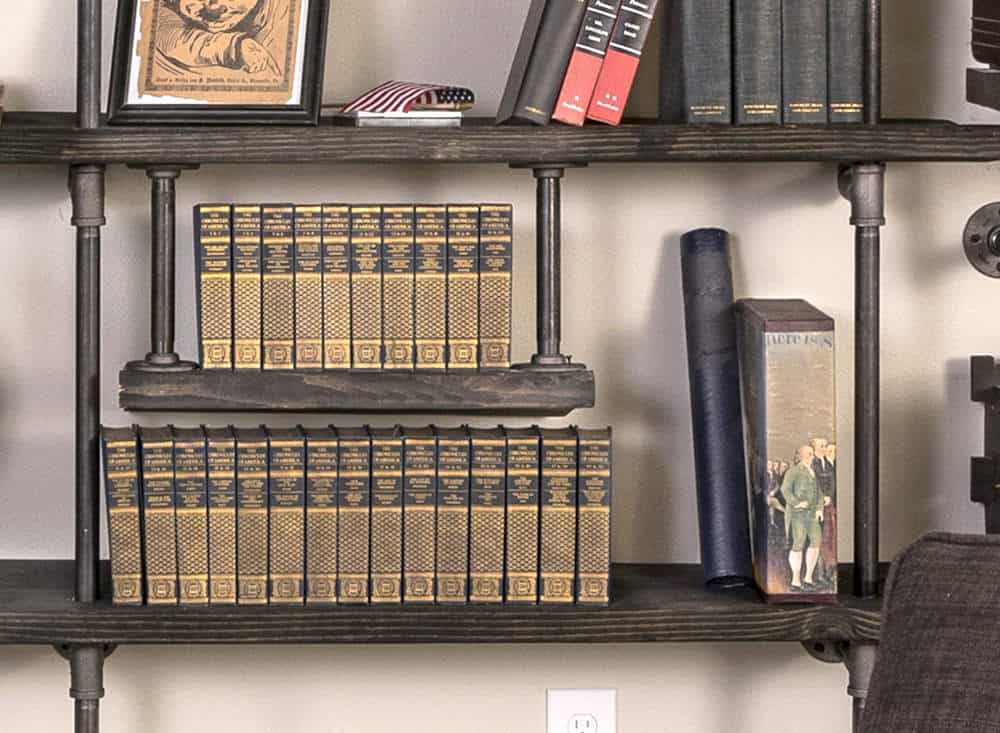
This industrial pipe shelving is made up of three separate sections:
- Left shelving unit: five shelves, 70 inches long
- Center shelf: one shelf, 53 5/8 inches long
- Right shelving unit: five shelves, 36 inches long
Each shelf is approximately 11 inches deep, but the dimensions can easily be adjusted to fit your wall.
One of my favorite parts of this design is that the wood shelves are only attached to the wall at the very top using floor flanges. That means no drilling into your floor while still ending up with an incredibly sturdy bookshelf.
Planning Your Pipe Shelving DIY Project
Before buying a single piece of pipe or wood, spend a few minutes planning your layout.
If you’re building a simple shelf, this step isn’t critical. But for full wall wood shelves like this one, a quick sketch can save you from expensive mistakes.
Take a photo of your wall and pencil sketch your shelving over it. You can even use PowerPoint, Canva, or graph paper—whatever you’re comfortable with. Your drawing should help you answer a few simple questions:
- Will the shelves fit the wall?
- Will they fit around windows or trim?
- Are they tall enough for books or décor?
- How much wood and pipe do you actually need?
You don’t need architectural drawings—just a simple plan before you head to the store or purchase online.
A Quick Note About Pipe Sizes
Black pipe fittings can be a little confusing because the labeled size isn’t the same as the actual outside diameter.
As long as every fitting you buy is labeled 3/4-inch, they’ll all work together—even though the outside diameter is larger than 3/4 inch. Refer to this chart.
Always double-check that every flange, tee, elbow, and pipe nipple is the same labeled size before you leave the store.
Where to Buy Pipe
Pipe is easily the most expensive part of this project, so shopping around is worth it.
For a large shelving unit like this one, I recommend ordering from Supply House or checking a local plumbing supply store. Prices are often 50–75% lower than what you’ll find at the big-box home improvement stores.
If you’re only building one small shelf, buying everything locally may make more sense once you factor in shipping.
One more tip: black iron pipe usually arrives coated with a light layer of oil from the manufacturing process. Before assembly, wipe every piece down with a degreaser or mineral spirits so your shelves don’t end up with greasy fingerprints.
Here’s what was purchased:
Left Shelving Unit, 70″ long
- Pine boards, 2 x 12, 6 feet long – 5
- 3/4″ black floor flange – 6
- 3/4″ black elbow – 18
- 3/4″ black tee – 15
- 3/4″ 4″ black nipple – 3
- 3/4″ 6″ black nipple – 18
- 3/4″ 12″ black nipple – 6
- 3/4″ 18″ black nipple – 9
Middle Shelf, 53 5/8″ long
- Pine board, 2″ x 12″ x 6′, cut to fit the space
- 3/4″ black floor flange – 4
- 3/4″ black elbow – 2
- 3/4″ 6″ black nipple – 4
Right Shelving Unit, 36″ long
- Pine boards, 2 x 12, 3 feet long – 5
- 3/4″ black floor flange – 4
- 3/4″ black elbow – 12
- 3/4″ black tee – 10
- 3/4″ 4″ black nipple – 2
- 3/4″ 6″ black nipple – 12
- 3/4″ 12″ black nipple – 4
- 3/4″ 18″ black nipple – 6
Choosing the Lumber
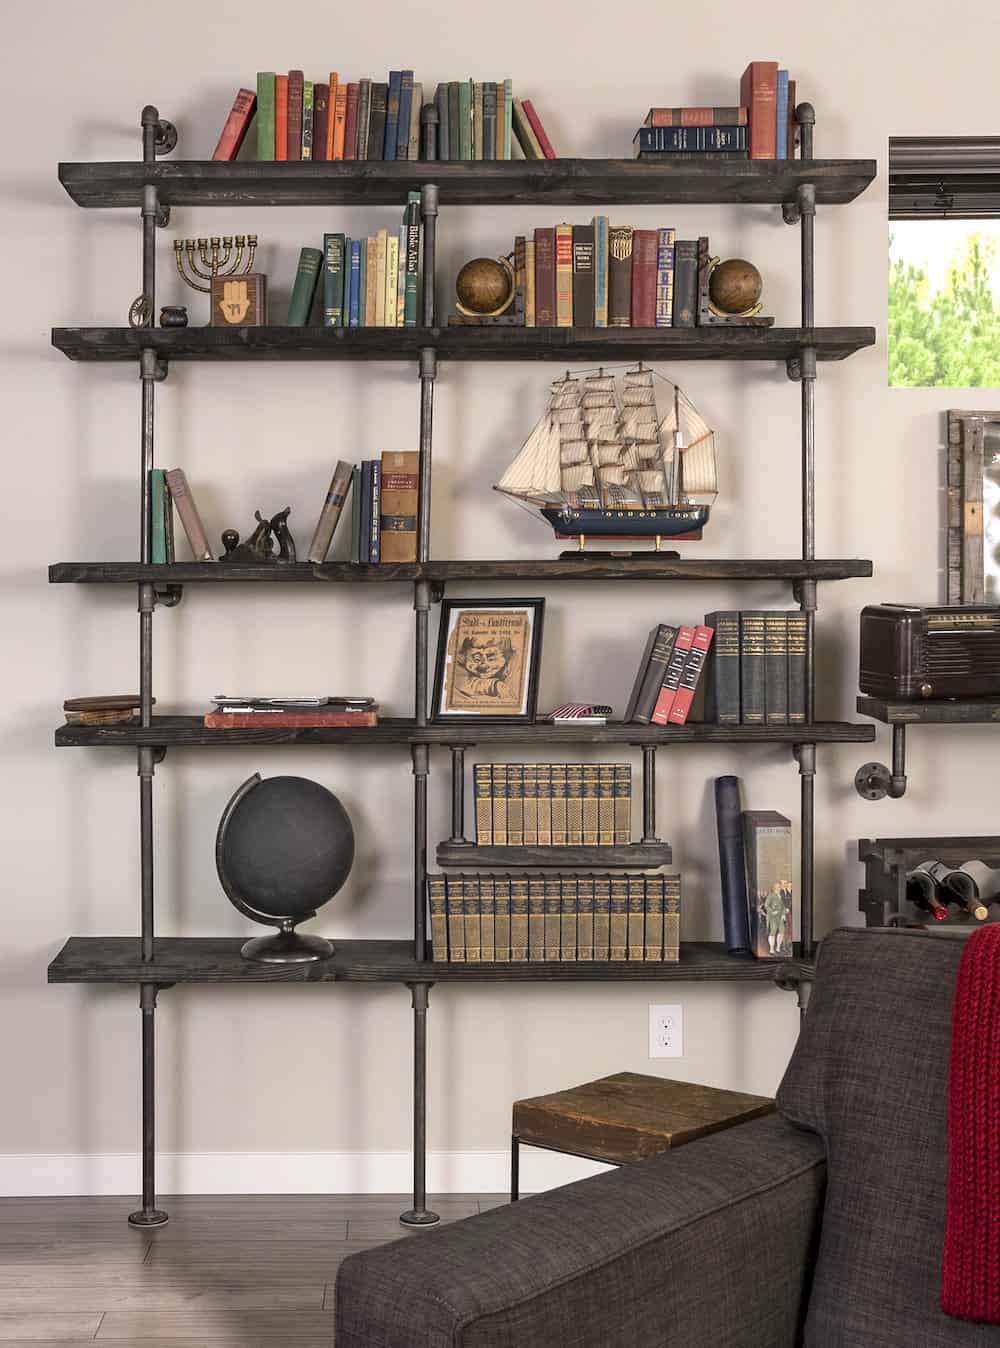
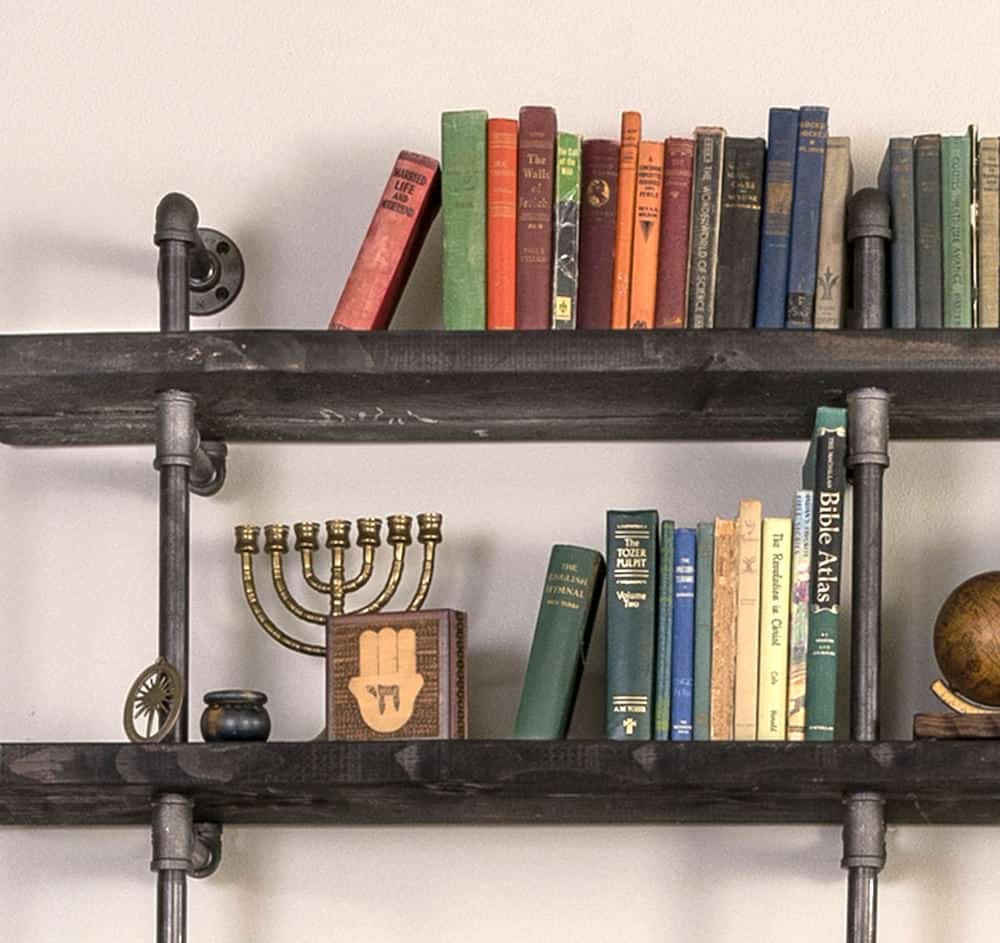
Pine is an excellent lumber choice for this project because it’s affordable, easy to work with, and takes stain beautifully. The ebony and carbon gray stain combination gives inexpensive pine a rich, reclaimed look without the reclaimed wood price tag.
If you’d rather have a smoother, more furniture-quality finish, you can upgrade to hardwoods like poplar or oak. They’ll cost more, but they’ll also resist dents a little better.
If you don’t own a table saw, don’t let that stop you. Most home improvement stores will cut lumber to length before you take them home.

Is This Pipe Shelving Stable?
Yes—when properly assembled and anchored to the wall with the right hardware, this shelving is extremely sturdy.
For most homes, securing the top flanges to the wall is enough. However, if you live in an earthquake-prone area or simply want additional stability, you can add extra flanges along the back of the shelving and fasten those to the wall as well.
If you have young children who may be tempted to climb on the shelves, additional wall anchors are also a smart idea.
No matter how you install it, remember that shelving is designed to hold books and décor—not people.
Can You Make It Freestanding?
Yes—but you’ll need to modify the design.
Instead of relying on the wall for support, you’ll need matching pipe uprights on both the front and back of the shelves connected across the top. Because a freestanding unit doesn’t have the wall helping to stabilize it, I also recommend making it shorter—two or three shelves is a much safer height.
If you’re planning a freestanding version, drill matching holes at both the front and back of every shelf so the pipe can pass through both sides.
Ready to get started? Here are the instructions!
DIY Industrial Pipe Shelving
Equipment
- Table Saw optional if your lumber is cut at the store
- Drill with drill bits including a 1 1/8″ Spade Bit
- Level
- Ladder
- Clean rags
- Paintbrush(es) or foam applicators
Materials
- Pine boards see the Notes section
- 3/4-inch black iron pipe and fittings see the Notes section
- 20 Drywall anchors and screws unless you are going into studs (then get wood screws)
- Degreaser or mineral spirits
- Minwax wood finish we used Ebony 2718 and Gray 271
- Polyurethane water based
- Painter’s tape
Video
Instructions
- Cut the shelves to size using a table saw. See the notes for cut lengths.
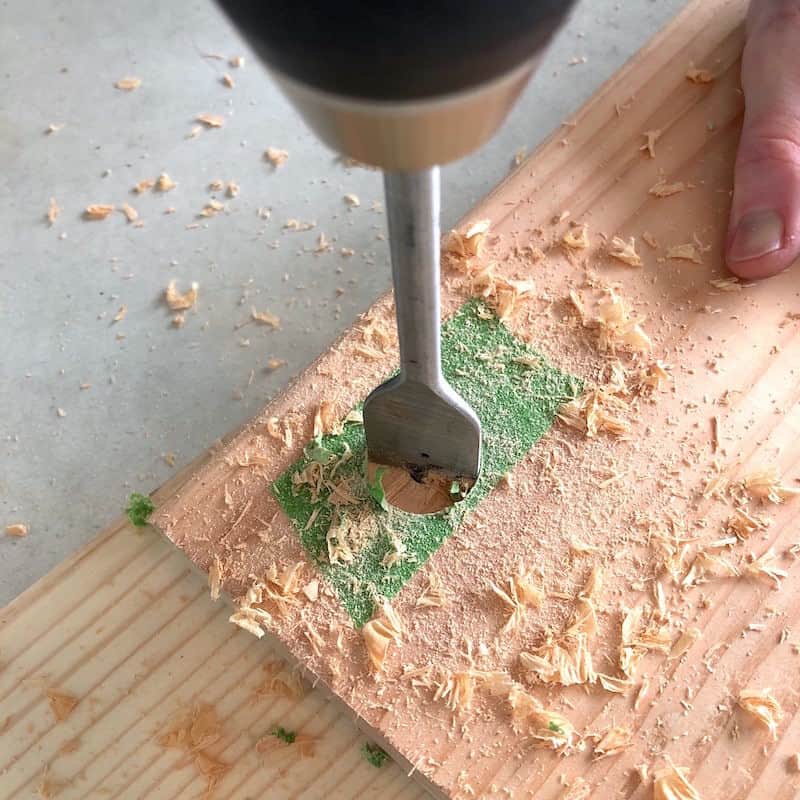
- Using your 1 1/8" spade bit, you're going to drill three holes through each 70" board and two holes through each 36" board. Your holes need to be in the same place on every 70" board and the same place on every 36" board since you are stacking them.
- Sand all surfaces until smooth.
- Apply Ebony stain and allow it to dry. Lightly add Carbon Gray in random areas for a weathered, reclaimed appearance.
- Once the stain is dry, apply two or three coats of water-based polyurethane. Allow the finish to cure completely.
- Clean every pipe fitting with a degreaser or mineral spirits to remove the factory oil coating.
- Assemble the pipe sections by connecting the pipe, tee fittings, elbows, and flanges before stacking the shelves.
- Beginning at the bottom, slide each shelf onto the pipe assembly and continue stacking until the unit is complete.
- Level the shelving and secure the top flanges to the wall using appropriate screws. Whenever possible, mount directly into a stud for maximum strength.
Notes
- Pine boards, 2 x 12, 6 feet long – 5
- 3/4″ black floor flange – 6
- 3/4″ black elbow – 18
- 3/4″ black tee – 15
- 3/4″ 4″ black nipple – 3
- 3/4″ 6″ black nipple – 18
- 3/4″ 12″ black nipple – 6
- 3/4″ 18″ black nipple – 9
- Pine board, 2″ x 12″ x 6′, cut to fit the space
- 3/4″ black floor flange – 4
- 3/4″ black elbow – 2
- 3/4″ 6″ black nipple – 4
- Pine boards, 2 x 12, 3 feet long – 5
- 3/4″ black floor flange – 4
- 3/4″ black elbow – 12
- 3/4″ black tee – 10
- 3/4″ 4″ black nipple – 2
- 3/4″ 6″ black nipple – 12
- 3/4″ 12″ black nipple – 4
- 3/4″ 18″ black nipple – 6
How much weight can these shelves hold?
Weight capacity depends on the shelf length, pipe configuration, wood species, and how securely the unit is anchored. Properly installed into wall studs, these shelves easily support books, baskets, and typical home décor. If you plan to store especially heavy items, shorten the shelf spans and anchor into a stud.
Can I drill the holes farther back to eliminate the rear supports?
No. The rear elbow fittings are part of what keeps the shelves level and stable. Moving the holes alone won’t eliminate the need for those supports without redesigning the entire pipe layout.
Can I customize the shelf lengths?
Absolutely! This design scales very well. Simply adjust your board lengths and pipe quantities to fit your space while keeping the hole placement consistent on matching shelves.
Let me know what you think in the comments! Here are some additional DIYs to check out:
Square Coffee Table • Coffee Table with Storage • Hose Holder and Planter • Lack Endtable Hack • Mirror Frame • Modern Headboard • Nolmyra Chair Hack • Outdoor Bench • Outdoor Table • Pallet Shelf • Platform Bed • Stacked Entry Bench • DIY Laminate Table Top • TV Riser • Wood Sign • Wood Step Stool Chair



With a 1 1/2 spade bit the tee slides through the hole making the shelf slide forward. Thanks for the DIY but you probably didn’t use a 1 1/2 in bit for it. After wasting one board with the 1 1/2 I’m going to have to do a smaller bit. I guess I should have not trusted your measurements after all and I would have saved one board…
I am no shill but SupplyHouse made it soooooooo easy to order – even harder to find lengths – shipped fast and the prices were very good overall.
Do you know how much weight these can hold? approximately?
How long are the pipes that go underneath the shelves? The ones that support each shelf?
Already to assemble and discovered the 1 1/2 inch hole problem. Bummer. Can the directions be corrected to reflect the proper hole diameter, 1 1/8?
Hi! Very informative…thanks! Only where i live one has to buy uncut lengths of pipe without thread! This means i have to somehow cut the thread myself after cutting the pipes!
One thing I would challenge on this is that it takes a lot longer than the 6 hours. The staining alone will mean extra time, not to mention buying your materials. And you really should be sealing that wood (more time) unless you don’t mind books or even just people touching it getting dirty.
And speaking of dirty, you’ll need a day to de-grease all your nipples, er uhm… pipes. You also may end up having to strip paint from pipes if you end up getting stuck with painted “black” nipples. But Supply House is great for finding the right sizes and getting them quick.
There’s also always the assumption you have all the tools needed. So consider brushes, pads, sand paper or a sander, bits (use 1 1/8 spade) mounting bolts, de-greaser, gloves…
That being said, this design produces a very nice finished product. Pity I can’t include a photo to show how perfectly this came out. Though I tweaked a few pieces and splurged on better wood than pine, it was totally worth the time and effort and greatly enhances my office space. So much better than the boxy wood shelves I had before.
Thanks for the amazing article! I was wondering, in the parts list you wrote down black for the color of the fittings but in the pictures they look more silver. I’m new to all of this, so is that just what black pipe fittings look like, or did you use stainless for yours?
That is just what the black fittings we ordered were like!
Looks great but my concern is that each shelve only supports 15 pounds of weight. Any recommendations on this? I have some large and heavy books. Thanks
@William Weis, if built with 3/4 pipe and 1 inch boards, provided you’ve mounted the flange to studs or drywall bolts, this thing holds way more than 15 lbs. I have a LOT of old books on mine
I have purchased the materials and am drawing out to figure out hole placement, but here is what I don’t understand. Based on the quantities, it seems like a 6″ pipe is used both for the elbow supports throughout *and* the flange mount to the wall. But – an elbow mount has more depth than a flange mount, so wouldn’t the elbow supports for the shelf impact the ability to mount to the wall?
@Noah, yes, from what I can see that is correct. I ordered the parts based on this post verbatim and the nipples that connect to the flange need to be longer. I ordered 7″ and 8″ nipple replacement just to be safe – though I’m fairly sure only 8″ will be needed.
@Noah, I used 8 and 6 inch on my shelf supports and 10 inch on the mounting to the walls and it came out perfect.