DIY Cookie Cutter Ornaments: Festive Decor for Less Than $1
Turn four cookie cutters from the dollar bin into cookie cutter ornaments for Christmas! This is a fun and easy craft for the whole family.
Skills Required: None. Even if you’ve never crafted before, you can make these ornaments. You’ll be cutting and gluing. People of all ages can make these.

Recently I went diving in the Target dollar bins, and let’s just say I was very successful. I came home with quite a few rolls of glitter tape and felt like I ruled the world.
Well, glitter tape wasn’t the only thing that I bought. A four-pack of plastic cookie cutters also caught my eye.
And not because I wanted to make cookies (although now that sounds delicious) – I bought them to make Christmas ornaments! And what makes that fantastic is that I already had everything else on hand, so the ornaments were only $.25 a piece for me.
This is a great kids craft or group Christmas craft . . . it’s not hard and everyone can join in. Read on to see how I made these DIY cookie cutter ornaments.
(if you love handmade ornaments, check out these DIY Christmas ornaments to make or these easy DIY Christmas ornaments for kids!)
Gather These Supplies
- Cookie cutters – mine were plastic, four for $1
- Christmas scrapbook paper
- Coordinating ribbon
- Craft glue
- Scissors
- Pencil
- Drill or nail and hammer (something to create a hole)
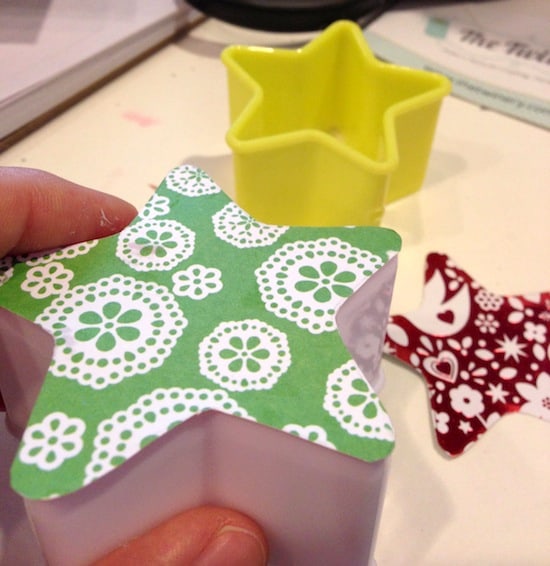
What do you think about my cookie cutter ornaments? Not too shabby for a last minute purchase and $.25 each, right? These were pretty fun to make.
I’ve also now crafted with cookie cutters, which means my life is complete! Get the tutorial below:

Cookie Cutter Ornaments
Equipment
- Pencil(s)
- Drill with drill bits or nail and hammer
Materials
- Cookie cutters
- Scrapbook paper Christmas themed
- Ribbon(s) Coordinating
- Craft glue
Instructions
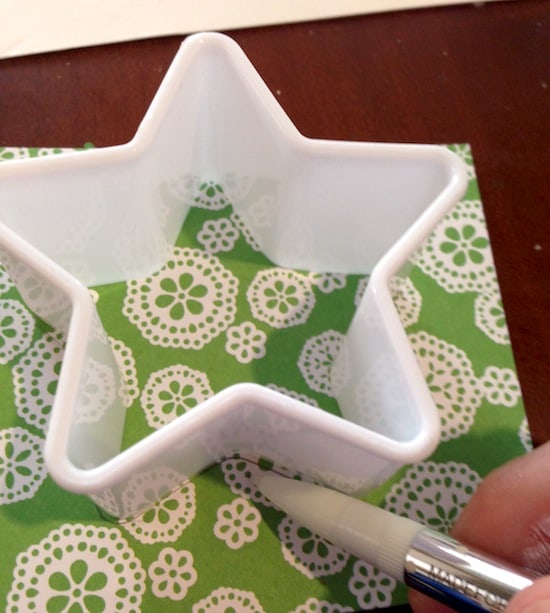
- Trace each cookie cutter onto the back of the scrapbook paper of your choice.
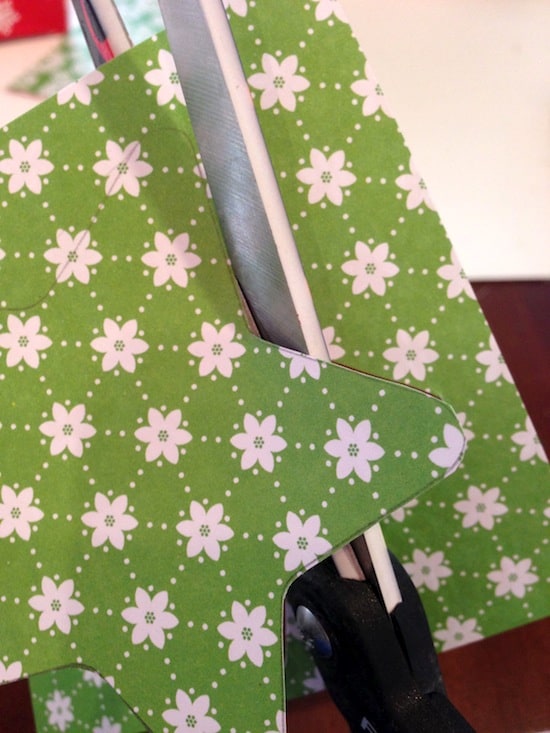
- Cut out the shapes, cutting just very slightly within the line. Set aside.
- Drill into the top of each cookie cutter to make a hole for hanging.
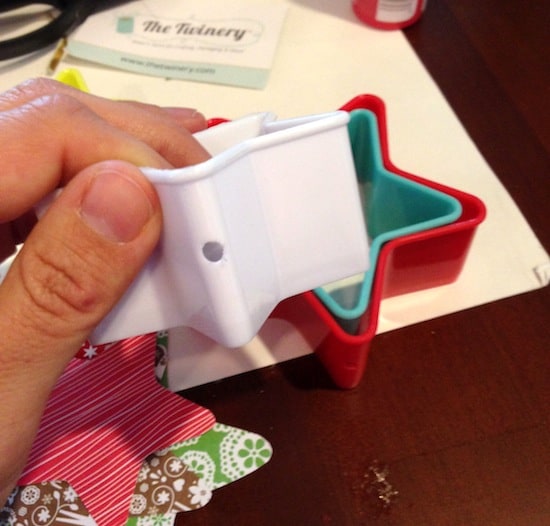
- Add glue to the edge of the cookie cutter and press down onto the paper. Wipe away excess glue. Repeat with the other cookie cutters. Let dry for several hours.
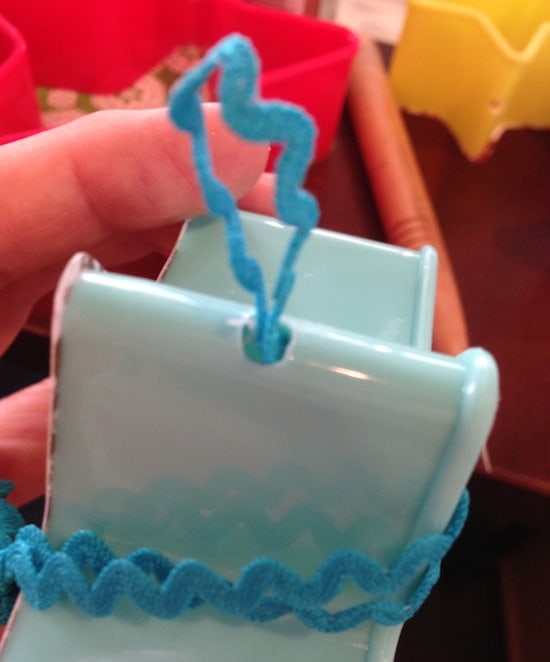
- Grab lengths of ribbon, one for each ornament. Tie a knot in one end of the ribbon and pull through the hole in the ornament. Add a dab of glue to secure; let dry fully before hanging.
Notes
These metallic key Christmas ornaments were made from the dollar bin as well. I’d also love for you to check out these other Christmas ideas to adorn your tree:
Candy Cane • Crochet Angel • Crochet Bell • Cross Stitch • DIY Gnomes • DIY Snow Globe • Mandala • Mini Wreath • Origami • Poinsettia • Polymer Clay • Temporary Tattoos • Washer Star • Wood Bead • Wood Bead Snowman • Wood Bead Star • Wood Slice • Yarn Wrapped


How.
A crop-a-dile works perfectly to make a hole!
That’s a great tip Natalie – I actually bought one just recently!
I just wanted to pop over to let you know that I featured your ornament on Creative Green Living this morning!
Very cute! I think you could also glue the ribbon to the back of the paper, and then not have to worry about drilling and the knot showing? Not sure, but either way, I totally want to make some!
Molly, I did think about that and I think that would work with stronger glue (mine was just “regular” glue). Good idea!