DIY Duct Tape Bracelets in Fun Colors for Kids
Make fun and colorful duct tape bracelets with this easy DIY tutorial! Waterproof, stylish, and great for kids and teens.
Skills Required: Beginner. These braided bracelets are extremely easy to make, and once you get the hang out of how to do it, you’ll be making a ton of them!
Duct tape isn’t just for home repairs – it’s an incredibly fun and versatile crafting material! These DIY duct tape bracelets prove just how creative you can get with a few rolls of colorful tape.
Unlike traditional friendship bracelets that require knotting or weaving, these are made with simple braiding techniques, making them perfect for beginners. Plus, they’re completely waterproof, so kids can wear them to the pool, beach, or sprinkler runs all summer long.
What makes this project extra cool? The endless customization! With the huge variety of patterns and colors available, you can mix and match designs to your heart’s content.
Want a neon-bright bracelet? Done. A sleek metallic look? Easy. A mix of fun patterns (which Duck Tape has)? Absolutely! They’re lightweight, flexible, and easy to slip/take on and off – no tricky clasps or knots.
This is the ultimate boredom-busting activity for tweens and teens, but adults will love them too. Once you make one, you won’t want to stop! These duct tape bracelets are guaranteed to be a hit.
What Size to Cut Your Duck Tape
For these bracelets you’ll need to cut three initial strips of Duck Tape that you’re going to braid. My bracelets are 9 inches round, and they easily slip over my hands onto my wrist.
I’ve given you a general guideline below for how long the strips should be cut for the circumference of a bracelet.
My wrists are on the smaller side for an adult, so the 9 inch round are like bangles on me. The good news is that if you don’t estimate correctly, you can always trim them down!
- 6 inches – 11 1/3 inch strips
- 7 inches – 13 1/4 inch strips
- 8 inches – 15 1/4 inch strips
- 9 inches – 17 inch strips
- 10 inches – 19 inch strips
Are you ready to learn how to make them? Keep reading!
Duck Tape Bracelets
Gather These Supplies
- Duck Tape – you’ll use three separate colors for each bracelet
- Craft knife or scissors
- Craft mat
- Clamp (optional)
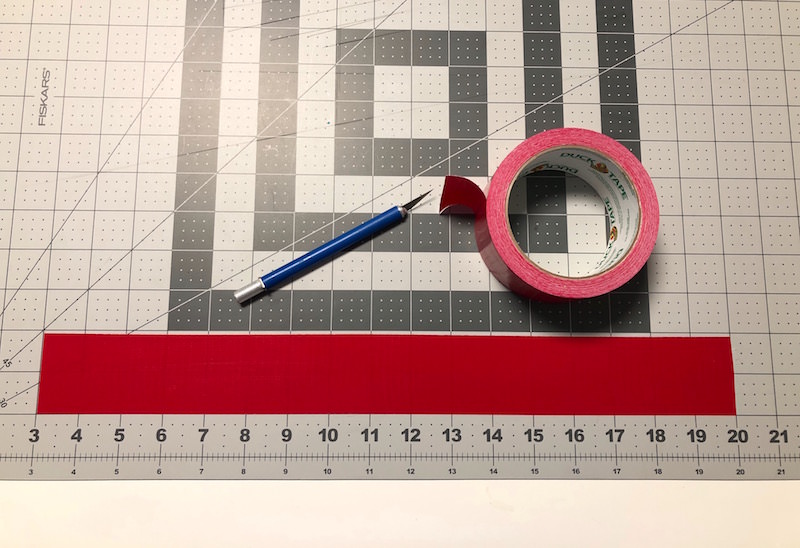
Cut the First Piece of Tape
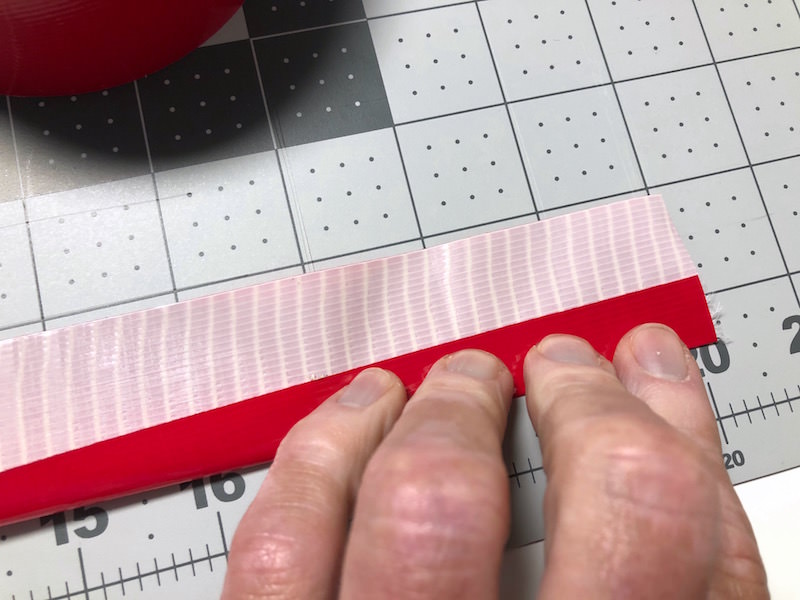
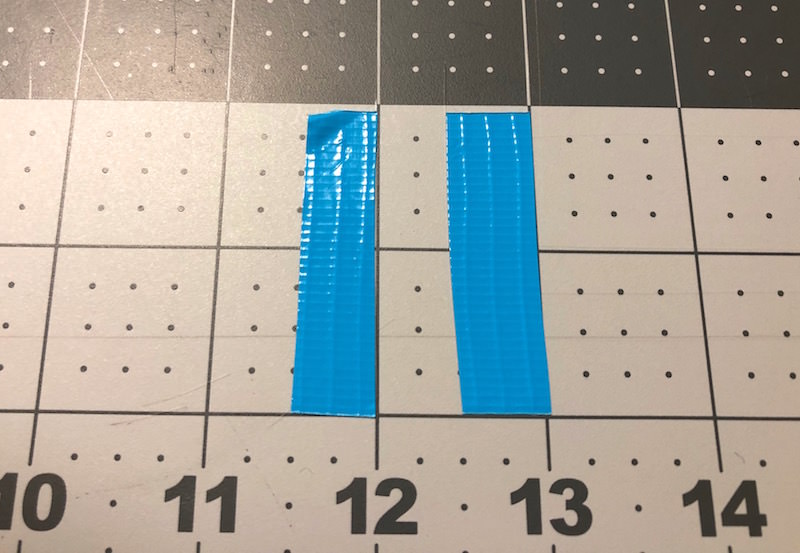
Start with a 17 inch piece of Duck Tape (or the correct length using the chart I gave you above). Place it down on a cutting mat and trim.
Fold Both Sides of Tape to Create Strips
Peel the Duck Tape off of the cutting mat and fold in one side toward the middle. Having a cutting mat can really help you estimate the middle of the Duck Tape.
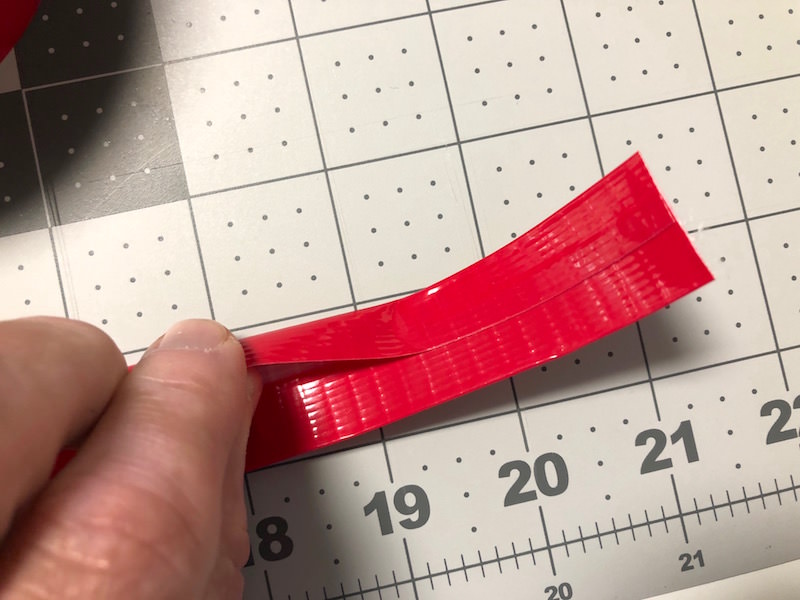
Fold the other side so that both pieces meet in the middle. If they slightly overlap, that’s totally fine. Repeat with two other colors of tape.
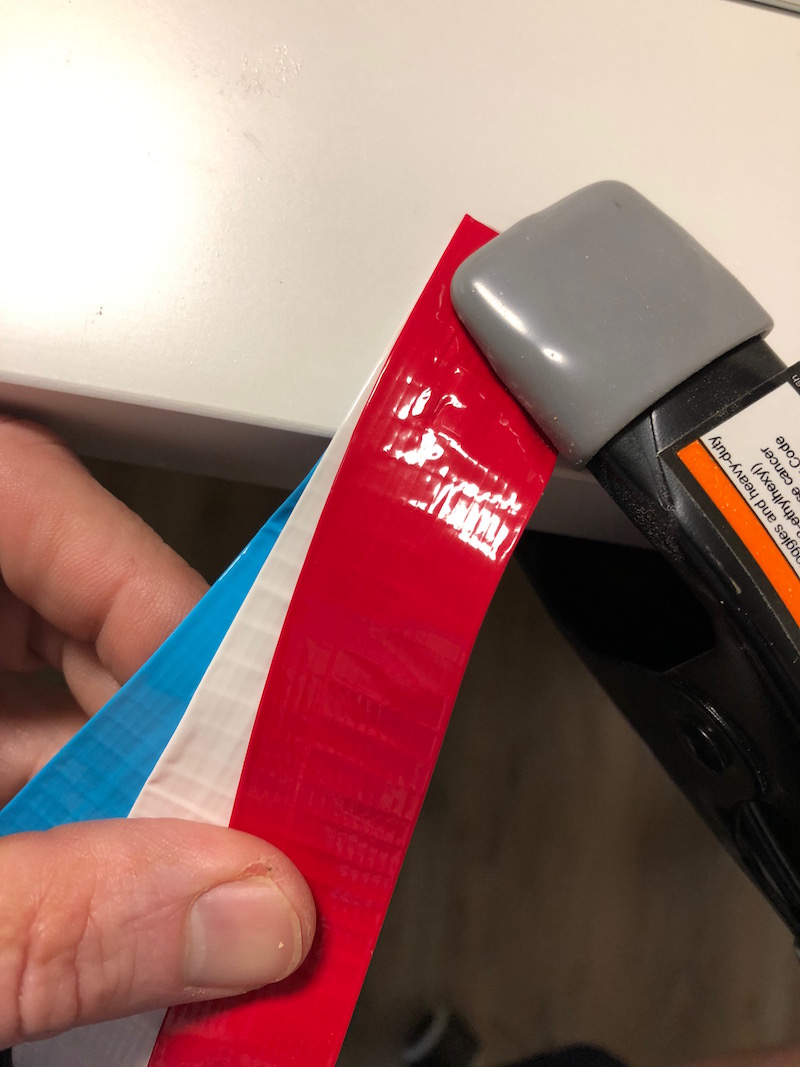
Clamp Tape to Table or Surface
Attach your Duck Tape to a table using a clamp, or you can even secure with another piece of tape. Yet another option – a clipboard! Just like a lot of kids use for friendship bracelets.
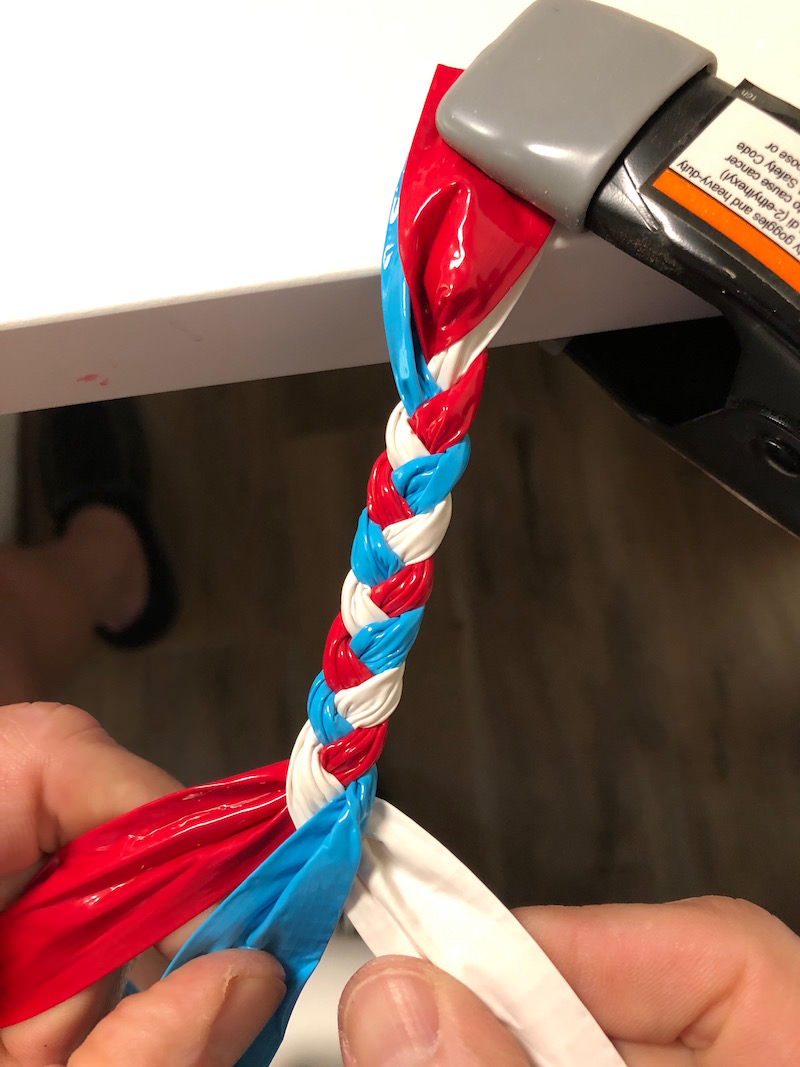
Braid the Tape
Begin braiding the Duck Tape, just as you would do a regular braid. You’ll want to braid rather tightly.
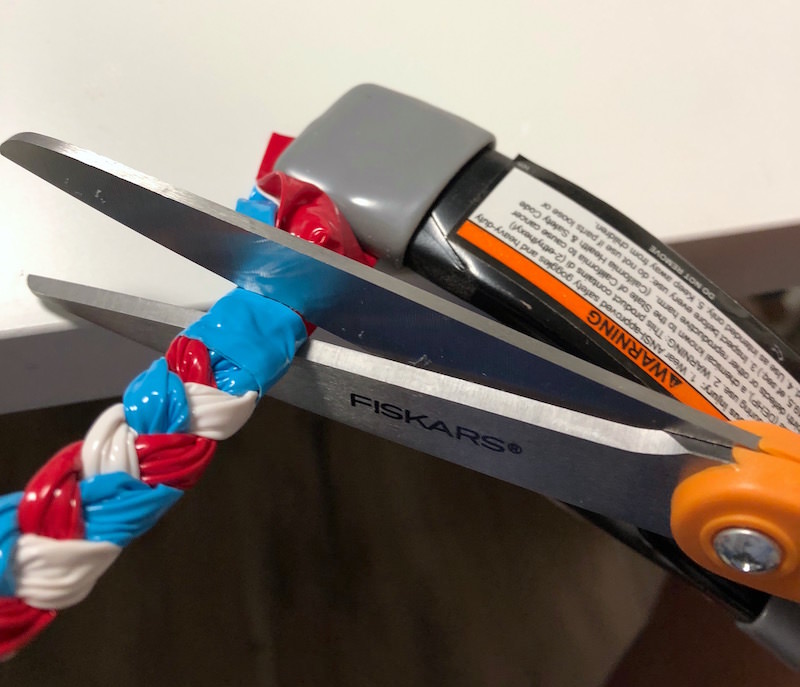
Cut Small Tape Strips and Finish Ends
Cut two 1/2 inch x 2 inch pieces of Duck Tape that are going to secure each end.
Place each of these pieces toward each end of the braid, and trim as shown.
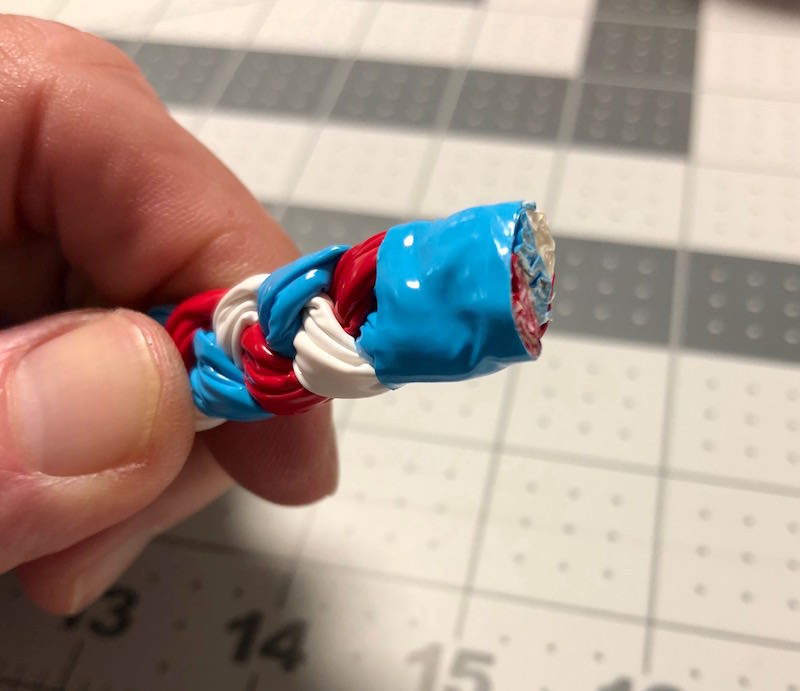
This is what the end of your braided bracelet will look like.
Lay your bracelet out on the cutting mat. You’re going to cut more Duck Tape!

Cut Tape Piece to Close Ends
Cut a three inch piece of tape – you can layer it if you like so that your closures have a cool look! It’s really up to you!

Tape and Wear
Secure your braided bracelets by bringing the two ends together and wrapping the three inch piece around to secure. Not only does this secure your bracelet, but it makes it really easy to take on and off.

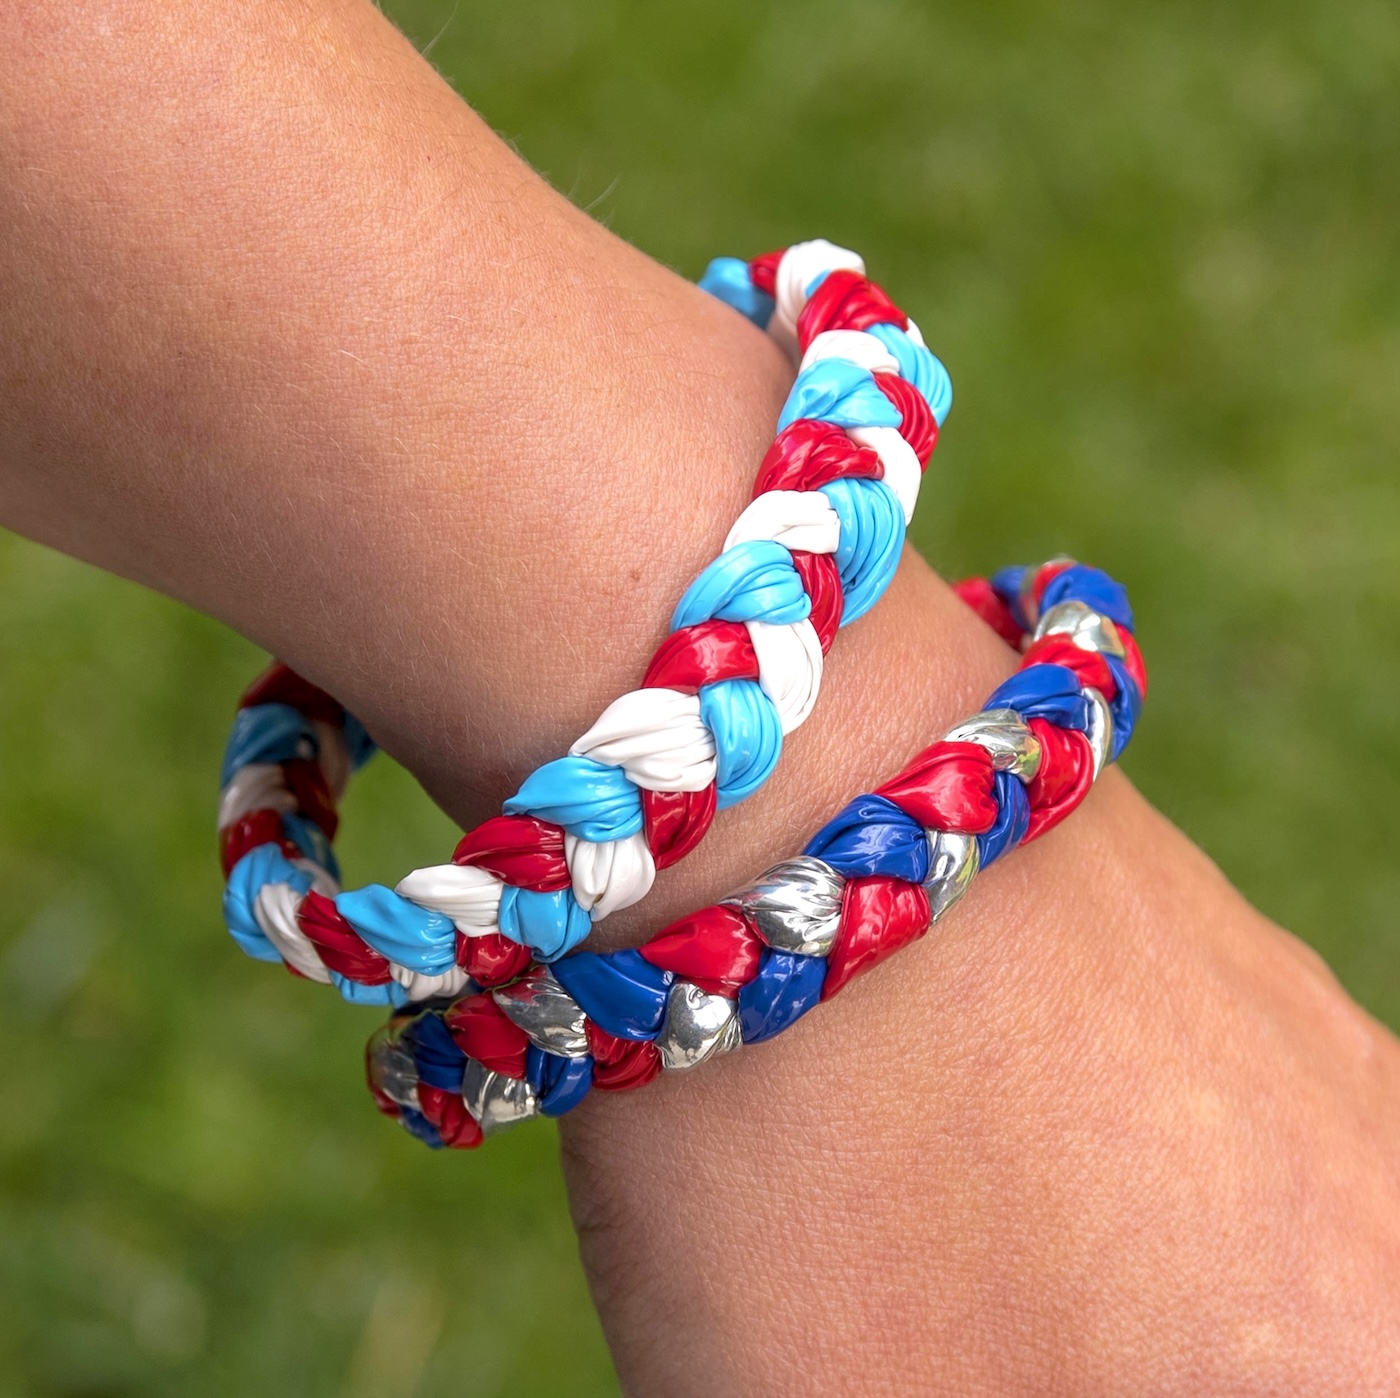
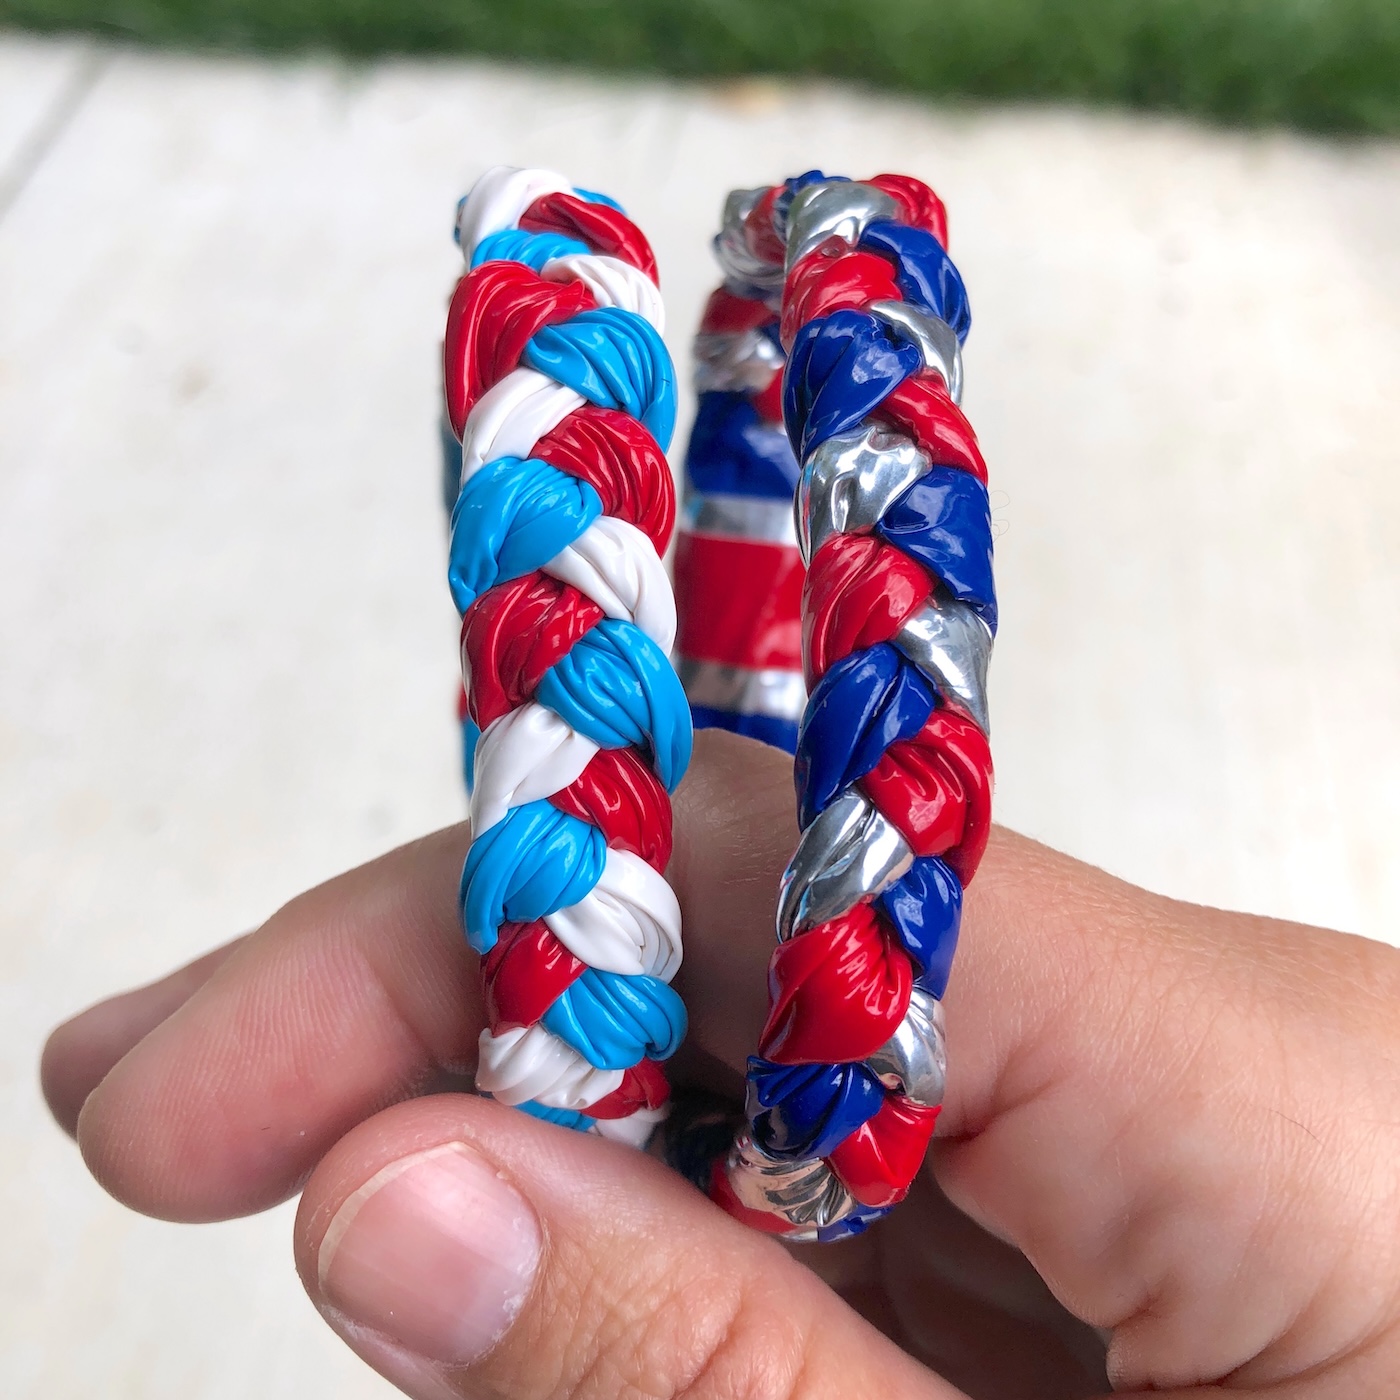
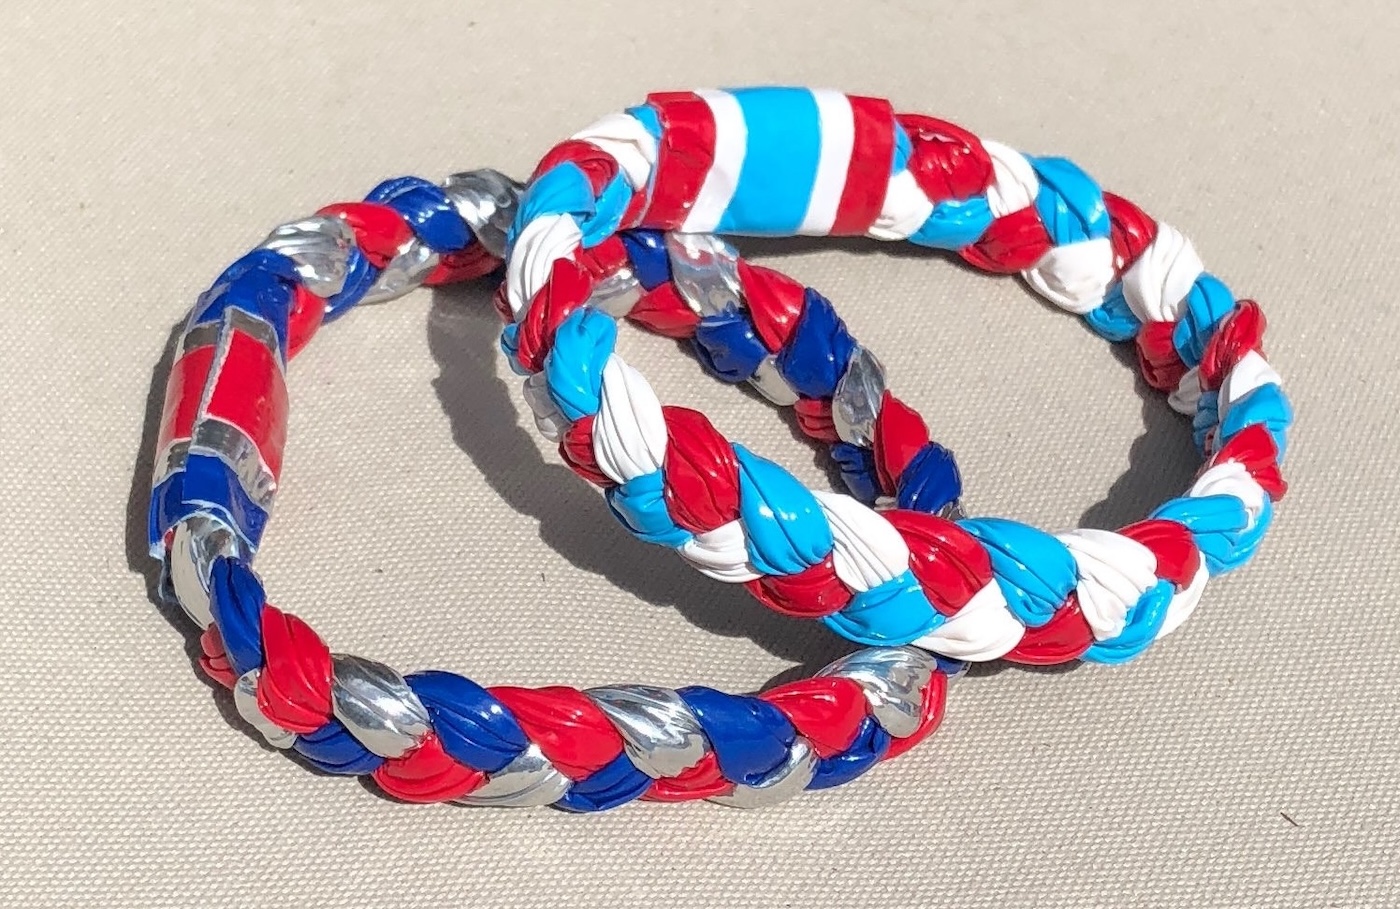
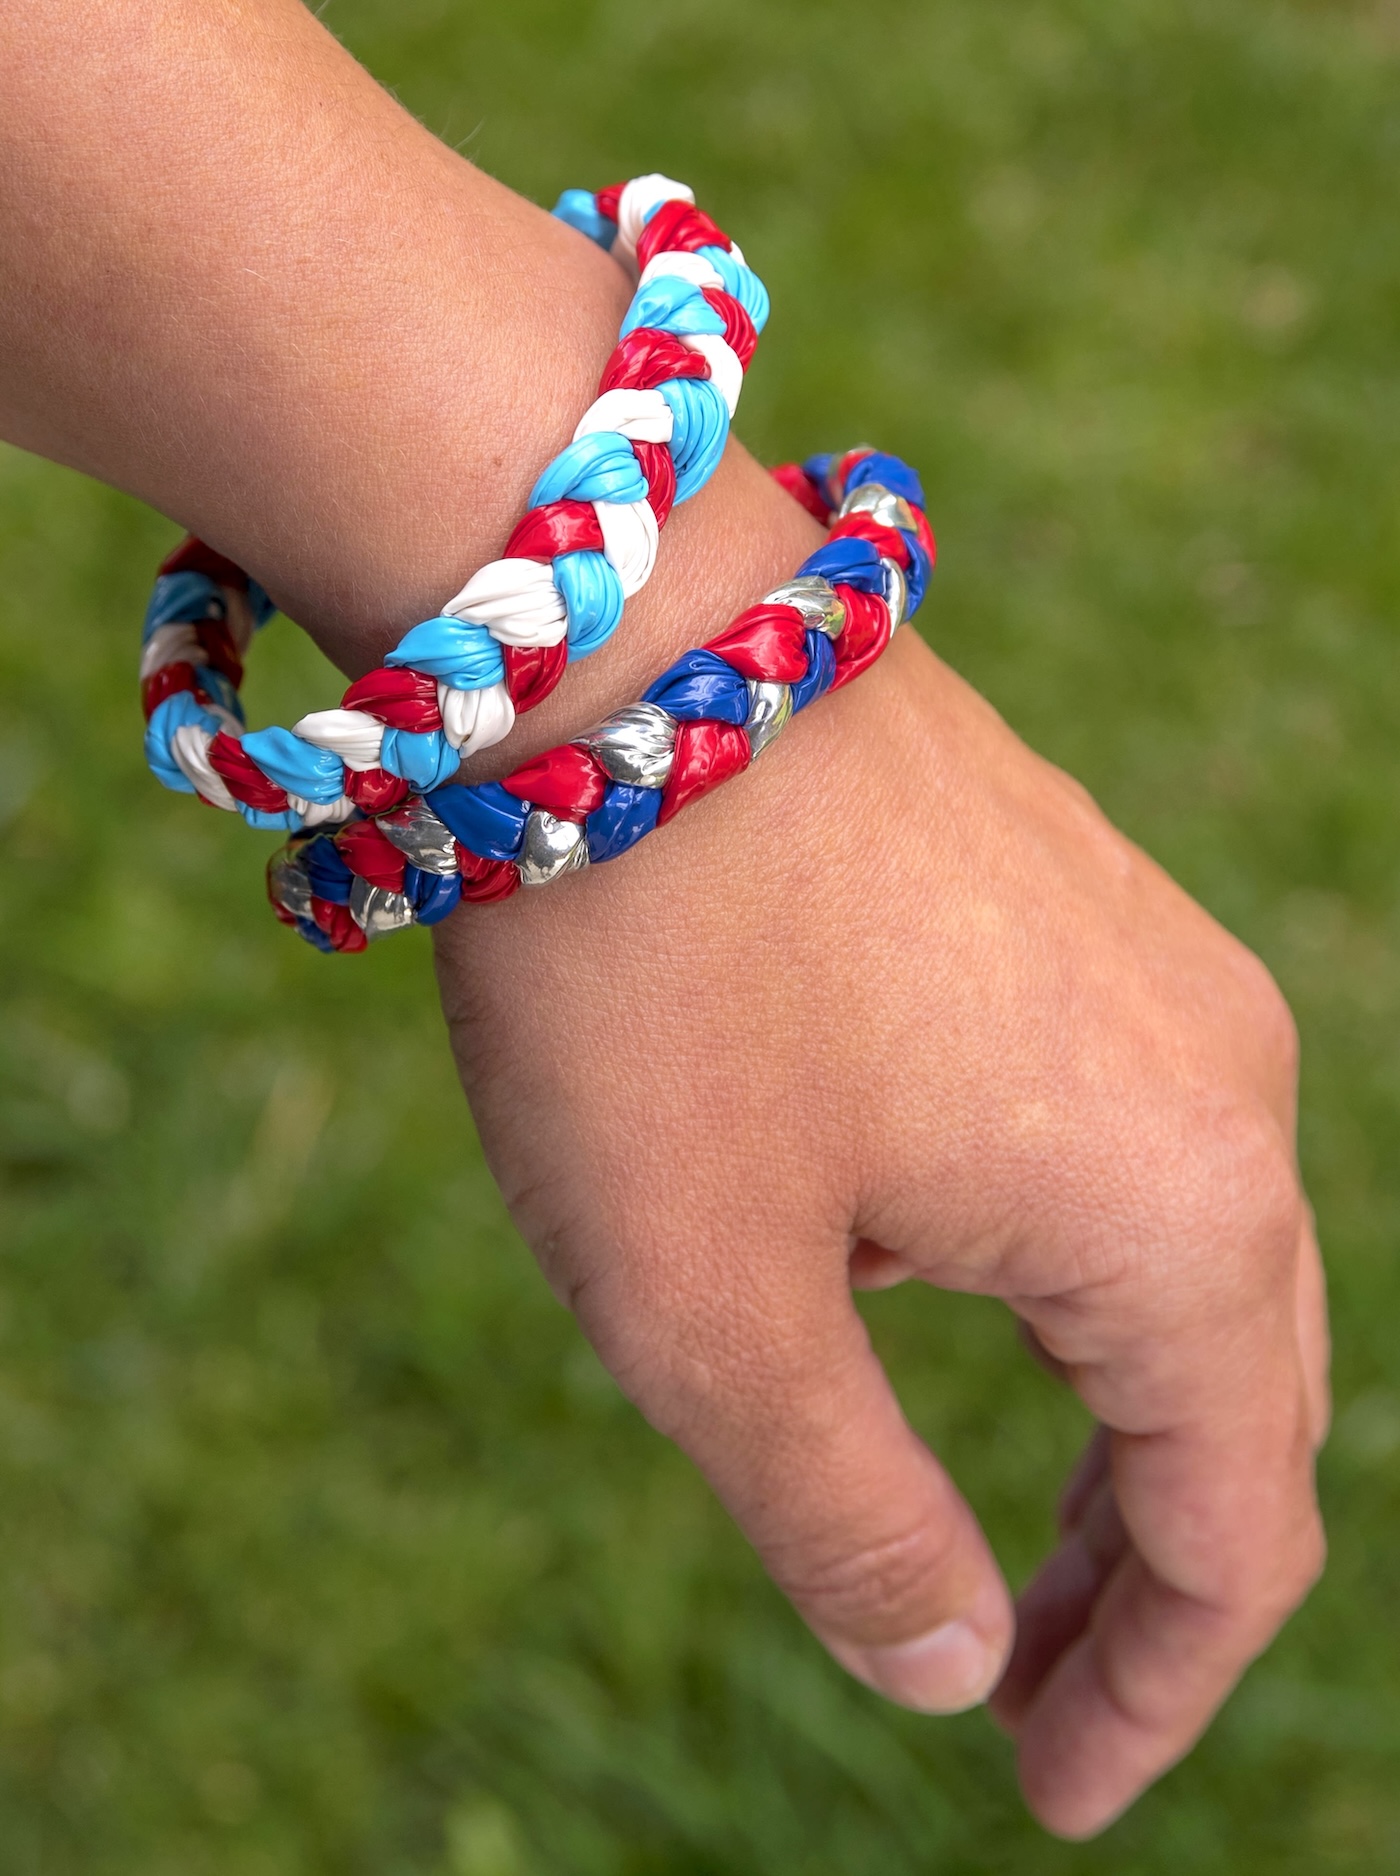
You can see that we tried these in a few colors. What you don’t know is that behind the scenes, we made a ton more with my niece later that day!
I wore these braided bracelets for several weeks. They are just so fun! I haven’t found someone yet that struggles to make them, either. If you’re looking for easy – this is your project.
What do you think of this project? Would you make them with your children? I’d love to hear in the comments! I’d also love for you to check out these other easy crafts:
Beaded Suncatchers • Bean Art Mosaics • Blow Painting • Borax Crystals • Bracelets with Perler Beads • Bubble Wrap Painting • Cat Bookmarks • Cloud Dough • Coffee Filter Flowers • Food Coloring Art • Fun Flower Pens • Glow in the Dark Playdough • Homemade Playdough • Jello Play Dough • Kinetic Sand • Moon Sand • Paper Chain • Perler Beads • Sidewalk Chalk Paint • Spin Art • Tie Dye Headbands • Wine Cork Stamps