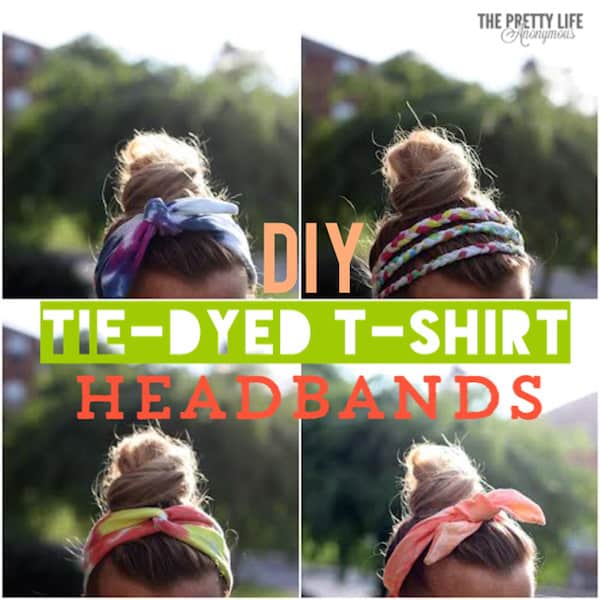
DIY Tie Dye Headbands from T-Shirts
These DIY tie dye headbands are easy to make from t-shirts and look great! Both kids and adults will love this fashion craft. Make a DIY headband for spring or summer using one of these three methods!
If you want to see this craft in action, scroll to the bottom of the post for a video!
Well, hi there! I’m Liz from The Pretty Life Girls and I love tie dye! It’s colorful, crazier you are with it the more awesome it turns out, and it is a fool-proof way to add some fun to your summer wardrobe.
If you like fashion crafts, you’re going to enjoy this project! Tie dye is also a great boredom buster, especially for tweens and teens.
I love tie dye! I made a tie dye dress before, and now I want to change things up a little bit!
I decided to take some white t-shirts that were taking up space in my closet and recycle them with a little tie-dye makeover, turning them into a handful of fun DIY tie dye headbands perfect for basking in the summer sun.
This is one of those easy crafts for adults you’ll have to try! It’s also a great summer craft for kids. Tweens and teens love this idea!
Here’s what I did to make these hair accessories:
DIY Headbands
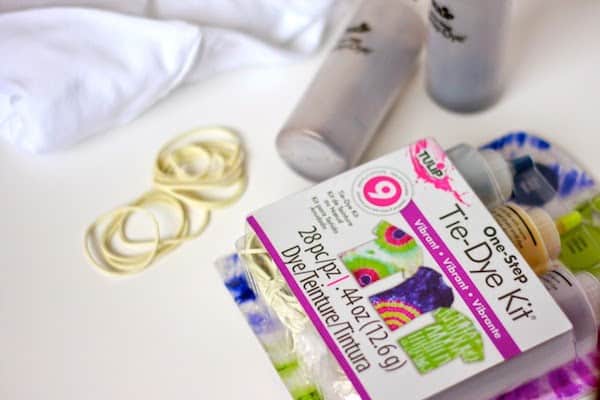
For my DIY tie dye headbands, I picked up a basic tie-dye kit you can find at any craft store. If you’re wondering how to tie dye a headband, this kit works perfectly.
However, if you choose to buy your tie dye separately, make sure you have rubber bands, gloves, and plastic wrap (these supplies are generally included in a kit).
Like mentioned before, I used a plain white t-shirt and turned it into fabric for the DIY headbands. You could also use any light colored t-shirt you have around the house.
Lastly, you will need a sewing machine and a good pair of scissors to put the DIY headbands together.
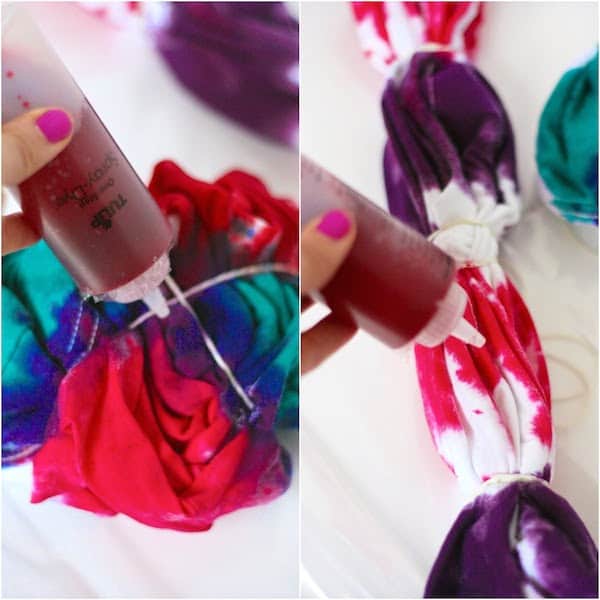
One of the most fun parts about using tie-dye is the different patterns you can make depending on how you fold and bundle your fabric (see an example here).
I love the surprise of seeing how they turn out after the colors have set! Once you have chosen your pattern, fold and bundle accordingly, apply tie-dye according to package directions, and wrap in plastic wrap to keep moist.
For DIY headbands with the most vibrant colors, allow your shirts to set for 6 – 8 hours. If you want to produce more pastel colors, let set for 30 minutes or so.
Once the dye is set to your desired intensity, unwrap, remove rubber bands, rinse off the remaining dye, and toss the t-shirt(s) alone in a hot washer with minimal soap. Dry normally and you’re done!
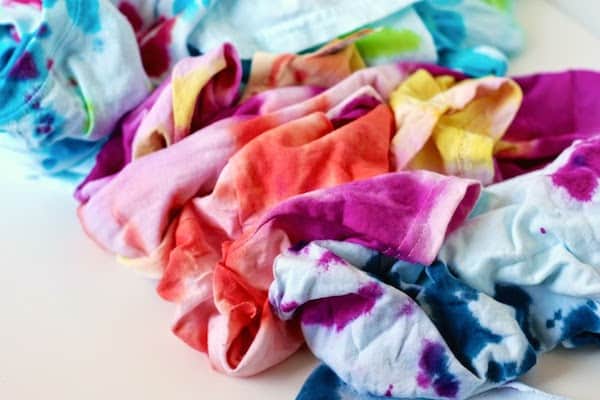
You have now created some one-of-a-kind fabric for some adorable DIY headbands! Here are the kinds of tie dye headbands I made with my t-shirts and the steps and tutorials I used.
Tips and Tricks for Successful DIY Tie Dye
Before you begin, I want to share a few quick tips! DIY tie dye projects are relatively easy, but there are a few things you should know:
- Wear gloves unless you want your fingers dyed for a while. Also wear an apron or old clothing and cover any working surface. Tie dye stains most things and it’s permanent on fabric!
- Use cotton items. Some poly blends will dye, but are much more likely to fade during the wash cycle. Stick with 100% cotton.
- Tie tightly as material (like a cotton t-shirt) expands when it’s wet.
- Make sure to get dye into the folds if you want the fabric completely covered with color.
- Remember your color wheel! Select colors that are next to each other. I’m sure you remember that ed and blue make purple. Don’t choose complimentary colors; you’ll make a brown mess if you combine orange and blue (for example).
Are you ready to make a DIY headband? Try one of the three methods below!
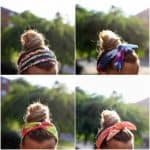
1. Braided DIY Headband
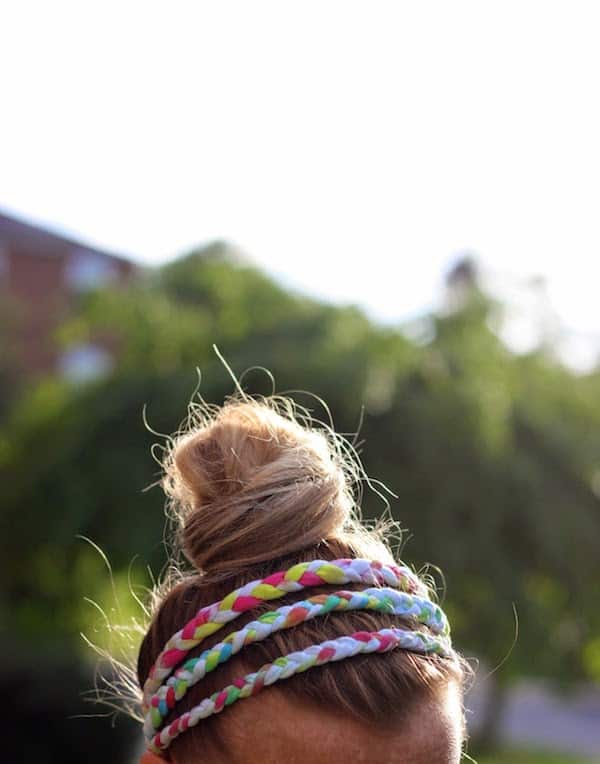
If you can braid, you can make this tie headband! Cut your fabric into nine 1/2-inch strips, long enough to wrap around your head. Create three braids.
Connect the ends of each braid individually by running them through your sewing machine. Once each braid is connect separately, line up each braid and run through the sewing machine again, attaching them to each other.
2. Knotted DIY Tie Headbands
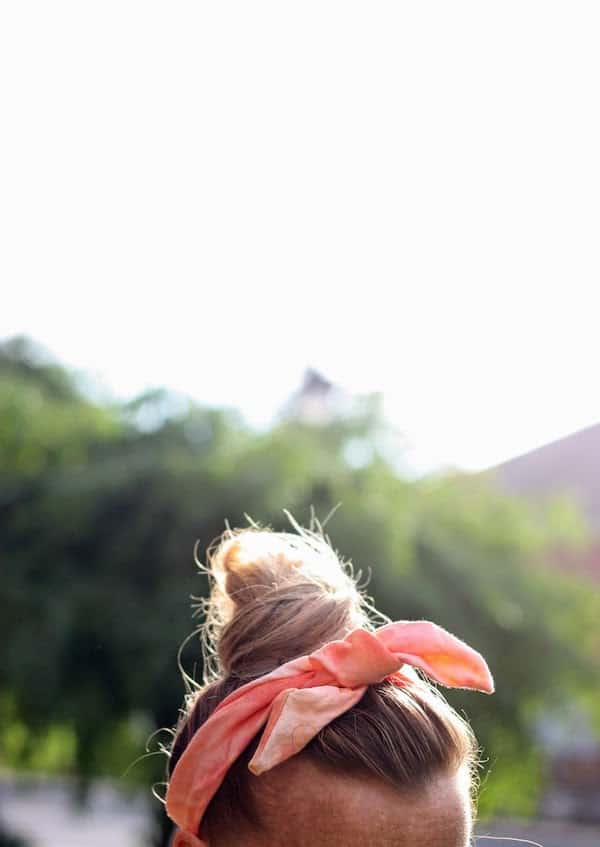
Once I got the hang of this tie headbands technique, I liked it so much that I made it twice! I can’t say that I came up with the tutorial for this one though. Instead, I followed the tie headbands tutorial shown here and adjusted them to fit my head.
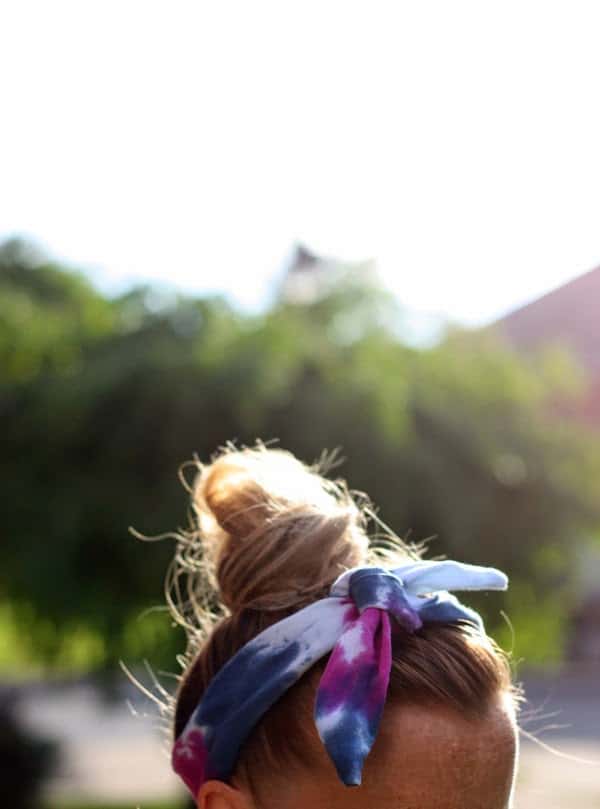
Tie headbands are nice because you can adjust them easily on your head. I love that part!
3. Twisted DIY Headband
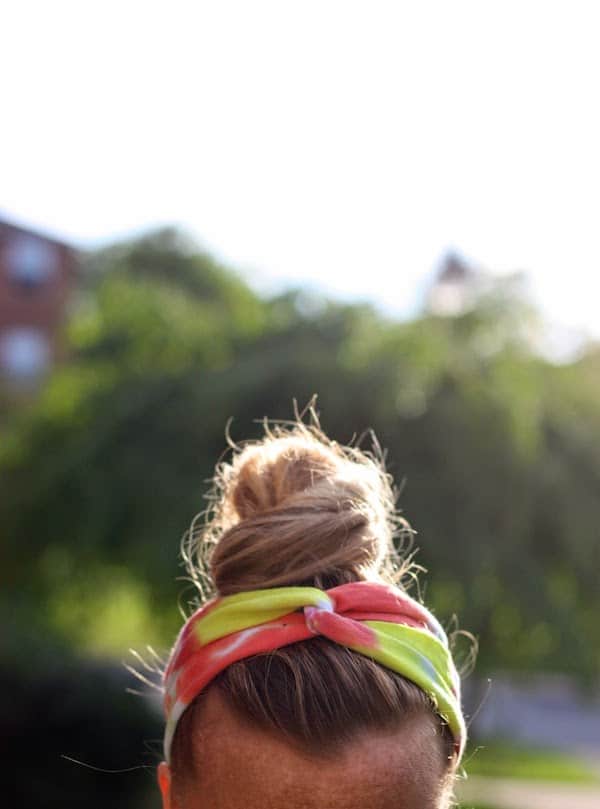
To make this twisted DIY tie dye headband I followed the steps shown here. This was definitely the easiest to make, and I love the way this style lends itself to really letting the tie dye patterns stand out!
Which DIY headband is your favorite? I’d love to heard in the comments!
Are you ready to see a video of these DIY headbands in action? Just watch it in the post!
Tie Dye Headbands
Equipment
Materials
- Basic tie dye kit
- Plain white t-shirt
Video
Instructions
Tie Dye the Shirts
- Wash and dry the t-shirts.
- Bind them with rubber bands and dye them according to package instructions.
- Let set for 6 – 8 hours and then proceed with one of the patterns below.
Braided Headband
- Cut a portion of a t-shirt into nine 1/2-inch strips, long enough to wrap around your head. Create three braids.
- Connect the ends of each braid individually by running them through the sewing machine.
- Once each braid is connect separately, line up each braid and run through the sewing machine again, attaching them to each other.
Knotted Headband
- Cut a large piece of fabric from the t-shirt.
- With the fabric folded, cut two rectangles 13″ long (along the stretch) and 2 1/2″ wide. Use a rounded object to trace a half circle on the open end (opposite the fold) of the rectangle and cut.
- You’ll have two long ovals. Place them right sides together, press a little with some steam if the knit starts rolling over on itself. Use a serger or a zigzag stitch to sew all the way around the ovals. You want the knit to maintain its stretch, so don’t use a regular straight stitch. Leave a 1 – 2″ opening at the center along one side only for turning the headband right side out.
- Turn the headband right side out and reshape. Press. Cose up the opening. You can just zigzag stitch on the outside of the fabric since this spot will be at the nape of the neck and won’t show OR you can slipstitch it closed so it doesn’t show.
- Wrap around the head and double knot.
Twisted Headband
- Cut two long pieces of t-shirt about 6 inches wide; fold in half and sew. Turn right side out.
- Measure your head and trim the sewn pieces down. Fold the two pieces in half and cross over.
- Sew together each end. Make sure to not sew the wrong pieces together!
- Sew inside the slit to keep the pieces together..
If you enjoyed making these headbands, I’d love for you to check out these other upcycled clothing ideas and kids crafts:
Denim Chair • Duct Tape Bracelets • Felt Mushrooms • Food Coloring Art • Glow in the Dark T-Shirt • Tie Dye Dress • Weaving for Kids


Such a great idea! I love all the different variations too!
So OMazing
I am a product of 60’s – 70’s and love Tie-Dye things! Thank you for the great tutorials about headbands! Will get kit and go to work!