Fun Flower Pens (Made with Duct Tape!)
Learn how to make flower pens using a fun craft material – duct tape! These DIY flower pens are easy enough for kids or adults. SO fun!
Skills Required: Beginner. It helps if you’ve worked with duct tape before, but it’s not essential. This is a really simple project.
I love beautiful stationery and pens. If left to my own devices, I could spend hours walking through the stationery section in a store. Are you the same way? If so, then today’s duct tape crafts tutorial is for you!
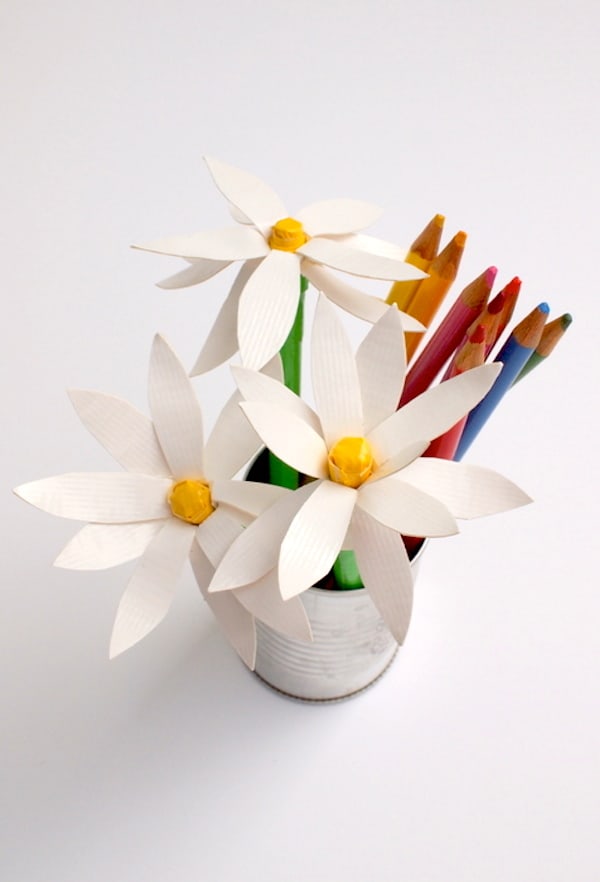
Here’s an easy way to transform a plain old pen into a super cute and happy daisy pen. These flower pens are so easy to make, you’ll soon find yourself with a whole bouquet to keep for yourself or give away! It’s a perfect Mother’s Day craft for kids, summer craft, or a back to school idea.
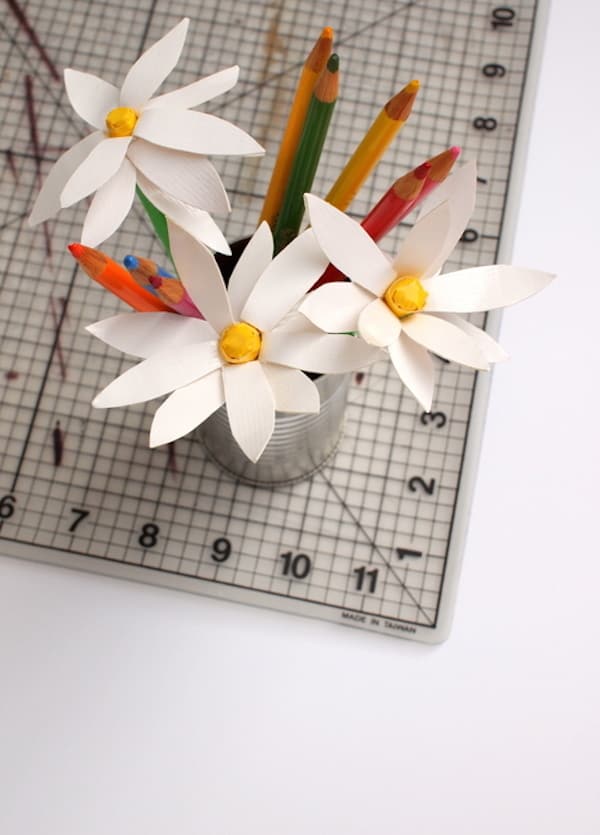
Duct Tape Flower Pens
Before we dive into the project, I wanted to answer a few frequently asked questions about this post. If you want to get straight to the tutorial, scroll down (there is a how-to card at the end of the post). I hope you find these answers helpful!
What type of pens should I use?
You want to use pens with a cap, since retractable pens have to be pushed on the flower end to push down the ink tube so you can write. Flower pens need the end to stay in place because there’s where the flower sits!
Honestly you could even use pencils, but you would cover the eraser end and then you’d have to remove tape on the flower sten to sharpen. But, it’s possible (if that’s something you want to do).
What happens when the pen is used up?
Well – honestly, you’ll have to throw the whole thing away if you can’t remove the ink tube and refill it. There are refillable pens, so that’s an option. You’re going to have to spend a bit more, at least initially.
You also need to make sure that, like I mentioned above, the pen isn’t retractable. I notice that most of the refillable pens are retractable, so you’ll have to do some digging for refillable. However, they do exist.
Are there other types of flowers I can make?
The other options I’ve seen are a rose and then a generic flower you can make in any color. The ones we made are daisies I suppose – I haven’t tried either of the others!
Are you ready to dive in to this unique boredom buster? Continue reading to learn how to make these flower pens!
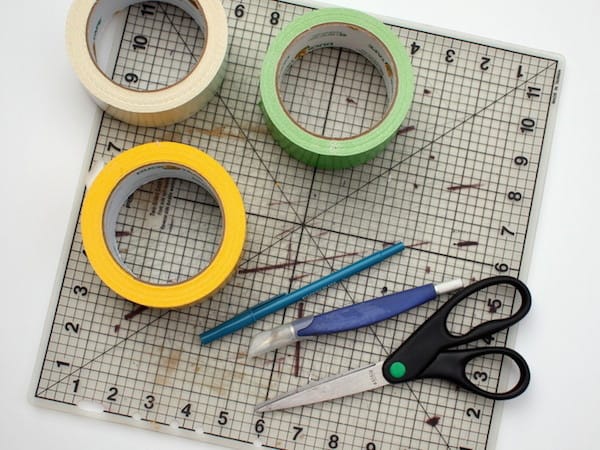
Here are the materials you’ll need:
- Duct tape – white, yellow, and green
- Pens with capas
- Self-healing cutting mat
- Craft Knife
- Scissors
Note: If you don’t want to purchase the green duct tape, you can also simply use floral tape instead to wrap around the base.
Let’s make some DIY flower pens with duct tape!
First, we’re going to make the yellow center of the daisy.
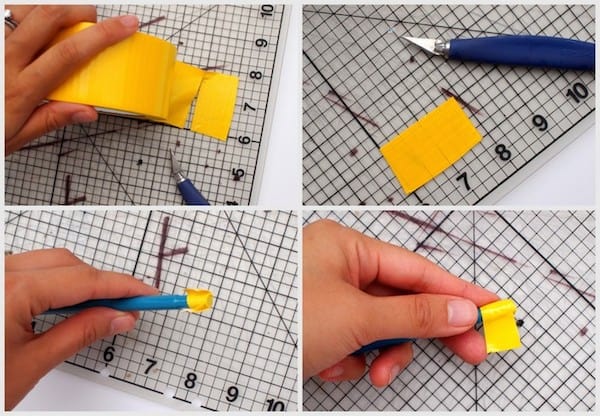
1. Cut a piece of 1-inch long yellow duct tape. To cut duct tape, simply peel off a piece of tape from the roll and press it down onto your cutting mat. Then, use a craft knife to cut the tape.
2. Use your craft knife and cut out a square and two rectangular pieces from your piece of yellow duct tape.
3. Wrap the square piece over the top of your pen to cover it.
4. Use your rectangular pieces to wrap around the edges of the square tape. This will ensure that it stays put and the ends looks neat.
Now we’re going to transform the pen’s barrel into a daisy stem!
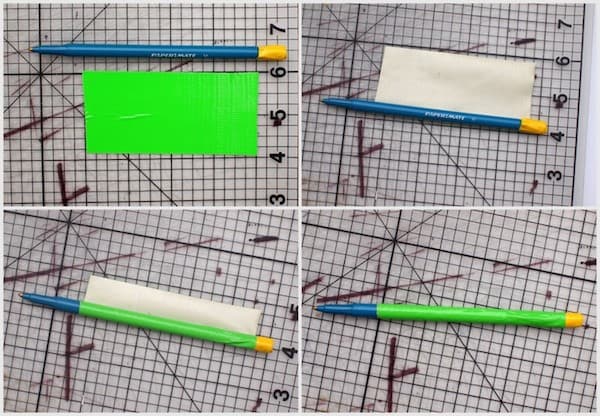
5. Cut out a piece of green duct tape (using the same method in step 1) that’s about 4-inches long. The piece of duct tape should be long enough to cover the barrel of the pen while leaving about a ½ inch of pen exposed for the cap to fit on comfortably.
6. Flip the piece of duct tape over (sticky side up) and place your pen on the bottom of the duct tape.
7. Then, carefully roll the pen over the duct tape to create a stem.
Now we’re going to make the petals!
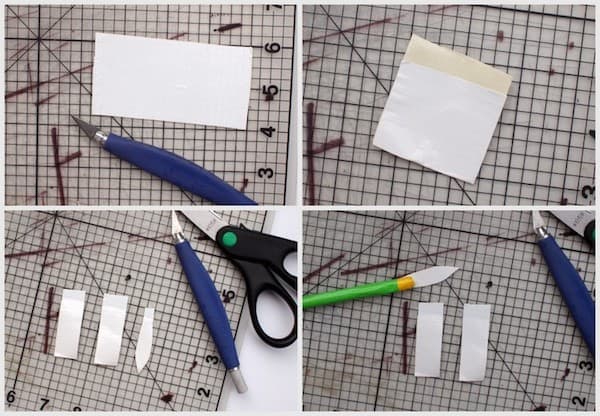
8. To make petals that are about 1 ½ inches long, cut out a 3 ½ inch piece of white duct tape (using the method from step 1).
9. Fold the tape over and press down, leaving a bit of sticky side exposed (this sticky part will secure your petal to the pen).
10. Use your craft knife to slice the duct tape into three approximately equal pieces.
11. Then, use a scissor to cut out the petal shapes and use the craft knife to trim the sticky end. Now stick your petals onto your pen.

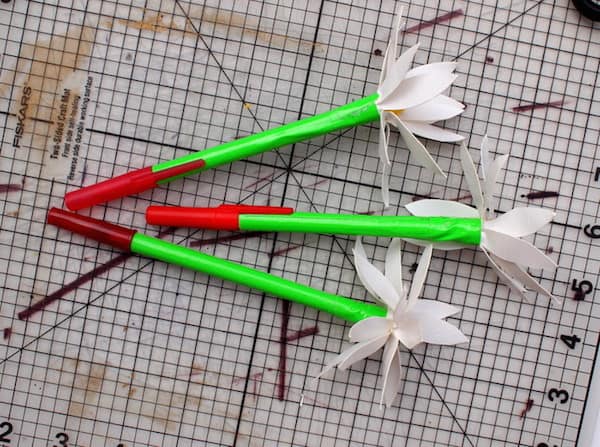
12. Once your daisy has enough petals, it’s time to cover up the bottoms of the petals. Cut out a piece of green duct tape (using the same method as in step 1) and wrap it around the base of your petals. This will hide any uneven ends and ensure that your petals stay put.

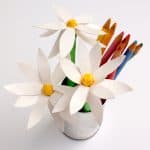
Easy-peasy, right? Now enjoy your lovely bunch of daisy flower pens. They’re sure to brighten up your day every time you use them! And if you want to make other flowers, you can just follow the same tutorial and change the colors of the petals and center.
Flower Pens
Equipment
- Cutting mat self healing
Materials
- Duct tape white, yellow, green
- Pens with caps
Instructions
- Cut a piece of 1-inch long yellow duct tape.
- Use the craft knife to cut out a square and two rectangular pieces from the piece of yellow duct tape.
- Wrap the square piece over the top of the pen to cover it.
- Use the rectangular pieces to wrap around the edges of the square tape. This will ensure that it stays put and the ends looks neat.
- Cut out a piece of green duct tape (using the same method in step 1) that’s about 4 inches long. The piece of duct tape should be long enough to cover the barrel of the pen, while leaving about a ½ inch of pen exposed for the cap to fit comfortably on.
- Flip the piece of duct tape over (sticky side up) and place the pen on the bottom of the duct tape.
- Carefully roll the pen over the duct tape to create a stem.
- To make petals that are about 1 ½ inches long, cut out a 3 ½ inch piece of white duct tape (using the method from step 1).
- Fold the tape over and press down, leaving a bit of sticky side exposed (this sticky part will secure your petal to the pen).
- Use the craft knife to slice the duct tape into three approximately equal pieces.
- Use scissors to cut out the petal shapes, and use the craft knife to trim the sticky end. Now stick the petals onto the pen.
- Once the daisy has enough petals, it’s time to cover up the bottoms of the petals. Cut out a piece of green duct tape (using the same method as in step 1) and wrap it around the base of the petals. This will hide any uneven ends and ensure that the petals stay put.
- Repeat to make more pens.
Video
Notes
Happy crafting! If you enjoyed this kids’ craft idea, check out some of my other projects:

Cool idea!
Thanks for the tutorial ! Those flowers look so cute. I also love the fact that these were made by using tape only. You see, I’m really fond of tape. And what I mean by that, is that I’m the biggest fan of tape in the world- Anyways, thank you again for teaching us this !