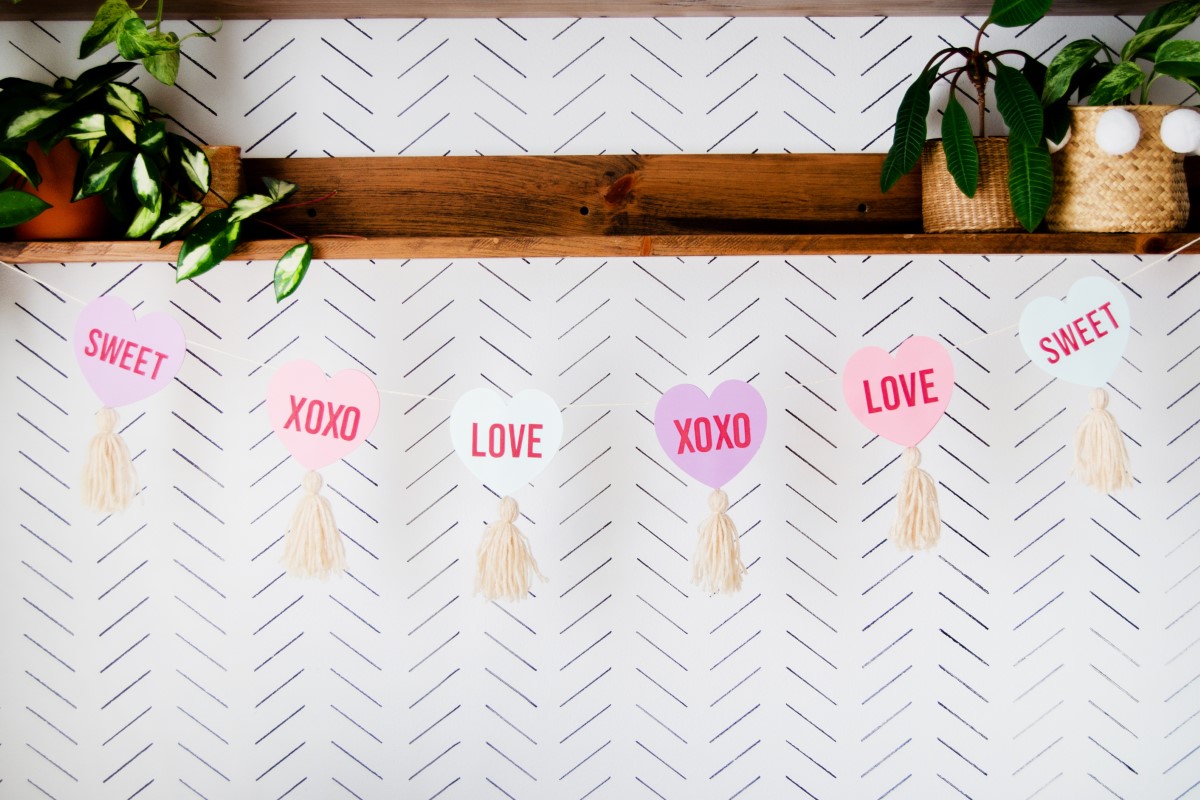
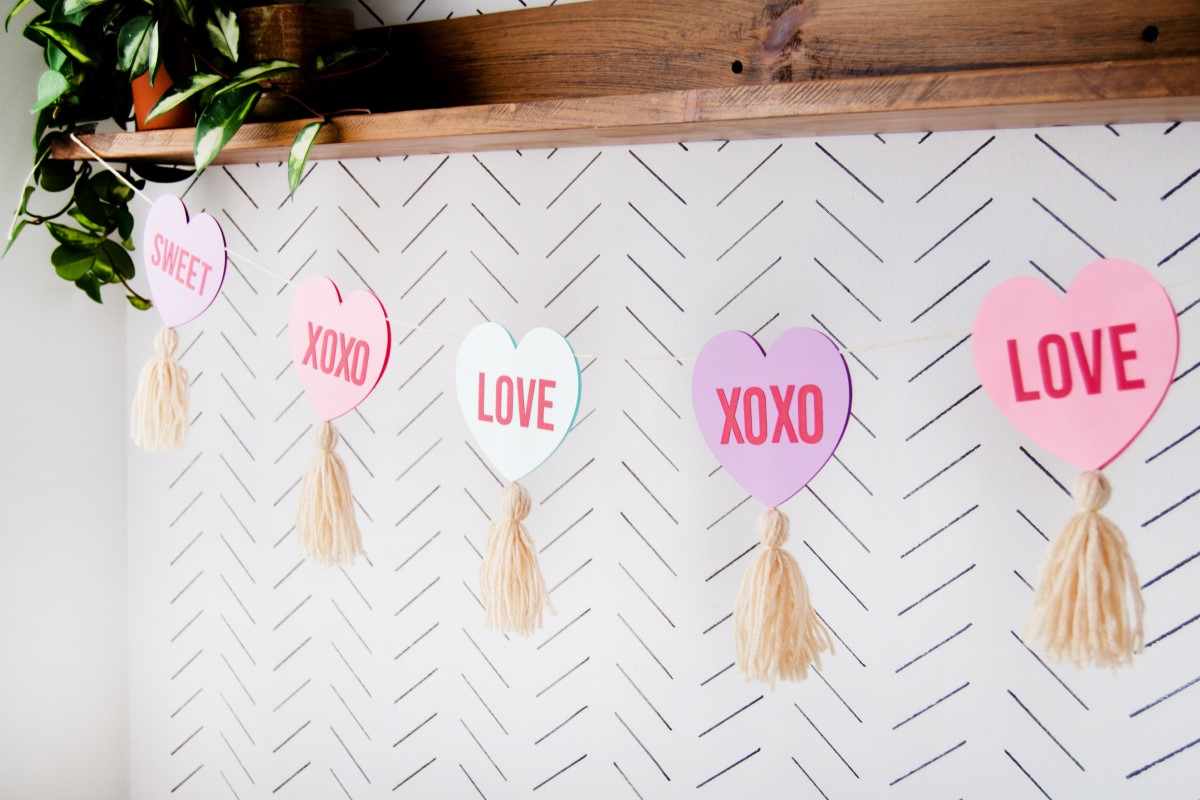
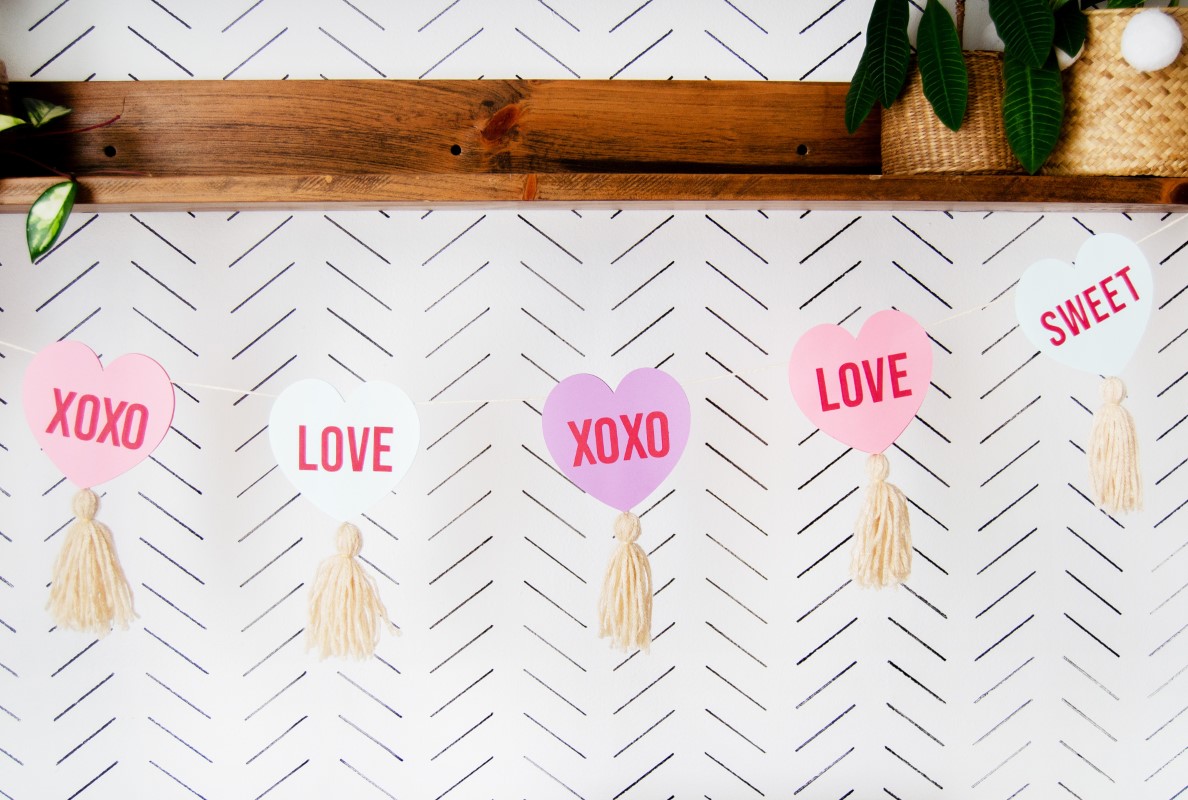
Valentine’s Day Garland with Paper Conversation Hearts
Learn how to make an easy DIY valentine garland with pretty paper hearts! It’s a cute and simple way to decorate your space for the holiday.
Skills Required: Beginner. You will need to cut and glue paper as well as create tassels with yarn to assemble the garland. This is a perfect craft for newbies.
Valentine’s Day is that sweet time of the year when everything seems to be sprinkled with a dash of love and a whole lot of pink and red! This holiday for “lovahs” is just around the corner.
If you’re anything like me, you’re probably looking for ways to sprinkle a bit of that love around your own space. Well, you’re in luck!
Today, I’m thrilled to share a project that’s not only going to add a pop of holiday charm to your surroundings but is also a delightful nod to those adorable Conversation Hearts we all know and love.
I’m going to show you how to make a DIY Valentine’s Day garland!
Crafting has always been a way for me to express my creativity, especially when it comes to decorating for the holidays. And let’s be honest, who doesn’t enjoy an opportunity to personalize their space with unique, heartfelt decorations?
This year, I set my sights on creating something special, but simple, for Valentine’s Day – a cute and simple DIY valentine garland. This project is perfect for beginners and seasoned crafters alike, requiring basic cutting, gluing, and a little tassel-making with yarn.
In the spirit of keeping things fun and manageable, I’ve chosen supplies that are likely already in your craft arsenal or are easily accessible. We’re talking about colorful cardstock, yarn, Mod Podge, and a few other bits and bobs.
The process itself is straightforward, involving creating fluffy tassels, cutting out sweet paper heart shapes, and assembling everything together to bring our DIY garland to life.
Whether you’re aiming for something that’s punny, romantic, or even a bit sassy (hello, Anti-Valentine’s version), this project offer room for personal touches. You can drape your desk, mantel, or doorway with a string of conversation hearts that carry messages of your choosing.
So, grab your scissors, fire up that glue gun, and let’s create a piece of Valentine’s Day decor that’s as unique and lovely as your own crafty spirit.
Whether you’re making this garland to brighten up your space or to gift someone special, the process is sure to fill your heart (and home) with a little extra love this Valentine’s season. Let’s get crafting!
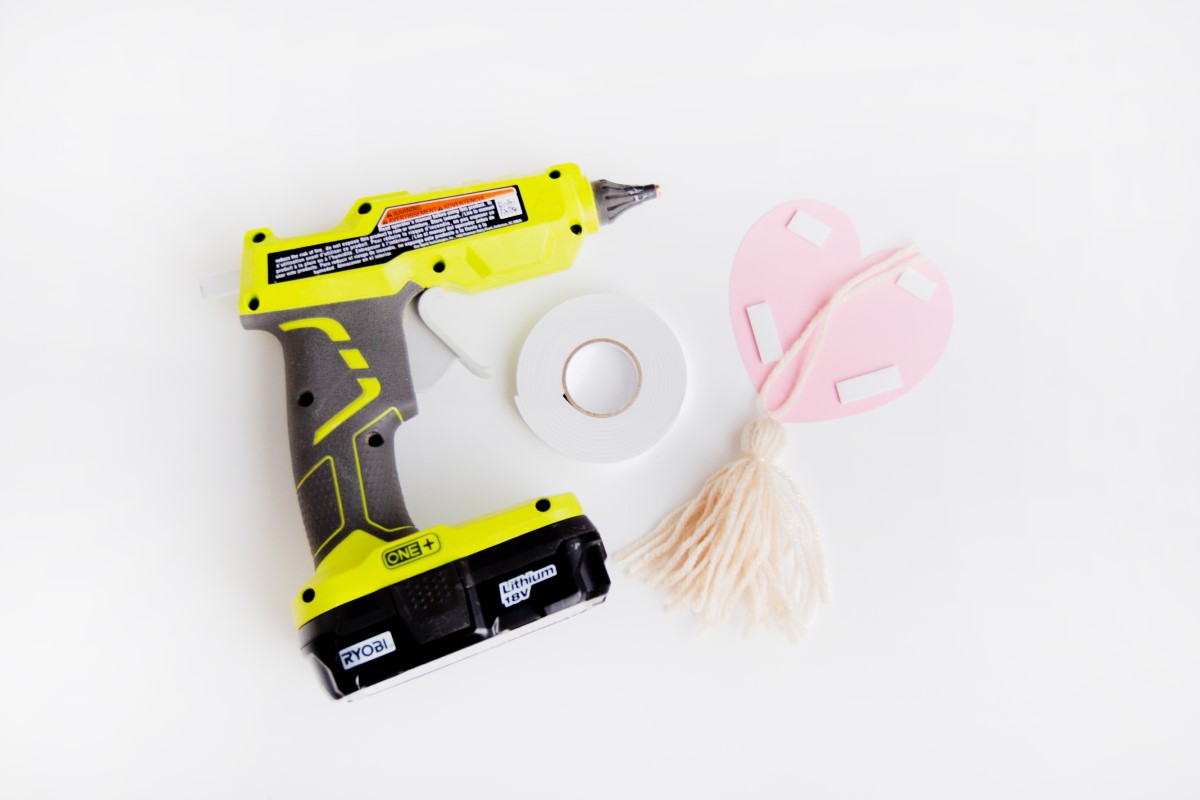
Gather These Supplies
- Cardstock (in pastel colors and red)
- Yarn – color of your choice
- Clear hair ties – one for each tassel (you can also use clear rubber bands)
- Hot glue gun and glue sticks
- Scissors
- Mod Podge
- Paintbrush
- Mounting tape
- Heart template (for personal use only) – JPG and SVG
Tips and Thoughts for This Project
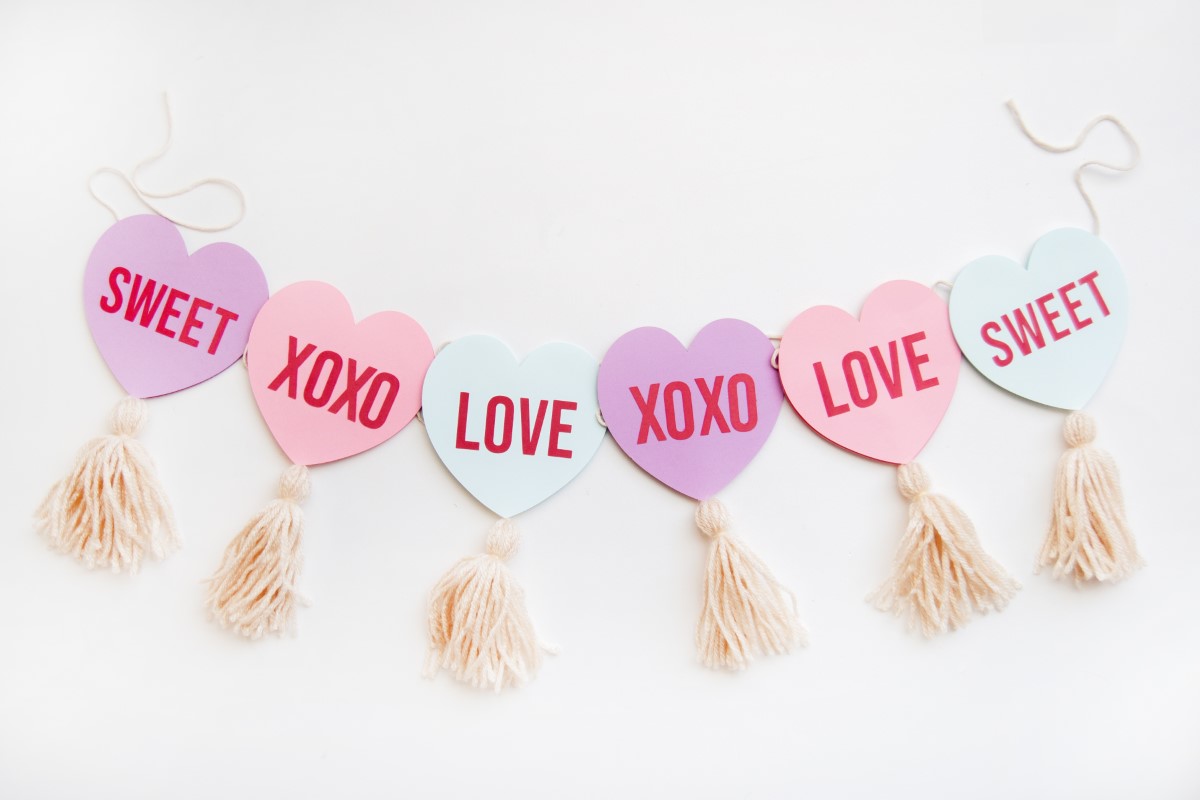
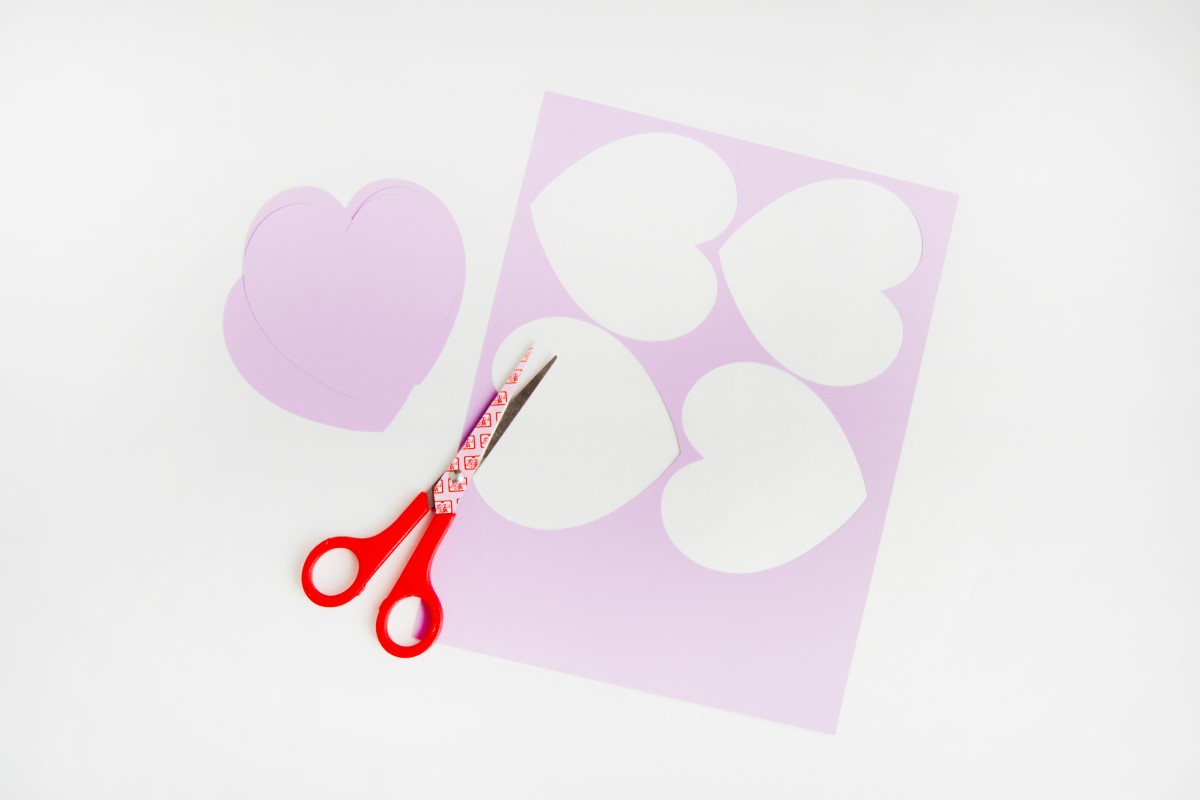
You can use an electronic die-cutting machine if you have one, or use scissors to cut the hearts out. You will need two same colored pieces for each conversation heart (with 6 conversation hearts, I cut 12 hearts in total).
Alternatively, you can use pre-cut hearts from the craft or dollar store. You can also use adhesive or chipboard letters from the craft store for the lettering.
Get the printable how to card for this project below:

DIY Valentine Garland
Materials
Instructions
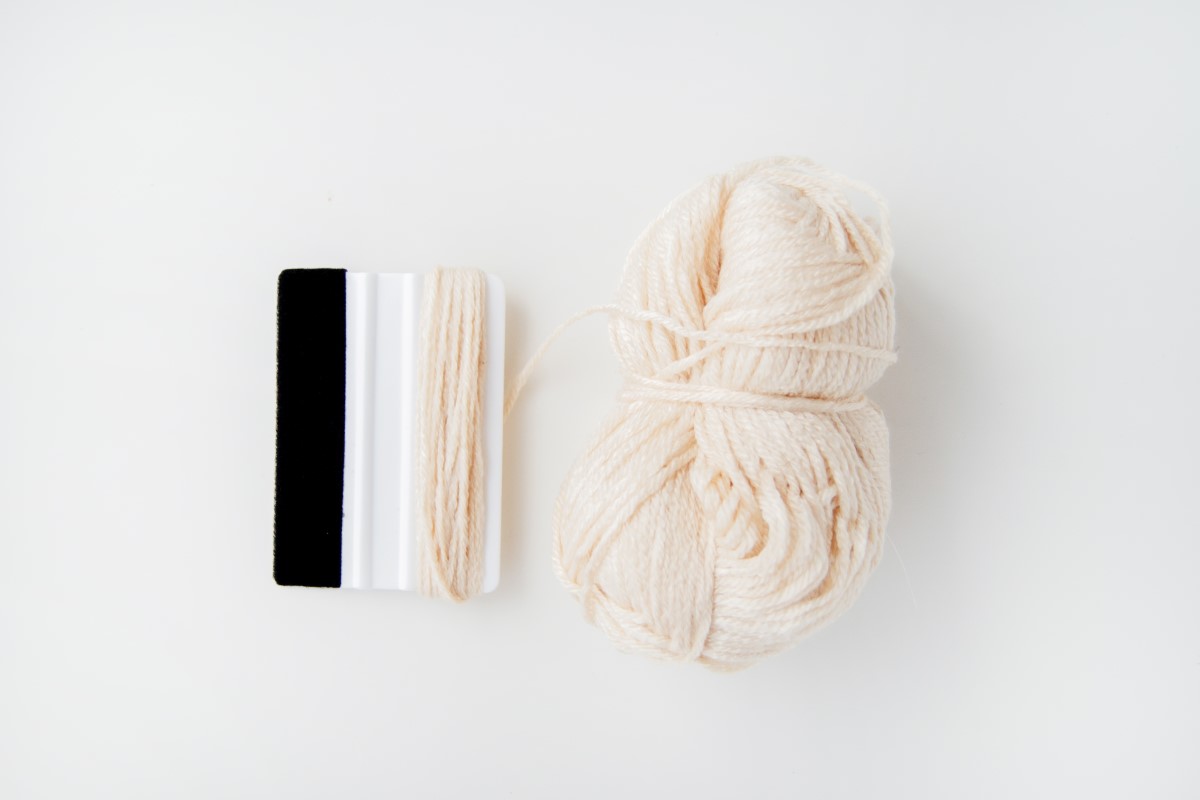
- To create a tassel, wrap yarn around the long side of a gift card sized card 20-25 times (or more if you would like a thicker tassel).
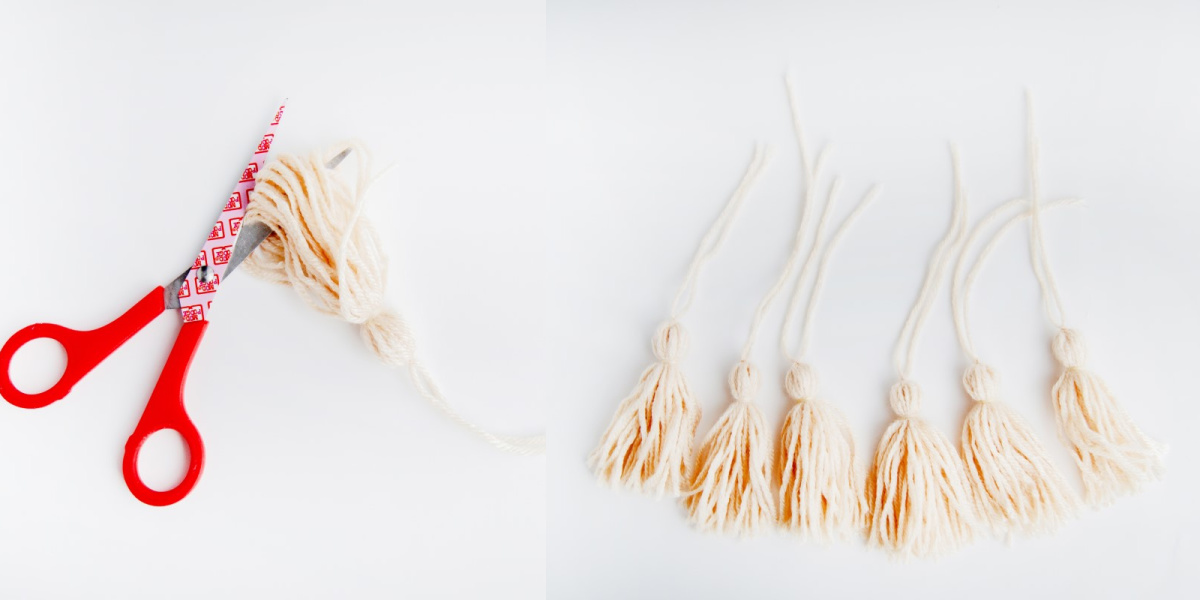
- Cut a separate piece of yarn (at least 9 inches long) to tie off the top of the tassel. Take the piece of yarn and slide it underneath the wrapped yarn at the top. Tie two knots to secure. Slide the wrapped yarn off the card gently and keep its general shape intact.

- Use a clear rubber band or hair tie and wrap it around the top section of the tassel to create a tassel head. Cut the bottom of the tassel and trim the ends to clean it up. Create one tassel for each heart and set aside.
- Cut the heart shapes out of the pastel cardstock using the provided template.
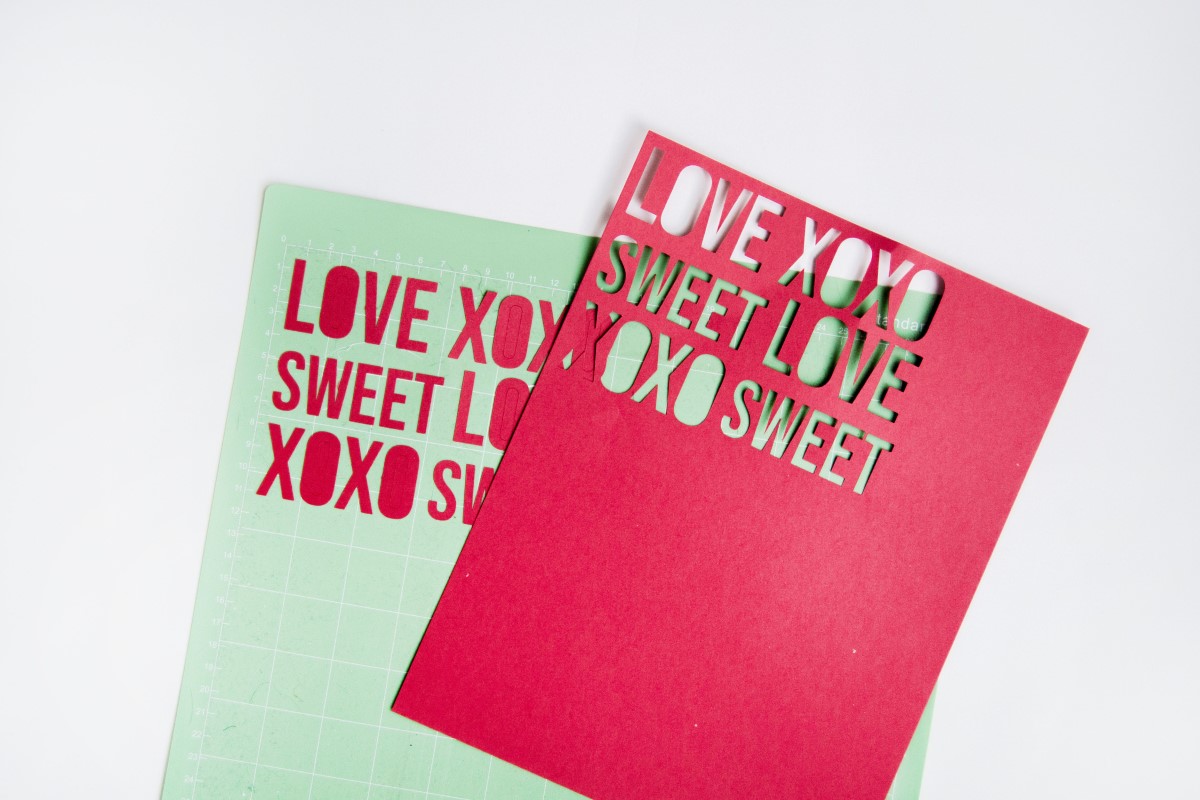
- Cut the letters using your electronic die-cutting machine.
- Attach the tassel to the middle of a cut heart using hot glue. Cut pieces of double sided mounting tape (for dimension) and adhere it onto the heart as well. This will be the backside of the conversation heart. Repeat for the rest of the back pieces.
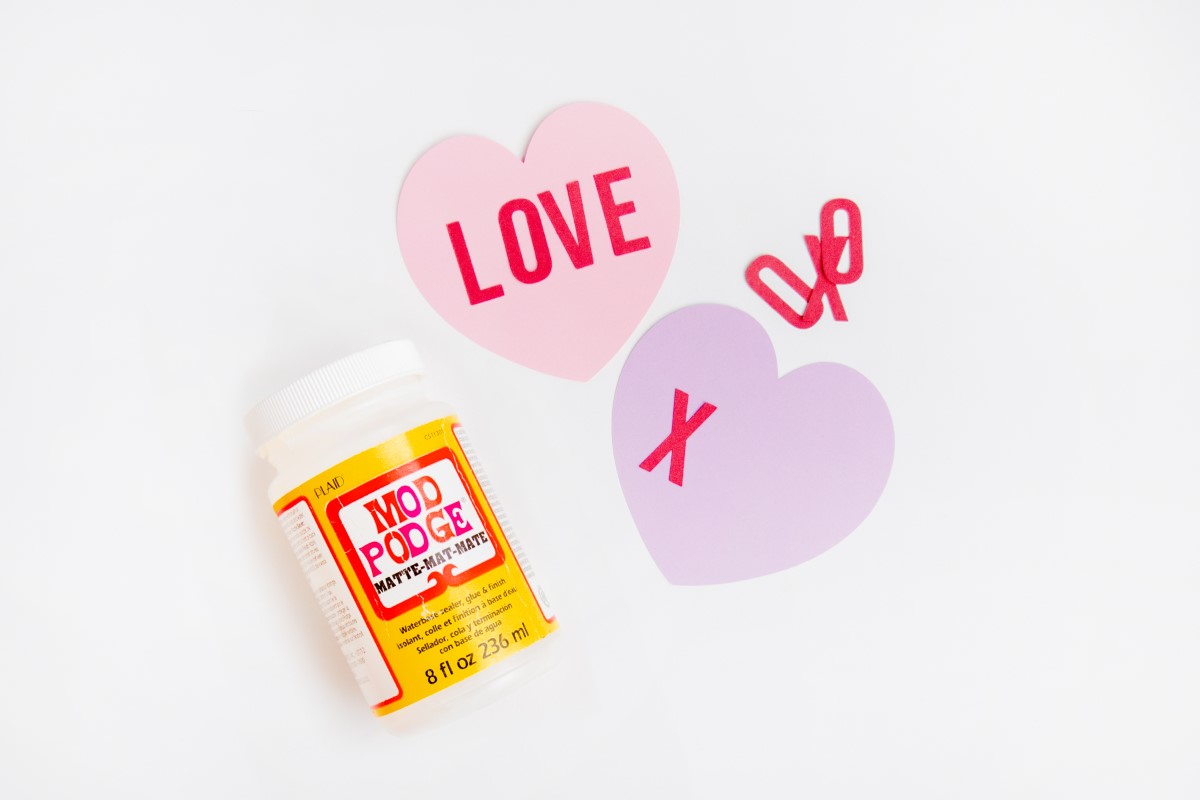
- Mod Podge the letters to spell your message onto the front pieces (I did XOXO, Love and Sweet). Make sure they are centered on the heart. You can choose to apply a layer of Mod Podge on the heart and letters for added durability. Leave it to dry.
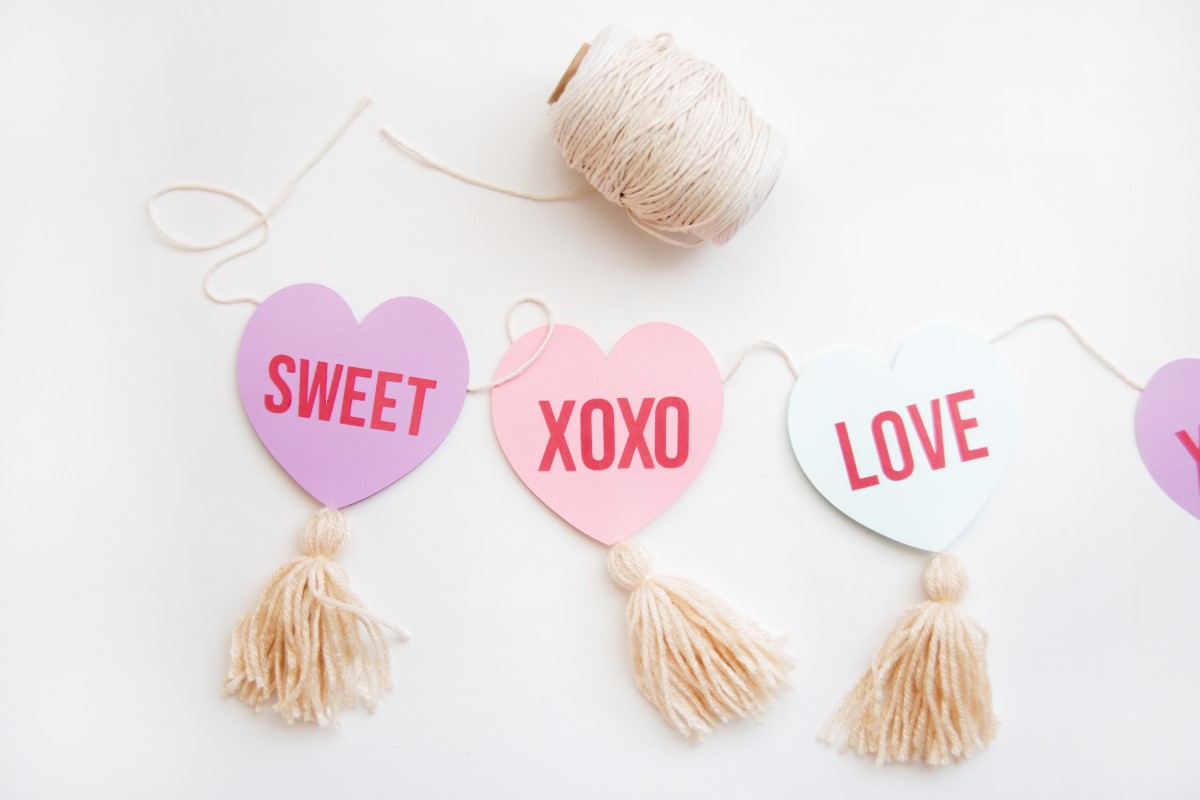
- Assemble the conversation hearts by pairing the same colored pieces. Remove the protective paper from the mounting tape, align the front and back sides and attach them together.

- String the assembled conversation hearts onto a long piece of yarn, making sure to space them out evenly. Use hot glue to keep them in place.
If you enjoyed this holiday project, please let me know in the comments. You can find other inspiration in the links below. Have a lovely day!

This garland is so cute! You did an awesome job!
Paige
https://www.thehappyflammily.com/